How to live stream from your Linux desktop
Nick Peers reveals how to create a multi-screen live stream with the help of OBS Studio.
Create a scene
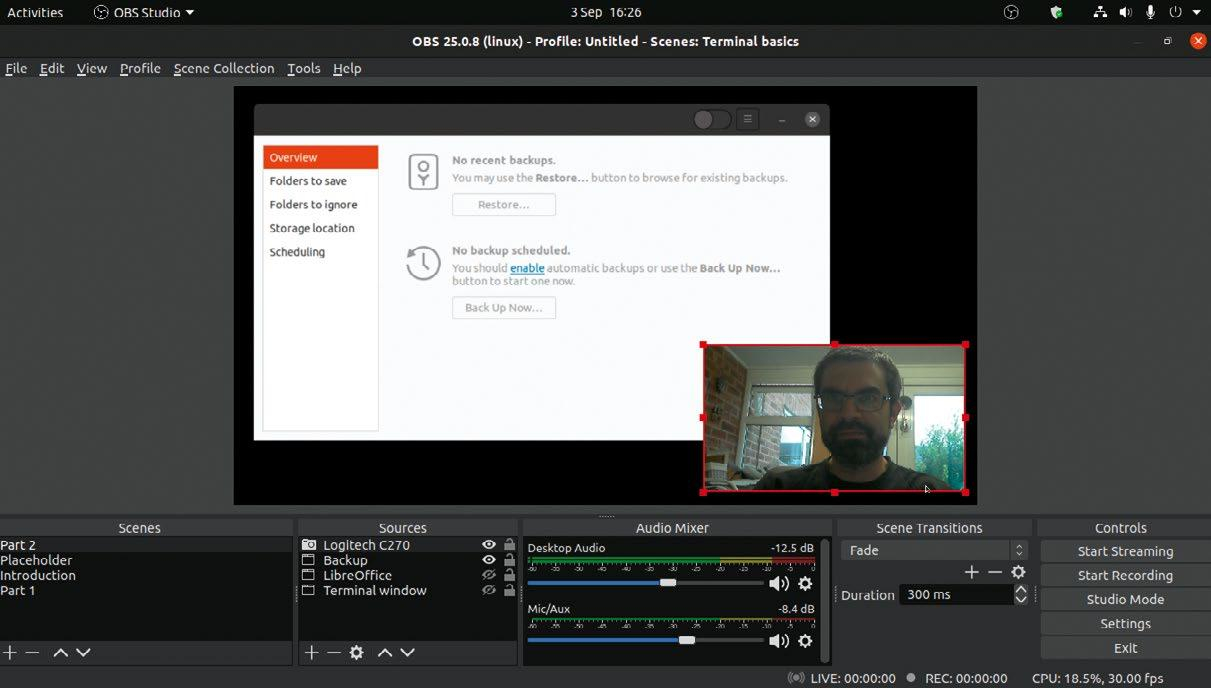
Once you’ve worked out your stream’s structure, open the main program where you’ll find the Scenes panel is already populated with a single scene. Right-click this and choose Rename to give it a more suitably descriptive title.
You can work on scenes in any order you like – simply rearrange them by drag and drop to help you switch scenes during your stream with the minimum of fuss.
Next, you’ll want to set up the current scene’s first source. You’ll see your default audio device and microphone are already configured as output and input devices, respectively.
The volume meters should indicate clearly if they’re working or not – open Ubuntu’s Settings tool and select Sound if nothing happens, or you think the wrong device may have been set as your default.
Other sources – including webcams, audio devices, and screen capture tools – need to be set up manually.

Click the + button in the Sources section to see what types of sources are available. Let’s start with your webcam: choose Video Capture Device (V4L2). Give your source a suitably descriptive name under Create new – such as the webcam model – and click OK.
After a short pause, a new properties screen will appear. If your webcam isn’t already selected, click the Device drop-down to switch to it – you should immediately see a video preview indicating the webcam is working correctly.
Are you a pro? Subscribe to our newsletter
Sign up to the TechRadar Pro newsletter to get all the top news, opinion, features and guidance your business needs to succeed!
You’ll also see a host of settings underneath this: Resolution should be set to 1,280x720 if you’re following our advice from earlier, and if you scroll down you’ll reveal additional options such as brightness, contrast and saturation sliders for tweaking the picture if required. Make whatever changes you need, then click OK.
Your new source will appear in the Source pane, and the video feed should appear in the main window, surrounded by a border with drag handles so you can shrink and reposition the video feed within the main window – you’ll want to do this if you plan to stream multiple sources at the same time.
You’ll also see two icons next to your new source’s entry: click the eye icon to hide or show the feed, and the lock button to prevent you from moving or resizing the source. To edit the source’s properties simply double-click it.
If you’re planning a straightforward live stream involving a single camera, you’re ready to live-stream, but if you wish to add more sources, then repeat the process as before.
Getting two or more webcams to play nicely together can be tricky – you may need to make sure they’re on different USB buses (check the current configuration using lsusb -it ) so they’re not competing for bandwidth or using the same driver.
If you’d like to show your PC’s desktop during your live feed, you have two choices: to capture your entire desktop, click + under Sources and choose Screen Capture (XSHM). If you have multiple desktops set up, click the Screen drop-down to choose the one you want to focus on after naming it.
You can opt whether or not to capture the cursor (keep this ticked if you’re demonstrating a program or process), while an Advanced Settings option enables you to specify a different X Server instance.
If you’d prefer to capture a specific application or window rather than the entire desktop, make sure the program in question is open, then click + and choose Window Capture (Xcomposite).
Once you’ve named the source, click the Window drop-down and choose the target. The program should appear on-screen in the Preview window.
You’ll see several options for cropping the border of your window at the top, bottom and to the sides – but these shouldn’t be necessary unless you’re forced to untick ‘Use alpha-less texture format (Mesa workaround)’ to fix potential problems with your graphics drivers.
More esoteric sources
Other sources to look for include Media Source (which makes it possible to play a pre-recorded video file), Image and Image SlideShow. Each comes with its own set of configuration options, with image slide shows supporting transition effects, slide mode (automatic or hotkey-controlled), and the ability to loop and randomise your images if required.
One particularly useful option is Text (Freetype 2), which enables you to place titles and other captions on your stream, and read content from other files (including logs).
If you need to display text at different sizes, you’ll need to configure individual Sources for each line. Once you’ve placed them on the page, select all the text elements in the Sources pane, right-click and choose Group Selected Items to treat them as a single element, which makes it easy to move and/or resize the text in one block.