How to manage your passwords in Chrome
Let Chrome remember your passwords so you don't have to
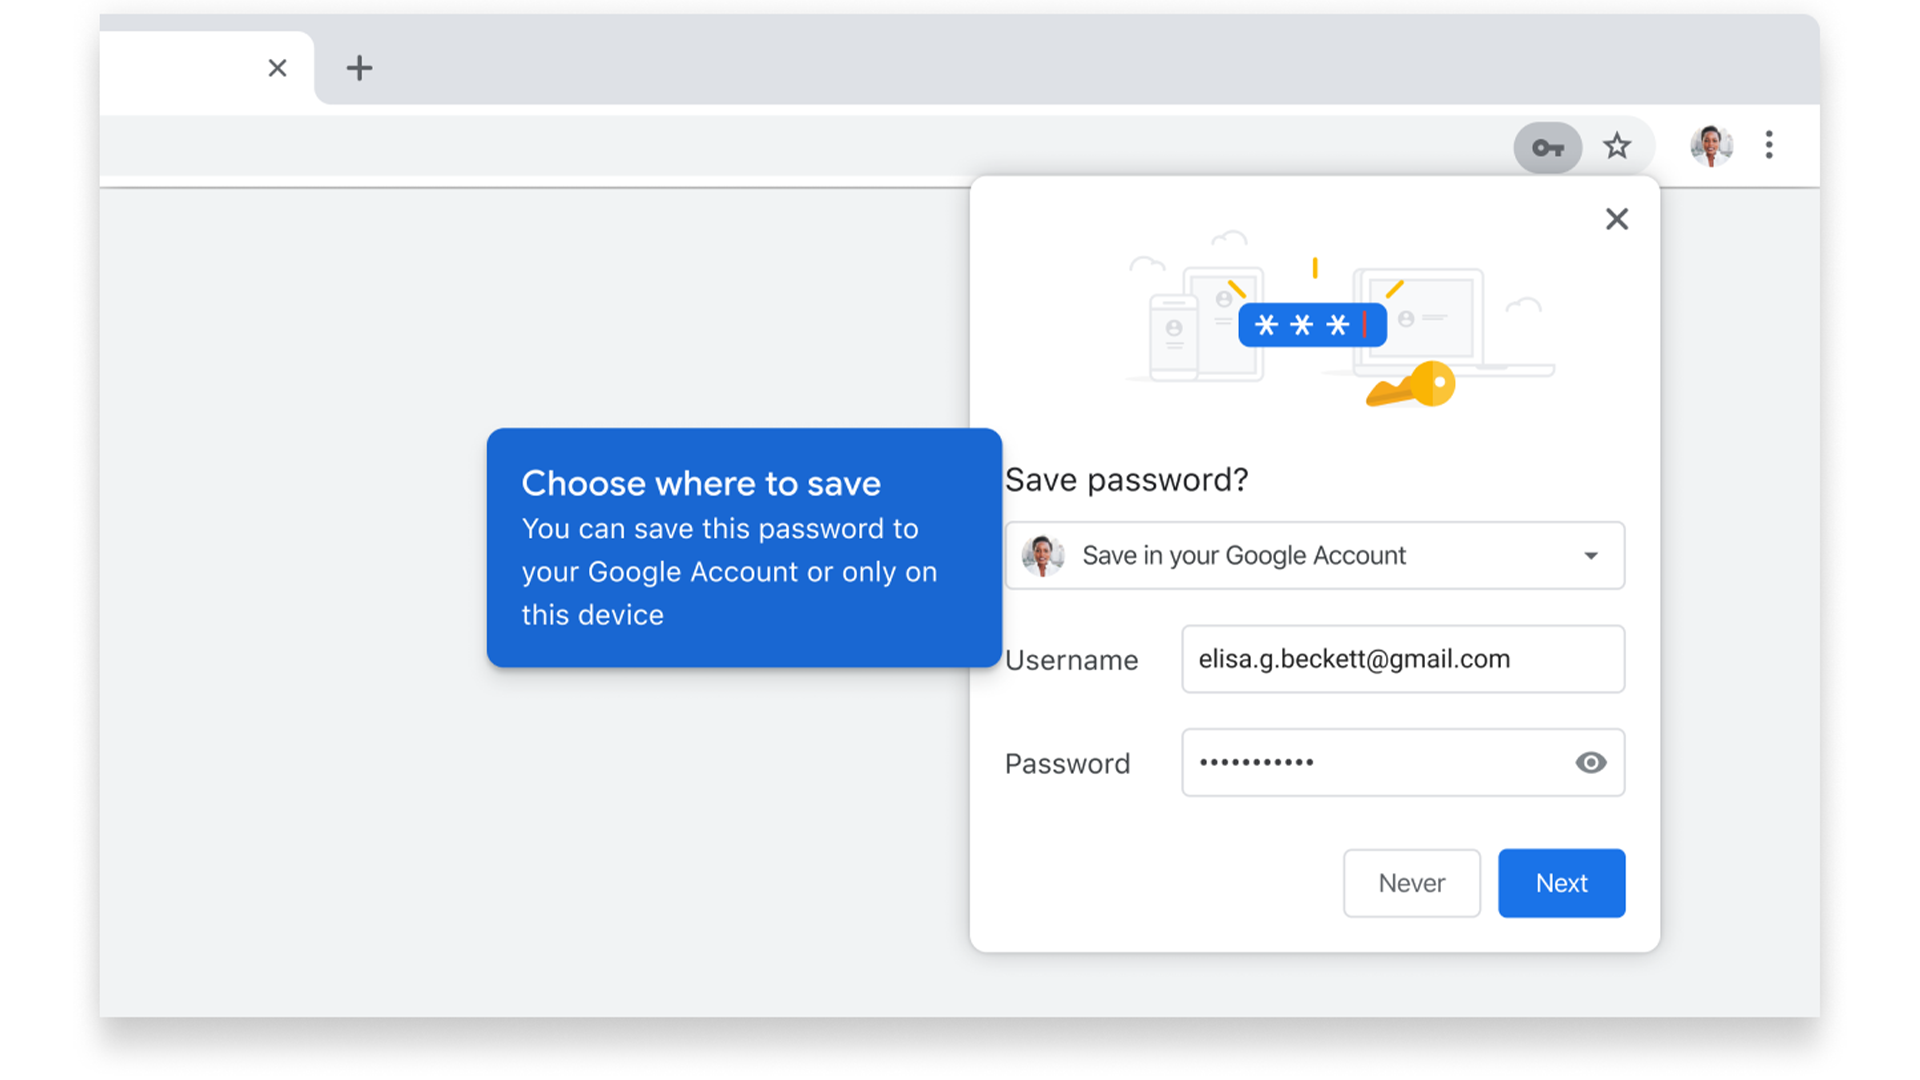
It comes with the territory that you'll be storing a bunch of passwords in your favorite web browser to make it easier to sign into some accounts in a hurry.
This is why Google Chrome has an Autofill feature for your login details for some sites, where it will ask if you want to insert your credentials without you lifting a finger.
It's a simple affair where you can allow the web browser to do this at every site you have an account with, which is why we've put together the below guide to help you set it up to have it ready for your next browse of the web.
Tools and Requirements
- Google Chrome
Step by step guide
1. Install and update Chrome
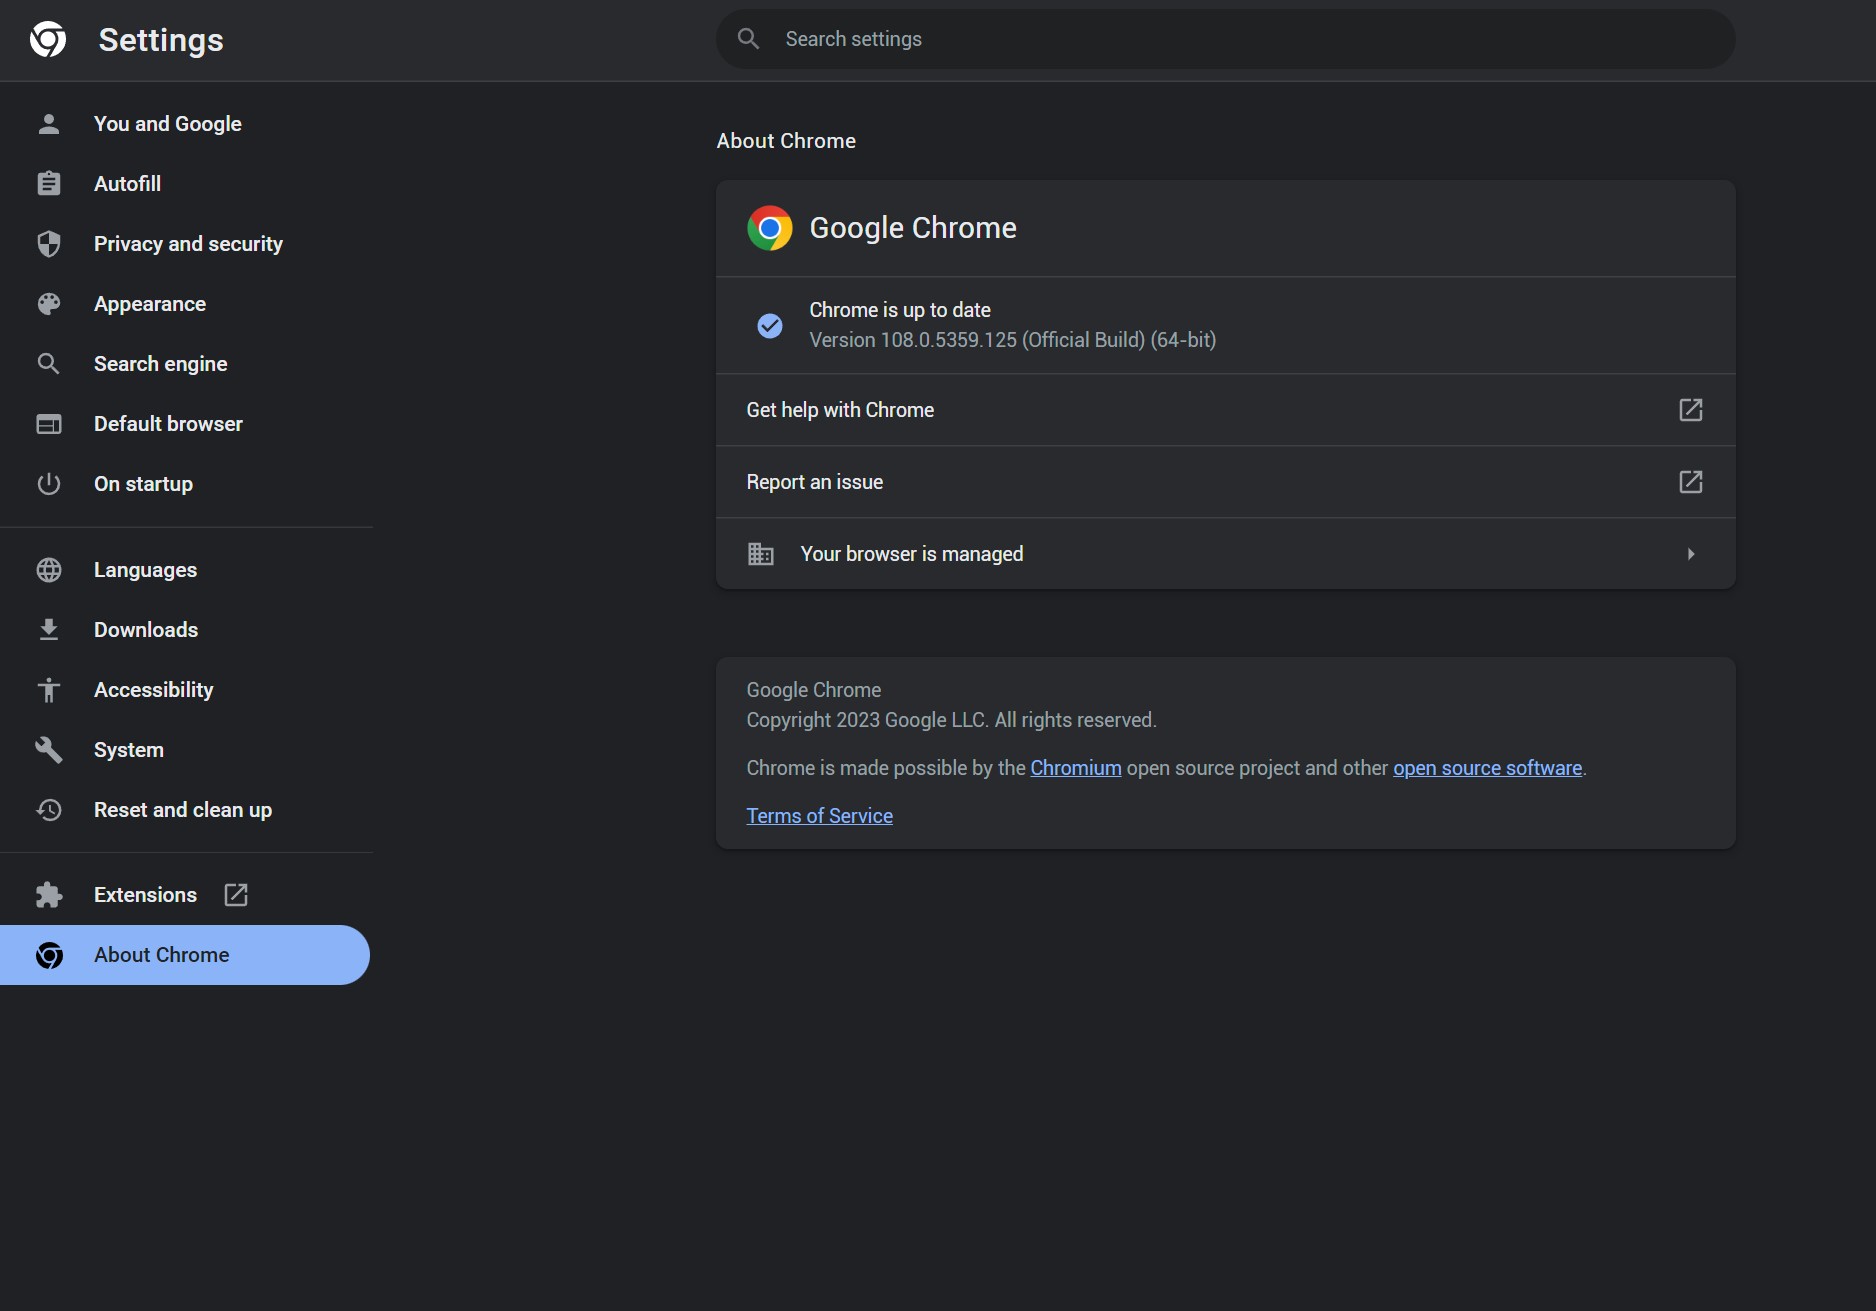
If you have not already started using Chrome but you like the idea of switching from your current browser, you can download and install it from Google. But if you so already have Chrome installed, whether it is your main browser or not, you should make sure that it is completely up to date.
In the browser, click the three-dot menu to the upper right and select Help > About Google Chrome. Chrome will perform a quick check to see if there are any updates available, and you should install them and restart if prompted to do so.
2. Saving passwords
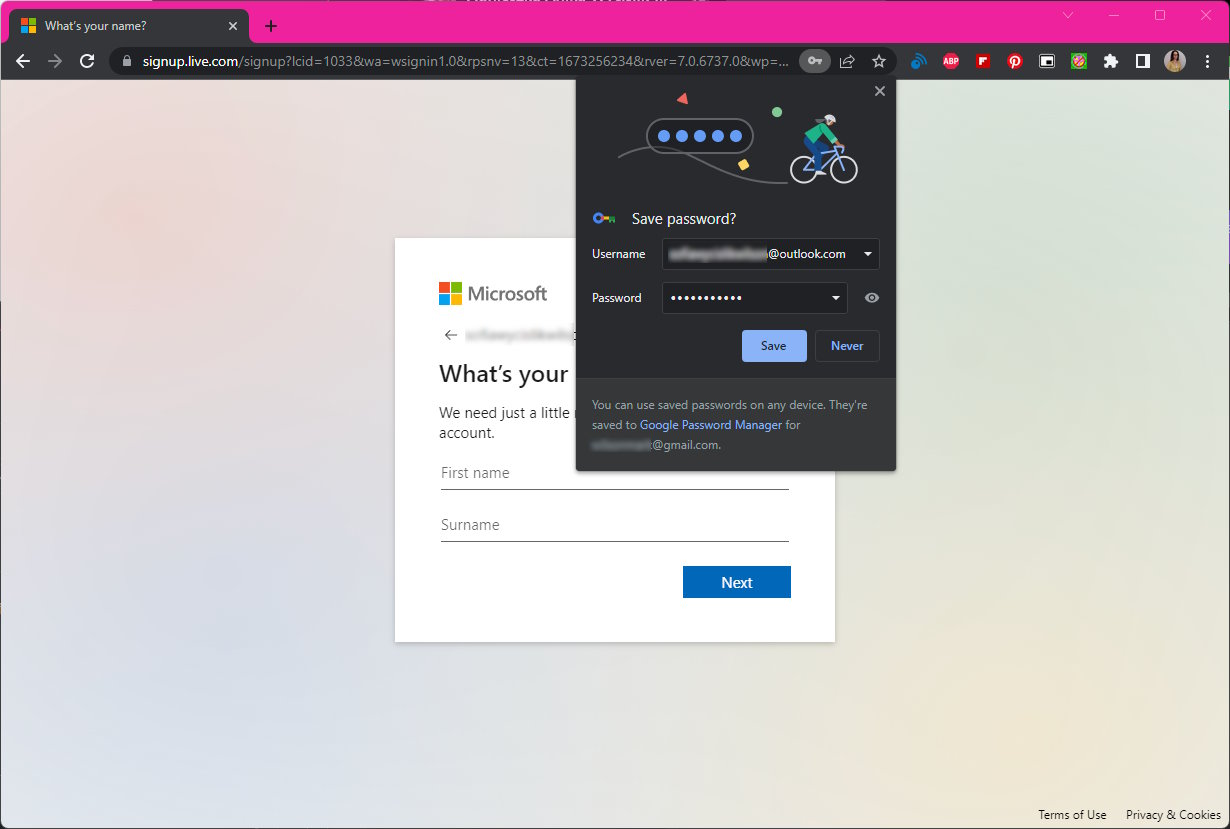
There are two scenarios in which Chrome gives you the opportunity to save a username and password so you don't have to remember them. The first is when you create a new online account - be that with a social network, an online store, an email account, or anything else; the second is when you sign into an account.
A pop-up will appear asking if you would like to save the password, and you can click either Save or Never as you see fit.
3. Check your settings
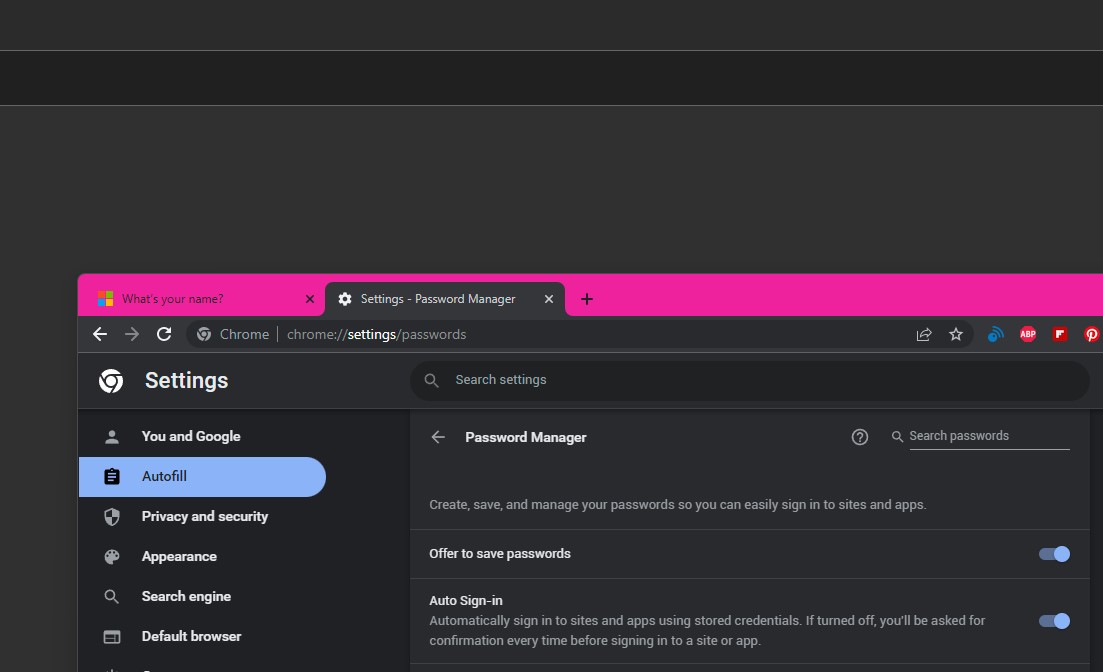
If you find that Chrome does not prompt you to save a password, it may be the case that you have disabled the option in your browser. To change this, click the three-dot menu to the upper right and select Settings.
Move to the Autofill section, click Password Manager to the right, and then make sure that the Offer to save passwords option is enabled.
4. Autofilling passwords
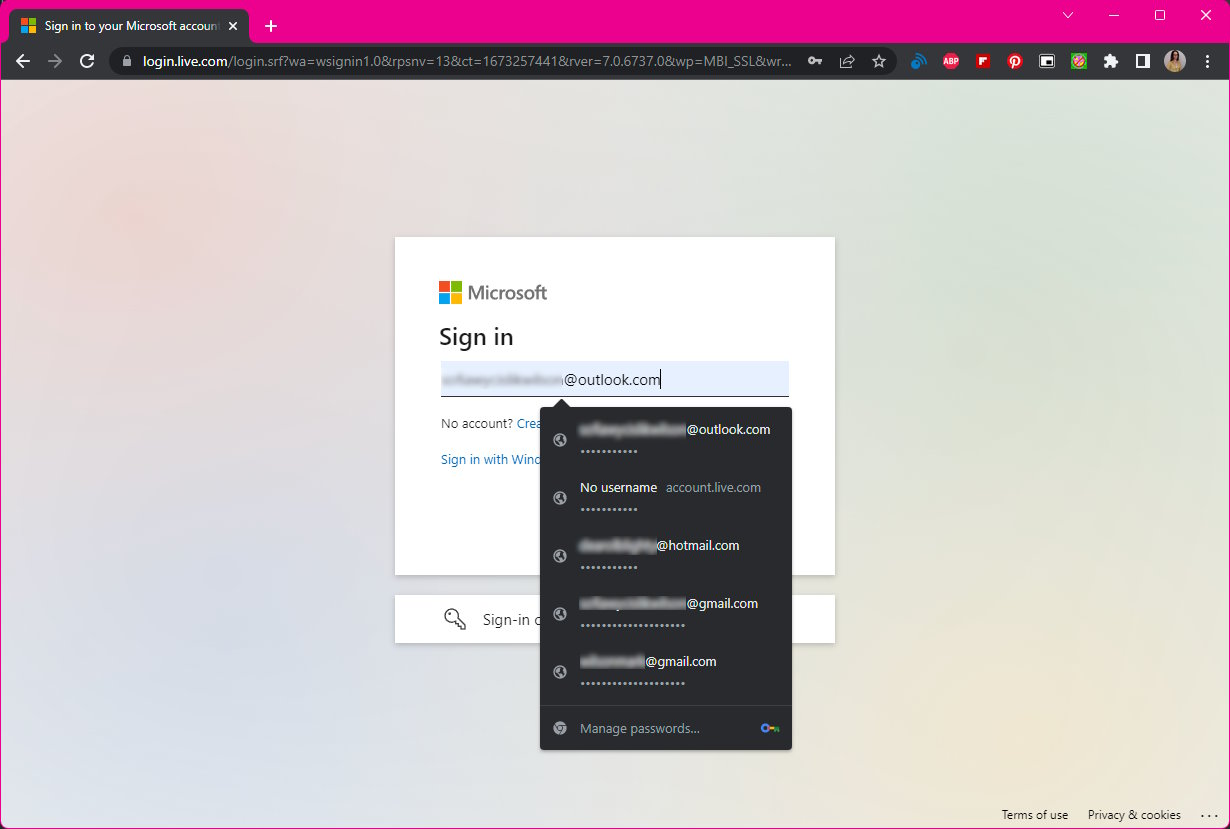
When you revisit a site for which you have saved your login credentials, you will find that this information is automatically filled in for you. Just how this is done, and how it looks, will depend on the design of individual websites, and you may find that your username and password are both entered on the same screen, or you may need to confirm your username before your password is then filled in.
If you have multiple accounts with a particular site, you can select which to sign into by clicking in the username field and using the menu that appears.
5. Viewing passwords
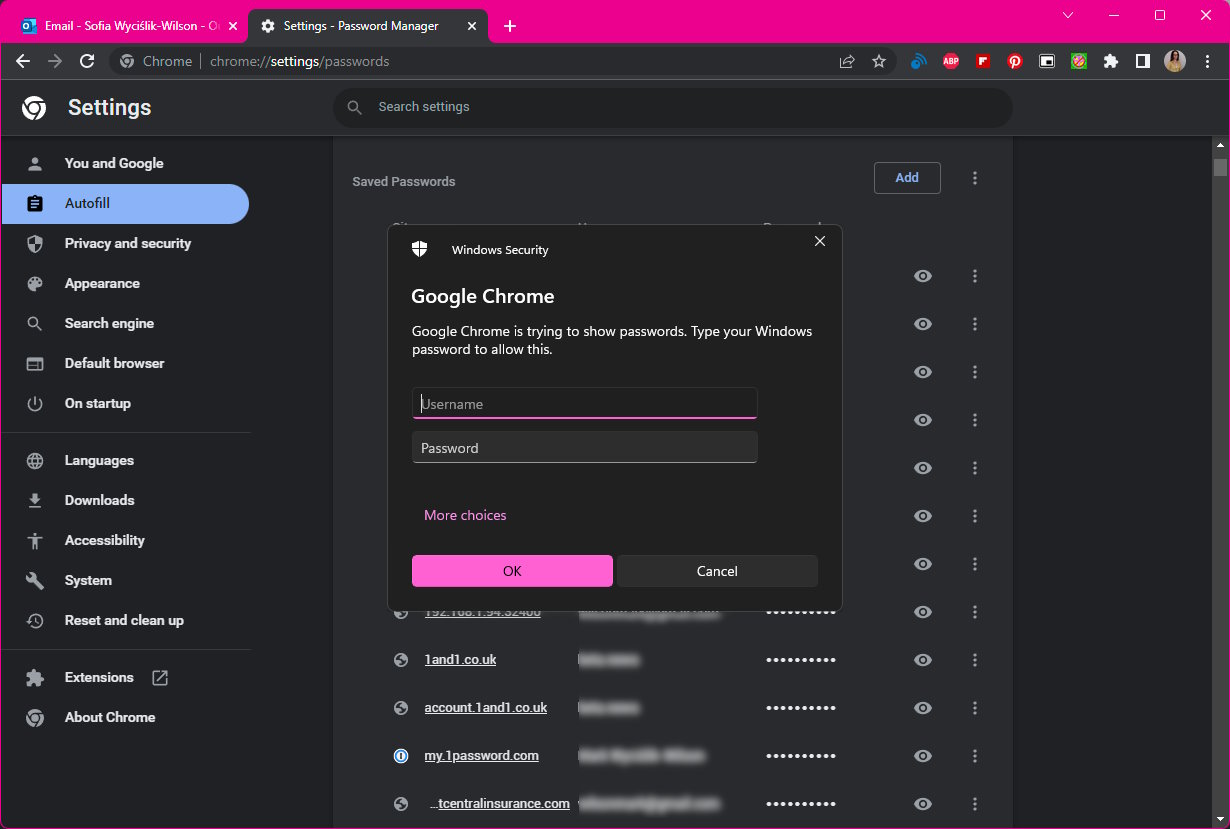
You may find it useful to check the passwords that you've saved. To do this, open Settings in chrome and head to the Password Manager in the Autofill section. Under the Saved Passwords heading, you will see a list of all of the sites for which you have saved passwords - but the passwords are hidden by default.
To view the password for a particular site, click the eye icon and enter the credentials you are asked for - such as your Windows login details, or PIN. Chrome will then reveal the password to you.
6. Changing saved data
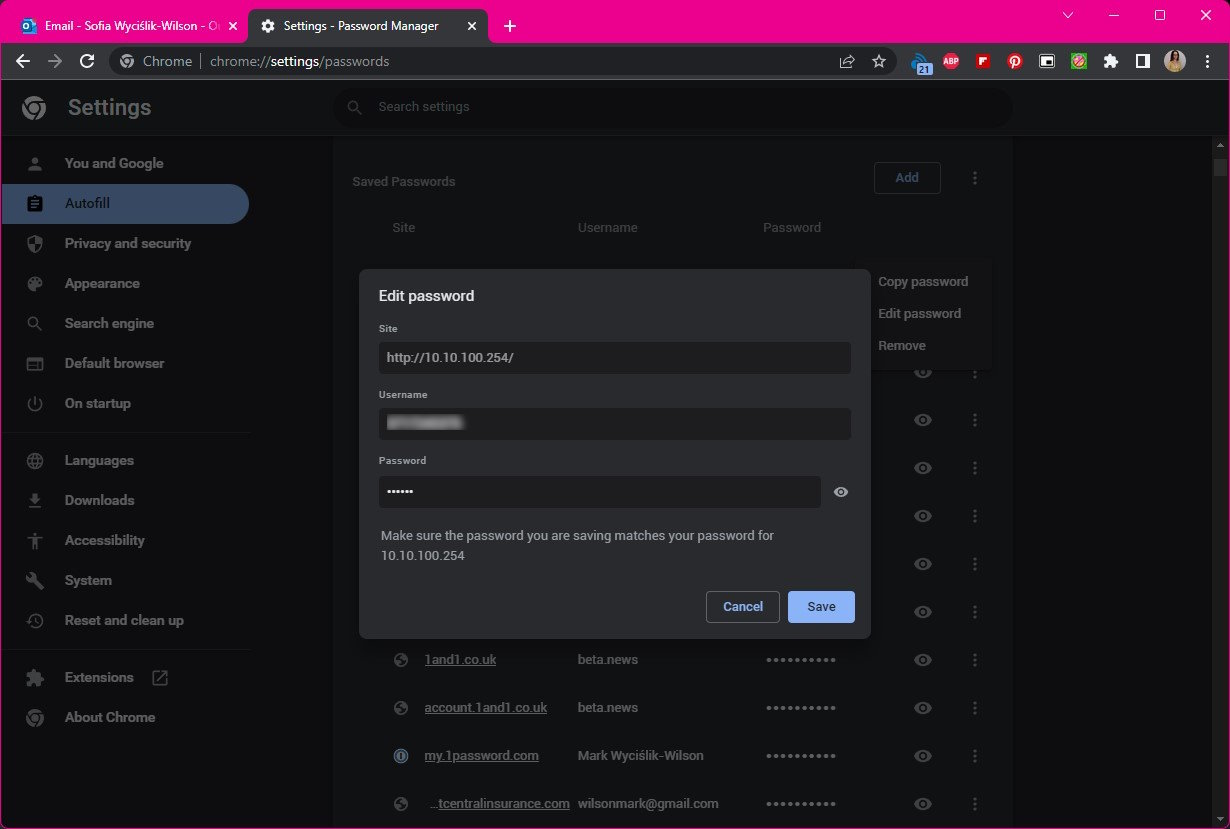
At some point, you may need to change the data you have saved for a particular site, and this can be done with the Password Manager. Click the three-dot button to the right of the eye icon next to an entry and select Edit password from the menu.
Again, you will need to provide credentials such as your Windows password or PIN, but then you can go ahead and make the necessary changes to a username and password before clicking Save.
7. Deleting passwords
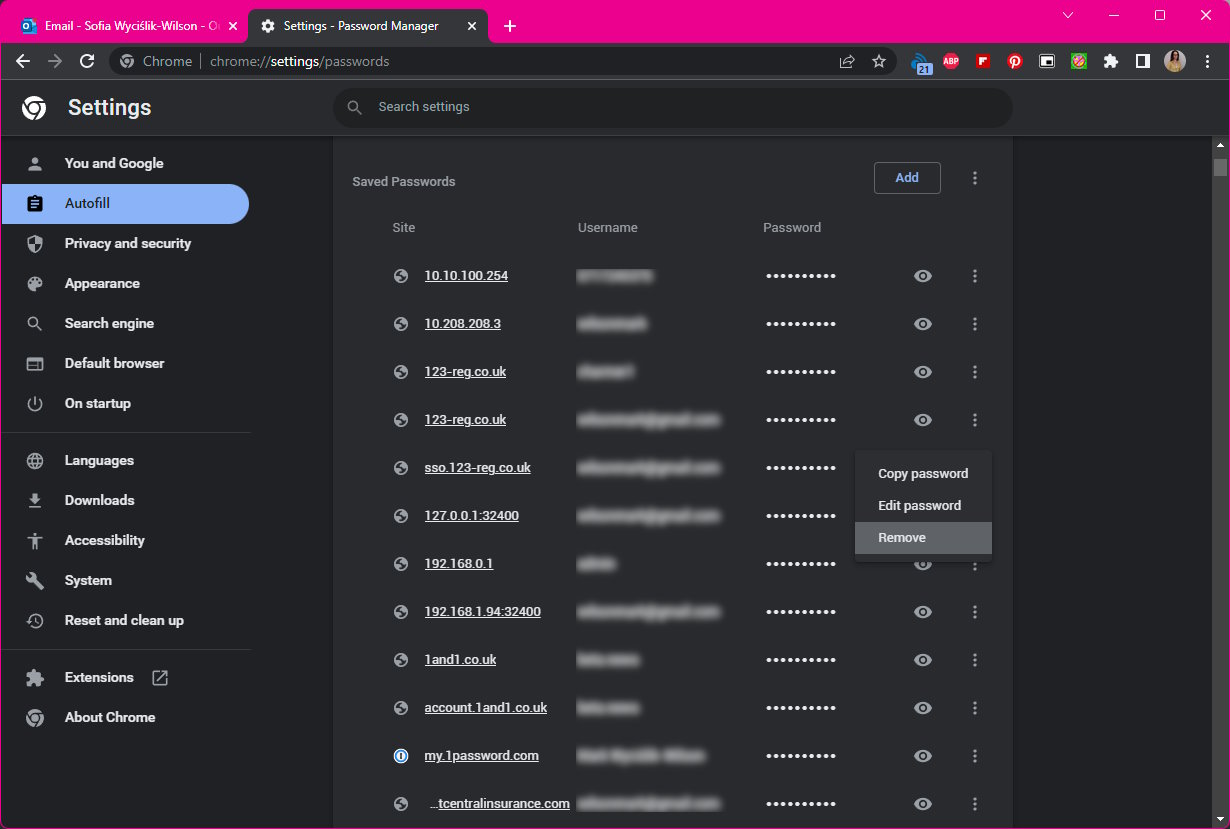
Whether for the sake of neatness or out of concern for security, you may want to delete the password you have saved for a particular site -- again, this can be done with the Password Manager.
Click the three-dot button to the right of the eye icon next to the entry for a site you wish to delete from the password manager and select the Remove option from the menu.
8. Remove sites from Never Saved
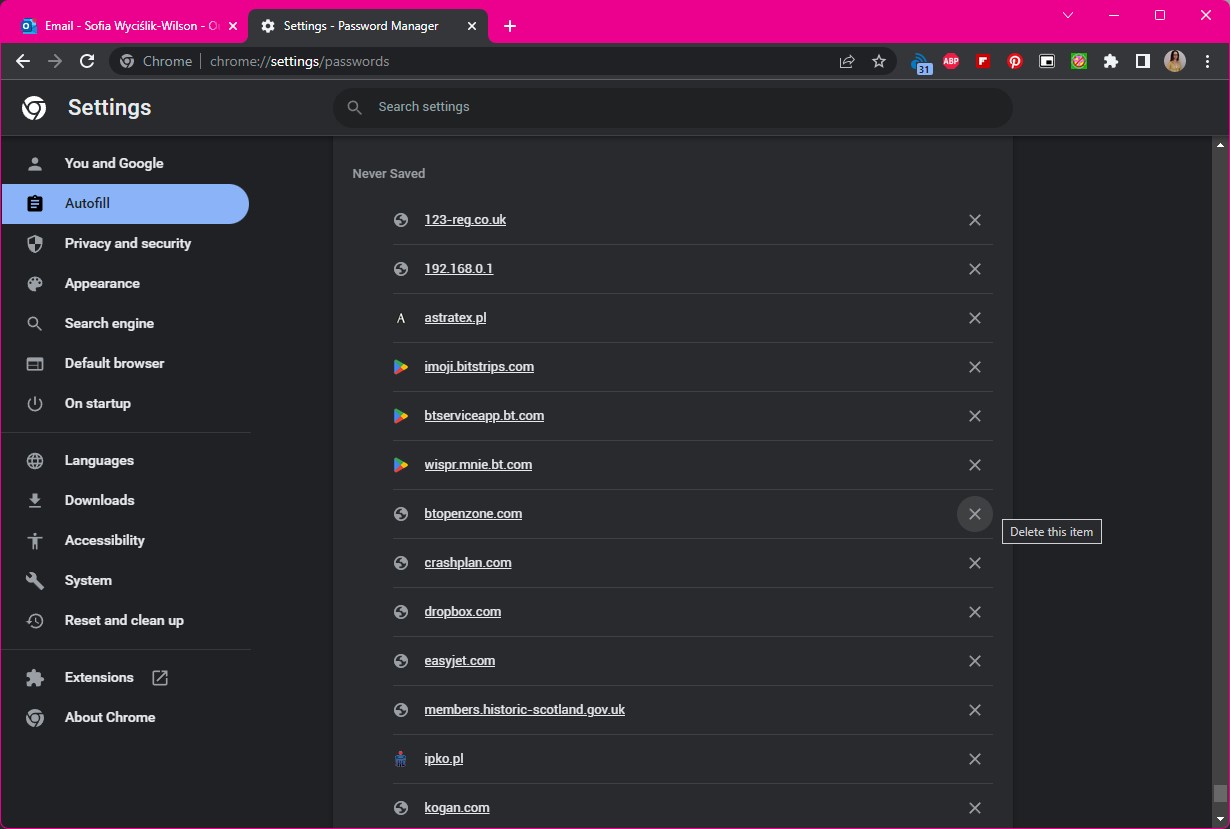
We mentioned earlier that it is possible to opt out of having passwords saved for a particular site by selecting the Never option when prompted. If you change your mind about a particular site, open up the Password Manager in Settings and scroll down to the bottom of the page to the Never Saved section.
To have Chrome prompt you to save the password for a site the next time you visit it, just click the x button next to a site to remove it from the list.
9. Checking password security
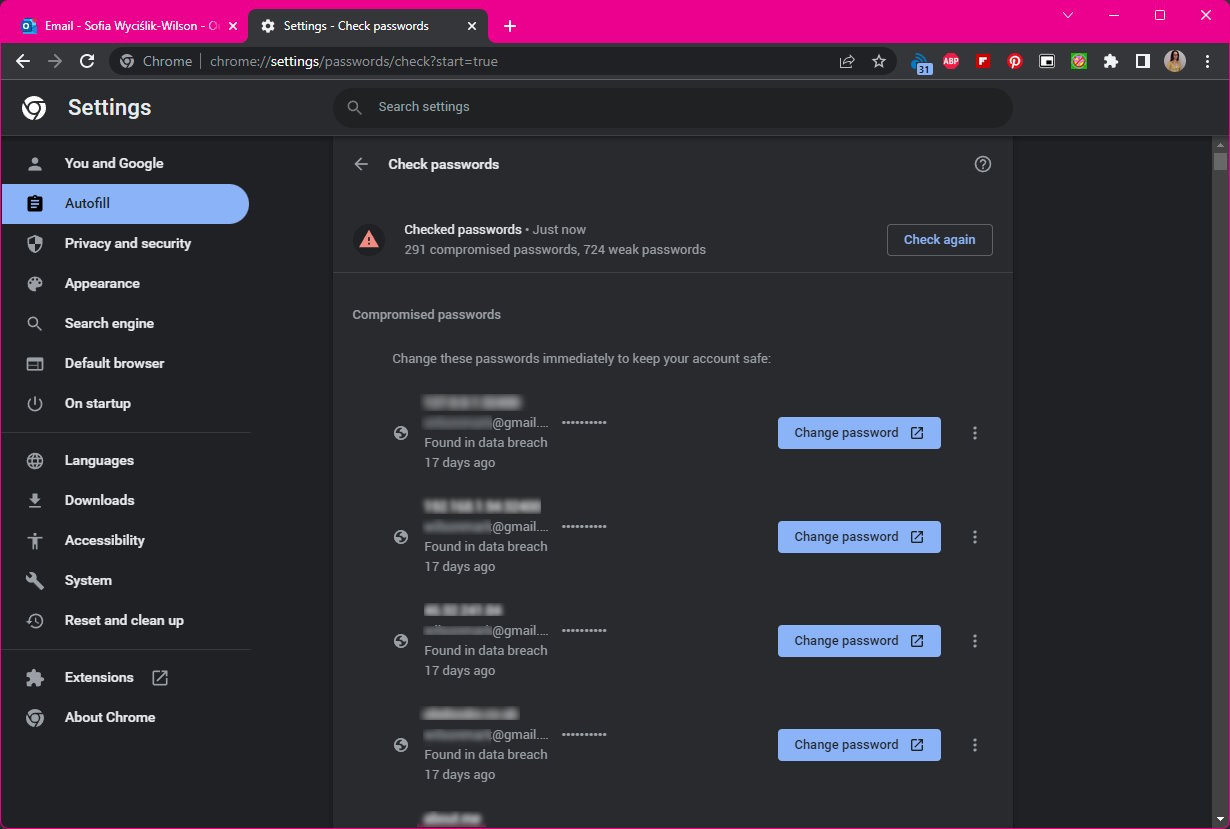
Chrome can advise you if you're using weak passwords for any sites, as well as informing you if your passwords have been part of a security breach. In the Password Manager, click the Check Password link and the browser will perform a scan of your saved passwords.
In the list of results, you will be told of any passwords that have been comprised, and you can click the Change Password button to be taken to the relevant site to take the necessary action.
Further down, you will see a list of password Chrome considers to be weak, and again offered the opportunity to change them.
10. Exporting passwords
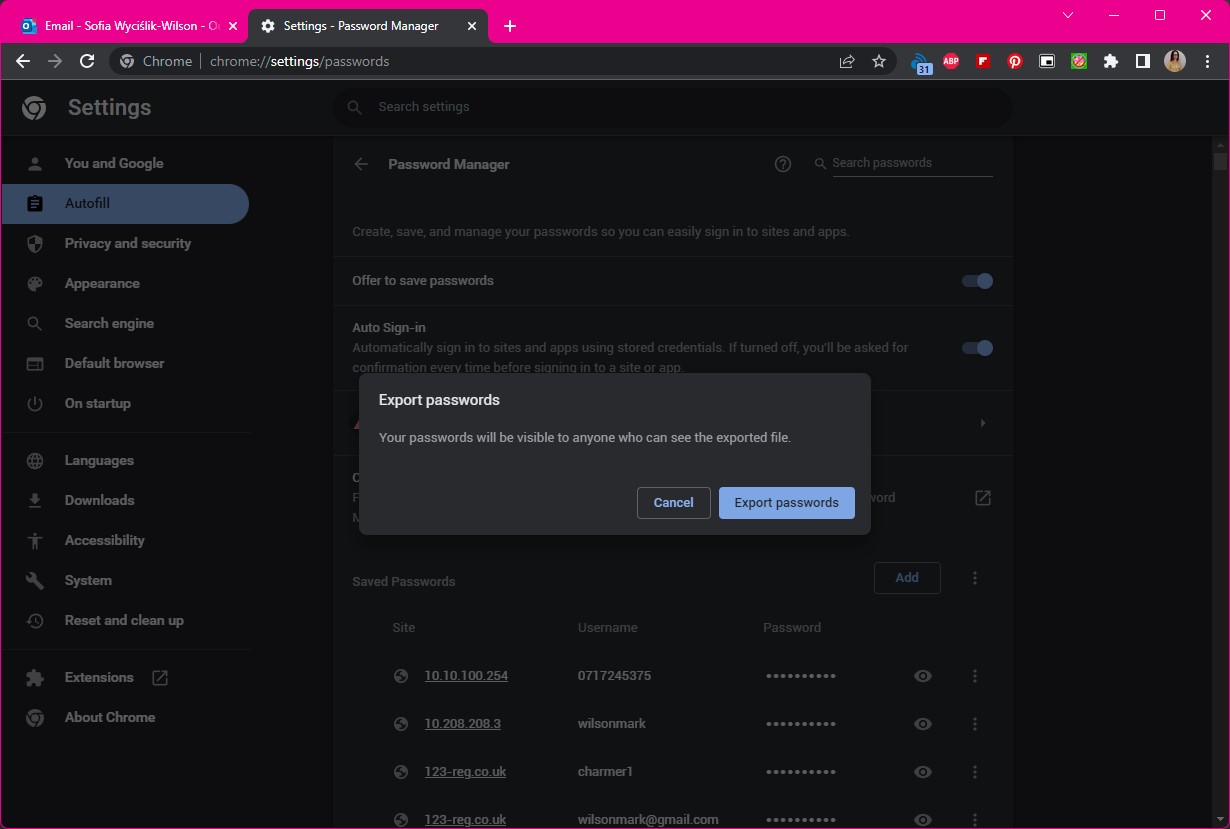
While your passwords are synchronized and backed up via your Google account, you may still want to export your saved passwords for extra security. This not only gives you an additional backup, but it also gives you the option of importing your saved passwords into another browser if you decide to move away from Chrome.
In the Password Manager, click the three-dot menu next to the Add button in the Saved Passwords section, and then select Export passwords from the menu. You can then save your passwords as a .csv (comma-separated values) file.
Final Thoughts
It is undeniably handy to have Chrome taking care of your password management. After all, your web browser is something you use every day, so it's great not to have to rely on any other software. It is not just Chrome that offers a password manager, of course -- it is now a common feature of just about every browser on the market. But if you're looking for some extra feature or demand additional security, you may want to look to third-party tools.
Two that are worthy of note are NordPass and RoboForm. NordPass is available in Free, Premium, and Family bundles, with paid-for tiers having monthly, yearly, or two-yearly payment options.
RoboForm also has free and paid-for versions to choose from, so it's another great option for anyone on a budget.
Get daily insight, inspiration and deals in your inbox
Sign up for breaking news, reviews, opinion, top tech deals, and more.

Sofia is a tech journalist who's been writing about software, hardware and the web for nearly 25 years – but still looks as youthful as ever! After years writing for magazines, her life moved online and remains fueled by technology, music and nature.
Having written for websites and magazines since 2000, producing a wide range of reviews, guides, tutorials, brochures, newsletters and more, she continues to write for diverse audiences, from computing newbies to advanced users and business clients. Always willing to try something new, she loves sharing new discoveries with others.
Sofia lives and breathes Windows, Android, iOS, macOS and just about anything with a power button, but her particular areas of interest include security, tweaking and privacy. Her other loves include walking, music, her two Malamutes and, of course, her wife and daughter.
- Daryl BaxterSoftware & Downloads Writer