How to map a network drive in Windows 10
Easy access to network storage
In this guide we'll show you how to map a network drive in Windows 10. Network drives – also known as Network Attached Storage (NAS) – are an invaluable tool for PC users, both for professional and leisure purposes.
A hard drive connected to your Wi-Fi router allows its contents to be available for all your devices that are connected to the same network – or even remotely over the internet.
If your business requires being able to share files between colleagues, or you simply want to be able to stream media from one room to the next at home, setting up a network drive is the way to go.
While the thought of connecting storage to your internet connection may sound daunting, there’s no need to panic. Setting up a network drive is simple, and we’ve got the step by step guide to prove it.
We'll show you how to map a network drive in Windows 10. Mapping a network drive is the process off connecting a network drive to Windows 10, allowing it to view the drive as if it was physically connected to your PC.
So, read on to find out how you can easily connect to a drive and distribute files using it in our guide on how to map a network drive in Windows 10.
1. Connect your network drive to your router
Most drives should offer some instructions, but generally the process is the same. Plug the drive into the wall via the included power adapter, and then connect it via network cable (hopefully included) to one of the ports on the back of your router.
Get daily insight, inspiration and deals in your inbox
Sign up for breaking news, reviews, opinion, top tech deals, and more.
You can then continue the process for mapping the network drive in Windows 10.
2. Open This PC in Windows Explorer
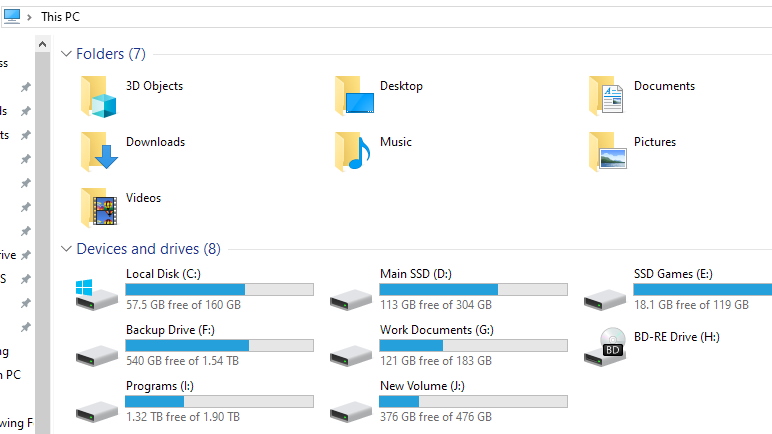
Open up file explorer (press the Windows Key and “E”) and then look to the sidebar on the left of the window. Click 'This PC', and then navigate to the 'Computer' tab.
You can also search for 'This PC' with Cortana. In the main window, make a note of the letters assigned to each drive - this will be helpful to avoid creating a duplicate in the next step.
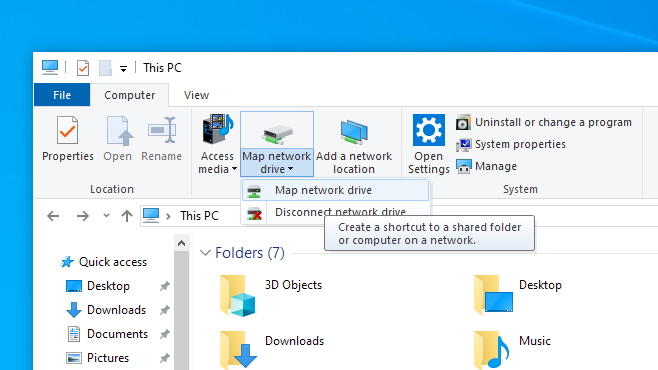
3. Select 'Map Network Drive'
This will allow you to select a letter to assign to the drive. Avoid using C (this is usually the computer’s local storage), while D to F are usually assigned to various removable media such as discs or USB drives.
Ensuring the assigned letter isn’t one of those ensures fewer complications down the line.
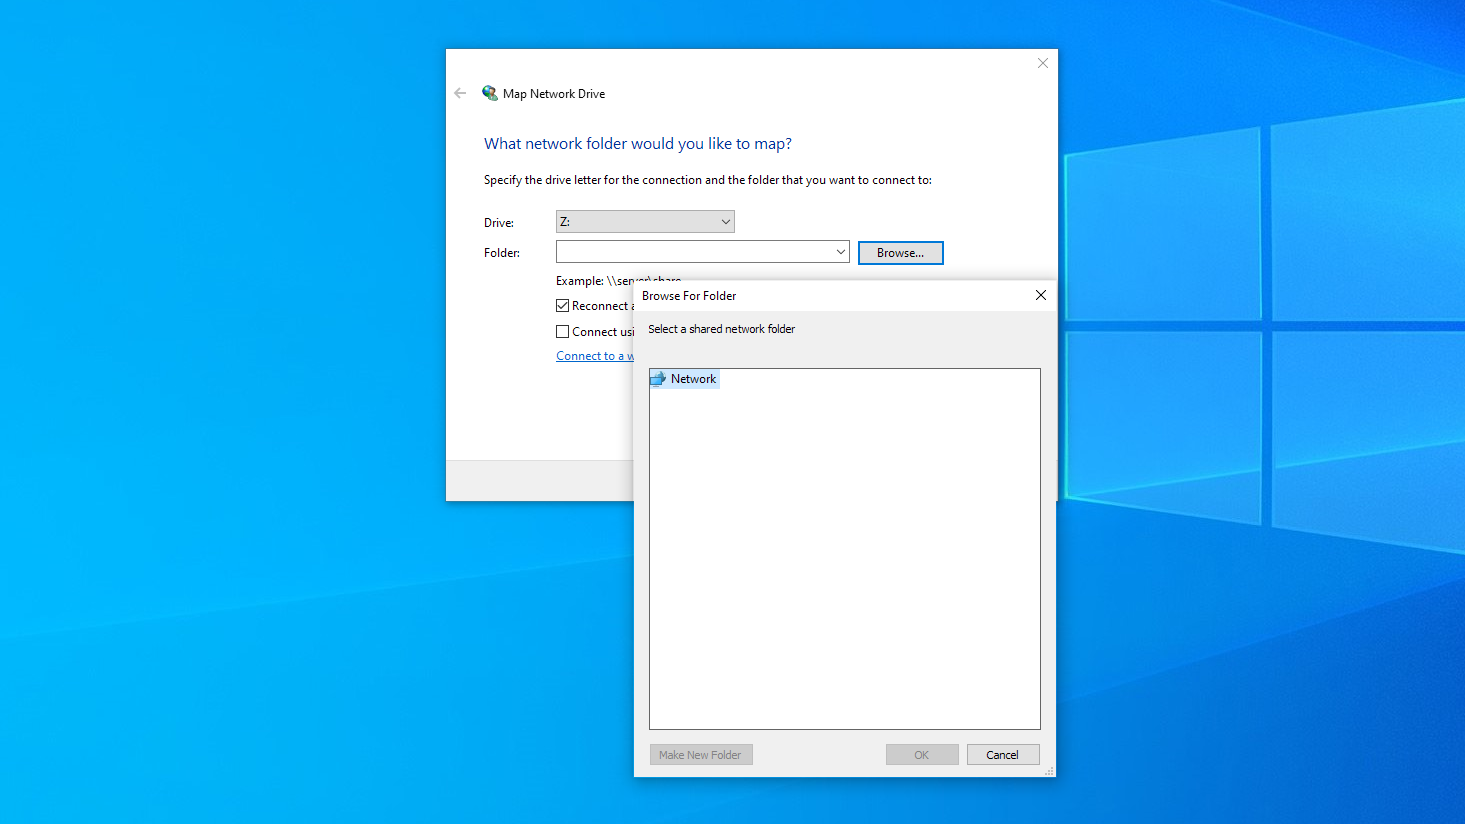
4. Search for your network drive
Click the 'Browse' button, and you’ll be able to navigate to the drive itself within the network menu that pops up.
If this is your first network drive, you’ll hopefully just have the one listed, but you may need to browse through several by name if you have a few.
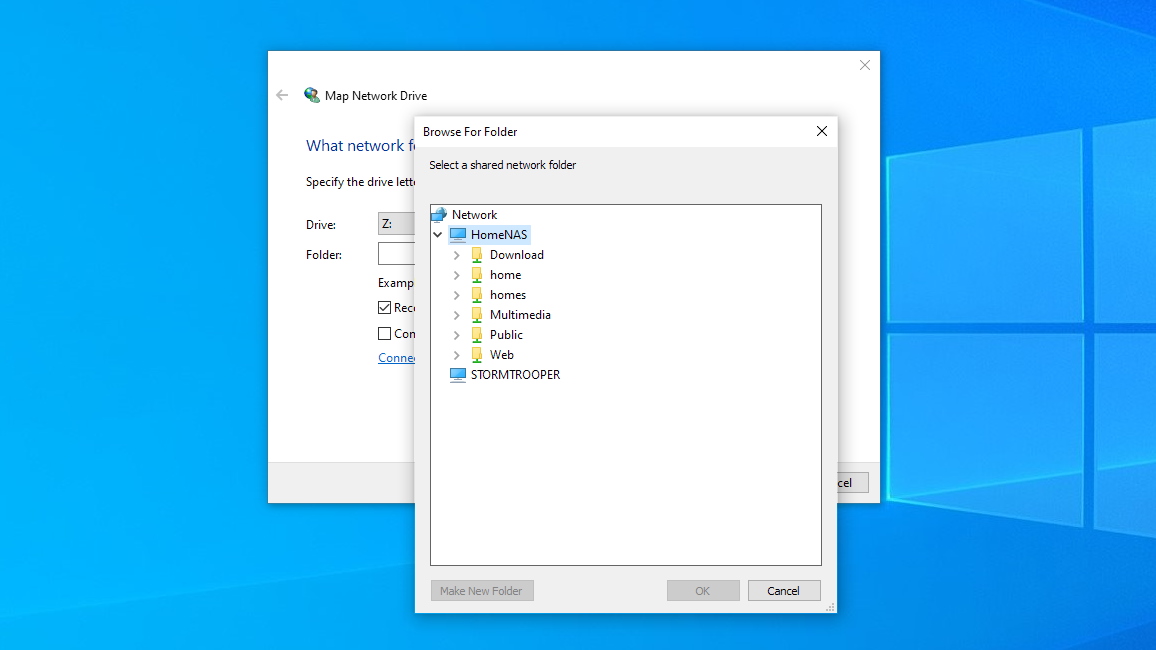
5. Locate or create a shared folder
Within the drive, you’ll find options for shared folders if there are any, or you can create your own. This will be where you’ll eventually drop your files into for access anywhere else.
To create a folder, right click and click 'New Folder'. You can name it whatever you choose, but remember the name for when you need to locate it on another PC.
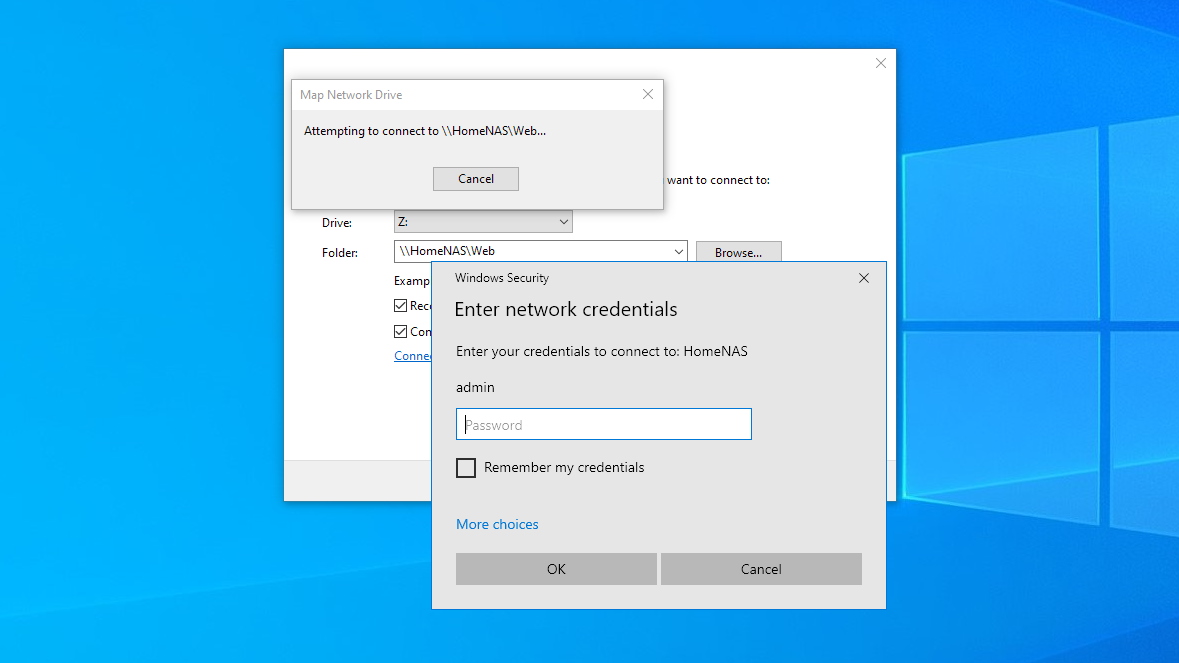
6. Authenticate with a username and password
This password will be required when logging onto the network drive, so be sure to make a note of it for any colleagues or family that will require access to it.
Select 'Reconnect at sign-in' so that the drive can connect when you power on your PC.
You can skip this step, but it means that your folder is accessible to anyone able to log onto your Wi-Fi network, so we’d suggest putting a password in place.
If you've already set a password and user name for your NAS device, then you may need to enter those in here to access the drive.
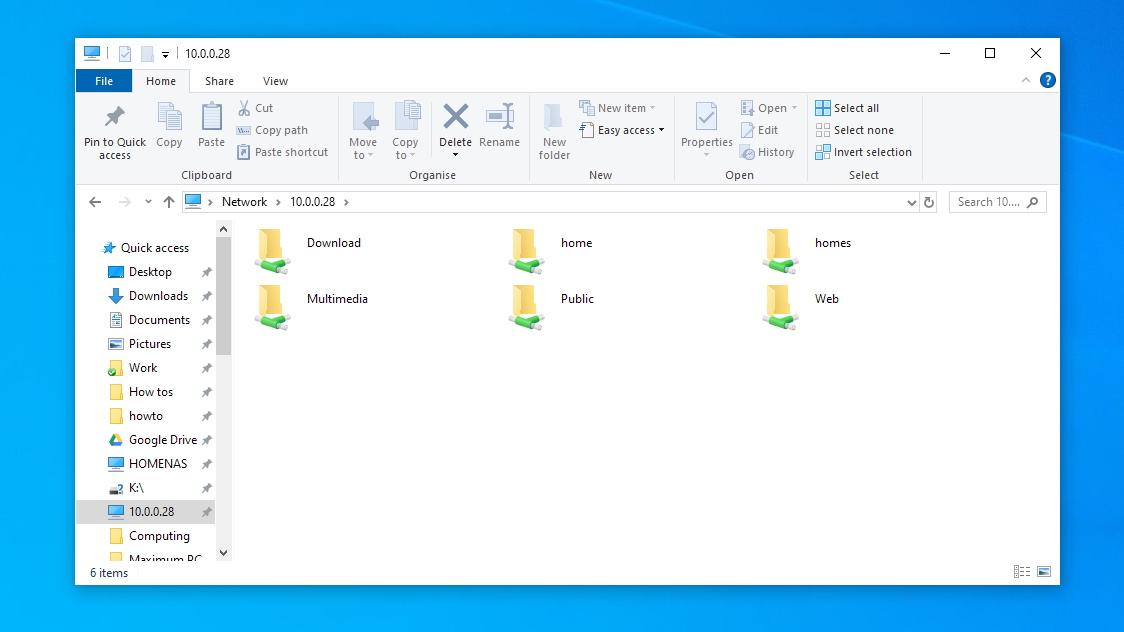
7. Access the drive
Click 'Finish' and you’ll see a new window for the drive, and it’ll be denoted by the letter you assigned back in step 3.
You will also see its contains the shared folders that we identified in Step 4. You can now view and open the files on the network drive as if they were on a hard drive physically connected to your PC.
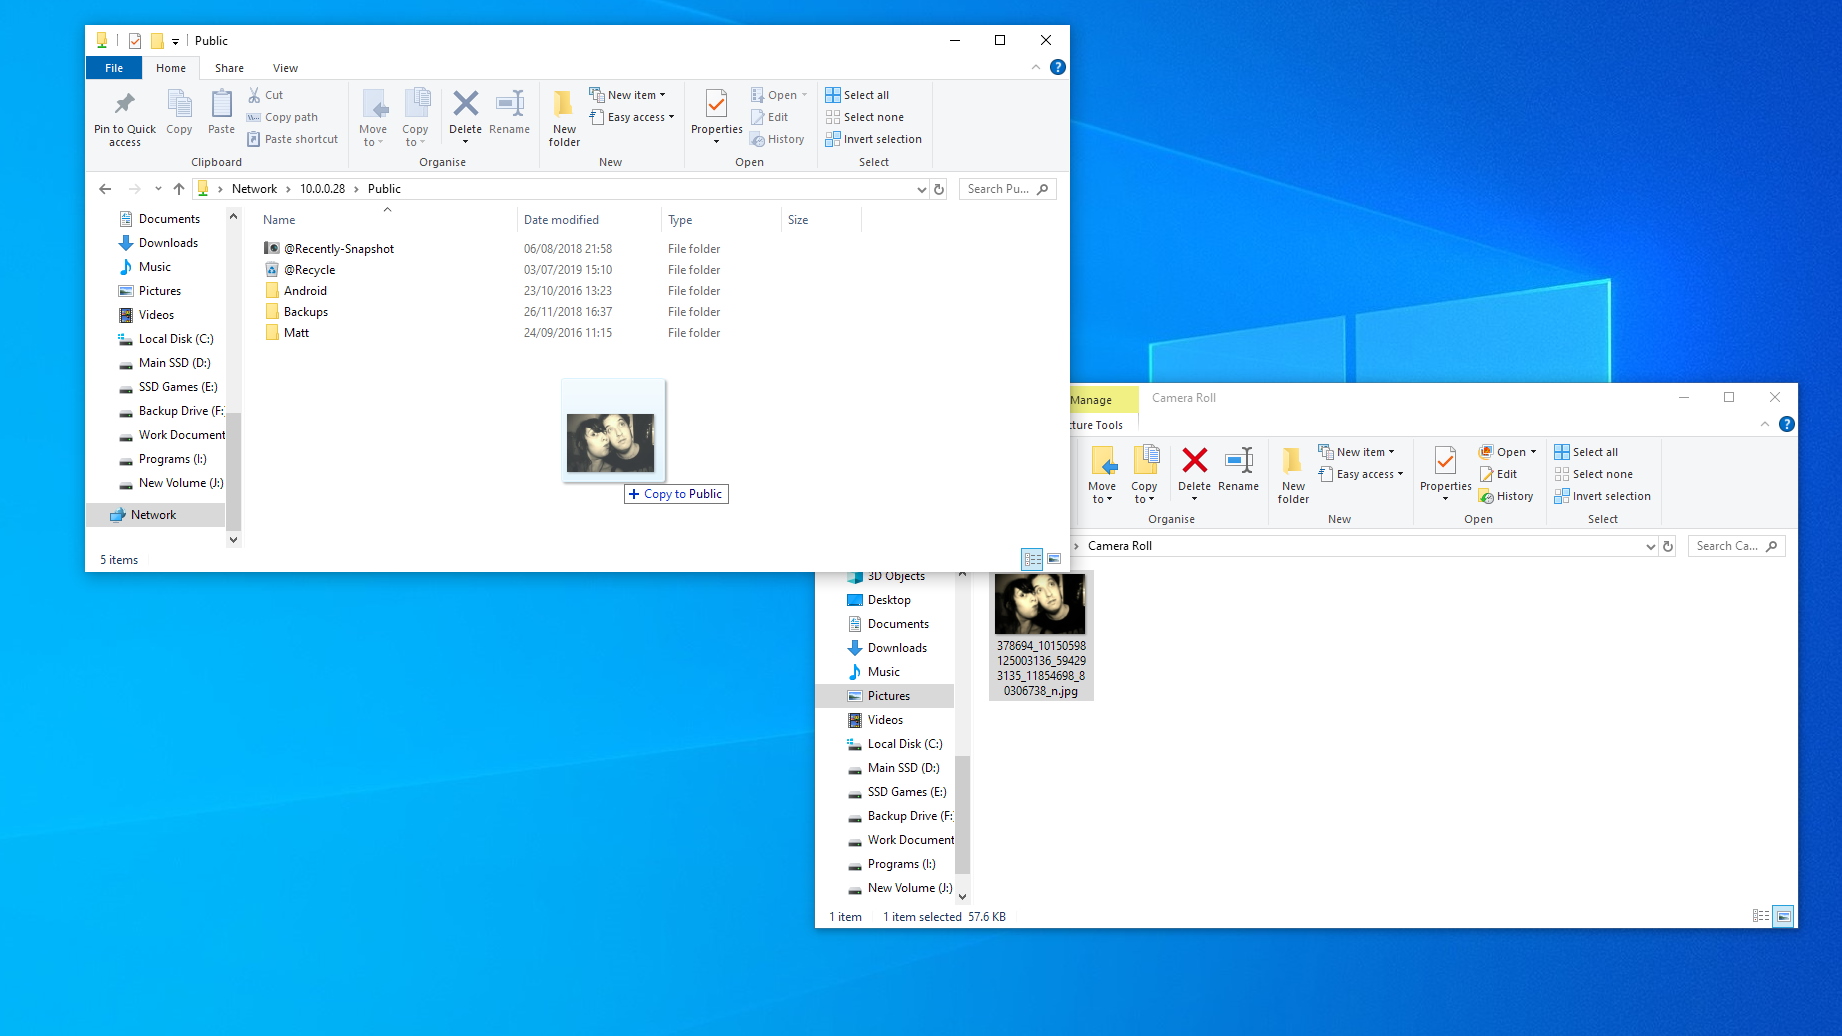
8. Move files to the network drive
The drive will now be listed on the sidebar to the left of any file explorer windows, and you can open it in a new window to be able to drag documents, photos, or anything else over to it.
This is done as it would be with any other folder, so you can copy, cut and paste as per usual.
You now know how to map a network drive in Windows 10. Follow the same steps for any other Windows 10 PC on your network which you want to access the drive.

Lloyd Coombes is a freelance tech and fitness writer for TechRadar. He's an expert in all things Apple as well as Computer and Gaming tech, with previous works published on TopTenReviews, Space.com, and Live Science. You'll find him regularly testing the latest MacBook or iPhone, but he spends most of his time writing about video games at Dexerto.