How to organise your photos with Adobe Bridge CC
Sort your photos
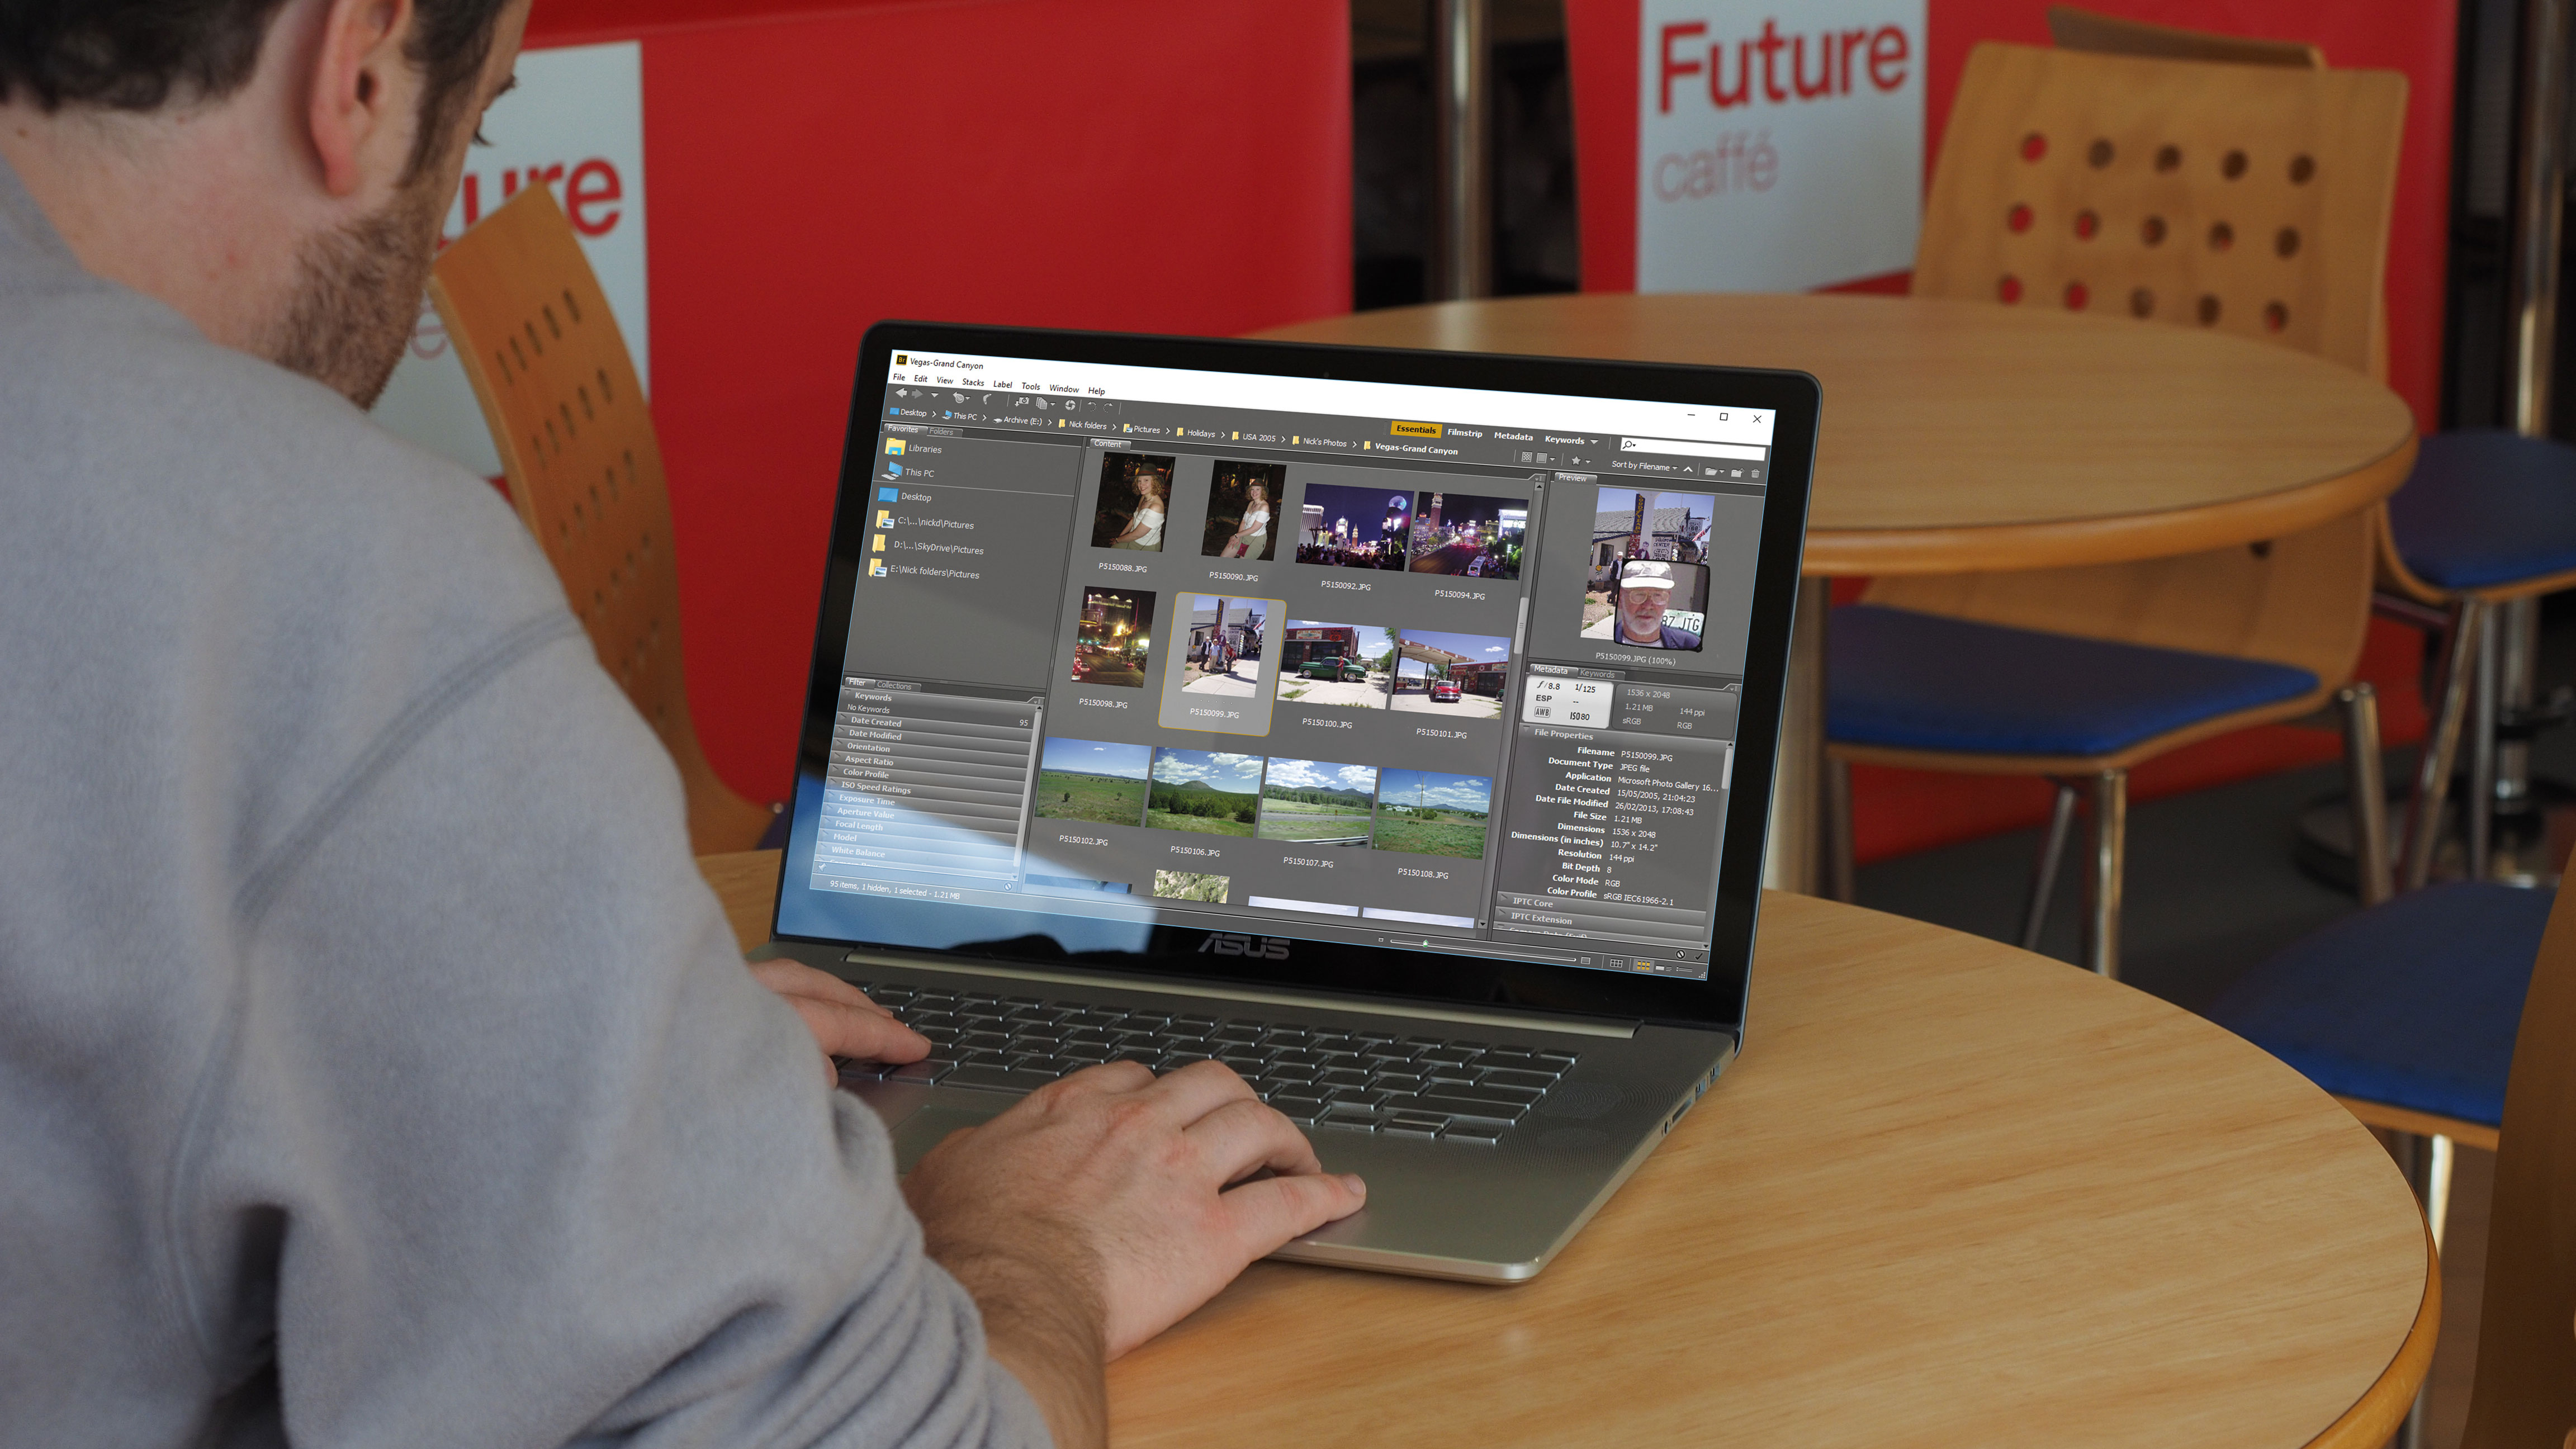
Using Adobe Bridge CC
These days, it doesn’t take very long to accumulate photos and other images across multiple drives. And getting them organised is no easy task.
But, luckily Adobe has come to the rescue. The company known best for its powerful (and pricey) Photoshop product has quietly made its tool for organising and cataloguing your images free to use.
The program in question is Adobe Bridge CC, and it’s packed with handy features and time-saving tools to bring order to your photo collection.
Read on to discover how to organise your photos into collections. You can also apply useful tags and other identifying data to photos with the minimum of fuss and even import photos directly from other sources, including your digital camera.
If you’ve been struggling to stay on top of your photos, Adobe Bridge CC will be your new best friend.
1. Set up Adobe ID
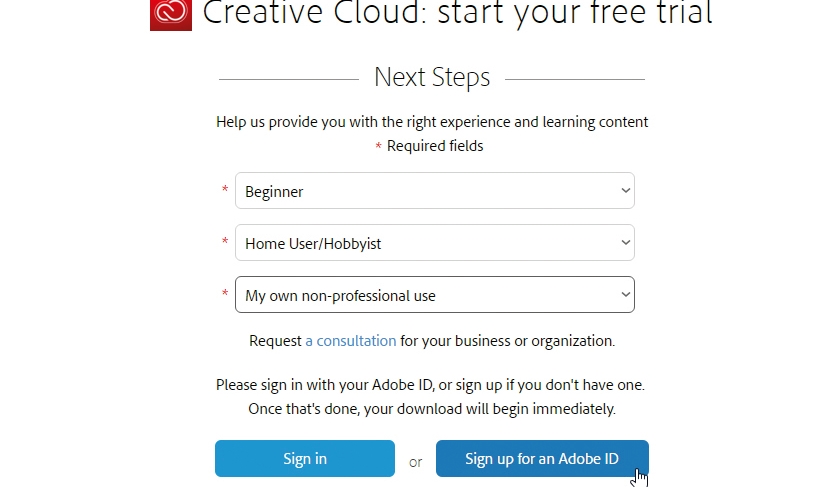
Go to to the Adobe Bridge CC website and click ‘Download’. Select ‘Beginner’, ‘Home User/Hobbyist’ and ‘My own non-professional use’ before clicking ‘Sign in’ if you have an Adobe ID.
Click ‘Sign up for an Adobe ID’ and fill in the form if not – you’ll need to supply personal details, an email address and password. Click ‘Sign up’ and follow the instructions to get your download.
2. Download and install
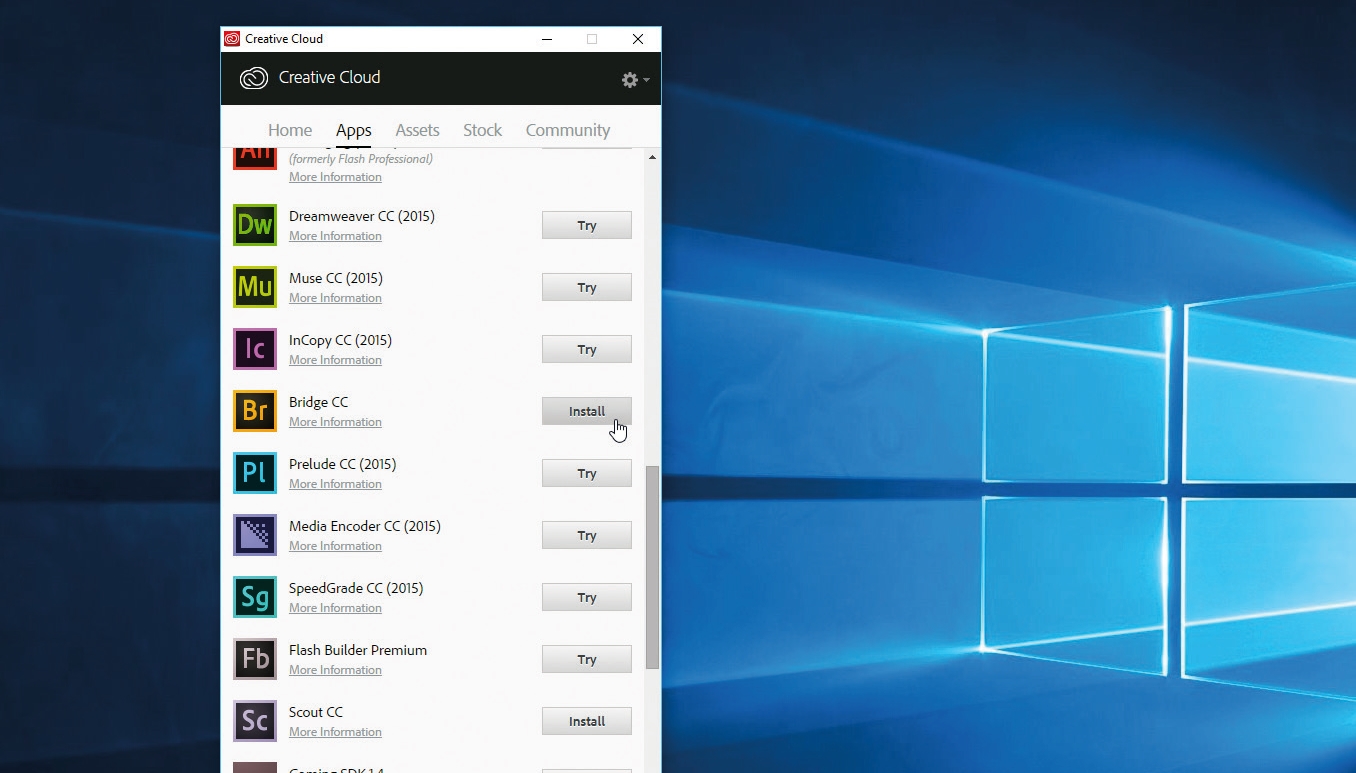
You’ll start by downloading and installing the Creative Cloud desktop app – follow the prompts and once it’s installed, sign in with your Adobe ID credentials.
Switch to the ‘Apps’ tab and scroll down the list until you find Bridge CC – click the ‘Install’ button next to it. Scroll back up to see a meter revealing the download and installation progress. Click ‘Open’ when done.
3. Set up favourite folders
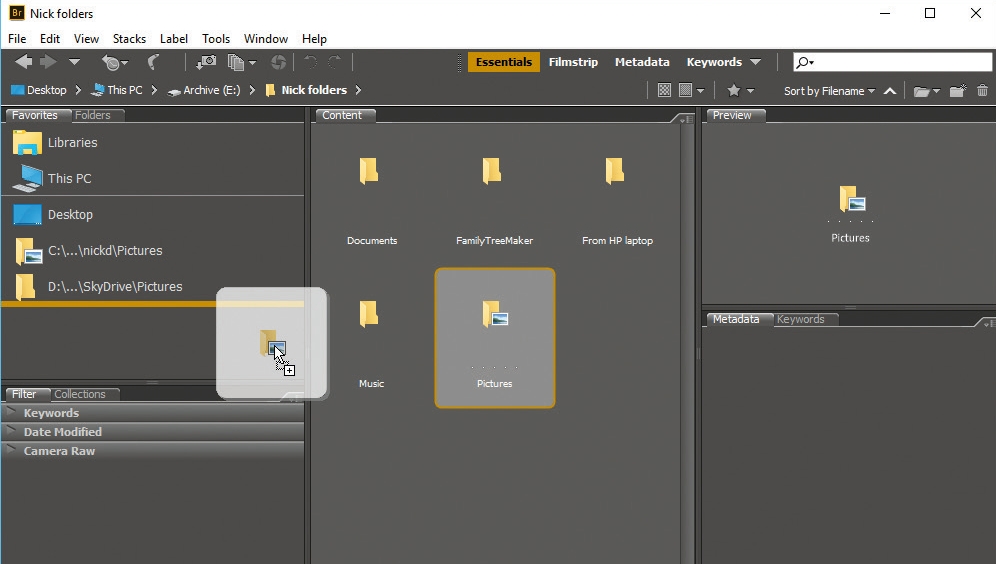
A multi-paned window (split into five sections) will open. The annotated screenshot reveals the key elements of the program’s user interface – take the time to make your picture folders more accessible by locating them in the middle pane, then dragging the folder into the Favourites list.
Drag and drop folders within the pane to rearrange them, or right-click to remove them.
4. Group photos into collections
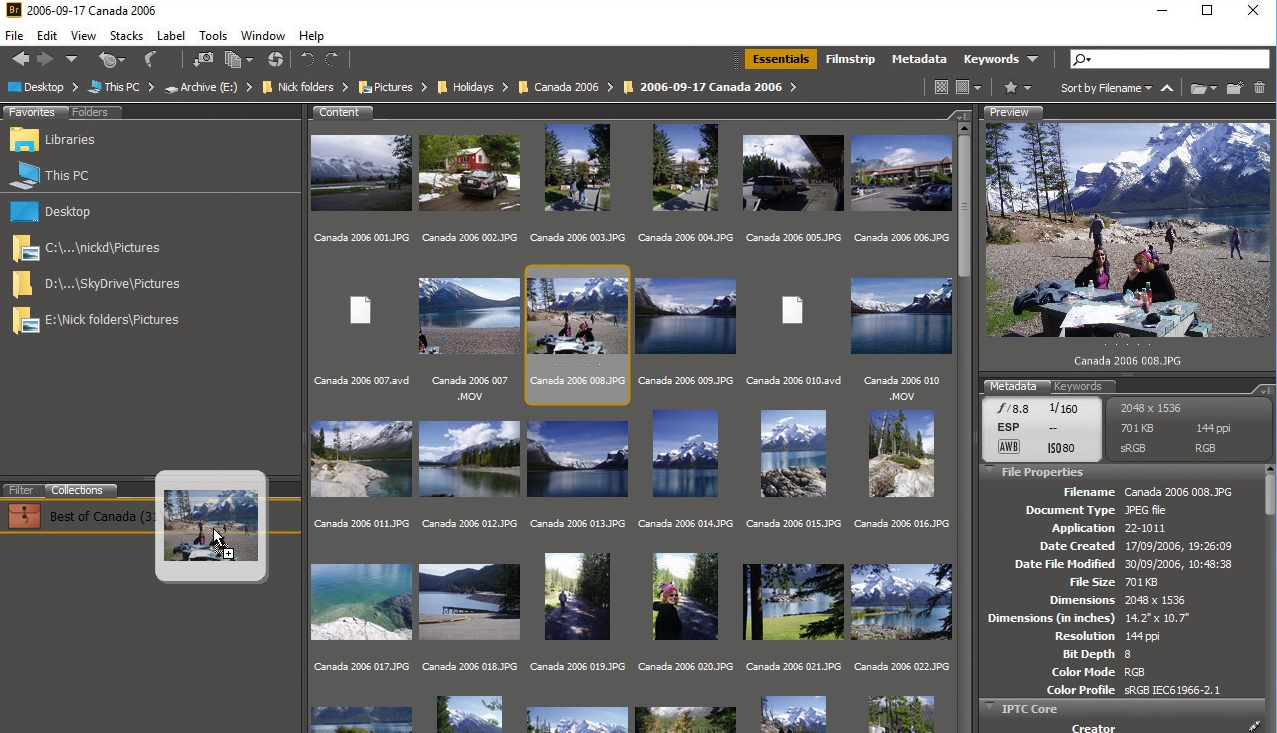
Bridge allows you to group related photos together into collections without having to move them into the same folder.
Switch to the ‘Collections’ tab in the bottom left pane, then click the ‘New Collection’ button. Give it a suitable name, then use the top left pane to browse for photos to add to it. Drag them onto the collection icon to add them.
5. Smart collections
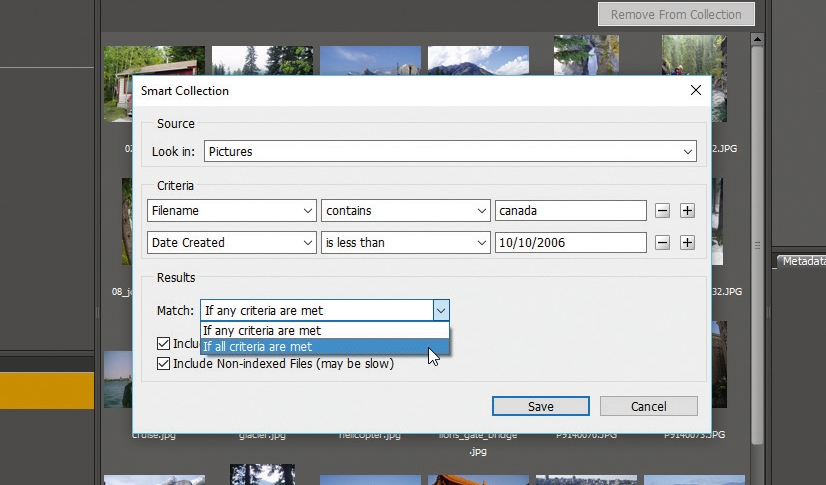
Alternatively, click ‘New Smart Collection’. This creates a dynamically updated collection of photos that match specific criteria, such as ‘filename’, ‘metadata’, ‘date modified’ or ‘created’, and keywords.
Choose which folder or drive to search, and select whether or not to include subfolders and match one or all criteria. Click ‘Save’, then right-click and choose ‘Edit’ to make changes.
6. Assign metadata
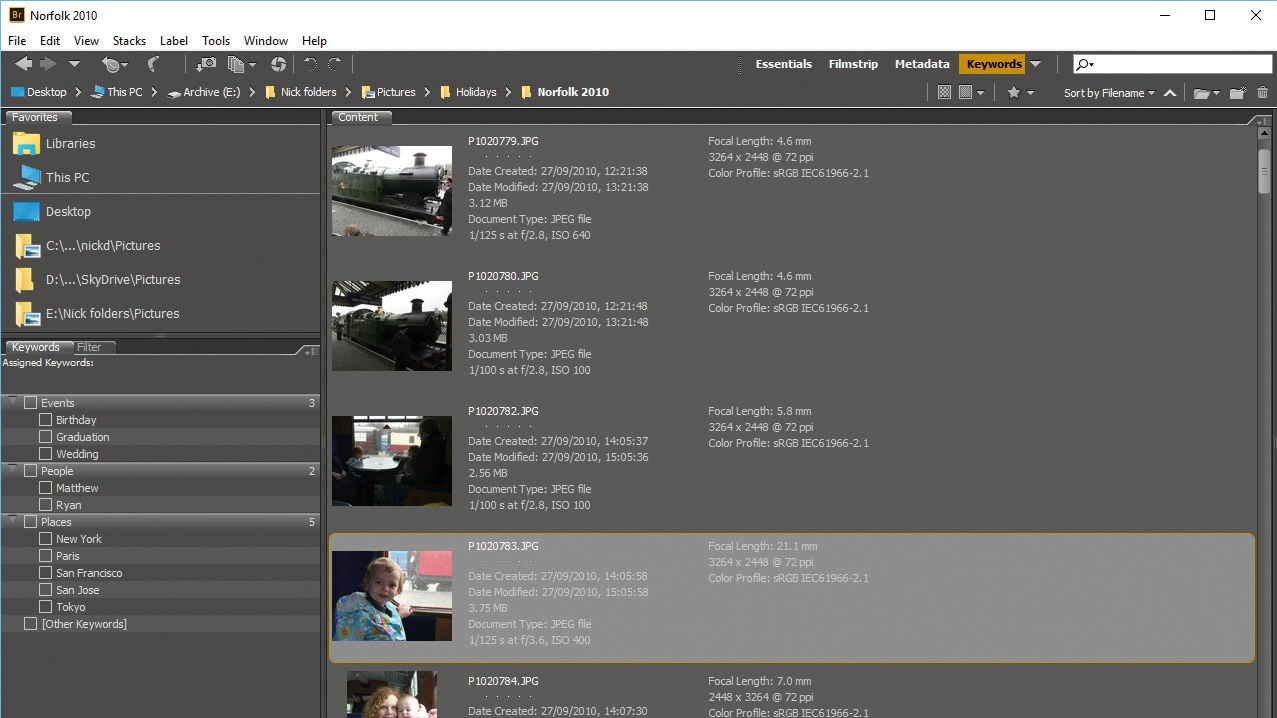
Identifying and finding photos can be time-consuming without adding additional information to the file’s properties in the form of metadata.
One of the simplest forms of metadata is to add keywords to your photos, such as the place they were taken or the people who were in them. Select the Keywords tab in the bottom right pane to view them, or switch to the Keywords view.
7. Manage keywords
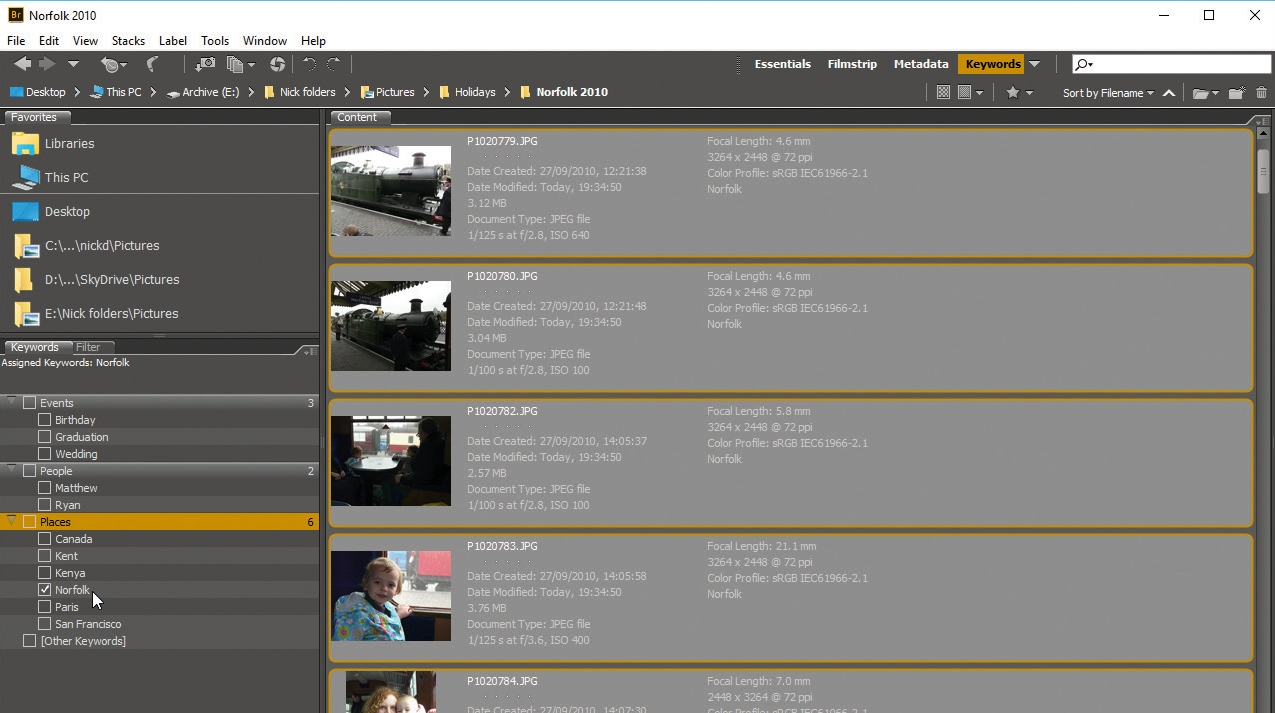
Several suggestions already exist, click ‘+’ to add a new keyword from scratch. If a photo already contains a keyword, select it and the keyword appears italicised in the list – right-click it and choose ‘Make persistent’ to add it to Bridge’s collection.
Use categories to group related keywords together, then select linked photos and tick the relevant keywords to add them.
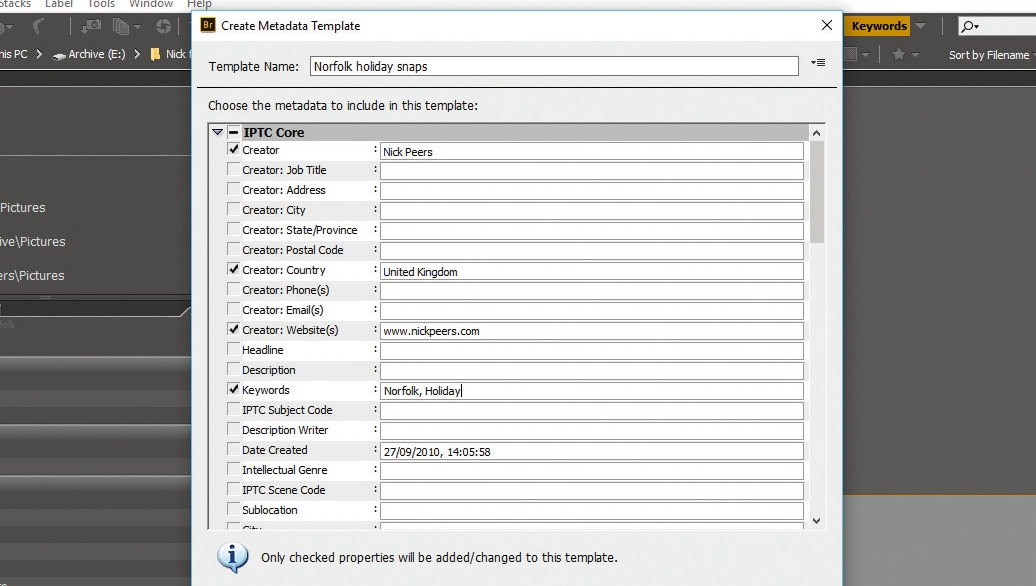
8. Use metadata templates
faster way to assign metadata – including other tags listed under the Metadata tab – is to set up metadata templates.
Choose ‘Tools > Create Metadata Template’ to set up a template of information for specific photos. Work through the sections filling in the fields you want – you’ll find keywords under the IPTC Core section, for example. Give it a suitable name and click ‘Save’.
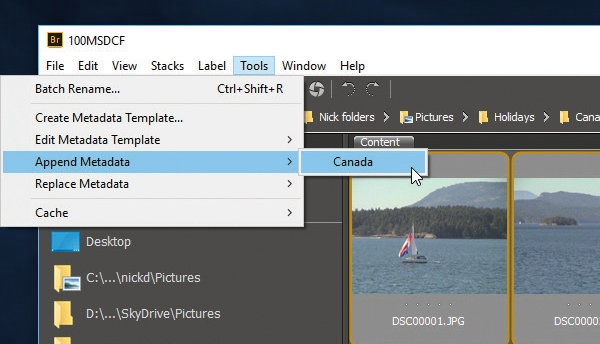
9. Apply metadata
Next, select all the photos you wish to apply the metadata to – one way to do this is organise them into a temporary collection.
Once selected, pick the the template from the ‘Tools > Append Metadata’ or ‘Tools > Replace Metadata’ menu depending on whether you want to simply add the metadata to what’s already there, or replace it with the tags in your template.
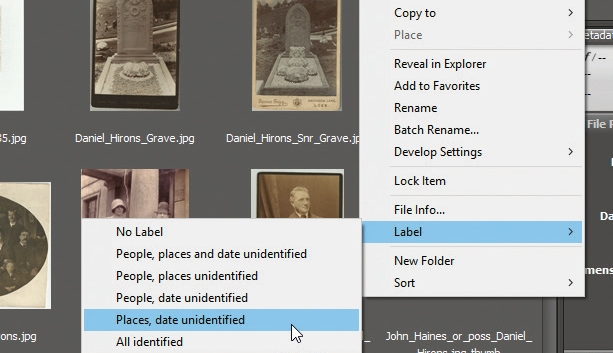
10. And there’s more
We’ve scratched the surface of what Bridge can do, so keep digging – import photos from your camera (click ‘Advanced’ to access more options), apply ratings to favourite photos and develop your own labelling system via ‘Edit > Preferences > Labels’, allowing you to mark files for whatever purpose or workflow you want to use.
- Enjoyed this article? Discover how to get the most from your PC and new things to do in Windows Help & Advice. Take advantage of an exclusive offer in our sampler today.