How to personalize macOS Mojave
Welcome to our guide on how to personalize macOS 10.14 Mojave. The latest version of the Mac operating system, macOS 10.14 Mojave, comes with a beautiful and functional user interface – so much so that you may be happy with the default options.
However, the macOS wallpaper (and other elements of the interface) can also be tweaked to suit your personal tastes. In this guide you’ll discover how to customise macOS Mojave, from simple changes such as switching your background to more advanced features with windows and the Dock.
All of these steps can be reversed and shouldn’t affect the day to day running of macOS but make sure to save and close any open files and run a full Time Machine backup before proceeding. This will allow you to restore your Mac’s default settings in future if you wish.
Apple has also officially announced macOS 10.15 Catalina, but these steps will still apply to the newer version of macOS when it launches later this year.
1. Change your Desktop background
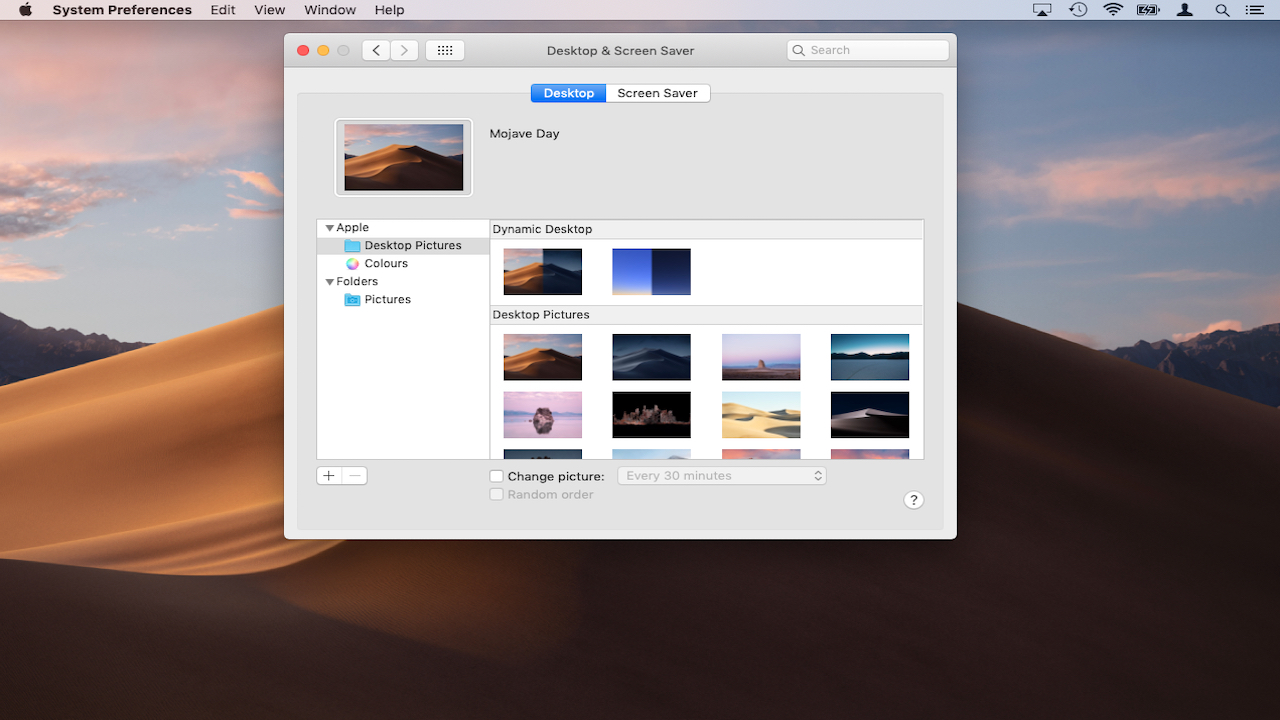
One of the simplest changes you can make to macOS Mojave is to switch to a different desktop background. You can either choose another of the default wallpapers offered by Apple or a picture from your Photo Library.
To get started, right-click on your desktop and choose ‘Change Desktop Background’. From here, select one of the ‘Desktop Pictures’ included with Mojave or go to ‘Folders’ on the left-hand side and choose ‘Pictures’ to make one of your own personal photos as a background.
If a picture hasn’t been designed originally as a desktop background e.g. a family photo, it may not display correctly. Check the ‘Stretch’ option and macOS will automatically resize it to fit your screen.
Sign up for breaking news, reviews, opinion, top tech deals, and more.
2. Tweak your Dock
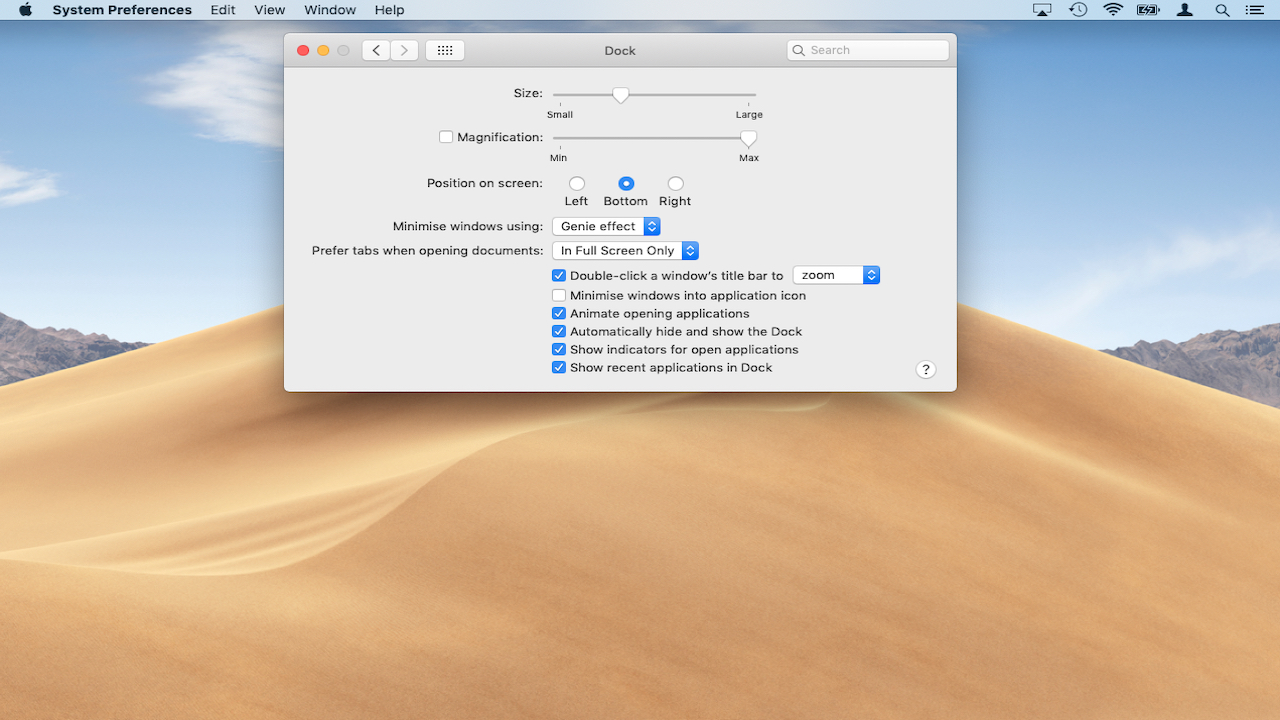
If you value your space, the Dock can be configured to disappear when not in use. Go to System Preferences > Dock and check ‘Automatically hide and show the Dock’.
You can also hover your mouse over the Dock, right-click and choose ‘Turn Hiding On’. From here you can also choose to change the position of your Dock from the bottom of the screen to the left or the right-hand side.
If you want to customize your Dock further, right-click the icon for any program and select ‘Keep in Dock’.
You can also rearrange the order of items in the Dock by clicking and dragging the program icon left or right. You can also use this to remove the default macOS icons such as Safari, as well as to always display icons for your favourite programs like Mozilla Firefox.
3. Customise the Finder
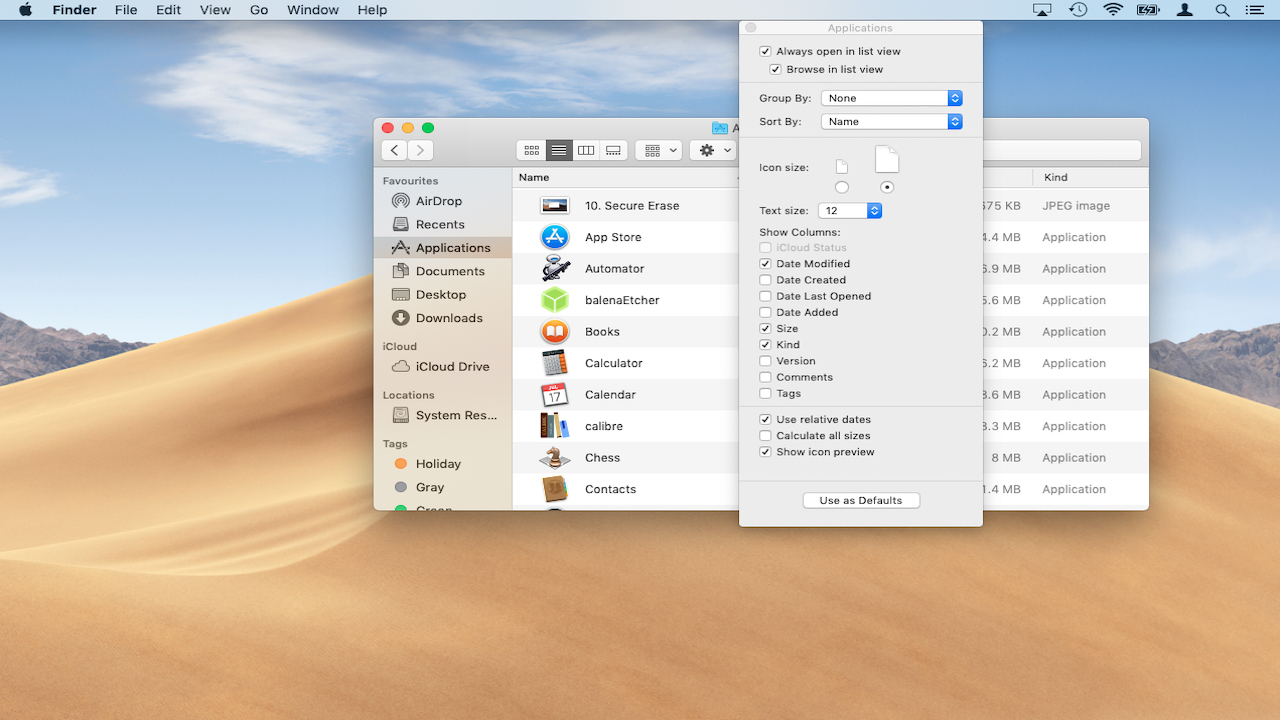
Once you’ve tweaked the Dock to your satisfaction you can also configure the Finder to show your favourite folders. To get started, click Finder > Preferences then tick the checkbox next to any folders you want to automatically appear in the pane such as Pictures.
If you have a special folder you access regularly, you can also drag it into the left-hand pane, and Finder will create a shortcut you can click to access later.
Use the ‘View’ menu to choose how files and folders are displayed. Choose ‘Show View options’ to view specific information on each folder. Click the radio button beside ‘Icon size’ to enlarge icons in that folder.
4. Customise icons
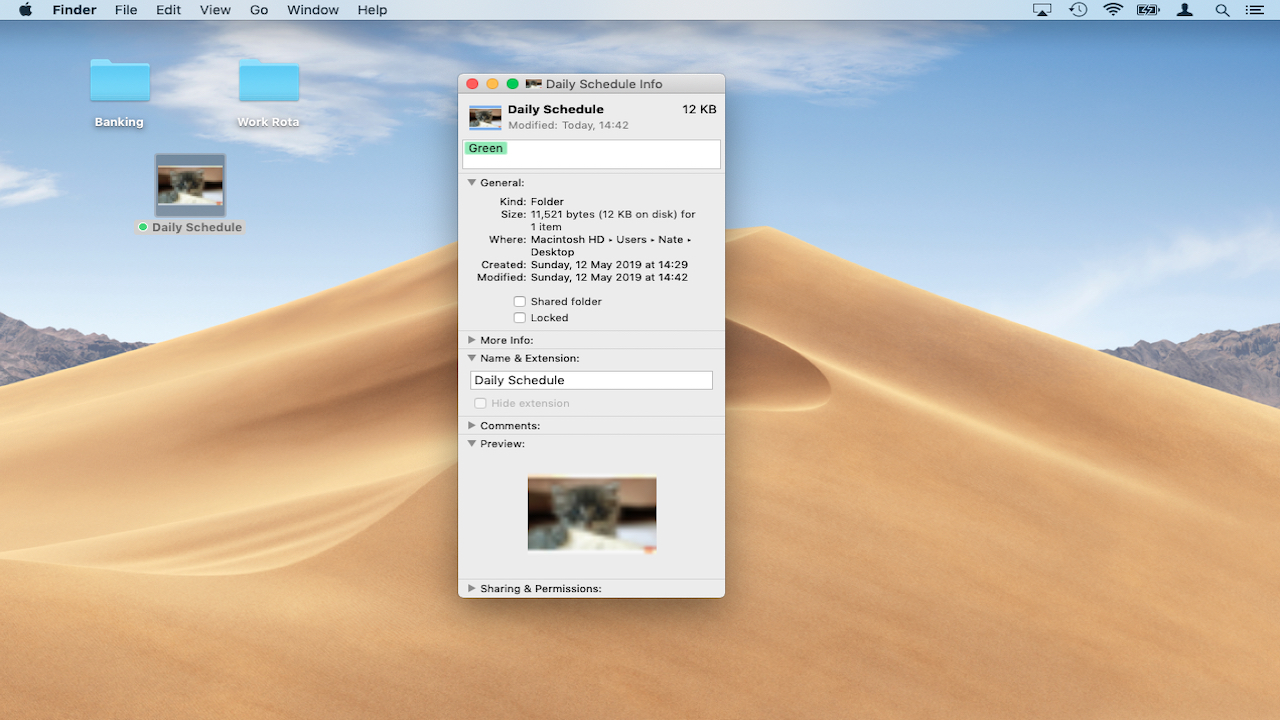
You can create a custom icon for any file or folder using your own pictures, icons downloaded from the web or the icon from another folder.
To get started, first open the image you want to use an icon in Preview. Next, choose Edit > Select All and then Copy.
Open Finder and navigate to the folder or file who’s icon you want to change. Right-click the file/folder and choose ‘Get Info’. Click the image of the current icon, then press Cmd + V on your keyboard to paste the new one
Icons can also be tagged. Go to the folder in question, right-click and scroll down to ‘tags’ to choose your preferred color.
5. Enable High Contrast mode
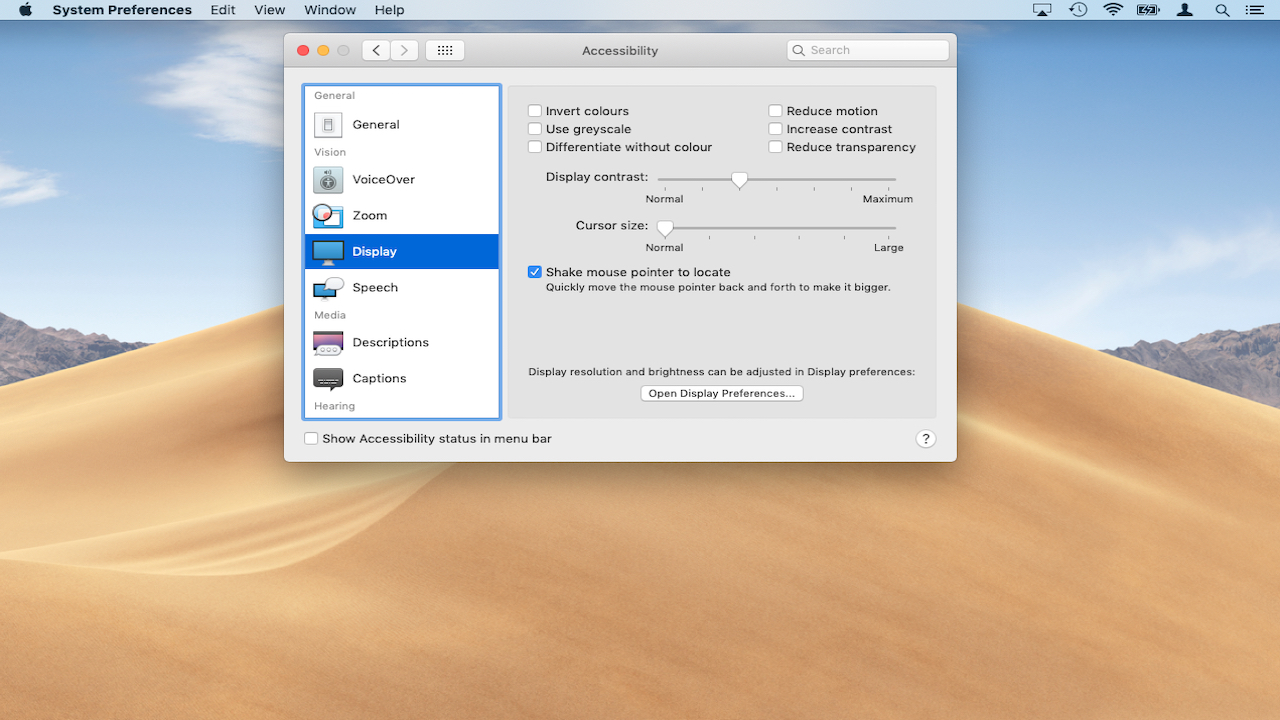
If you’re partially sighted or simply prefer a more straightforward layout to the macOS desktop, you can enable ‘High Contrast’ mode.
This makes your desktop easier to see and is arguably easier on the eyes. If you’d like to try this feature, open System Preferences > Accessibility. Scroll to ‘Display’ and increase ‘Display contrast’ as you see fit.
You can also check other boxes such as ‘Increase contrast’, ‘Reduce transparency’ or ‘Use Greyscale’. You can also increase the size of your cursor from here.
6. Change the screensaver in macOS
Your Mac should always reflect your personality, even when you’re away from it. This includes choosing a screensaver which matches your tastes.
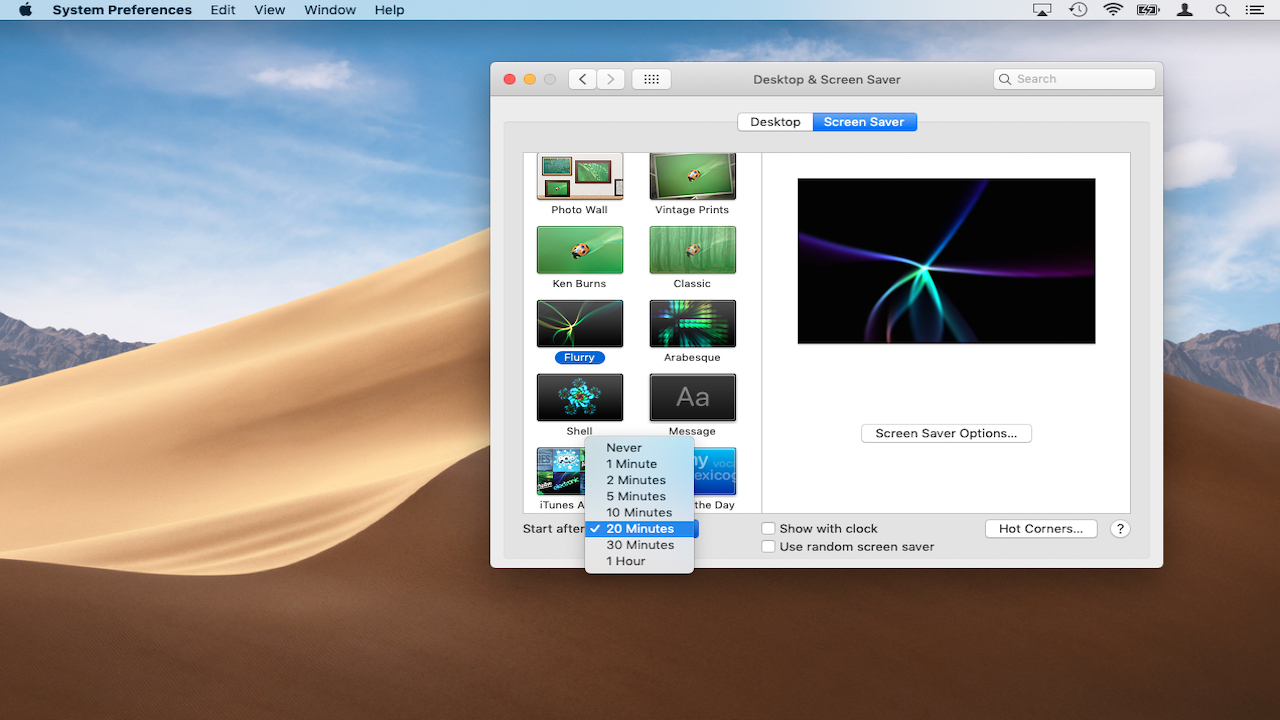
To get started, open System Preferences > Desktop & Screen Saver. Click on Screen Saver and choose an alternative. If you can’t make up your mind, choose ‘Use random screen saver’.
This way the system will choose a different screensaver each time your away from your Mac.
By default, Mojave will power off your screen altogether after 10 minutes of inactivity. If you want your screen saver to be displayed before this happens, click the drop-down menu marked ‘Start After’ and choose a shorter time, such as five minutes.
7. Bring back the Dashboard
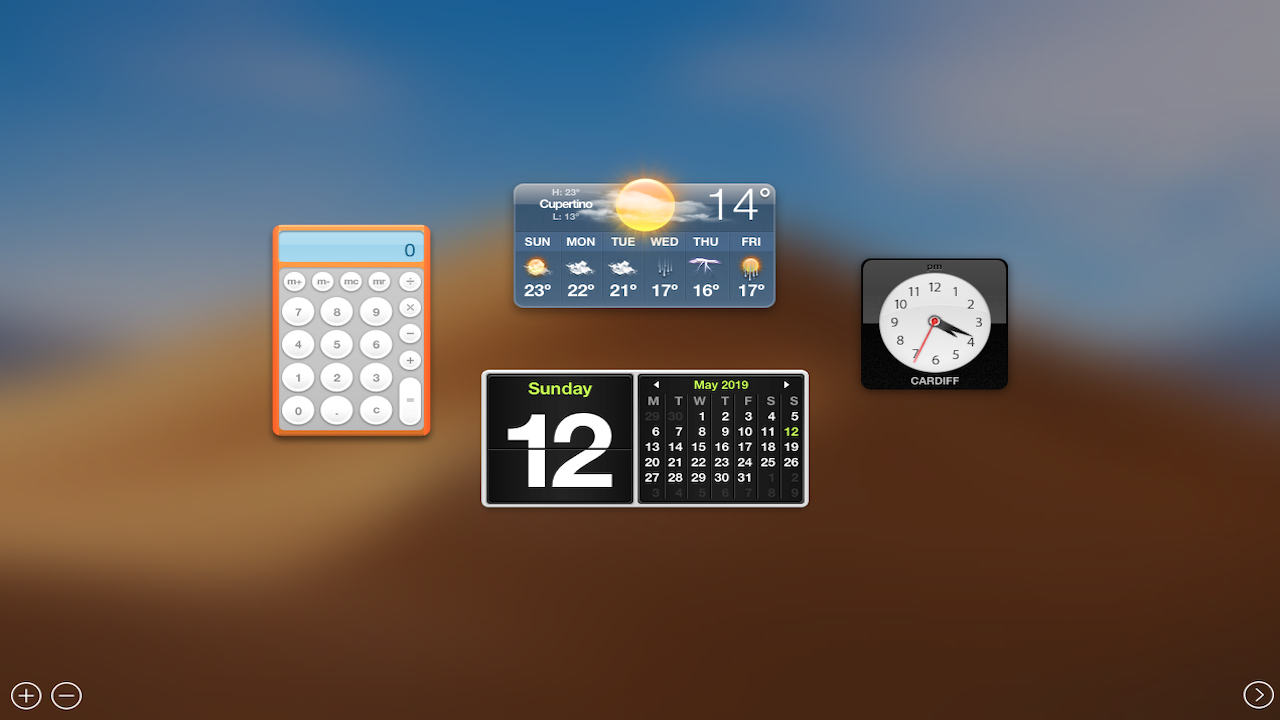
By default, the Dashboard feature is disabled in macOS Mojave. Fortunately it’s very easy to reactivate, as it’s a great way to collate essential info like weather, stock prices and stickies.
To start using the Dashboard again, open System Preferences > Mission Control. Under ‘Dashboard’ click on the drop-down menu and chose ‘As Overlay’ or ‘As Space’.
To pull up the Dashboard at any time, simply tap ‘F12’. If this doesn’t work, try ‘Fn + F12’. Press ‘Esc’ to hide the Dashboard.
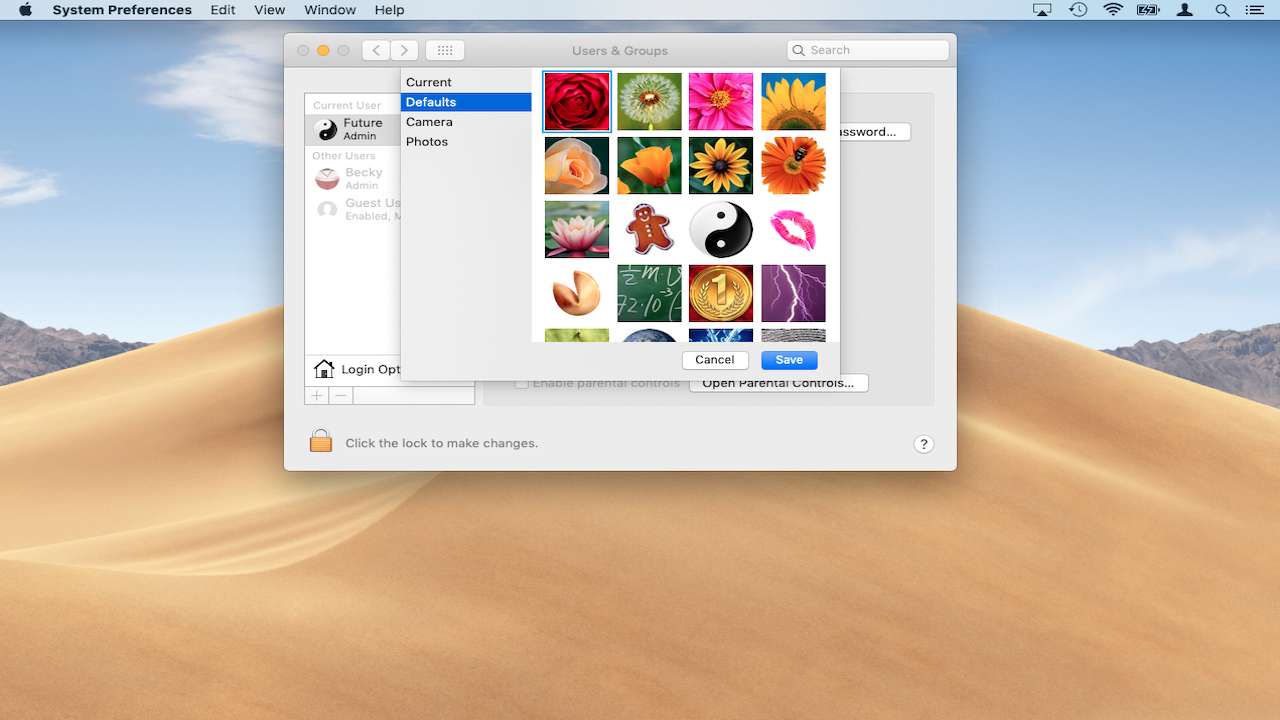
8. Choose your Avatar
When you create a user account in macOS Mojave, the system will automatically assign you a login picture such as a tennis ball.
You can change this to another system avatar or even one of your own photos if you prefer.
First go to System Preferences > Users & Groups. Click the login picture to choose from amongst the system defaults.
If you want to use an image of your own, open Finder and navigate to its location e.g. Downloads. Next click and drag the picture over your current login picture; macOS will automatically switch to your picture. You can change back to a system image at any time by clicking and selecting one of the default pictures instead.
Image credits: TechRadar
- macOS 10.15: news, release date and rumors
- Get yourself a Mac VPN with our guide
Nate Drake is a tech journalist specializing in cybersecurity and retro tech. He broke out from his cubicle at Apple 6 years ago and now spends his days sipping Earl Grey tea & writing elegant copy.