How to record a Microsoft Teams meeting
Here's how to record a Microsoft Teams meeting for later reference

Microsoft Teams has become a vital part of many people's working lives over the last couple of years. As a video conferencing and collaboration tool, it has enabled colleagues and clients to continue communicating with one another even when they have been unable to meet in person.
However, unless you are a very fast note-taker, it is unlikely that you’ll be able to record the input of your Teams meeting participants in real-time. In addition, there will be times when it simply isn’t possible to get everyone on a Microsoft Teams call that needs to be there. If that’s the case, then being able to record a meeting so you can review it at a later date is extremely important.
Fortunately, Teams provides the functionality to record meetings - even in its free plan. However, for less experienced Teams users, it may not be immediately clear how to record a meeting. If you’re unsure, you’ve come to the right place. This guide will take you step-by-step through how to record a Microsoft Teams meeting.
Step One: Who’s allowed to record
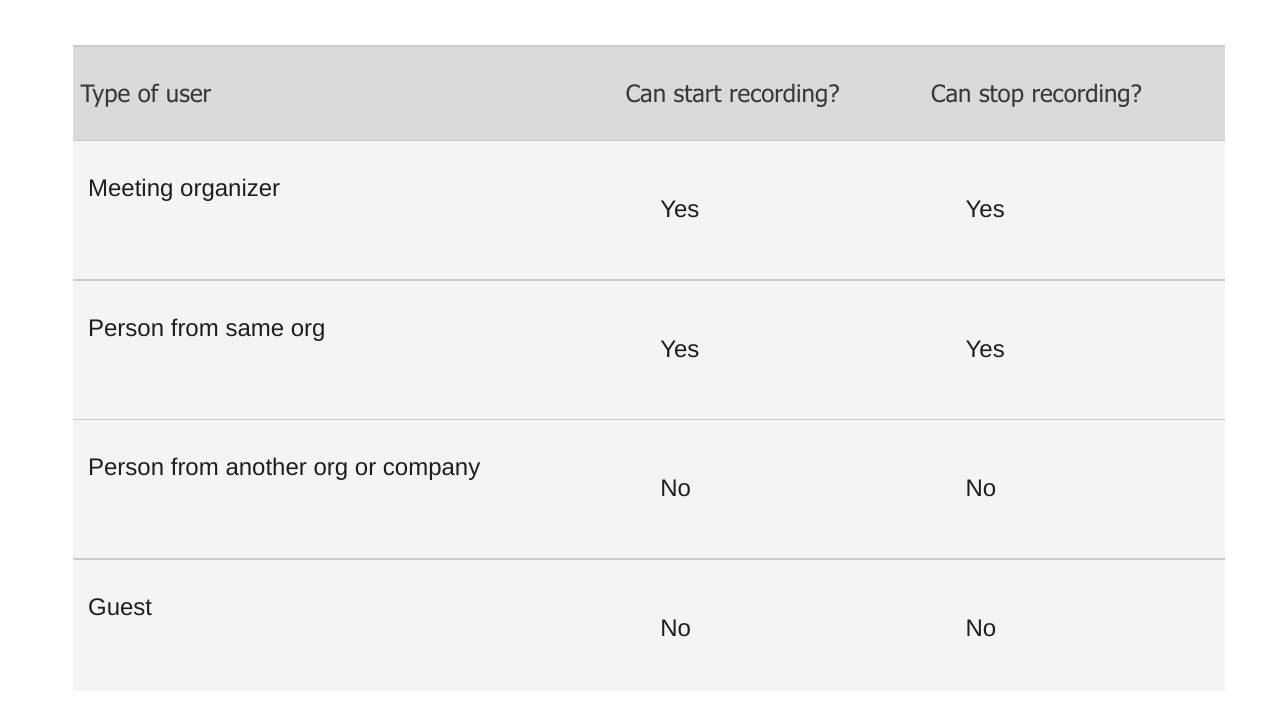
Although all Teams meetings can be recorded, that doesn't mean that any meeting participant can start a recording. Firstly, meeting recordings need to be enabled by your IT admin. Another important aspect to consider is that guest users cannot record meetings. In fact, Microsoft does enforce a few other restrictions too.
Essentially, meeting organizers and individuals from the same organization are able to start and stop recordings. Even so, that doesn’t mean that recordings are unavailable to external meetings participants. Since January 2021, Microsoft has started saving Teams recordings in OneDrive and SharePoint, so it is easy to download and share your recordings with individuals from both inside and outside your organization
Step Two: Start recording
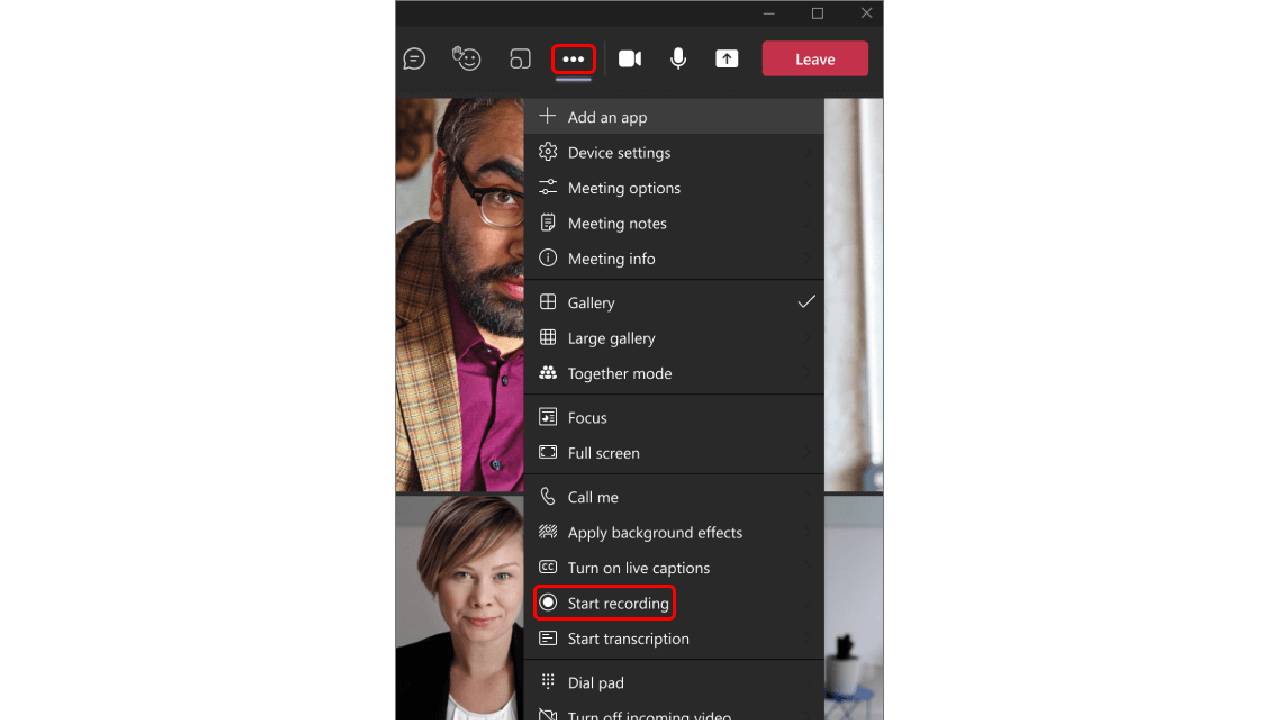
Unsurprisingly, in order to record a Teams meeting, you first have to be taking part in one. So join or start a meeting, and then click on the ellipses within the “More actions” section of the meeting control panel. From the dropdown list that appears, you should see “Start recording.” Click that and everyone taking part in the meeting will receive a notification that the recording is in progress.
Keep in mind that only one meeting participant can record a meeting. However, the recording will continue even if the individual that started the recording leaves. Only once everyone has left the meeting, will the recording stop. Should a participant forget to leave the call, the recording will automatically stop after four hours have passed.
Are you a pro? Subscribe to our newsletter
Sign up to the TechRadar Pro newsletter to get all the top news, opinion, features and guidance your business needs to succeed!
Step Three: Stop recording
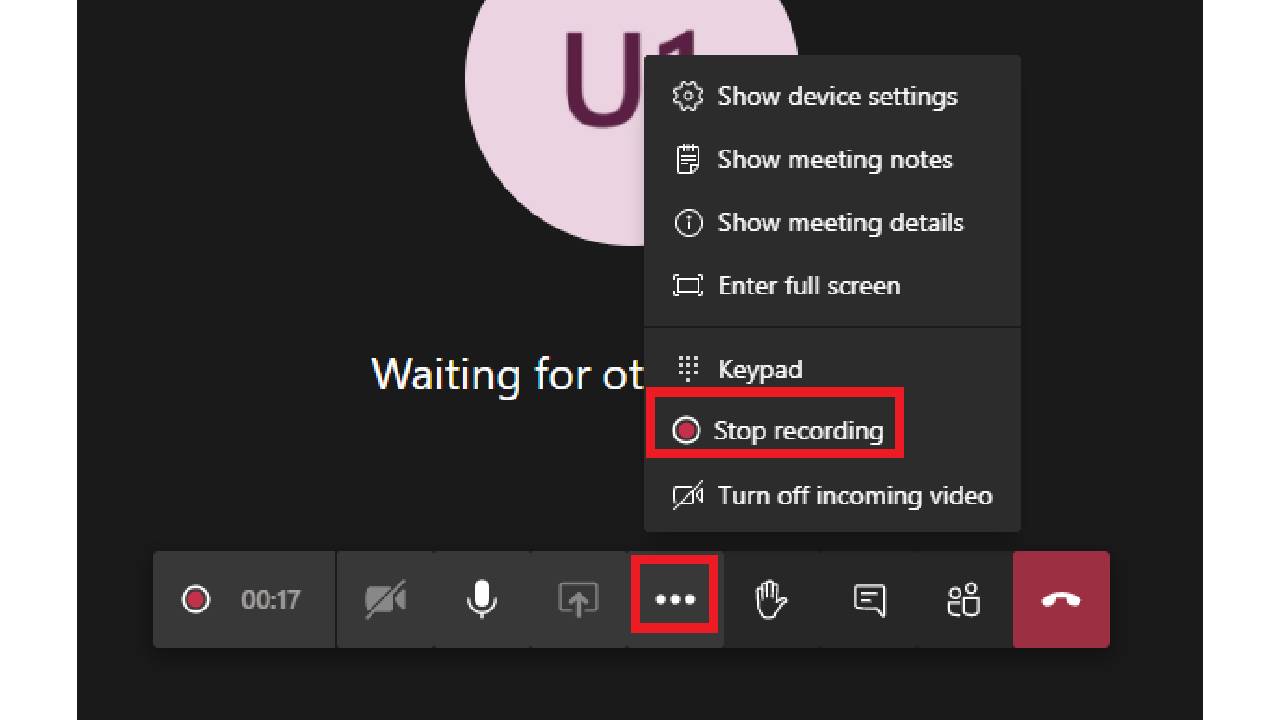
There are times when you might want to stop your Teams recording before the meeting has ended. If that’s the case, then bringing your recording to an end is easily achieved. Simply go to “More actions” again and select “Stop recording.” Alternatively, you could choose to just stop the live transcription and keep the recording going.
Step Four: Find recordings
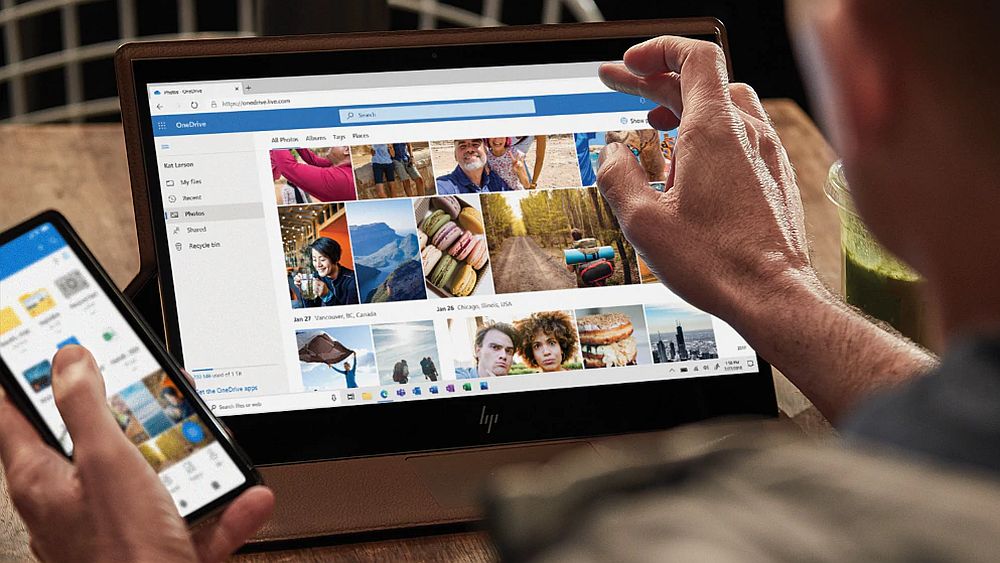
Successfully recording your Microsoft Teams meeting is one thing, but it isn’t much use if you can’t locate your recording. As mentioned above, Teams recordings can now be found in either SharePoint or OneDrive depending on the type of meeting that took place. If it was a channel meeting, the recording will be processed and saved to SharePoint. OneDrive will be used for any other type of meeting.
For convenience, meeting participants will also receive a link to the recording in the relevant chat or channel. Clicking the link will take you to either SharePoint or OneDrive where you will have the option of downloading or previewing the recording. Sharing the recording with anyone else, regardless of whether they participated in the meeting or not, is also straightforward. In either SharePoint or OneDrive, simply click the “Share” link and enter the details of the person you’d like to share the recording with. Also, if you were the meeting organizer, it’s here that you’ll find the option of deleting the recording.
Step Five: Recording expiration
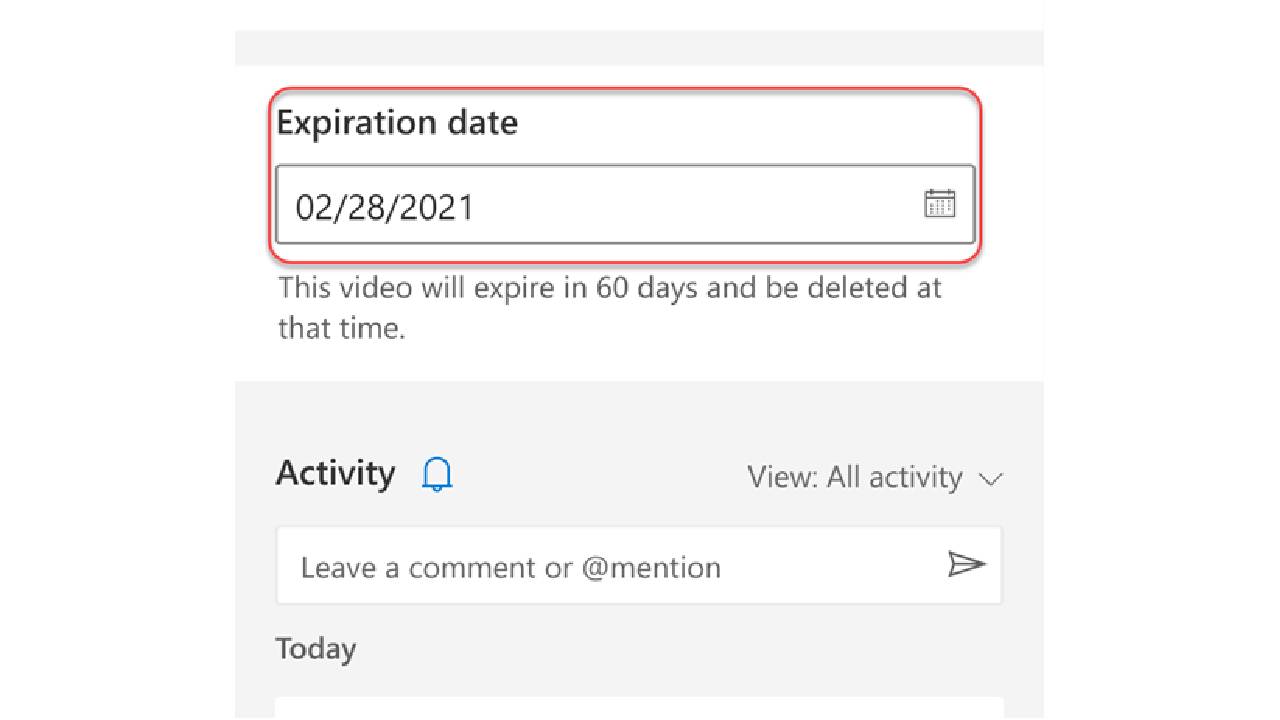
Having Teams meeting recordings lying around could potentially represent a significant security risk, particularly with more businesses sharing sensitive material remotely. With that in mind, it’s a good idea to delete recordings as soon as you don’t need them, but doing so manually is an added inconvenience - and one that is easy to forget about. However, it is possible to automate the deletion of your recordings.
If your recording has an expiration date, Teams users will receive a message when the meeting ends. Open the details page if you want to change this date. You can reach the details page either by clicking on the recording and selecting the info icon in the top right corner, or by finding the recording file in either SharePoint or OneDrive and clicking “Details.” On the details page, you can find a drop-down menu with options for extending the expiration date. Alternatively, if your video is not of a sensitive nature, you could choose for the video not to have an expiration date at all.
Barclay has been writing about technology for a decade, starting out as a freelancer with ITProPortal covering everything from London’s start-up scene to comparisons of the best cloud storage services. After that, he spent some time as the managing editor of an online outlet focusing on cloud computing, furthering his interest in virtualization, Big Data, and the Internet of Things.
