How to recover files in Windows 10 with File History
Disaster recovery
1. Enable File History
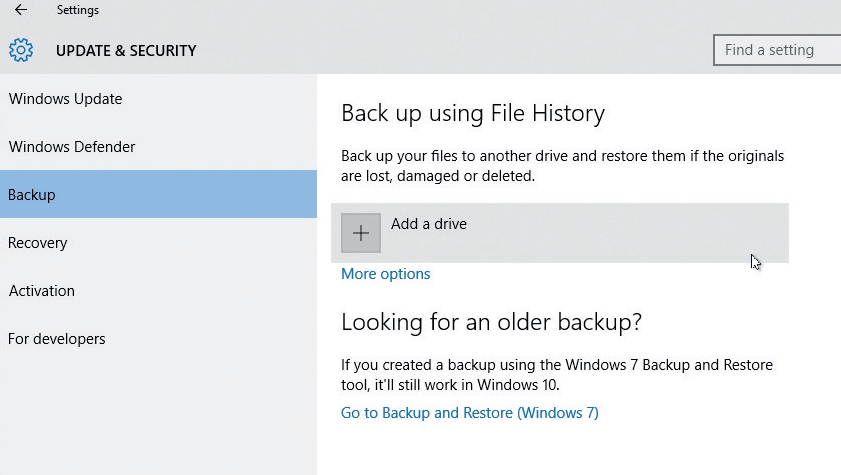
By default, File History is turned off, so open the Start menu and click 'Settings'. Select ‘Update & security’ and choose ‘Backup’.
Now click ‘Add a drive’ to choose which external drive to store your backups on – this can include NAS drives or USB drives plugged into your router (just click ‘Show all network locations’ when the link appears).
You’ll also see a reference to ‘Go to Backup and Restore (Windows 7)’ – if you’ve upgraded from Window 7 and want to continue using the old backup tool from that version of Windows, click this link and jump to step 6.
2. Set backup options
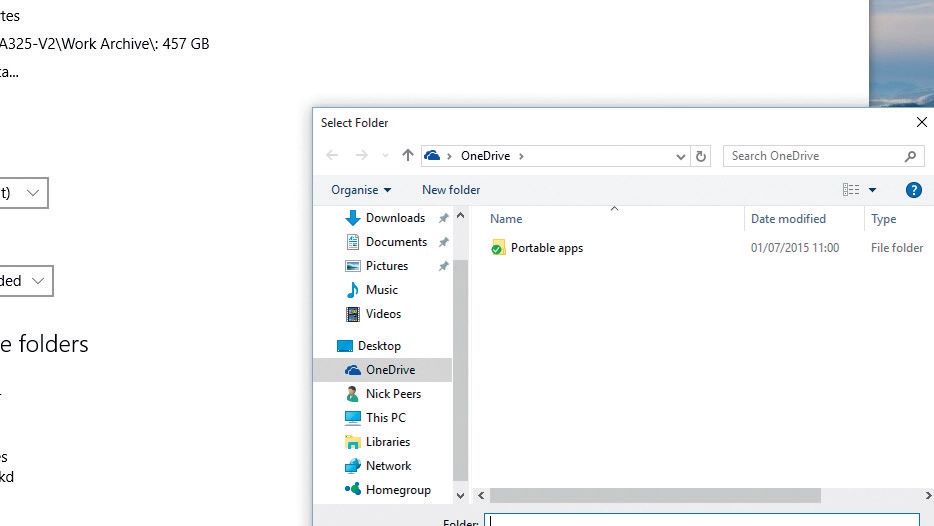
Click the ‘More options’ link to review the default settings. File History takes a fresh backup of files (including changes) every hour, but you can set this to as little as 10 minutes or restrict it to once daily.
By default, backups are kept forever, but click this and change it to ‘Until space is needed’ if you’re happy to lose the eldest versions of backed up files should space run low.
Review which folders are included in the backup and then click ‘Add a folder’ to add others. Click an existing folder followed by ‘Remove’ to exclude it from your backup.
If you want to keep all your old backups, when space runs out switch to a new drive using the ‘Stop using drive’ button (your existing backups are protected).
3. Access advanced options
At the bottom of the screen is a ‘See advanced settings’ option – click this to access the File History Control Panel, which will be familiar to Windows 8 and Windows 8.1 users.
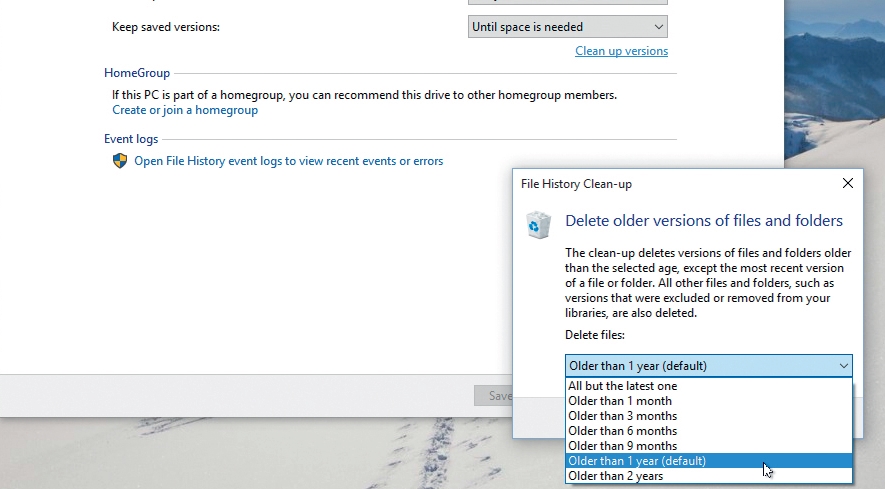
When this appears, click ‘Advanced settings’ to access more options. Pay particular attention to ‘Clean up versions’ – this option allows you to free space by automatically deleting backups (and versions of backups) that are older than a certain date (one month to two years).
There’s also an ‘All but the latest one’ option that deletes all previous versions of files – use with care.
4. Restore files
File History allows you to recover accidentally lost and deleted files, plus earlier versions of files (should you make changes you subsequently want to undo).
The simplest way to restore missing files is to browse to the folder containing those files in File Explorer, then click the History button on the Home tab of the ribbon.
Now use the playback controls at the bottom of the screen to go back in time until you find the file you’re looking for.
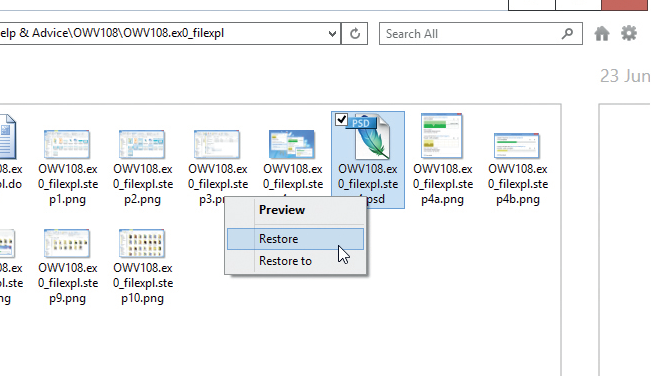
Right-click the file, choose ‘Preview’ to confirm its identity, ‘Restore’ to recover it to this folder, or ‘Restore to’ if you want to save it somewhere else.
5. Preview and restore older versions
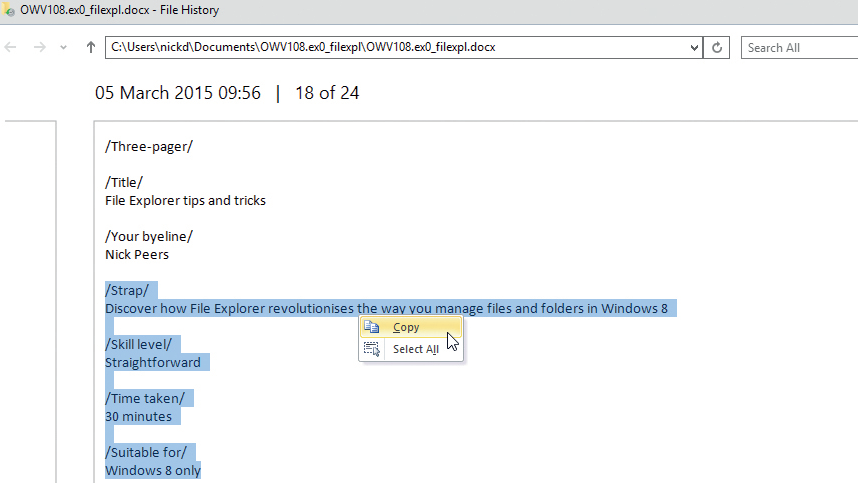
To restore an older version of a single file, first select the file in File Explorer before clicking the 'History' button.
A preview of that file will appear – this time use the playback controls to find the version you wish to restore. You can copy and paste text out of documents, or click the green restore button to replace the current version with this one; if you’d prefer to restore a copy, click the 'Settings' button in the top right-hand corner and choose ‘Restore to’, then choose the folder where you’d like to save the copy to.
Once complete, a File Explorer window will open pointing to your recovered file.
6. Set up backup
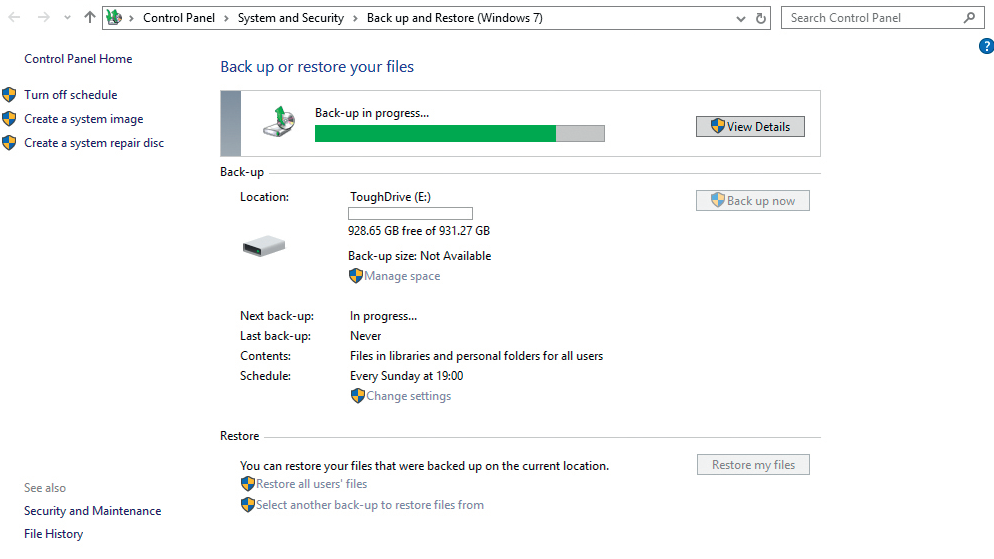
The Backup and Restore tool from Windows 7 is also present in Windows 10 for those who wish to use it. It offers the same features as File History, but also includes an option for creating a byte-for-byte copy of your Windows drive in the form of a system image.
After clicking ‘Go to Backup and Restore (Windows 7)’, click ‘Set up back-up’ to choose your backup device (local or network). When prompted, select ‘Let me choose’ to verify exactly what Windows backs up (leave ‘Include a system image of...’ ticked to take a fail-safe backup of your entire system too).
7. Restore previous versions of files
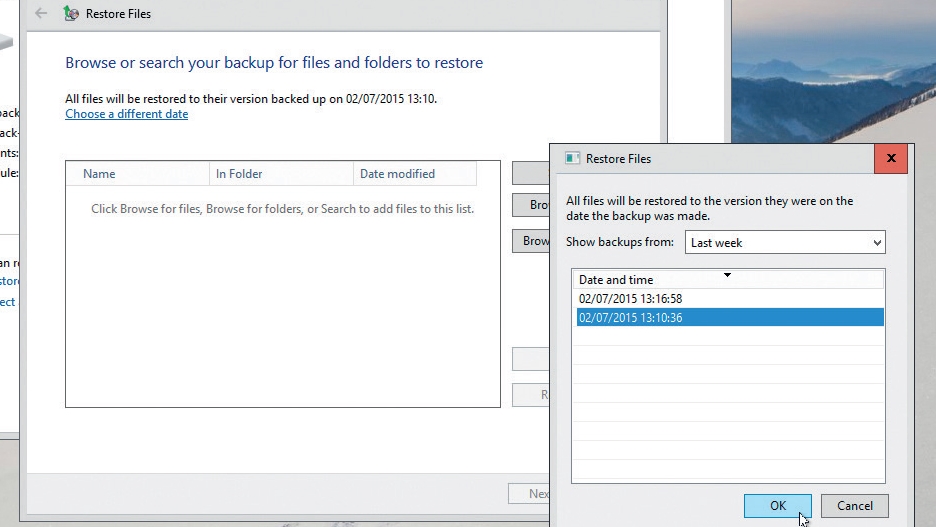
You’ll need to restore individual files directly from the backup tool itself – open the tool and click the ‘Restore my files’ button to search or browse for the files you need.
To restore an older version of a backed up file, click ‘Choose a different date’ when searching for files. Select the date containing the version you wish to restore, then search for it.
8. Make sure you’re always protected
By following these steps, you’ll ensure that your important files are always kept safe. If you have a number of Windows 10 devices, make sure that all of them use the File History feature to protect their data.
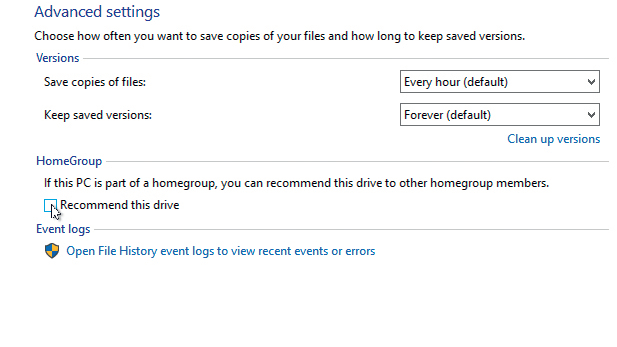
If they’re all on the same HomeGroup, you can get them to share the same back-up drive by going to ‘Advanced settings’ and ticking ‘Recommend this drive’.
- Enjoyed this article? Discover how to get the most from your PC and new things to do in Windows Help & Advice. Take advantage of an exclusive offer in our sampler today.