How to resize images in Photoshop
Boost or reduce your image size in Photoshop
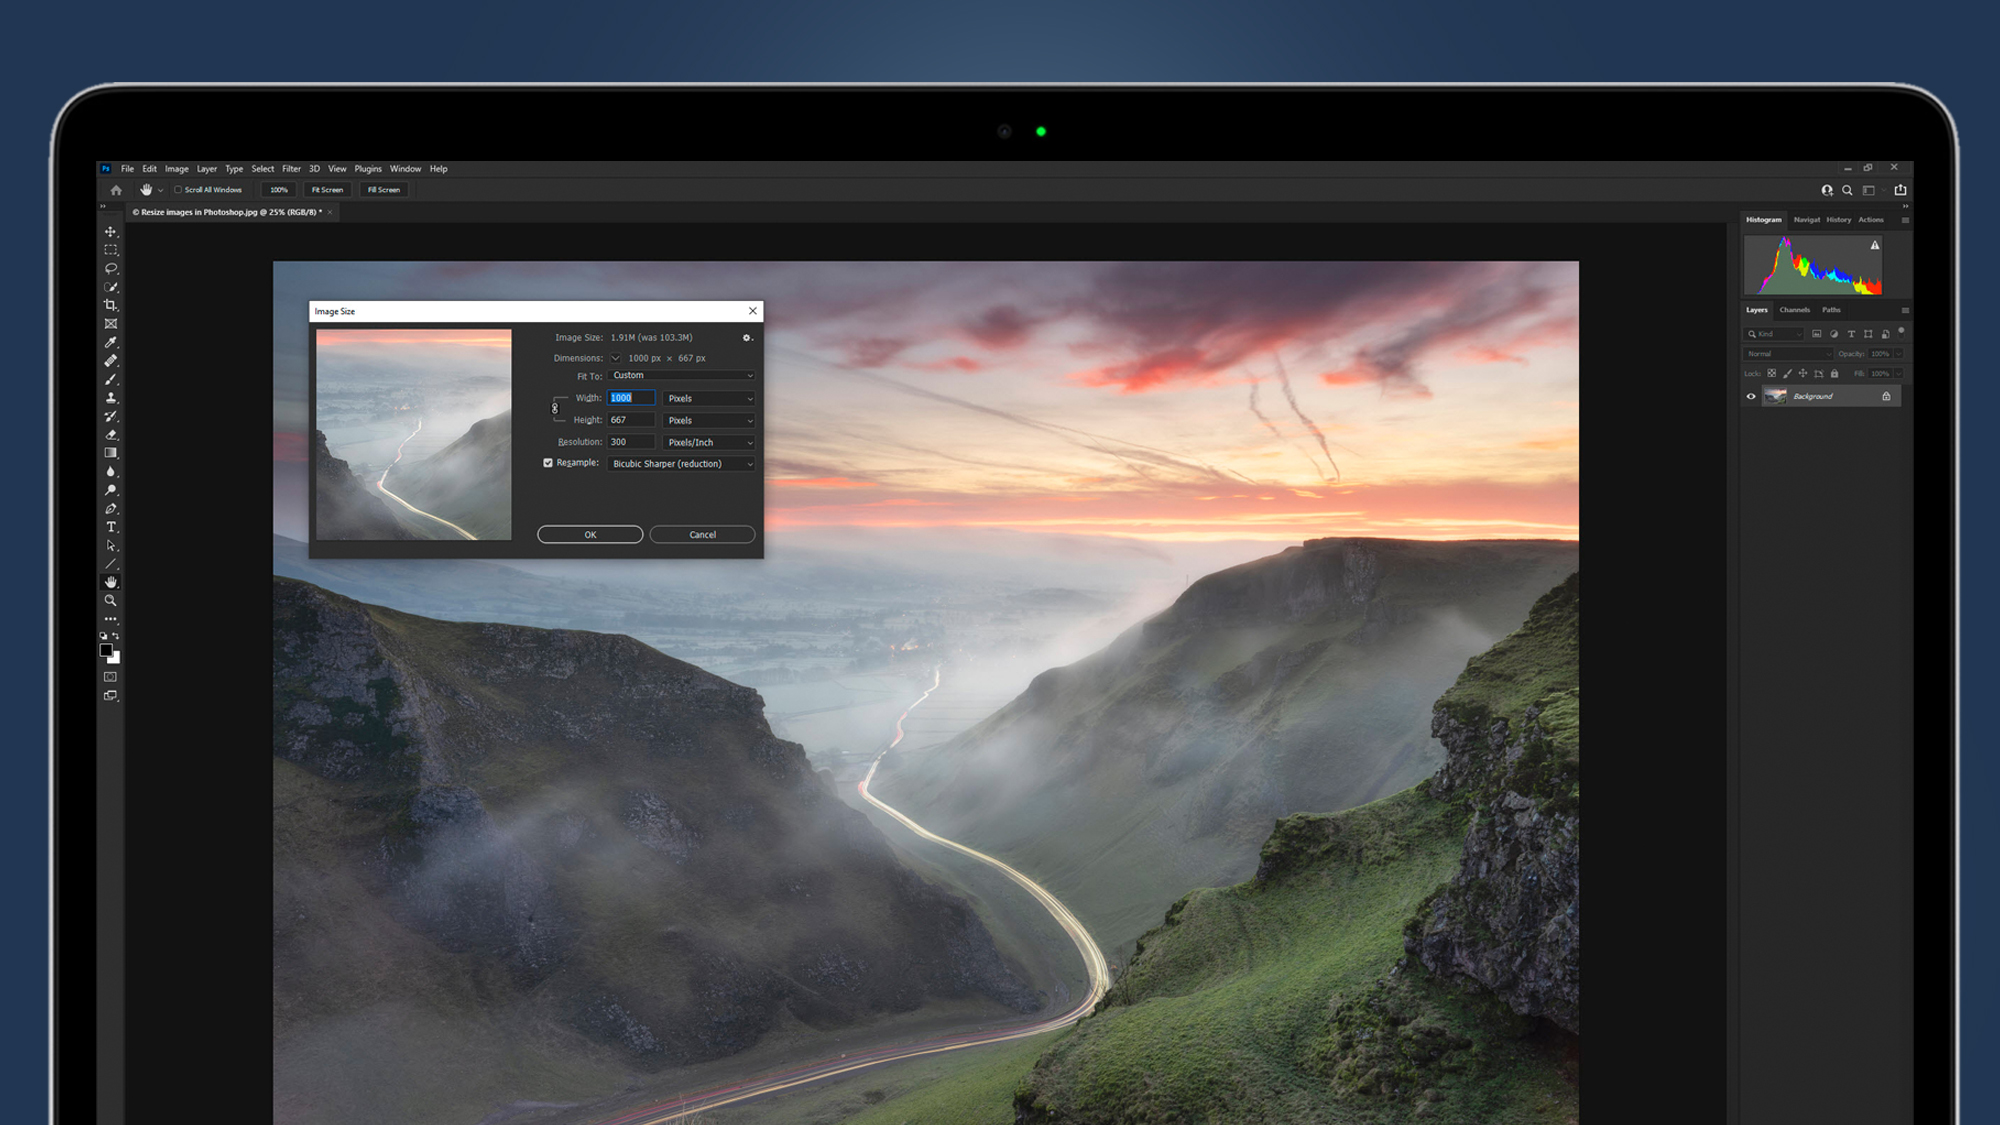
Resizing images in Photoshop is a basic yet important technique for every photographer to learn; one that you’ll undoubtedly use over and over again as you share your images in both physical and digital formats.
Whether you’re downsizing to share images online or upscaling them to make larger prints than is possible at the native resolution of your camera, there are simple processes that need to be followed to ensure that image size and quality are maximized. And we've got them covered in this guide showing you how to resize your photos in Photoshop.
To make sure that you know the process inside out, we’ll show you how to correctly downsize your images and change the color space to one that’s used for sharing images online.
We’ll then take you through the process of enlarging a high-resolution image to make larger prints possible, including basic sharpening to account for the small loss of sharpness you typically experience when enlarging images.
- Photoshop vs Lightroom: what's the difference and which is the best for you?
How to reduce your image size in Photoshop
1. Open the image resize box
To resize an image, go to Image>Image Size or use the shortcut Ctrl+Alt+I to open the Image size dialogue. The first thing you need to make sure of is that the Resample box is checked, otherwise the Resolution will increase as the Width or Height are adjusted, so the image essentially remains the same size.
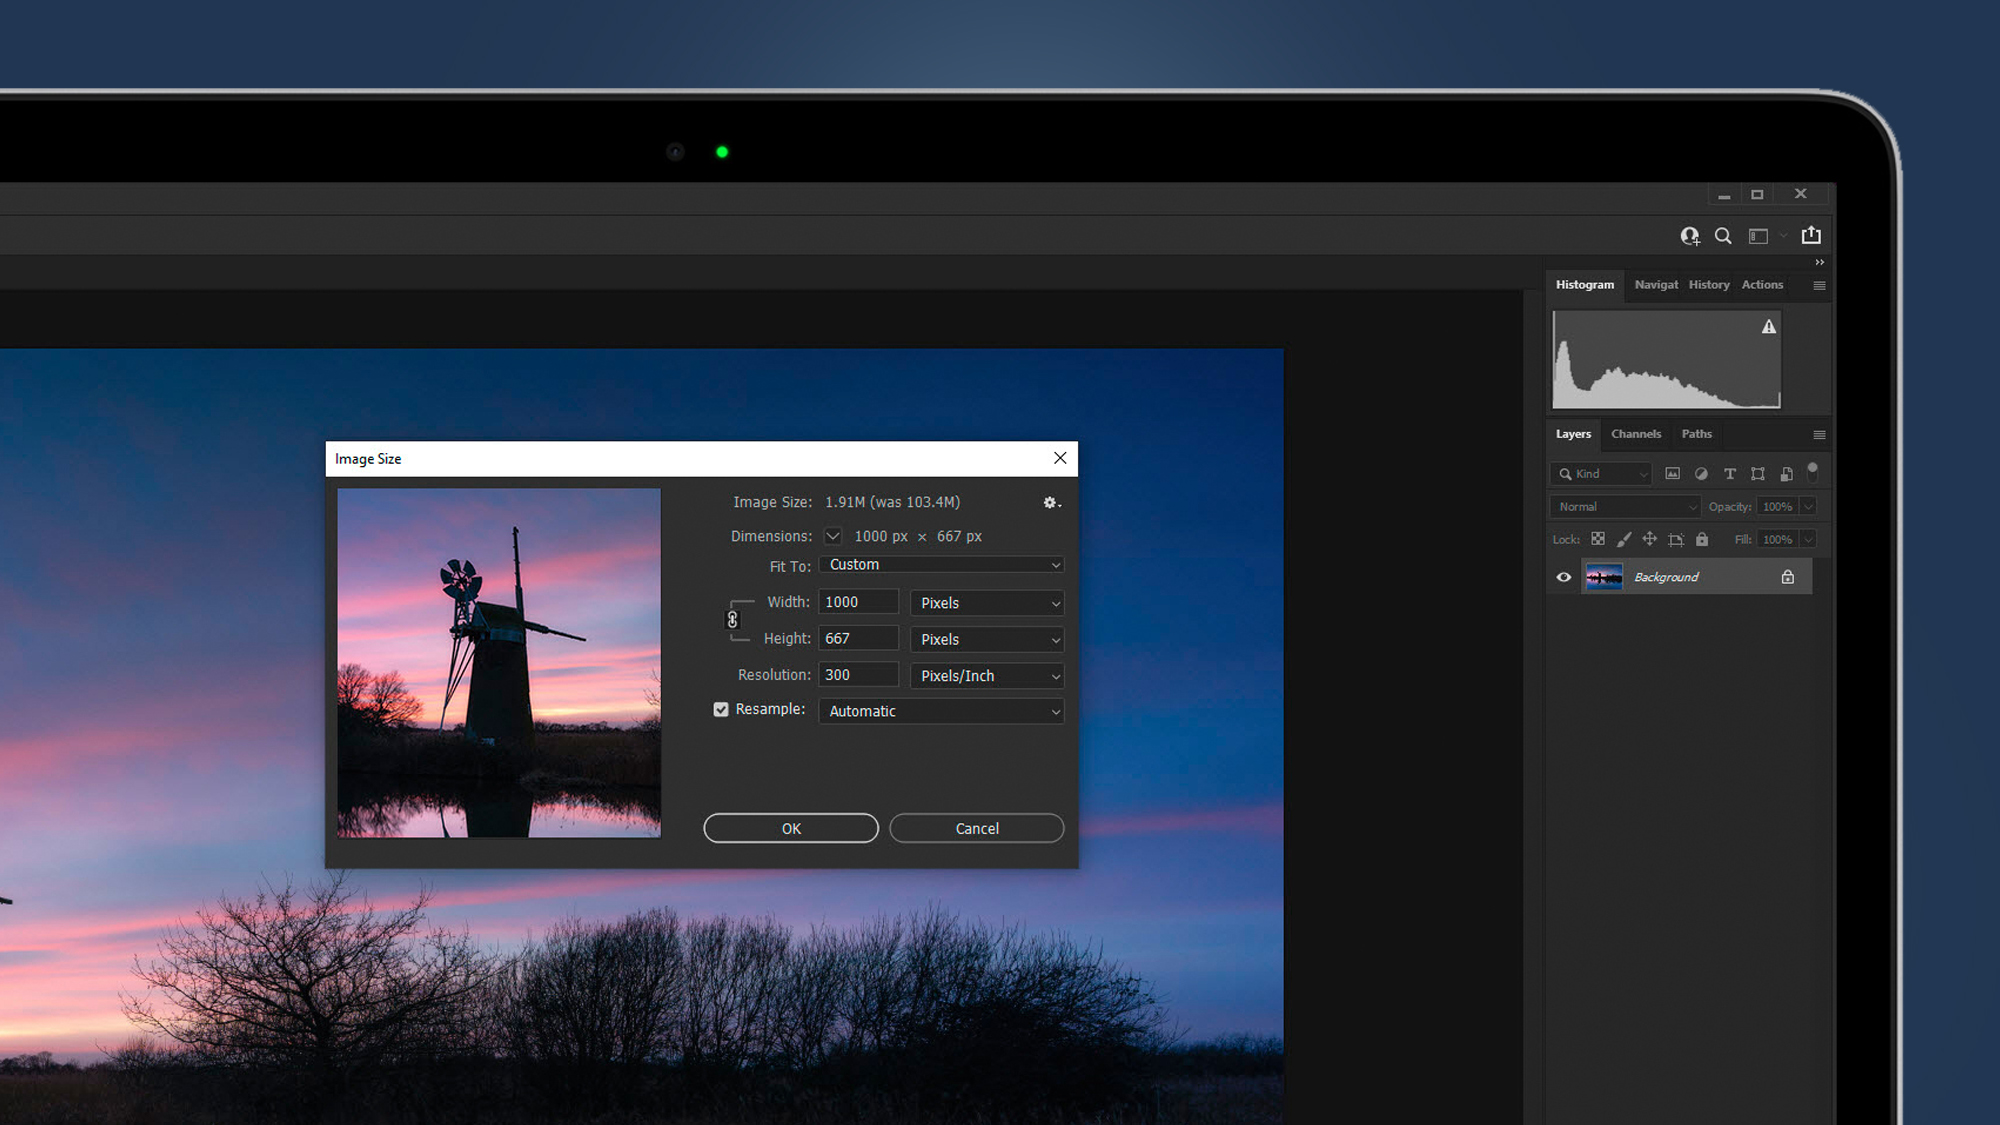
You can set the dropdown menu next to Resample to 'Automatic' or 'Bicubic Sharper (reduction)'. Next, make sure the desired unit of measurement is set – we used Pixels here – and then set the reduced size of the longest edge of the image.
For this shot here, the long edge is Width so this was set to 1000px to make it a small size for email or sharing on social media.
Get daily insight, inspiration and deals in your inbox
Sign up for breaking news, reviews, opinion, top tech deals, and more.
2. Set the color space
Different color spaces work best for different outputs, so if you’re sharing an image online the best color space is sRGB, while for print it’s Adobe RGB 1998.
SRGB is a smaller space made up of fewer colors than Adobe RGB 1998, so it’s generally best to save camera JPEGs or output processed Raw files in the latter and convert to sRGB when you plan to share images online.
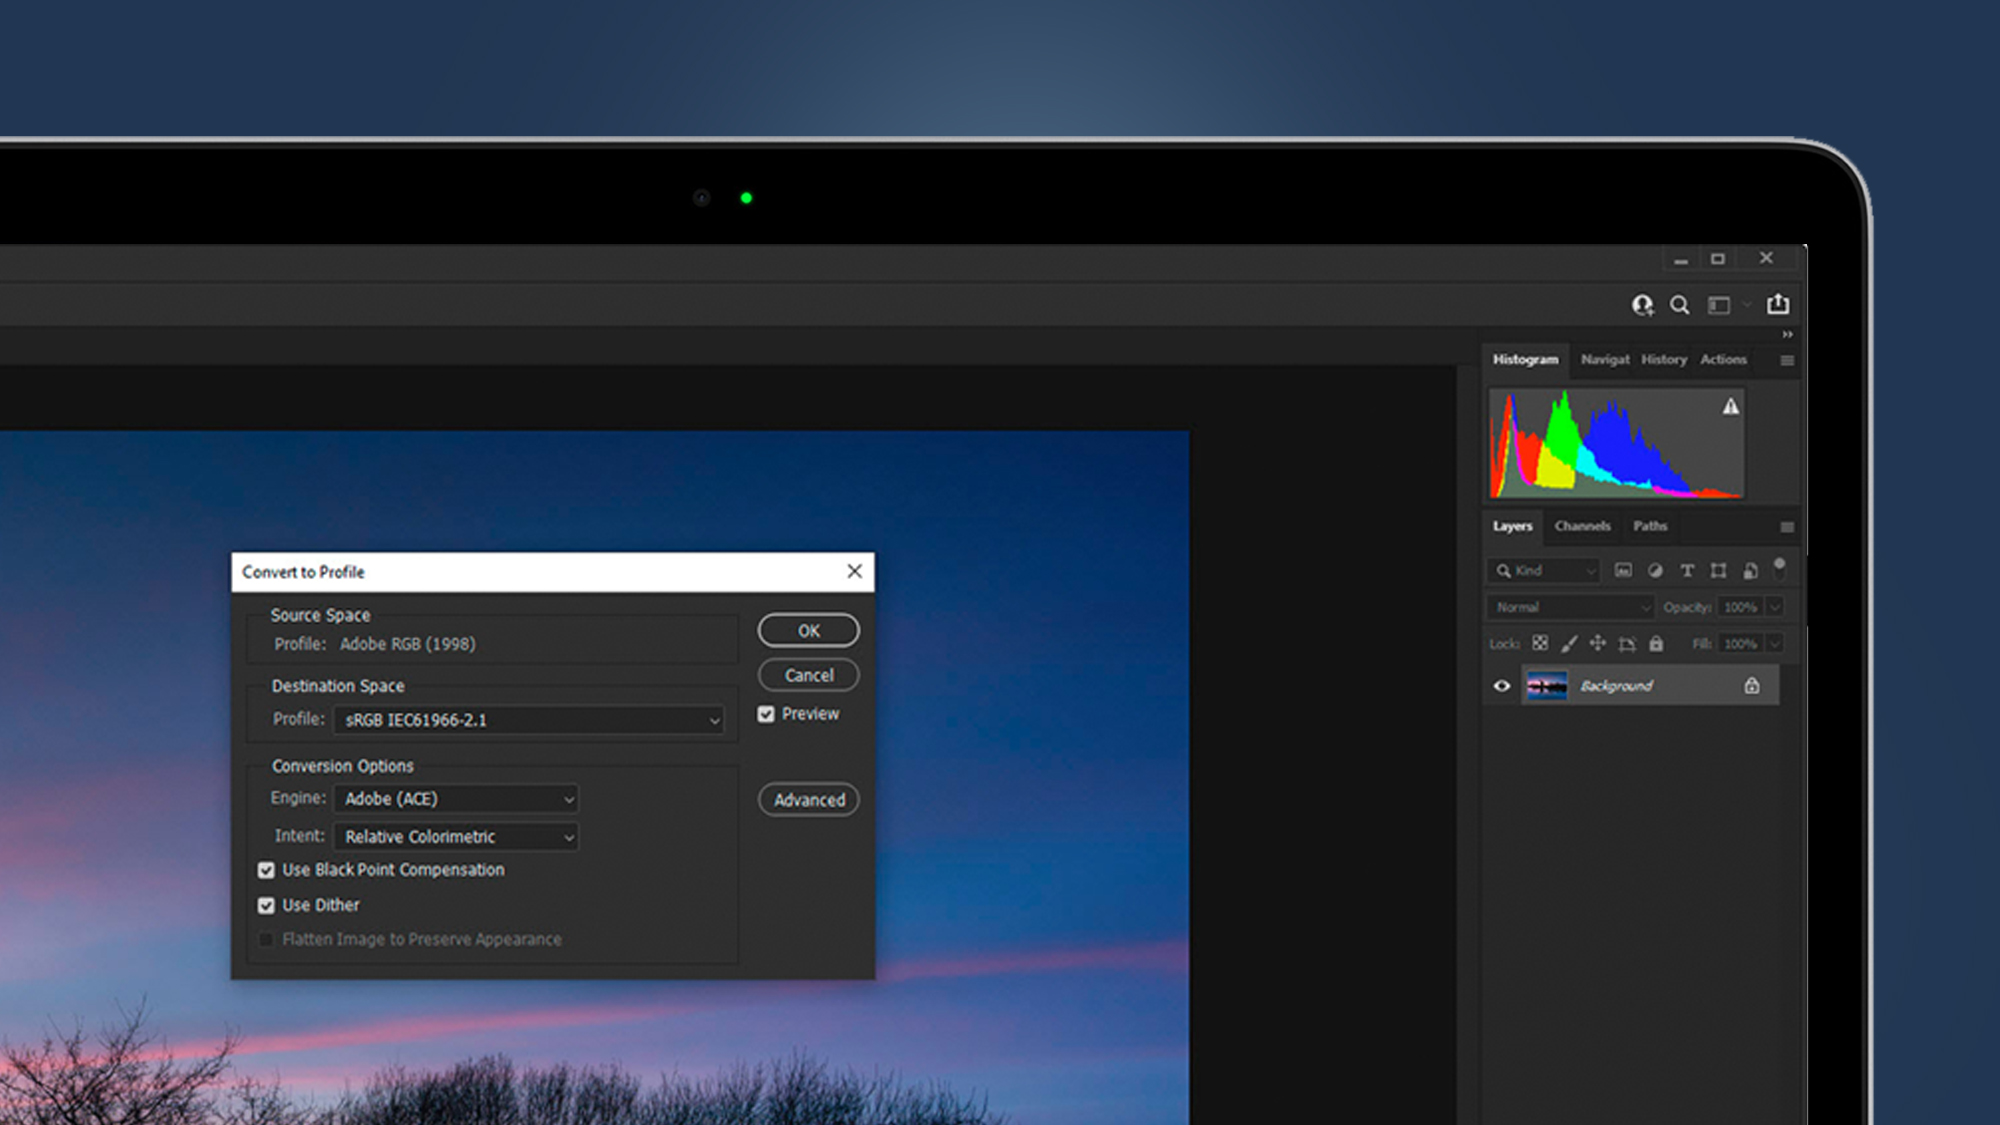
To change the color space, go to Edit>Convert to Profile. When the dialogue opens use all of the default settings but change the Destination Space to sRGB IEC61966-2.1 if you're sharing an image online. If you’re printing the image and simply reducing the file size, leave the color space as Adobe RGB 1998.
3. Save a copy
When you resize an image it’s always best to save a copy so the original image is left untouched. To Save As, which is a way of saving a new version of a file, go to File>Save As or use the shortcut Ctrl+Shift+S.
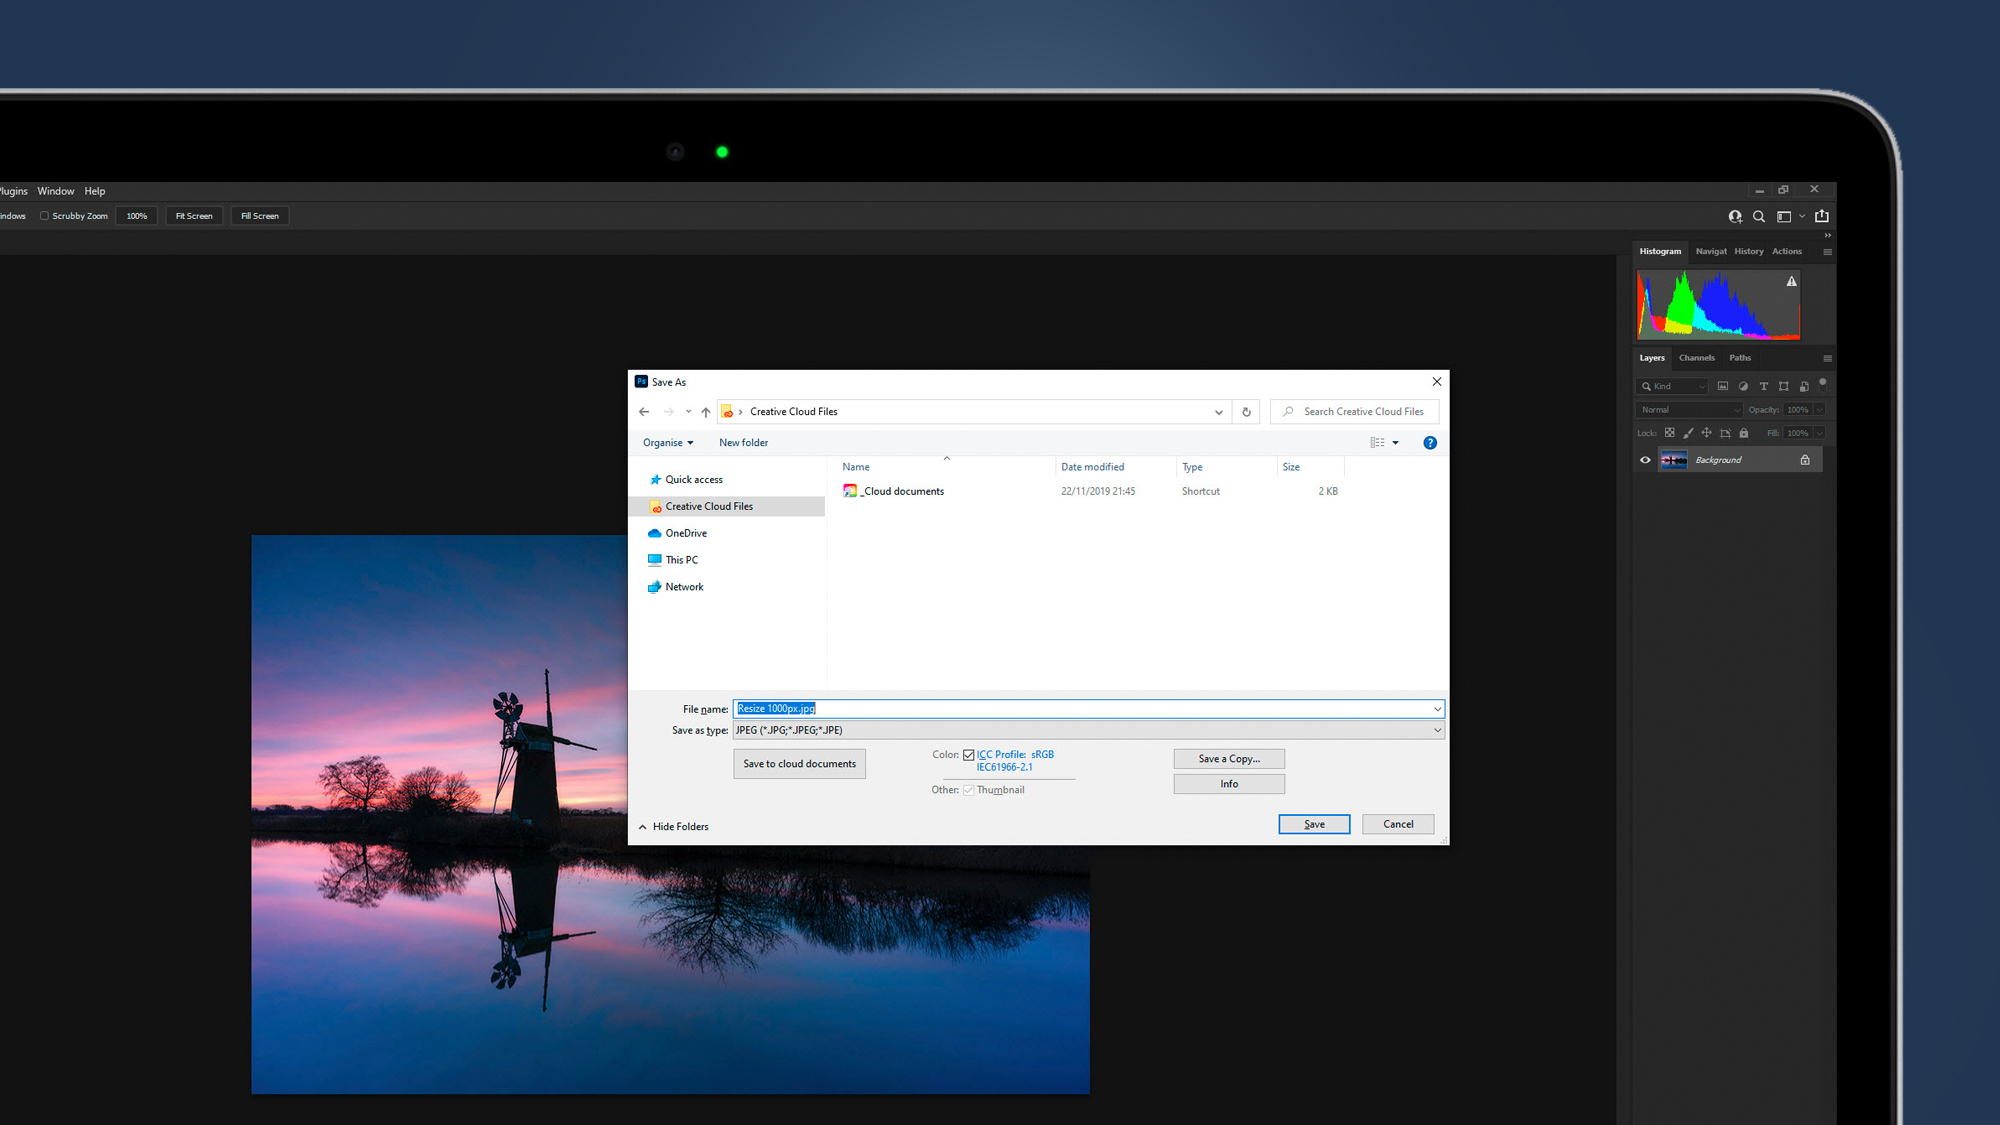
When the dialogue opens, set the file name to something that represents the resized image to make it clear that this is the altered version, which in this case was to add 1000px to the original file name. Select your desired save location using the file tree on the left of the Save As dialogue, and then set the desired file type. In most situations, the best file format will be JPEG because the resized file will either be saved long term or deleted once shared.
How to increase your image size in Photoshop
1. Check the resolution
Go to Image>Image Size or use the shortcut Ctrl+Alt+I to open the Image size dialogue and make sure that the Resample box is checked so that the resolution remains the same once the Width or Height are increased.
When enlarging prints, the best resolution to set is 300 Pixels/Inch – so if the Resolution is set to anything other than 300, click the Resample off and type 300 into the box before clicking Resample back on.
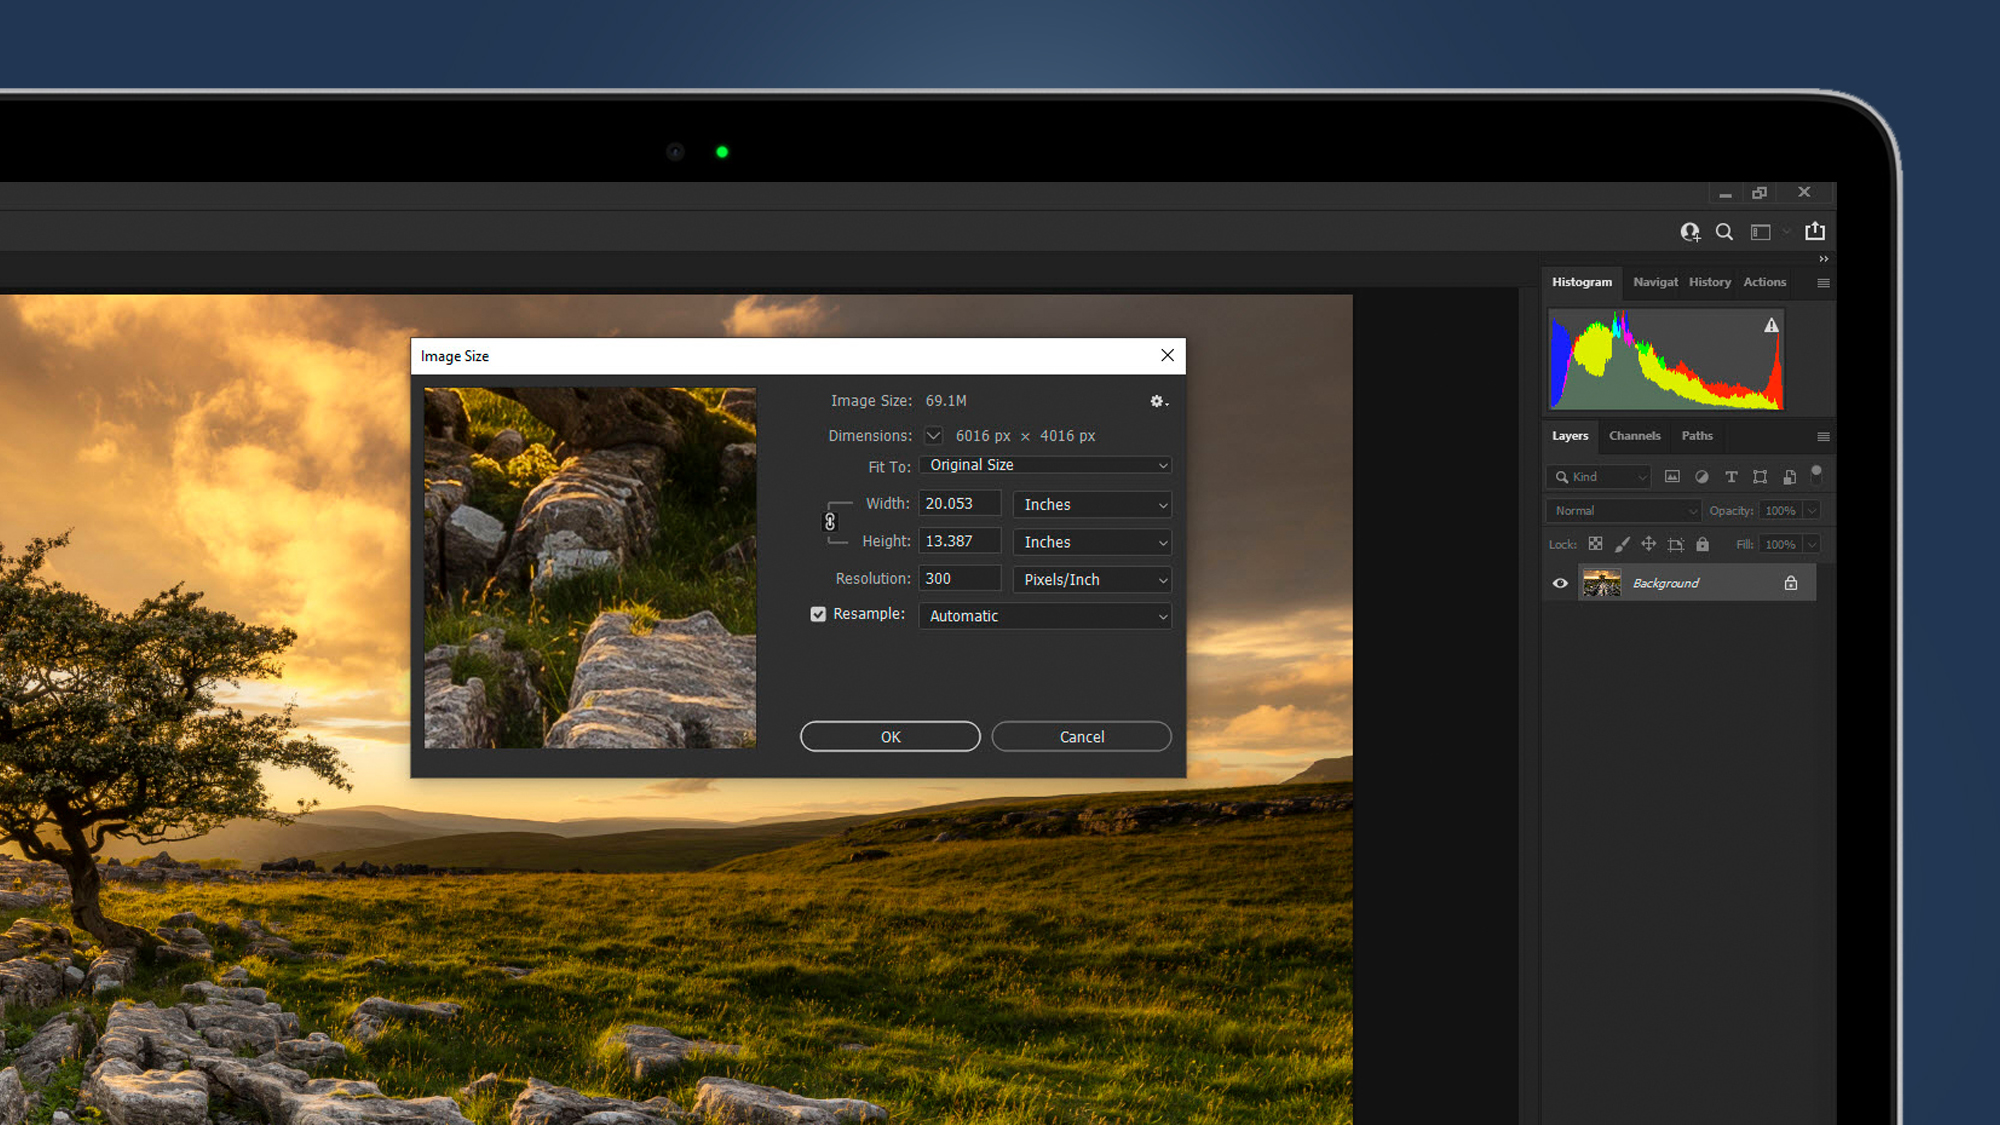
Doing this ensures that the Width, Height and Resolution are linked so the image dimensions will adjust according to the resolution set before we increase the size of the image on the longest edge in the next step.
2. Increase size
Set Resample to 'Preserve Details 2.0' because this produces the best results possible when enlarging images. You can achieve fantastic results increasing images by up to 100% where detail and sharpness are maintained because the image isn’t being pushed too far.
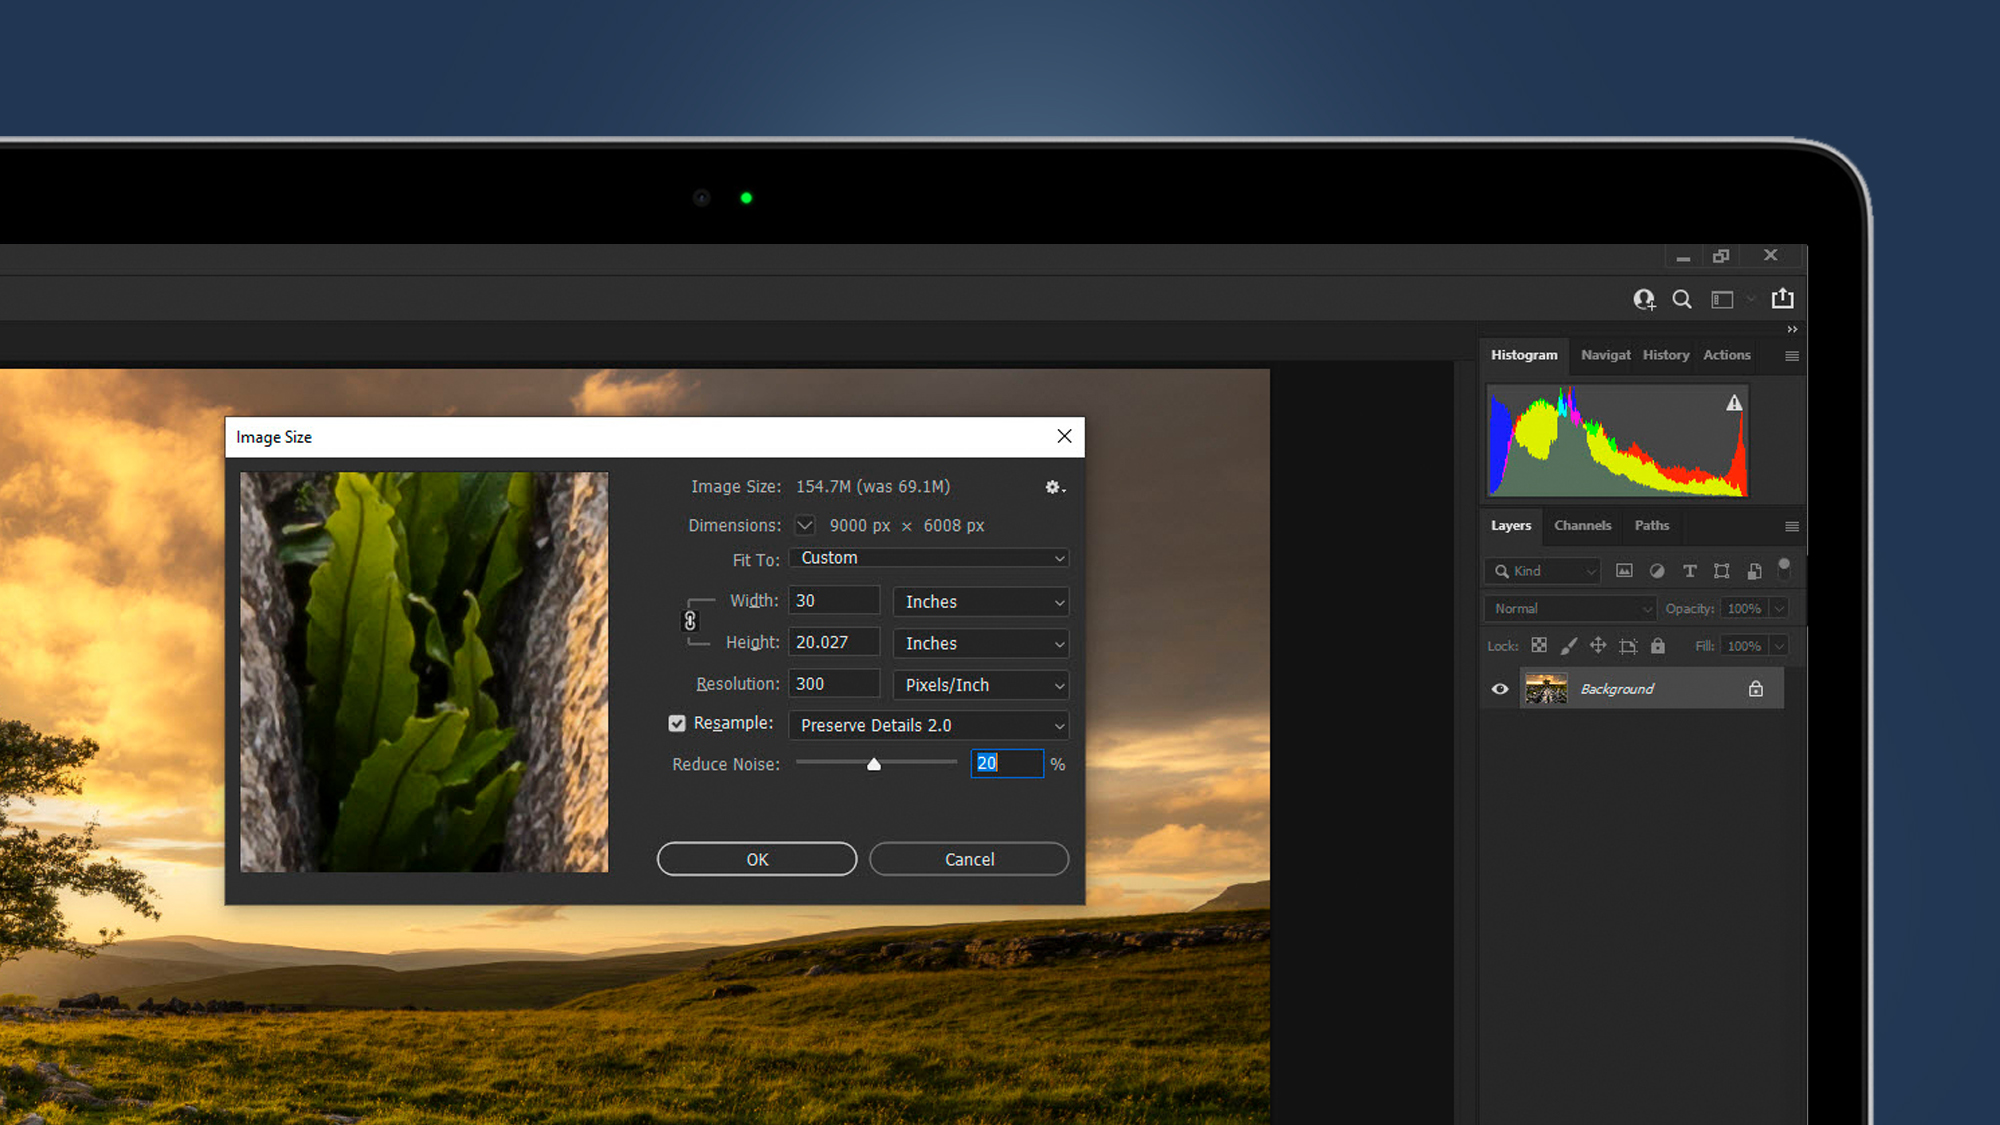
You can increase image size further, but be aware that this will incrementally reduce overall image quality the higher you go. With this image, the long edge (Width) measurement was set to inches so that the Width could be increased to 30 inches to make a 30x20 inch print.
Once the new long edge amount has been typed in, you can increase the Reduce Noise slider to reduce grain before hitting OK.
3. Sharpen your image
Enlarging images always softens them slightly, so we can regain the original level of sharpness using the Camera raw Filter.
Go to Filter>Camera Raw Filter, and when the dialogue opens click on the Detail tab. If you’re a beginner, simply increase the Sharpening Slider to between 20-40 and leave the other sliders at the defaults. But if you understand how the other sliders work you can apply more customized sharpening.
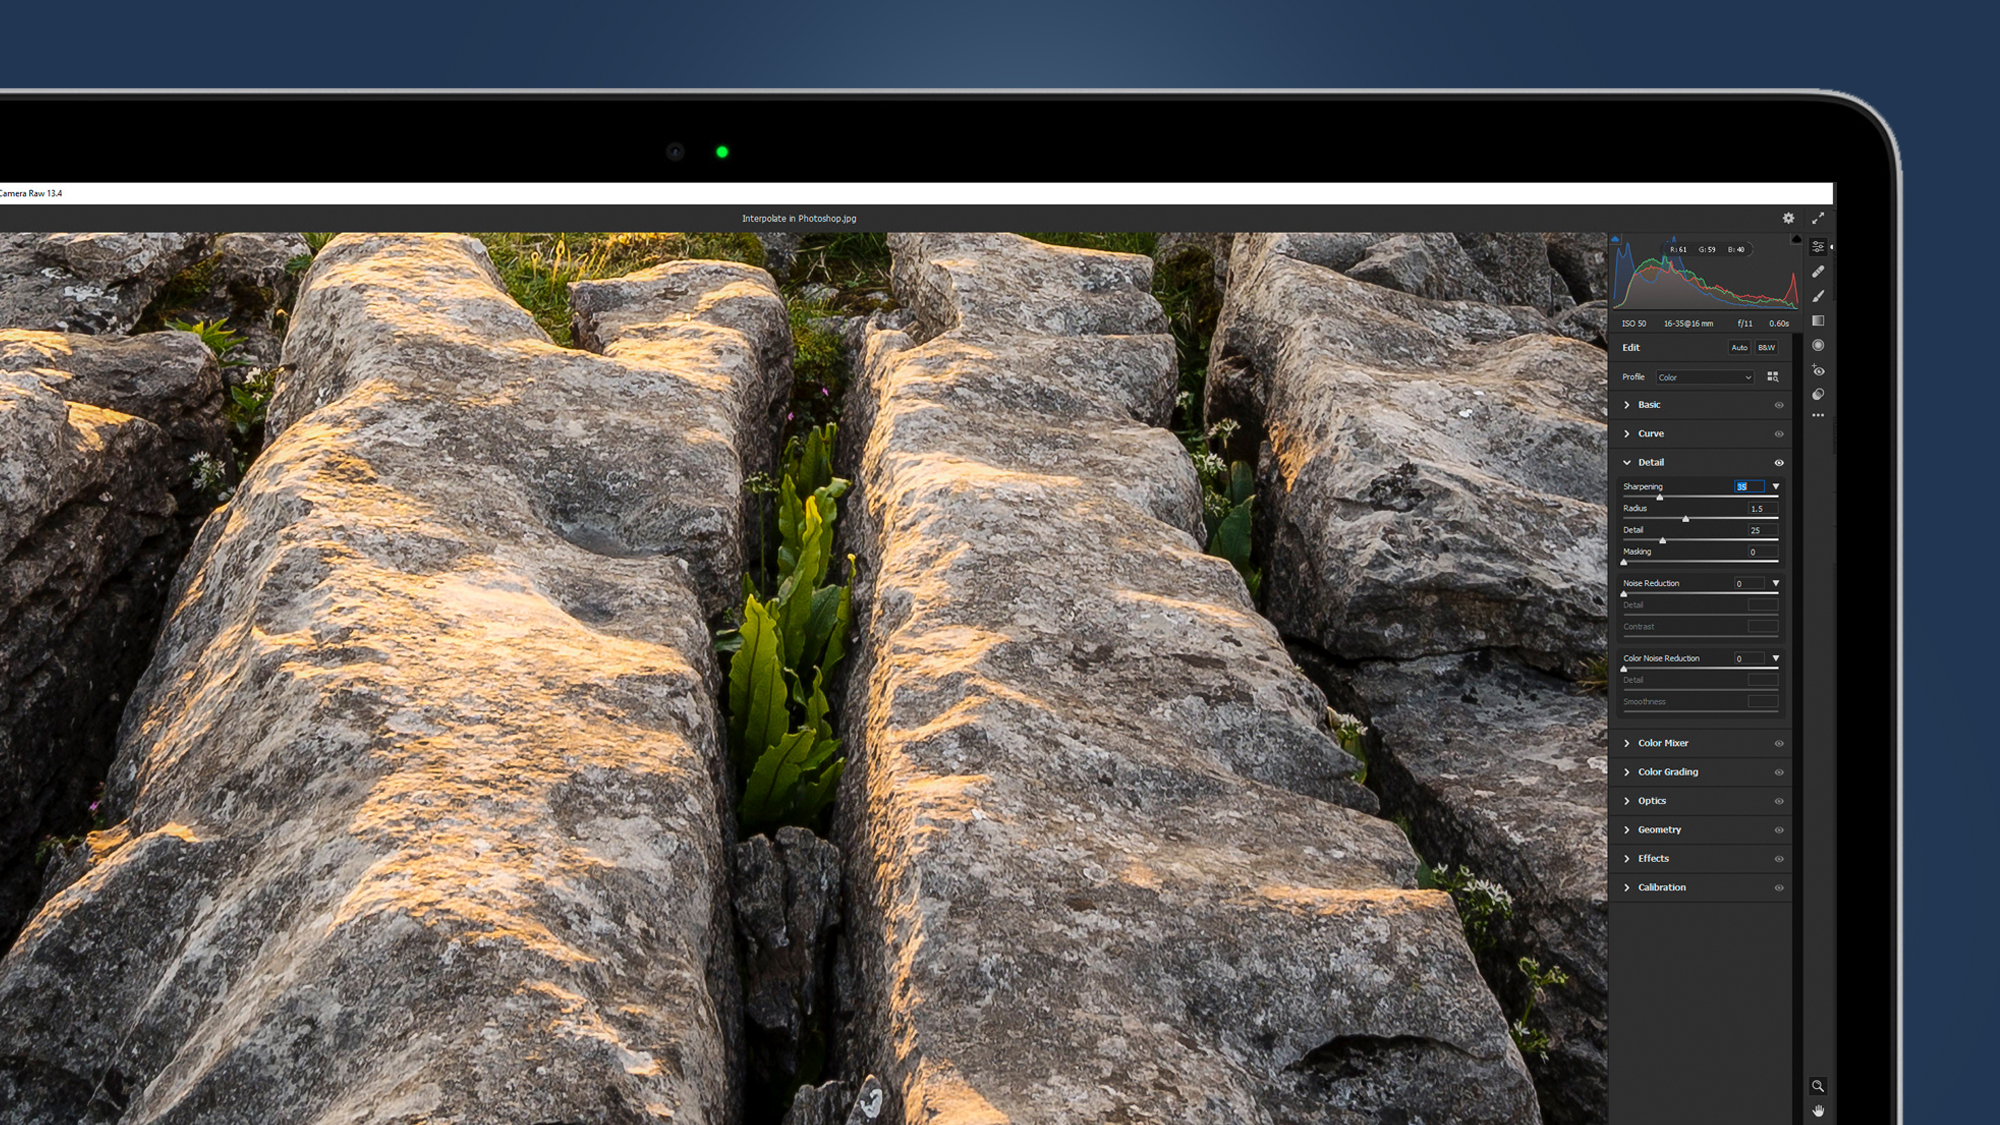
To finish off, go to File>Save As or use the shortcut Ctrl+Shift+S and save a new copy of the image as a JPEG in the desired location on your computer, using a name that identifies it as an enlarged version of the original.
- These are the best Photoshop alternatives
James Abbott is a professional photographer and freelance photography journalist. He contributes articles about photography, cameras and drones to a wide range of magazines and websites where he applies a wealth of experience to testing the latest photographic tech. James is also the author of ‘The Digital Darkroom: The Definitive Guide to Photo Editing’.
