How to set up Salesforce to Jira integration
Share data between your CRM and task project management tools
Jira is a unique project management software that helps you track content, projects, and more. Salesforce is one of the best CRM software platforms to manage your customers, sales, and leads. By using a Salesforce to Jira integration.
You can take advantage of both platforms’ capabilities in tandem and streamline your business.
Specifically, a Salesforce to Jira integration enables you to share information between the two platforms so that everyone in your organization is on the same page. You can map Salesforce contact data to Jira tasks, synchronize attachments, and automate pipelines for deal management.
In this guide, we’ll show you how to set up a Salesforce to Jira integration in just a few steps.
Today's best Salesforce deals
Get Salesforce from $25 per user/mo (US-only link)
Salesforce is the CRM market-leader for good reason: it offers a comprehensive suite of customer relationship tools, excellent integration, and unrivalled customization. Follow this link to find out more.
How to set up Salesforce to Jira integration: Preparation
In order to set up a Salesforce to Jira integration, you’ll need to have accounts with both Salesforce and Jira.
If you’re new to Jira, you can sign up in minutes. There are three different versions of Jira: Core, Software, and Service Desk. All three can be integrated with Salesforce using the steps we’ll describe below. Jira Core is free for teams with fewer than 10 users, so it’s a great place to start. Jira Core also offers a 30-day trial for teams with additional users.
Another thing to note when signing up for Jira is that you can choose between a cloud-based or self-hosted version of the software. Both can be integrated with Salesforce.
Are you a pro? Subscribe to our newsletter
Sign up to the TechRadar Pro newsletter to get all the top news, opinion, features and guidance your business needs to succeed!
You’ll also need to set up Salesforce before you can integrate with Jira. Importantly, Salesforce Essentials, the lowest-tier plan for the main Sales Cloud platform, does not support integration with Jira. You must sign up for a Professional, Enterprise, or Unlimited plan to integrate Salesforce and Jira. The Professional plan costs $75 per user per month.
Salesforce has been rolling out a new version of its platform, known as Salesforce Lightning. Both Salesforce Classic and Salesforce Lightning integrate with Jira, and the integration process is identical between the two platforms.
The easiest way to integrate Salesforce and Jira is to use the Salesforce-Jira Connector plugin designed by Service Rocket. This plugin makes Salesforce data available in Jira and vice versa.
You can try out the connector plugin for free for 30 days, but after that it requires a paid subscription. Plans start at $10 per year for teams of up to 10 users and extend to $4,600 per year for teams of up to 250 users.
Step 1: Add the connector plugin to Jira
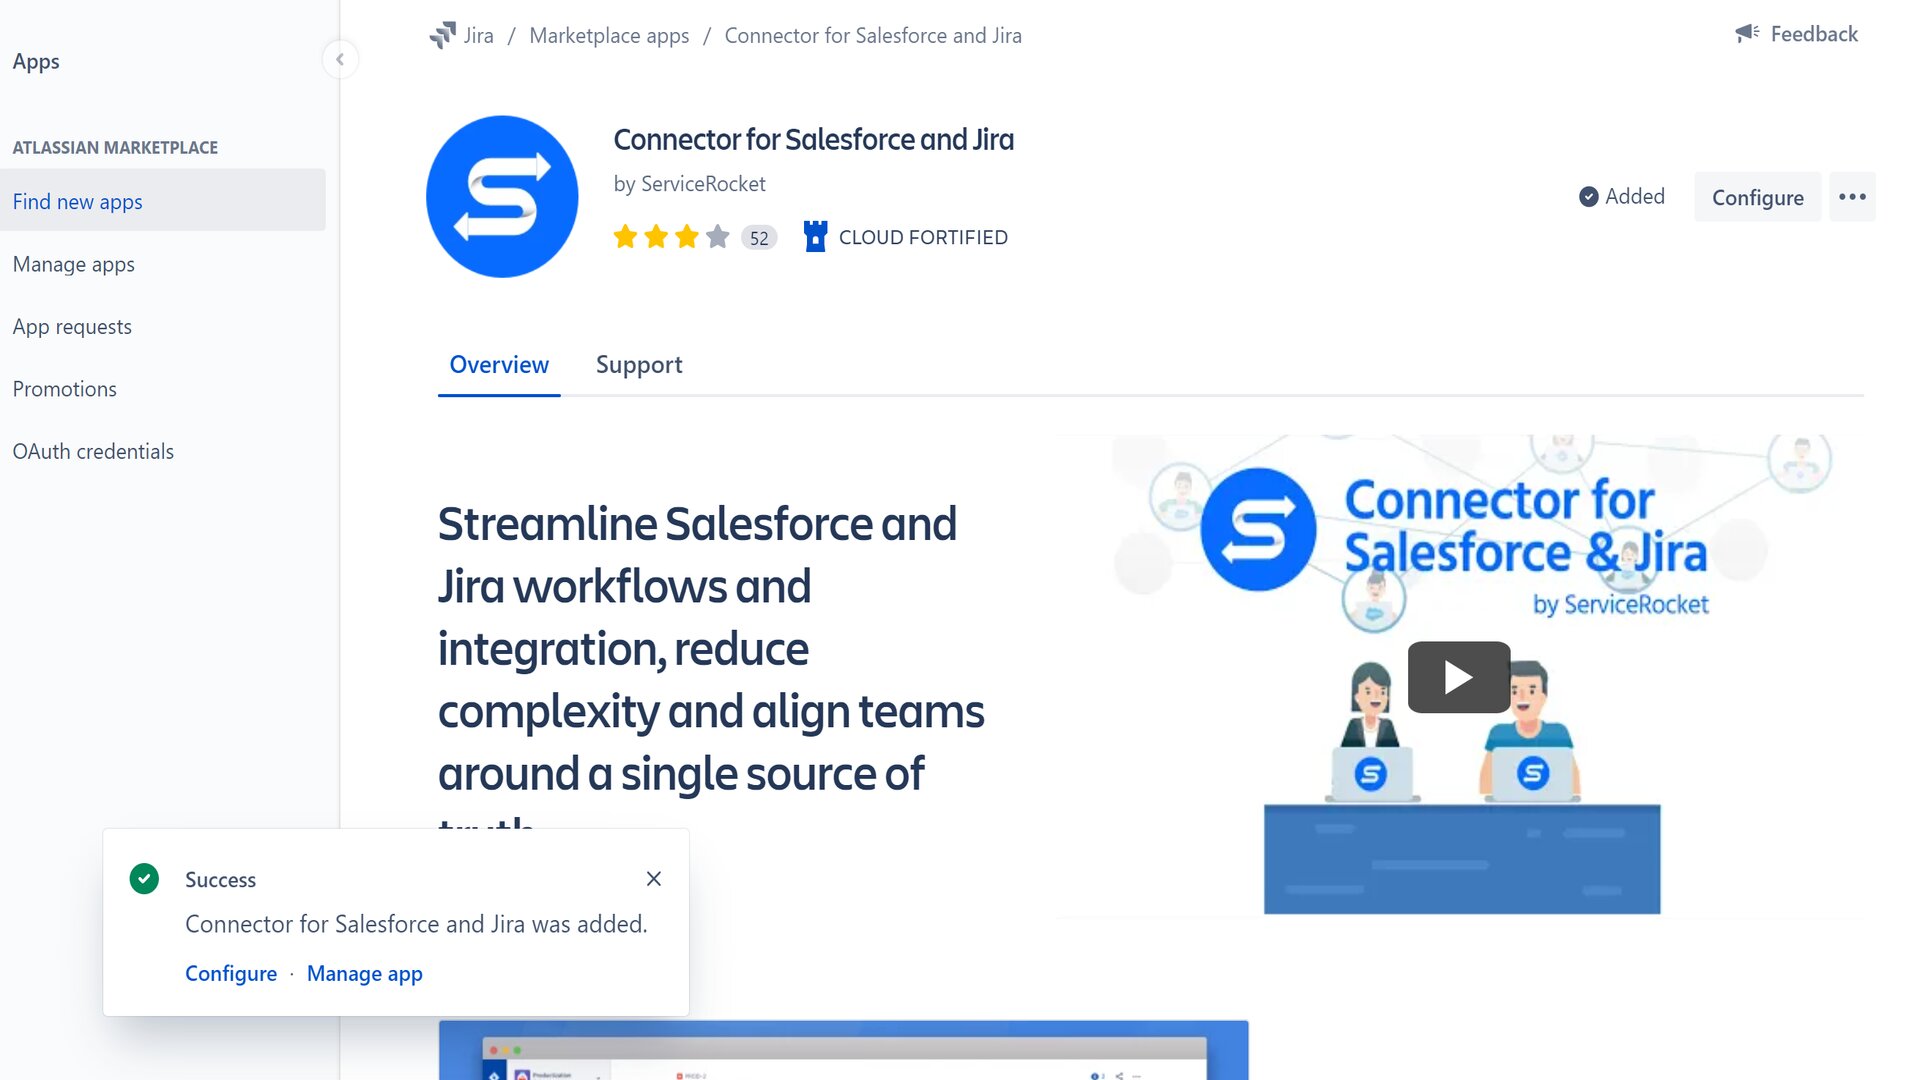
Log into your Jira dashboard and navigate to the app marketplace. Search for Connector for Salesforce and click on the plugin. Then click Try it free to add the connector plugin to your Jira installation. You should see a dialog box informing you that the plugin was successfully added.
Step 2: Choose the correct connector plugin for Salesforce
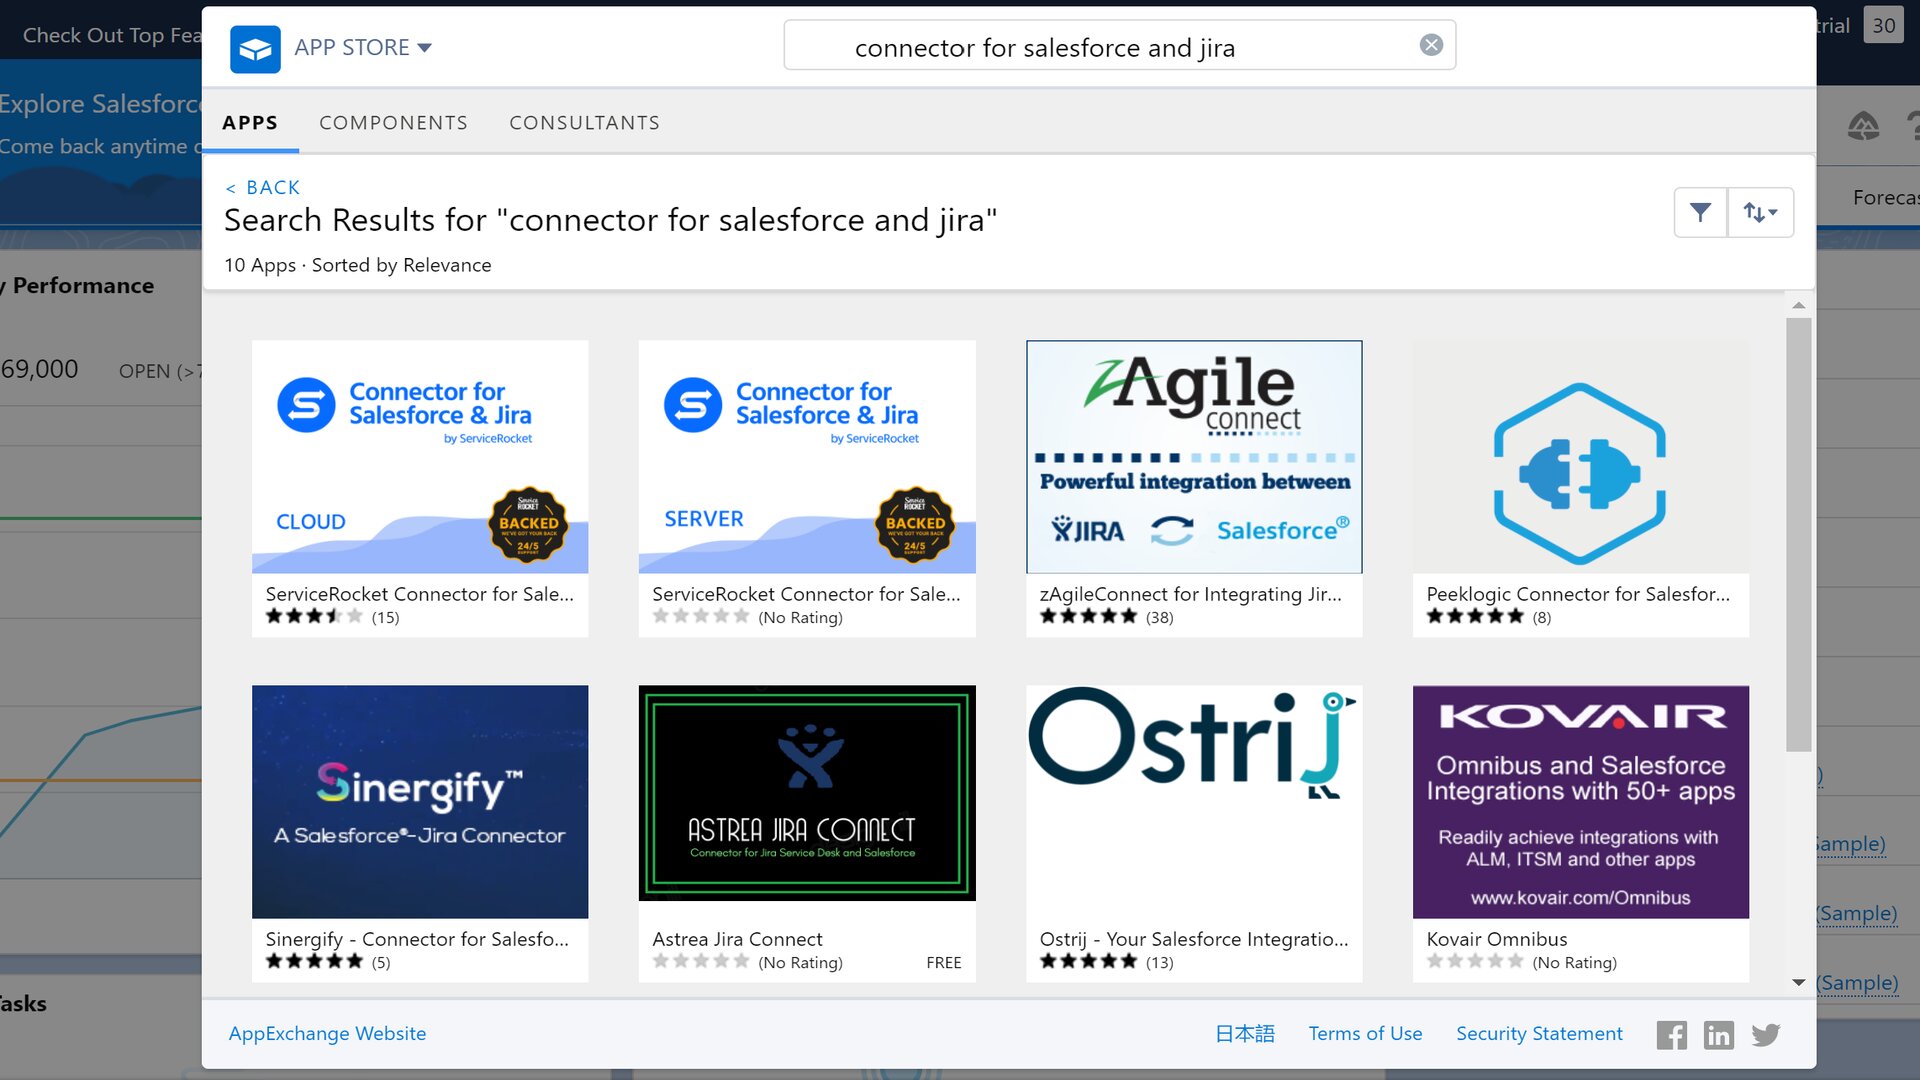
While there’s only one connector plugin for Jira, you’ll have to choose between two editions of the plugin in Salesforce. The cloud edition is for integrating with the cloud-based version of Jira, while the server edition is for integrating with the version based on an on-premises server.
Log into your Salesforce dashboard and navigate to AppExchange. Search for Connector for Salesforce and Jira, and you should see both editions of the connector plugin. Select the one that’s right for your Jira installation, and then click Get it now. You may be prompted to log in to the AppExchange with your Salesforce credentials.
Step 3: Select a production or sandbox installation
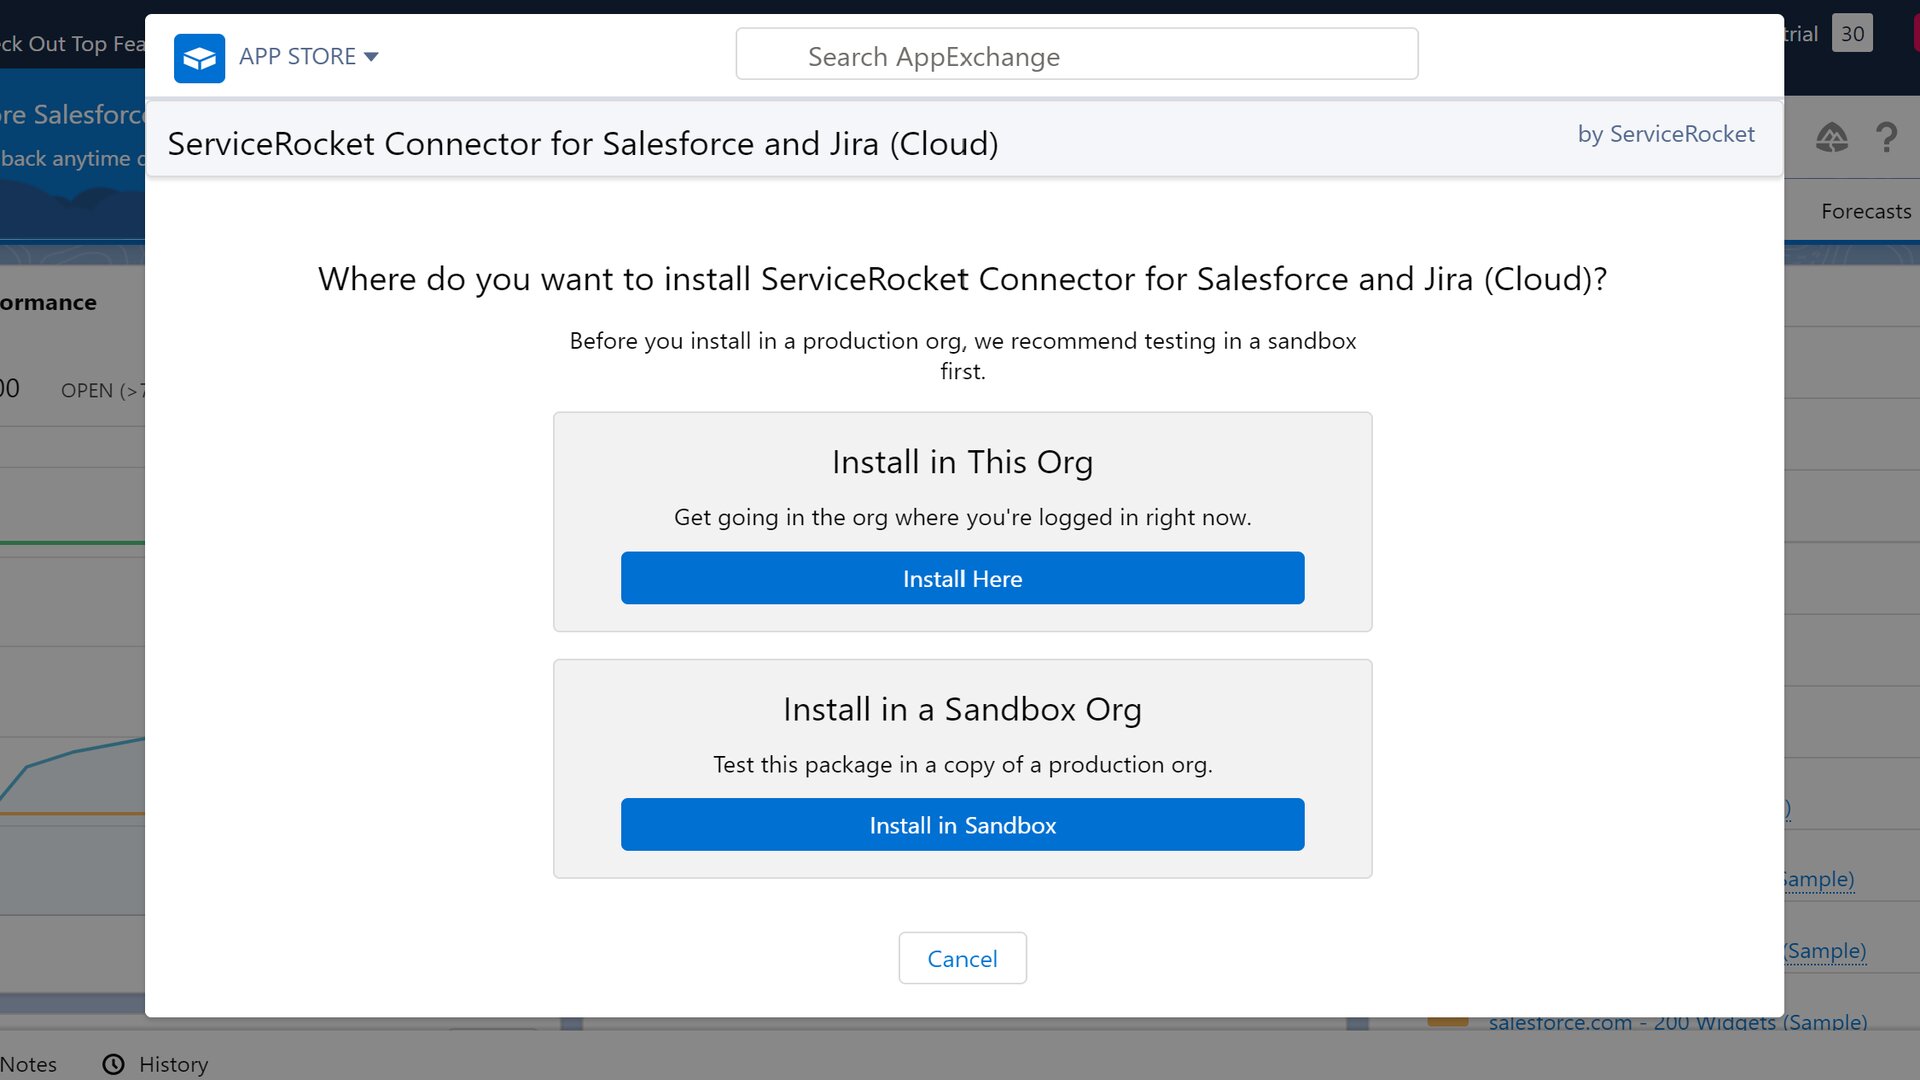
Before the connector plugin is added to Salesforce, you need to decide whether to install it in a production environment or a sandbox. A production environment is your live Salesforce environment, while a sandbox is a virtual replica of your Salesforce environment that won’t affect any of your live data.
If this is the first time you’re integrating Salesforce and Jira, you may want to install the connector in a sandbox to ensure it does not unintentionally modify data in either your Salesforce or Jira accounts.
Note that if you choose a sandbox installation now, you can re-install the connector in a production environment later. However, you will need to repeat all of the subsequent integration steps to ensure that Jira is connected to your live Salesforce environment.
Step 4: Add the connector plugin to Salesforce
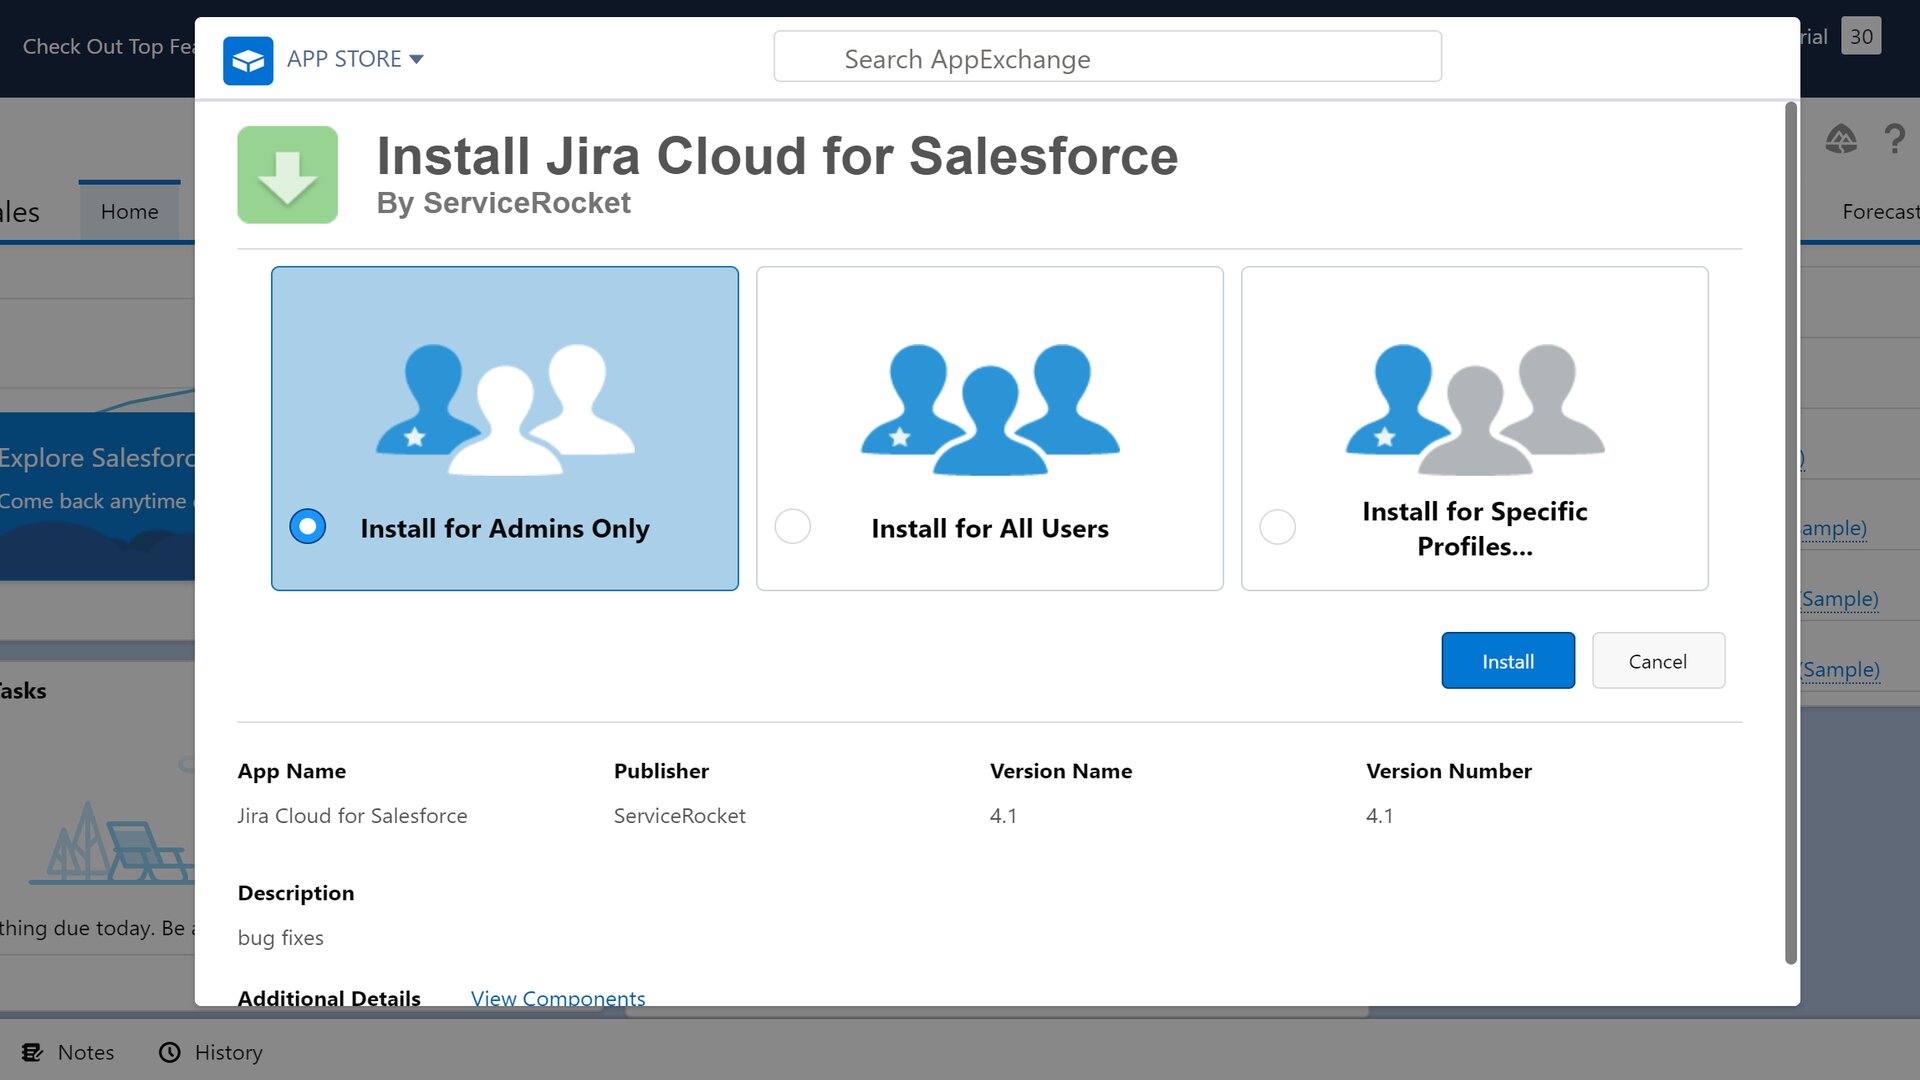
Review the details of your connector plugin installation and agree to the terms and conditions. Then click Confirm and Install. You can choose to install the plugin for Salesforce administrators only, for specific users only, or for all users. Click Install to finish adding the connector plugin to Salesforce.
Step 5: Create a remote site in Salesforce
Now that you’ve installed the connector plugin, the next step is to create a remote site in Salesforce. Adding a remote site enables you to link your Salesforce environment to an external website—in this case, your Jira cloud environment.
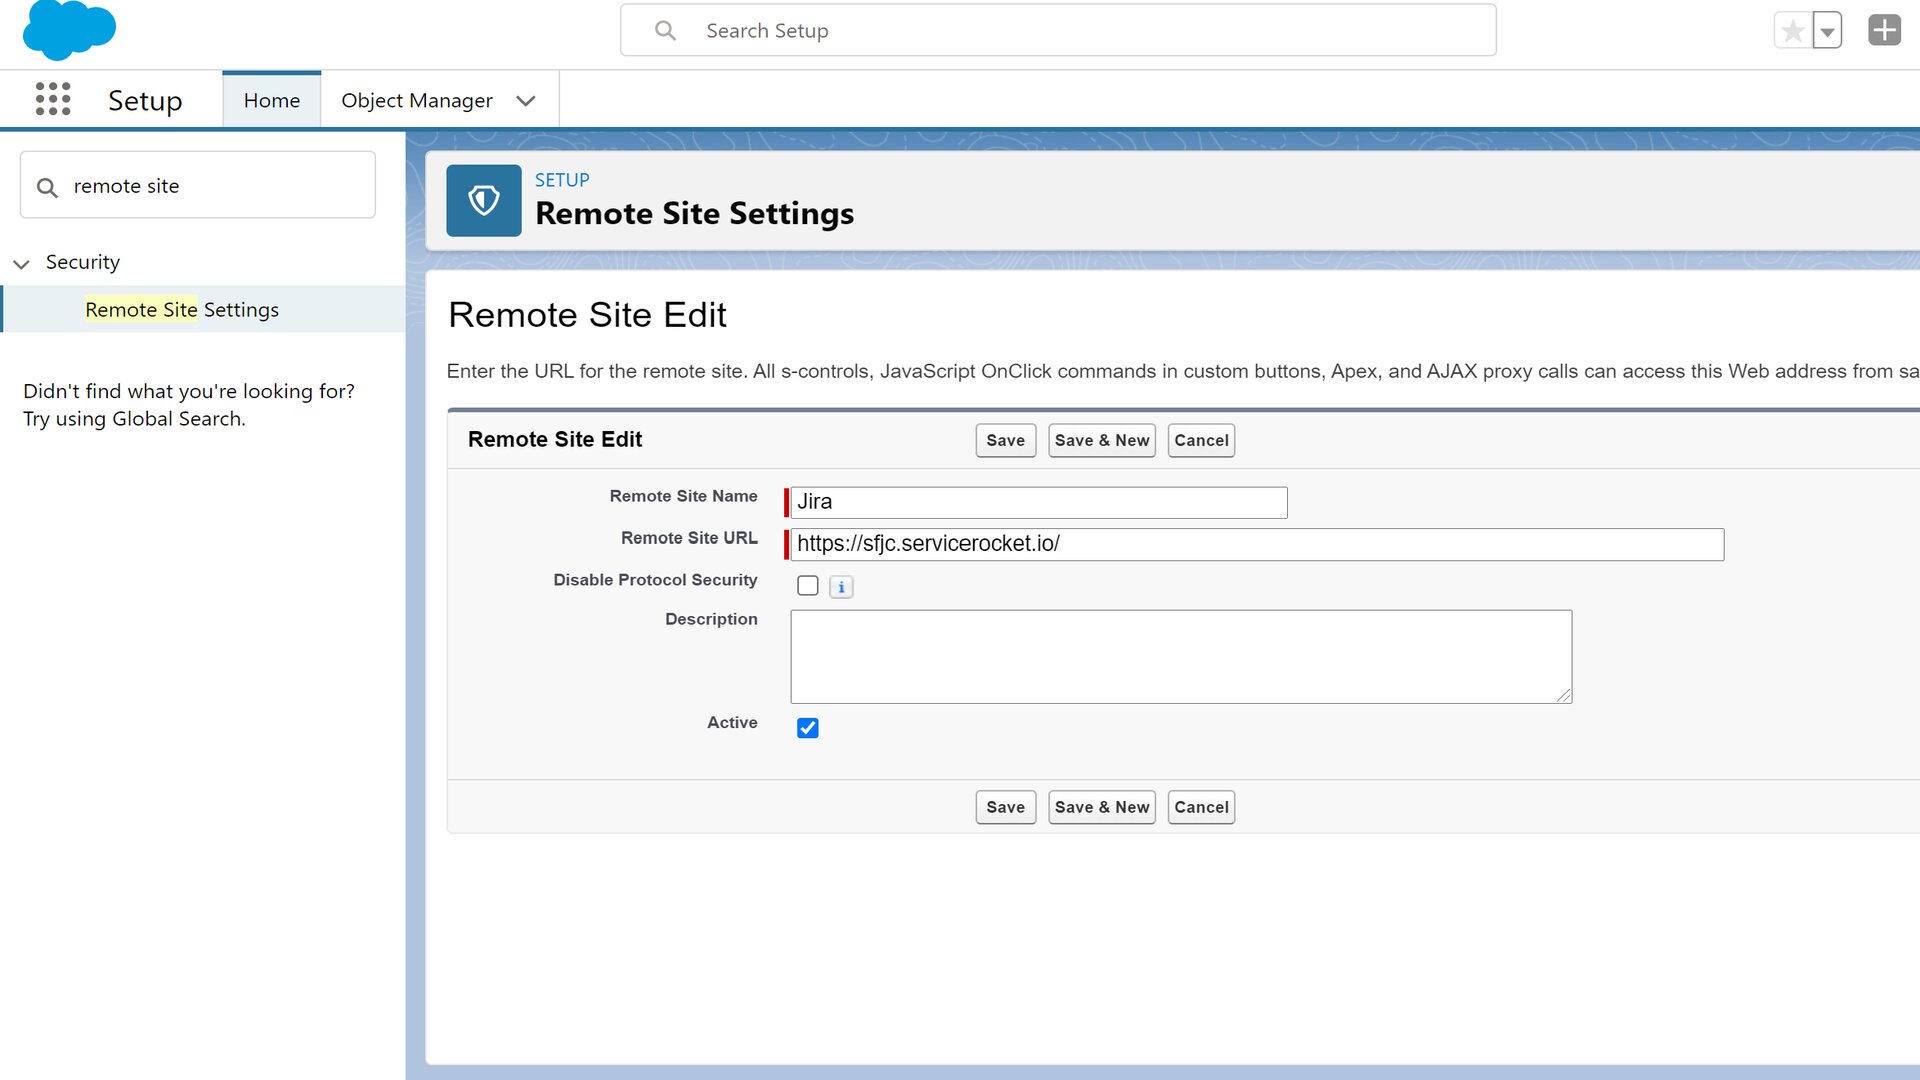
Navigate to the Salesforce setup menu and search for remote site settings in the panel. Click New Remote Site and name the new site Jira. In the Remote Site URL box, enter:
https://sfjc.servicerocket.io/Now click Save.
Step 6: Create an API access token
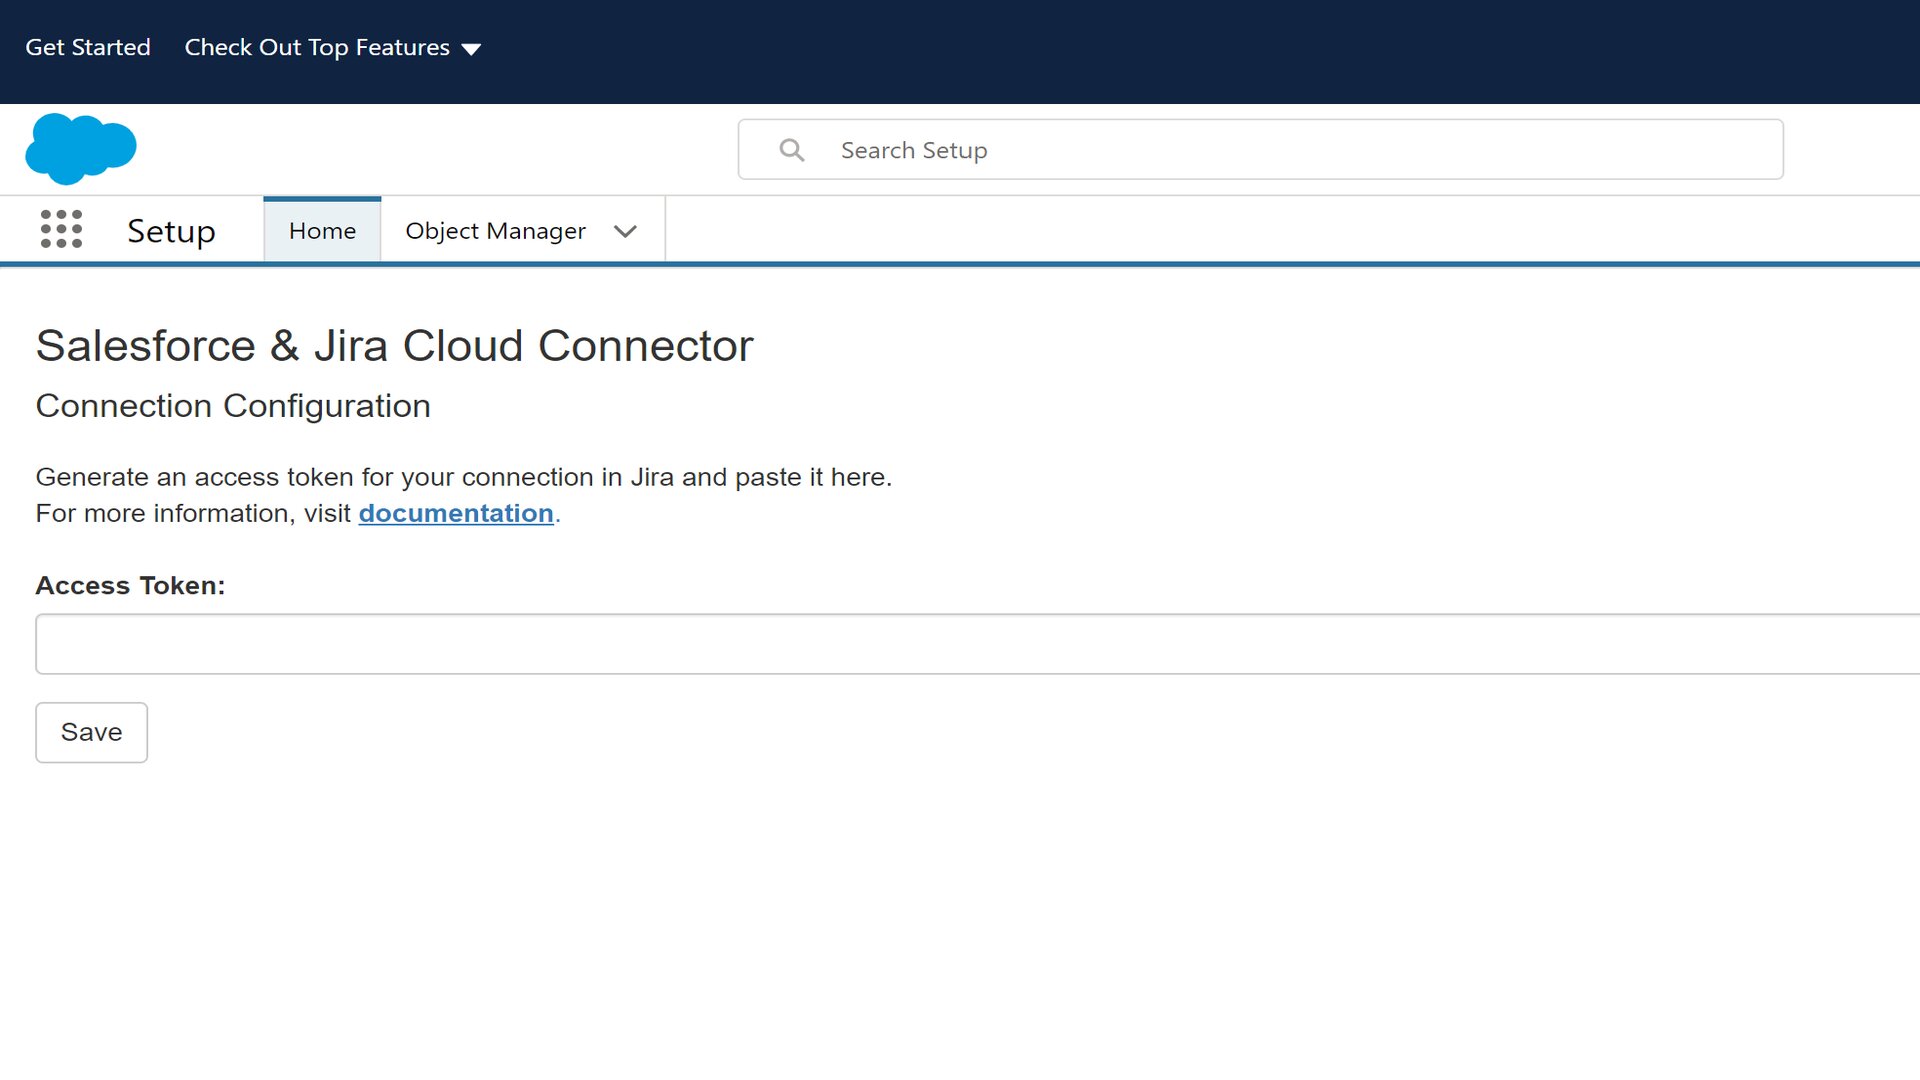
Now that Salesforce is connected to Jira via a remote site, you need to give Salesforce access to the data in your Jira environment. That requires an API access token, which you’ll get from Jira and use to configure the connector plugin in Salesforce.
In the Salesforce setup menu, search for installed packages, find the connector plugin, and click Configure. Don’t enter anything in the API token box just yet.
Now, switch over to Jira and click on Salesforce under the Apps menu. In the left-hand panel, click on Connections and then click Add Connection. Give your connection a name, then click Authorize to connect your Salesforce account.
Click on the three dots on the right side of the screen and select API access token.
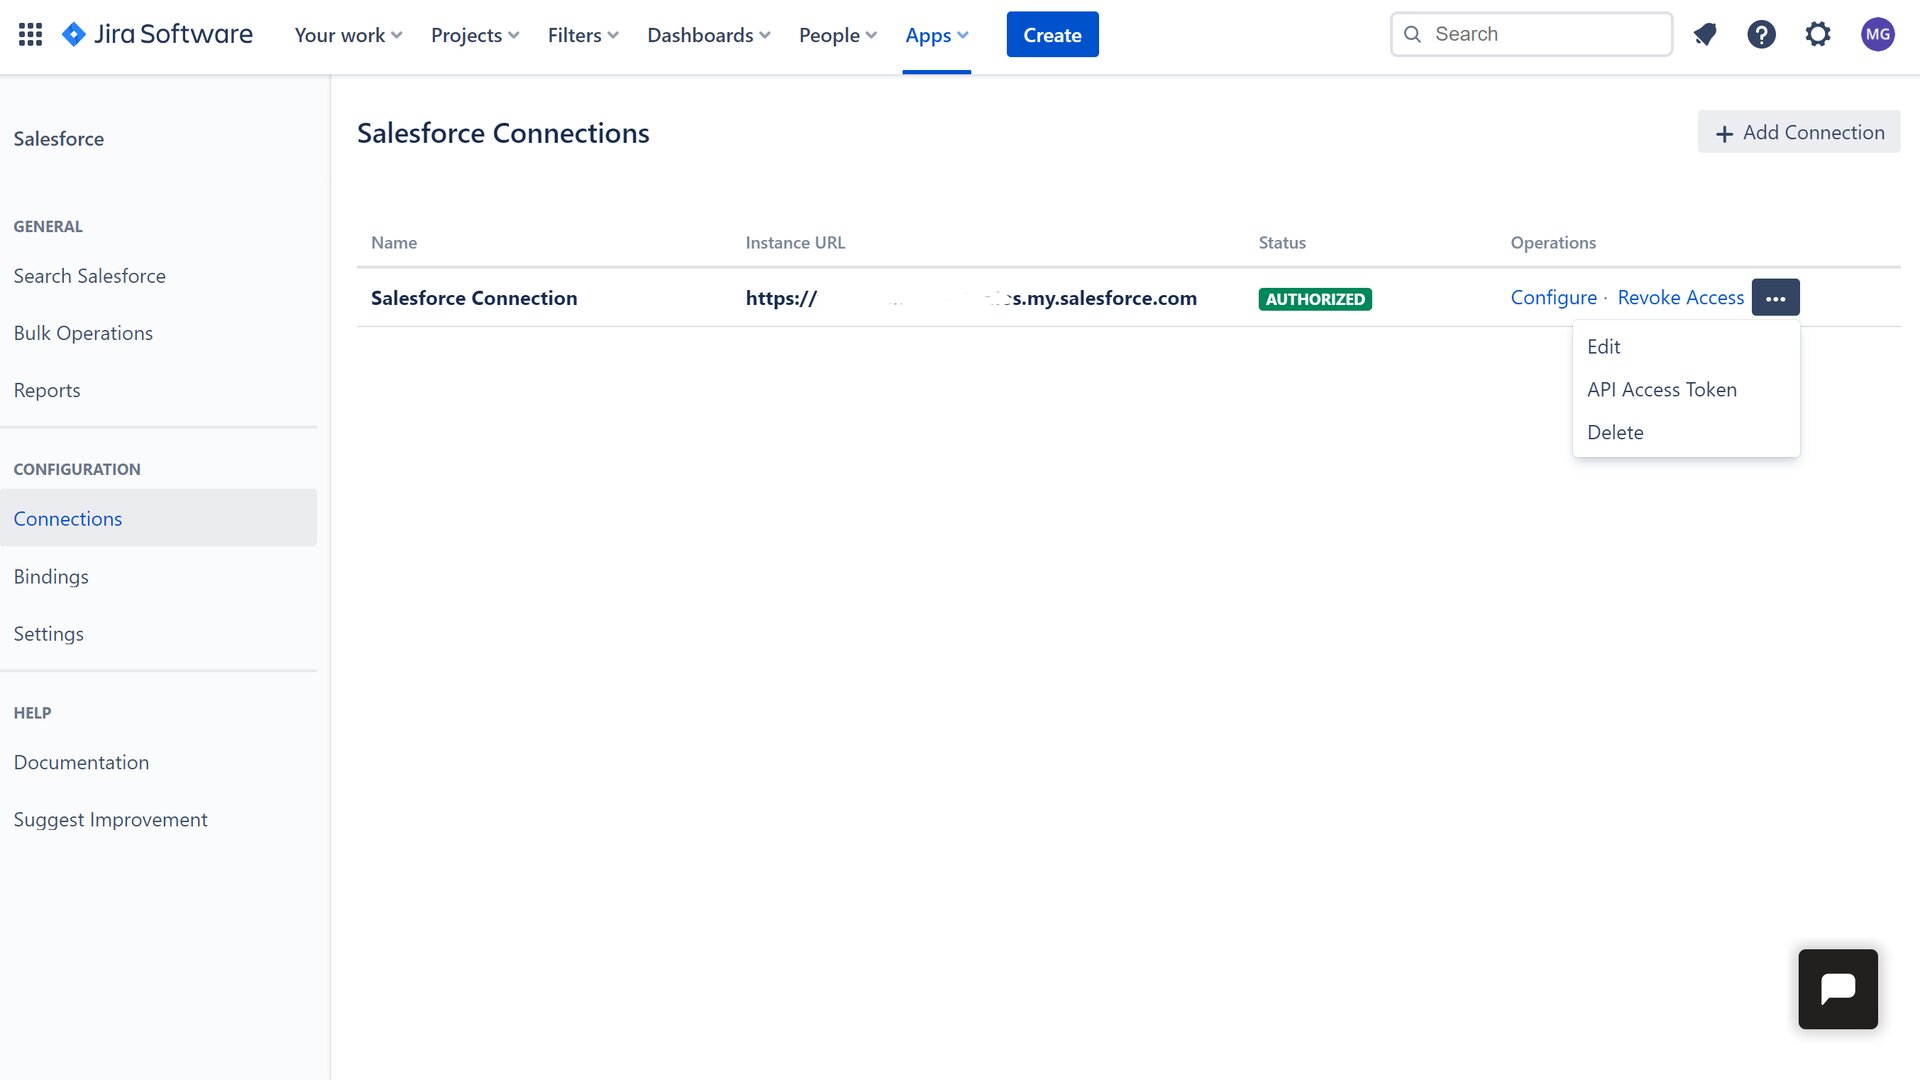
Copy that token and paste it into the API token box in Salesforce, then click Save.
Step 7: Customize your connection settings
At this point, Salesforce and Jira are now integrated. By default, projects, tasks, and comments from Jira will appear in Salesforce and contact data from Salesforce will be available in Jira. However, you can configure your connection settings for greater control.
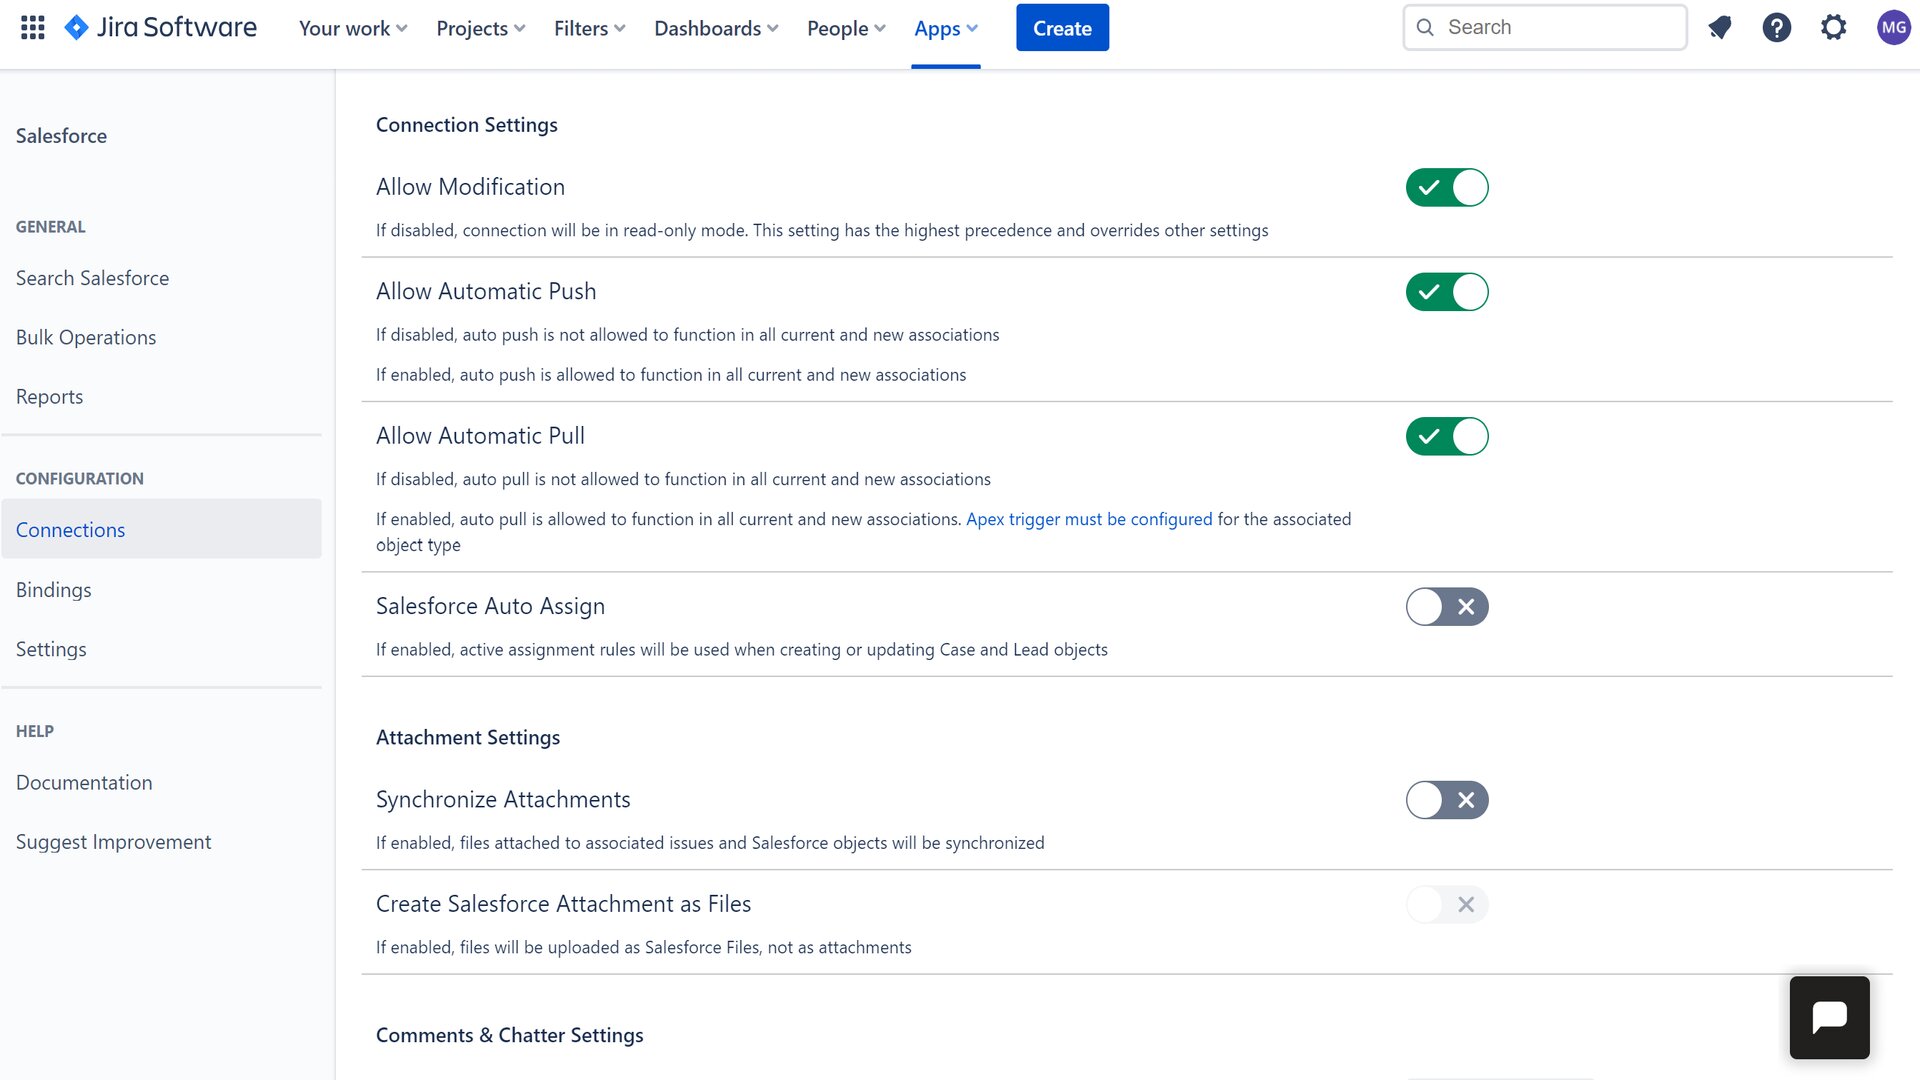
In Jira, navigate to Salesforce through the Apps menu and click Connections, then Configure. Use the sliders to control whether data is automatically pushed to or pulled from Salesforce and whether attachments and comments are synchronized between the two platforms. You can also turn on email notifications, which will deliver a message every time a user makes a change in Jira that is synchronized to Salesforce or vice versa.
Summary and next steps
Setting up an integration between Salesforce and Jira enables business teams to seamlessly share data, manage projects, close deals, and keep your customers happy.
With the Salesforce-Jira Connector plugin from Service Rocket, connecting one of the top CRM platforms with one of the top project management platforms only takes a few minutes. Once the integration is set up, you can customize which types of data are shared, which users have access to the integration, and more.
Want to learn more about Salesforce and Jira? Check out our Salesforce Service Cloud review and our Jira Service Desk review to find out what these platforms can do for your business.
We also have in-depth guides to the best CRM software and best project management software if these platforms don’t offer exactly what your business needs.
Michael Graw is a freelance journalist and photographer based in Bellingham, Washington. His interests span a wide range from business technology to finance to creative media, with a focus on new technology and emerging trends. Michael's work has been published in TechRadar, Tom's Guide, Business Insider, Fast Company, Salon, and Harvard Business Review.
