How to set up Salesforce with Tableau
Set up advanced business analytics for the most powerful CRM in the world
Salesforce provides a highly customizable, versatile total business software suite. Users have access to a choice of products for sales, service, marketing, and other business functions. Tableau is a brand of business analytics software owned by Salesforce, which is designed to be compatible with all of its software products. It is possible to use these programs together, but to do so you must first understand how to set up Salesforce with Tableau.
Follow these eight simple steps to connect these two powerful systems, and take advantage of the full power of Salesforce—one of the best CRM software solutions on the market—backed by Tableau’s insightful business analytics.
Today's best Salesforce deals
Get Salesforce from $25 per user/mo (US-only link)
Salesforce is the CRM market-leader for good reason: it offers a comprehensive suite of customer relationship tools, excellent integration, and unrivalled customization. Follow this link to find out more.
How to set up Salesforce with Tableau: Preparation
Once Salesforce acquired Tableau in August 2019, Tableau became a native application in the Salesforce suite. As such, it comes with a built-in Salesforce connector that enables you to connect Tableau analytics to your Salesforce data quickly and easily. To take advantage of this functionality, you must first create a Salesforce account and install Tableau on the host workstation.
Before you install Tableau, make sure that your machine matches all of the system requirements detailed in the before you install guide on Tableau’s website. If your machine is up to the task, install Tableau by following the step-by-step installation instructions. Once Tableau is installed, it is time to create a Salesforce account.
Salesforce is a total business software solution with over 14 different products under its umbrella. To create an account, you will need to sign up for at least one of these products, such as Service Cloud, Sales Cloud, or Marketing Cloud. If you would like to learn more about Service Cloud, read our Service Cloud Review.
Once you have selected your Salesforce products, you will be asked to set up an account with a username and password. Hold on to these, as you will need them to link Salesforce to your Tableau account.
Step 1: Ensure that the correct APIs are enabled
APIs are programs that enable applications to access data in your Salesforce org. Going into detail about what an org is falls outside the scope of this guide, but consider it to be your ID in Salesforce—all of your Salesforce products and applications are linked to your “org number.” If you want to connect Tableau to Salesforce, you will need to make sure that your company’s org has the following APIs enabled:
Are you a pro? Subscribe to our newsletter
Sign up to the TechRadar Pro newsletter to get all the top news, opinion, features and guidance your business needs to succeed!
- SOAP API to sign in
- BULK API to download objects
- REST API to get metadata and download objects not supported by BULK API
- Replication SOAP APIs to retrieve changes in your data
If you are uncertain, liaise with your IT team or contact Salesforce support for assistance to ensure that the correct APIs are enabled.
Step 2: Launch Tableau’s connector
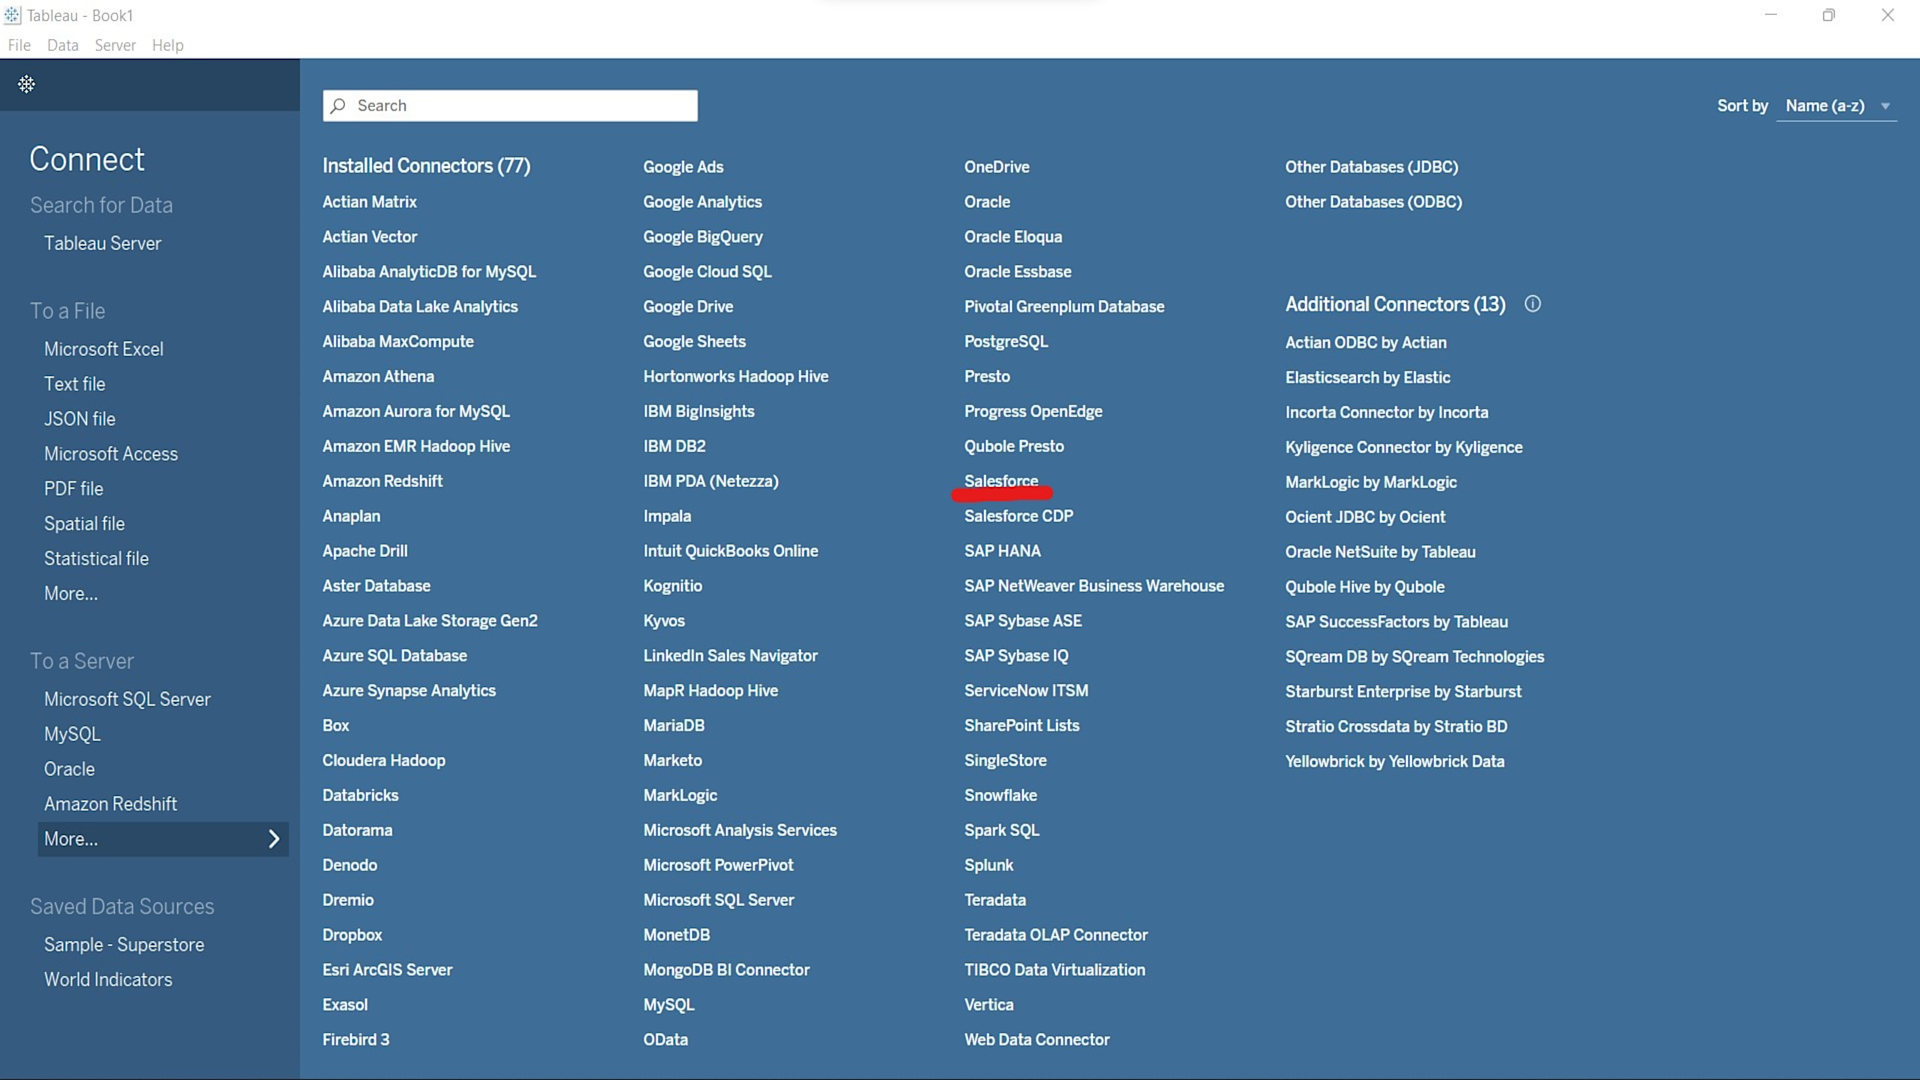
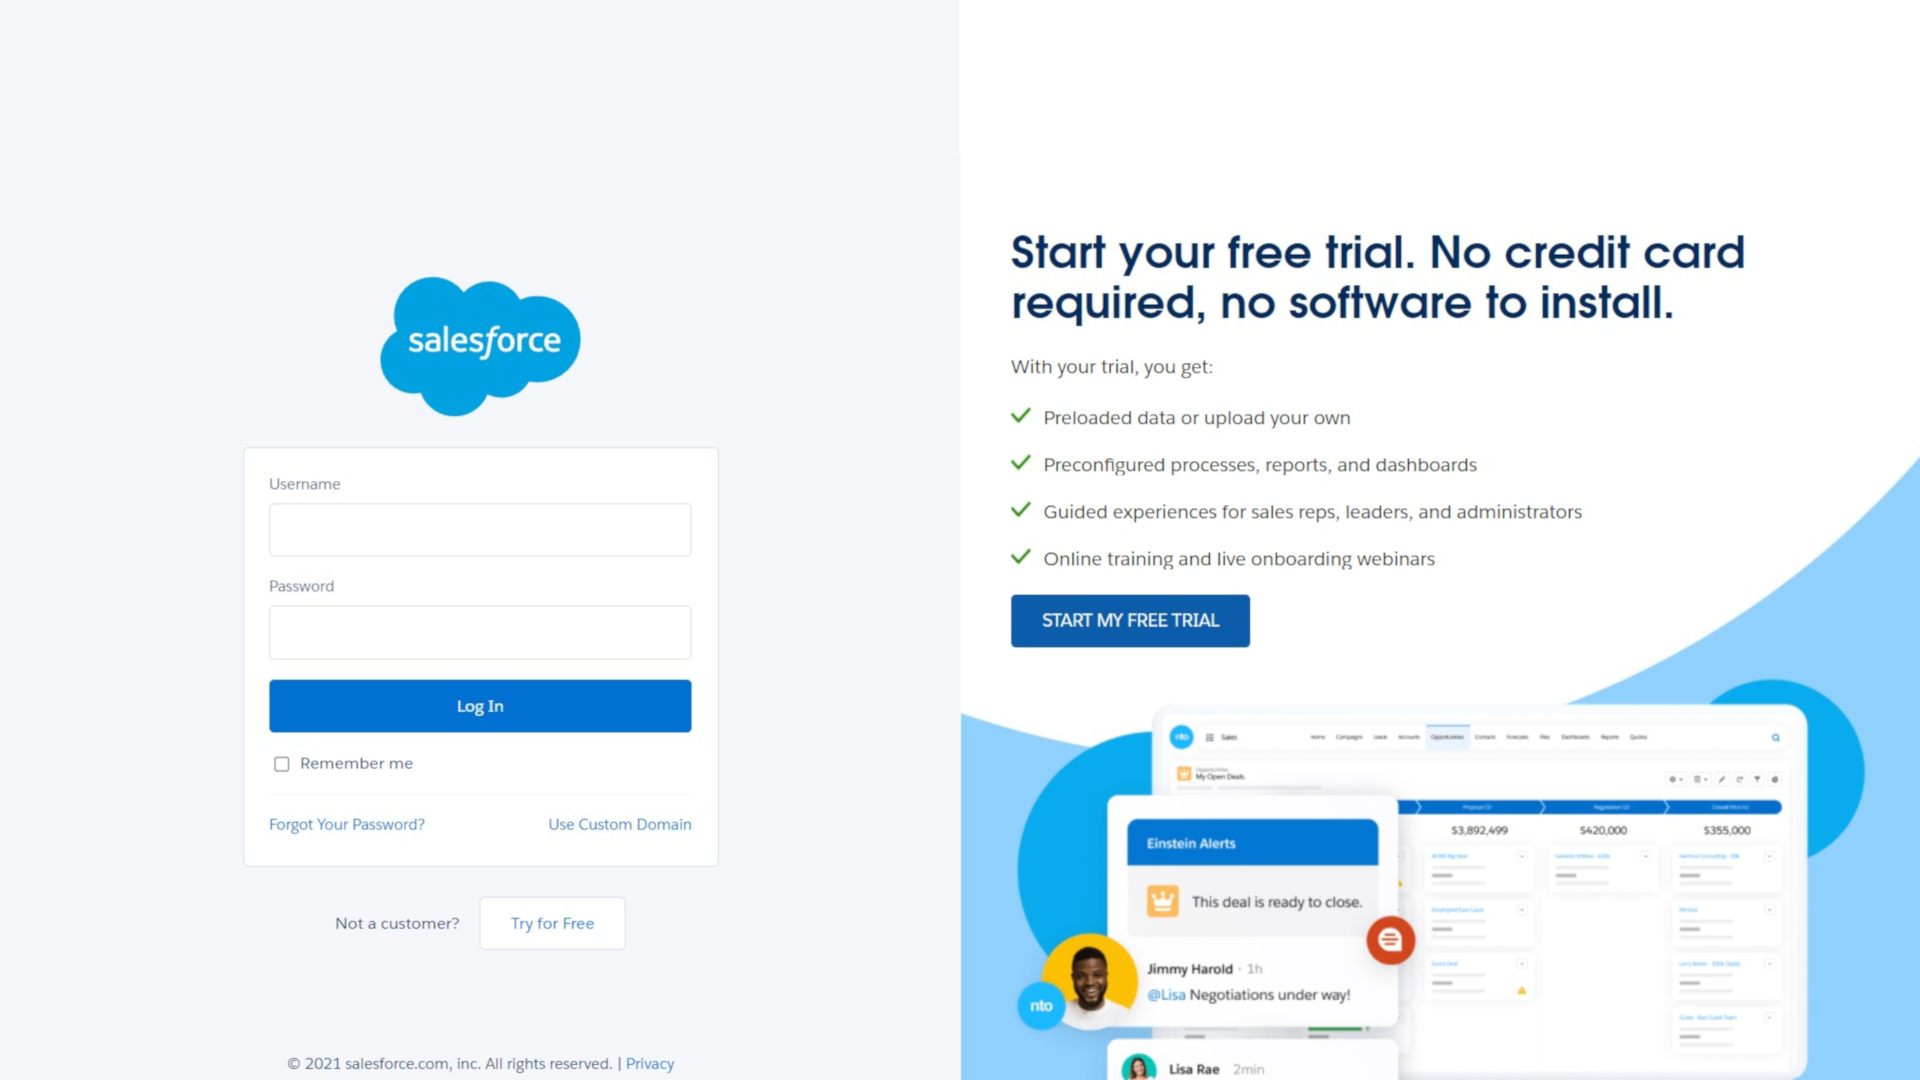
Once you have enabled the correct APIs, launch Tableau. Navigate to More, under To a Server in the connect panel on the left. Then select Salesforce from the list that opens up. This will open a new browser window with a dialog box prompting you to enter your Salesforce username and password. Enter them to proceed.
The dialog box will now prompt you to allow Tableau to have access to your Salesforce account. Click “allow” to give Tableau the required access.
Step 3: Name your data source
At this point, assuming all the APIs from step one have connected correctly, you should reach the data source page. If you get an error that mentions hitting the API limit, jump ahead to Step 7. If any other error occurs at this stage, contact Salesforce support—the issue is likely related to one or more of the APIs.
Assuming everything has worked, your database should now be transferred from Salesforce to Tableau. You can rename your data source name at the top of the screen. It is best practice to do so according to your company’s naming convention—this way other users can easily recognize where this data came from.
It is worth noting that some data cannot be transferred successfully from Salesforce. Text fields with more than 4096 characters, and calculated fields—fields that pull data from other fields with a formula—will not transfer into Tableau.
Step 4: Select a schema
The next step is to create the actual connection between the Salesforce data you just downloaded and Tableau’s analytics. To do so, choose either a standard or custom connection.
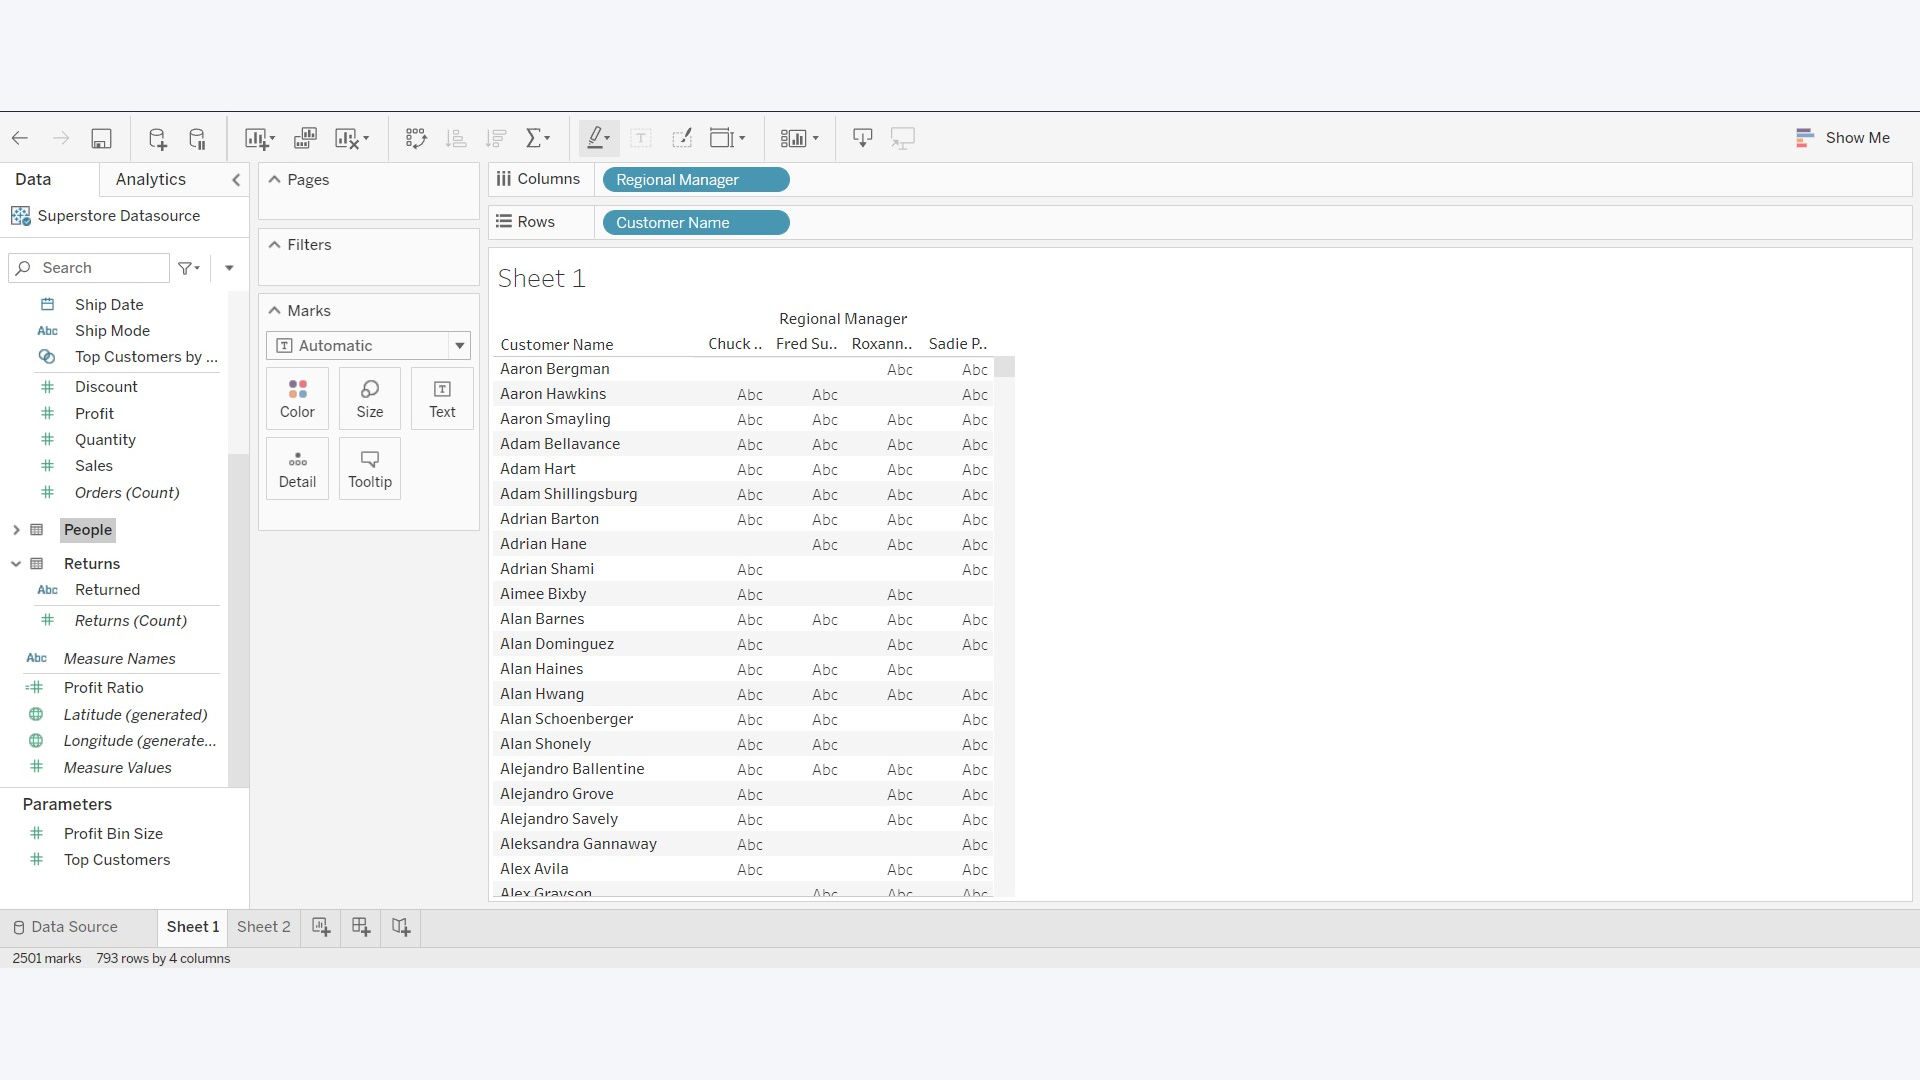
A standard connection uses predefined queries with a drag-and-drop interface to analyze your data. A custom connection enables you to write your own queries. Custom queries give you more options as a user, but require a working knowledge of VizQL, Tableau’s query language.
For a standard connection, drag one of the commonly used predefined queries from the left side of the screen onto the main work area, and begin your analysis. If you want to use a custom connection, go to the table tab and select a table with any custom objects created by your organization—your team will need to build them in Tableau beforehand.
If you do not need to set up any connections between tables, or to connect your data to other databases, you can start using Tableau to run your analysis. Feel free to skip to Step 8 of this guide.
Step 5 (optional): Set up joins
Before you can run Tableau’s analytics on your Salesforce data, you may need to create joins in your data. Different tables might need to be joined together to run your analysis—values that show up in different tables can be linked, and strings can be concatenated.
When you right-click a table in the Tableau workspace, a list of available tables to join appears. Simply click on the fields you want to join and drag a line between them to link them together. You can join any string fields, as well as any fields where the same value appears on two or more tables at once, called constrained fields. To learn more about joins, read the Tableau team’s tutorial here.
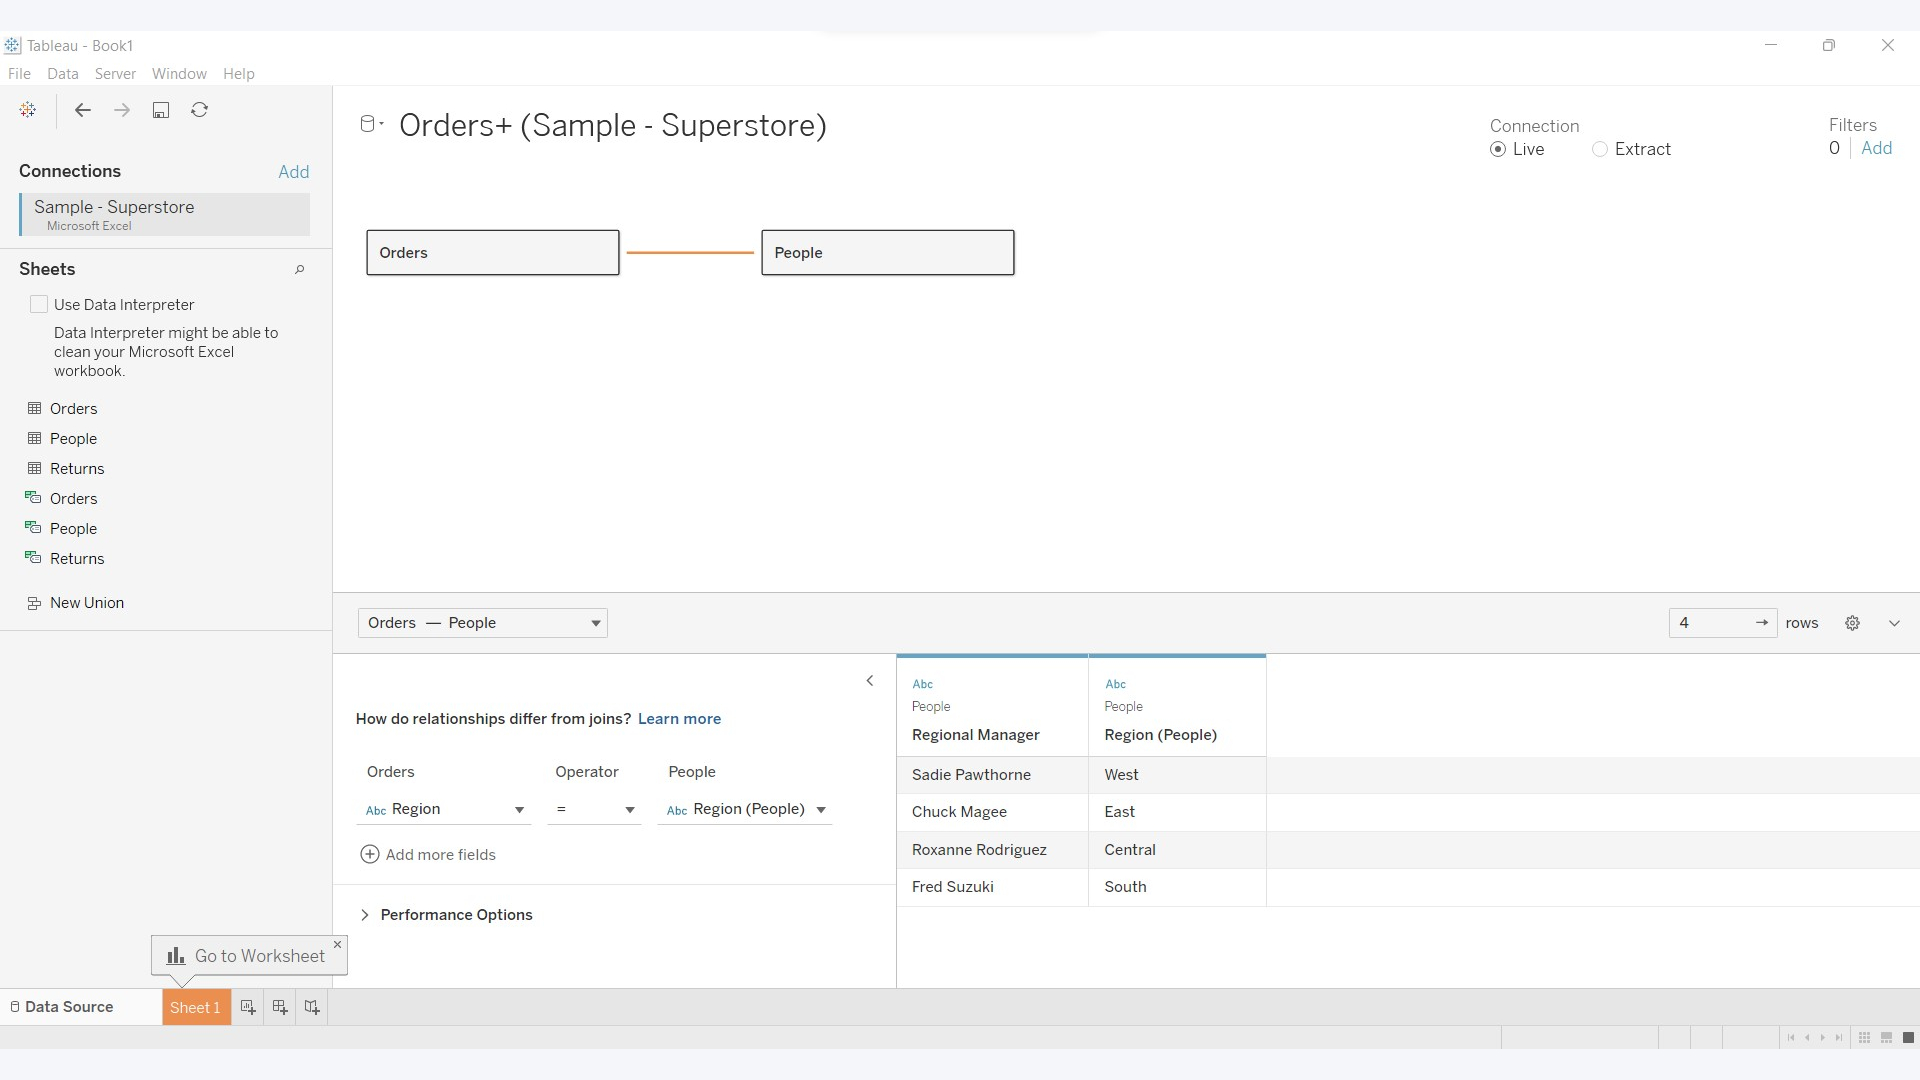
Once you have joined the data to your liking, you can run your Tableau analysis. If you do not need to join databases together, feel free to skip ahead to Step 8 of this guide. Otherwise, read on to learn how to link your Salesforce data to information from other databases.
Step 6 (optional): Link your Salesforce data to other databases in Tableau
Connecting Salesforce data in Tableau to data from other sources to run a combined analysis requires a cross-database join. For instance, marketing data from Google Analytics can be combined with data from Salesforce Marketing Cloud to run a combined analysis with Tableau.
Adding a join from another database is not complicated—simply select the + icon next to connections on the top left of the join menu and choose what data source you want to link to. Select that data source and choose the table you wish to join.
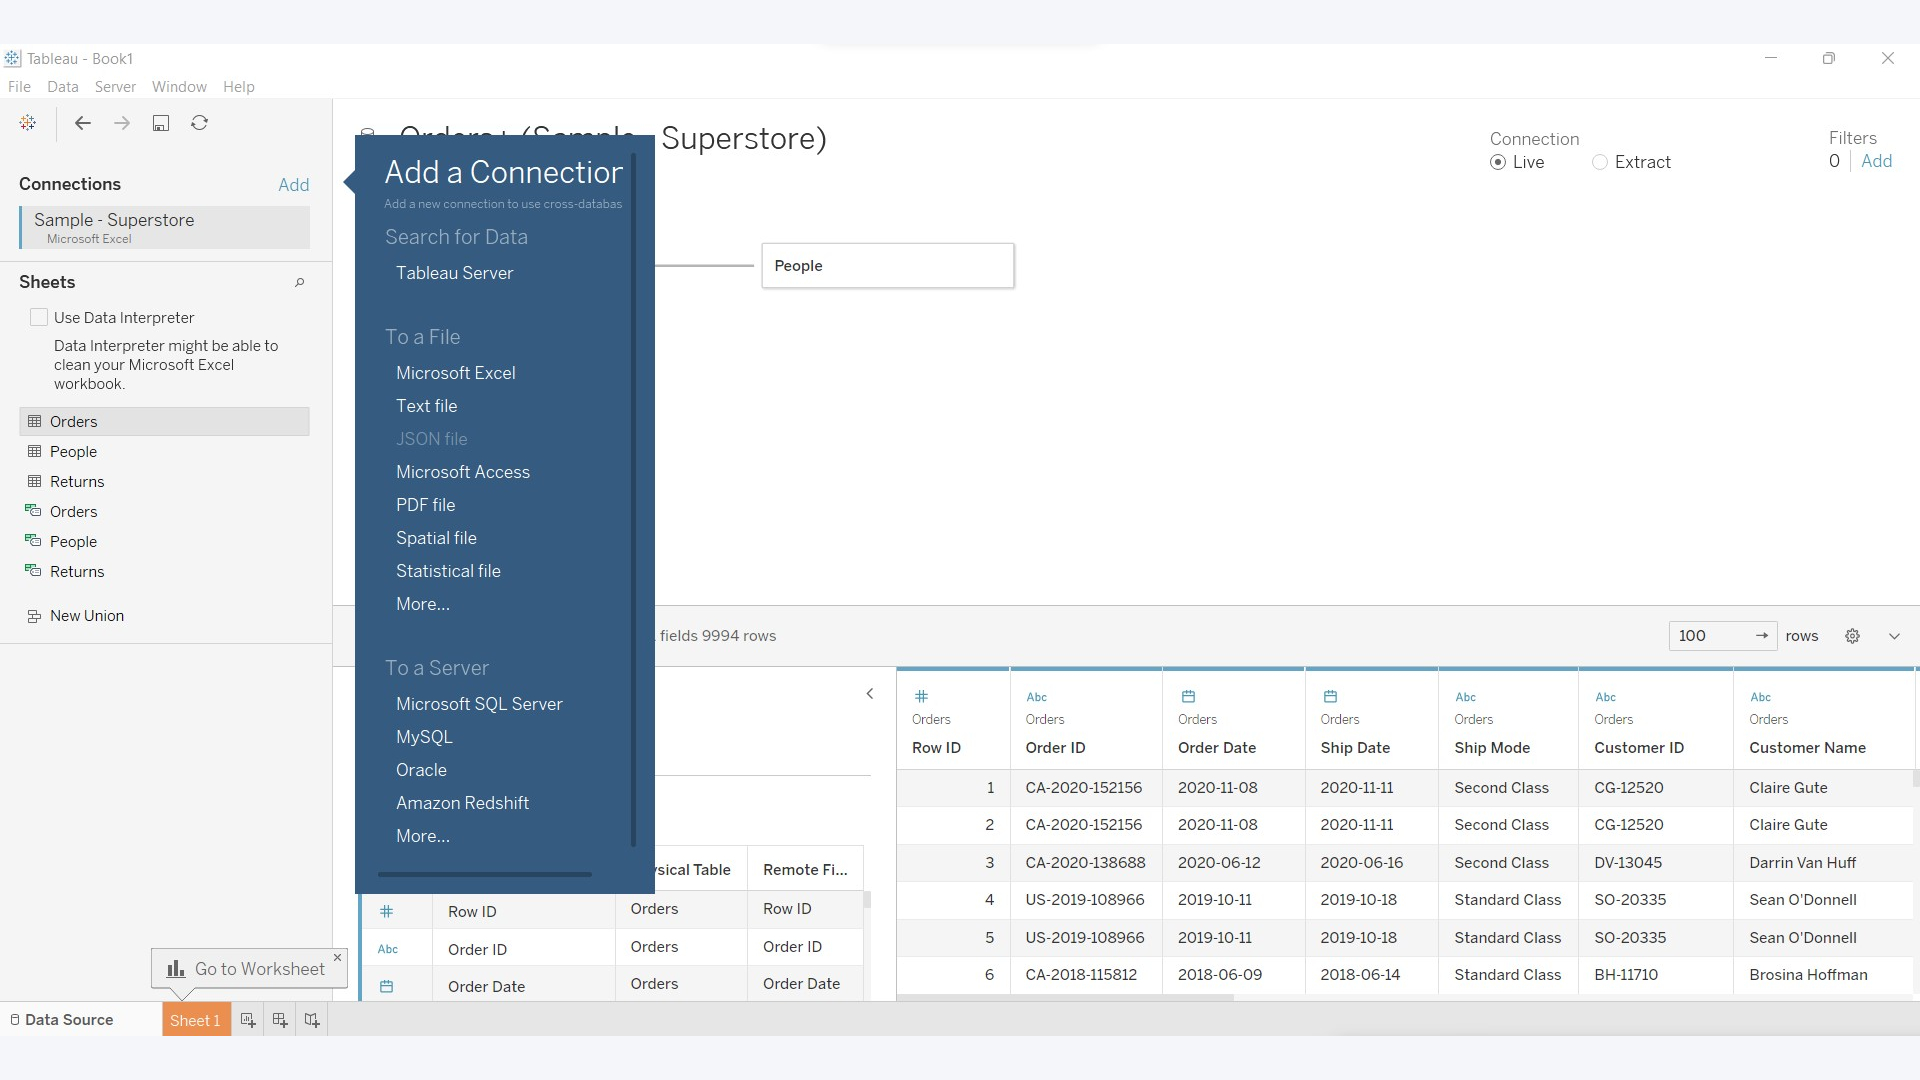
There are some types of data sources that cannot be connected to Salesforce data. Namely, any data that is updated live cannot be connected to Salesforce, because Tableau does not allow that functionality for live updates on Salesforce data.
Step 7 (optional): Contact Tableau support to get a workaround for API limit errors.
Recall the APIs you enabled in Step 1 of this guide. These APIs essentially enable Tableau to enter your Salesforce database and collect data. Your Salesforce database sits on the cloud, sharing space with the data of other Salesforce users. Every time Tableau pulls information from Salesforce it increases the load on its servers. To get around this problem, Salesforce actively limits how many API requests—requests by other applications, like Tableau, to access data—can happen at one time.
If you get an API limit error after following all of the steps above, that means your installation of Tableau is hitting the limit on API requests, and Salesforce is blocking Tableau from making more. Contact the Tableau technical support team to resolve this error: they will develop a workaround specific to your use case.
Step 8: Update data periodically
The first time you connect Tableau to your Salesforce system, it will upload a static snapshot of your customer data. This means that if customers are added to or removed from Salesforce after you upload, this information will not be automatically updated in Tableau.
To update your data, you can either do a full refresh or an incremental refresh. An incremental refresh will re-upload any objects that have been changed or added to Salesforce since the last refresh. Keep in mind that this history only goes back for 30 days.
If you neglected to complete an incremental refresh for more than 30 days, you will need to do a full refresh, re-uploading all data from scratch. This will take longer but will ensure that no information is missed in your Tableau reporting.
Summary

Now that you know how to connect your Salesforce suite with Tableau, you can take full advantage of the advanced business analytics functions it offers. This includes building advanced reports with an easy drag-and-drop interface, accessing data governance functions, and scaling up analytics effortlessly as your business grows.
Further reading
To learn more about CRM, read our guide to the best CRMs for small business or our guide for small businesses: Five reasons why you need a small business CRM.
Or to learn how to augment your Salesforce suite even further with a powerful business communication platform, read our guide on how to set up Slack to Salesforce integration.
Serguei holds degrees in finance and marketing from York University, and brings more than five years of professional experience at their intersection to his writing. His previous roles as a finance advisor involved breaking down and explaining complex concepts in everyday terms, a talent he now brings to his work as a freelance writer.
