How to set up Slack to Salesforce integration
Follow these 9 steps to integrate Slack and Salesforce
Salesforce is widely recognized as one of the best CRM software options available today, while Slack has become the de facto instant messaging tool for many businesses.
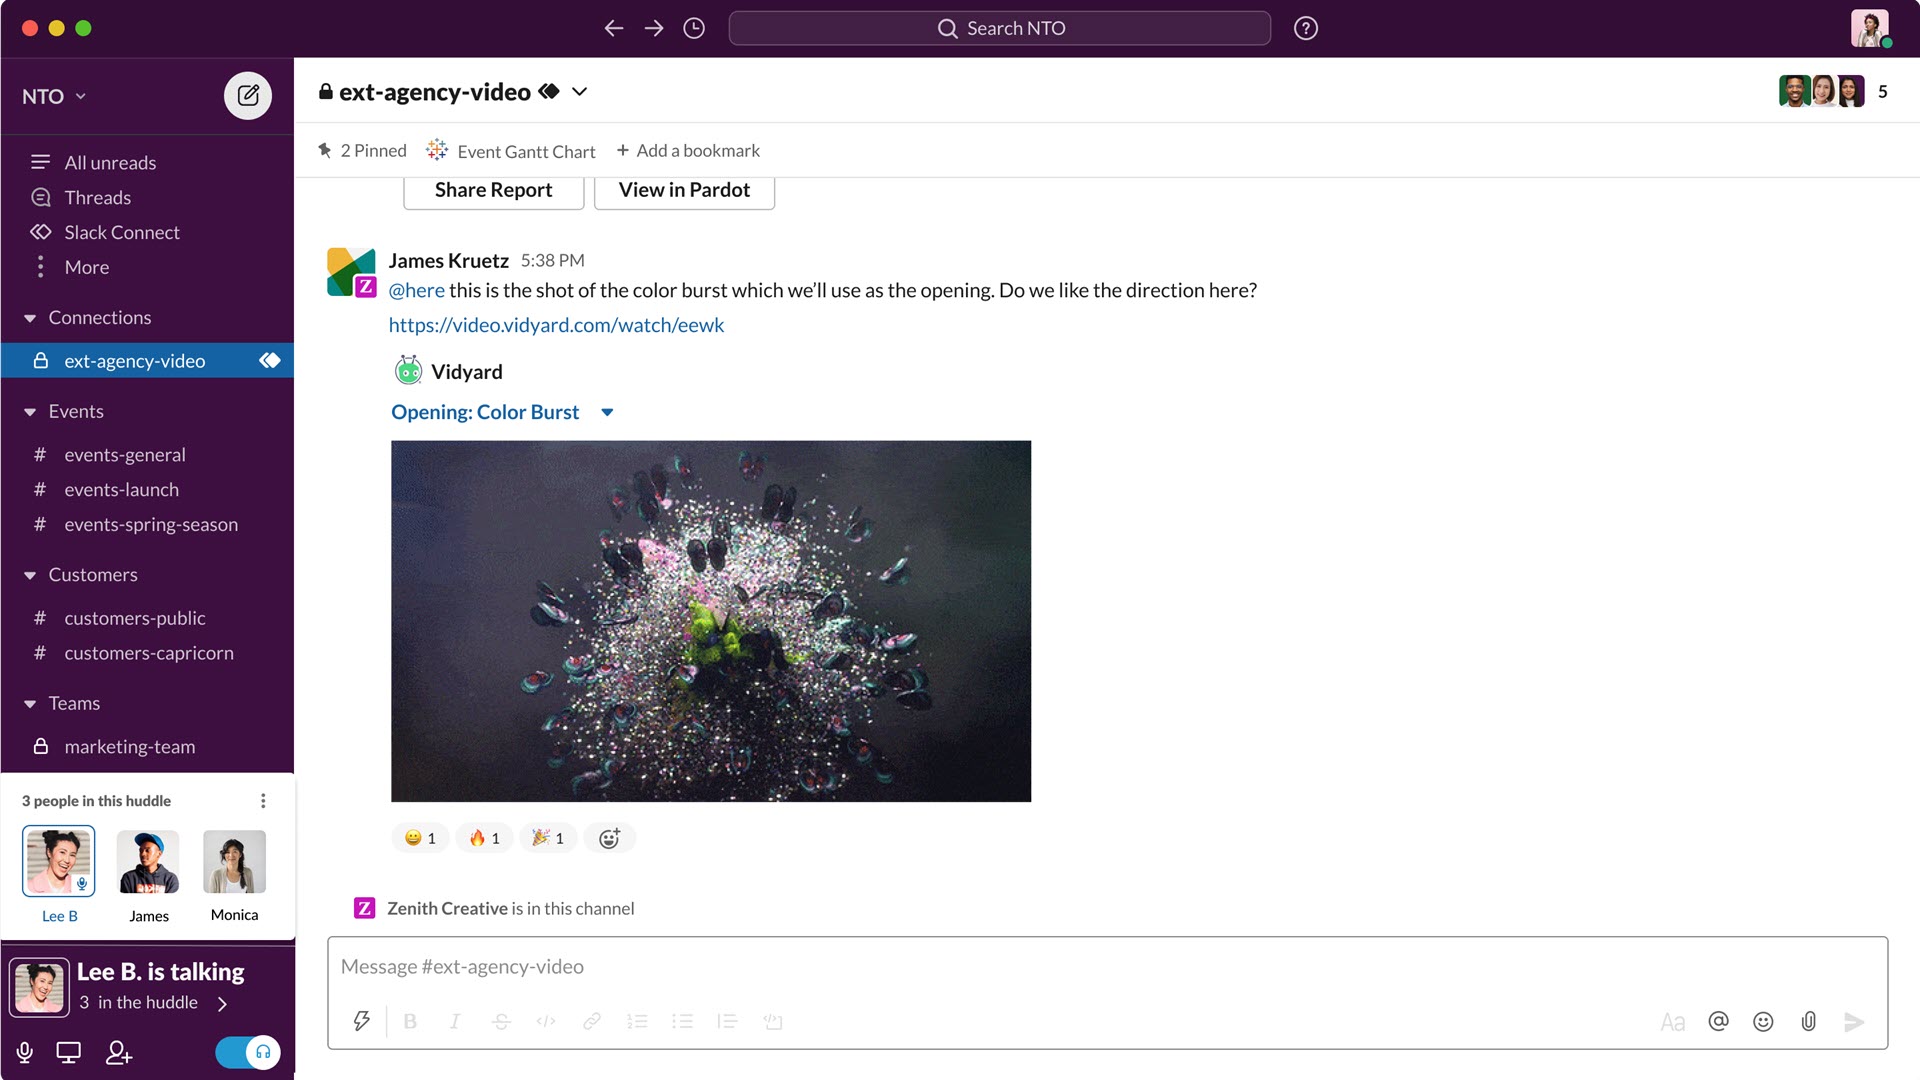
In August 2021, Salesforce released a new Slack to Salesforce integration tool, enabling teams to get updates on Salesforce records from within Slack. This allows team members to respond faster to new opportunities, resolve problems faster, and act on insights immediately.
In this article, we’ll outline the steps required to get Slack and Salesforce talking to each other.
5 reasons why small businesses need a CRM
Today's best Salesforce deal
Get Salesforce from just $25 per user/mo (US-only link)
Salesforce is the market leader for good reason: it has a comprehensive suite of CRM tools, features excellent integration options, and unrivalled customization. Follow this link to find out more. For US businesses-only.
Salesforce to Slack: Preparation
• First, you will need both Salesforce and Slack accounts.
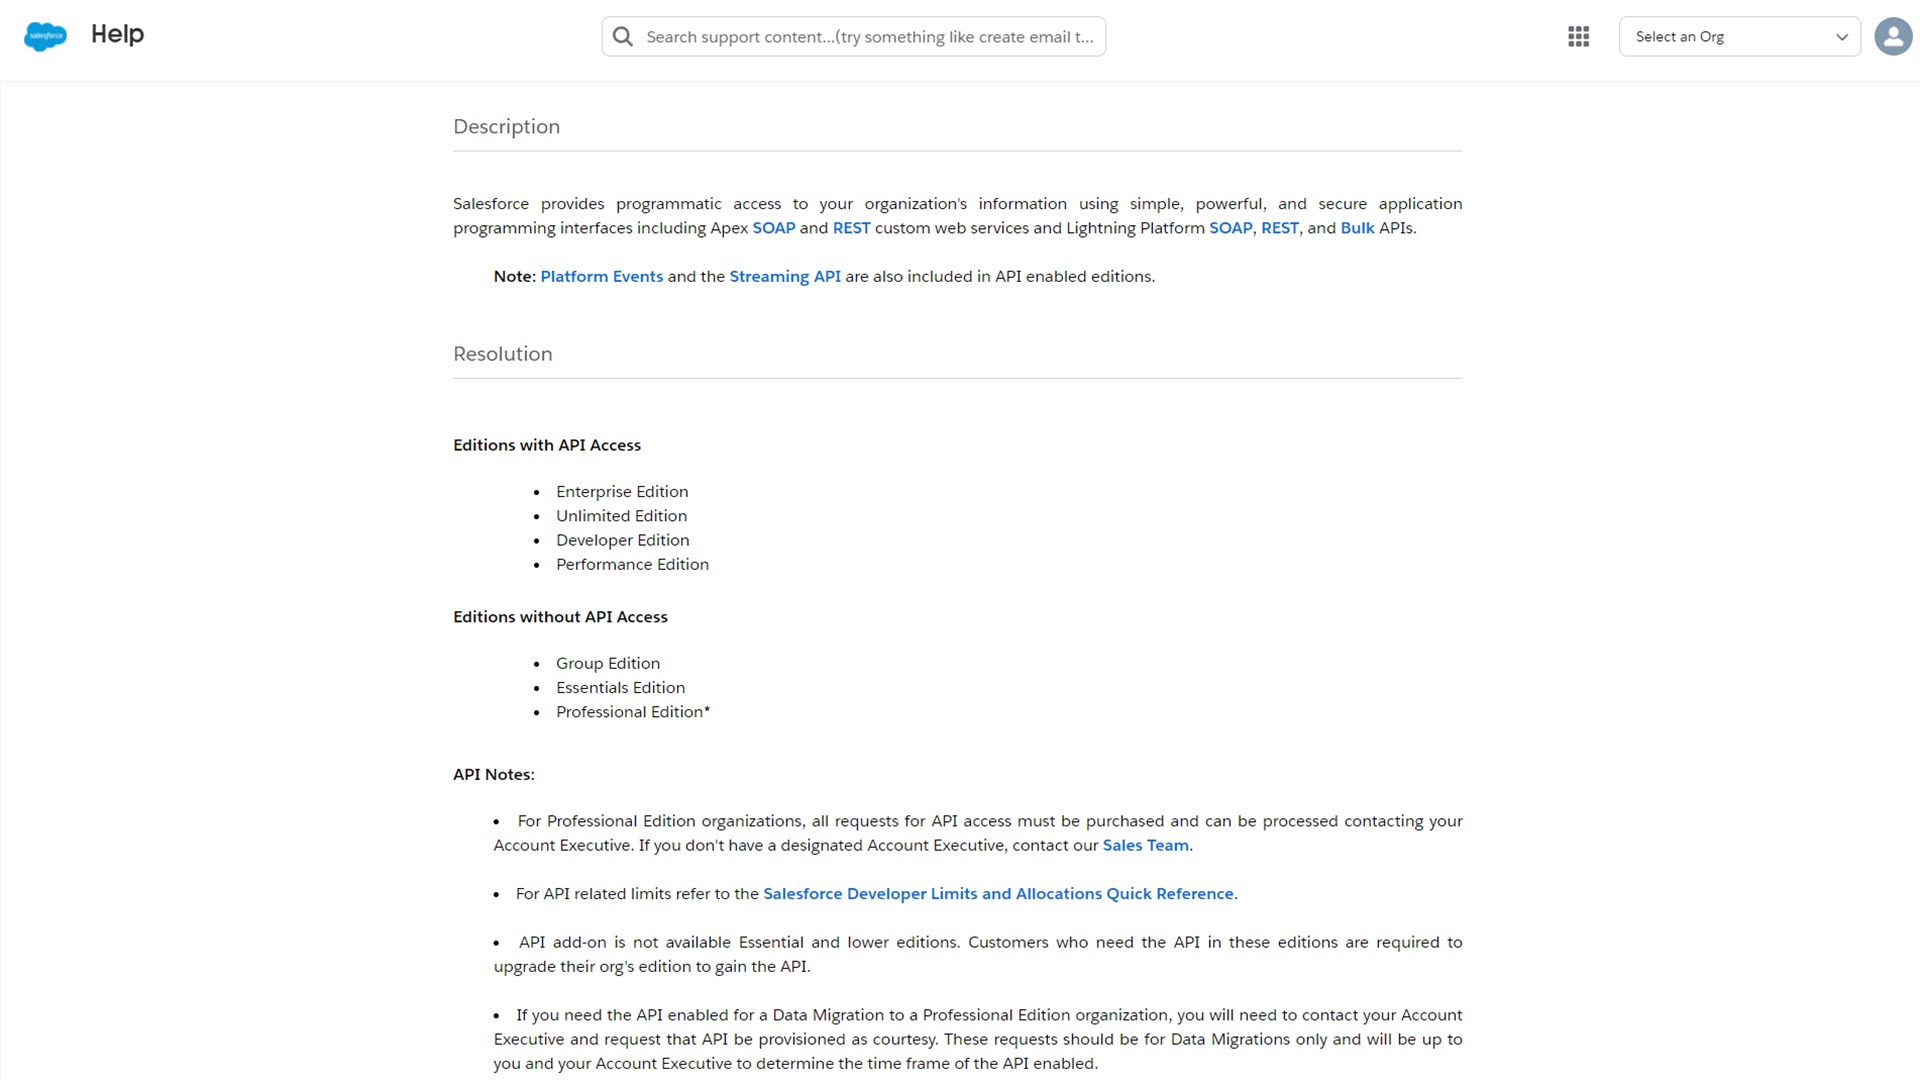
• You will need a Salesforce account that supports API access. These are the Performance Edition, Developer Edition, Unlimited Edition, and Enterprise Edition.
• If you have Salesforce Professional Edition, you can get API access by purchasing an API access plugin from the Salesforce sales team.
Note: Group Edition and Essentials Edition don't have API access, so if you have one of these above plans you will need to upgrade for the Slack to Salesforce integration to work.
Are you a pro? Subscribe to our newsletter
Sign up to the TechRadar Pro newsletter to get all the top news, opinion, features and guidance your business needs to succeed!
• We highly suggest using the Google Chrome browser and disabling any pop-up blockers while setting up this bridge between apps. Otherwise, some steps, such as logging in to the AppExchange Marketplace, may not work.
Step 1: Install the Slack package from the AppExchange
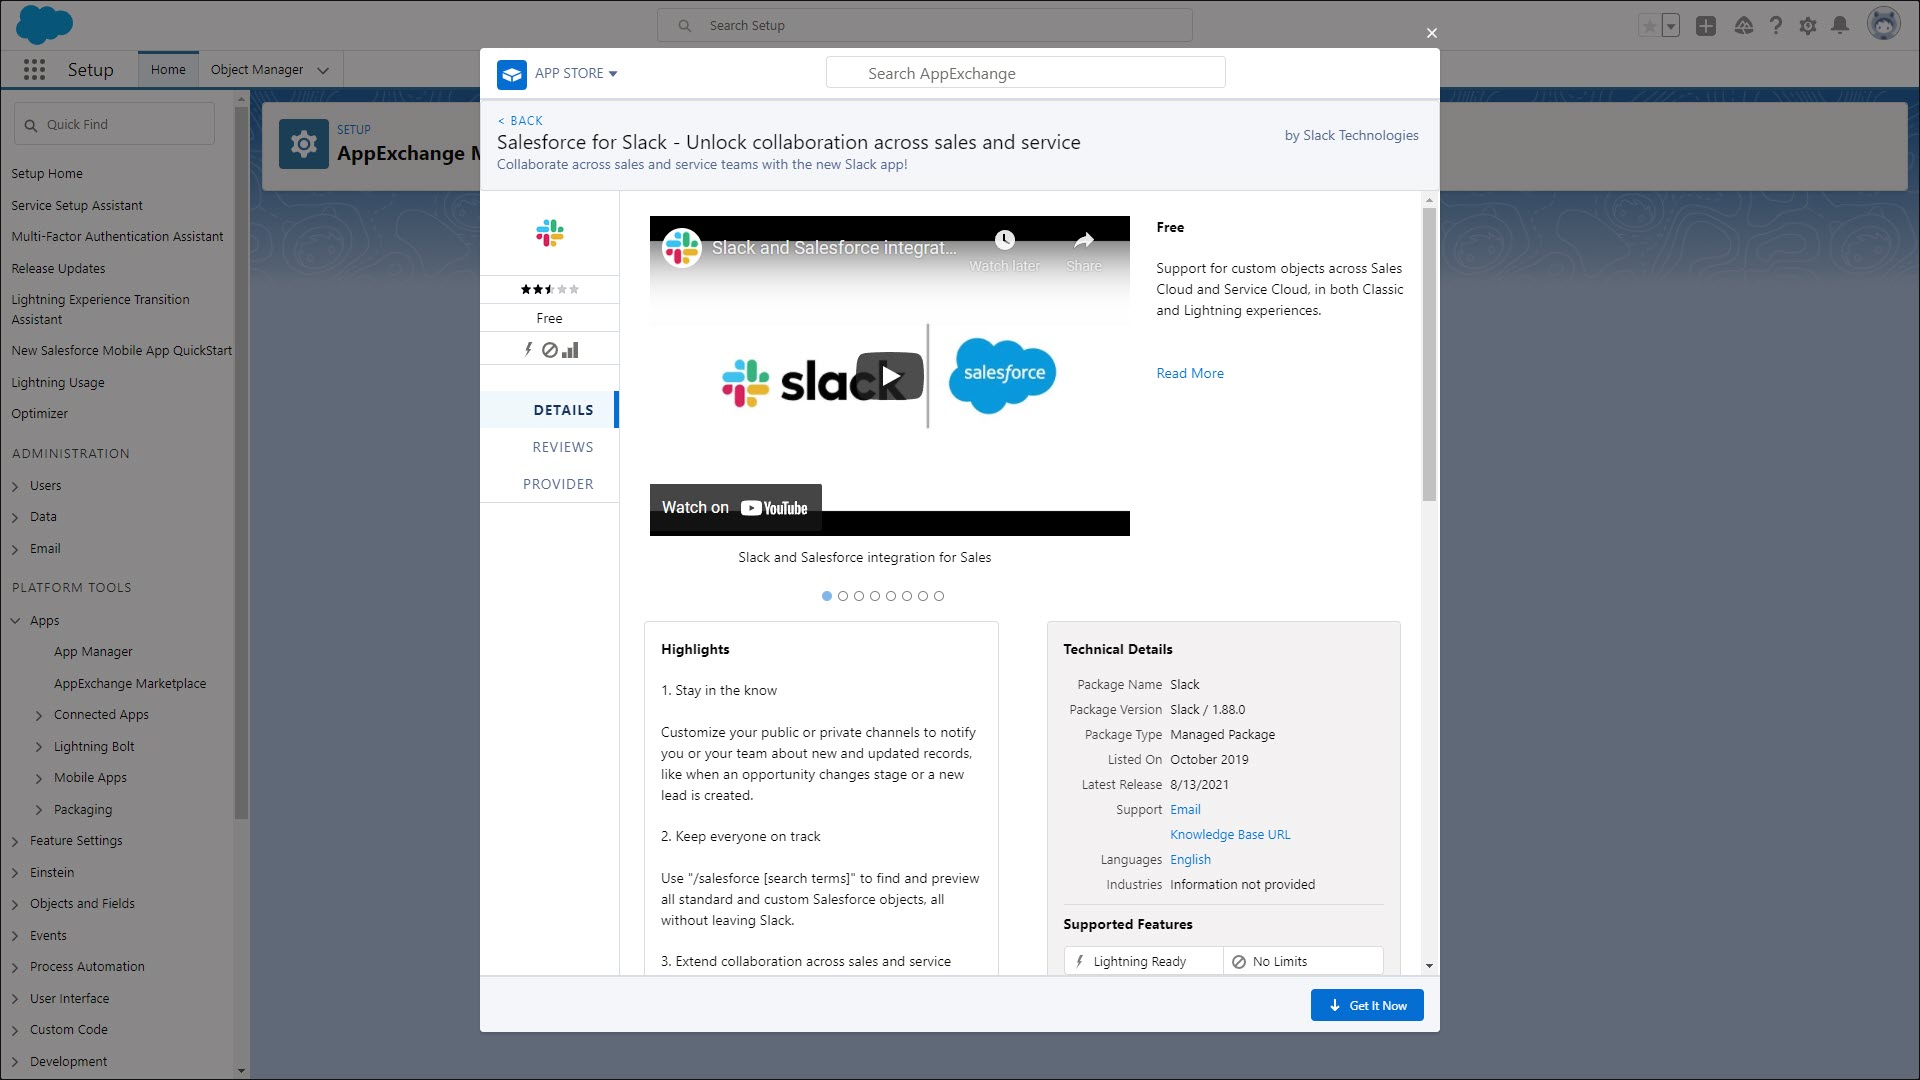
Log in to Salesforce and click on the Settings cog to the top right of the interface. In the menu, select the AppExchange Marketplace, which is found within the Apps submenu.
Here, search for Salesforce for Slack. Click on the first app, developed by Slack Technologies. Choose Get It Now. If you’re not already logged into the AppExchange, you will be asked to log in to the AppExchange using your Salesforce credentials or AppExchange account.
You have the option of installing Salesforce for Slack in your production environment or a sandbox for testing. Choose Install Here or Install in Sandbox, and click Confirm and Install.
On the next page, choose Install for Admins Only. It can take a few minutes for the application to install. If it takes over 60 seconds, you’ll instead be sent an email letting you know when the app has completed installation.
Step 2: Grant users permission to use Slack
All users who will be changing recorded data in Salesforce should be granted permission to connect to Slack. This means that when any user changes Salesforce records, notifications can be sent to Slack.
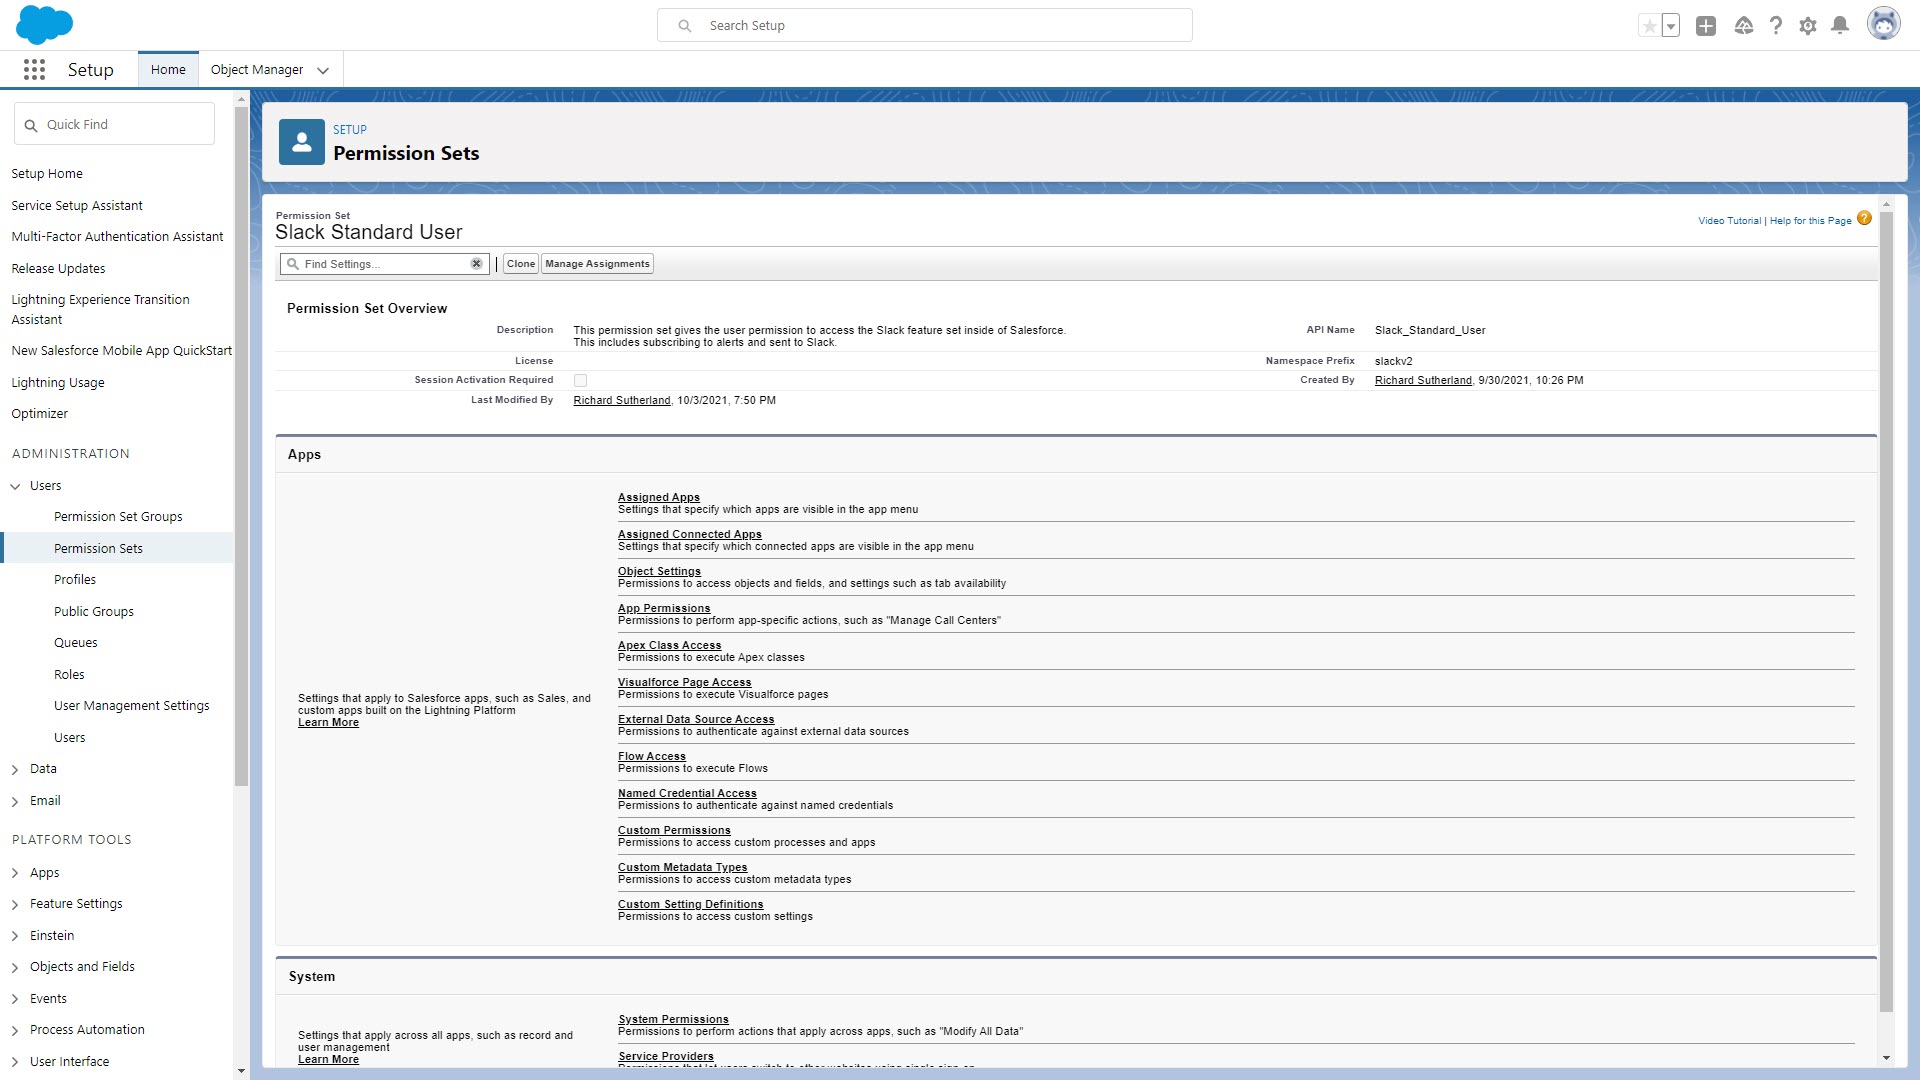
In Salesforce, hit the Settings cog again and search for Permission Sets. In the list of permission sets, click on Slack Standard User. Now click on Manage Assignments.
In the list of users presented to you, check the boxes for all users who change Salesforce records. For most companies, this will be virtually everyone who uses Salesforce. Click Add Assignments.
Step 3: Run the Slack Setup Assistant
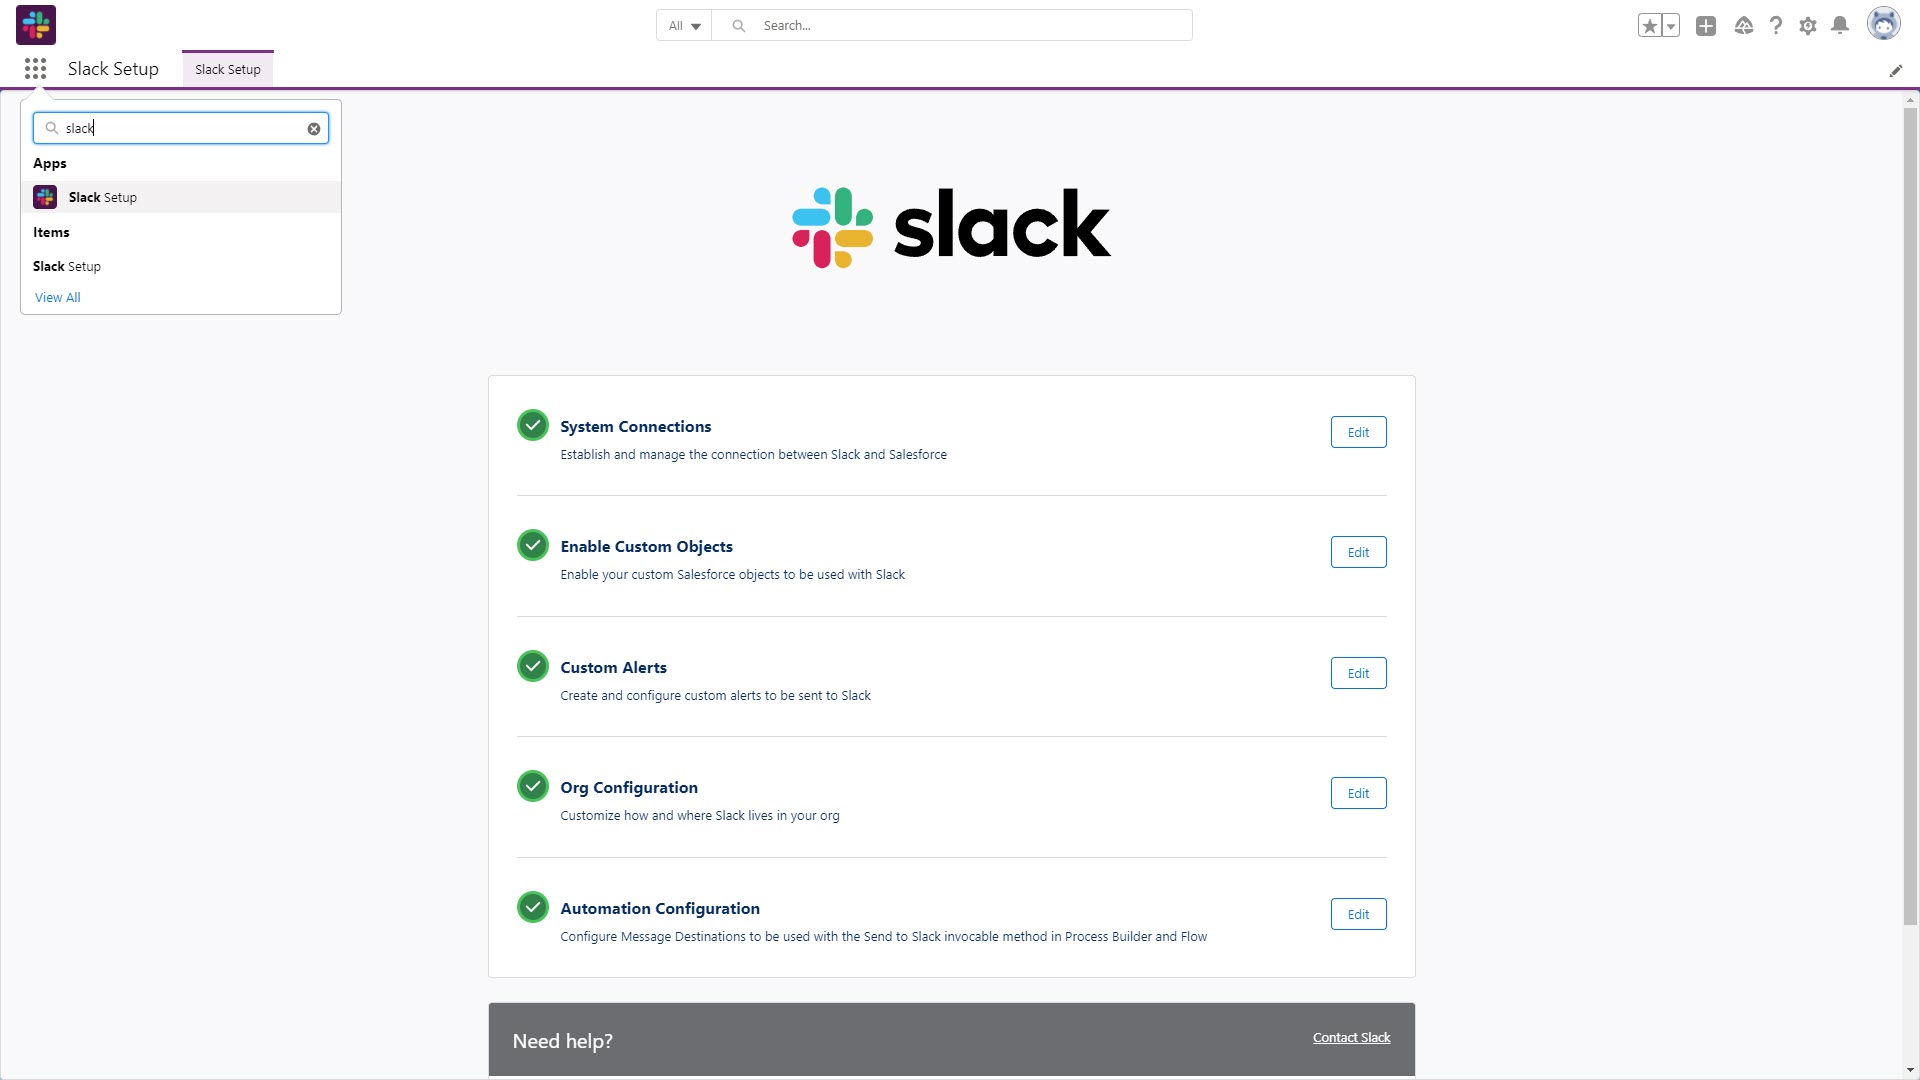
The Salesforce for Slack app has a setup wizard that you must run at least once to set up some values and connect the two applications. Most of the settings can be left as the defaults, and you can run the Slack Setup Assistant again in the future if you want to edit any fields.
To run the Slack Setup Assistant, first click on the App Launcher, which is an icon with nine dots on it to the top left of the Salesforce interface. Search for Slack Setup and select this option.
Step 4: Connect to Slack
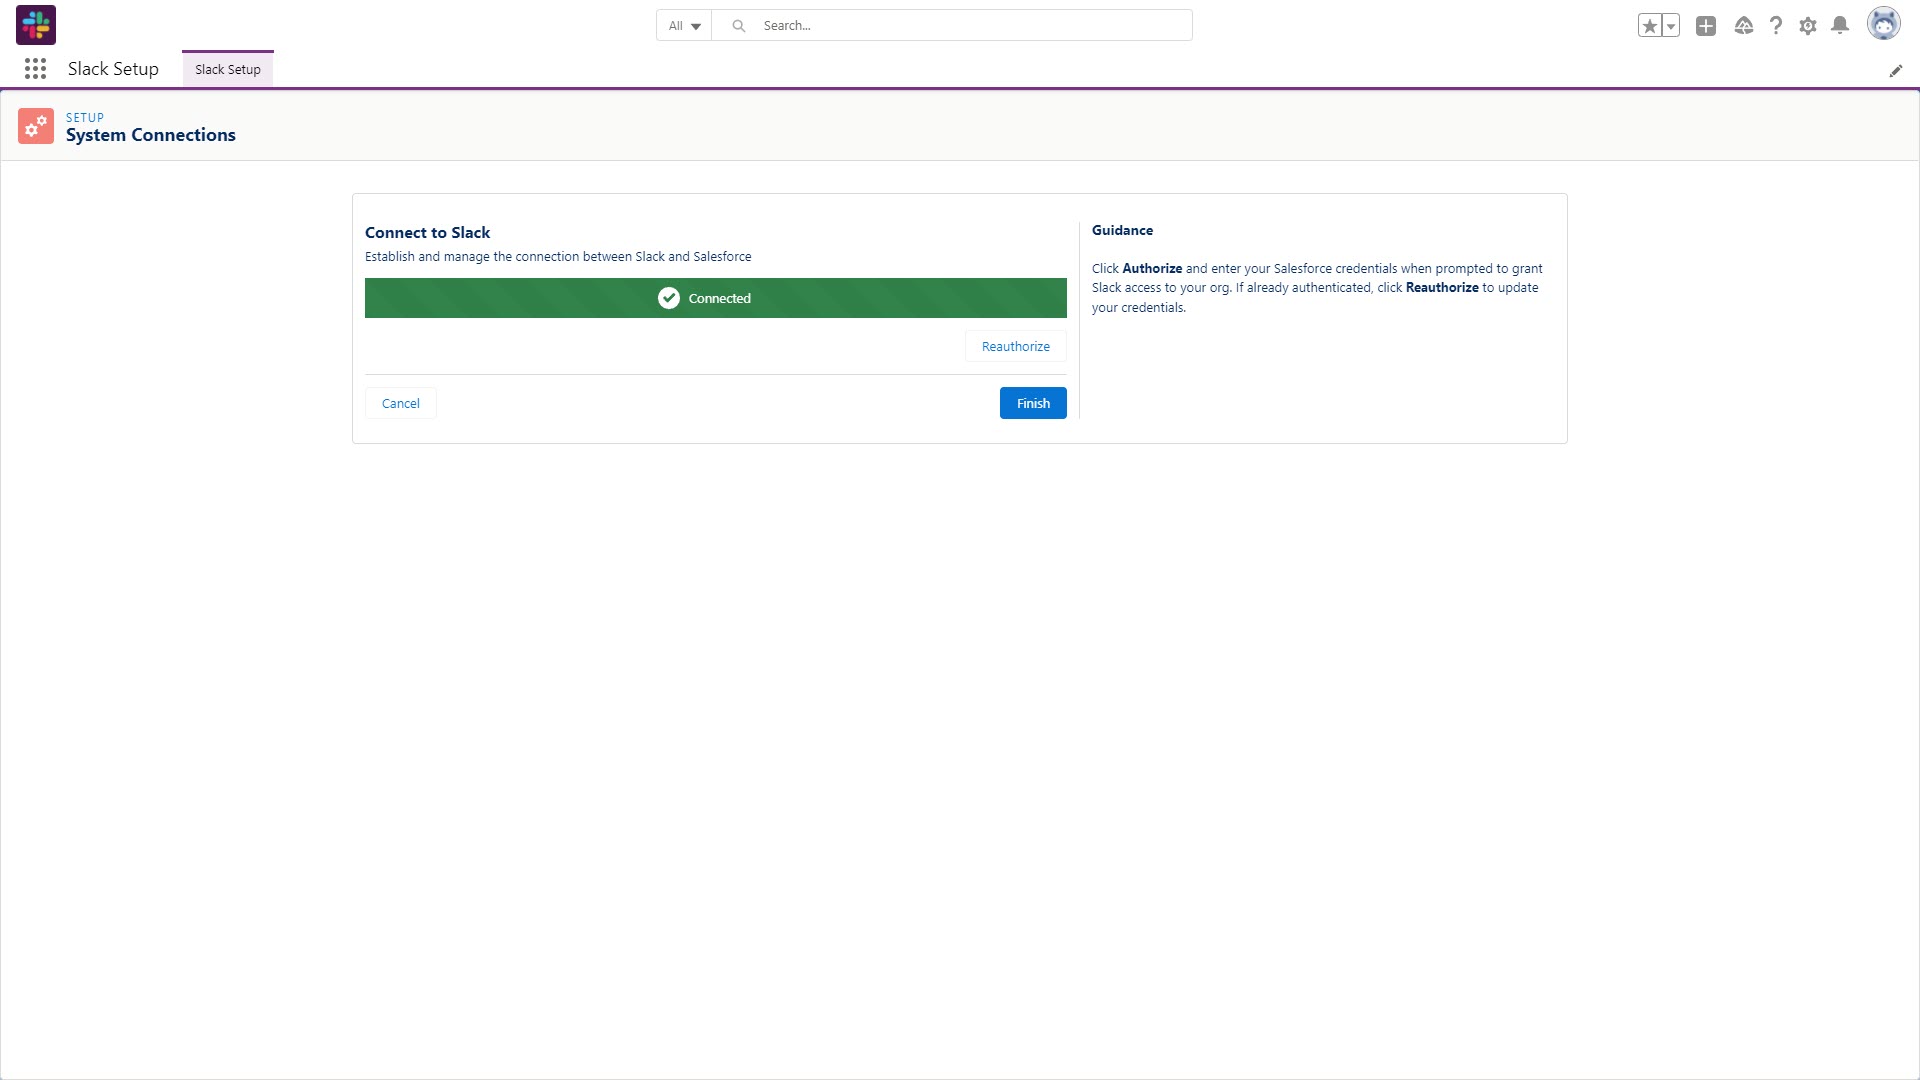
The first step of the Slack Setup Assistant establishes a connection between Slack and Salesforce. Click authorize and enter your Salesforce credentials. These credentials are only used to connect the two apps together.
Step 5: Add custom objects (optional)
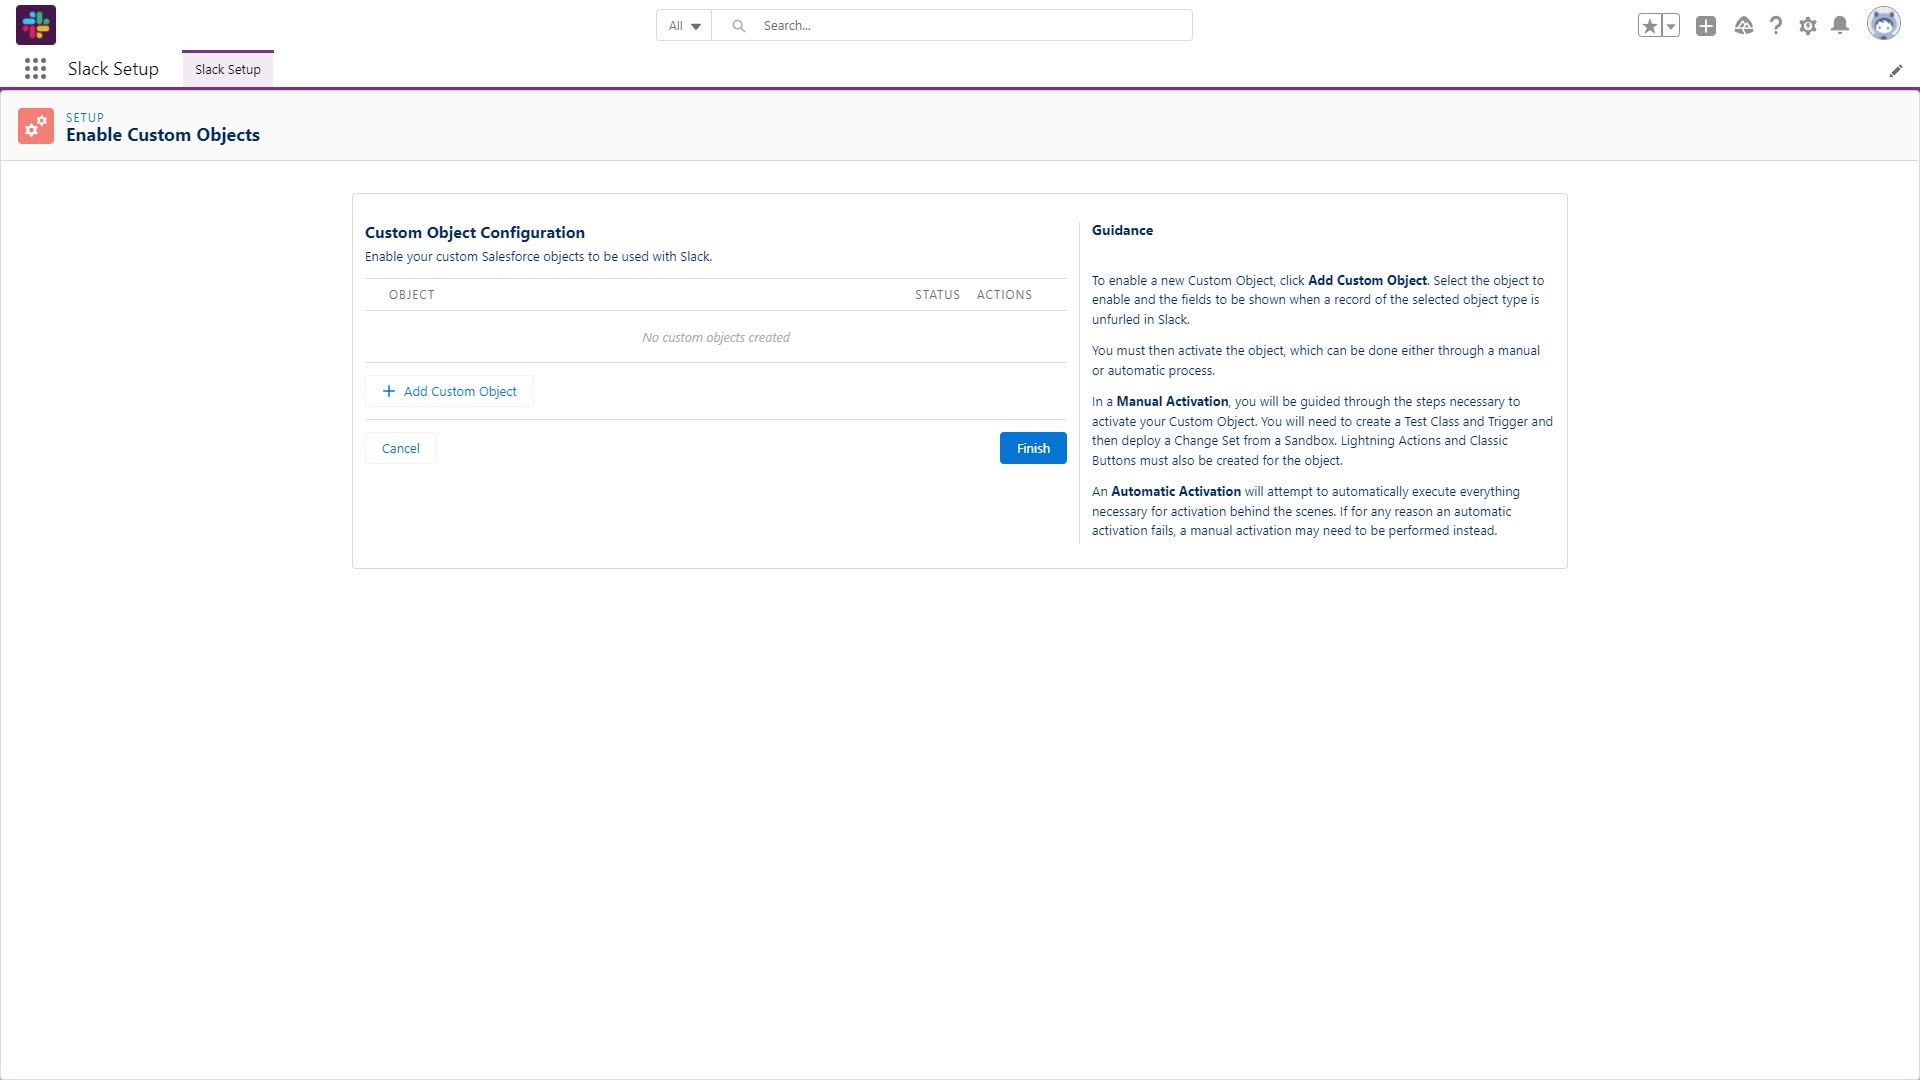
The Slack to Salesforce app will already work with standard Salesforce objects like Accounts and Leads, but if you’ve created any custom objects in Salesforce, you can add them in the second step of the wizard. This way, these custom objects can also be shared to Slack.
If you have custom objects you want to share with Slack, click Add Custom Object, search for the object name, and click Add. Otherwise, you can click Finish to skip this step.
Step 6: Add custom alerts (optional)
The Slack to Salesforce app will send some default alerts to Slack, such as when an account is assigned to a team member. It’s also possible to administer alerts from within either Slack or Salesforce – or set up some custom alerts in the next step of the wizard.
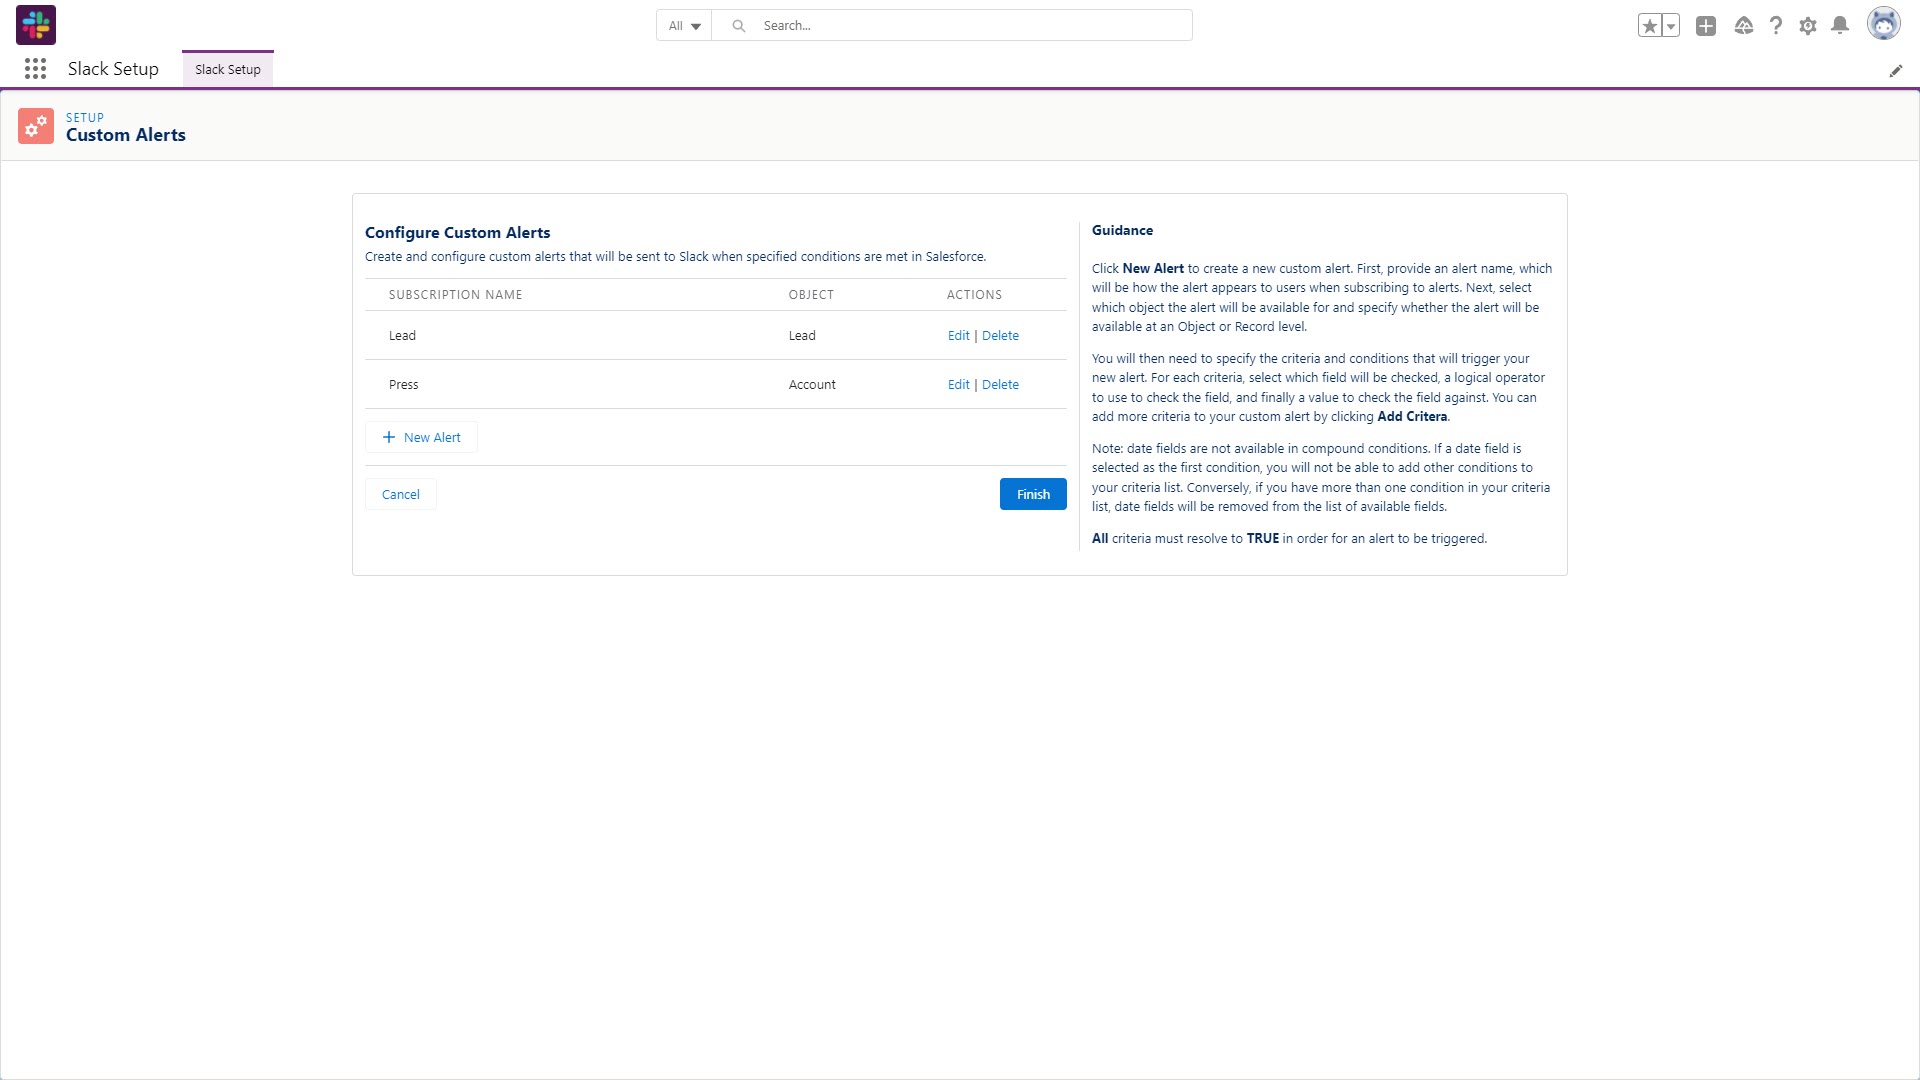
To configure custom alerts, click New Alert and give your Alert a name. Select the Salesforce object you want to be alerted about. You can choose between being alerted when any record of the selected type meets your criteria or being alerted only when a specific record meets your criteria.
Click Next, and you can choose the criteria under which the alert will be sent. For example, you can choose to send an alert when any Lead in New Jersey is flagged as Hot. You can add as many criteria as you wish and then click Save.
Step 7: Add Slack actions to Layouts (optional)
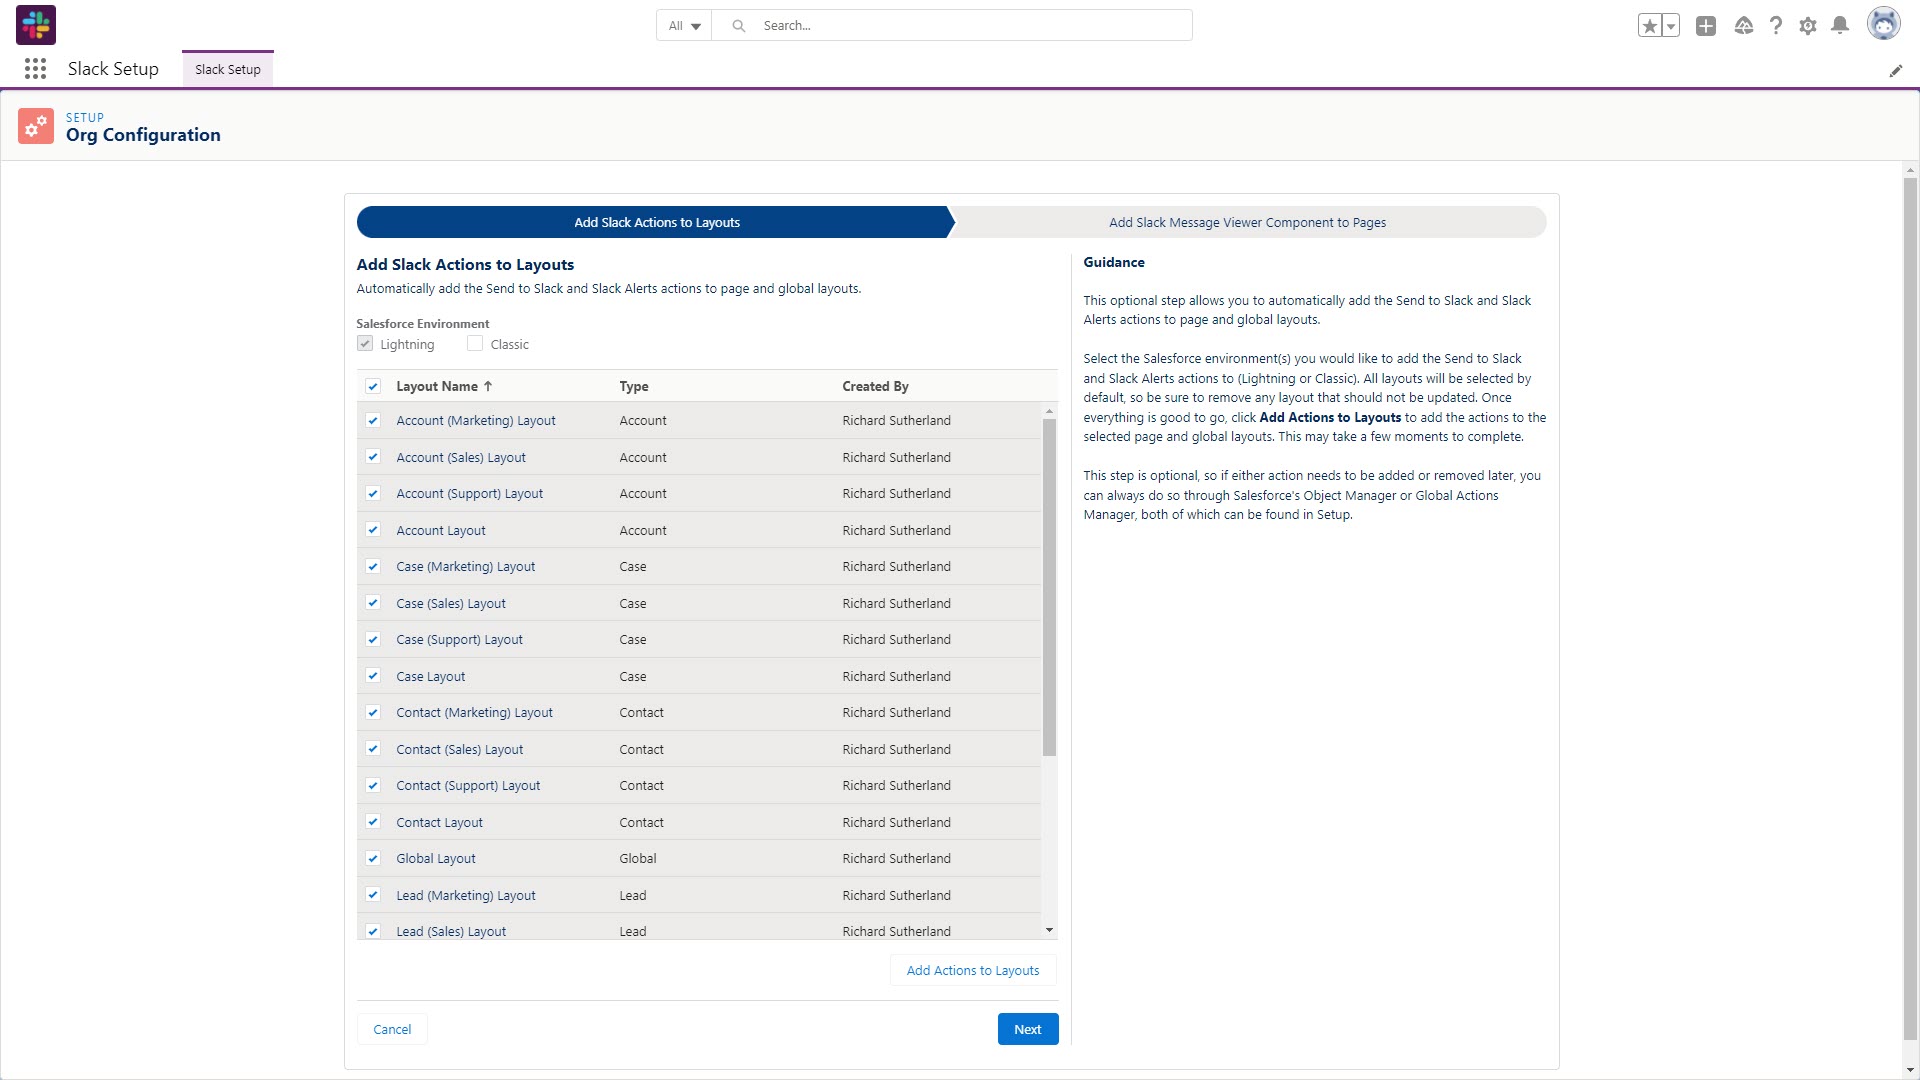
The next step of the Slack Setup Assistant app lets you add Send to Slack and Slack Alerts buttons to all the various pages you use in Salesforce. This allows team members to quickly send details of records to Slack at the touch of a button or set up alerts when a record has changed in specific ways.
Choose all the Layouts (pages) you want these buttons to appear on from the list and click Add Actions to Layouts. You can always return to the wizard and remove them in the future if you wish. Hit Next to proceed.
Step 8: Add custom message destinations (optional)
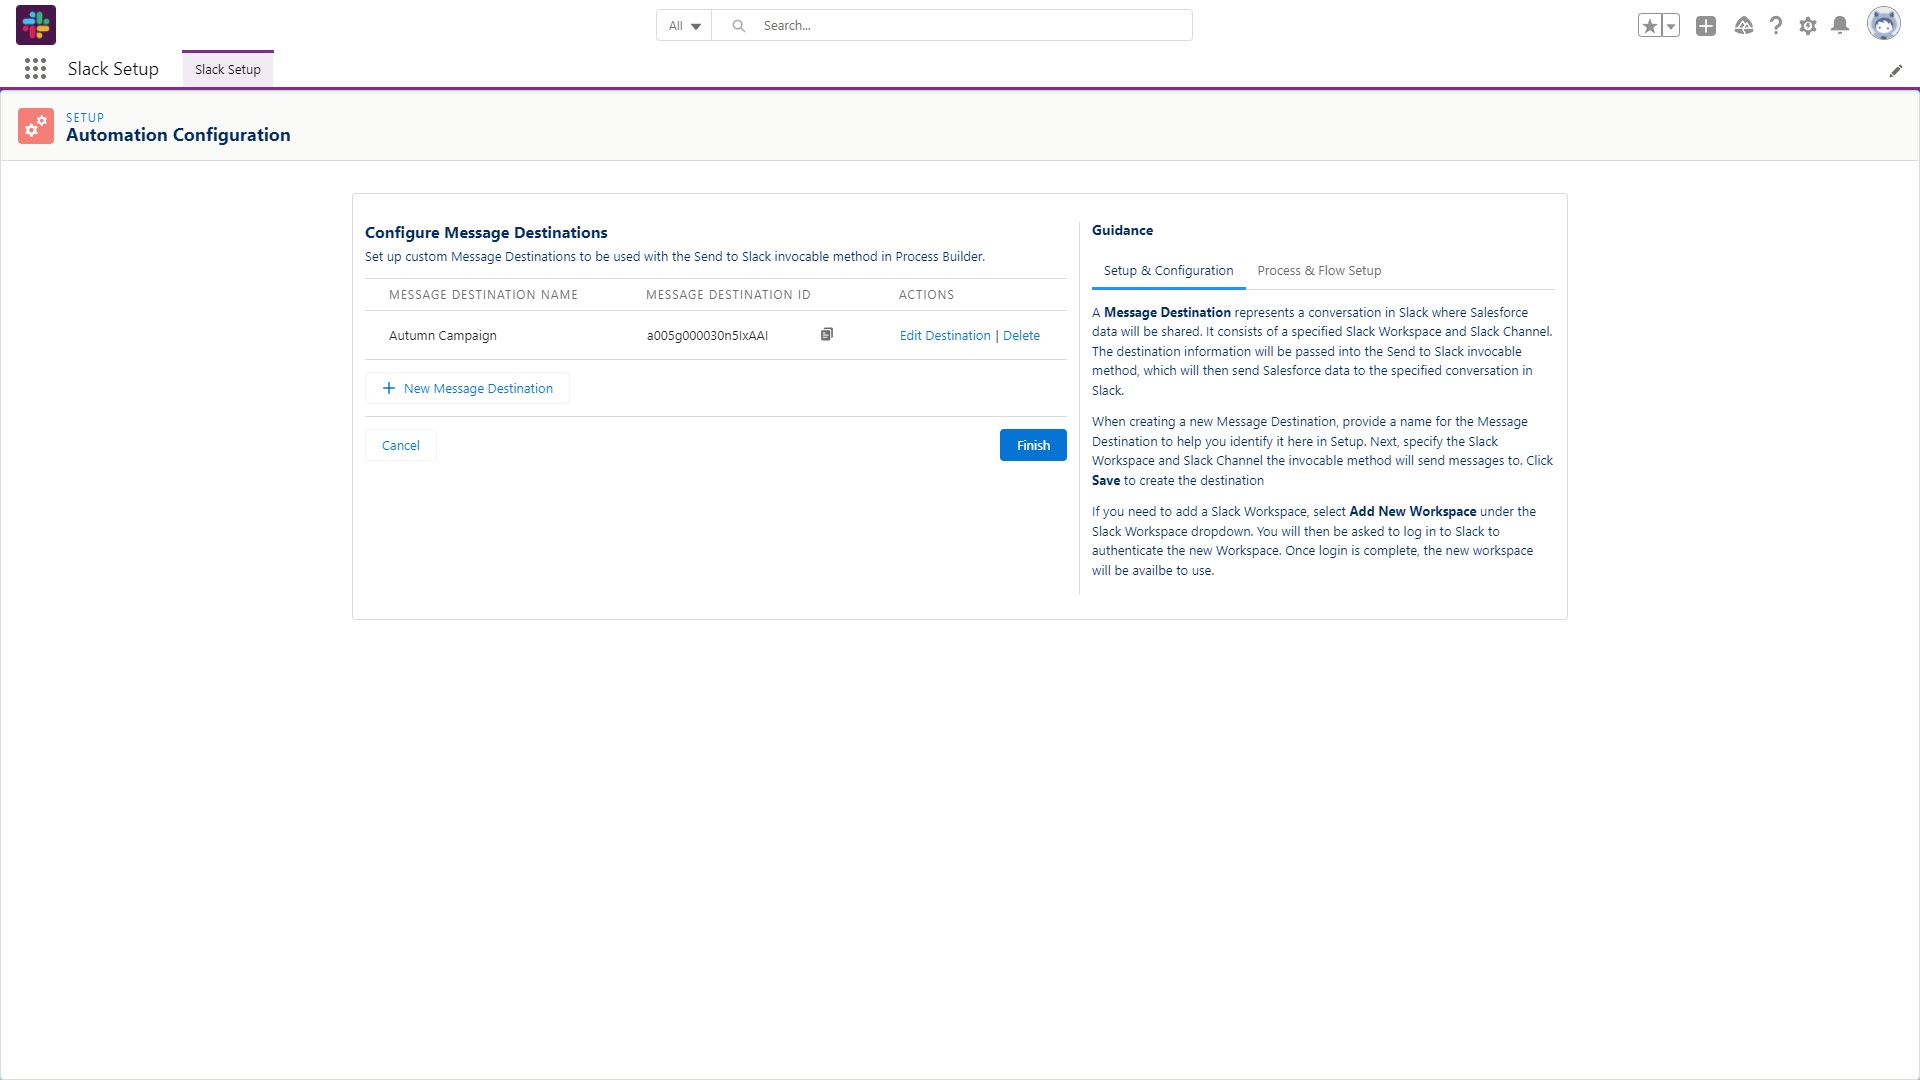
Instead of just blasting messages to the global Slack channel, you can choose to send them to particular Slack rooms. You may have different Slack rooms for sales, development, and marketing, for example, each with members who are interested in different alerts.
The easiest way to do this is to first create the Slack rooms in advance. Then, in the final step of the Slack Setup Assistant, click New Message Destination and select the Slack room from the dropdown list. Click Save.
The message destination will now appear as an option in all your alerts. Choosing this message destination in an alert will send the message to the specific Slack room instead of the global channel.
Step 9: Change how notifications are sent (optional)
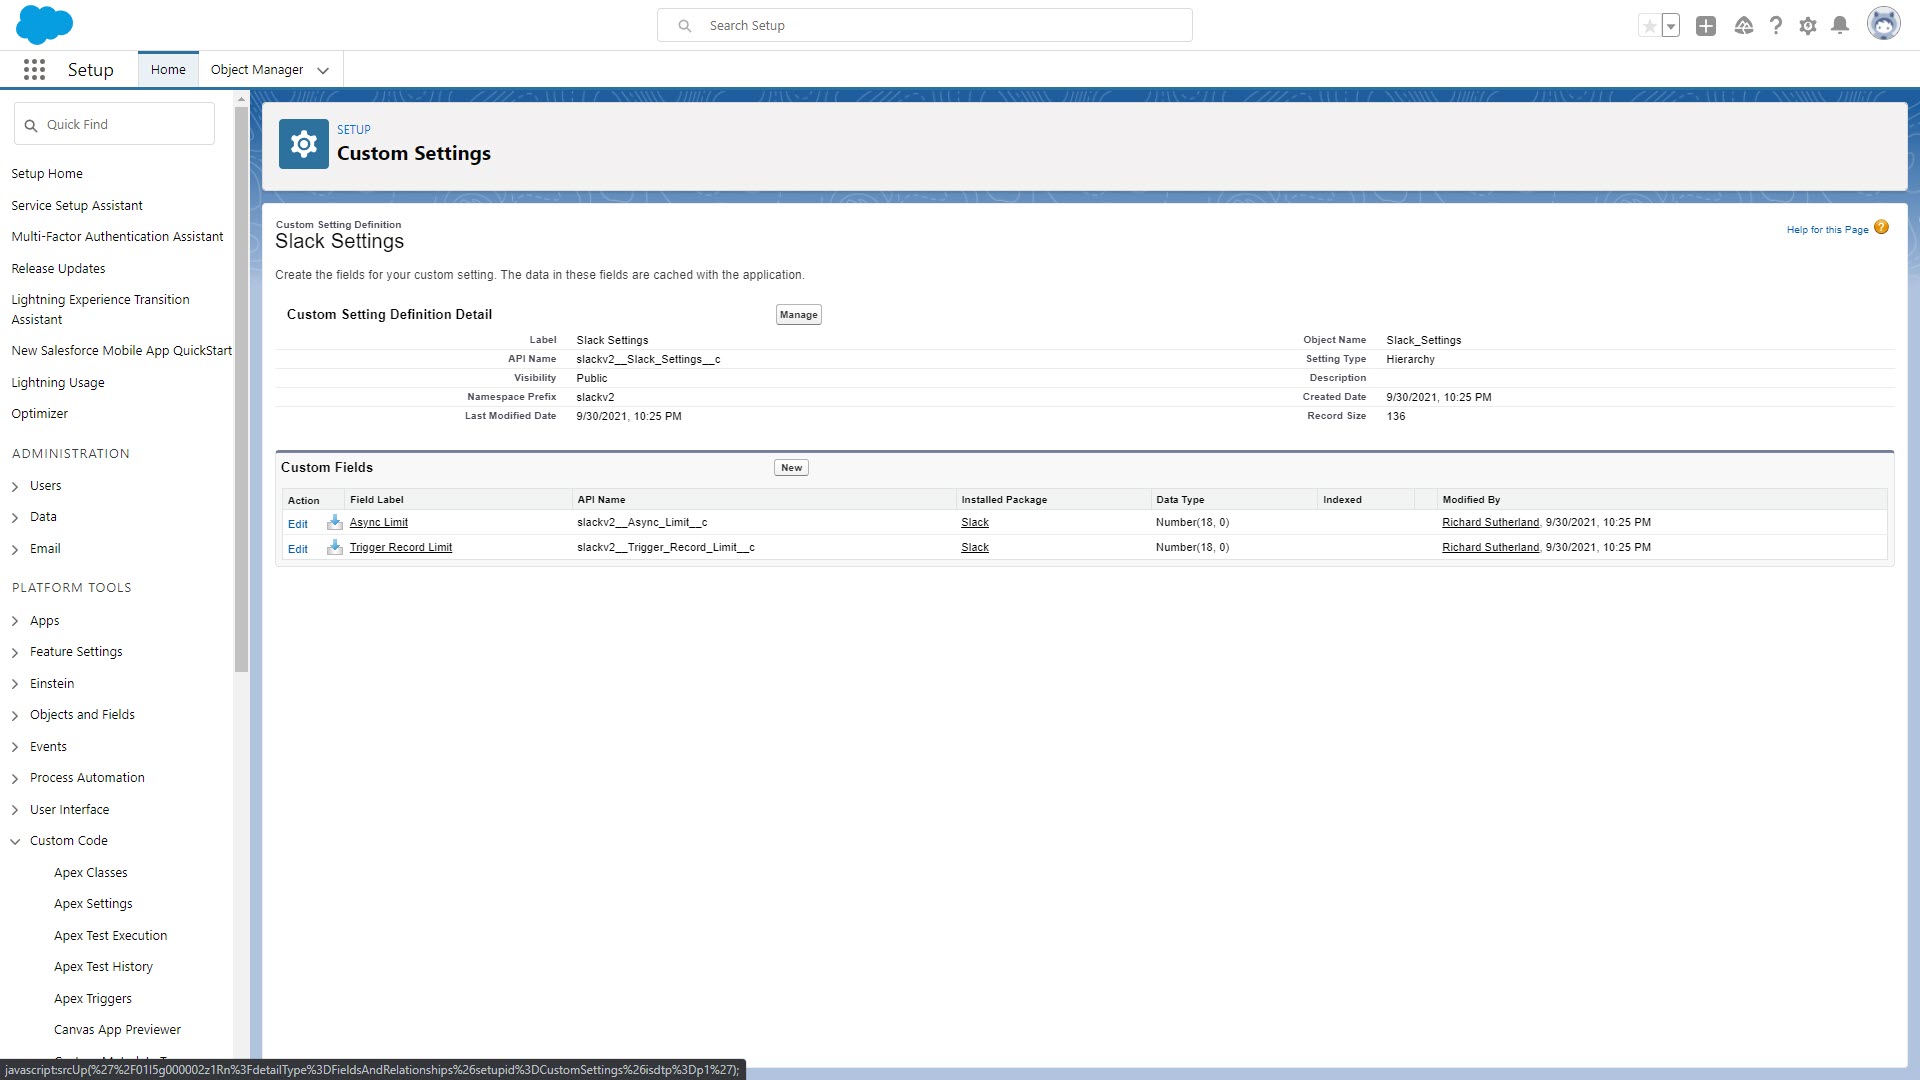
There are two further Slack settings you might want to tweak in the Salesforce settings. You’ll find them by clicking on the Settings cog, searching for Custom Settings, and clicking on Slack Settings.
Trigger Record Limit defines the maximum number of Slack messages that can be sent at the same time. You may want to limit this if you want to change hundreds of records at a time without sending Slack alerts for all of them.
Async Limit defines the number of asynchronous calls made daily between Slack and Salesforce. This can affect how quickly messages come through from one system to the other, but we recommend sticking with the default values, which are already fairly optimized.
Summary
In this guide, we’ve shown you how to integrate Salesforce and Slack using the new Salesforce for Slack app. In summary, you must install the Salesforce for Slack app in Salesforce and configure it using the Slack Setup Assistant.
Once you’ve followed these steps, records and automated alerts can be sent from Salesforce to Slack. Your employees can use Slack to query Salesforce about records and use Salesforce data to communicate effectively as a team.
More on CRMs, Salesforce, and Slack
If you’re new to Salesforce or Slack, check out our full Salesforce review and Slack review to decide whether these tools might be right for your organization.
To find out more about CRMs, read our feature What is a CRM? Or discover the best CRM for small business.
Richard brings over 20 years of website development, SEO, and marketing to the table. A graduate in Computer Science, Richard has lectured in Java programming and has built software for companies including Samsung and ASDA. Now, he writes for TechRadar, Tom's Guide, PC Gamer, and Creative Bloq.
