How to share screen on FaceTime
Enjoy greater collaboration on calls with screen sharing
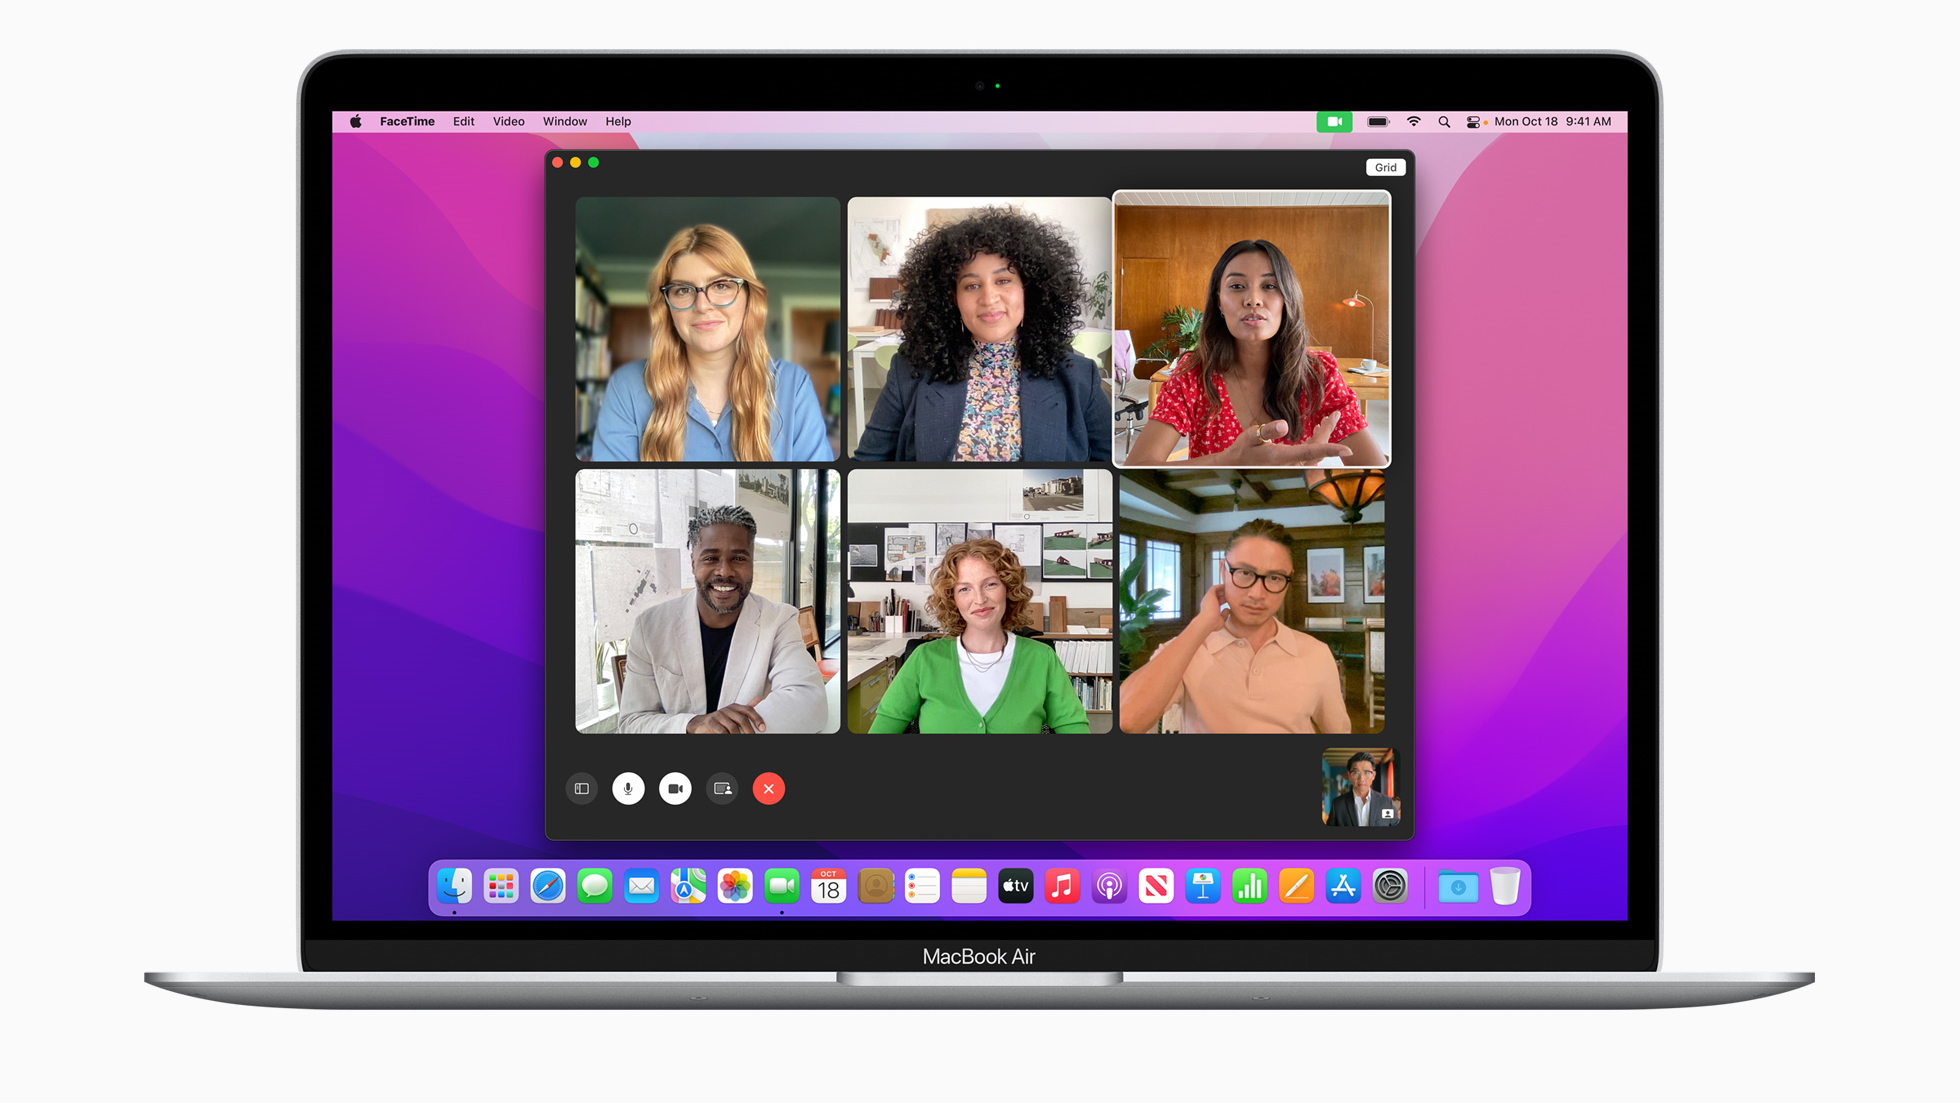
Viewing photos, watching videos together, or giving presentations — learning how to share your screen on FaceTime will make your video calls more interactive and fun.
FaceTime, Apple's video and audio calling service, integrates seamlessly with Apple devices, offering superb call quality and a smooth screen-sharing experience. Sharing your screen on FaceTime facilitates collaborative activities, allowing you to share media, review documents, or provide step-by-step guidance more effectively to participants in the call.
In this article, we'll show you how to share your screen on FaceTime using iPhone, iPad, and Mac in a few easy steps. Additionally, for those seeking serious video-calling options, we suggest exploring the best video conferencing software.
Tools and requirements
- An iPhone, iPad, or Mac
- FaceTime app
- Stable internet connection
Steps for how to share screen on FaceTime using iPhone and iPad
- Begin a FaceTime call.
- Tap the screen to reveal additional options.
- Tap the Share icon (beside the red End button at the top right).
- Select Share My Screen from the menu.
- Move out of the FaceTime app for participants to see your screen.
- To stop sharing, return to FaceTime and tap the Share icon again.
Step by step guide to share screen on FaceTime using iPhone and iPad
The steps below have been demonstrated on an iPhone, but the process is similar on iPads.
1. Initiate a FaceTime call
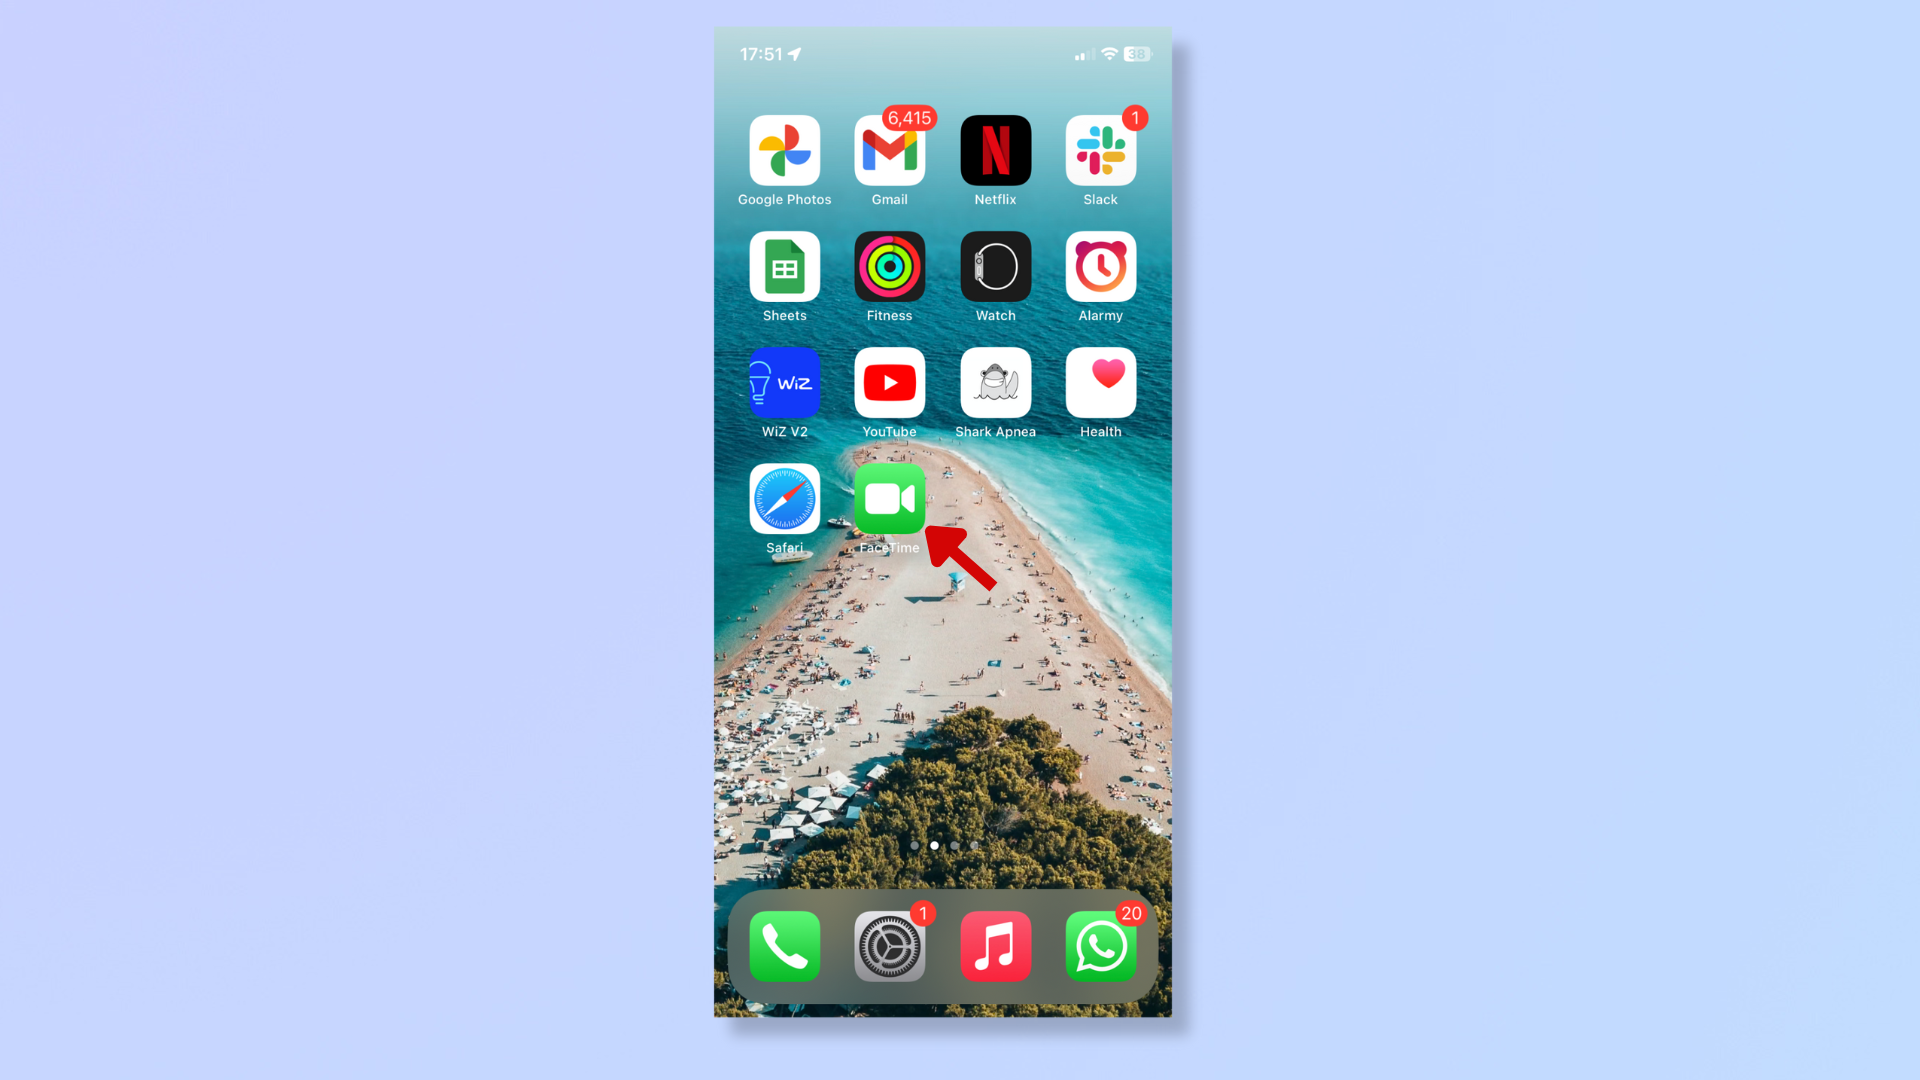
Launch FaceTime on your Apple device and tap the contact(s) you wish to call.
2. Tap the Share icon
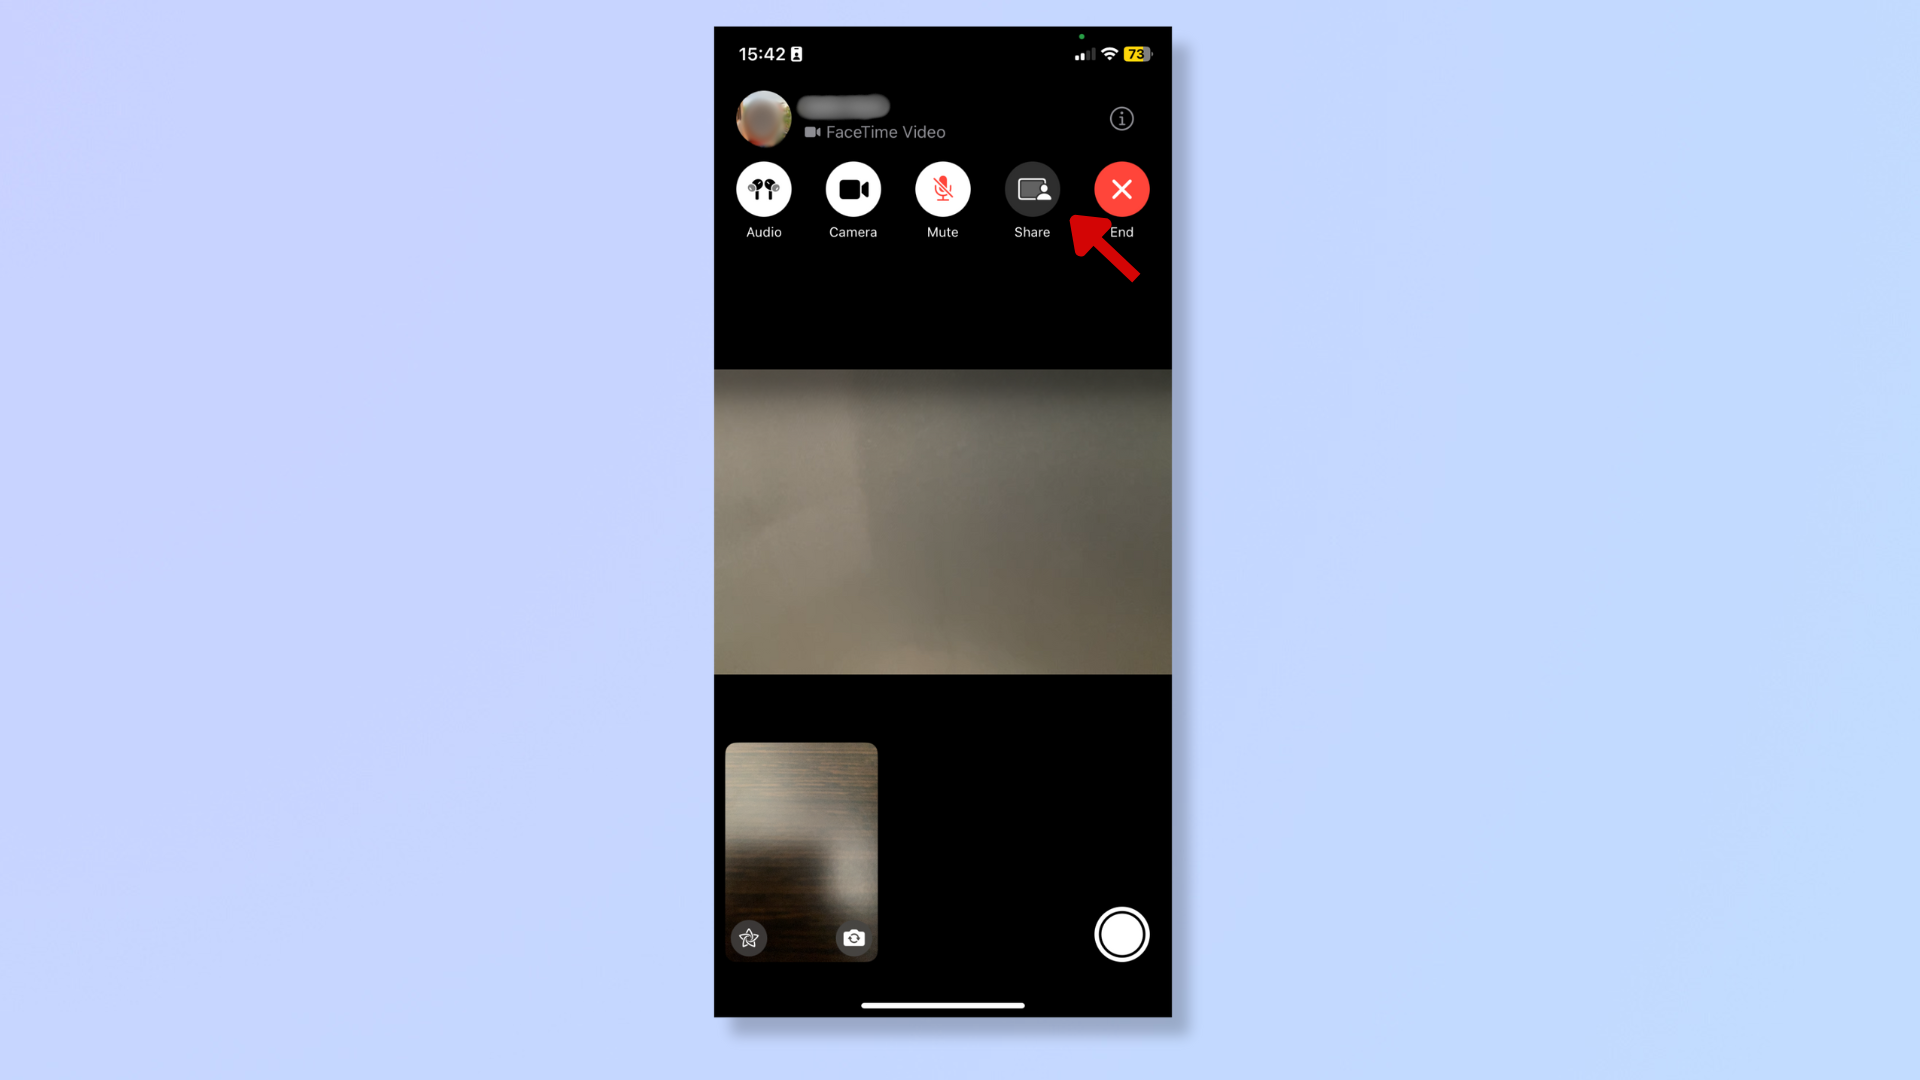
Once the call is active, tap anywhere on the screen to bring up the additional options (if they aren’t already visible). Tap the Share icon beside the red End icon (towards the top right on iPhones and bottom left on iPads).
3. Select Share My Screen
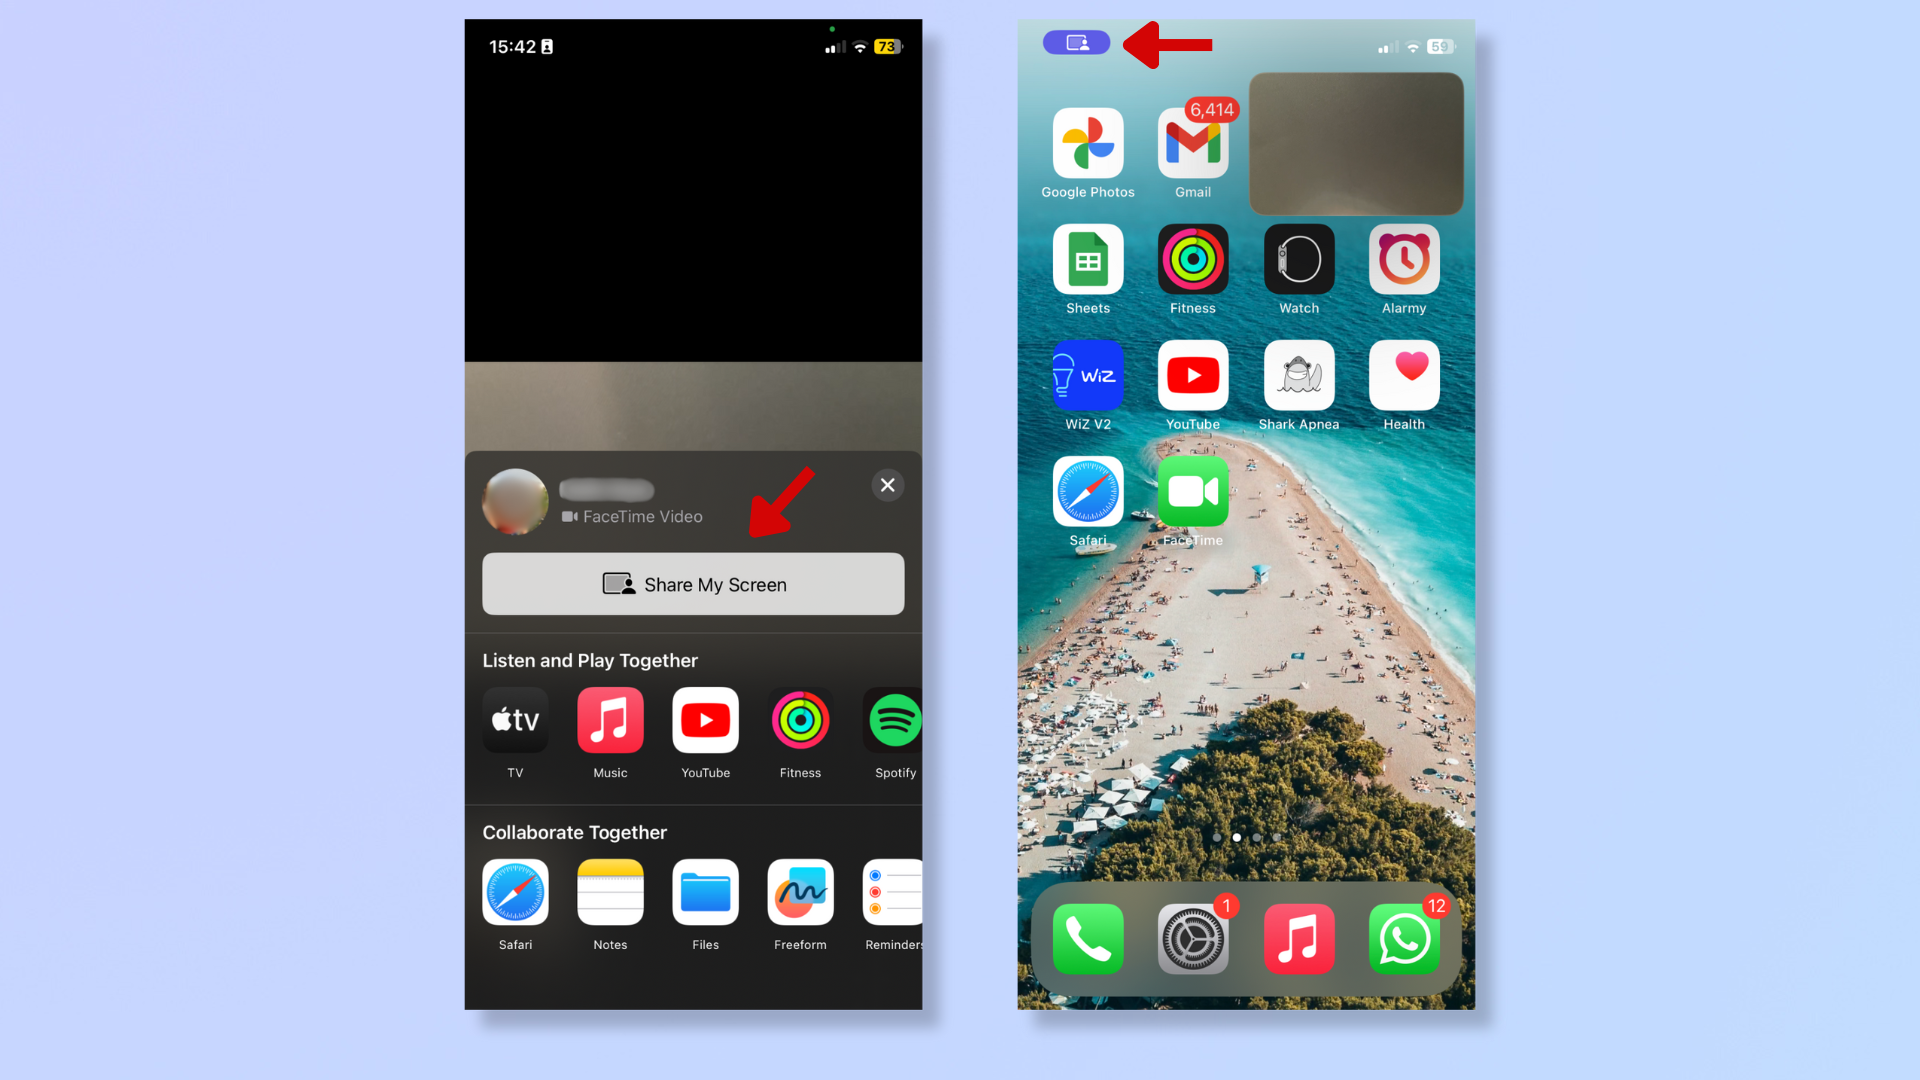
A menu will appear with various apps that support sharing. Tap Share My Screen, which is at the top of the menu, and after a 3-second countdown, the screen sharing will begin.
On iPhones, the camera will turn off during screen sharing.
When you move out of the FaceTime app while sharing the screen, you’ll find a purple share icon at the top-left corner of your iPhone (or the top-right corner of your iPad), indicating that screen sharing is active.
To end screen sharing, return to the FaceTime app and tap the Share icon again.
Steps for how to share screen on FaceTime using Mac
- Begin a FaceTime call.
- Click the Share icon (beside the red X button at the bottom left).
- Click Screen.
- Click anywhere on the screen to begin screen sharing.
- To stop sharing, click the purple share icon and select Stop Sharing.
Step by step guide to share screen on FaceTime using Mac
1. Start a FaceTime call
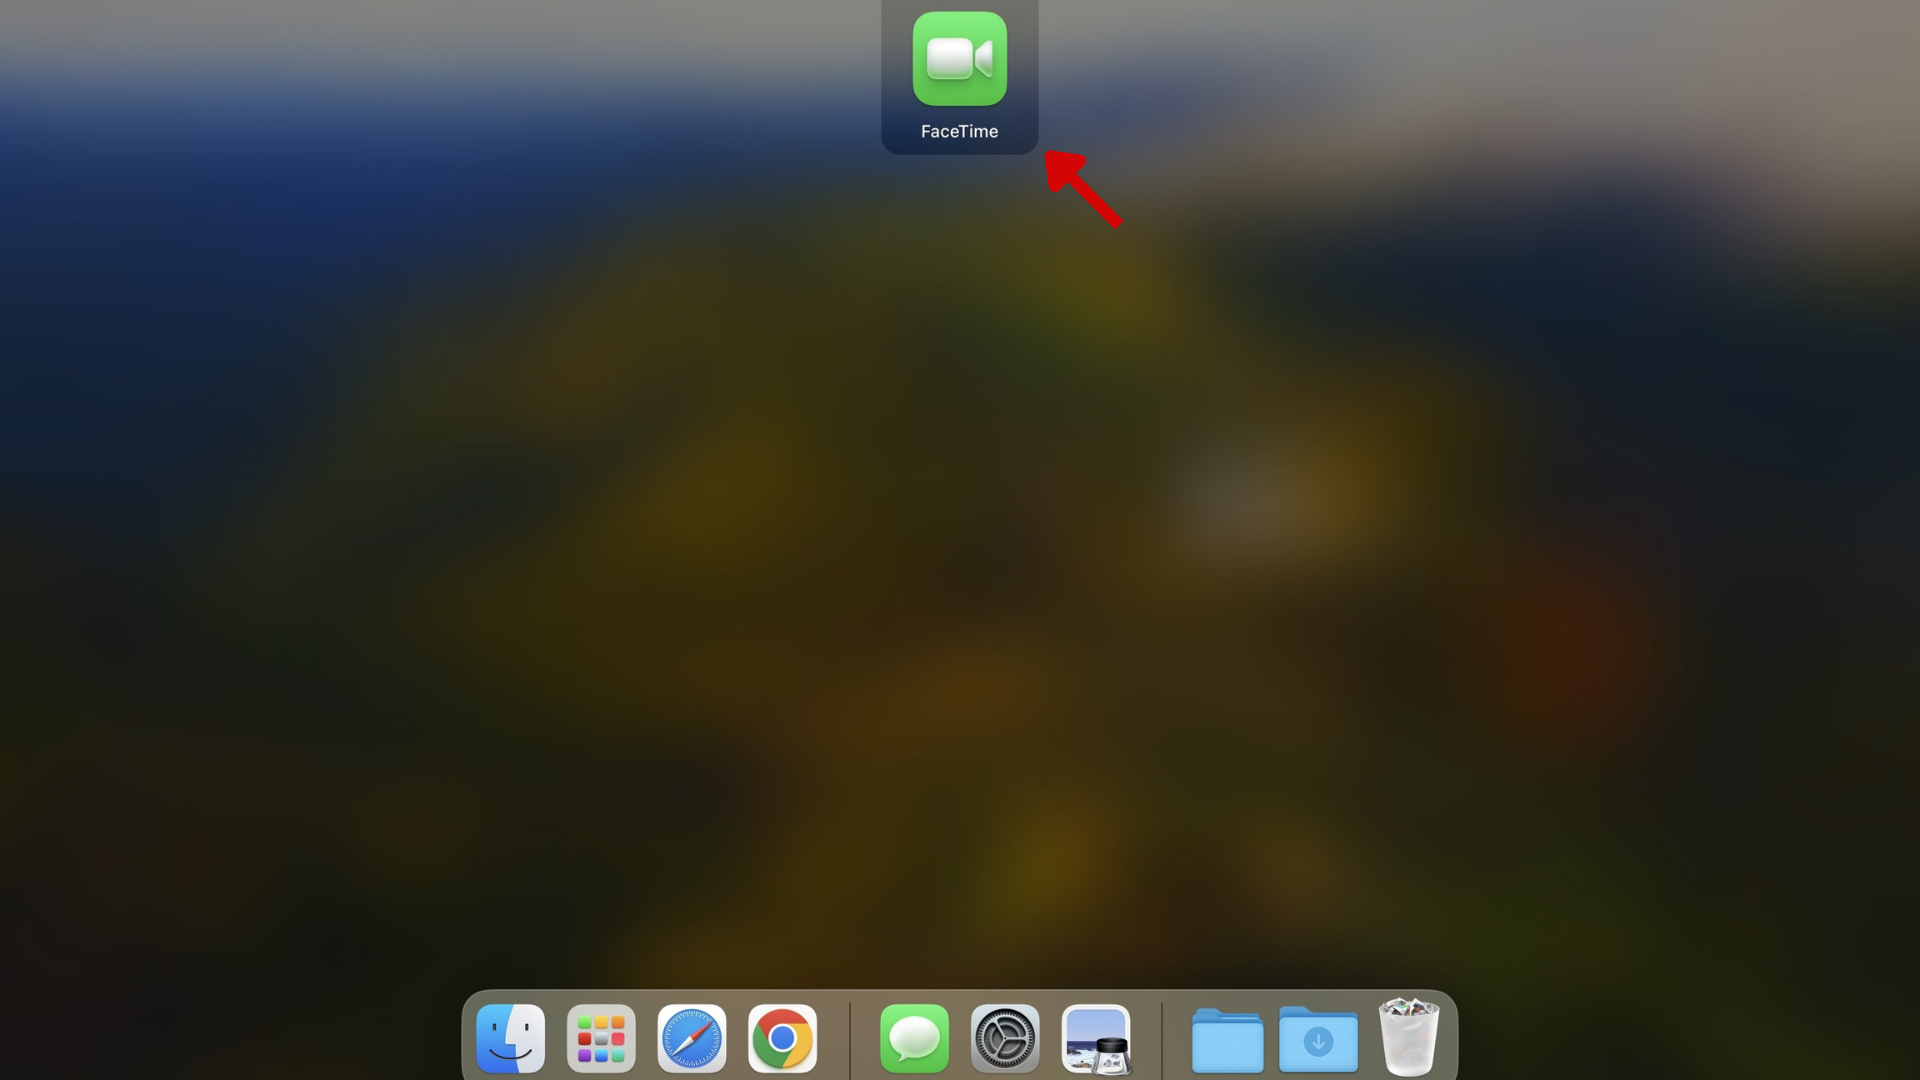
Open FaceTime on your Mac and begin a call.
2. Click the Share icon
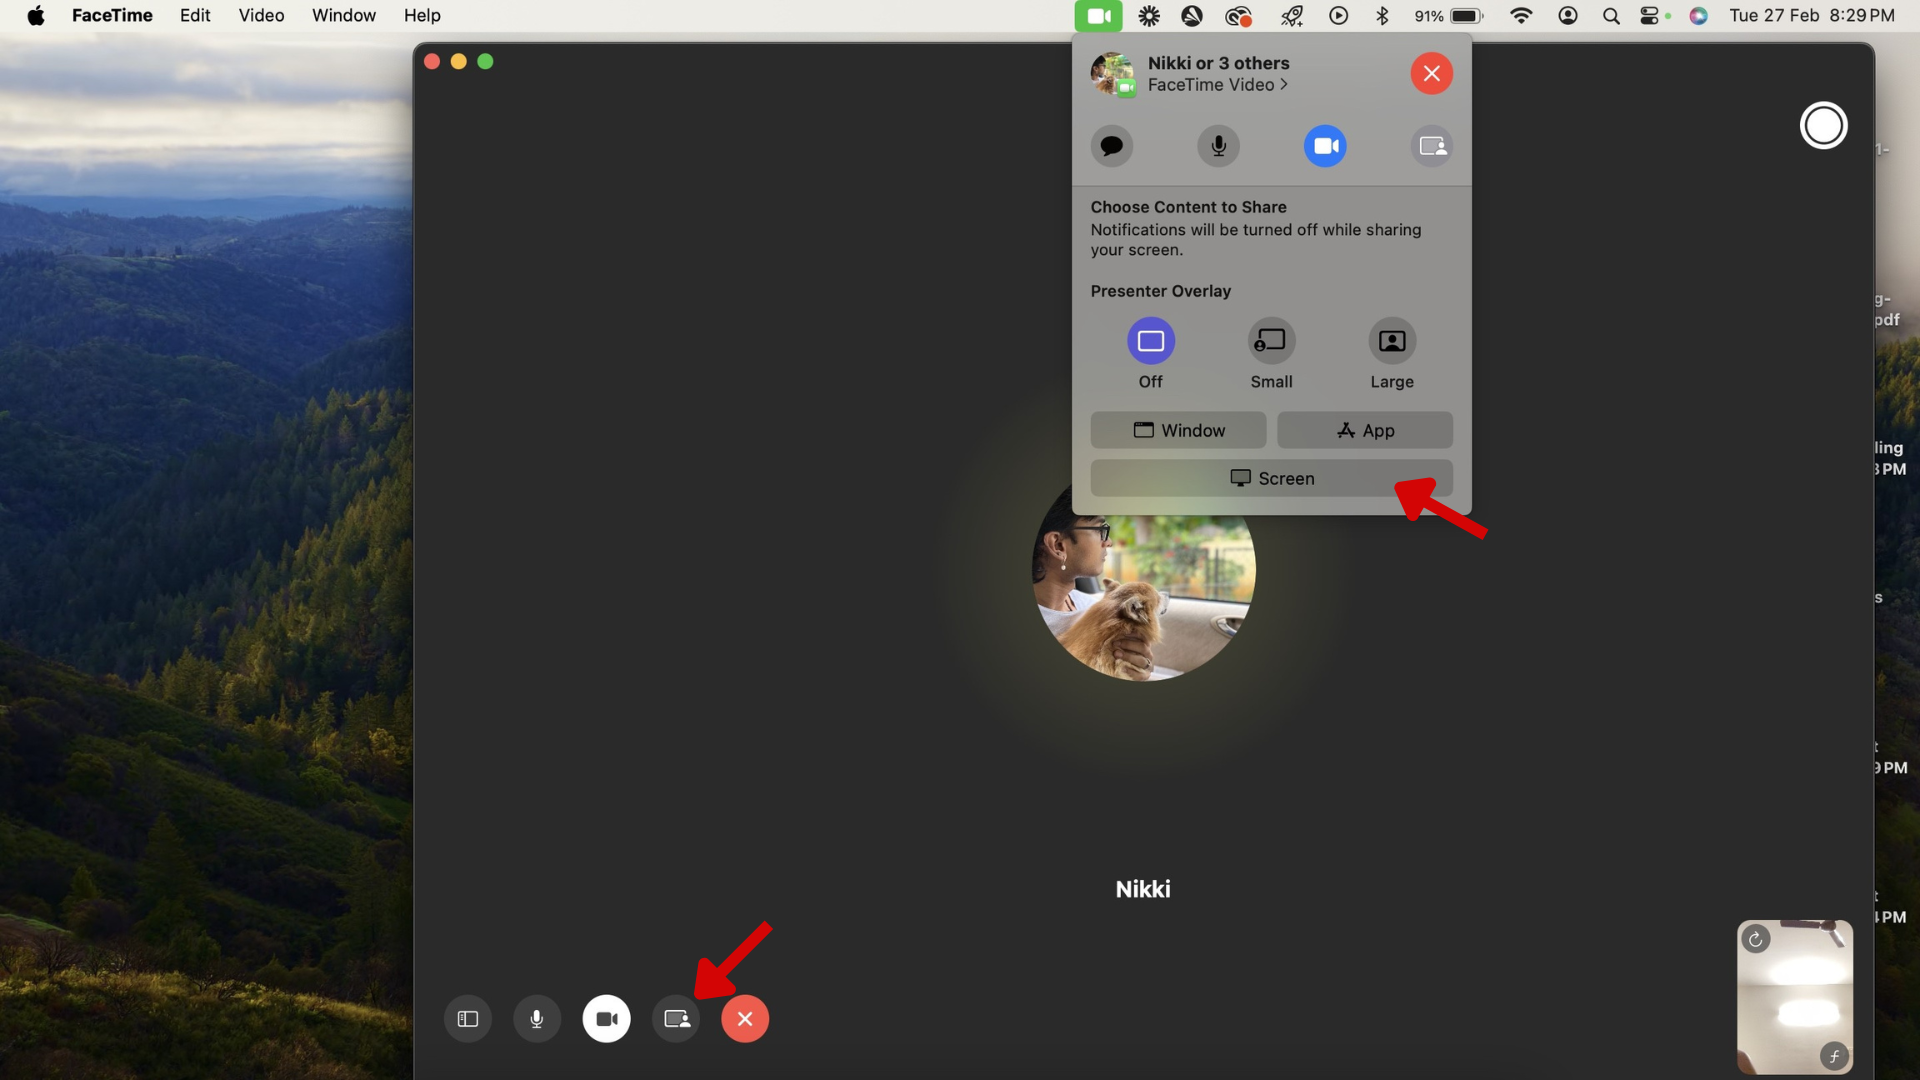
Click the Share icon beside the red X icon in your FaceTime window (bottom left), and a new menu will drop down from the menu bar at the top.
Click Screen, which sits at the bottom of the new menu.
3. Share screen
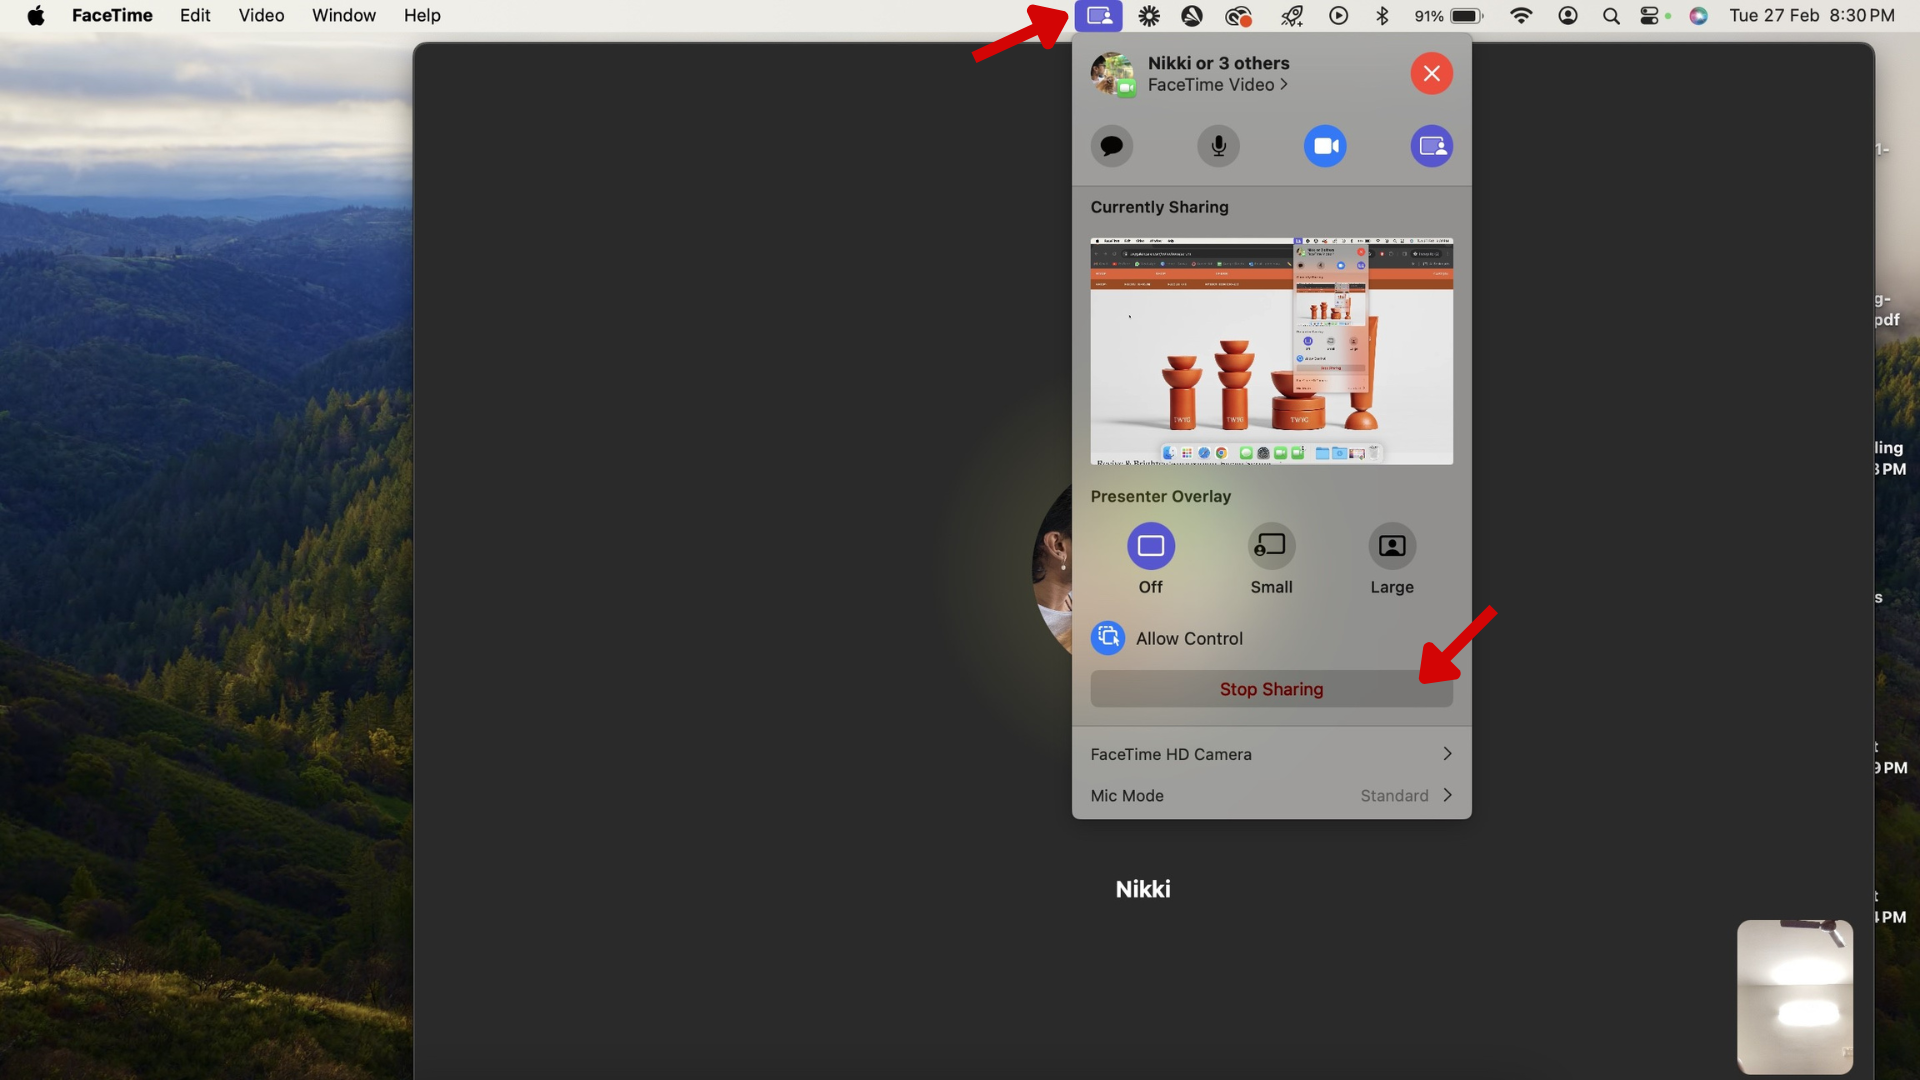
Click anywhere on the screen to begin screen sharing. A purple share icon will appear in the menu bar to indicate you’re sharing your screen.
To end screen share, select the purple share icon and click Stop Sharing.
If screen-sharing isn’t working on your Mac, check if it’s enabled by heading to System Settings > General > Sharing > Screen Sharing (Toggle on).
Final thoughts
Screen sharing on FaceTime brings excellent versatility to the already superb calling experience, with new possibilities for collaboration and sharing. It enhances clarity in communication for work calls and adds a dash of fun to your personal calls. Remember that for a seamless experience, all participants should have compatible devices that are updated to the latest OS.
For more tips on iOS devices, check out our guides on how to use a mouse on your iPad, how to set parental controls on iPad, and how to use Visual Look Up on iPhone.
Get daily insight, inspiration and deals in your inbox
Sign up for breaking news, reviews, opinion, top tech deals, and more.
Nikshep Myle is a freelance writer covering tech, health, and wellbeing. He has written for popular tech blogs like Tom's Guide, GadgetReview, SlashGear, and Creative Bloq, and has extensively reviewed consumer gadgets. When he’s not writing, you’ll find him meditating, gaming, discovering new music, and indulging in adventurous and creative pursuits.