How to start your own help desk with Hesk
A leading self-hosted help desk solution

Hesk is a free, self-hosted help desk program. It includes tools to help you create a rich knowledge base, respond to customer queries fast and efficiently, and track ongoing issues.
As a self-hosted program, Hesk can be more difficult to get started with than some popular alternatives, yet it’s a powerful option that’s worth considering. We’ve created this step-by-step guide to help you get started.
How to start your own help desk with Hesk: Preparation
Before you can use Hesk, you should purchase hosting, which will provide the server infrastructure and processing power to run Hesk. We used Hostinger for this how-to guide—a popular host with a selection of hosting options for all budgets.
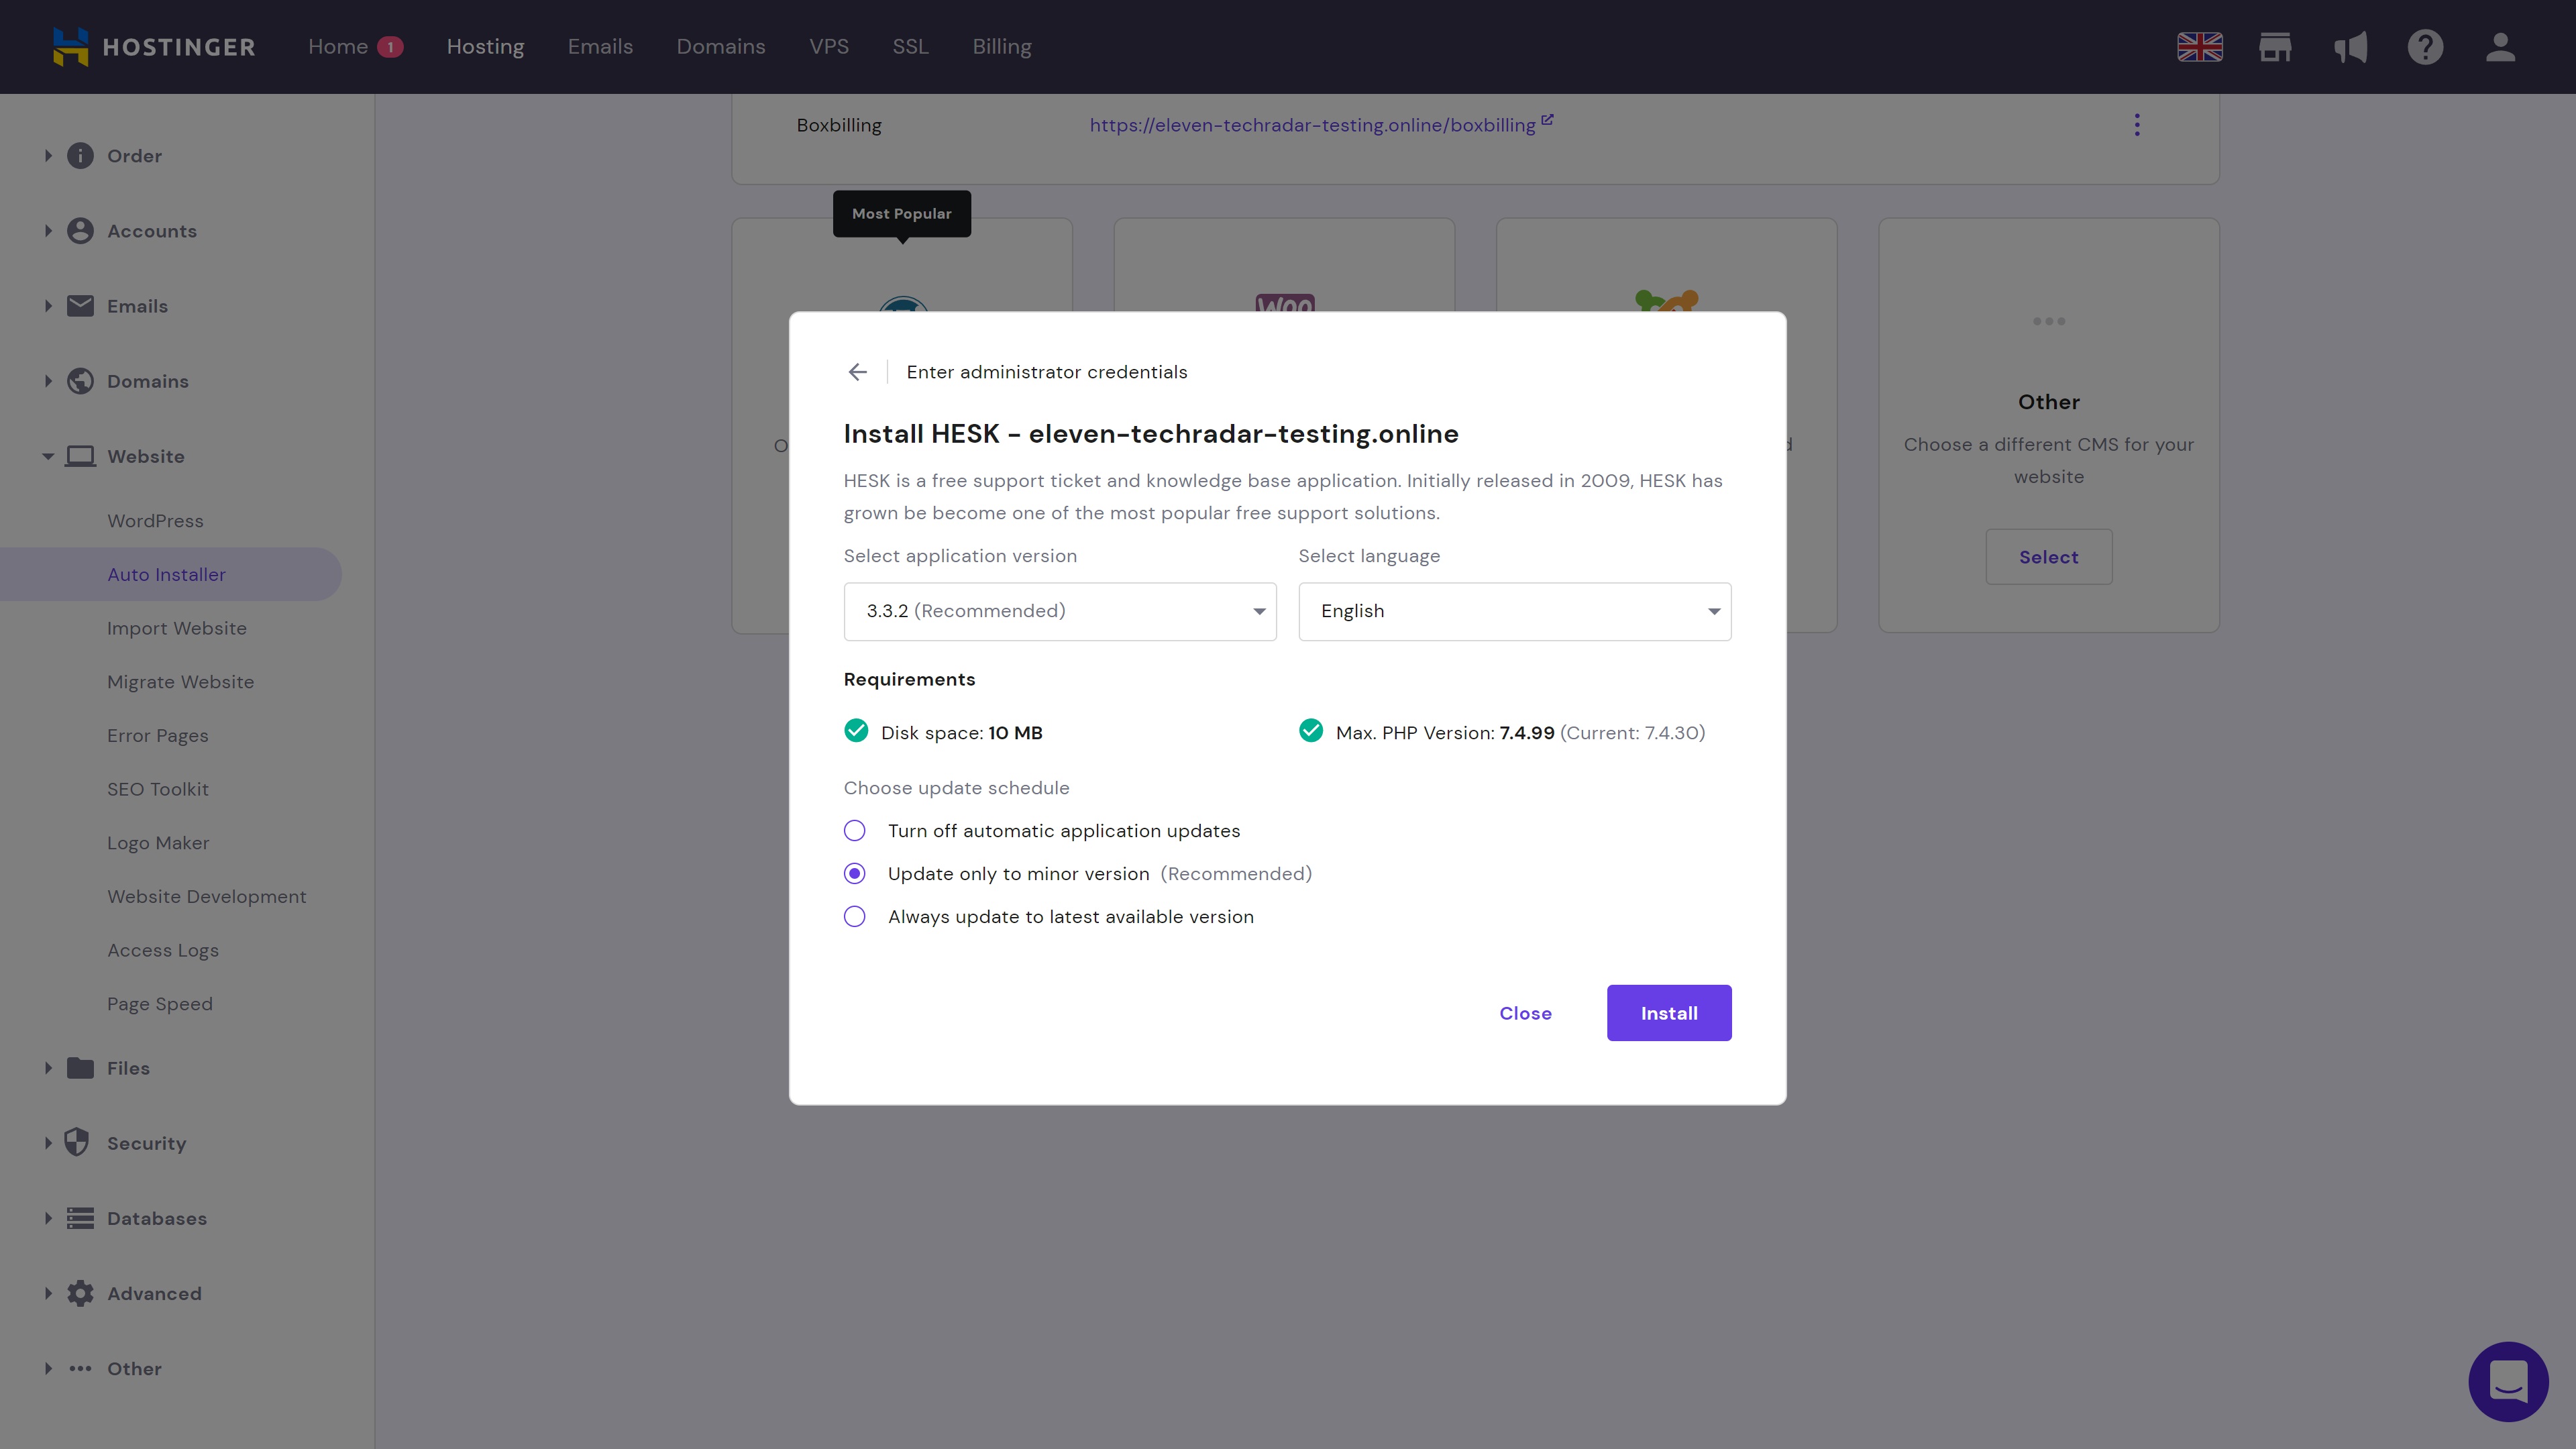
Once your hosting plan is in place, you should install Hesk on your server. Hostinger, like most leading hosts, comes with a useful Auto Installer tool that makes it super easy to install scripts like Hesk. You can find the Auto Installer in your Hostinger hPanel control panel. It includes an impressive selection of management tools to help you maintain control of your installations.
Installing Hesk shouldn’t take you more than a couple of minutes, and more detailed instructions are available in the Hostinger knowledge base if you need them. If your host doesn’t support one-click installation, you will have to install the program manually, which is a little more difficult.
Step 1: Create your profile
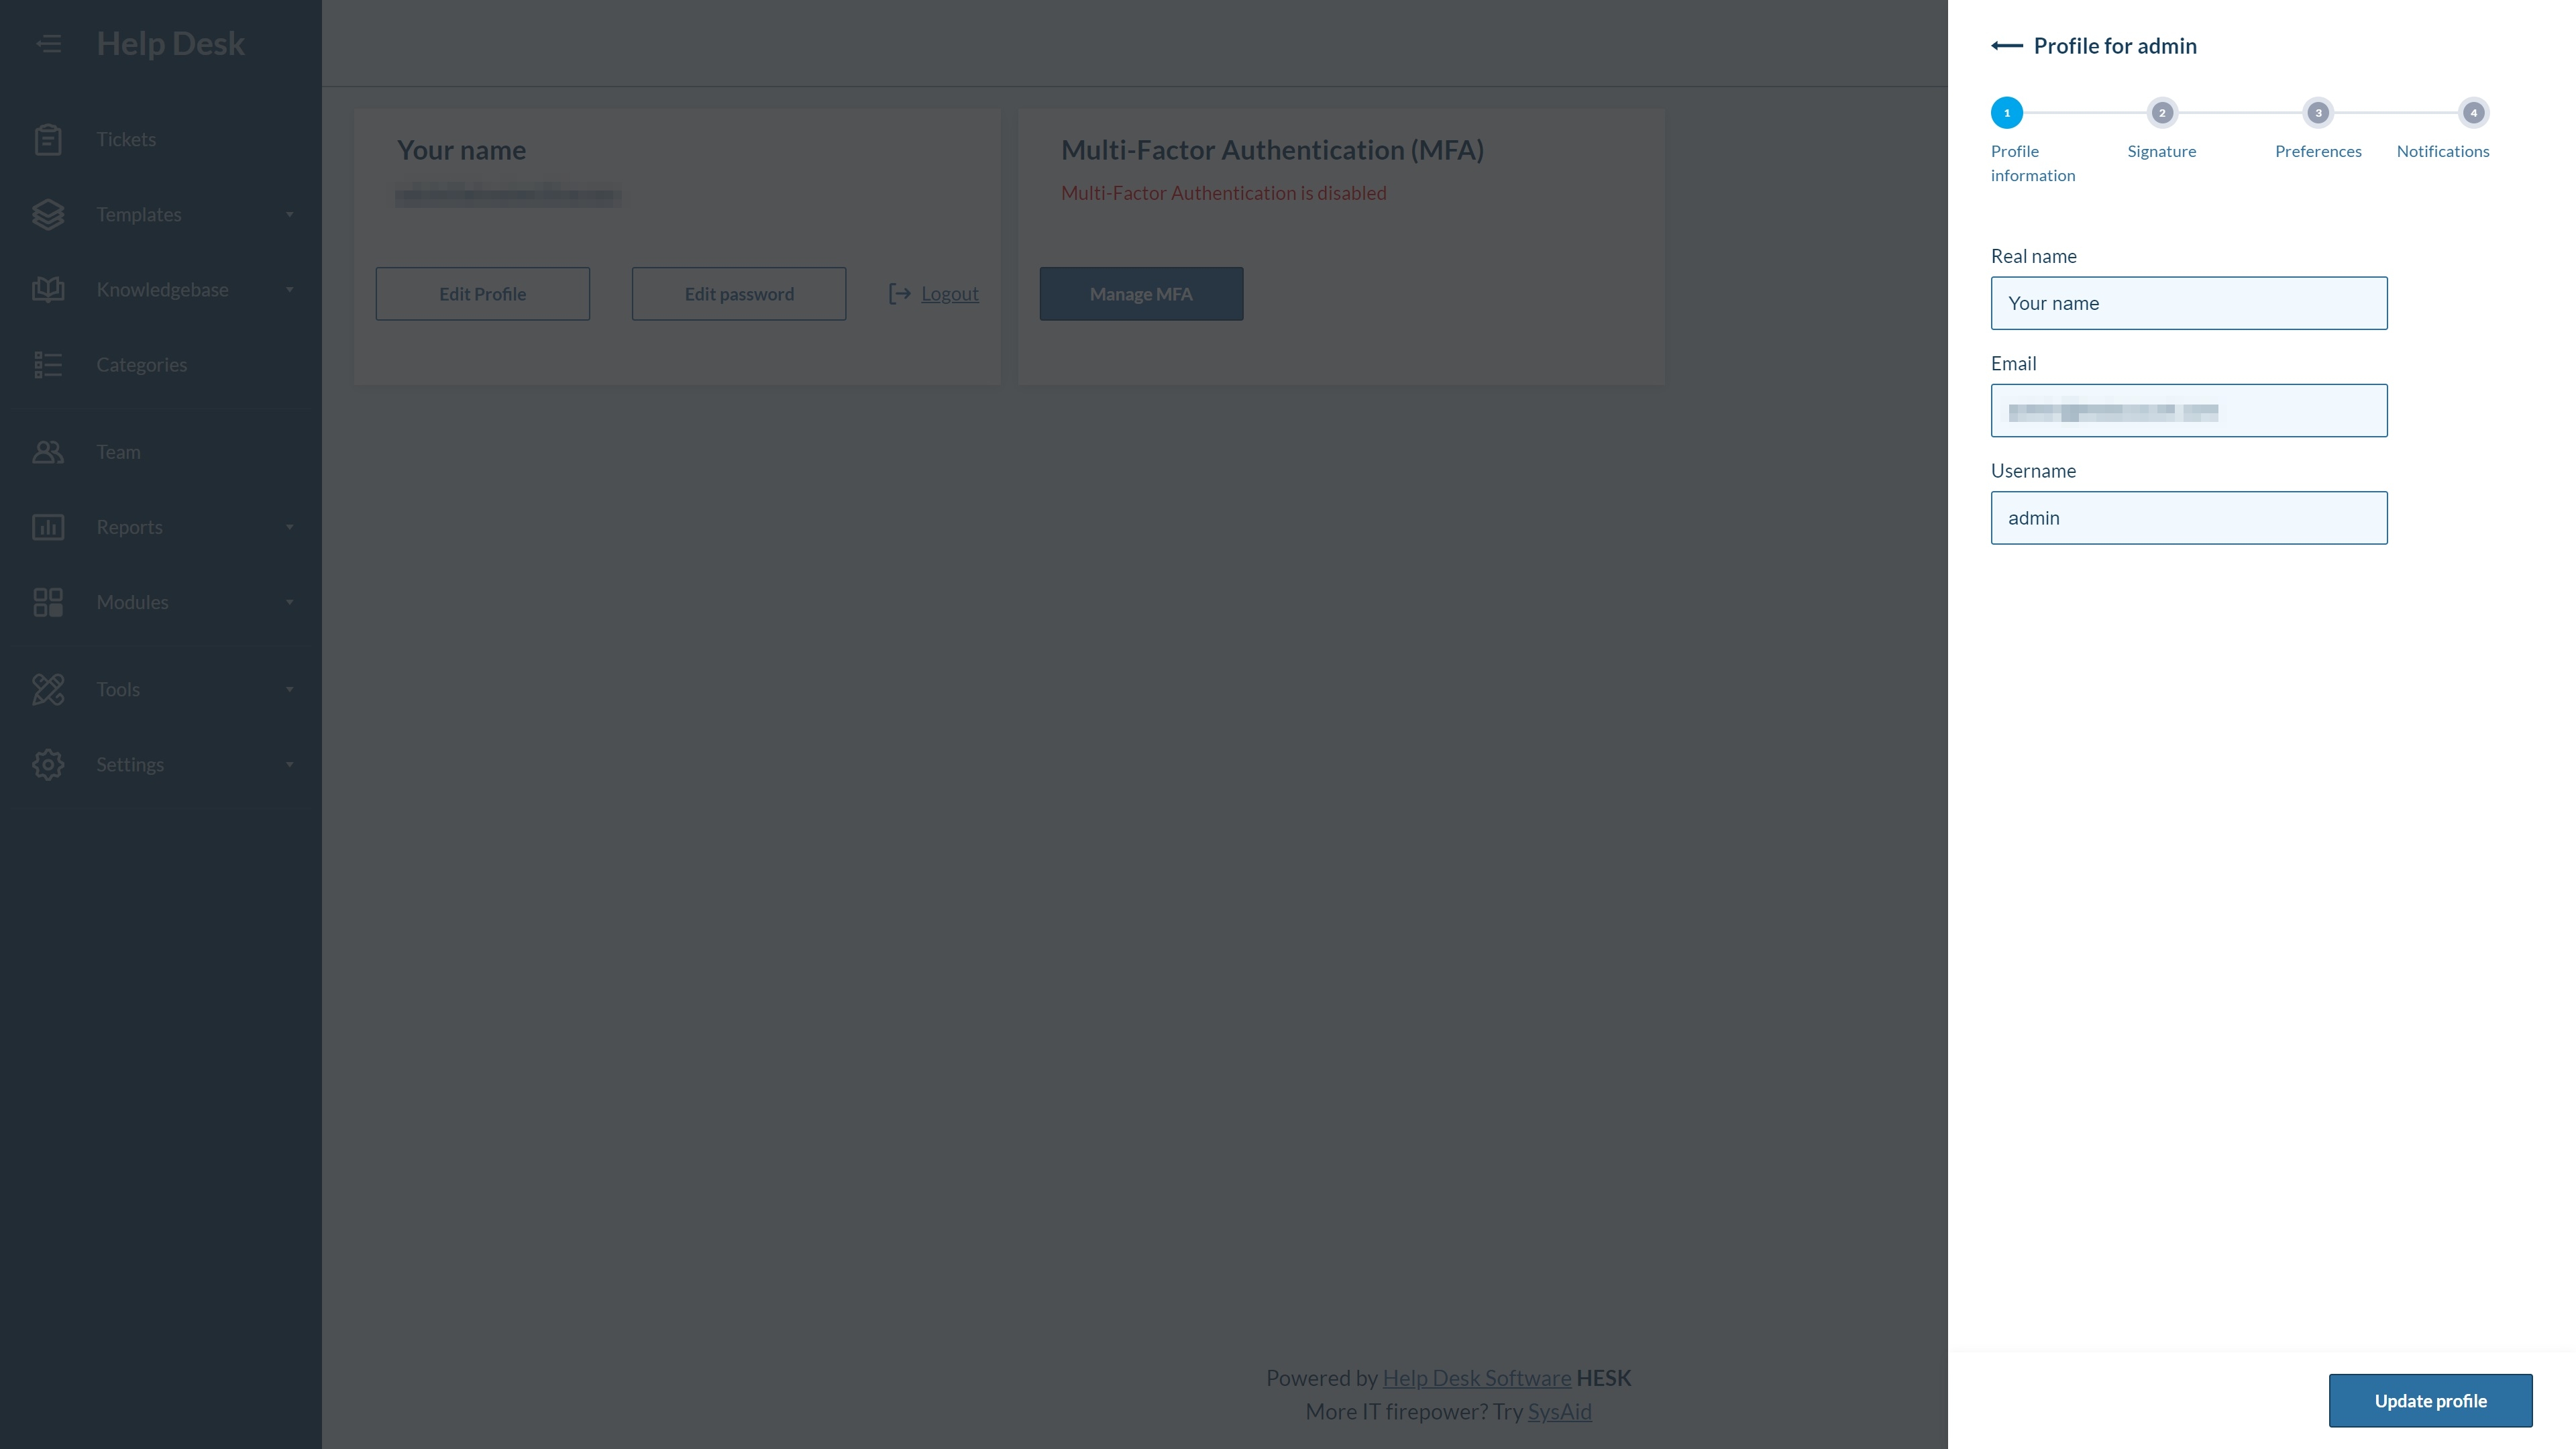
Once you’ve navigated to your Hesk admin page (if you’re using Hostinger, you can find a link to this within the Auto Installer), you’ll be able to start configuring your help desk. For starters, create a profile.
On the top-right of the main dashboard, you will see a dropdown menu with a View Profile button. Click this and update your name, email address, and username. You can also add a signature, update your admin preferences, create a new password, and set your notification preferences.
Are you a pro? Subscribe to our newsletter
Sign up to the TechRadar Pro newsletter to get all the top news, opinion, features and guidance your business needs to succeed!
Step 2: Update global settings
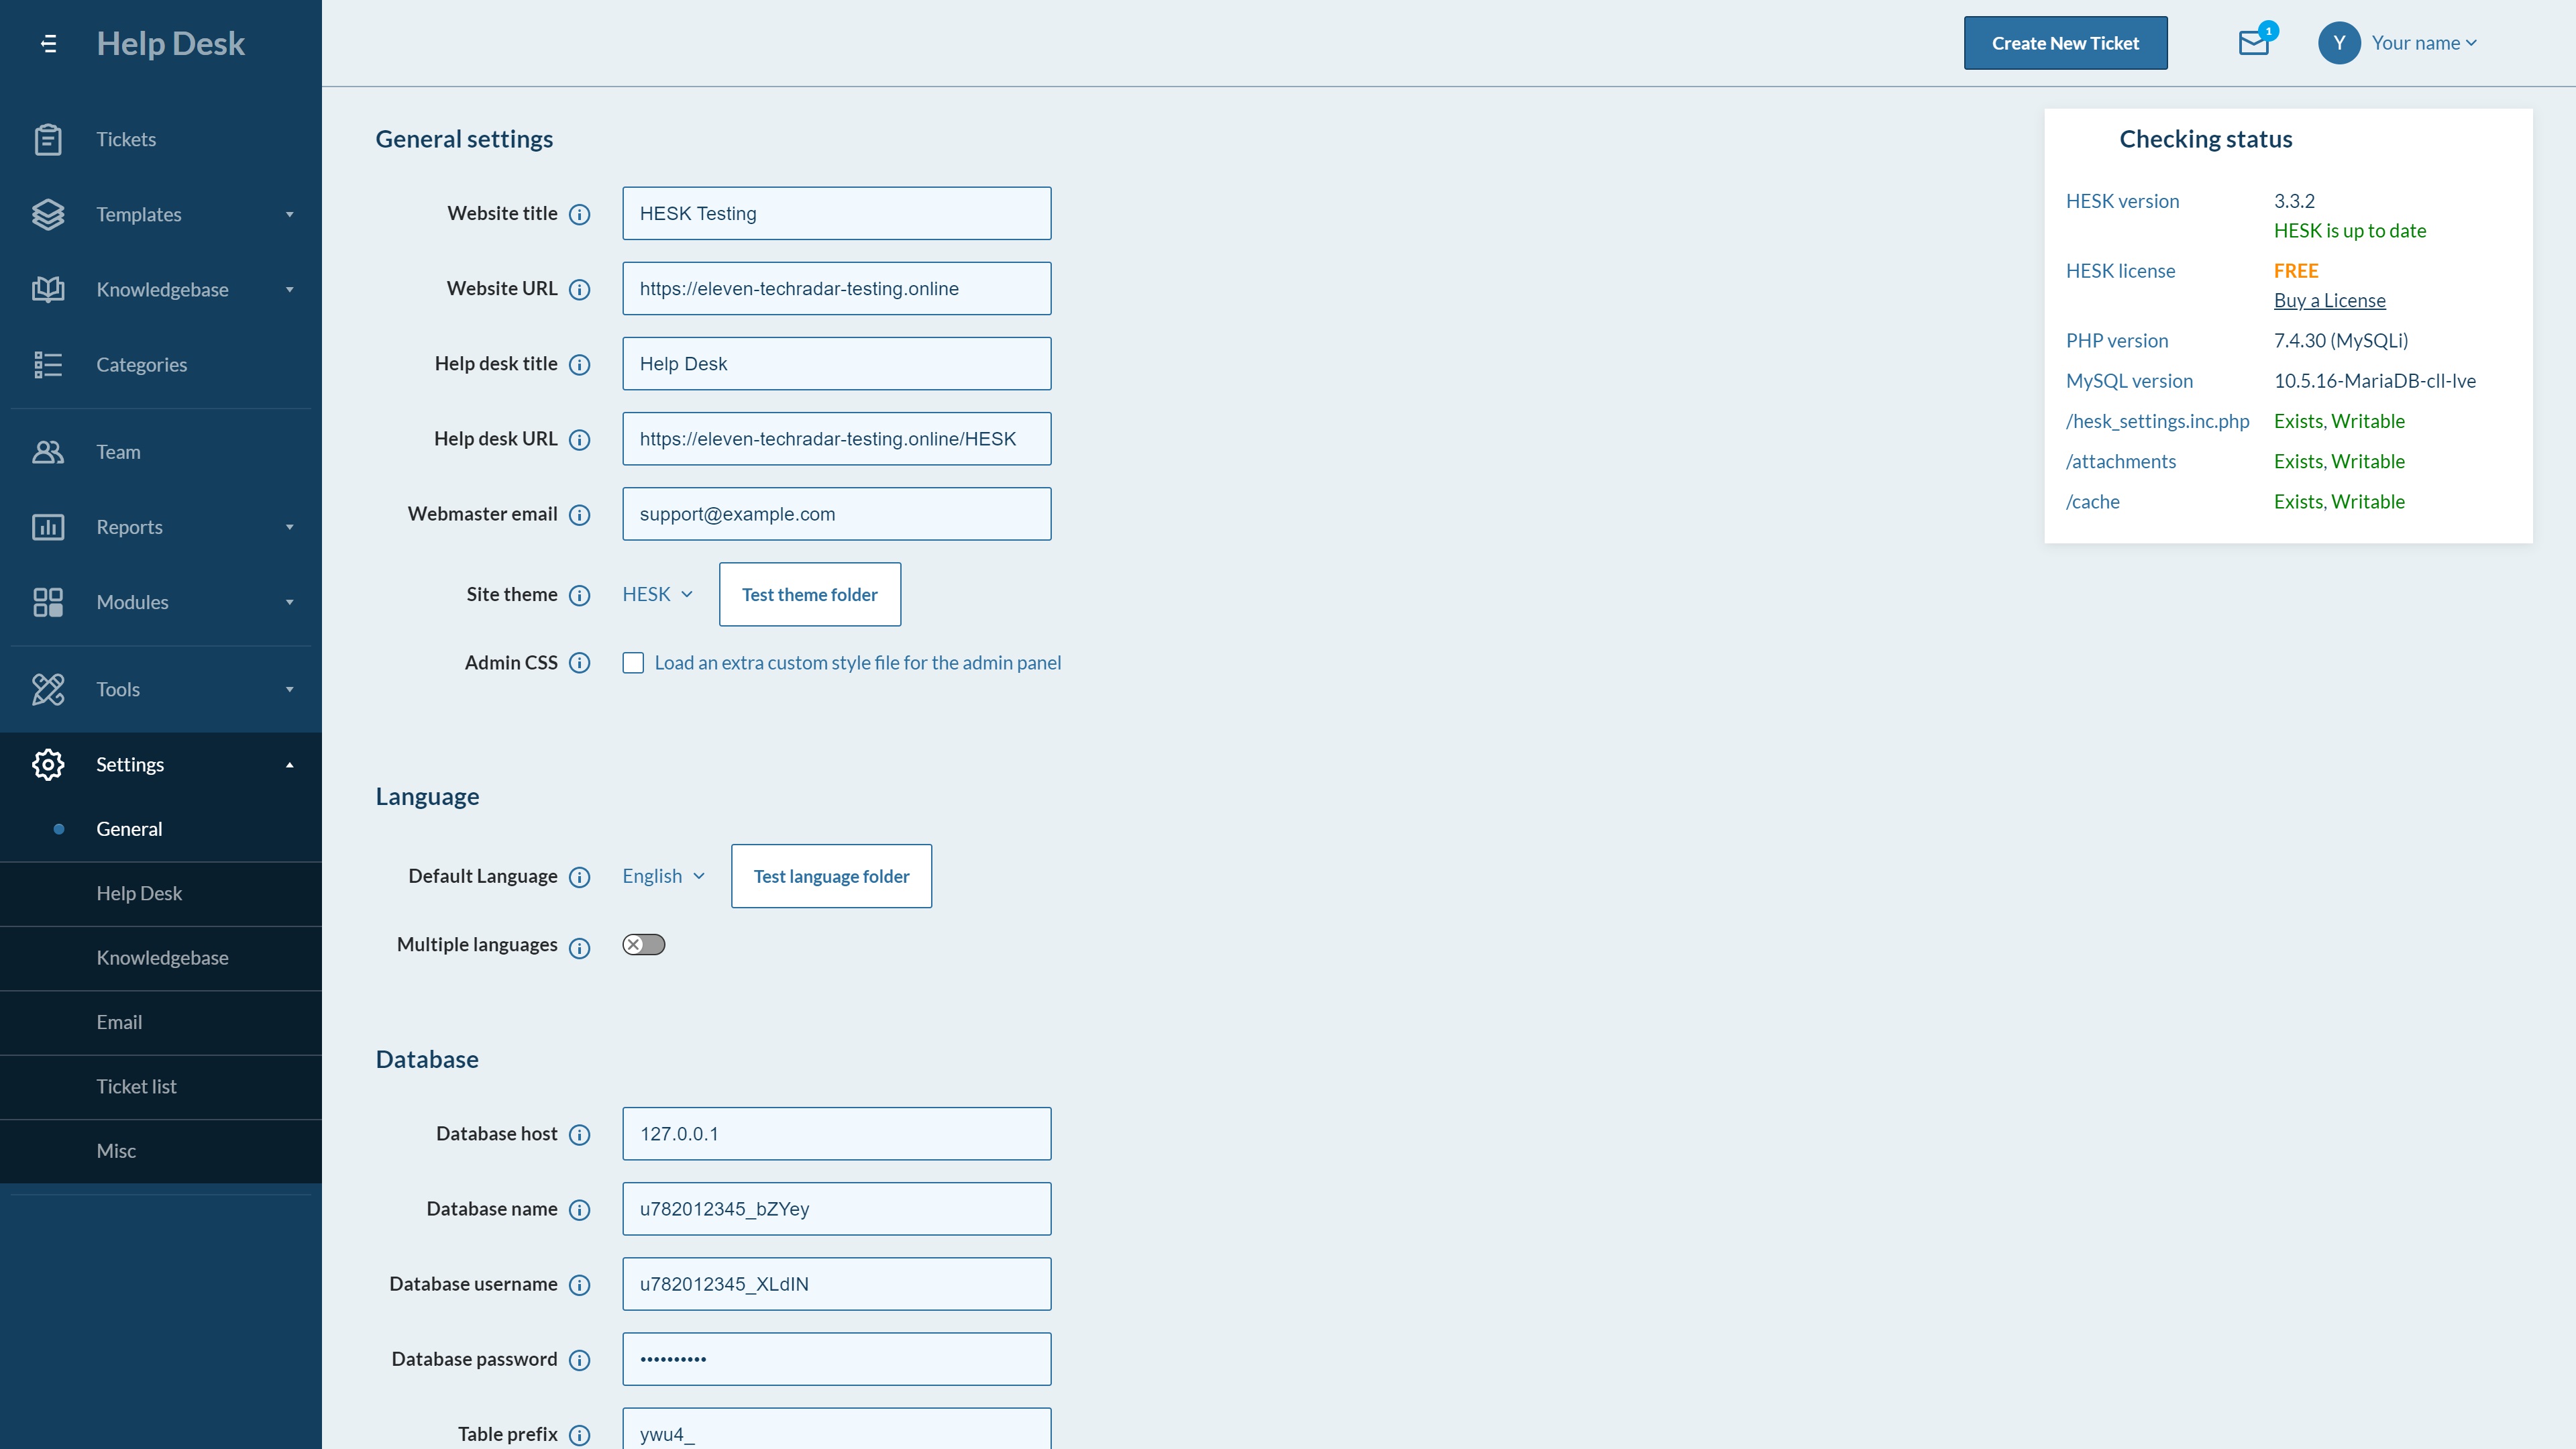
The Settings dropdown on the left of the main dashboard enables you to personalize a wide range of settings. To begin, you’ll need to establish your general settings, which include your help desk URL, webmaster email address, website URL, language, and help desk title.
Under Misc settings, you can update the timezone, date format, and more. There are various other settings related to your help desk, knowledge base, support email, and ticket list. We suggest working your way through these to familiarize yourself with the available options.
Step 3: Create help desk categories
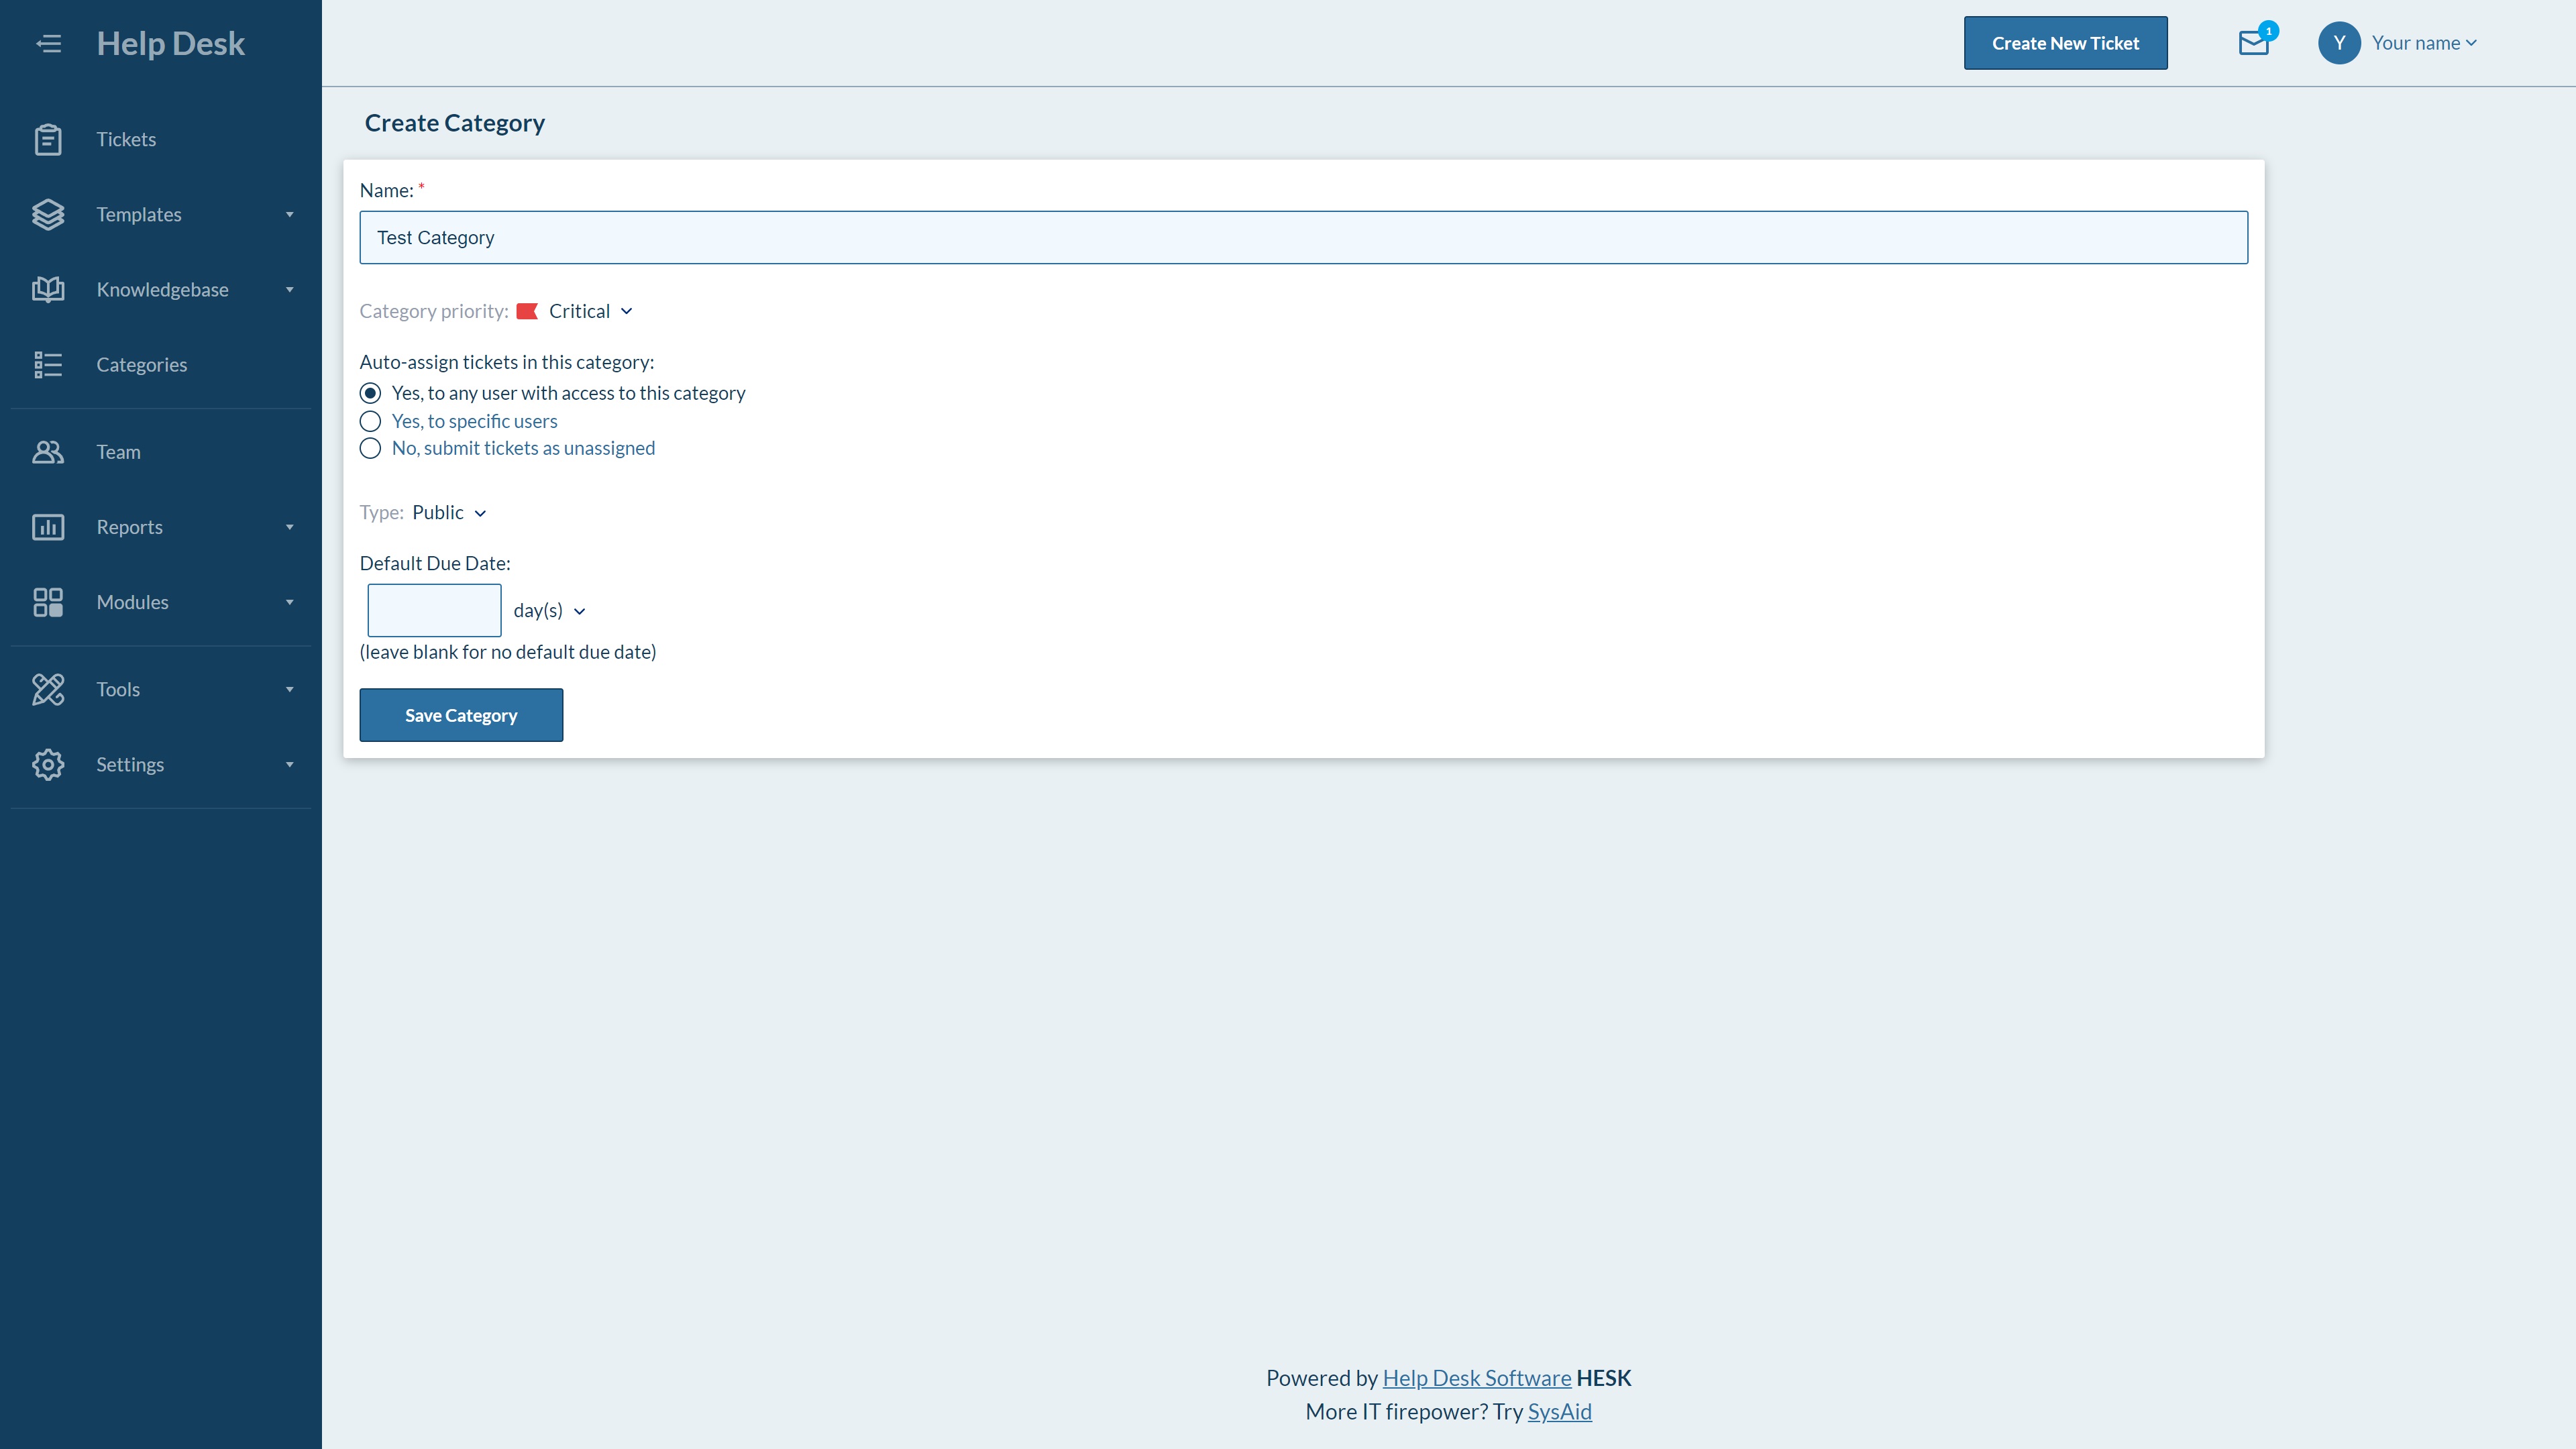
Next up, head to the Categories page to create relevant help desk categories. These should typically relate to the types of enquiries you expect to receive, which may include billing, tech support, sales, and more.
You can set a priority level and due date for each category. It’s even possible to auto-assign tickets to relevant team members.
Step 4: Add team members
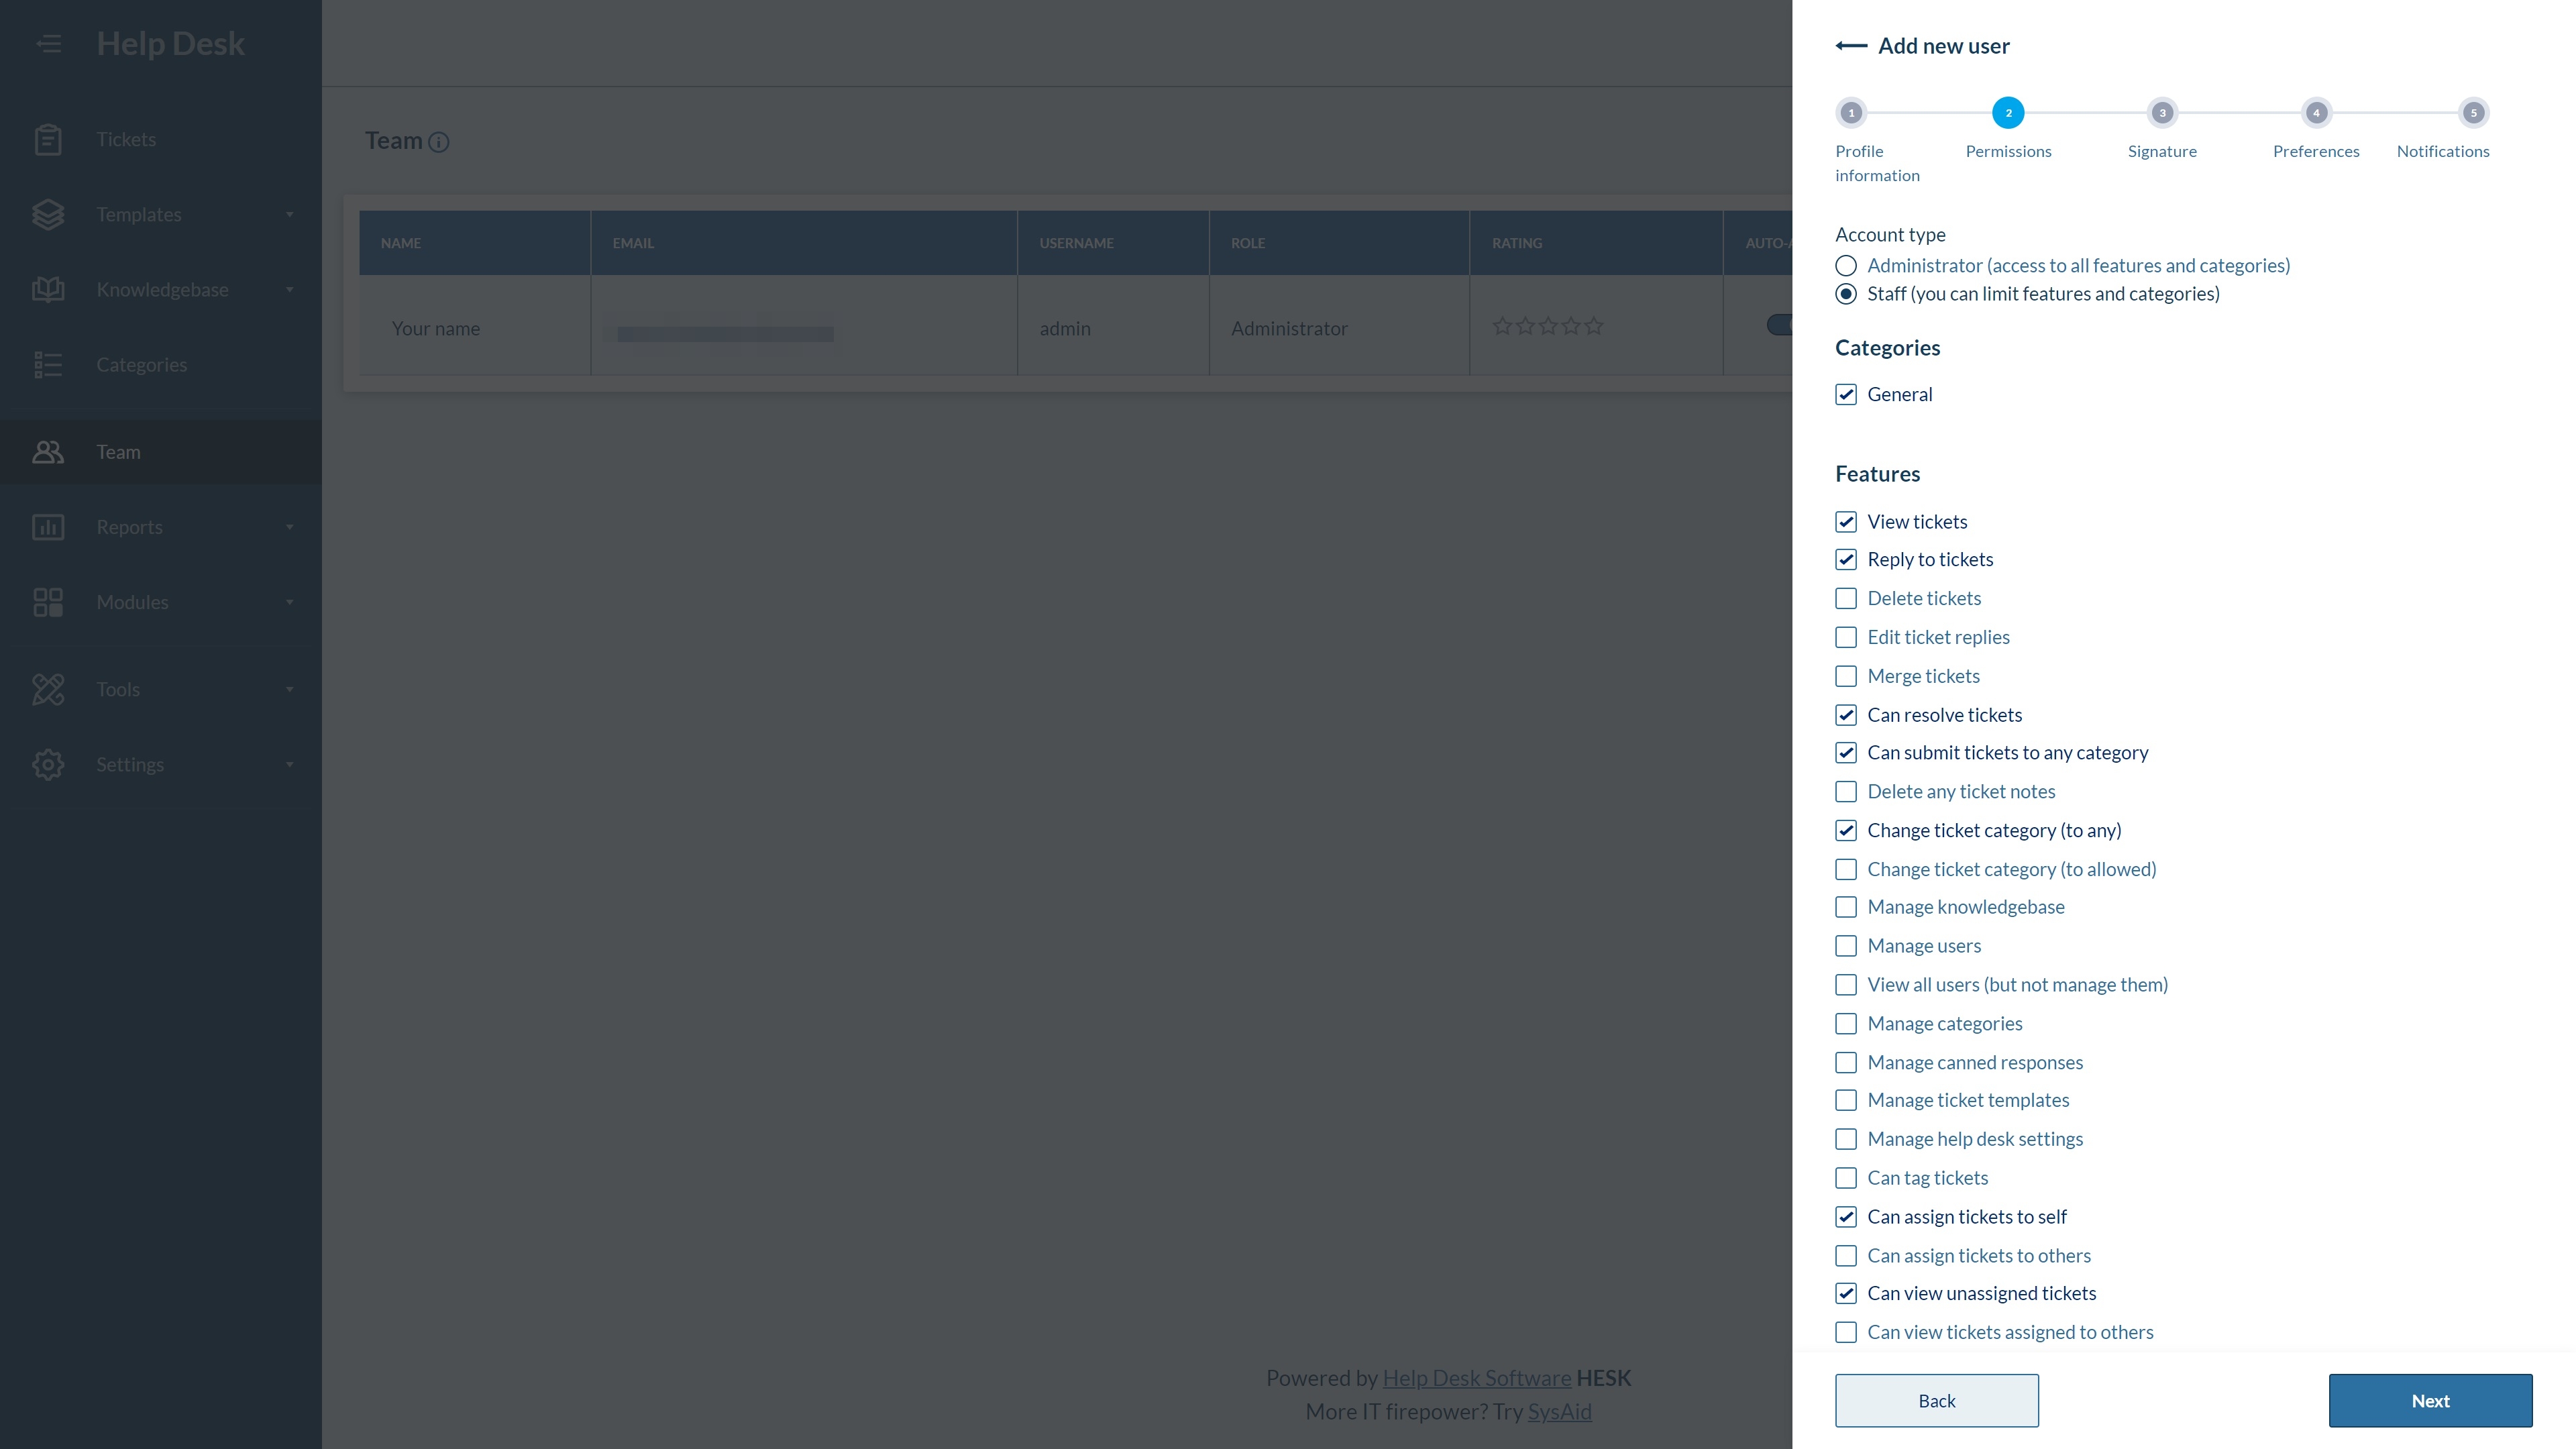
Under the Team tab, you can add new team members and manage existing profiles. A particularly useful feature here is that you can assign profile permissions, enabling you to restrict member access to specific areas.
You can also create user signatures, and edit the preferences and notification settings for each category.
Step 5: Create a knowledge base
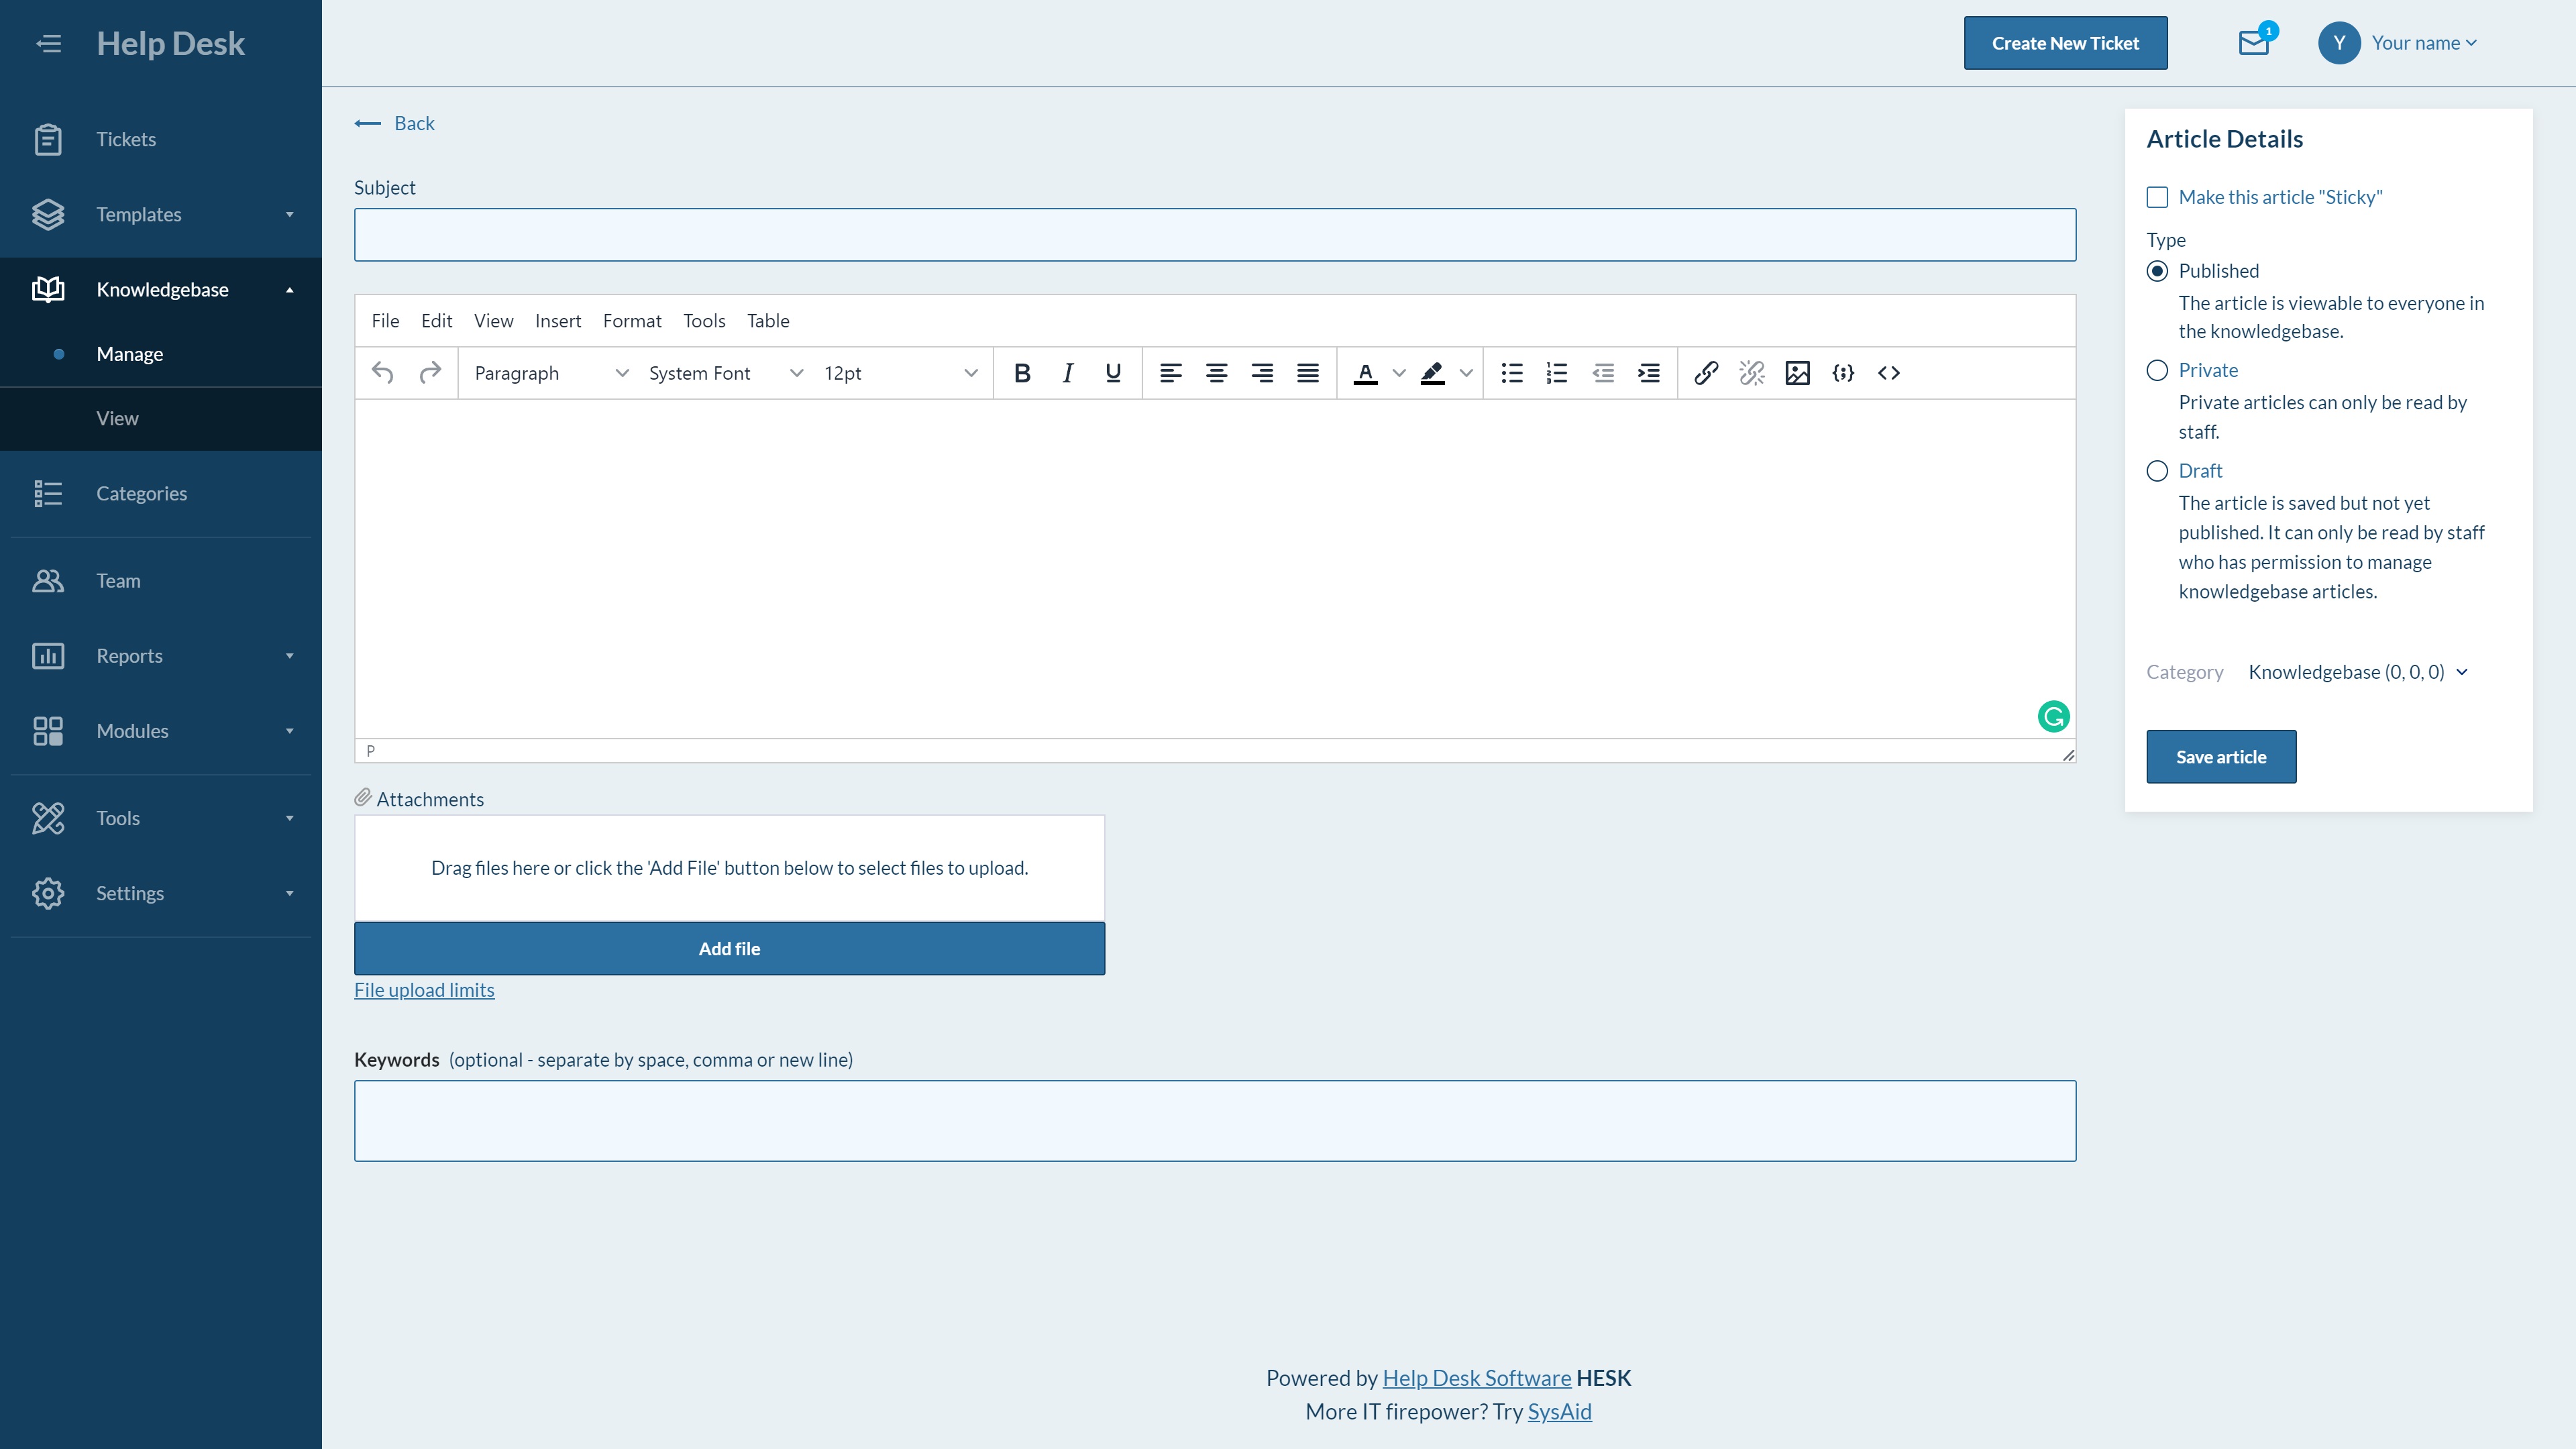
Creating an entire knowledge base is no mean feat, and you will need to allocate a decent amount of time and resources to this. Under the Knowledgebase tab, you will find numerous tools to help you put together a useful, high-value resource center.
For starters, you can create categories to ensure your knowledge base resources are organized and easy to find. The simple text editor enables you to put together customized self-help resources, and you can attach files as required.
You can also insert code snippets and media if required. Plus, filling the keywords box with relevant terms will help users find the correct resources.
Step 6: Set up canned responses
Finally, we suggest you head to the Templates tab to create some canned responses. These are common replies you expect to send to multiple customers. Creating and saving these will save you from having to type out routine answers or responses for each ticket.
Step 7: Familiarize yourself with the other tools
There are a few other tools we haven’t touched on in this how-to guide that you could take advantage of. Under the Tools tab are various management tools, the Reports tab enables you to view and generate reports, and the Modules tab contains access to tools that are only available with the paid version of the program, Hesk Cloud.
Summary
Though it may seem like a difficult undertaking at first, creating a help desk with Hesk really isn’t too challenging. In this guide, we listed seven simple steps that will help you get your own support center up and running in no time at all!
If you’re not sure that a self-hosted help desk solution such as Hesk is right for you, our guide to the best help desk software may be worth a read. We also recommend learning the difference between ticketing systems and help desk software.
Read more in this series:
- How to start a blog with Joomla
- Build your own CRM using SugarCRM
- How to host your files online using Nextcloud Hub
- How to build an HR System using OrangeHRM
- How to generate your own invoices using Invoice Ninja
- How to install live chat software with Sales Syntax
- Run your own ecommerce platform with PrestaShop
- How to create your own website with Soholaunch
- How to launch your own website with WebsiteBaker
- How to learn search engine optimization with SEO Panel
- How to kickstart your own Ancestry.com alternative with webtrees
- How to install a free ERP software called Dolibarr
- Demand gen vs lead gen: What's the difference?
- Host your own private forum with MyBB
- Build your own calendar application with WebCalendar
- Set up your own groupware service with Tiki Wiki CMS
- How to build your own email marketing service with phpList
- A Google Photos alternative: Store your photos online with Piwigo
- How to start with project management using The Bug Genie
- Make your own poll platform with LimeSurvey
- Roll out your own Wikipedia clone with MediaWiki
- How to host your own learning management software with Moodle LMS
- Set up an accounting system with FrontAccounting
- Produce your own bills with BoxBilling
Daniel is a freelance copywriter with over six years experience writing for publications such as TechRadar, Tom’s Guide, and Hosting Review. He specializes in B2B and B2C tech and finance, with a particular focus on VoIP, website building, web hosting, and other related fields.
