How to take a screenshot in Windows 11
How to snap your screen in the latest Microsoft OS
So, you've bought or updated your Windows device and you're wondering how to take a screenshot in Windows 11. Well, you're in the right place to learn!
While Windows 11 brings a big redesign and a new start menu, the one constant feature that sticks around is the art of taking screenshots.
Using the Print Screen key and pasting it into Paint has always been the best method of sharing screenshots in emails and WhatsApp, but there are better ways of taking screen grabs of certain apps without having to manually save them into a folder every time.
We’ll show you how to take a screenshot of just one app in Windows 11 or the whole desktop if you need to. If you're operating an older version of Microsoft's operating system, the steps are pretty much the same, but we've also got instructions on how to take a screenshot on Windows for a more general approach.
If you need to do the same on an Apple desktop or laptop, there are even easier methods to take screenshots on a Mac as well.
- How you can download Windows 11 right now
- Here’s our pick of the best student laptops in 2021
- Download the best Windows 10 antivirus
Steps for how to take a print screen on Windows 11
- Find your print screen button or open the Snipping Tool.
- If you're snapping the whole screen, select the window or area you want to print screen.
- Save or share your image.
Tools and requirements
Make sure you know where your Print Screen key is on your keyboard, as this will be one of the most common methods in taking screenshots.
It may also be a second function for another key, in this case, you’ll need to press the ‘Fn’ key as well to take a screenshot.
Get daily insight, inspiration and deals in your inbox
Sign up for breaking news, reviews, opinion, top tech deals, and more.
It may be labeled as the following:
- Prt sc
- PrtSc
- PrtScn
- PrntScrn
Step by step guide for how to print screen your entire screen
1. Find and press your print screen button
As per our guidance above, find the print screen button on your keyboard or laptop.
Press this button and the image will now be in your clipboard ready to be pasted into your editing software of choice, a messaging platform, or wherever else you may need it.
Pressing the Windows key and Print Screen will take a screenshot of everything that’s currently displayed, and will take this file into a folder, located in This PC > Pictures > Screenshots.
Step by step guide for how to print screen using the Snipping Tool
The Windows Snip and Sketch tool is a much more flexible way to take your print screens, letting you capture a specific window or area on your screen and quickly edit the resulting image all in one place.
1. Open the Snipping Tool
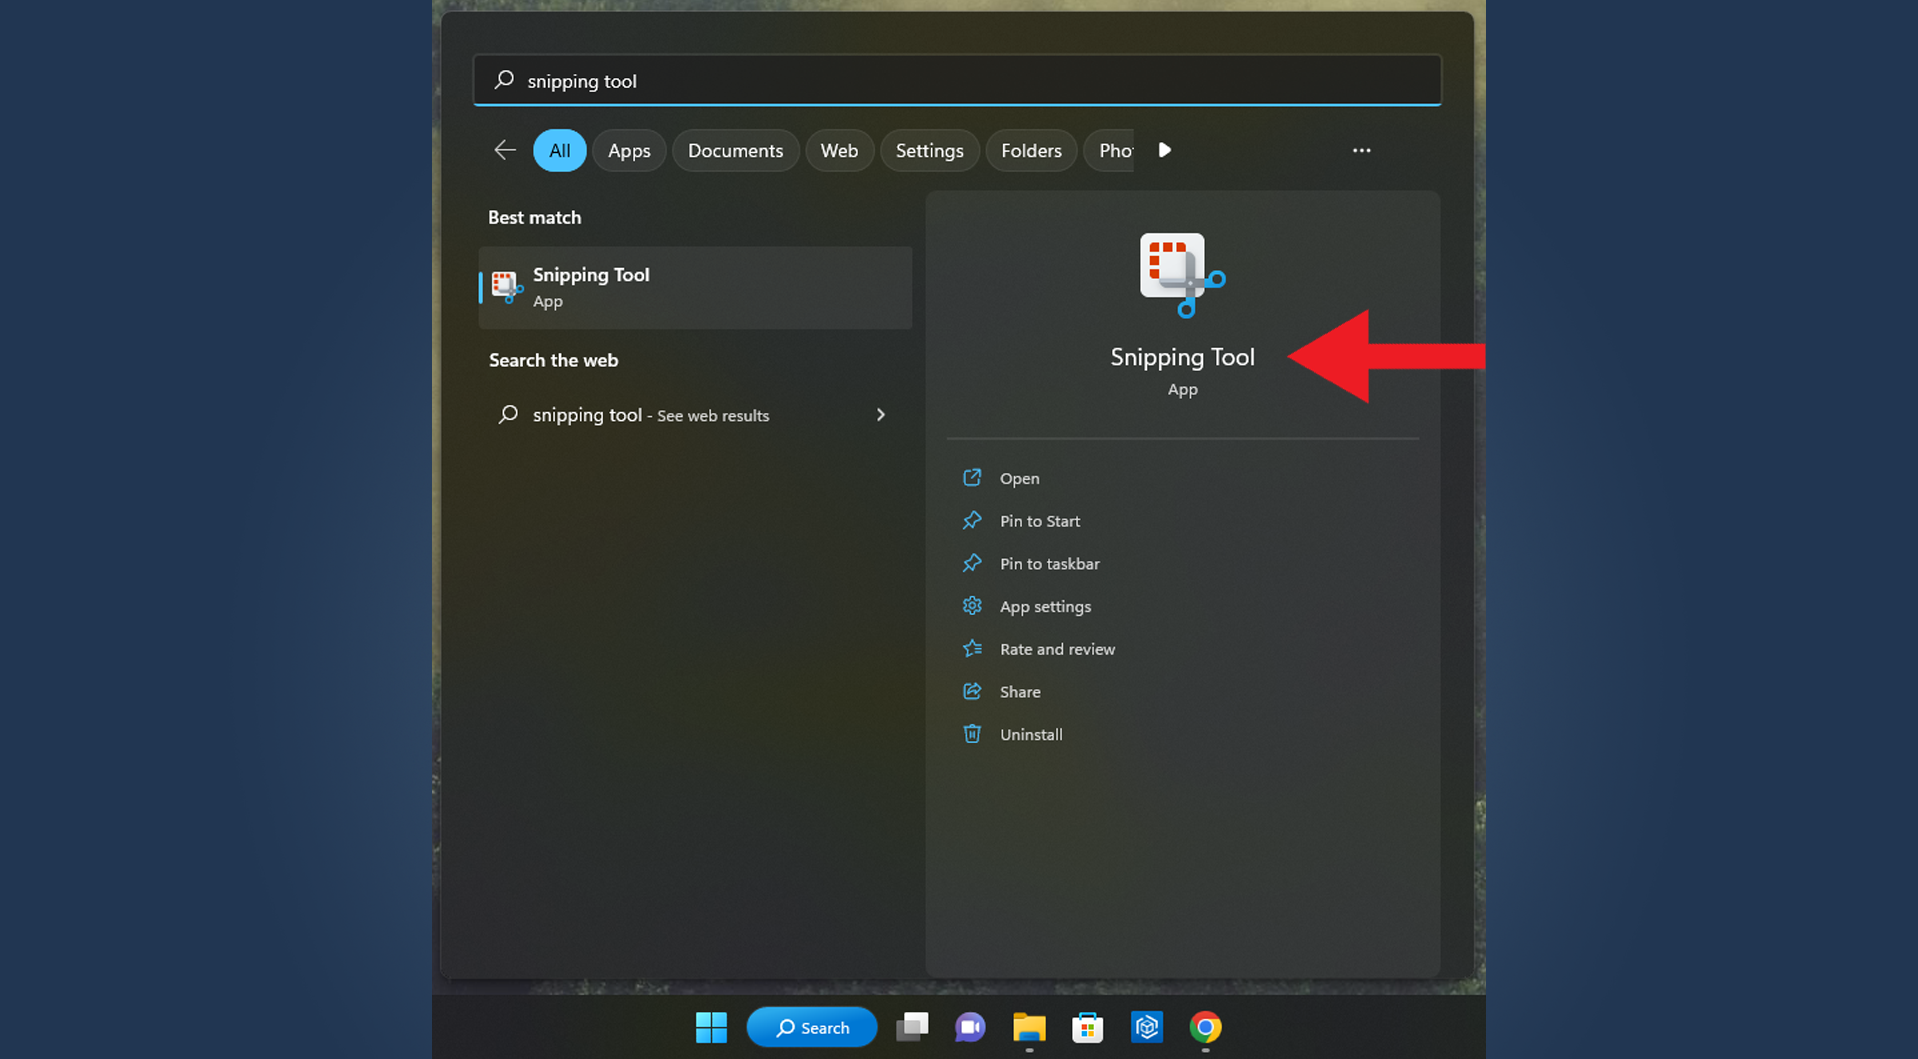
Press the Windows key, Shift, and 'S' together to open the Snipping Tool application, or search for it in the Windows start menu.
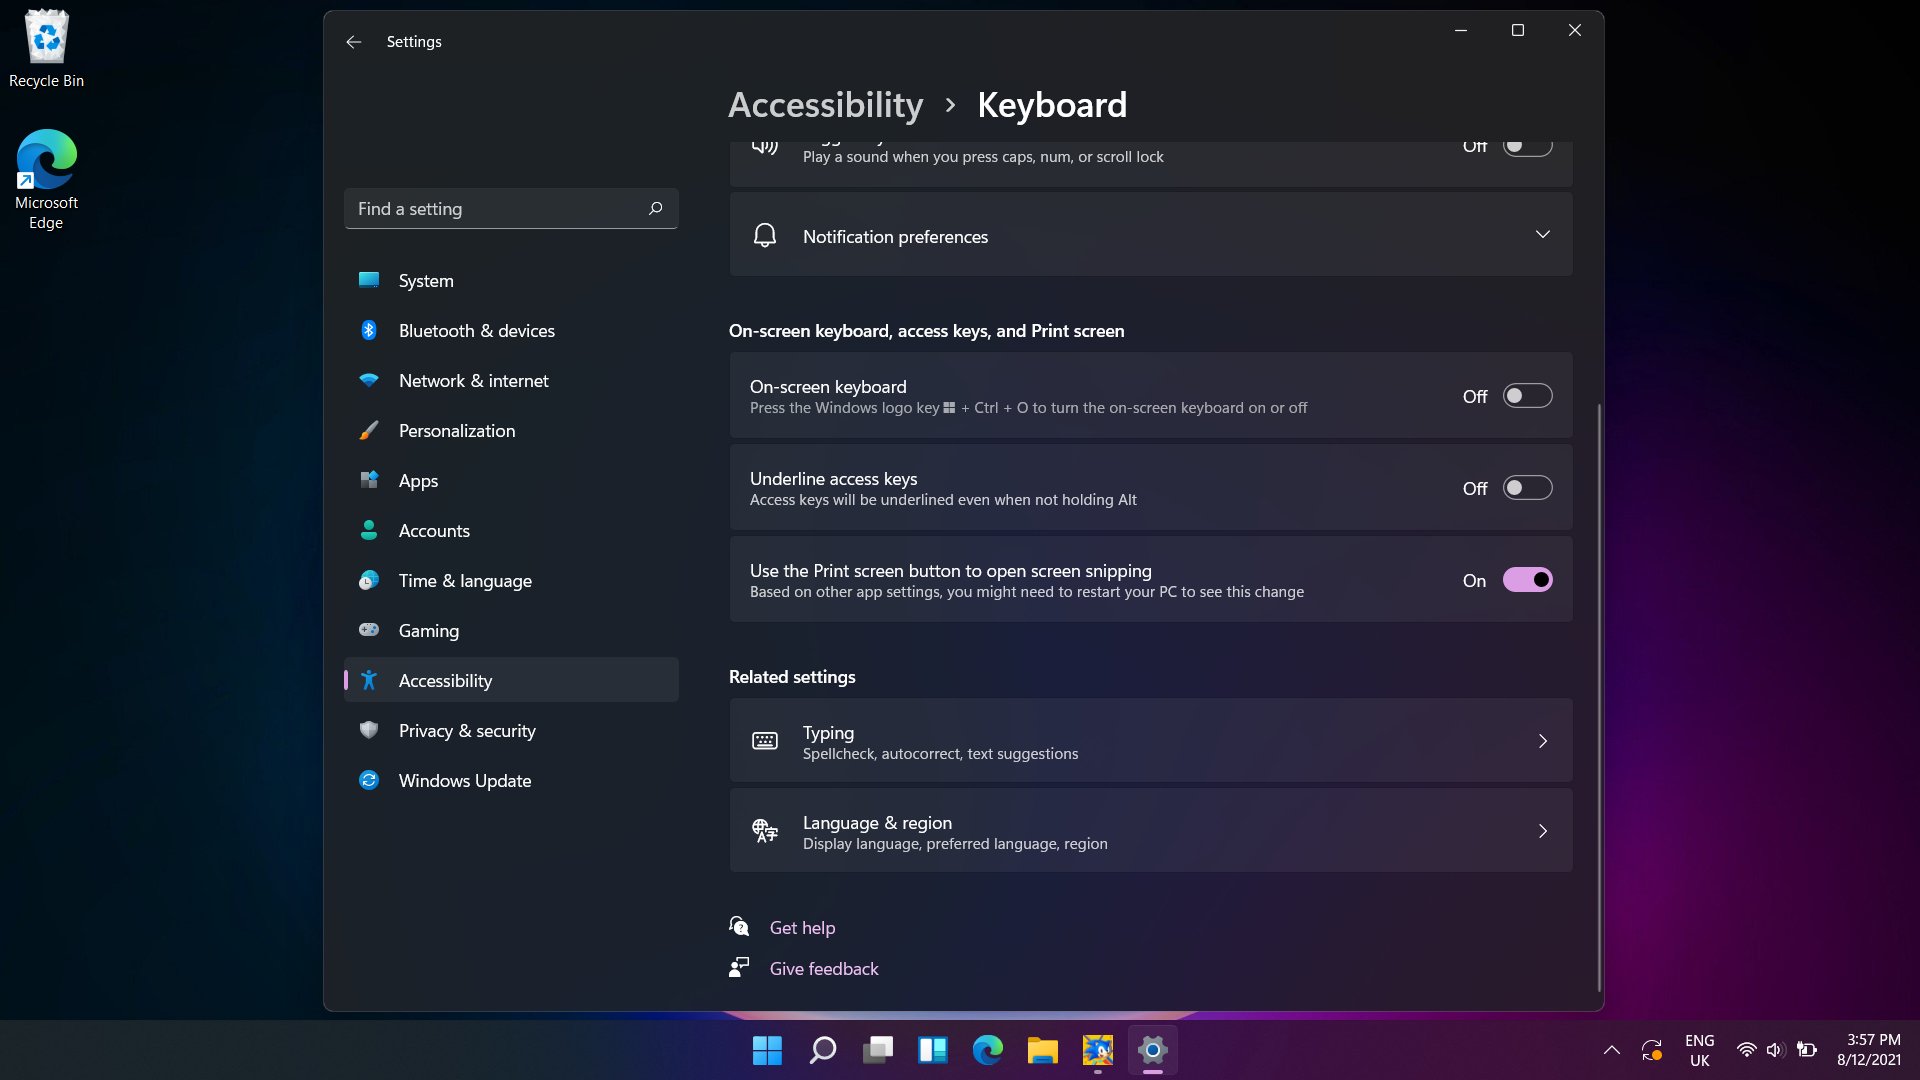
You can also assign this application to the Print Screen key instead. Go to Settings > Accessibility > Keyboard. Find the option labeled 'Use the Print Screen button to open screen snipping' and toggle this on. Once this is enabled, you can press Print Screen and the Snipping Tool will open instead, giving you even more control in taking screenshots.
2. Take your screenshot
On the top of your screen, a toolbar will appear with four icons. The first allows you to take a screenshot using a rectangular selection, the second lets you take a screenshot with freehand selection, the third screenshots your entire window, and the final button triggers a full-screen capture.
If you're taking a rectangular or freehand selection, simply draw with the cursor the area that you'd like to capture. For full-screen and window captures, simply press the respective button.
3. Open or paste your screenshot
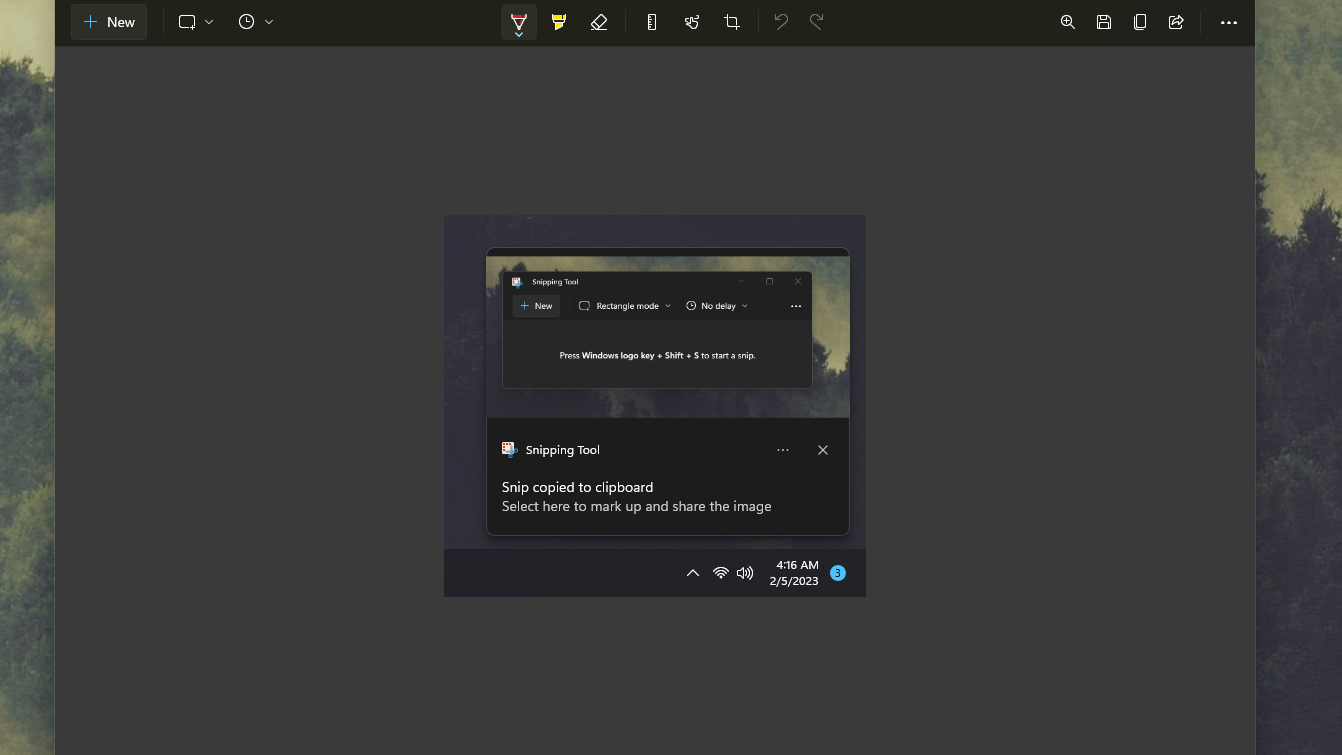
Your screenshot will have automatically saved to your clipboard, meaning you're ready to paste the screenshot wherever you need it.
Alternatively, you can edit directly onto the screenshot by clicking the notification that will have appeared in the bottom right of your screen to open and edit the file.
The Snipping Tool has a variety of useful editing tools allowing you to highlight, annotate and draw straight lines directly onto your screenshot.
From here, you can save your screenshot by clicking the floppy disk icon or share it by pressing the arrow emerging from a box.
- Here’s our picks of the best laptops in 2021

Daryl had been freelancing for 3 years before joining TechRadar, now reporting on everything software-related. In his spare time, he's written a book, 'The Making of Tomb Raider'. His second book, '50 Years of Boss Fights', came out in 2024, with a third book coming in 2026. He also has a newsletter called 'Springboard'. He's usually found playing games old and new on his Steam Deck, Nintendo Switch, and MacBook Pro. If you have a story about an updated app, one that's about to launch, or just anything Software-related, drop him a line.
- Josephine WatsonManaging Editor, Lifestyle