How to take raw photos on an iPhone that isn't the iPhone 12 Pro
You don't the latest iPhone for this

Apple recently debuted its new ProRaw image format on its flagship iPhone 12 Pro and iPhone 12 Pro Max models.
This guide will walk you through how to take r photos on your iPhone that isn’t the iPhone 12 Pro.e a much larger quantity of detail and information that can be used for flexibility while shooting and editing.
What if you’re a photography aficionado, but you didn’t want to splurge on the more expensive Pro models this year? Or what if you’re using an iPhone X, or iPhone XS, and want to push your camera to its limits?
This guide will walk you through how to take raw photos on your iPhone that isn’t the iPhone 12 Pro.
What is raw? And why should I use it?
Raw photos are a format used by photographers to enable more flexibility and creative control during the editing process. Normally, when you take a photo using your camera, it will save the photo as a JPEG file.
JPEG files are compressed image files that preserve the majority of the valuable detail in photos, while removing some of the embedded information and image data within the image file. This is useful for everyday use, as smaller photos are easier to share and take up less storage space.
However, these compressed images are much less flexible for editing, as the information needed to change and manipulate significant parameters of the image has mostly been removed during compression. This results in the signature 'blown out' look and the loss of detail when you try to push edits on a JPEG file too far.
Get daily insight, inspiration and deals in your inbox
Sign up for breaking news, reviews, opinion, top tech deals, and more.
Alongside this, JPEG files – particularly those from phones – will be saved as reprocessed files according to the manufacturer’s signature processing algorithm. This is why each phone manufacturer’s photos tend to have a default 'look' – Apple’s tends to be quite natural, while Samsung’s tends to be quite sharp and vivid.
Manufacturers incorporate this processing to show off computational photography chops, and this on-the-fly processing has made taking great photos easier than ever – often no more than a point-and-shoot away. However, this processing is often nigh impossible to undo due to the edits being embedded within the file.
With a raw file, you’re capturing all of the data that gets pulled straight off of the camera sensor. The result is a much larger file that can be used for much more flexible edits, giving photographers much more creative control. Things like the tones, colors, white balance and exposure can be edited freely, with no image degradation as you edit.
If you’re a budding photographer looking to take their editing skills to the next level, you should absolutely consider using raw to take photos. However, because of the large file size it may not be advisable to be your permanent camera setting, as compressed JPEG or HEIC files are often preferable for point-and-shoot photography.
But what if you don't have an iPhone 12 Pro?
There are several apps that let you take raw photos on iPhone, but our two favorites are Halide and Moment.
Halide
Halide has become the standard for taking your iPhone photography to the next level. It offers remarkable flexibility and creative control for professional use cases, while also being familiar and accessible enough to newcomers to photography.
The standard array of expected features is, of course, to be found here – full exposure control with shutter speed and ISO, white balance controls, and on-the-fly histogram support.
This is the second version of the app, Halide Mark 2, so it incorporates a range of new, innovative features as well. These include an intelligently activated focus loupe, color-coded zebra stripes to monitor clipping, and instant raw processing to help bridge the gap between computationally processed JPEGs and completely unprocessed raws.

The app allows for remarkable creative control whilst also offering sufficient handholding for the uninitiated, giving a best-of-both-worlds experience of photography. The app can be bought for a one-off £30 payment, but there are a range of highly affordable subscription options.
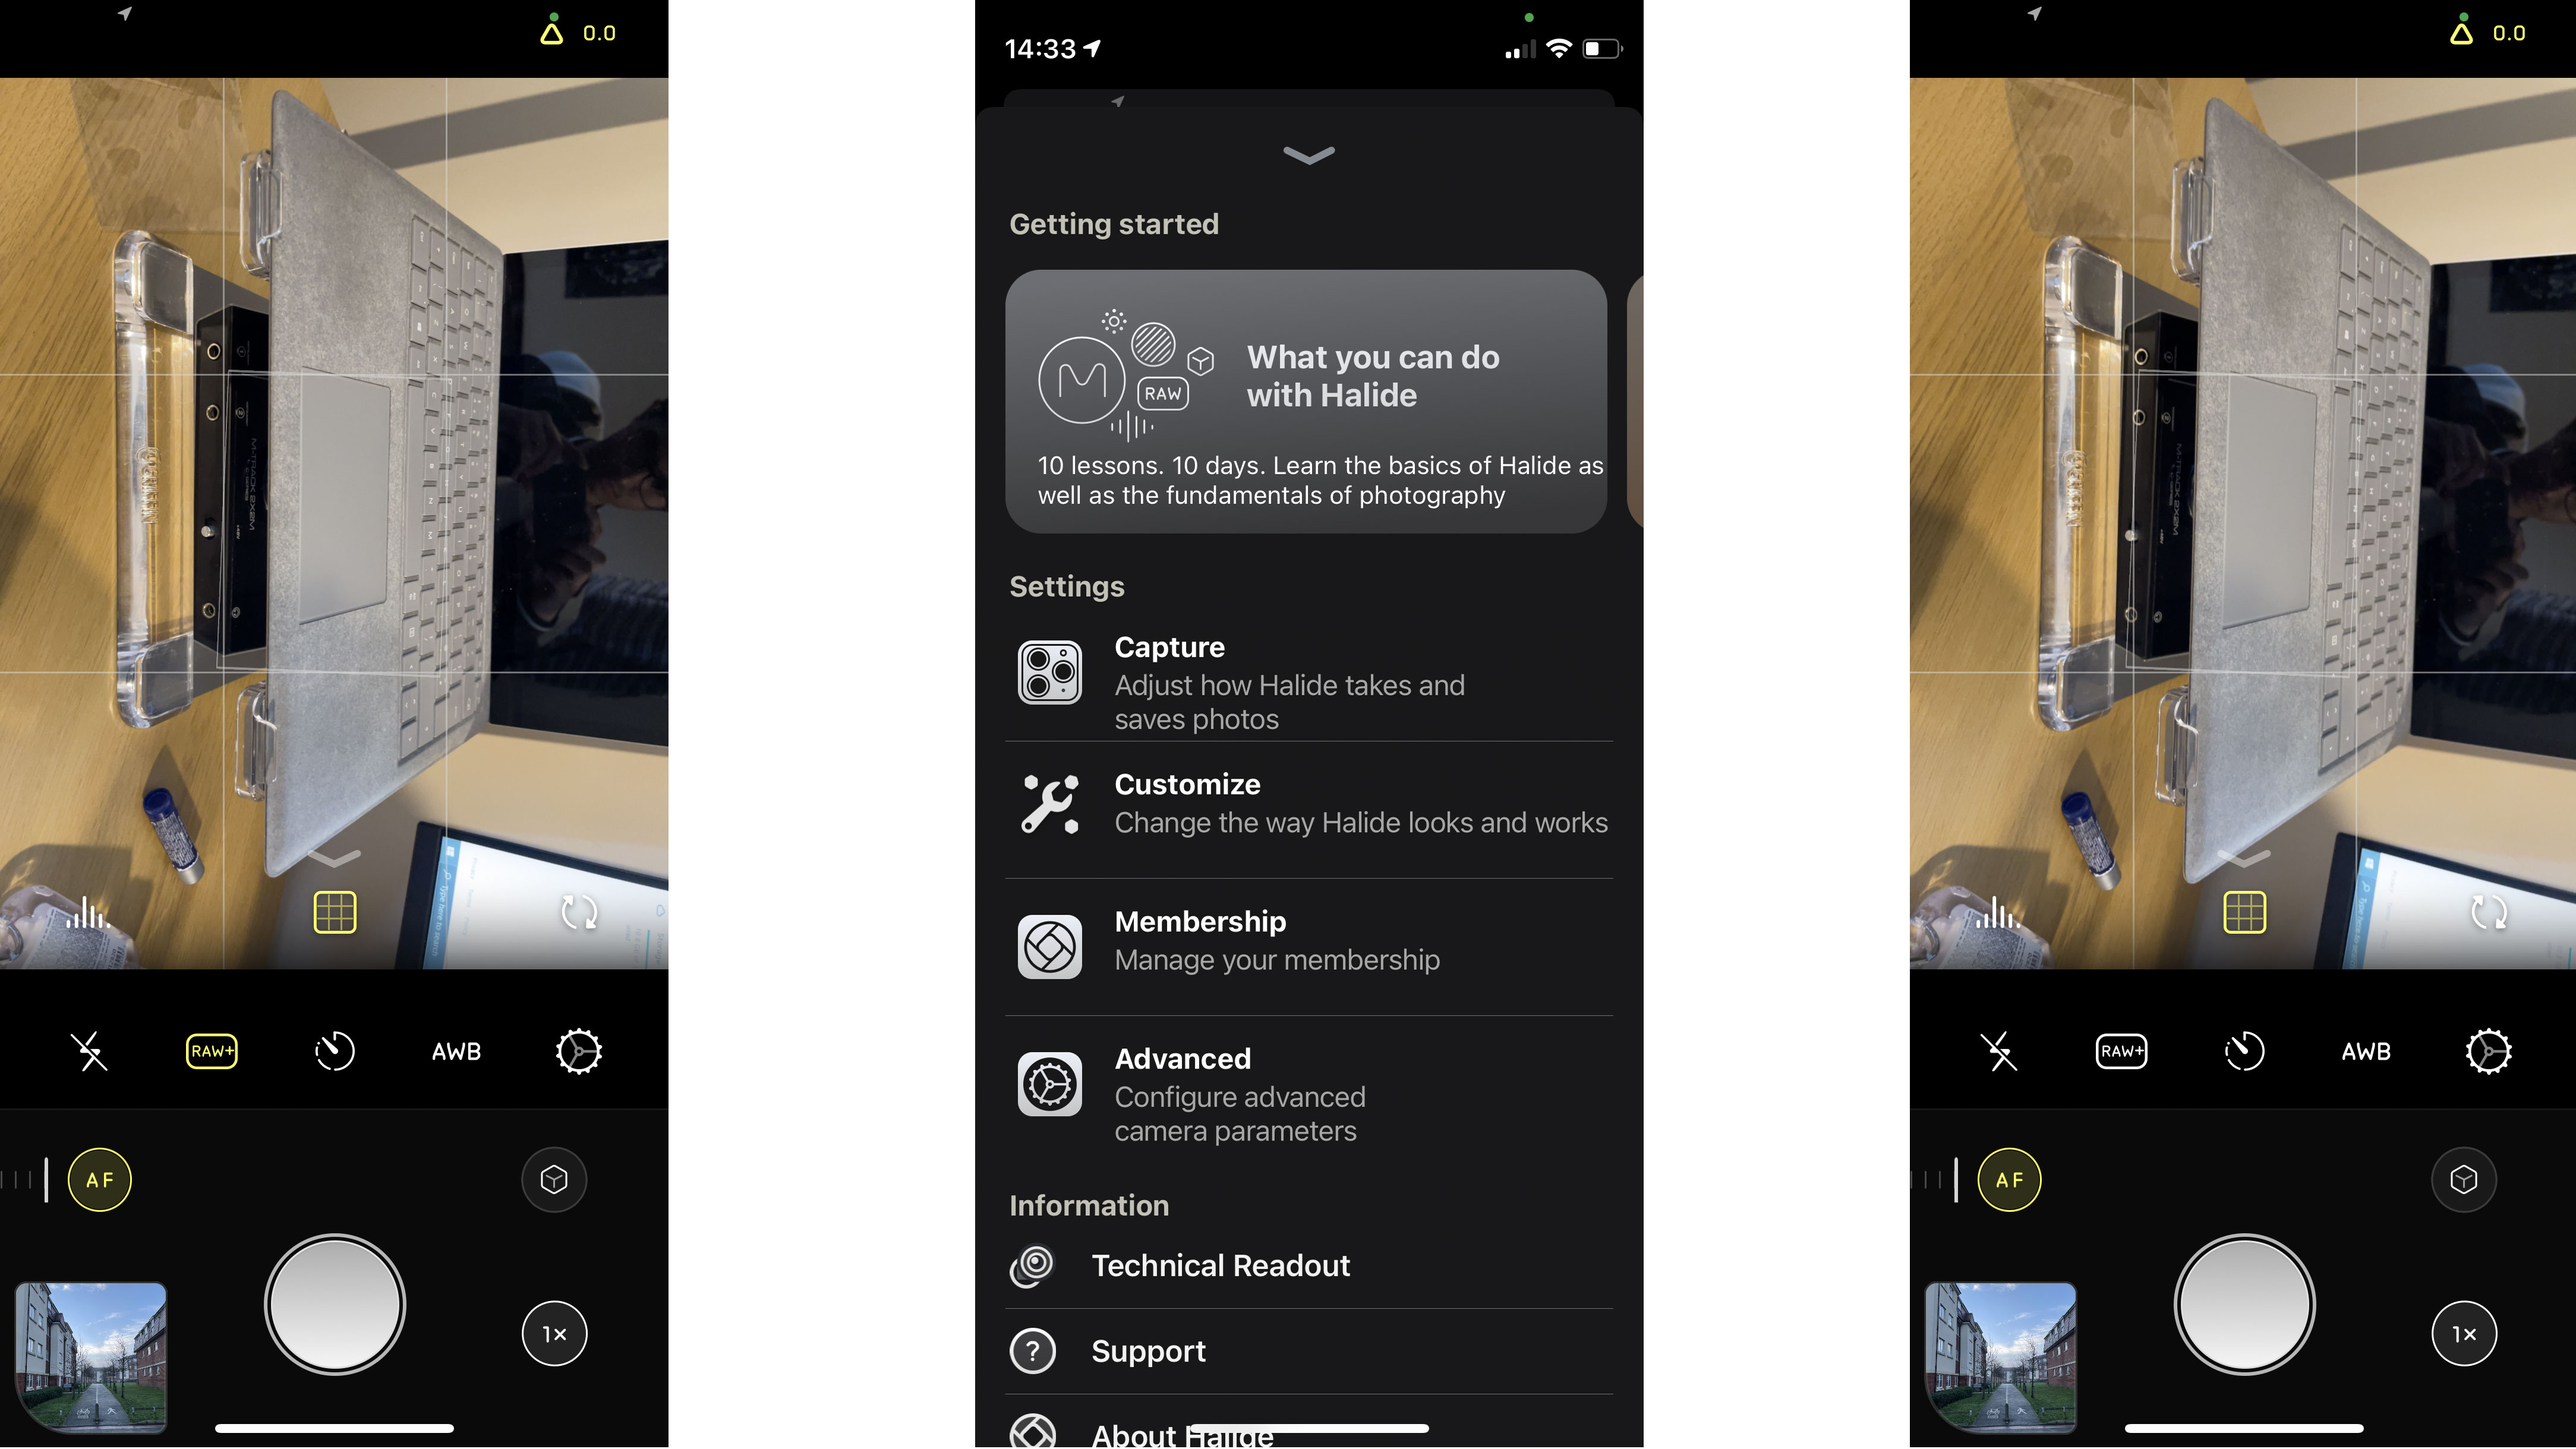
To take raw photos using Halide, open the app after completing setup. Swipe up from the bottom controls and tap the button that says “Raw+” on it. Tap this and it should turn yellow. You should now be able to shoot in raw. Raw photos will be saved as DNG files.
By default, Halide has Raw+ enabled, which captures a processed HEIC file alongside a raw photo. This can be changed in the app’s Capture settings.
Moment
The Pro Camera by Moment, brought to you by the guys who make those phone lenses, offers a functional yet simplified experience. All the features you’d expect are here – full focus and exposure controls, histogram, focus peeking and all the other necessary bells and whistles.
Where Moment excels is the user interface. The Moment app uses a simple and delightful design that keeps the focus on your subject. Each control can be toggled to pull up and adjust, and promptly tucked away out of sight. Crucially, the information on your exact adjustment is still visible on the bar above the shutter button, so you can be sure of the changes you’ve made and make any necessary adjustments subsequently.

What it lacks in the cutting-edge feature development and computational functions of Halide, it makes up for with its delightful UI and sheer ease of use. The app also incorporates a range of pro-grade video features into its $6.99 / £6.99 / AU$10.99 price tag and has support for a range of phone lenses in case that’s an avenue you wish to explore as well.
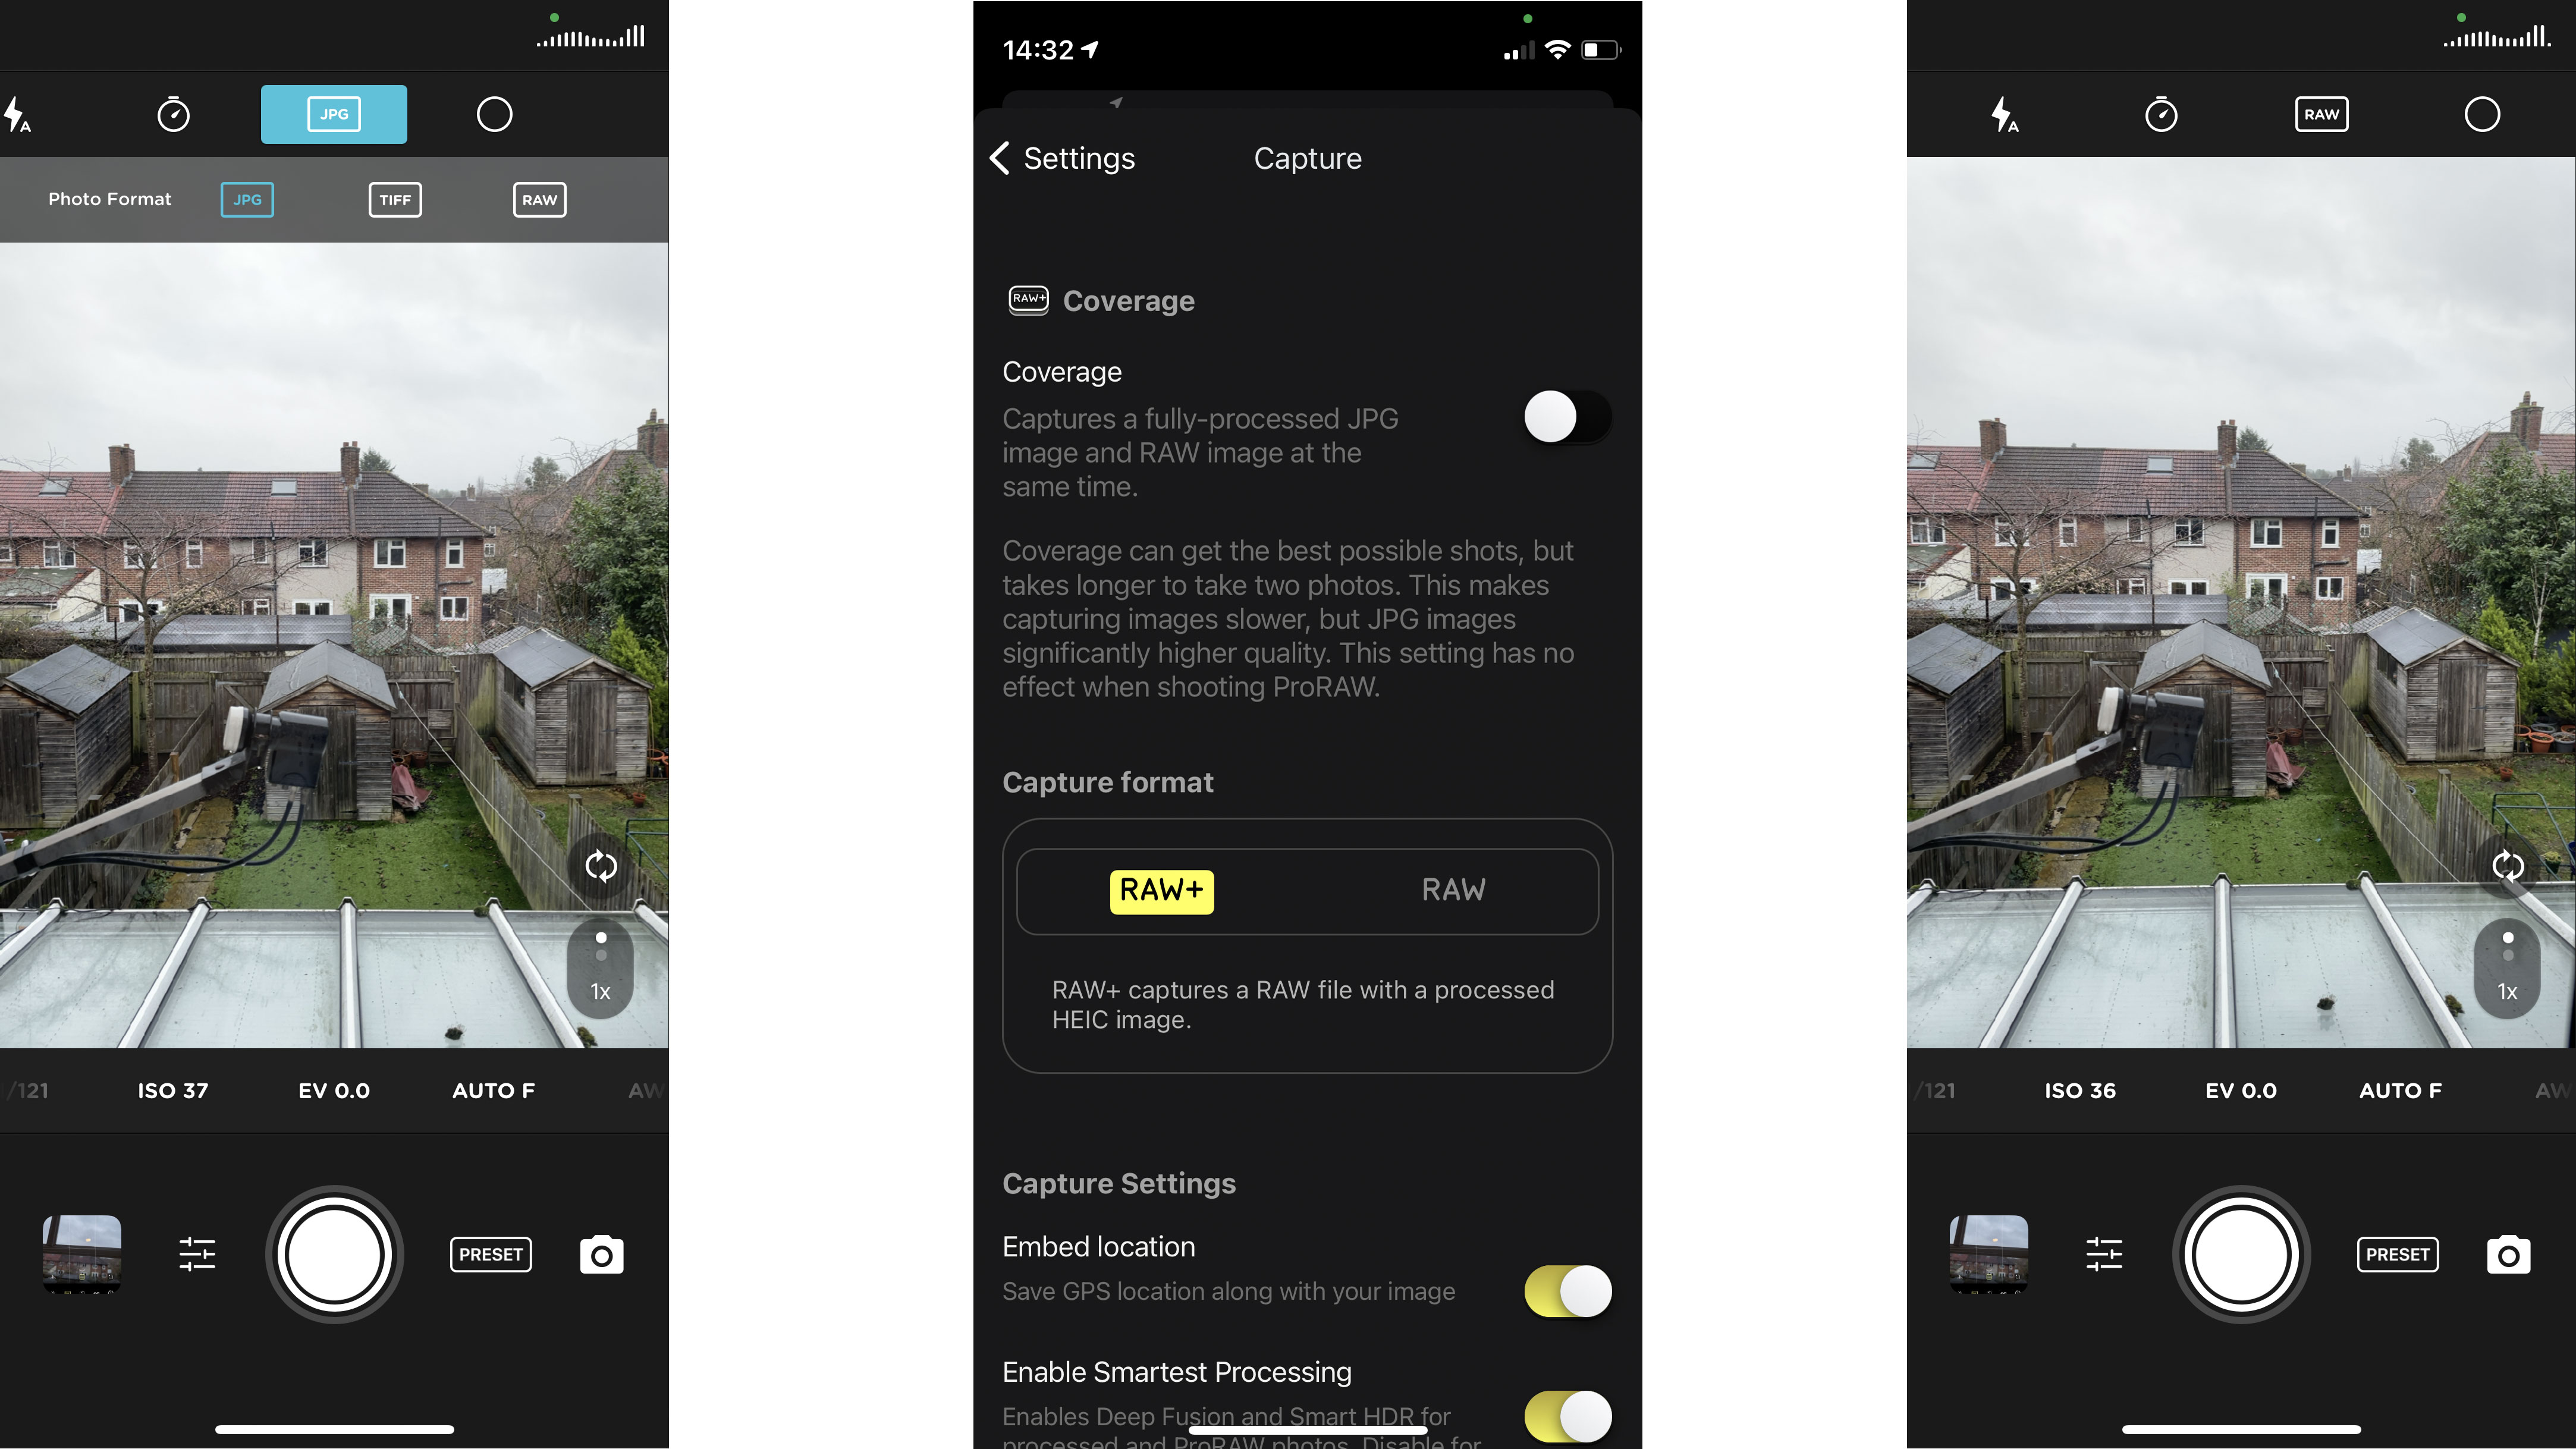
To take raw photos using Pro Camera by Moment, open the app after completing your first setup. On the top control bar, you should see a button that says “JPG”. Tap this and it will open a selection of photo format options. Tap raw and you’re good to go. The app will now capture DNG Raw files.
Both apps are highly functional, great for everyday use and can push your iPhone camera to its limit. I would use Moment as my daily driver, as the simple UI and lens support suits my photography needs. However, if any of the unique features of Halide such as its fantastic raw processing appeal to you, then it’s a no-brainer.
Will there be a difference between taking ProRaw photos and regular raw photos using these apps?
Somewhat, although not an insurmountable one by any means. The key advantage of the ProRaw format over raw from third parties is that ProRaw allows users to take advantage of Apple’s computational photography whilst shooting in raw.
This means the benefits and flexibility of features like Smart HDR 3, Deep Fusion, Apple’s Night Mode processing and other such advancements are all built into the raw photos taken using ProRaw on the iPhone 12 Pro.
This often means you can push the ProRaw images a little further with shadow and highlight processing (among others), or that the image straight off the sensor will have less noise. However, these are by no means insurmountable differences.
Halide attempts to compensate for this to some extent with its Instant Raw processing, although likely not to the same extent Apple does. Crucially though, given the flexibility and control you do gain when using raw files, it’s unlikely the lack of Apple’s computational photography will hold you or our images back in the slightest.
There’s a great deal of range and flexibility within the use you can get out of your iPhone camera. Even if you didn’t upgrade this year, or splurge on the pro models, you can definitely take advantage of the creative control granted to you by raw photography.
While both apps are paywalled, they both have free trials and are definitely worth the money in terms of the sheer utility you are bound to get out of them over time. It has never been a better time to be a phone photographer.