How to turn your iPad into a digital photo frame
Reinvent your old iPad by turning it into a digital photo frame
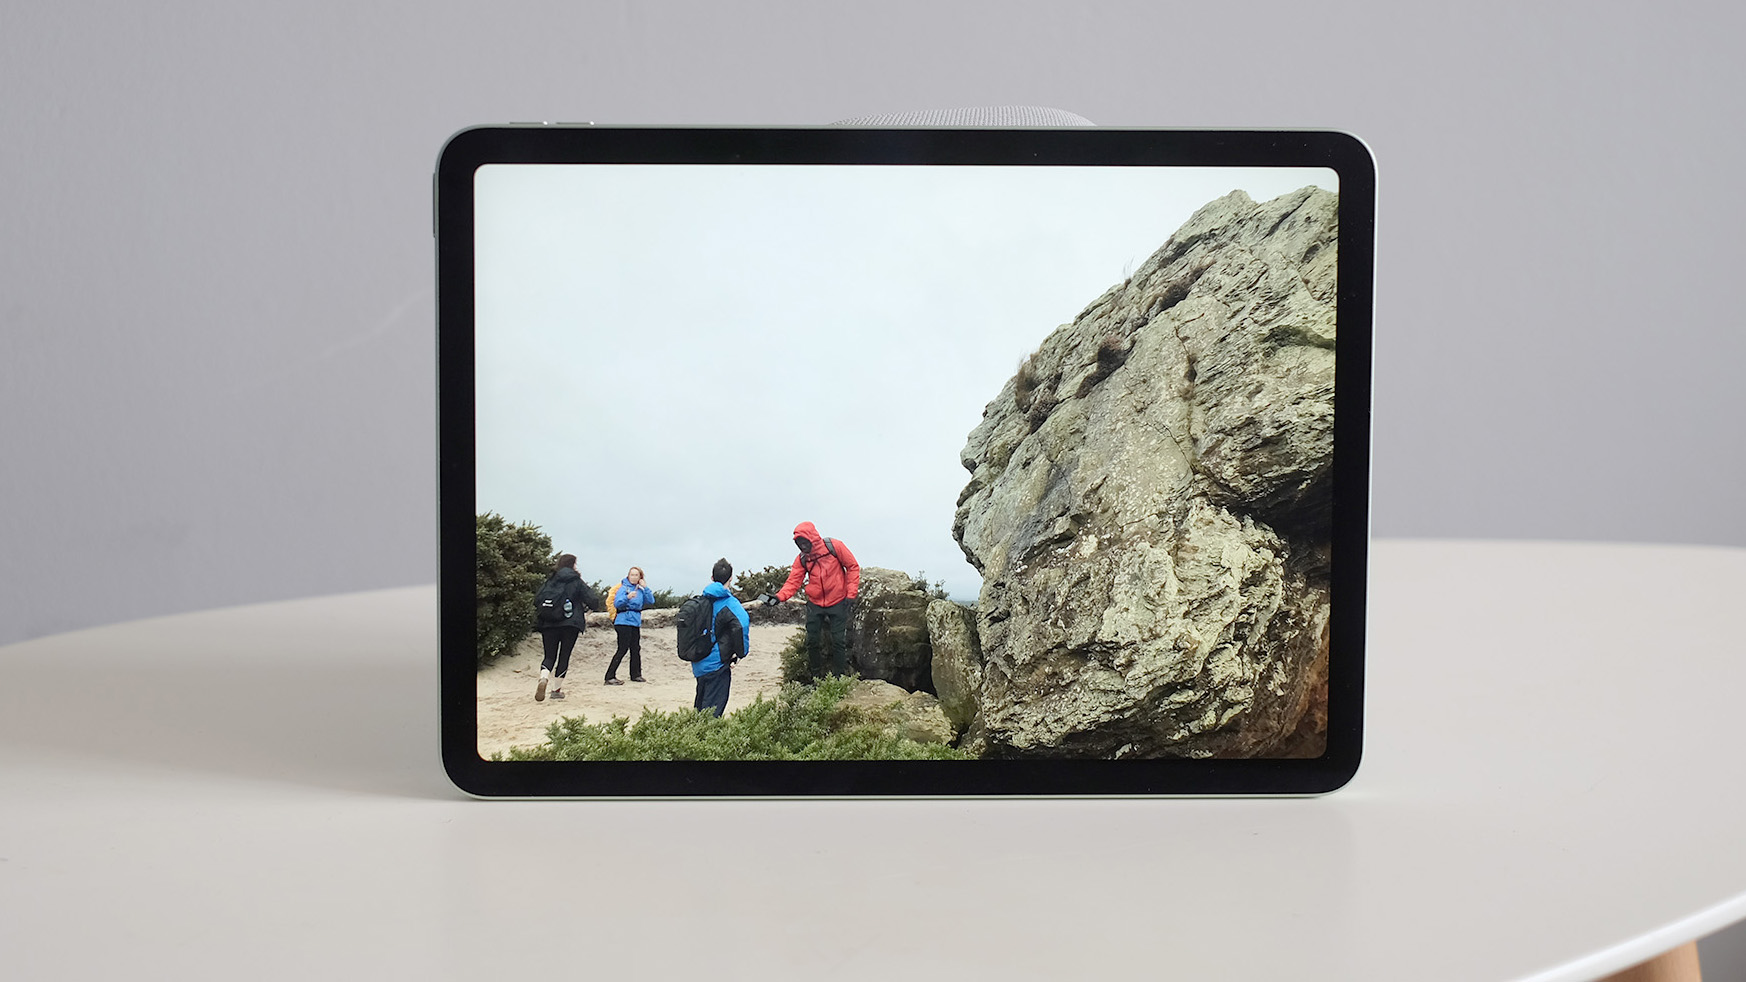
Quick steps
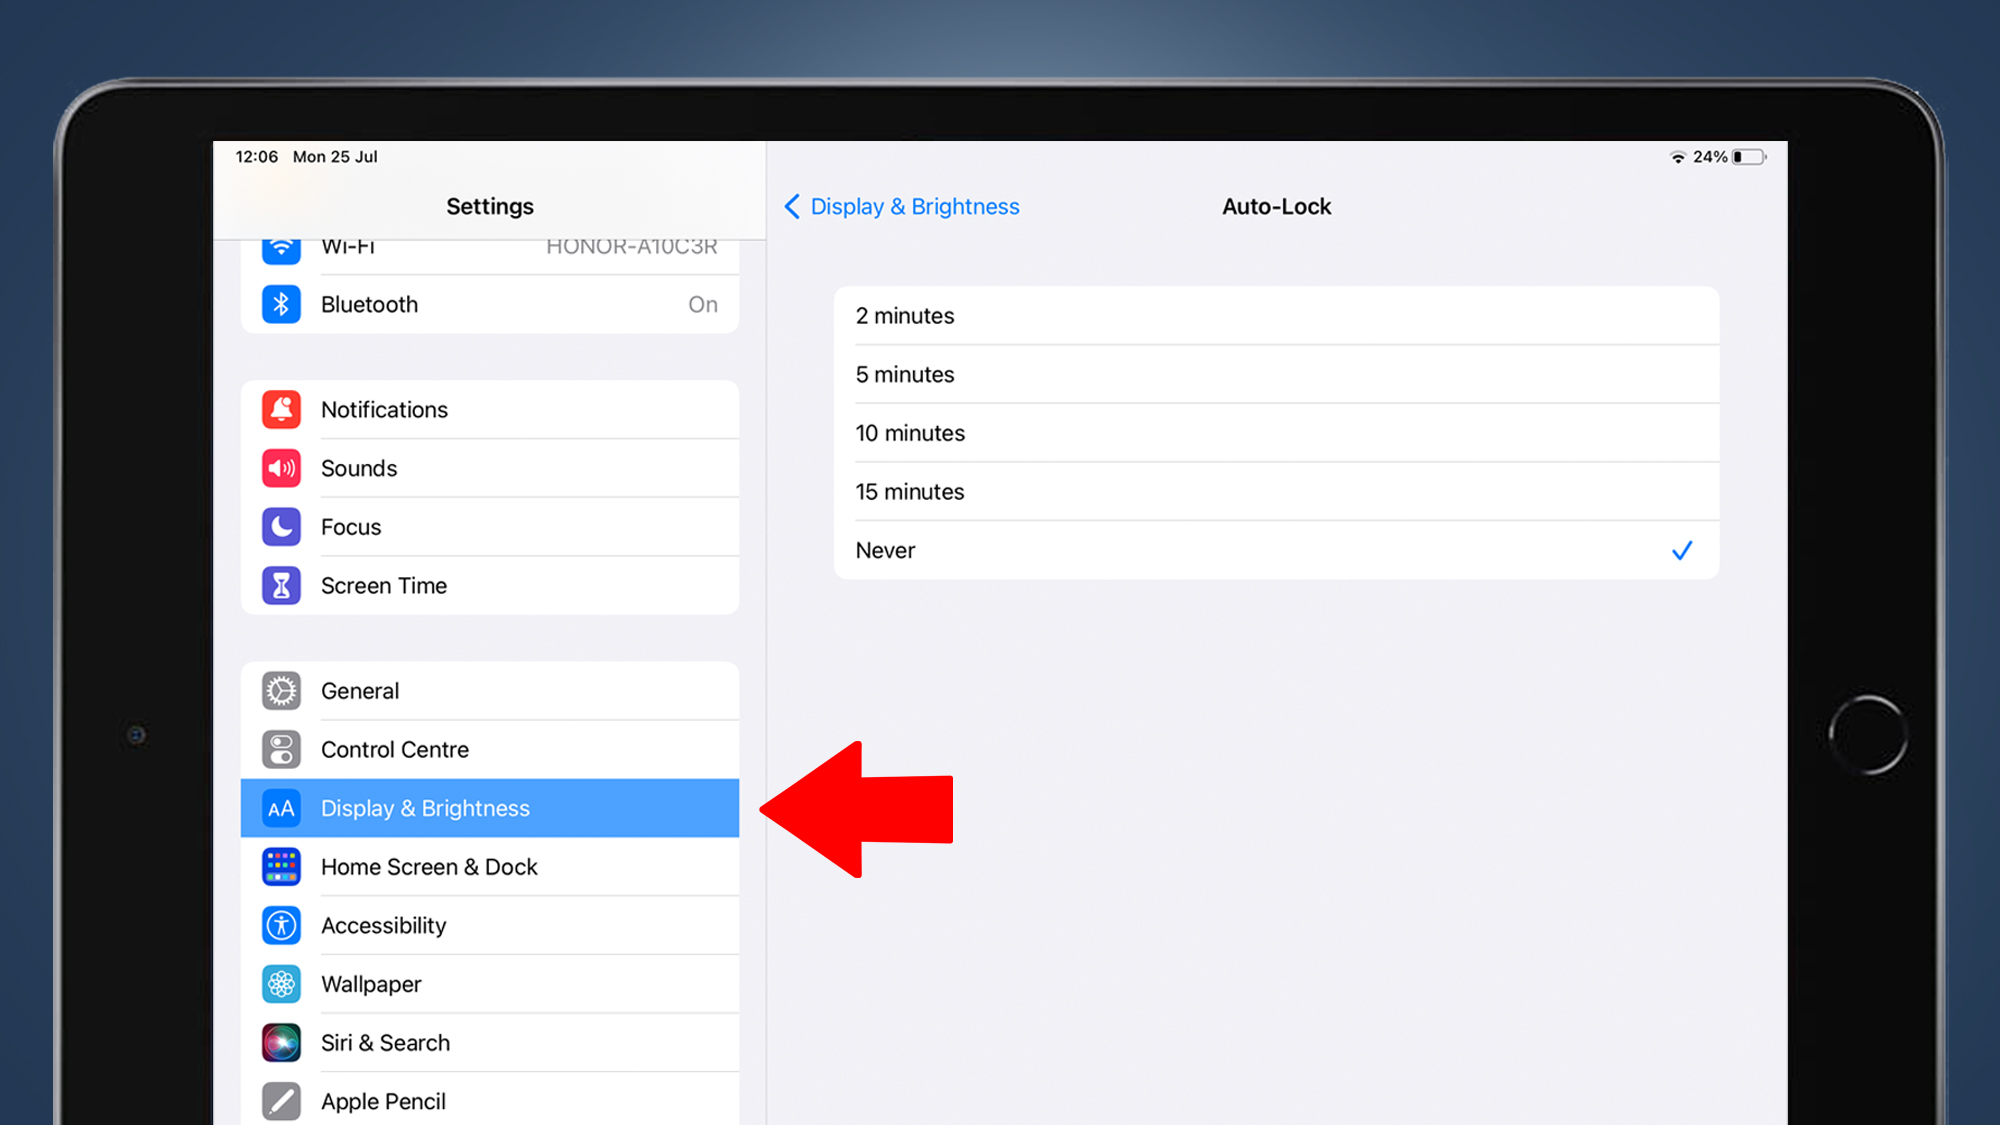
- On your iPad, go to Settings > Display & Brightness
- Tap 'Auto-Lock' and select 'Never'
- In the Photos app, create a new album with your chosen photos
- Now go to Settings > Accessibility > Guided Access > turn on
- Find your new album in the Photos app and tap the three-dot menu button
- Select 'Slideshow' and triple-press the Home button to turn on Guided Access
How to turn your iPad into a digital photo frame
Whether you're looking to reinvent an old tablet or add a string to the bow of current one, you may be wondering how to turn your iPad into a digital photo. Luckily, it's fairly straightforward – and our guide's here to show you the two best ways of going about it.
A digital photo frame is great way to bring photos into your home without accruing even more physical clutter. Unfortunately, cheap ones typically have poor displays. And the best digital photo frames aren't always cheap. But if you do have an older iPad lying around, it can be turned into a brilliant photo frame.
You may find that using a current-gen iPad for this is slight overkill or interrupts your daily use of the tablet. But if you tend to use your iPad in fits and starts, it's a fine way to get more use of it – and it's a great way to give older tech a new lease of life.
There are two recommended methods here. The first requires no extra software, just the features baked into your iPad’s software. In the second, we'll also look at why you might want to use one of the handful of decent iPad photo frame apps, and the extra features they provide.
How to turn your iPad into a digital photo frame: method one (Photos app)
While, photo frames are generally designed to stay backlit all day, tablets are more like phones, with screens that go to sleep after a while if there’s no user interaction.
You control this in Settings > Display & Brightness > Auto-lock. Set Auto-lock to Never and the screen will not automatically dim. This also, of course, means you’ll want to plug your iPad into a power source, or it will power off after the usual iPad 10-hour battery runs dry. Here are the rest of the steps needed to get your iPad behaving like a digital photo frame.
Tools and requirements (method one)
- iPad
- Apple Photos app
Step-by-step instructions
- This method uses just your iPad and the built-in Photos app, so is pretty straightforward. Firstly, go to Settings > Display & Brightness on your iPad. Now tap 'Auto-Lock' and select 'Never'. This is to prevent your iPad from locking while displaying your photos.
- Now it's time to create an album for the photos you want to display on your iPad digital photo frame. Open the Photos app, then in the navigation panel select 'New Album' under the 'My Albums' header.
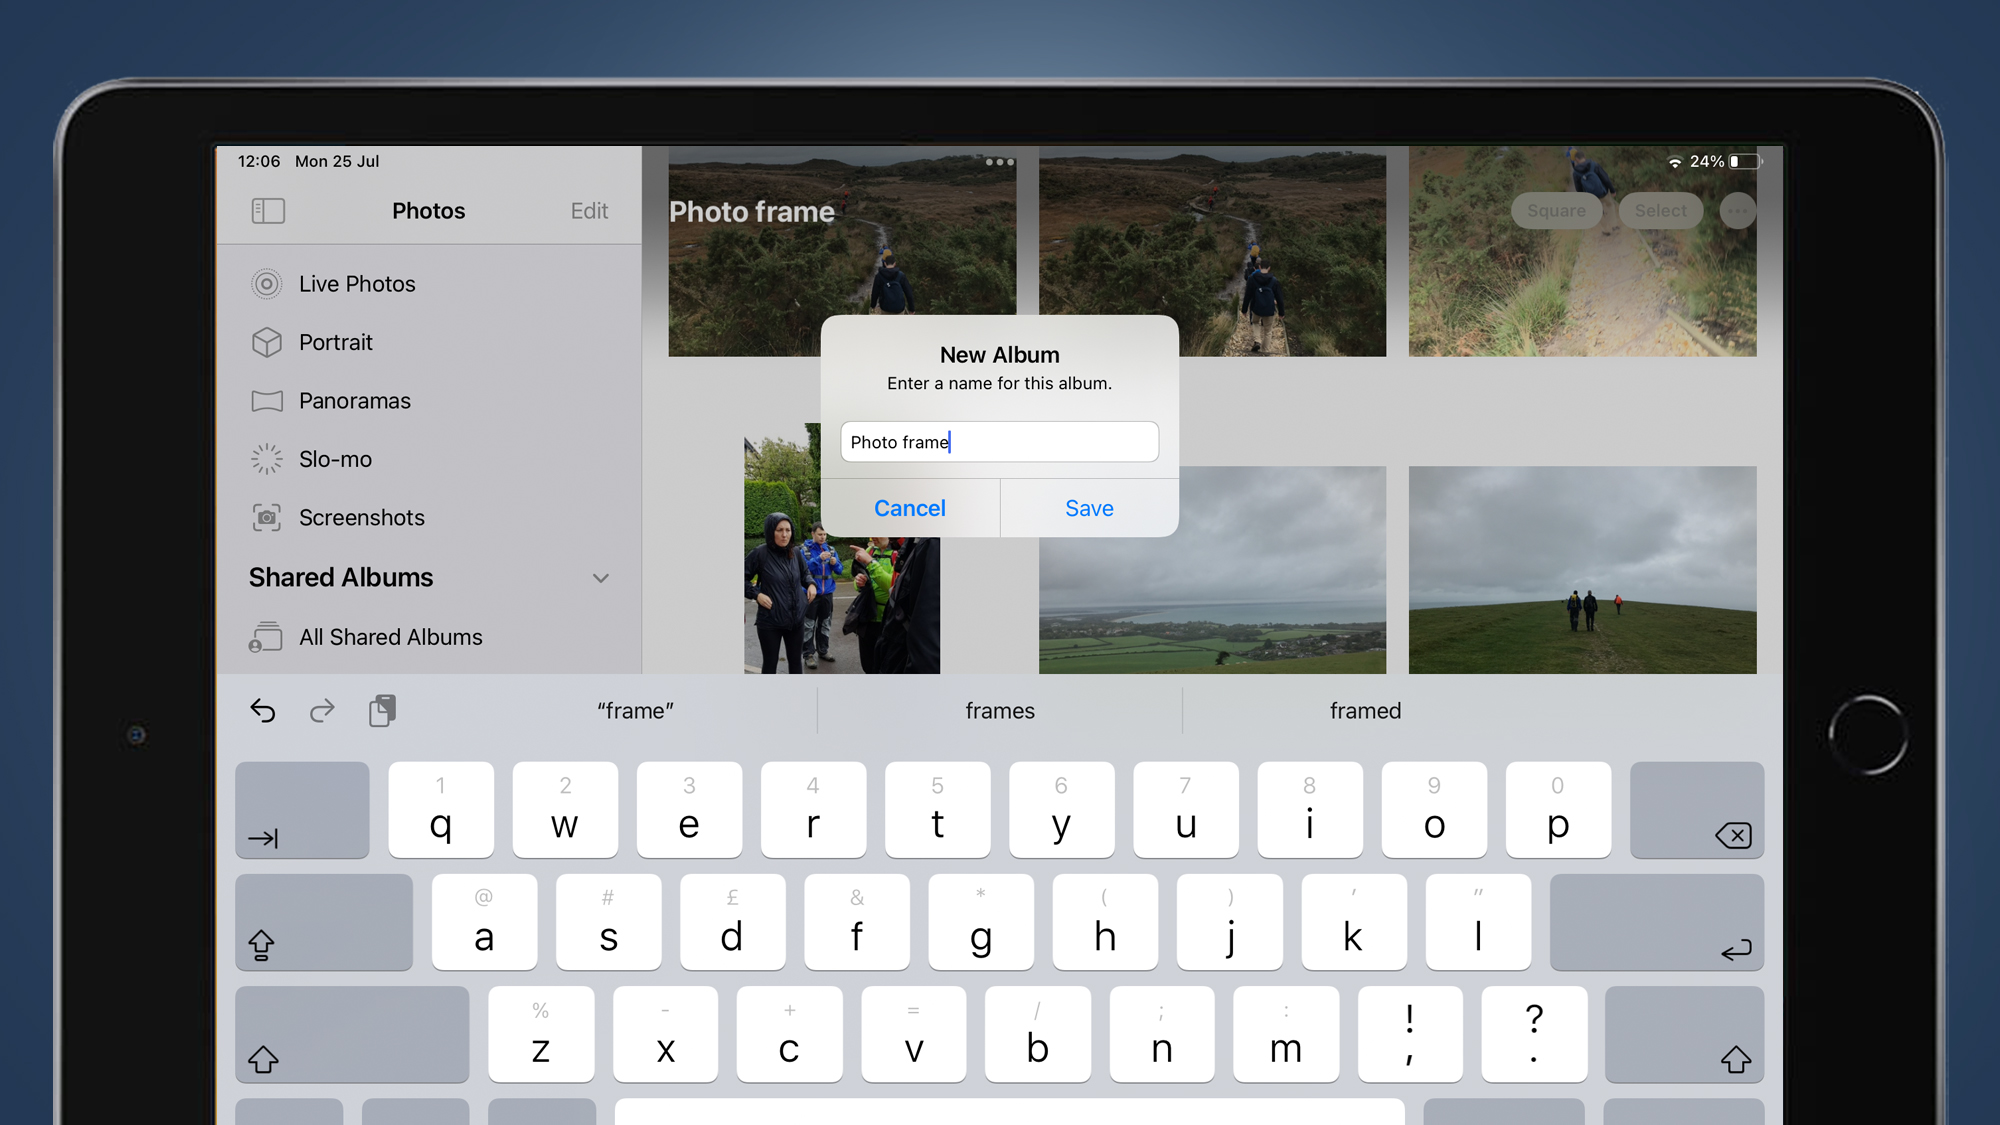
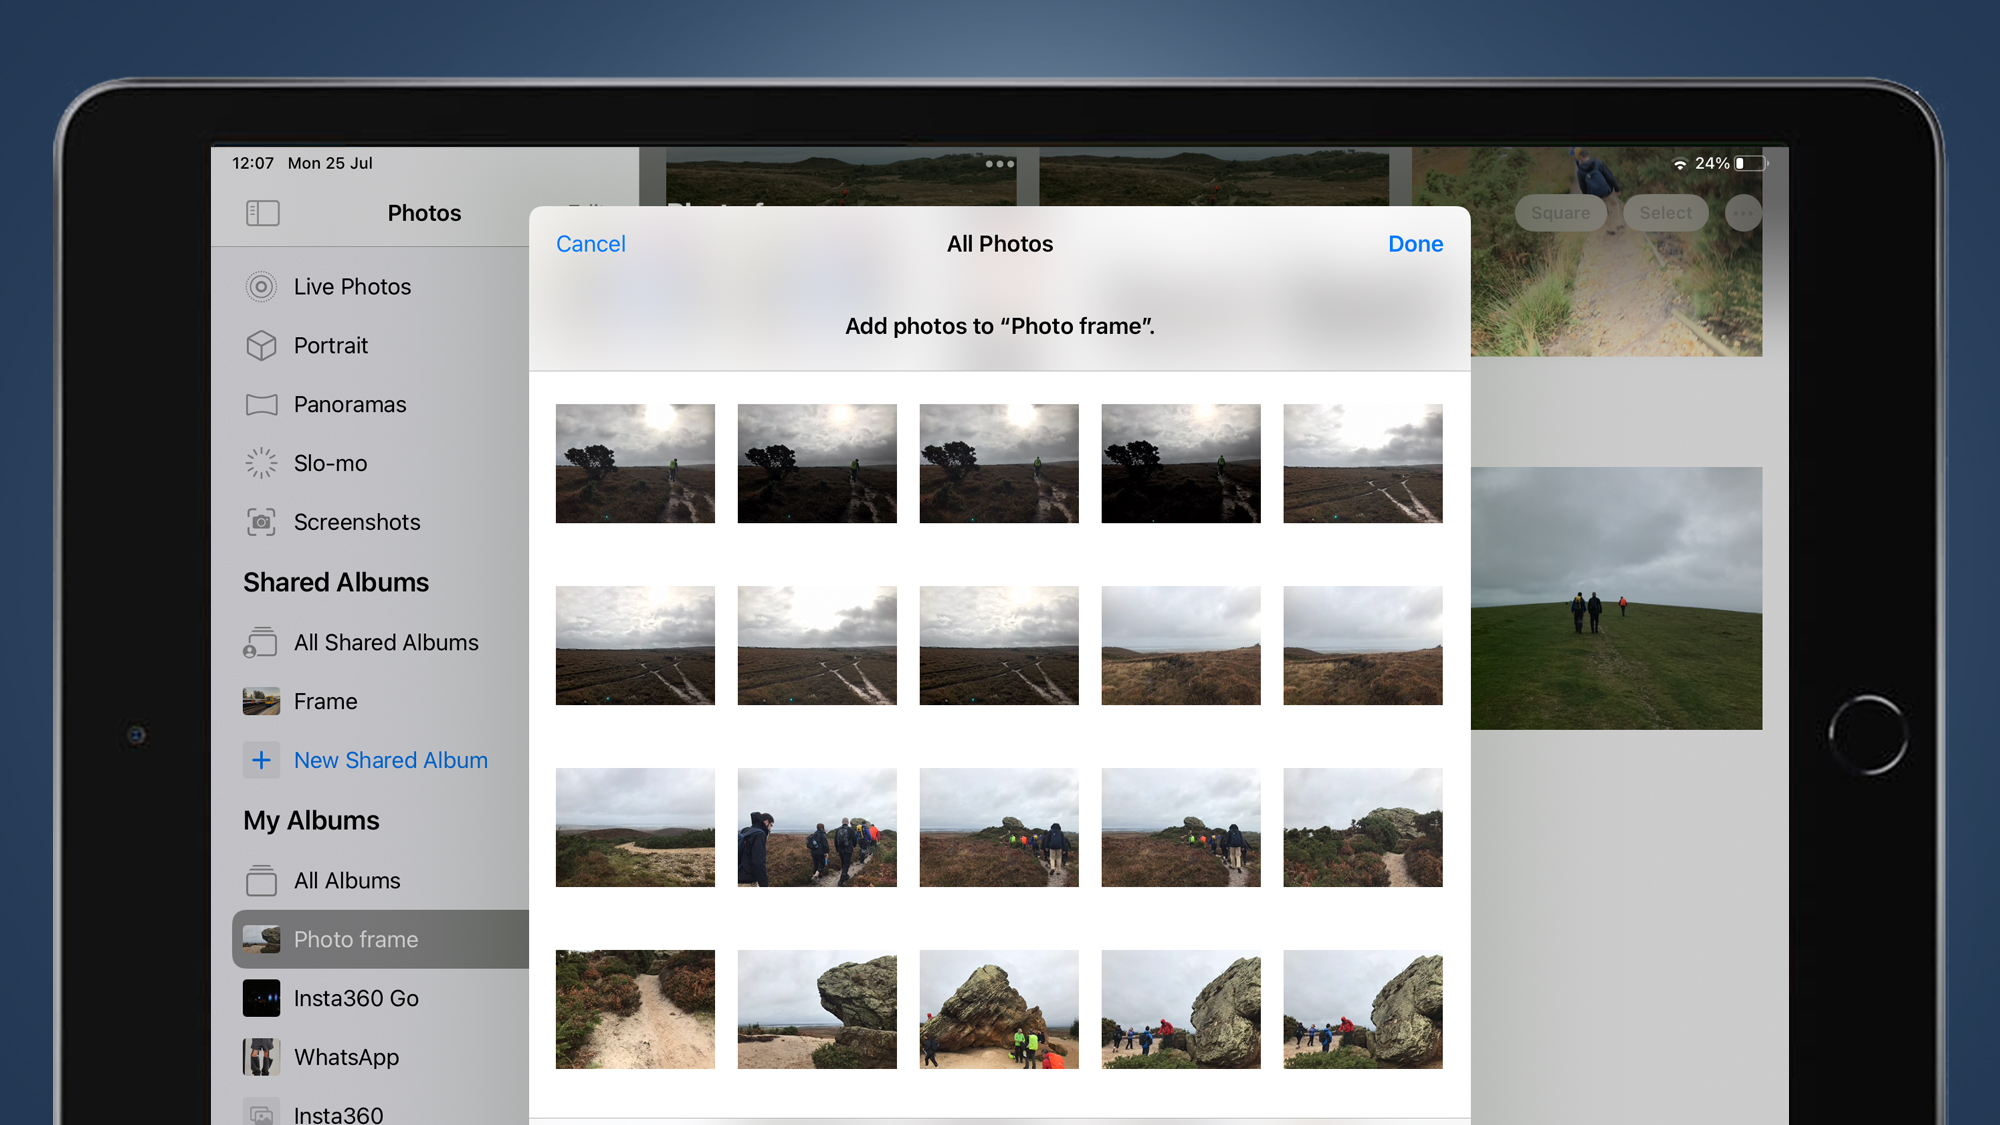
- Enter a name (perhaps 'digital photo frame', to help distinguish it from your other albums), hit save and select the photos you want to see on your iPad photo frame by tapping on them. Hit 'Done' when you're finished.
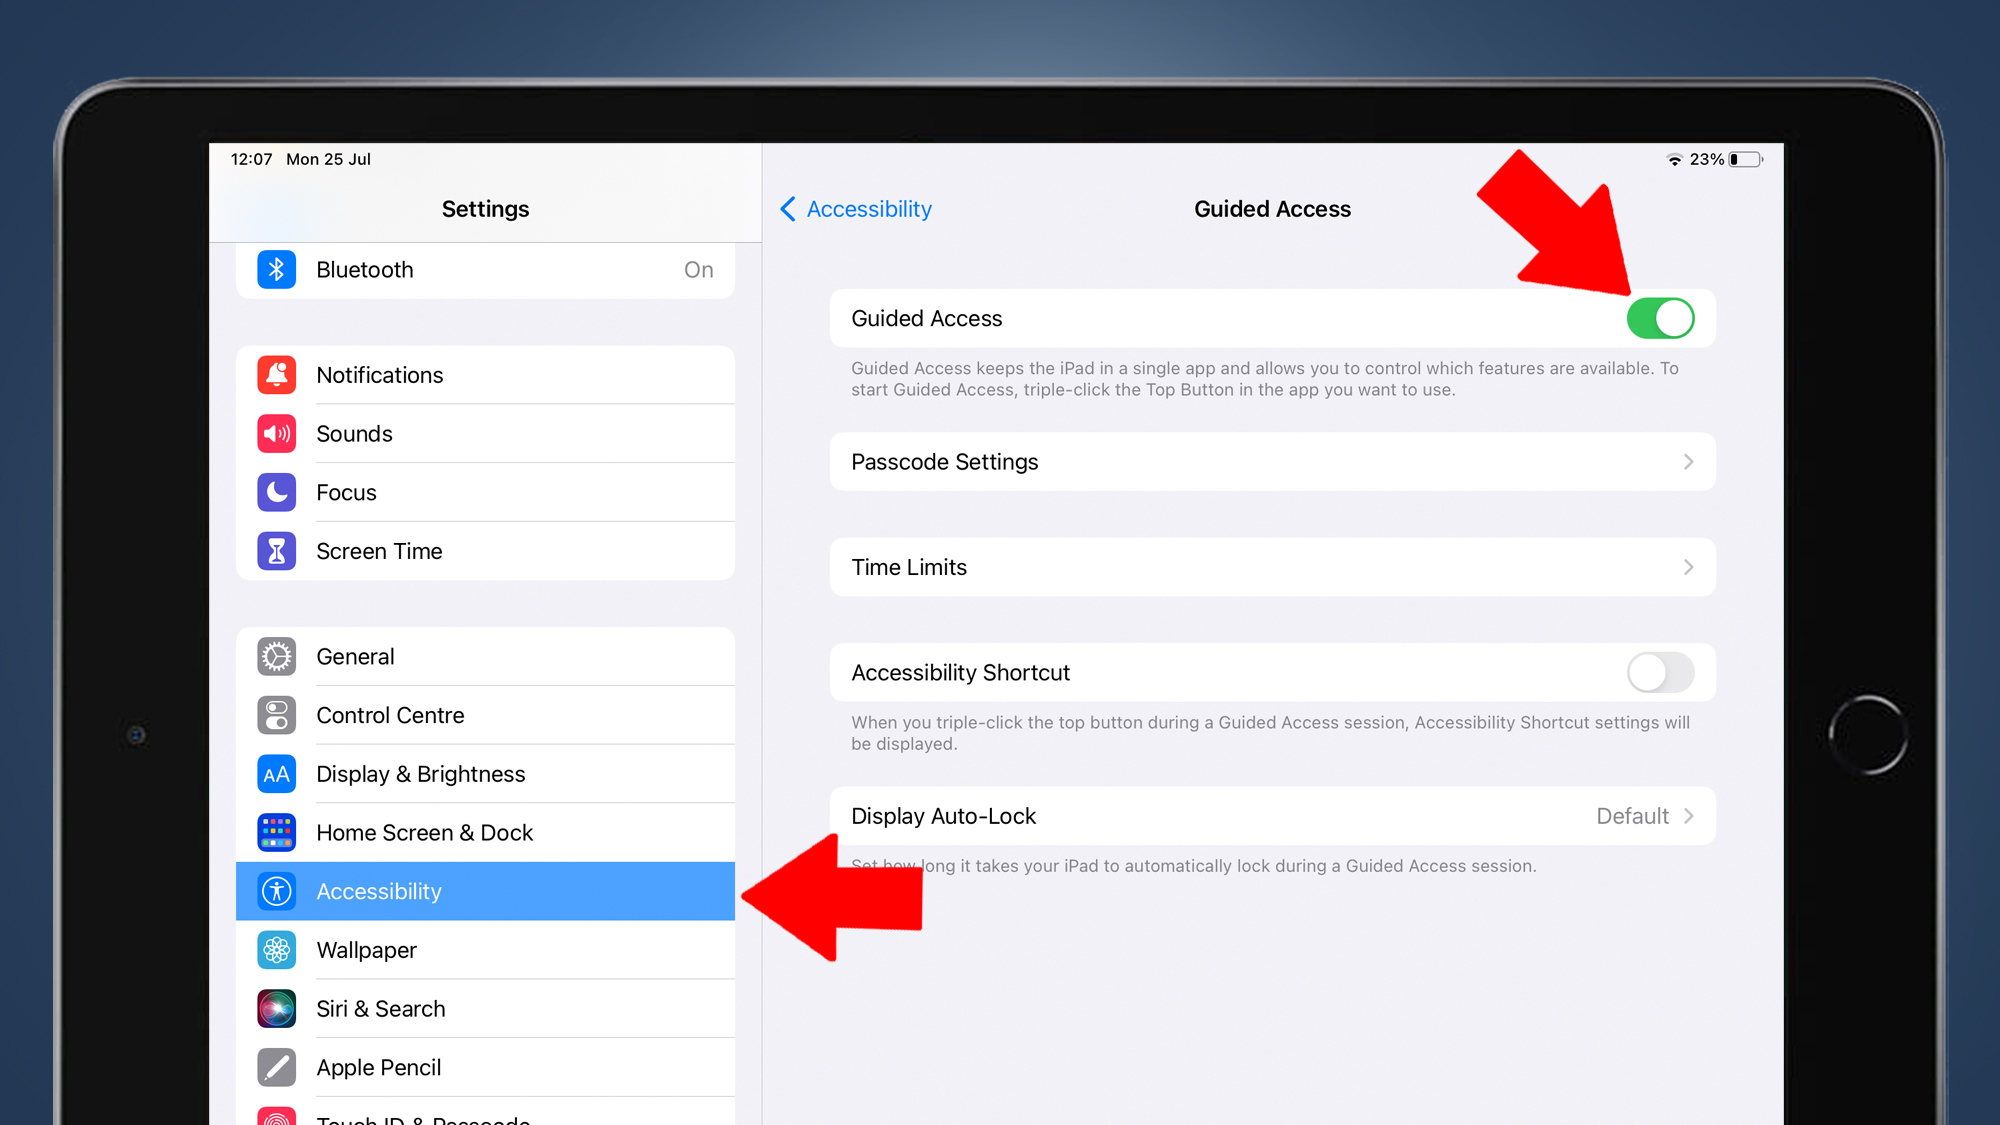
- Now it's time to set up the iPad's digital photo frame mode. Open 'Settings' again from the iPad home screen, then go to Accessibility > Guided Access, and tap the switch to turn it on.
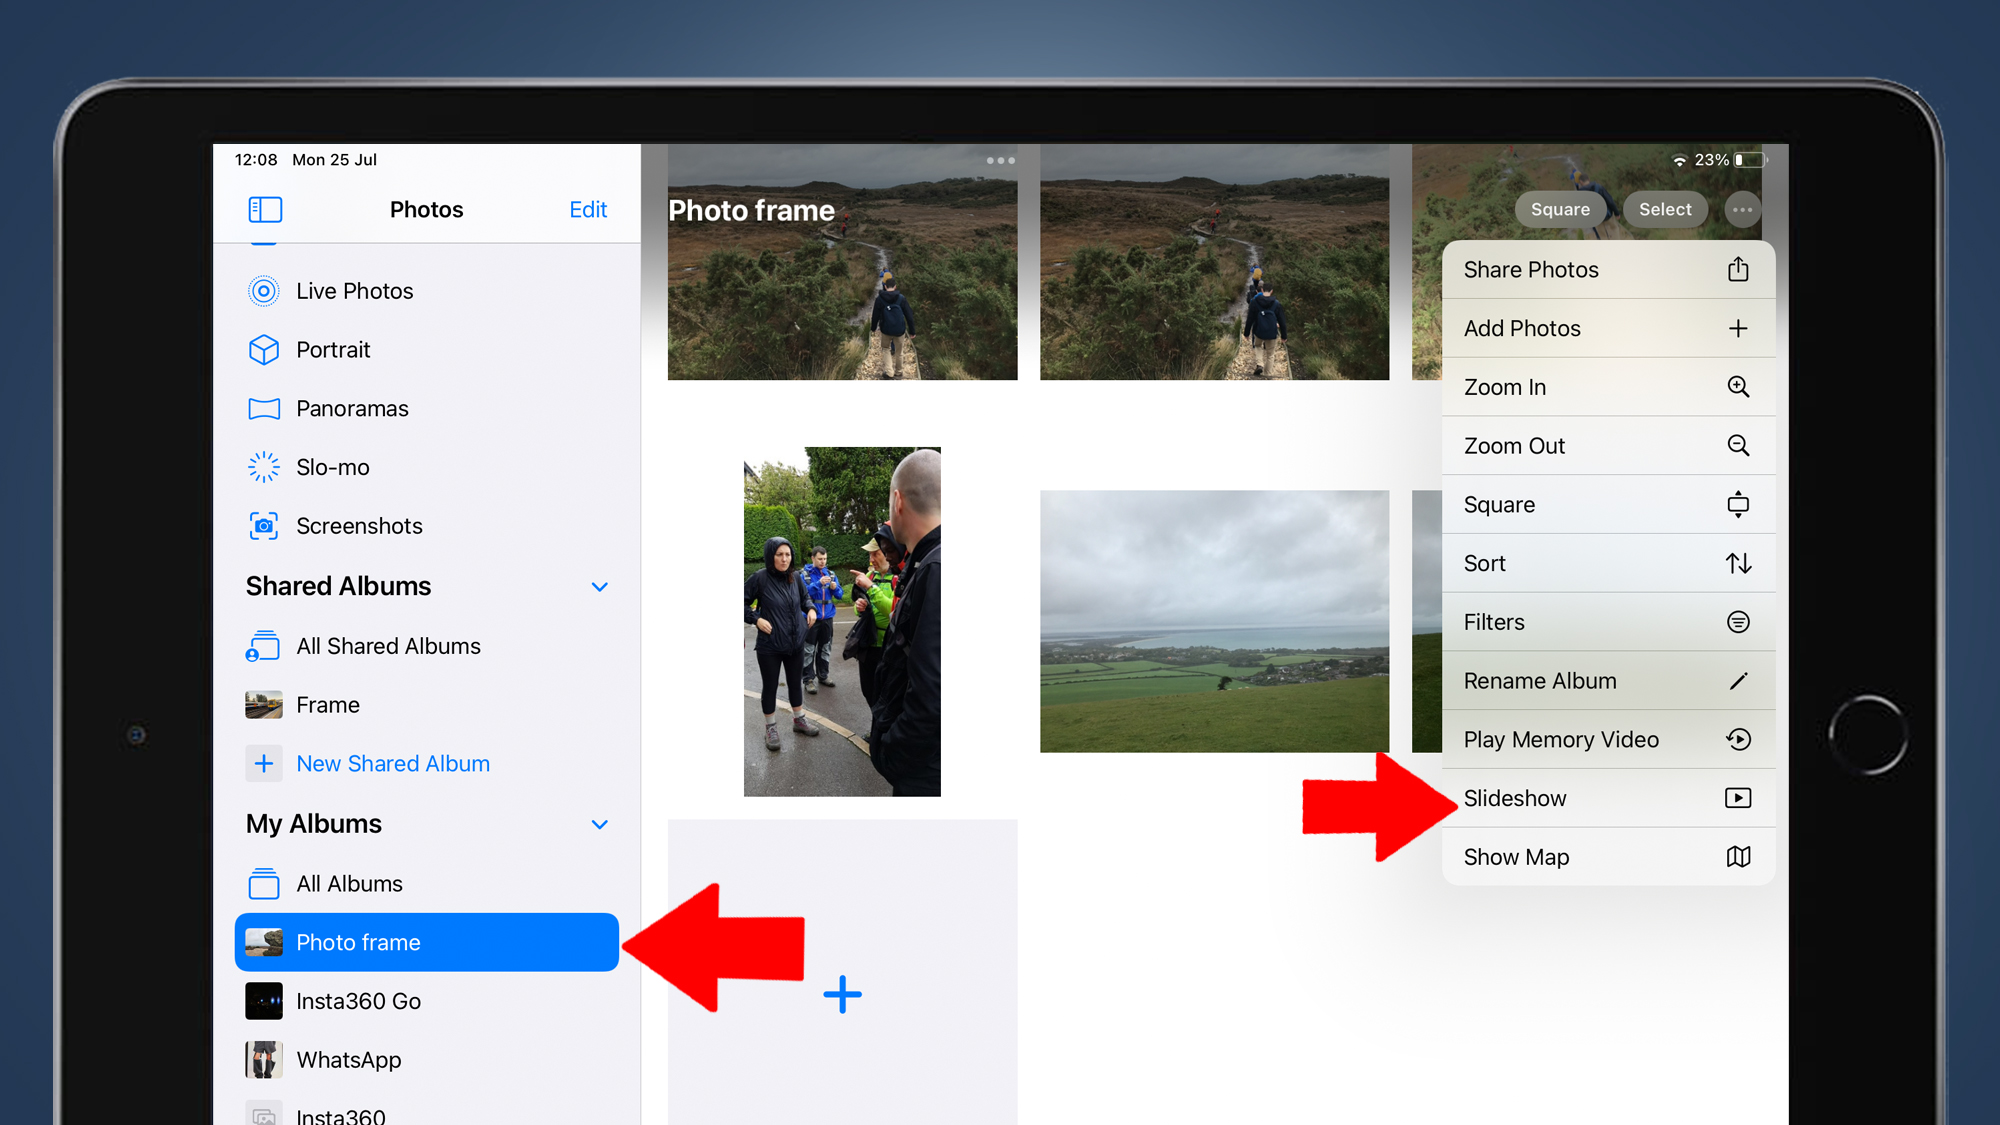
- Now head back to the Photos app and select the 'digital photo frame' album you made made earlier. Tap the three-dot menu button in the top-right corner and select 'Slideshow'.
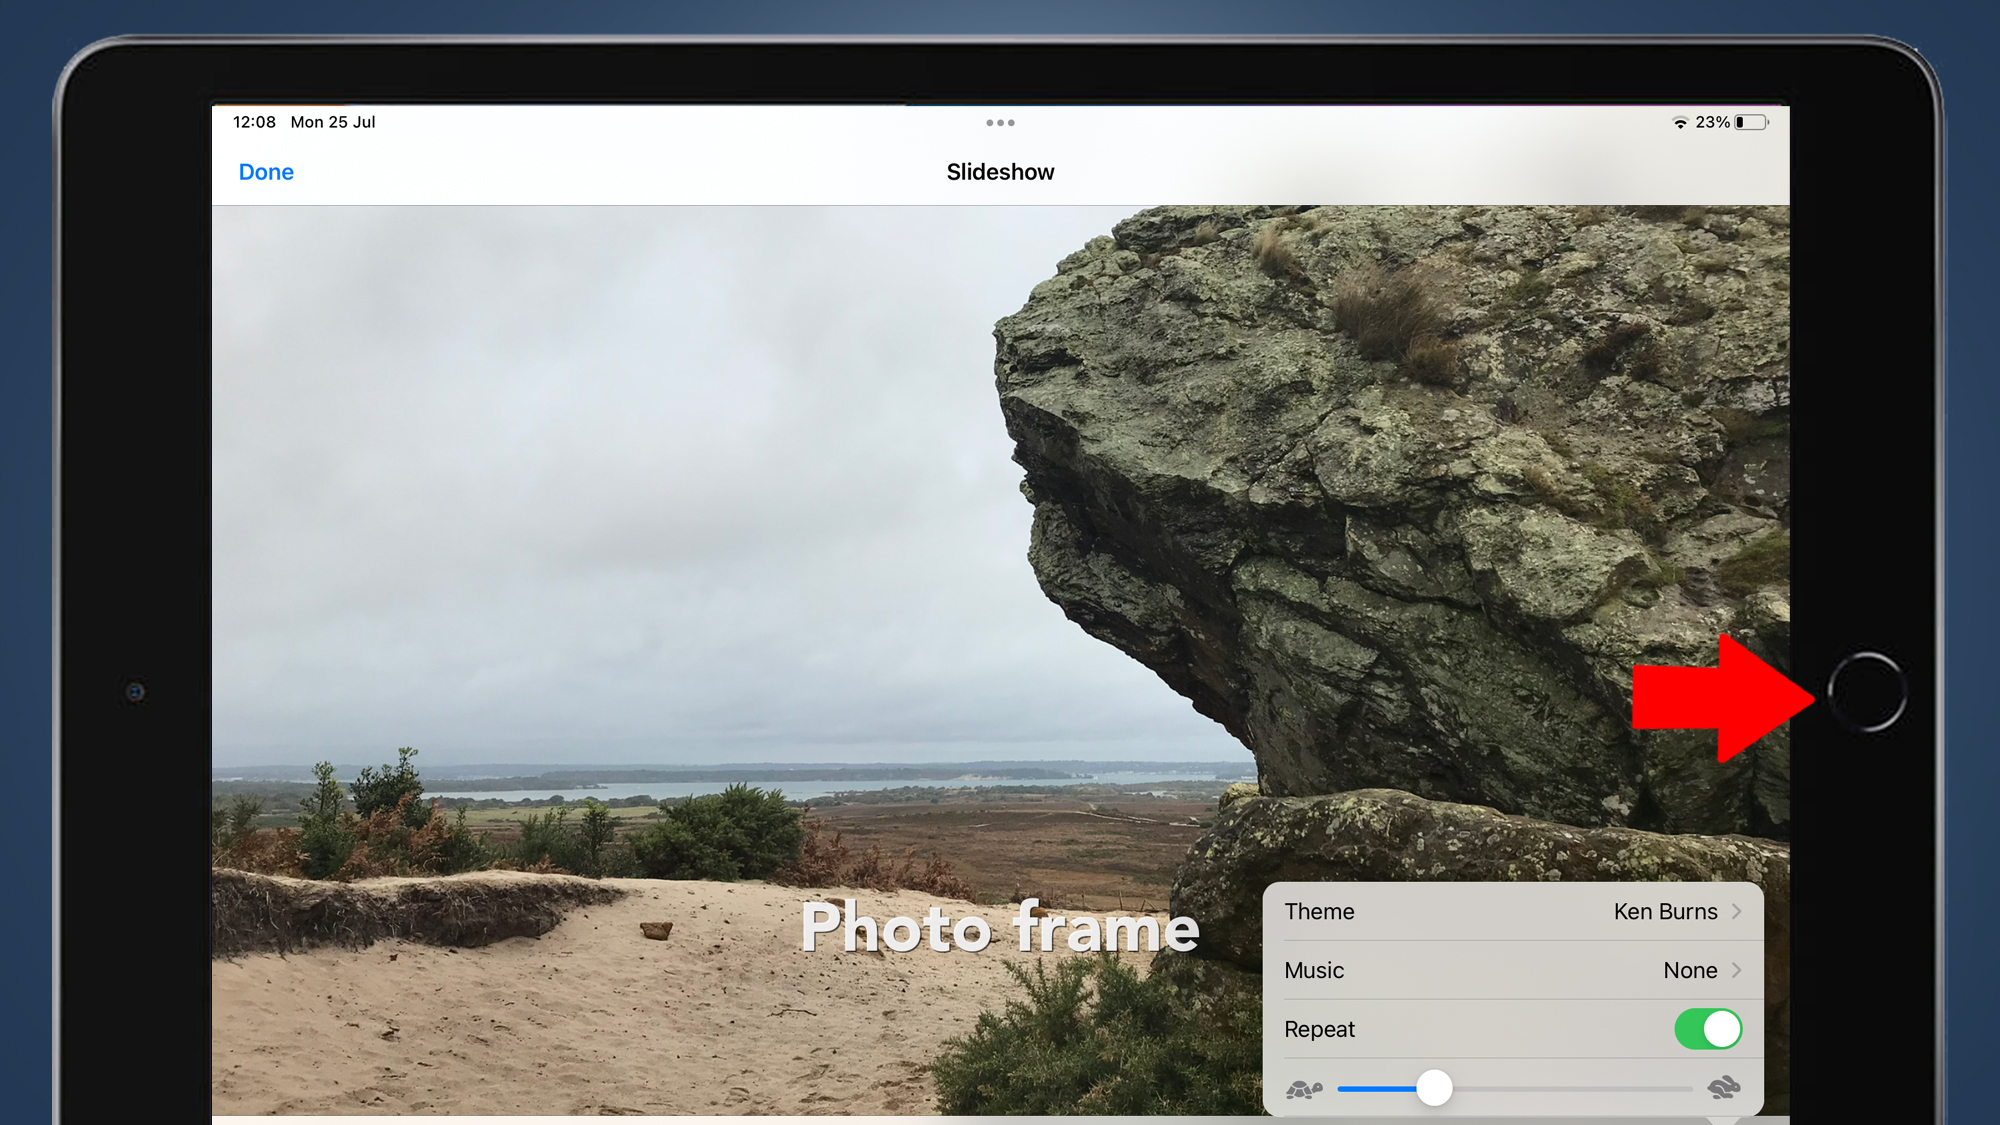
- Finally, triple-press the Home or Power button to turn on Guided Access. This will stop the iPad from leaving the Photos app and disable its usual hardware buttons. To get out of Guided Access and put your iPad back into its normal mode, double-click the Home button and unlock with Touch ID (if that's been enabled).
How to turn your iPad into a digital photo frame: method two (LiveFrame app)
An iPad makes a good digital photo frame with the Photos app alone, but you may also want to try a third-party app that adds some secondary features. For example, LiveFrame lets you make your iPad photo frame display the time and date if you like. Photos can also be displayed for as much as 30 minutes before shifting.
Get daily insight, inspiration and deals in your inbox
Sign up for breaking news, reviews, opinion, top tech deals, and more.
LiveFrame is free to download and try, but you’ll see a pop up after five minutes of use, after which you can either buy the app ($4.99/£4.49/AU$7.99) or watch an ad for a further five minutes of use.
Most of the earlier points in this guide still apply to this method. You want to setup the screen time-out, create an album in Photos and – if you want to use it – enable Guided Access. However, you'll obviously then want to download and run LiveFrame.
Tools and requirements (method two)
- iPad
- LiveFrame app (£free, no ads version $4.99 / £4.49 / AU$7.99)
Step-by-step instructions
- Firstly, follow the first four steps of Method One (see above). This will ensure your iPad doesn't lock up and also will turn on Guided Access, so you can freeze its usual functionality and get it working more like a digital photo frame. Done all that? Now it's time to Download LiveFrame from the App Store, then open it.

- The first screen you’ll see in LiveFrame is a plain nav menu, which lets you choose the source images for your photo frame. It can connect to social networks like Flickr and Instagram, but for the classic frame experience we are going to use the album we created earlier. Select My Device in the left nav pane, the select Custom Album Selection. Grant LiveFrame access to your iPad's photos in the pop-up.
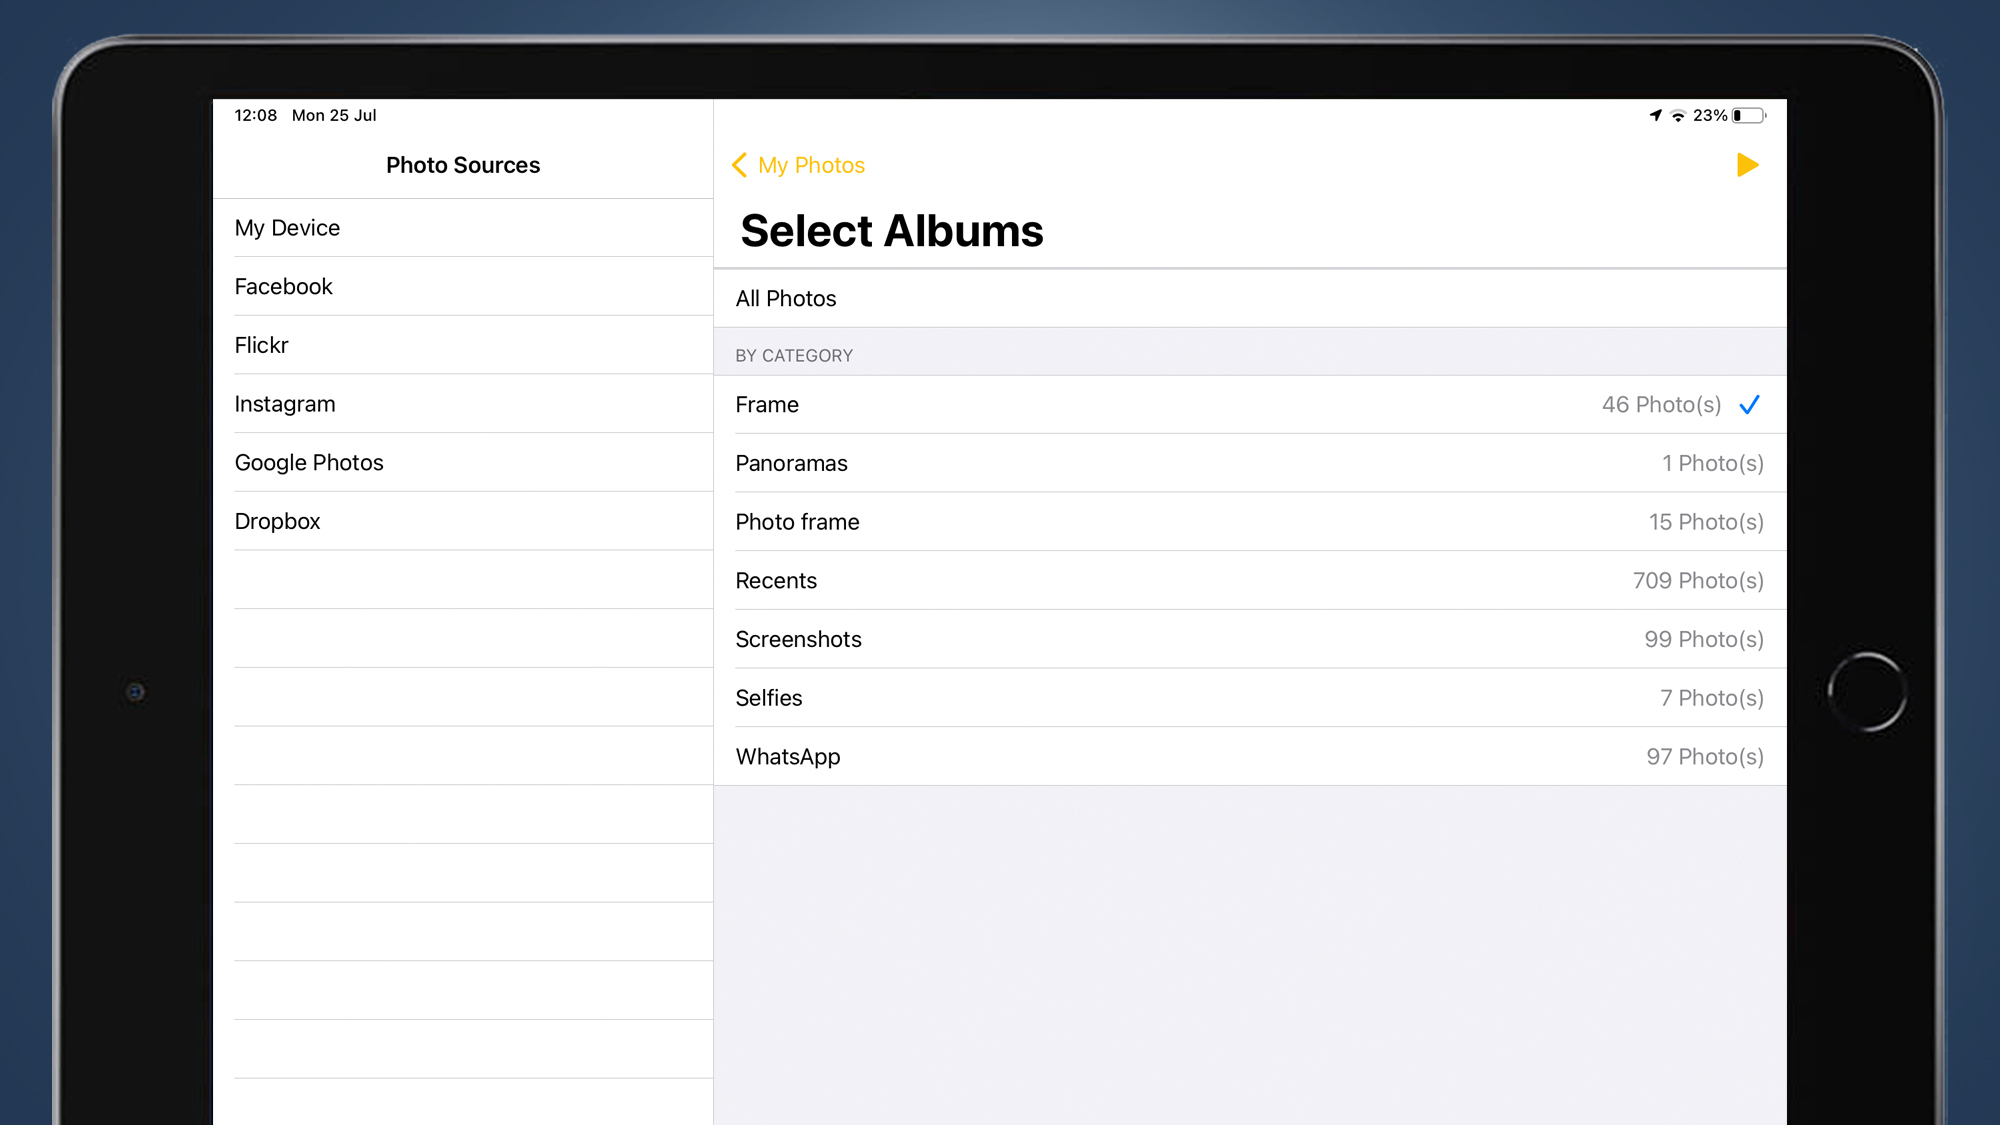
- Select your iPad in the main pane to the right and you should see an entry for the 'digital photo frame' album you made earlier. Tap it, then the 'play' button icon in the top-right corner to start a slideshow. Now triple-tap the Home or Power button to start Guided Access.
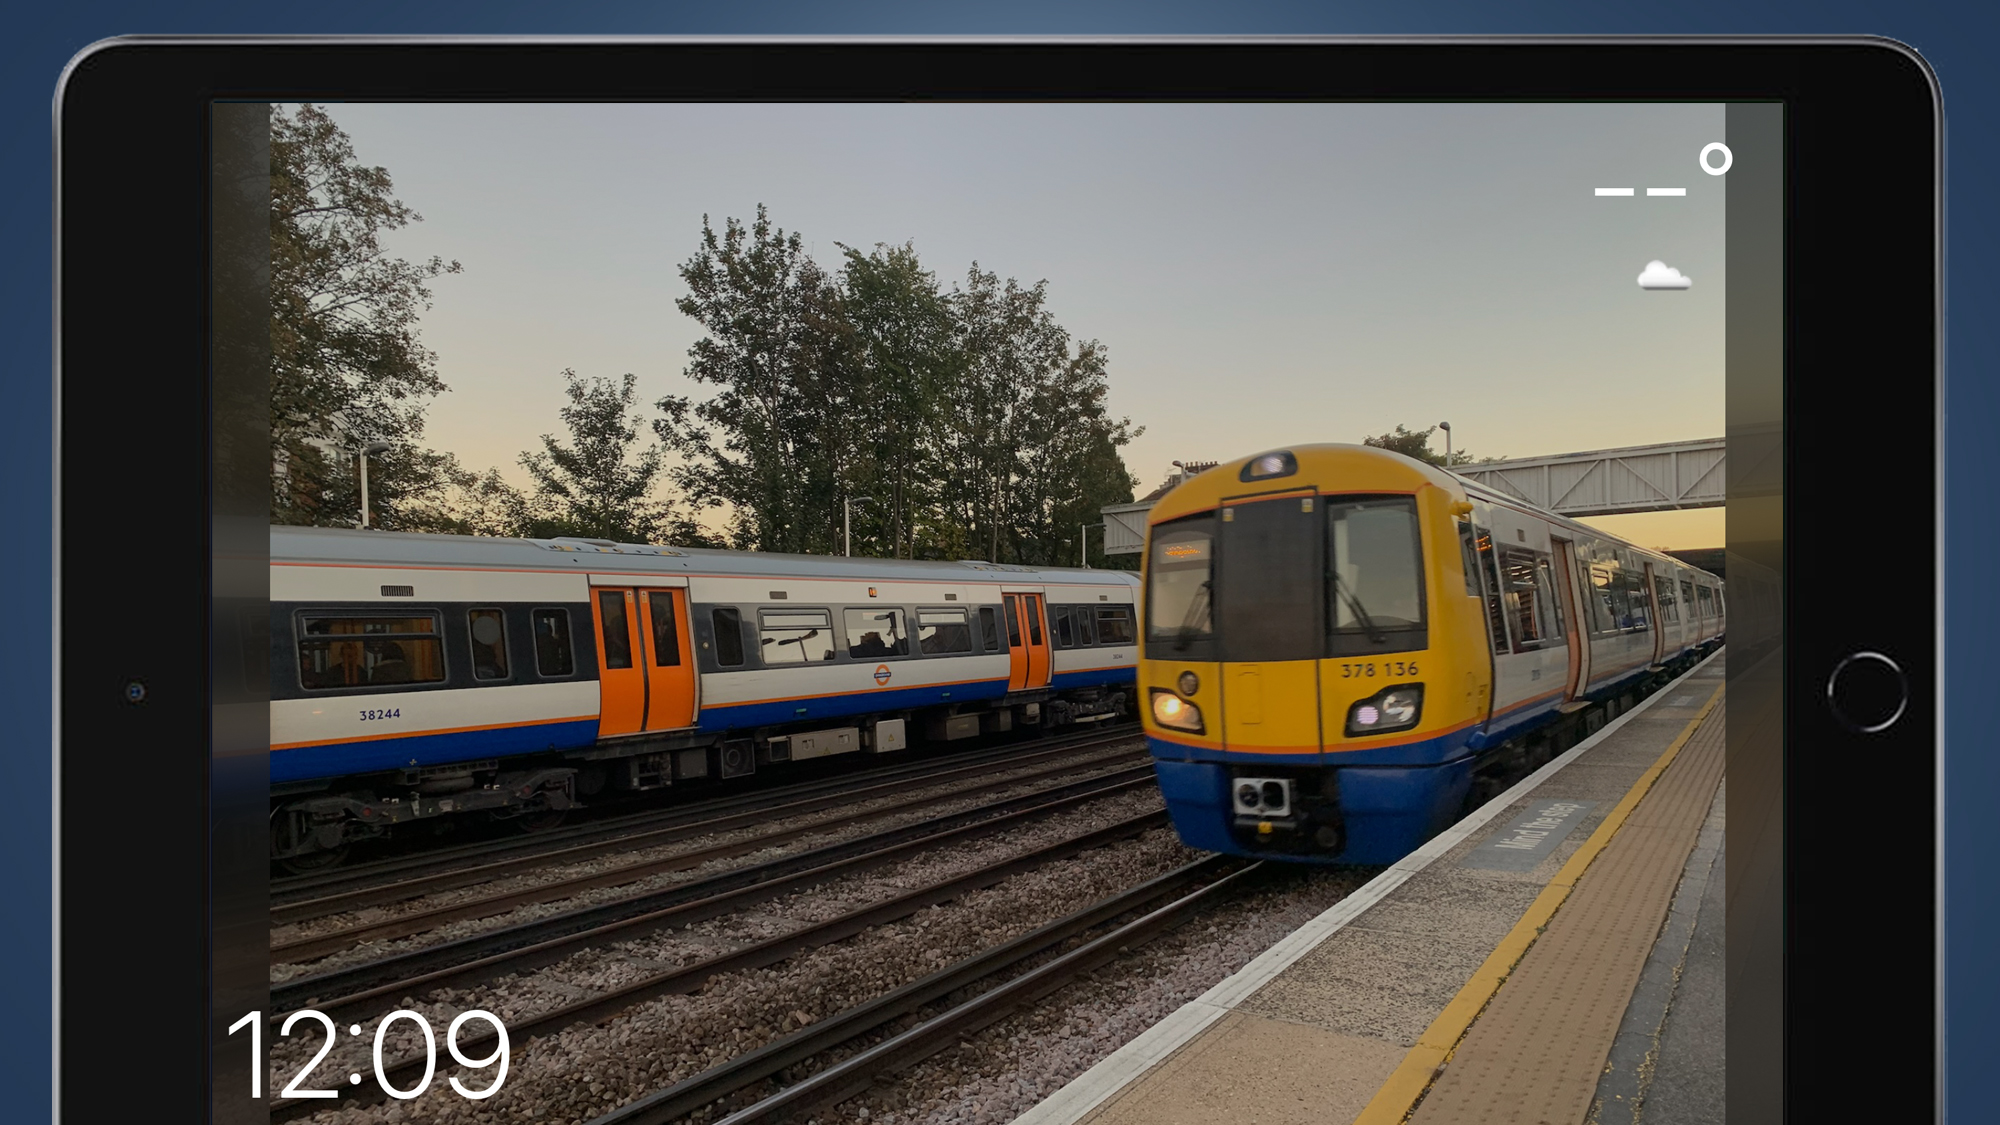
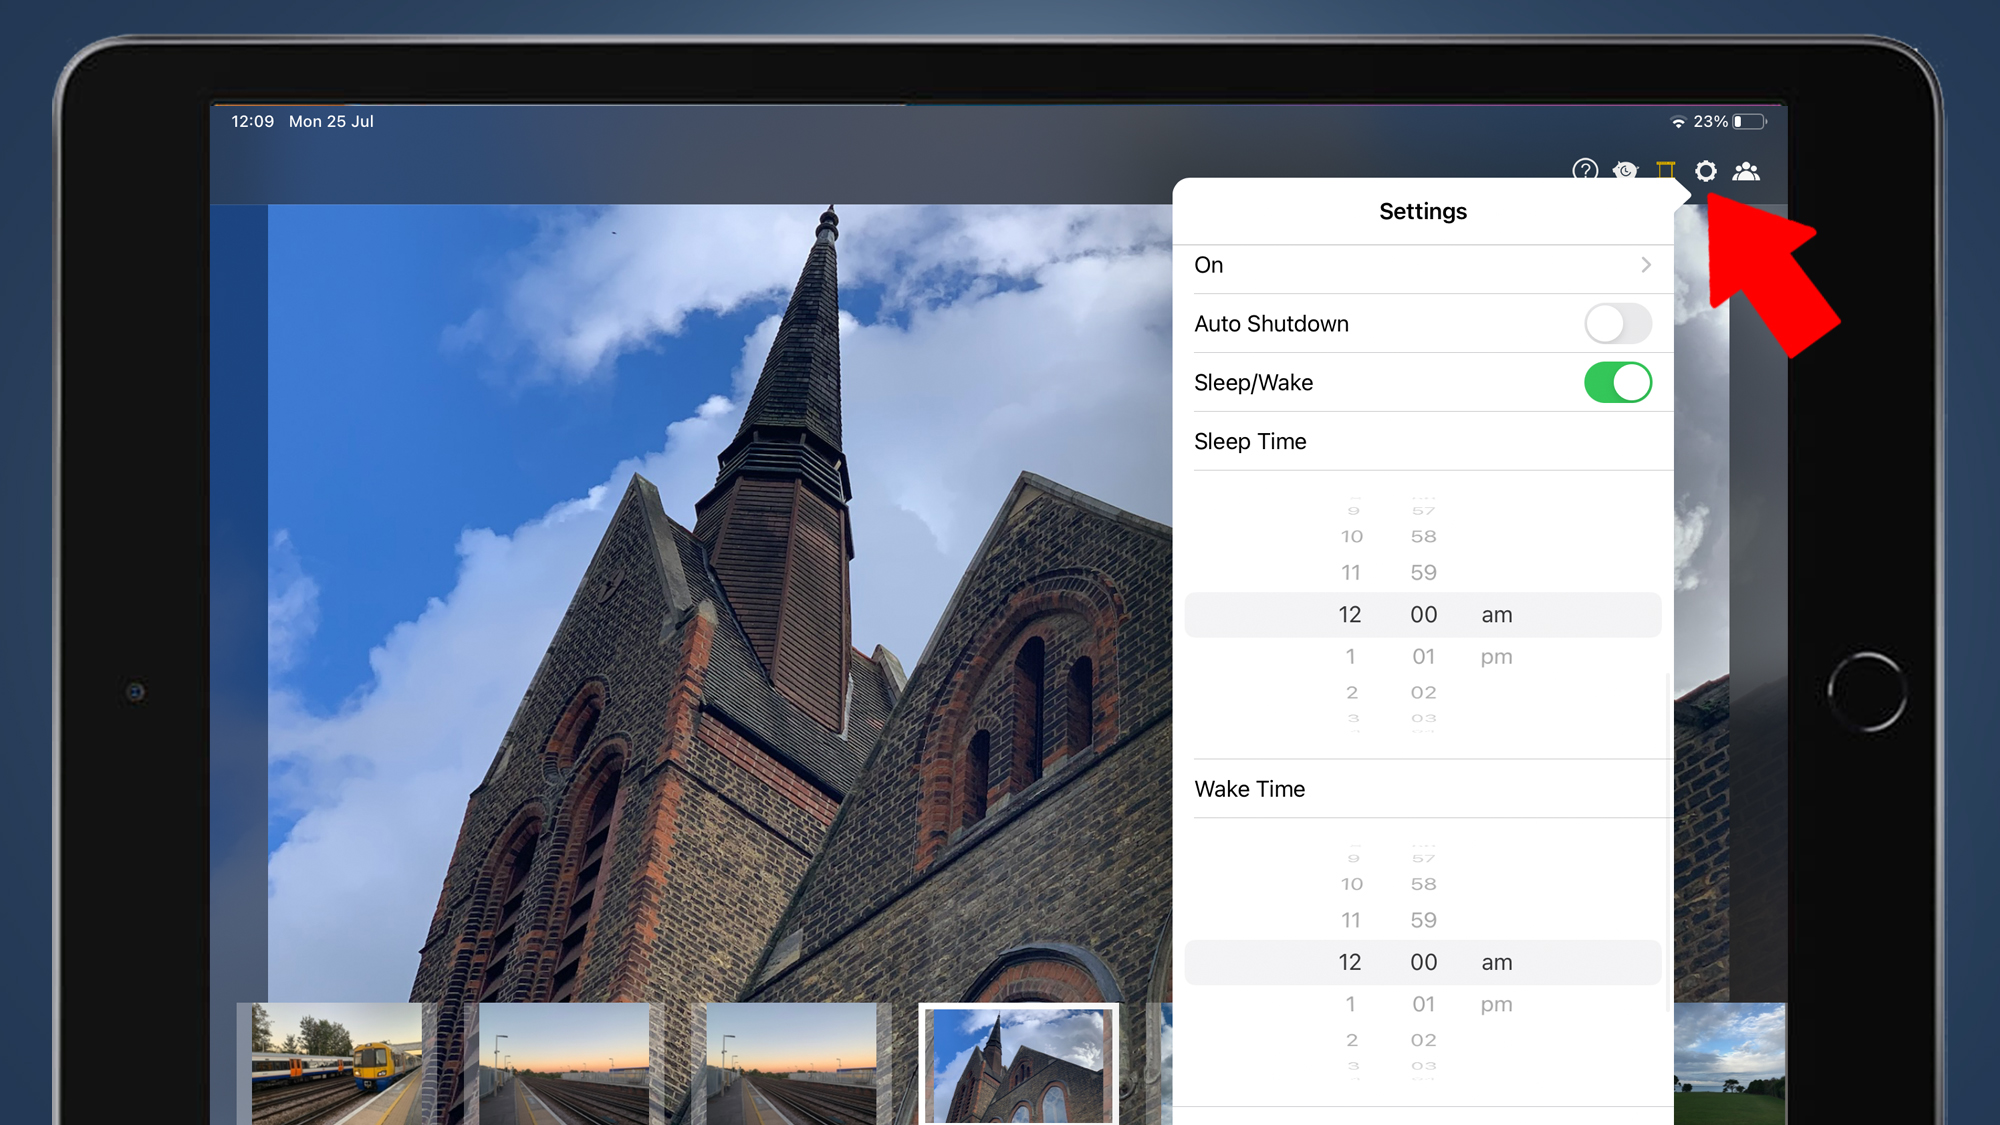
- Apps like LiveFrame give you the ability to customize your slideshow. When your slideshow is paused, you can find these by going to the app's Settings menu by tapping the cog in the top-right corner. One of the most useful settings is the Auto Sleep/Wake function. This lets you set a schedule for the photo frame so it wakes and sleeps automatically. Thanks to the way iPads work, this means the tablet will still be active, but the screen will be blacked out while the photo frame is 'asleep' (without consuming too much power).
Next steps
Photo frames are all about the visual, so we ideally want the iPad to look less like a tablet, and more like a photo frame.
The affordable and sensible route is just to get a stand that holds your iPad at a photo frame-like angle. You’ll find these on Amazon going cheap from companies like Ugreen, Topways and Lamicall.
A small company called EventFrame goes a lot further, producing 'handmade' solid oak in nine different colors/stains. The iPad is secured at the back using a thick bungee cord, meaning the tablet isn’t locked behind a backing plate – as a picture usually is in a frame.
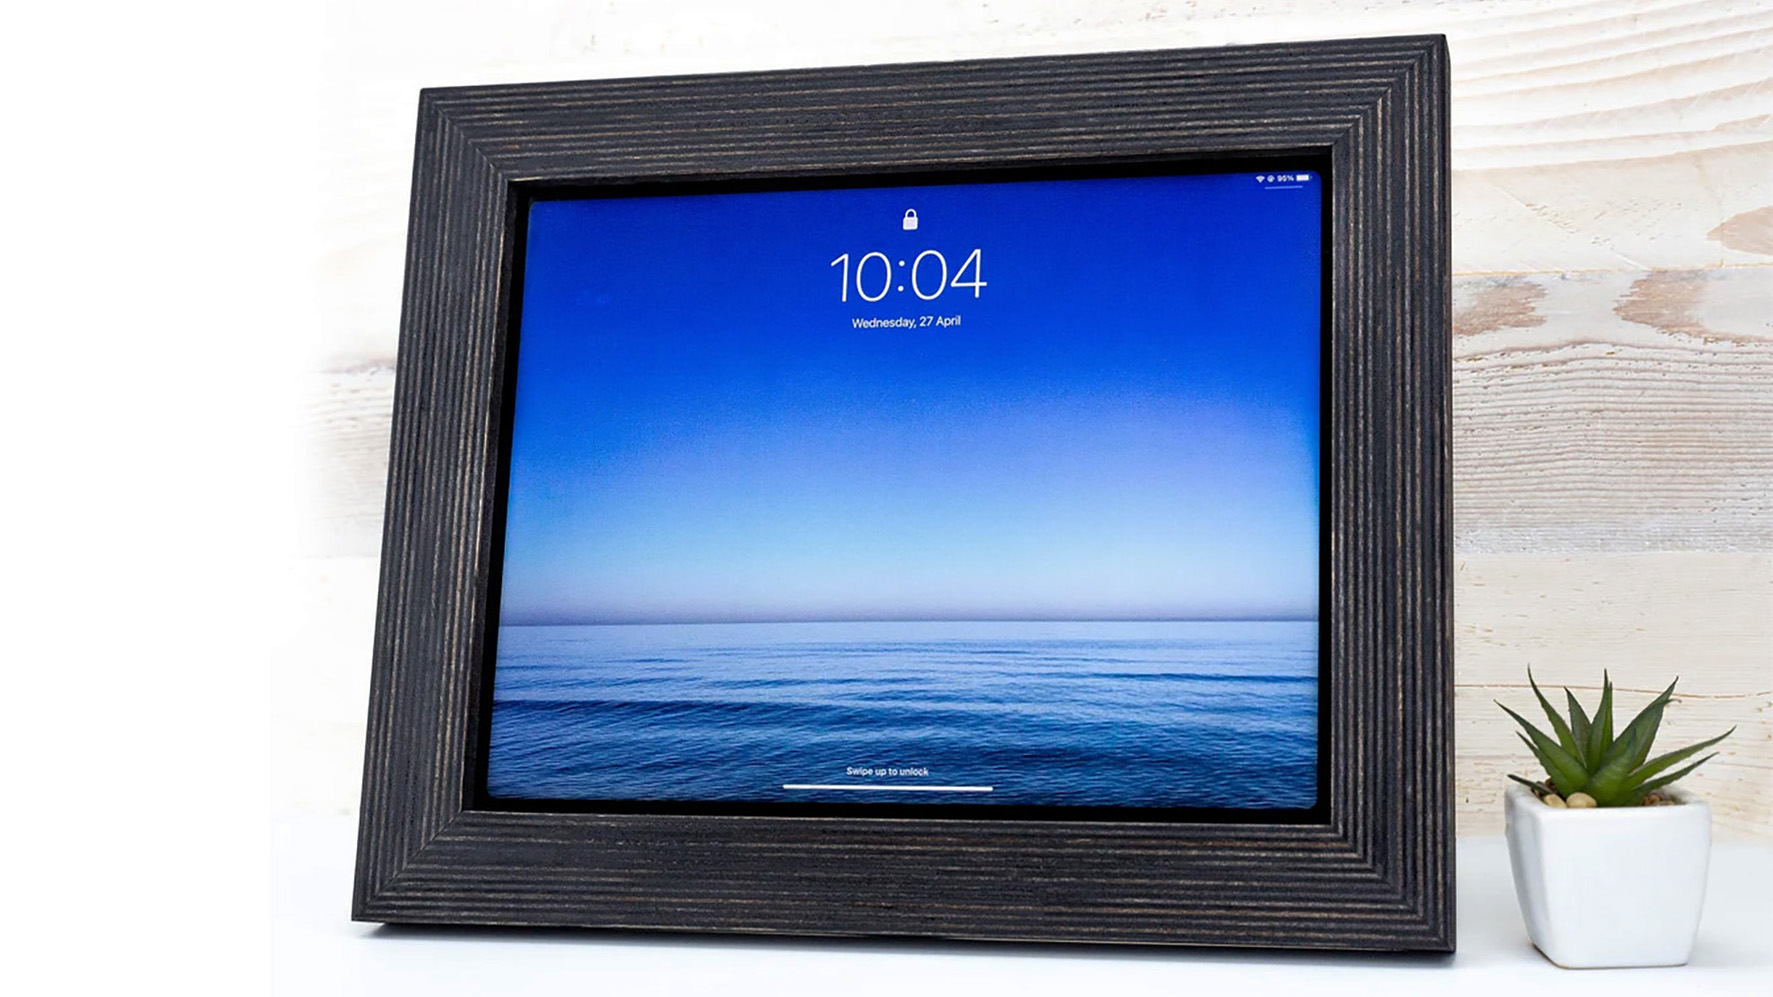
EventFrame sells its wares on Etsy, where it has great reviews, and on its website. The only issue is these frames don’t come cheap, which may ruin the appeal if you’re looking to save money by repurposing an old iPad.
You should also consider getting an extra-long, right-angle charge cable, which keeps the power cord close to the frame rather than making it curve out in goofy-looking fashion. Check which connector your iPad uses before ordering, though. All base-level iPads have Lightning connectors, while the latest mid-range and high-end ones use USB-C. If your iPad is a little older, it will use a Lightning port.
If your iPad is positively ancient, it may have a classic 30-pin connector. 30-pin right-angle charge cables are relatively rare, but if you are able to repurpose a tablet that old, you already earn double points for techy preservation.
Andrew is a freelance journalist and has been writing and editing for some of the UK's top tech and lifestyle publications including TrustedReviews, Stuff, T3, TechRadar, Lifehacker and others.
