How to uninstall McAfee completely
Remove McAfee's programs from your computer once and for all

In the dynamic world of cybersecurity, McAfee has been a familiar name, offering robust protection against various online threats. However, there may come a time when you need to remove McAfee from your computer, whether it's due to switching to a different antivirus program, troubleshooting conflicts, or simply because you no longer need it. Uninstalling antivirus software can be more complex than removing standard applications, so this step-by-step guide will help you completely remove McAfee from your computer.
How to uninstall McAfee completely
This guide covers removing McAfee using Windows Uninstall and the McAfee product removal tool.
If you are using a different operating system, like Linux or MacOS, then you should be able to uninstall McAfee in a similar way to the instructions given for Windows users. If you choose to use the McAfee Consumer Product Removal tool (MCPR), you will need to ensure that you download the correct version for the operating system you're using.
How to remove McAfee using Windows Uninstall
1. Check McAfee is installed
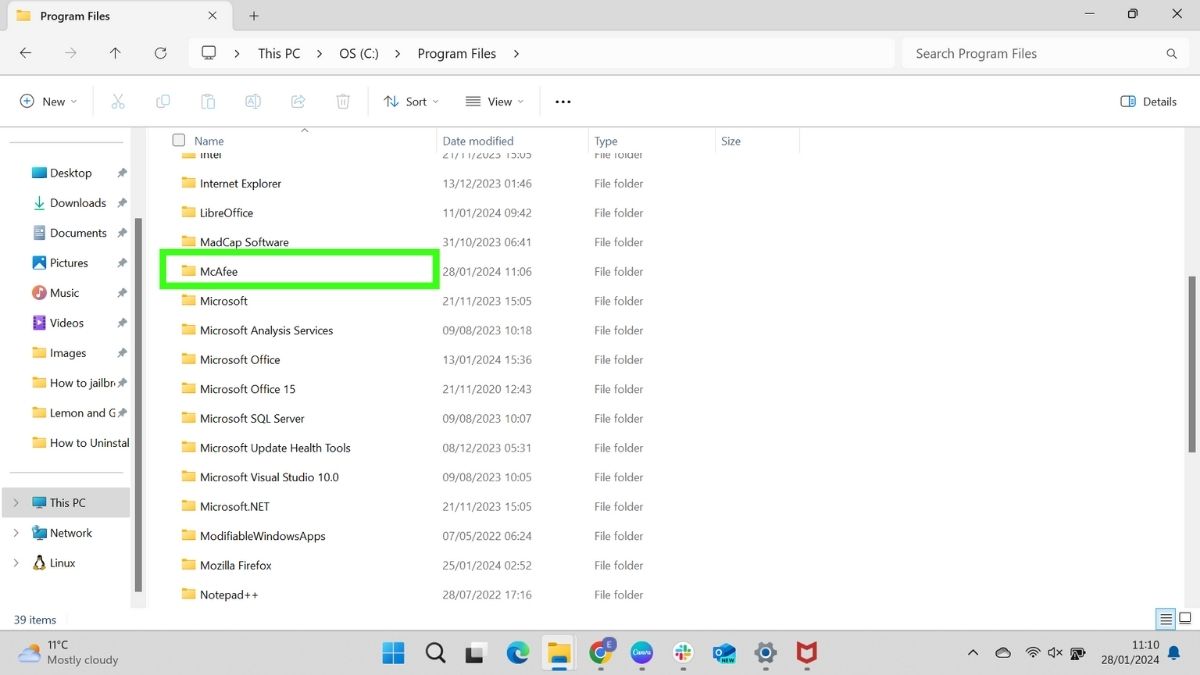
Before you uninstall McAfee, quickly check the Programs Files on your computer to ensure that McAfee is installed. It's useful to see where it is installed so that you can check that it has been removed correctly after you have followed these steps.
2. Go to Installed apps in Settings
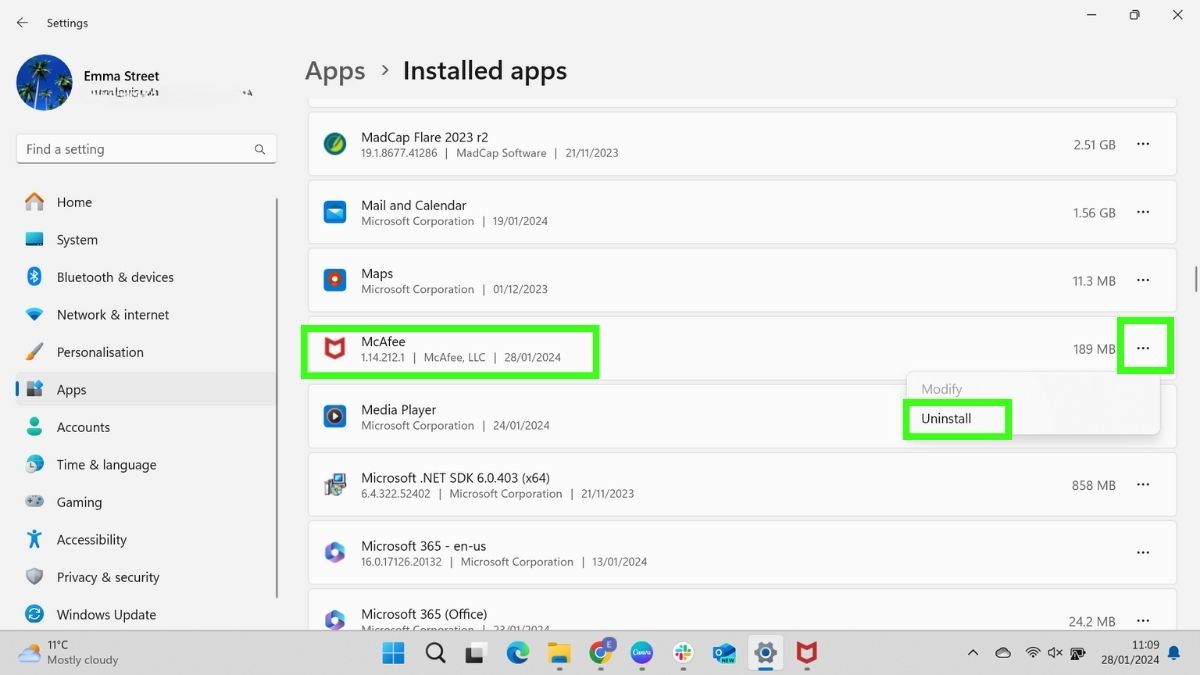
Go to your computer's settings menu. You can do this by clicking on the Windows icon on your taskbar and selecting Settings. Alternatively, type 'settings' into your search bar.
From the Settings page, select Apps, and then Installed Apps. This will list all the applications on your computer. These are ordered alphabetically by default.
Find McAfee on the list and click the three dots to the right. Select Uninstall.
3. Select uninstall
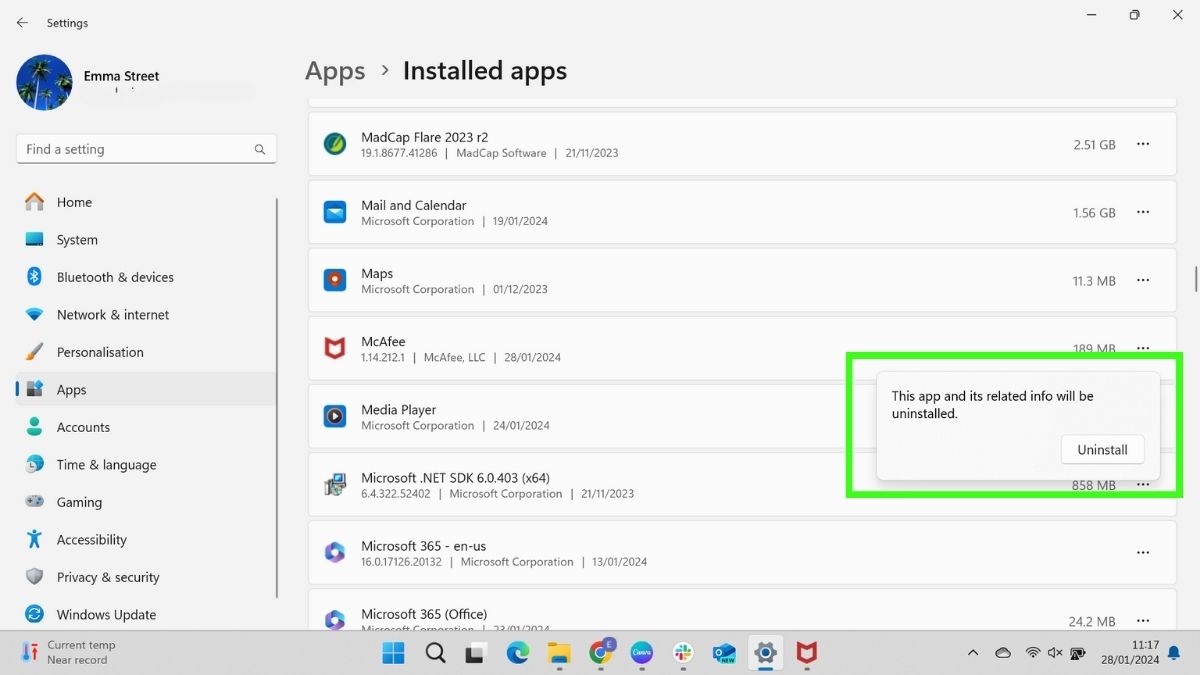
You will see a warning message telling you that the app and all its related links will be uninstalled. Select Uninstall again.
4. Provide optional feedback
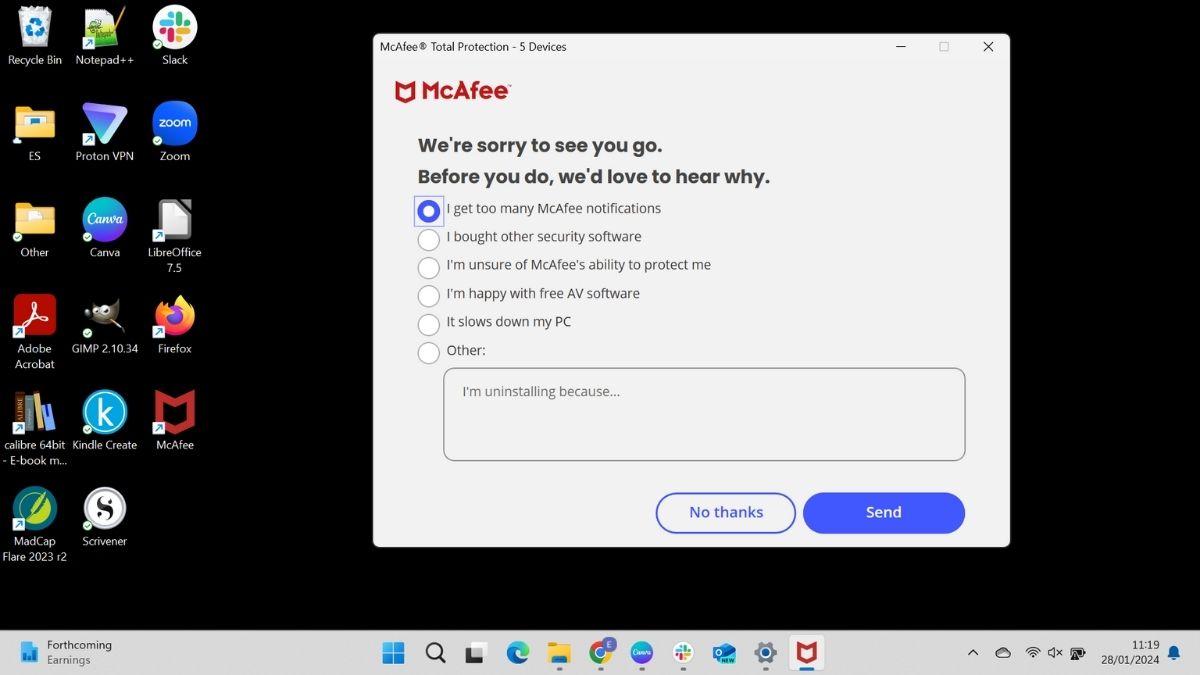
A window will pop up, giving you the chance to tell McAfee why you are choosing to uninstall the app. This is optional, and you do not need to complete it.
If you want to send feedback, select the relevant explanation or Other, and click Send. If you choose not to send feedback, just click No thanks.
5. Select Remove
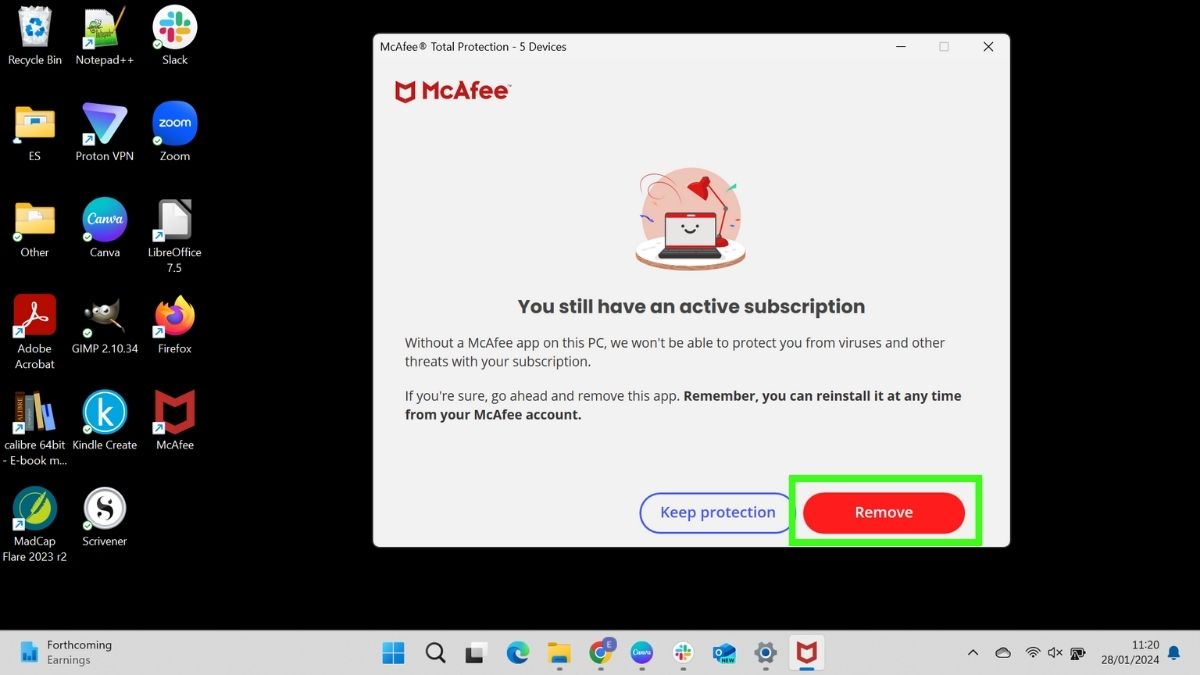
You will see a reminder that if you have an active subscription, you will be able to reinstall McAfee at a later point if you want to.
You will still see this message if you have set McAfee not to auto-renew if you haven't yet reached the expiry date.
Select Remove.
6. Wait for McAfee uninstallation to complete
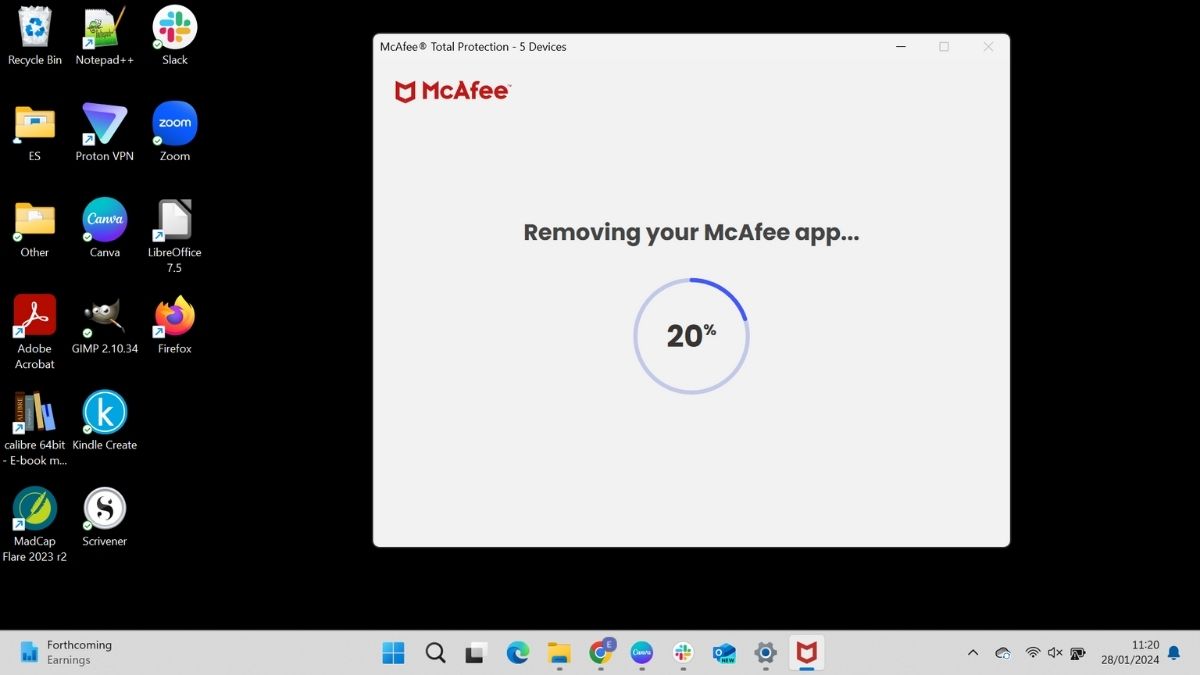
You will now need to wait for the McAfee uninstallation to run. This will take a few minutes. Don't switch off your computer while this is running.
7. Restart computer
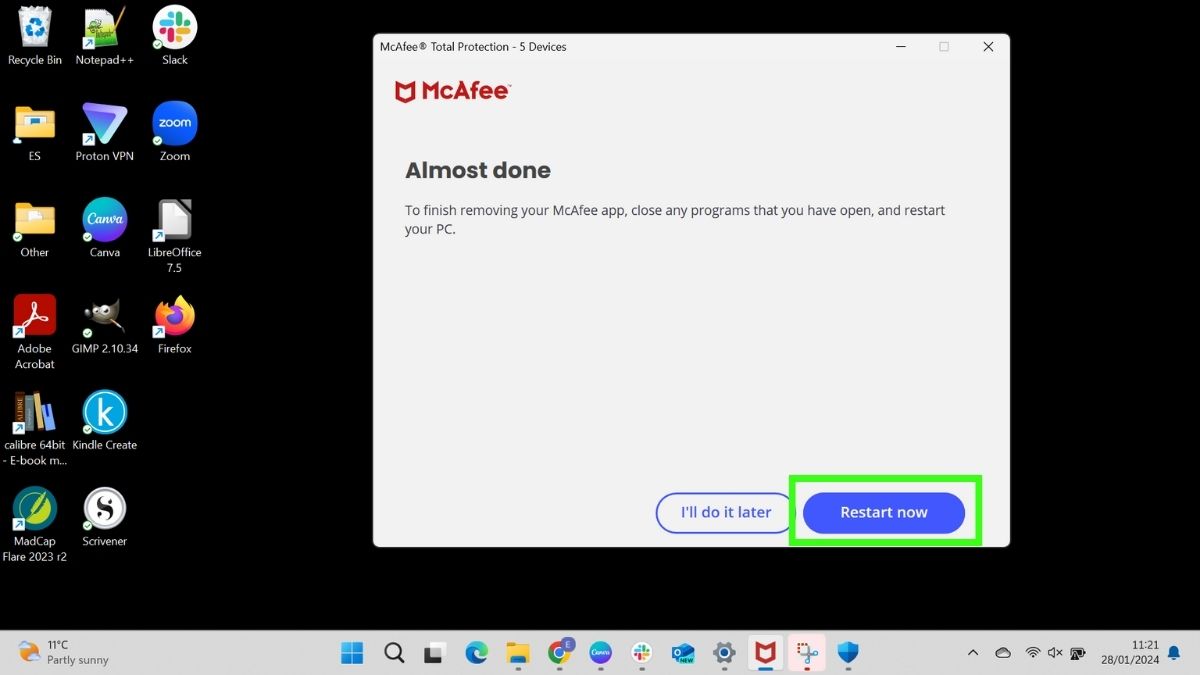
When the uninstallation is complete, you will need to restart your computer. Select Restart now if you are ready to restart straightaway. Otherwise, select I'll do it later.
8. Check McAfee has been removed
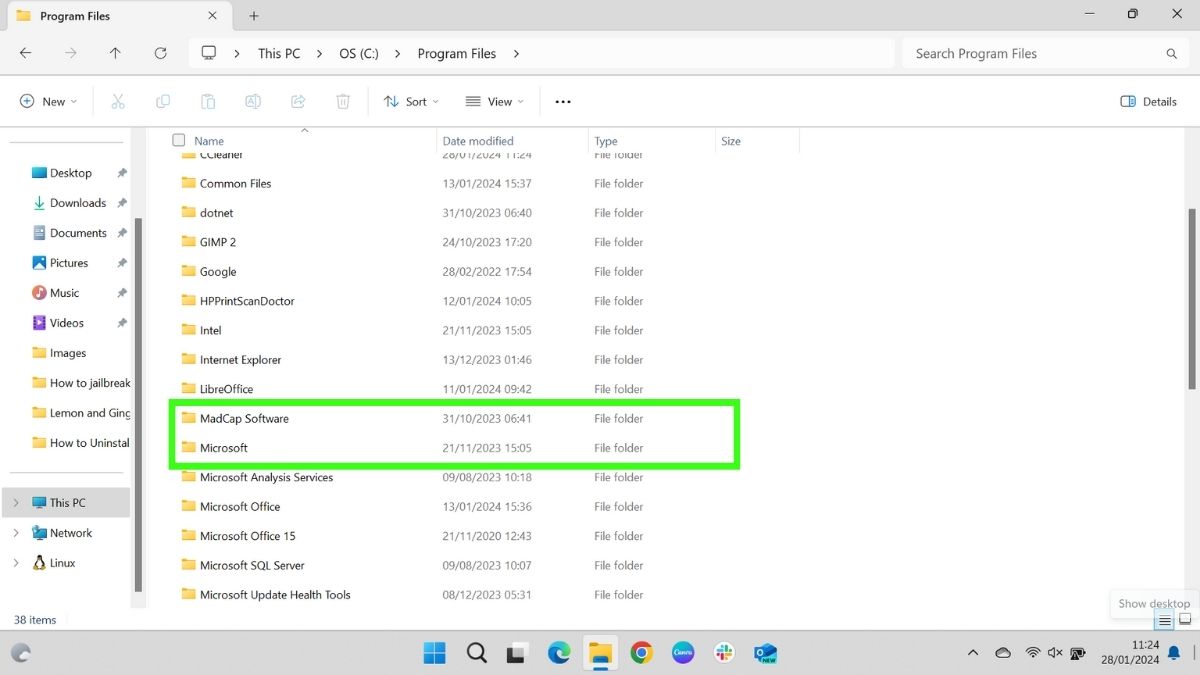
After you have restarted your computer, you can check that McAfee has been removed from your computer by checking the Installed Apps page from Step 3 or the Programs folder, covered in Step 1.
In the screenshot above, the list of programs is displayed in alphabetical order. Previously, McAfee displayed between MadCap and Microsoft, and now it's gone.
Uninstall using the McAfee Consumer Product Removal tool (MCPR)
1. Download tool from McAfee website
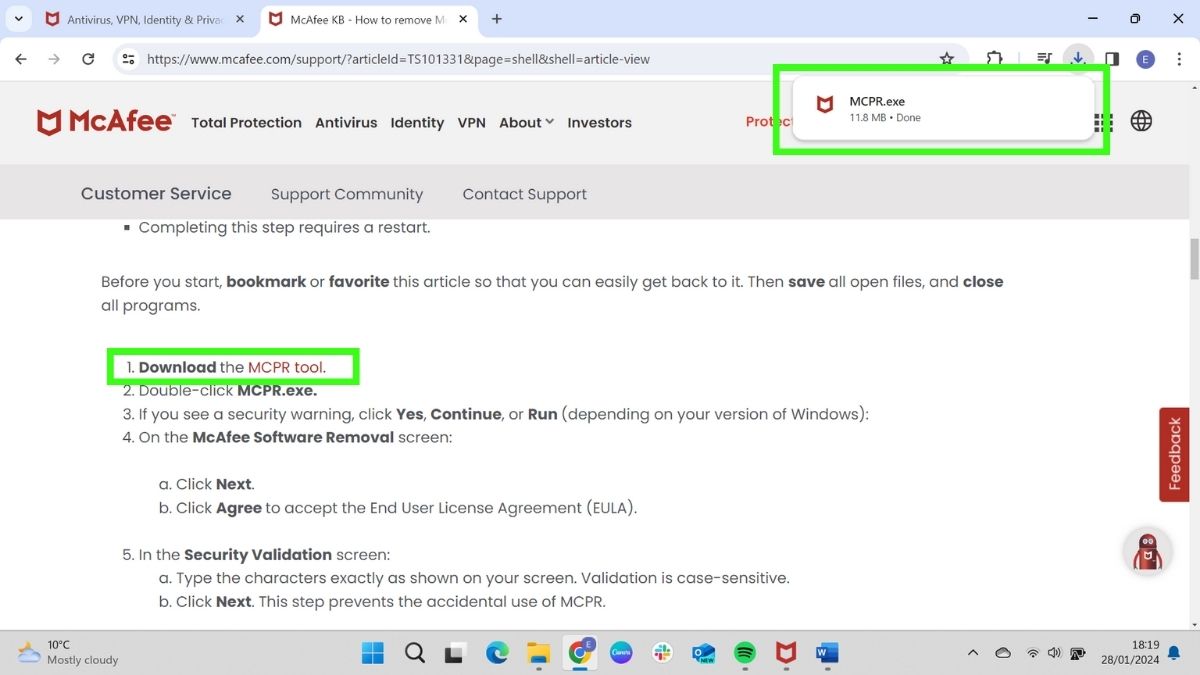
You can also uninstall McAfee using the McAfee Consumer Product Removal tool (MCPR). You can find this on the McAfee website's Knowledge Center page called How to remove McAfee products. Select option 2 to access the MCPR download button. Select the clickable link to download the MCPR.
You should note that McAfee recommends using Windows uninstall as a preferred option, and only using MCPR if this hasn't worked.
2. Run the program
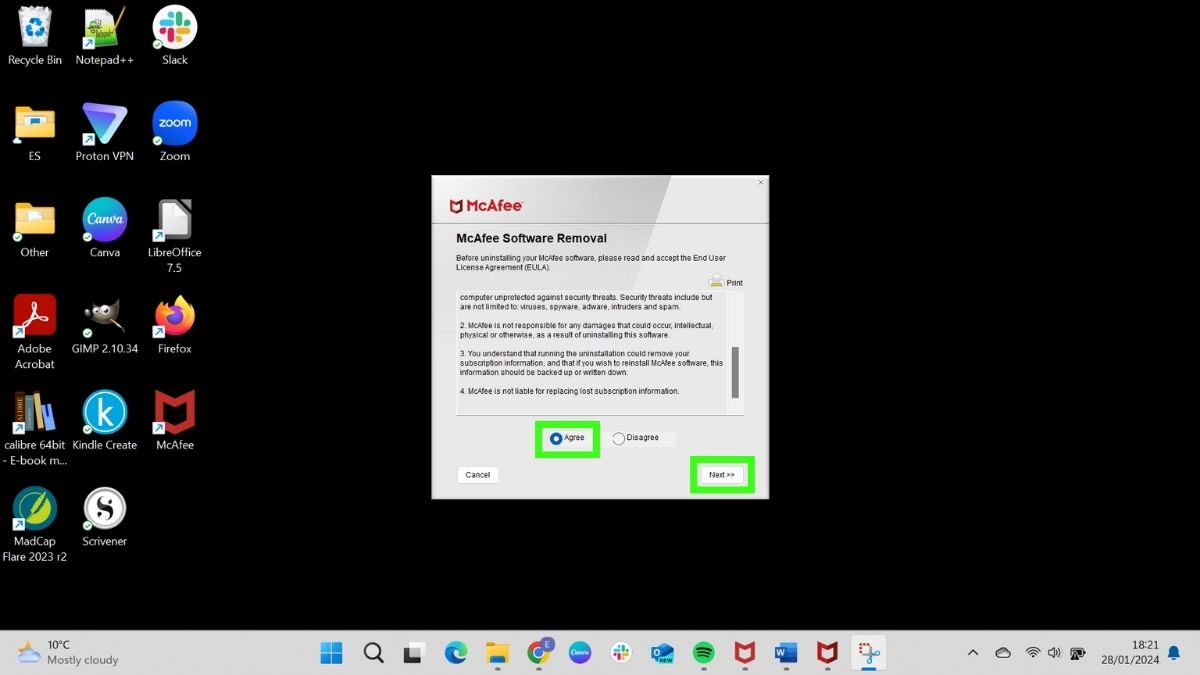
Once you have downloaded the MCPR executable file, run it to start the uninstallation.
You will need to agree to the terms of McAfee's End User License Agreement before you can continue.
Once you have clicked Agree, select Next.
3. Complete the Security Validation
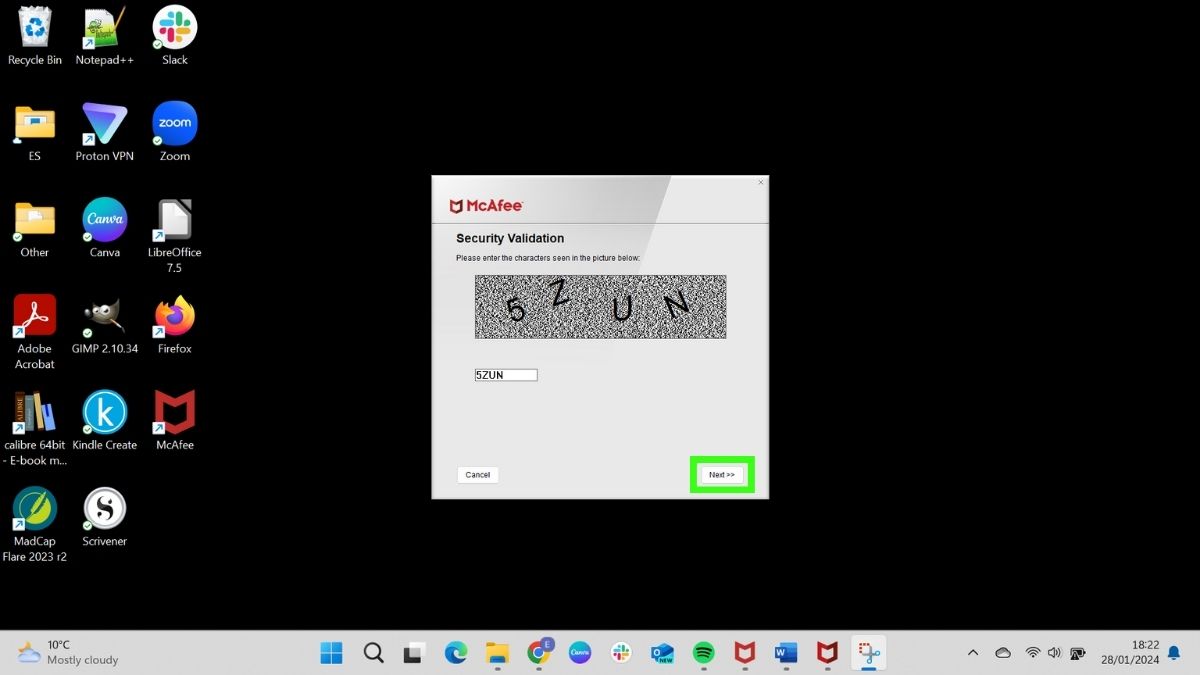
You need to complete the security validation. Type the letters you see on the screen into the response box and select Next.
4. Wait for the MCPR to complete
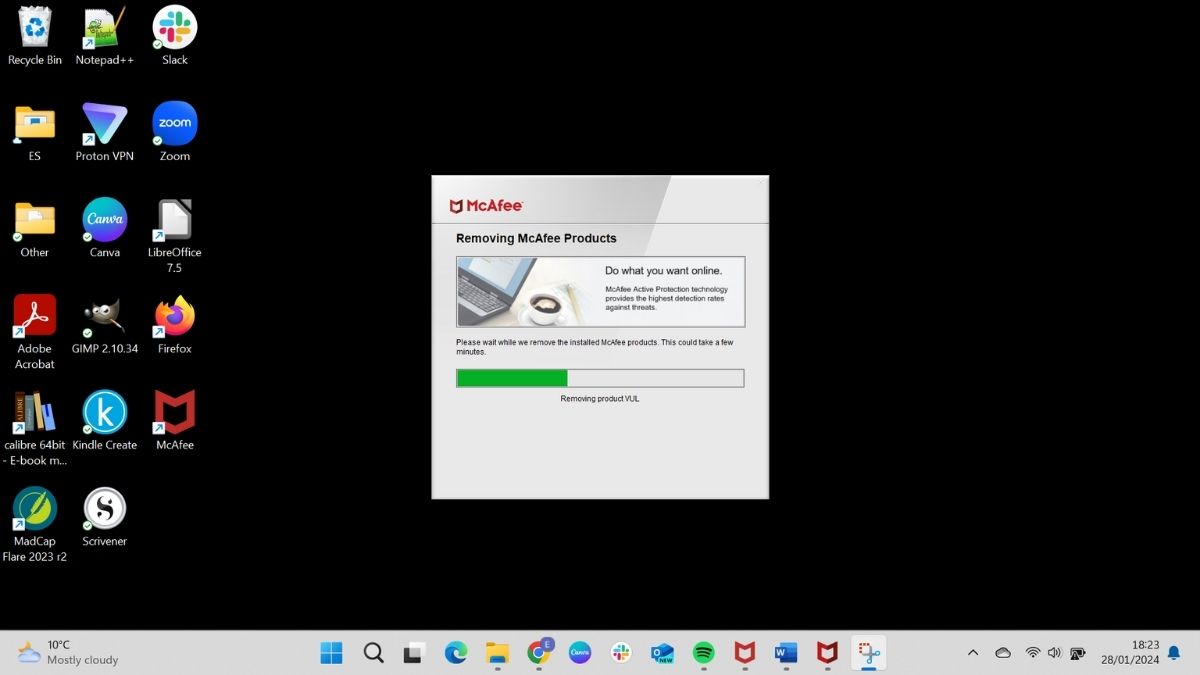
The MCPR will now run. This should only take a few minutes.
5. Restart computer
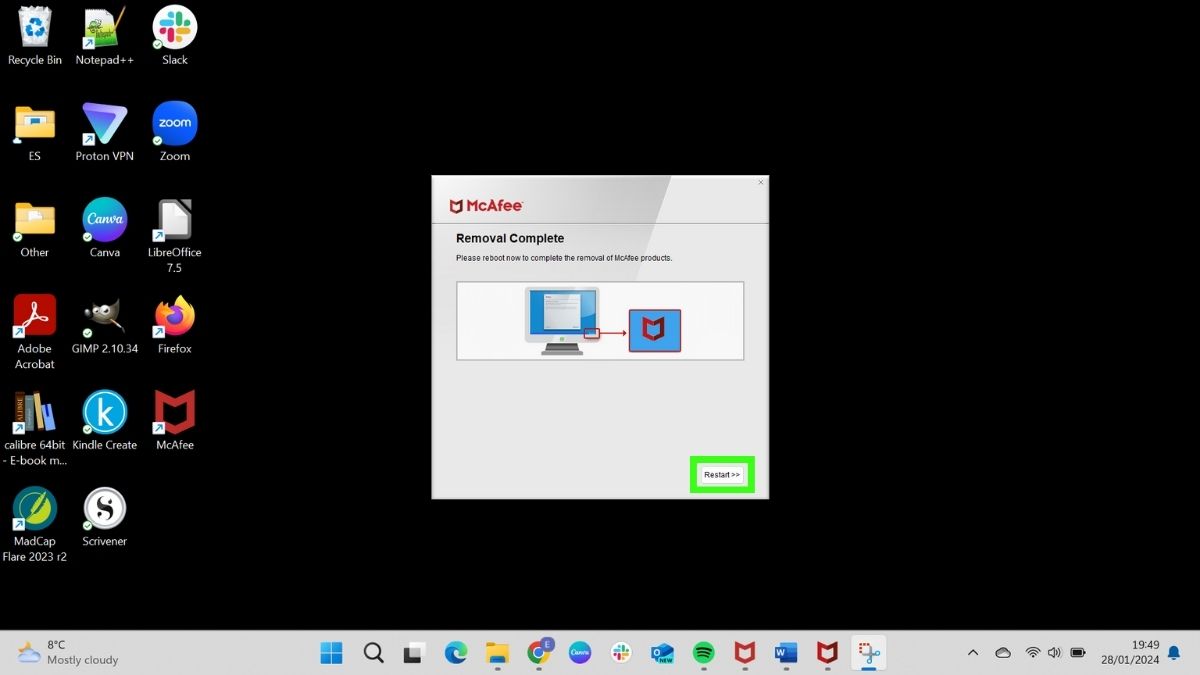
When the removal is complete, you will need to restart your computer. Ensure that any other apps are closed and you have saved any open documents, then select Restart.
6. Check McAfee has been removed
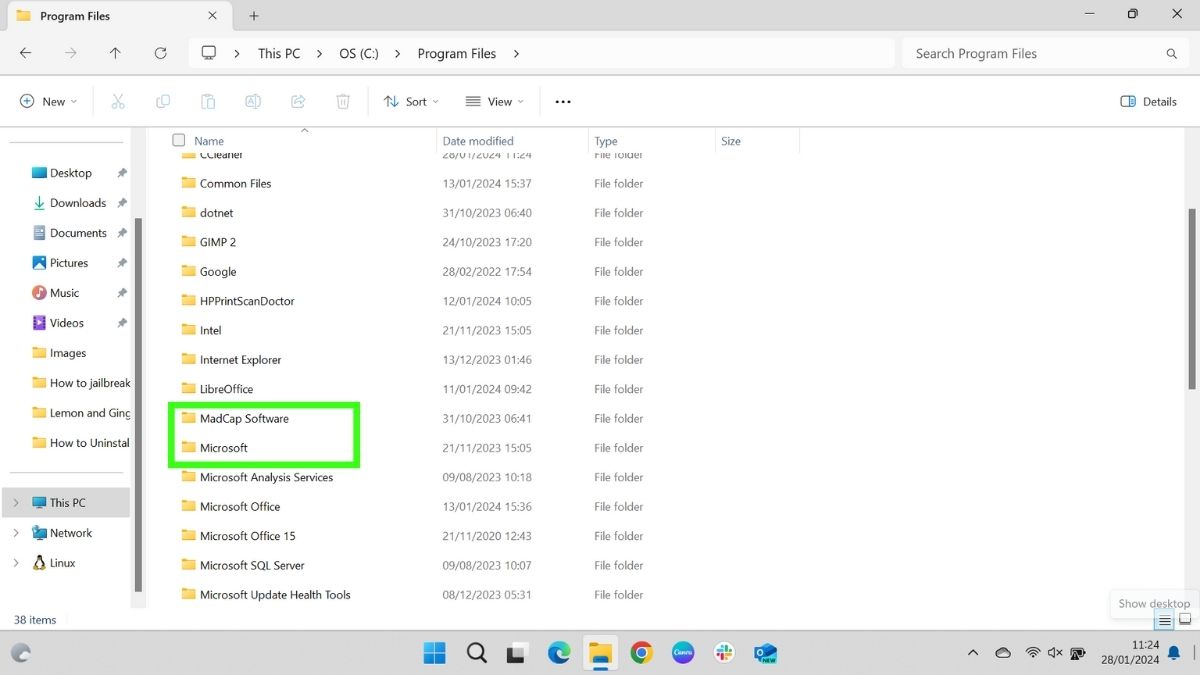
After you have restarted your computer, you can check that McAfee has been removed from your computer by checking the Programs folder.
In the screenshot above, the list of programs is displayed in alphabetical order. Previously, McAfee displayed between MadCap and Microsoft, and now it's gone.
Uninstalling McAfee antivirus from your computer is usually a straightforward process. However, it's important to be aware of potential issues that might arise during the uninstallation process and know how to troubleshoot them.
Sometimes, not all components of McAfee get removed. This can occur due to system errors or conflicts with other software. If McAfee or any of its components, like WebAdvisor, remain after uninstallation, re-run the MCPR tool. Ensure your operating system is up to date to avoid compatibility issues.
Sometimes, removing an antivirus can affect your firewall settings or internet connectivity. Check your firewall settings and ensure they are configured correctly after uninstallation.
If you encounter any problems that you can't fix, contact McAfee Support for advice.
Get daily insight, inspiration and deals in your inbox
Sign up for breaking news, reviews, opinion, top tech deals, and more.
In most cases, it only takes a few short steps to remove McAfee, ensuring that you maintain your computer's health and prepare it for installing other software as needed.
You might also like...

Emma Street is a freelance content writer who contributes technology and finance articles to a range of websites, including TechRadar, Tom's Guide, Top10.com, and BestMoney. Before becoming a freelance writer, she worked in the fintech industry for more than 15 years in a variety of roles, including software developer and technical writer. Emma got her first computer in 1984 and started coding games in BASIC at age 10. (Her long, rambling, [and probably unfinishable] Land of Zooz series still exists on a 5-inch floppy disk up in her parents' loft somewhere.) She then got distracted from coding for a few decades before returning to university in her thirties, getting a Computing Science degree, and realizing her ambition of becoming a fully-fledged geek. When not writing about tech and finance, Emma can be found writing about films, relationships, and tea. She runs a tea blog called TeaFancier.com and holds some very strong opinions about tea. She has also written a bunch of romance novels and is aided at work by a tech-savvy elderly cat who ensures Emma fully understands all the functions of the F keys so she can quickly undo whatever the cat has just activated while walking over the keyboard.