How to update your BIOS
It's not as tough as you might think
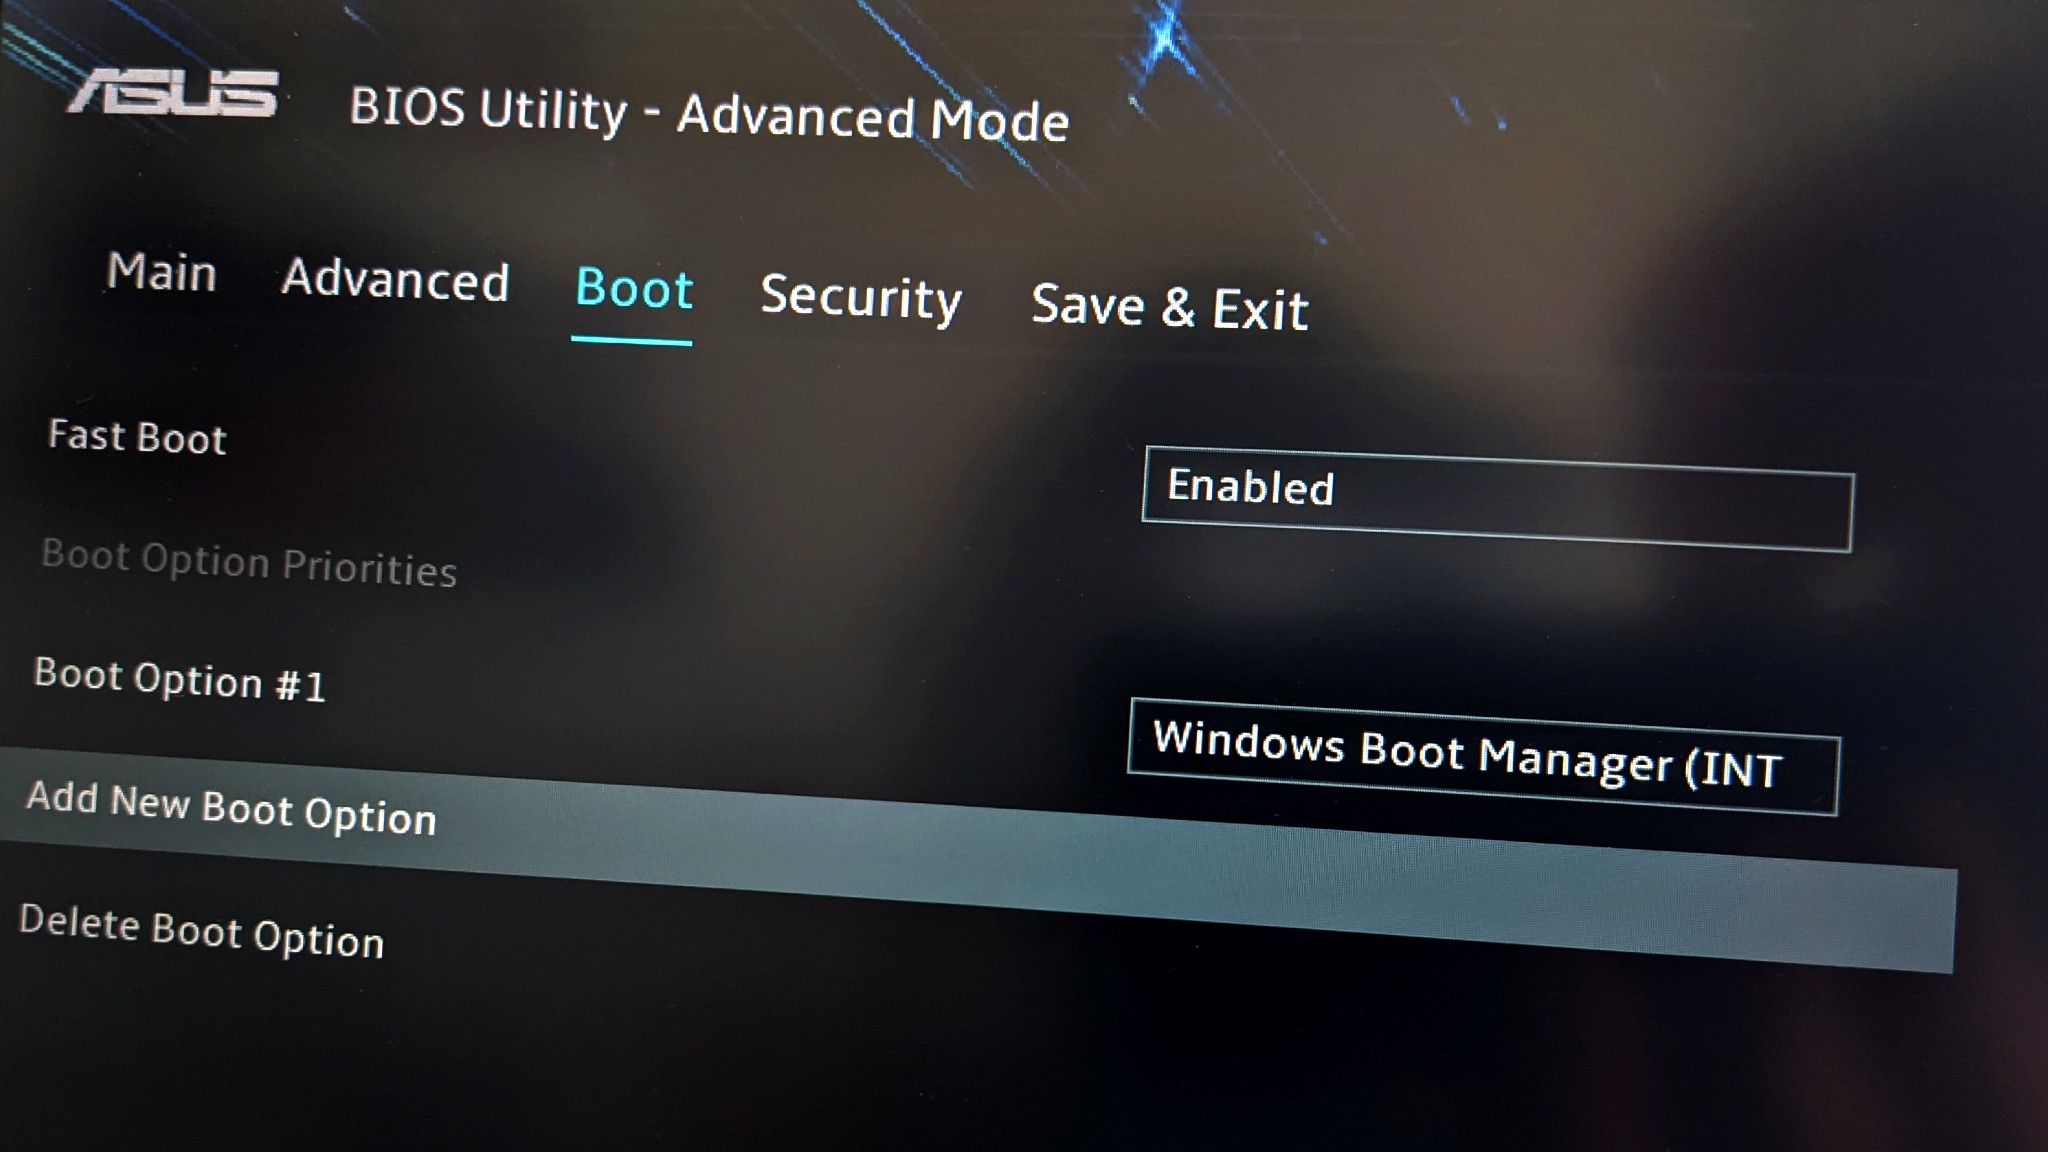
When you're using your PC, you're interacting with the operating system -- be that Windows or Linux. But there is so much more software involved than just the OS, starting off with the BIOS (or UEFI), which controls your system form the moment your power up. Often considered the domain of system builder, the BIOS is important for security and stability, and updates are often made available. But you may well have no idea how to update your BIOS.
Although both Windows and Linux make it incredibly simple to download and install operating system updates, the same cannot be said of the BIOS. And there is a reason BIOS updating has been made a little awkward -- it can break your computer if you don't do it correctly. So just how do you update your BIOS.
The process varies from system to system, form motherboard to motherboard, but that doesn't mean there is not a degree of standardisation. The first thing you need to do is determine what BIOS version you are currently working with, and from here you can set about updating to the very latest edition, complete with the most recent settings and features.
How to check your current BIOS version
If your BIOS is already the latest version then you won't have to worry about updating it. The simplest way to check on your current version can be done within Windows or Linux.
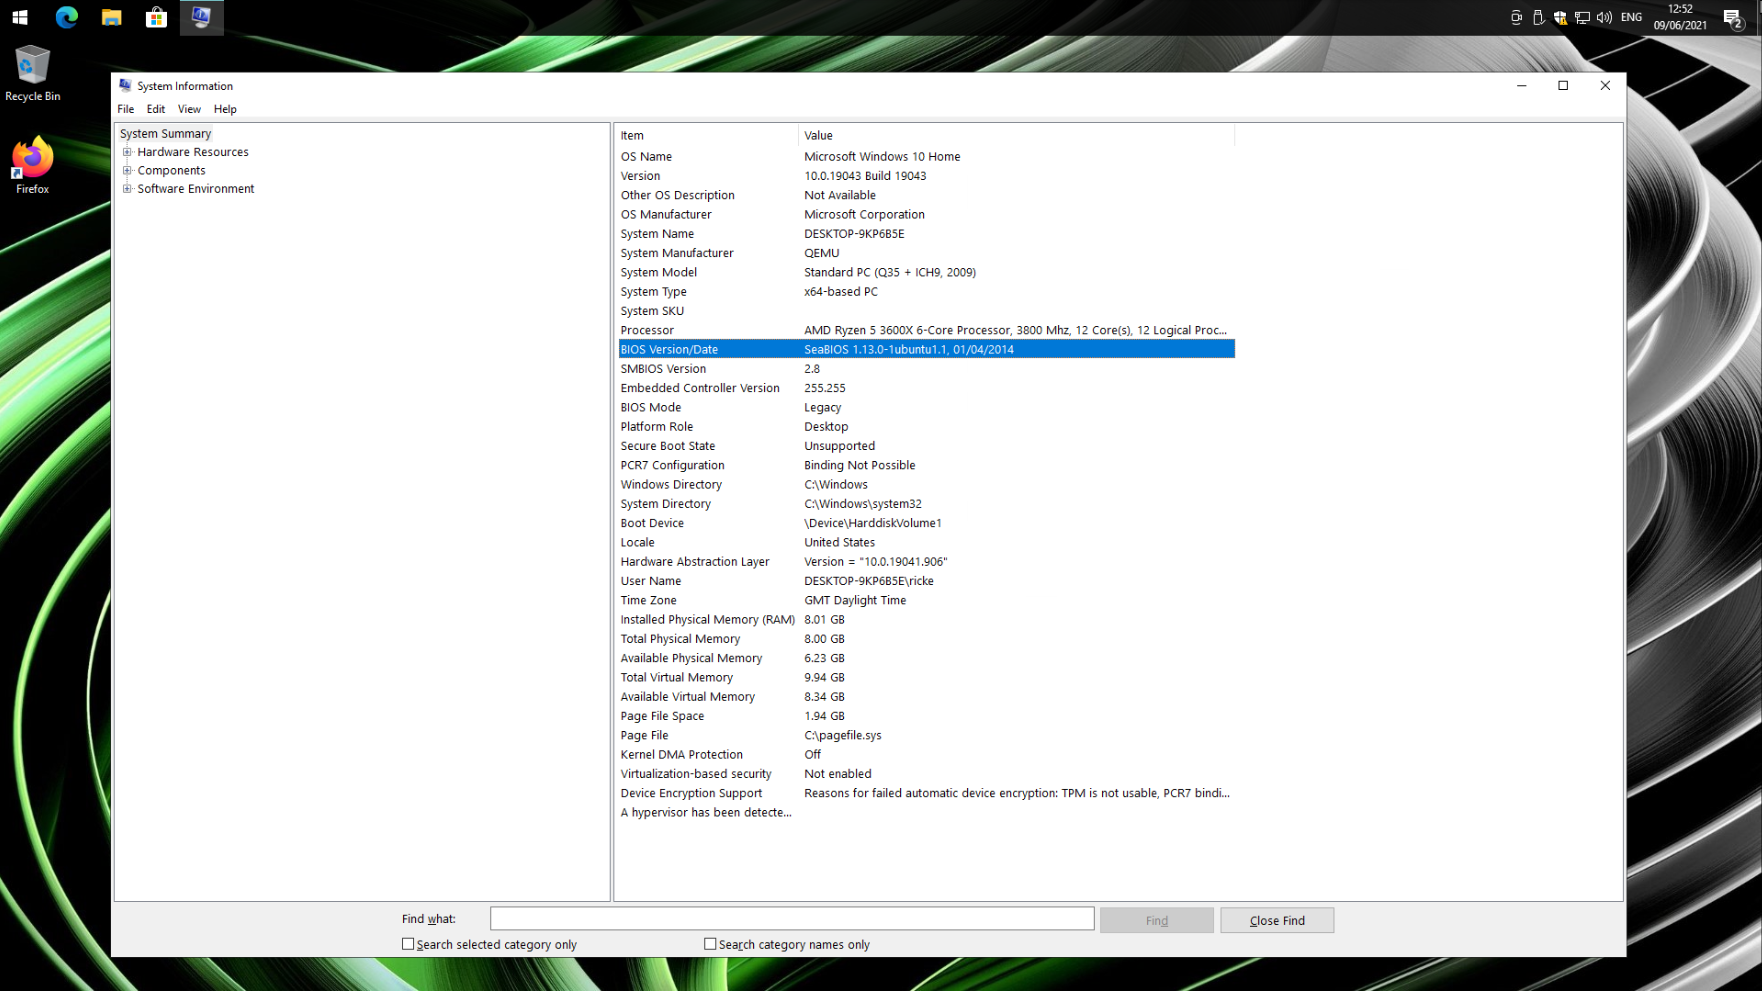
On a PC running Windows 10 or Windows 11, press Win + R and type msinfo32. Click OK and the System information window will open. In the first window presented you will see an entry labelled BIOS version/date. Take a note of the information here.
If you're on Linux you can also easily access your BIOS version information. Open a terminal and enter the following command:
sudo dmidecode --type biosYou will now see a printout of your BIOS information, including the vendor, version number and release date. From here, you'll need to open up your web browser for the next step.
Sign up for breaking news, reviews, opinion, top tech deals, and more.
How to update your BIOS
This is where things will differ from manufacturer to manufacturer. In some cases you will be able to download an installer that runs within Windows 10 or Windows 11 that will do the hard work for you. But in many others you'll need to go into the BIOS yourself and manually flash the update.
The BIOS will come from the support pages of the manufacturer of your motherboard. It's therefore important to know exactly which model you have. If you built your PC yourself then you probably already know this, but if you need to find out you can do so with ease.
1. How to find your motherboard information on Windows 10
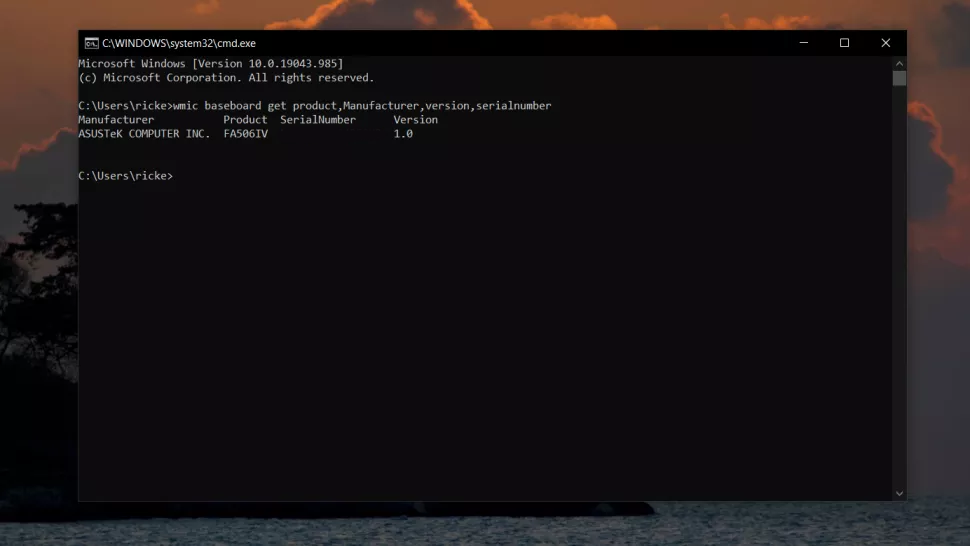
There are two methods you can easily use on Windows 10 or 11 to locate your motherboard information. The first involves Command Prompt, so go ahead and open it up, either from the Start Menu or by pressing Win + R and typing cmd into the box. When the terminal window opens up, enter this command:
wmic baseboard get product,Manufacturer,version,serialnumberYou'll now get a print out of the important information you need to identify your motherboard to download a BIOS update. If you're looking for something with a user interface, you can download an app called Speccy. Grab it either directly, or if you're using Windows Package Manager you can install it with winget install speccy.
Speccy will show you much more than just your motherboard information, offering an easy to digest summary of all the hardware on your PC.
2. How to find your motherboard information on Linux
Would you be surprised to find out that gathering your motherboard information on Linux is as simple as typing a command into the terminal? Of course not.
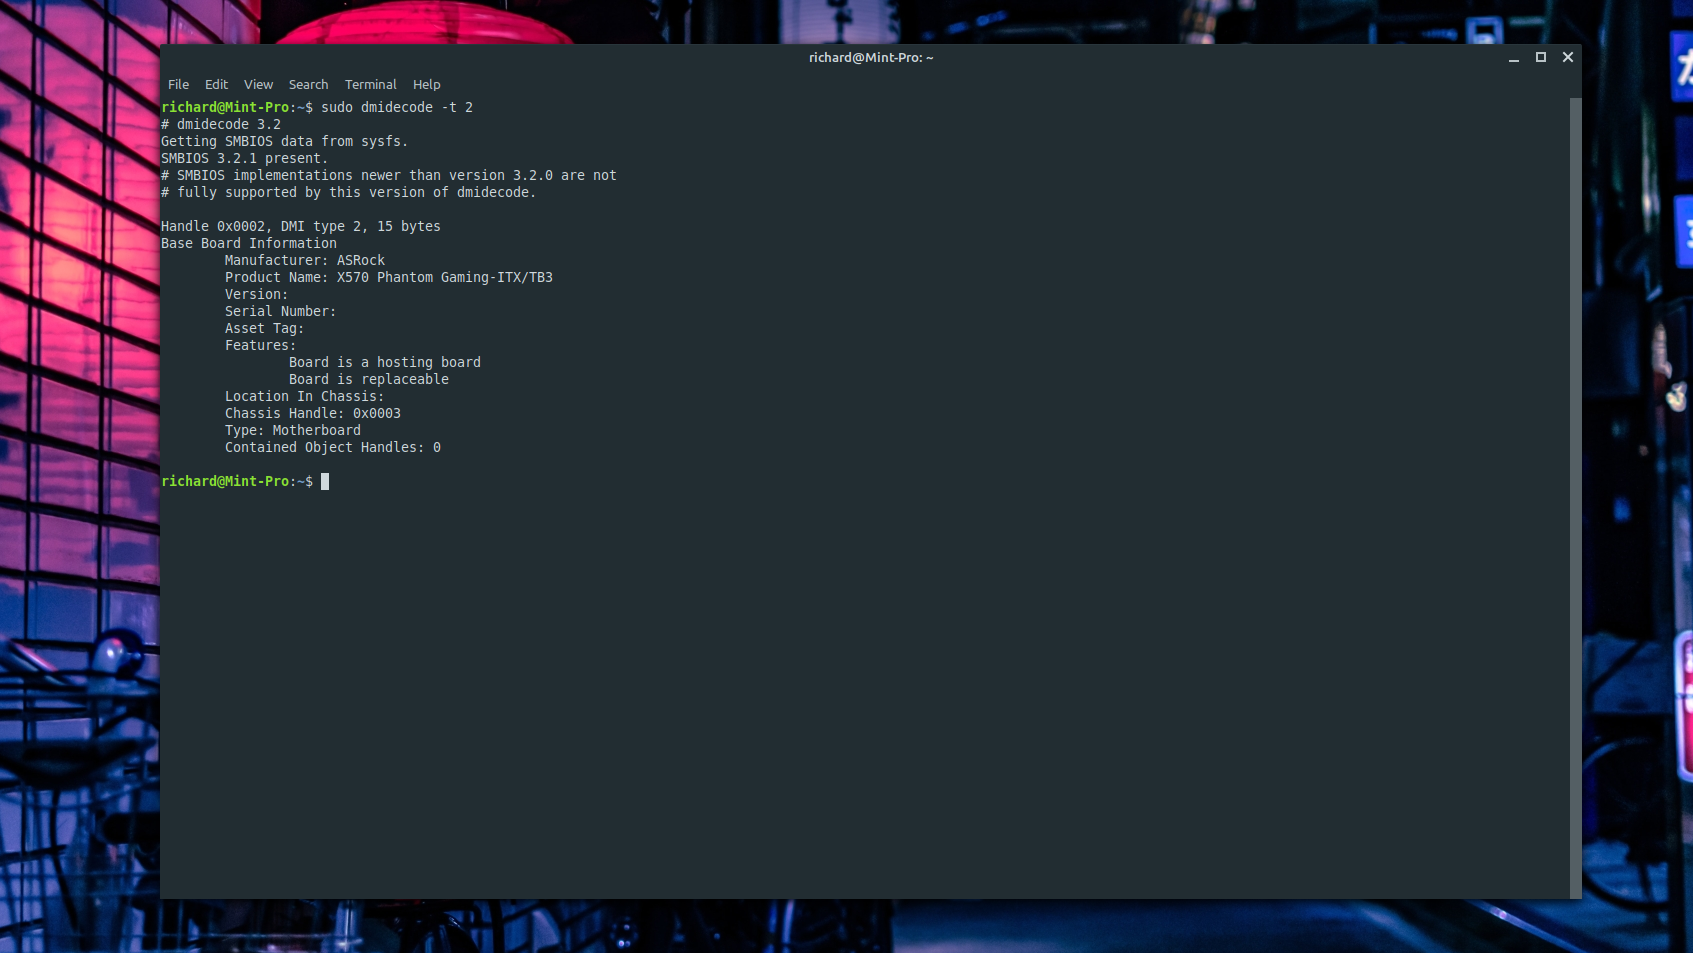
Open up a new terminal window and enter this command:
sudo dmidecode -t 2You'll now receive a print out of all the most important details including the model and serial number.
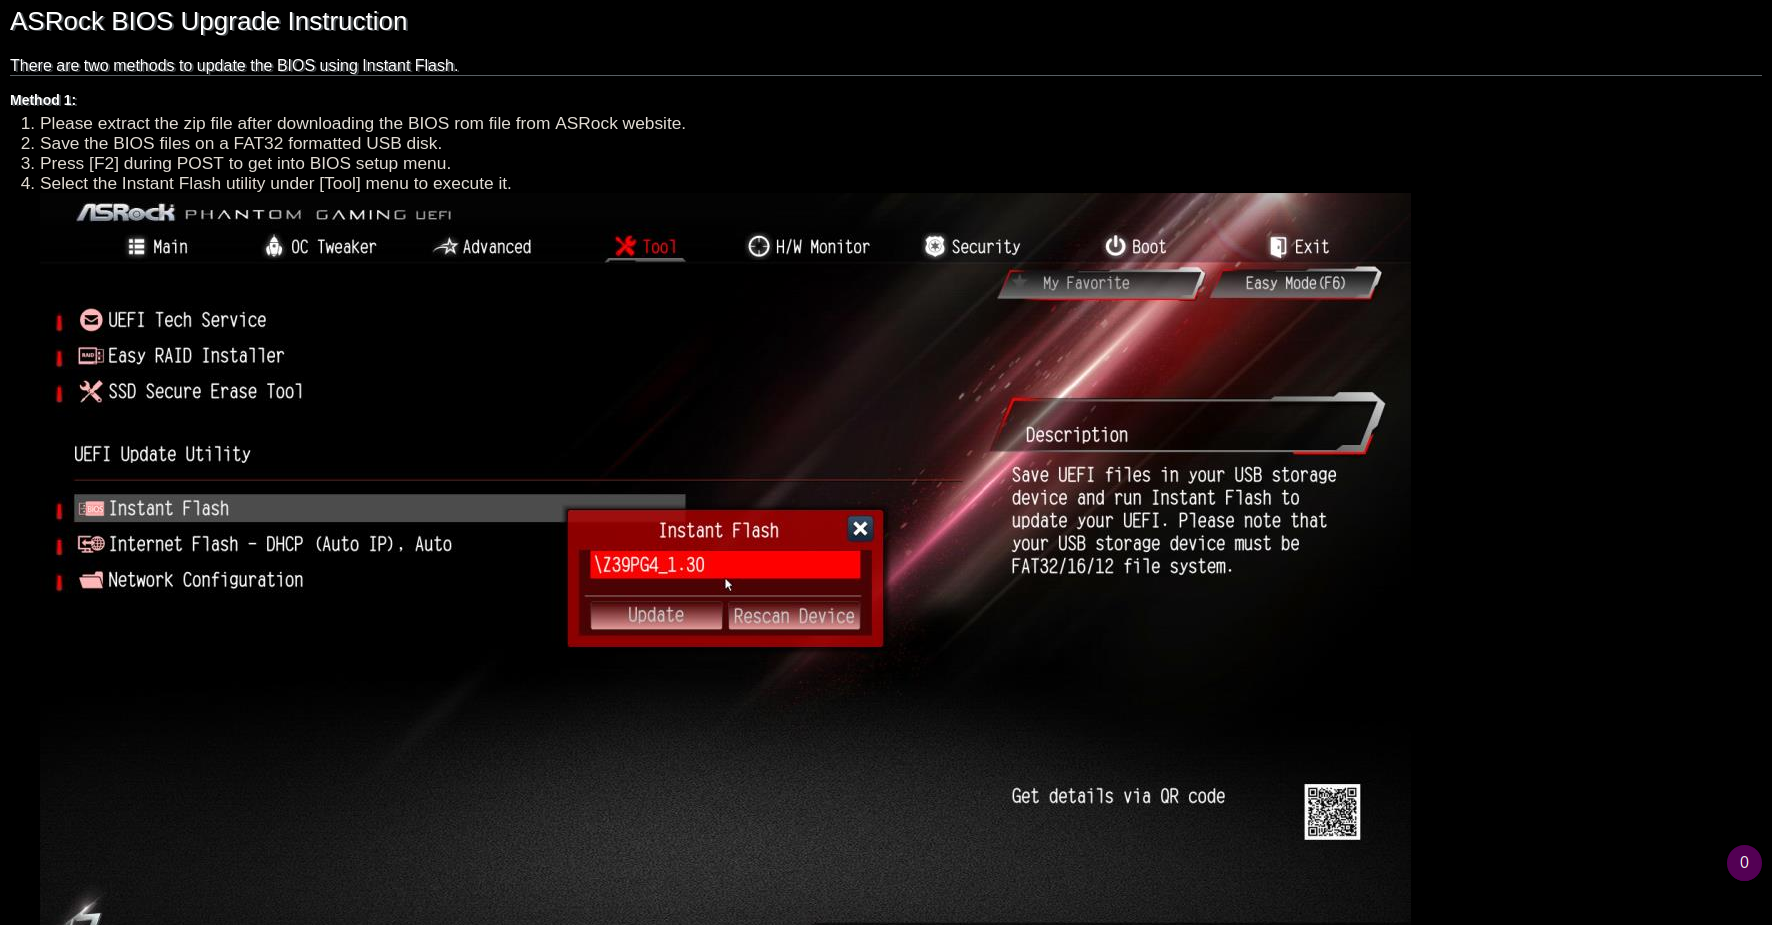
3. Download and install the BIOS update
The first thing to do is head to your manufacturer's website. If it's a pre-built PC or laptop, then go to the PC-makers site and locate the support section. If you built your own, do the same but for the maker of your motherboard.
This is where an element of self-discovery will come in. Updating the BIOS will vary. In some cases, you may have an executable installer you can run, in others a .zip file containing the BIOS and instructions on how to do it. In some cases, you'll have to use a USB flash drive and apply the update directly from within your BIOS or UEFI.
The good news is, you'll never be left high and dry. It's a fairly technical process and getting it right is absolutely crucial, so all the manufacturers will have instructions on their own particular implementation.
Using ASRock as an example, not only will the support site direct you towards the correct BIOS update for your motherboard, it offers an in-depth, step-by-step guide on using its instant flash feature to apply the update. Just make sure you read the instructions carefully first, or better still open them up on another device to have handy while you apply the update.
Summary
BIOS updates aren't something you need to worry about regularly, and in many cases if it isn't broke, don't fix it. BIOS updates aren't issued nearly as regularly as say, a Windows 10 update, but they do still come out sometimes.
If your PC is working well then you're fine leaving it alone. It's worth checking in from time to time though with your manufacturer to ensure that there are no critical fixes that a new BIOS update has been issued to fix.
It can be a little scary to apply if you haven't done it before, but take your time, make sure you know exactly what BIOS you need and how your particular machine applies its updates and it'll go without a hitch.