How to use a Bitcoin Tumbler
Mix your Bitcoins to protect your identity

The Bitcoin (BTC) cryptocurrency is designed for trustless, pseudonymous transactions. While it’s often touted as a way to move money anonymously, this is difficult to achieve in practice. Most Bitcoin Exchanges require you to provide ID and use a bank account in your own name to purchase coins.
All transactions are also publicly recorded in the Bitcoin Blockchain meaning the movement of your coins can be traced from the initial purchase to other payment addresses. Even if you buy Bitcoins for cash or mine them yourself, your Bitcoin wallet software may be associated with your computer's IP address.
In this guide, we’ll explore how to disassociate any Bitcoins you purchase from your identity by using a Bitcoin mixer (sometimes known as a 'tumbler'). A person who wants to protect their privacy first sends their Bitcoins to the mixing service, who will then swap their coins for someone else's of equivalent value, less a small commission. The user can then withdraw these new Bitcoins from the mixing service to a new wallet. This makes it extremely difficult to link your Bitcoins to your identity by examining transactions along the Blockchain.
The Bitcoin mixer we've chosen for this guide, BitCoinFog, is one of the oldest and most reputable. The service charges a randomized commission of 1-3% on Bitcoins it processes.
Bear in mind that if you send your virtual coins to a mixing service which is unreliable or operated by a scammer, you'll lose your Bitcoins. We encourage you to do your own research to find a trustworthy service.
- We show you how to mine Bitcoins
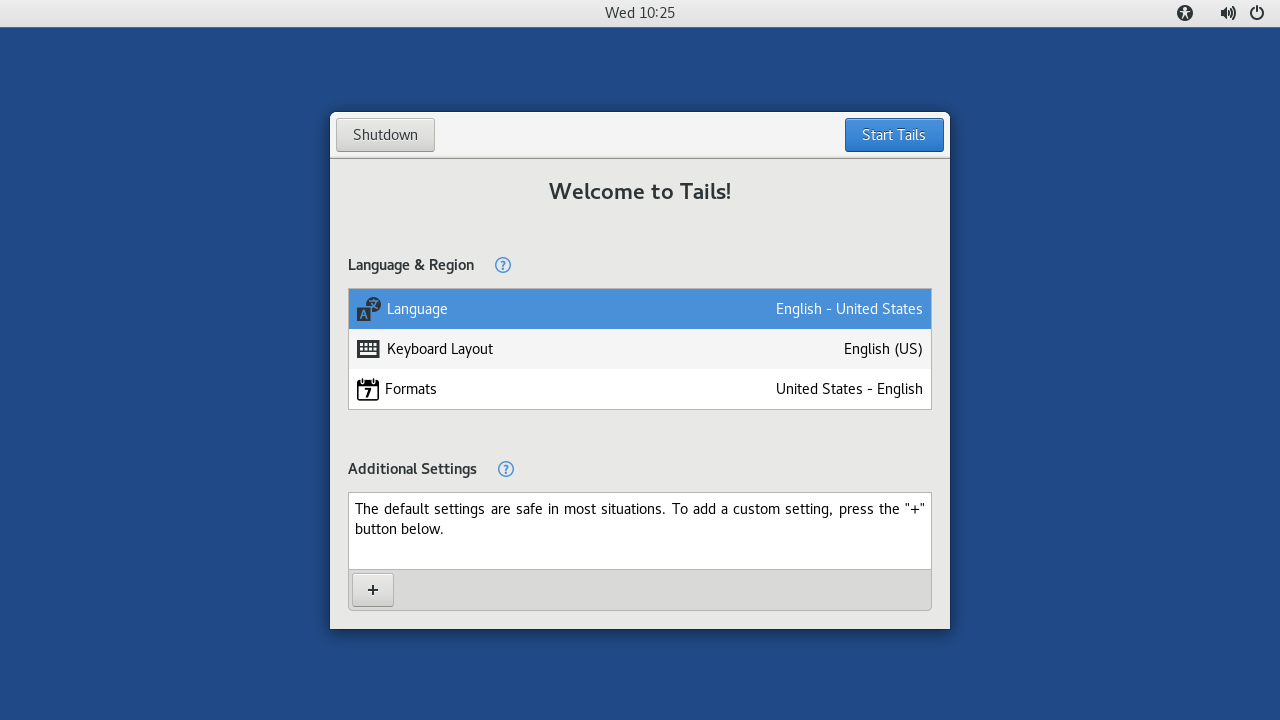
1. Boot TAILS
TAILS (The Amnesiac Incognito Live System) is a version of the Linux operating system. It can boot from a DVD or USB stick on your machine. After you've finished using it, no trace of your activity will be left on the target machine. This makes TAILS perfect for privacy-related tasks like Bitcoin mixing.
TAILS also shunts all internet connections through the anonymizing Tor network. In this guide, you'll use this to make sure your IP address isn't linked to your Bitcoins.
Are you a pro? Subscribe to our newsletter
Sign up to the TechRadar Pro newsletter to get all the top news, opinion, features and guidance your business needs to succeed!
See here for our guide on getting started with TAILS.
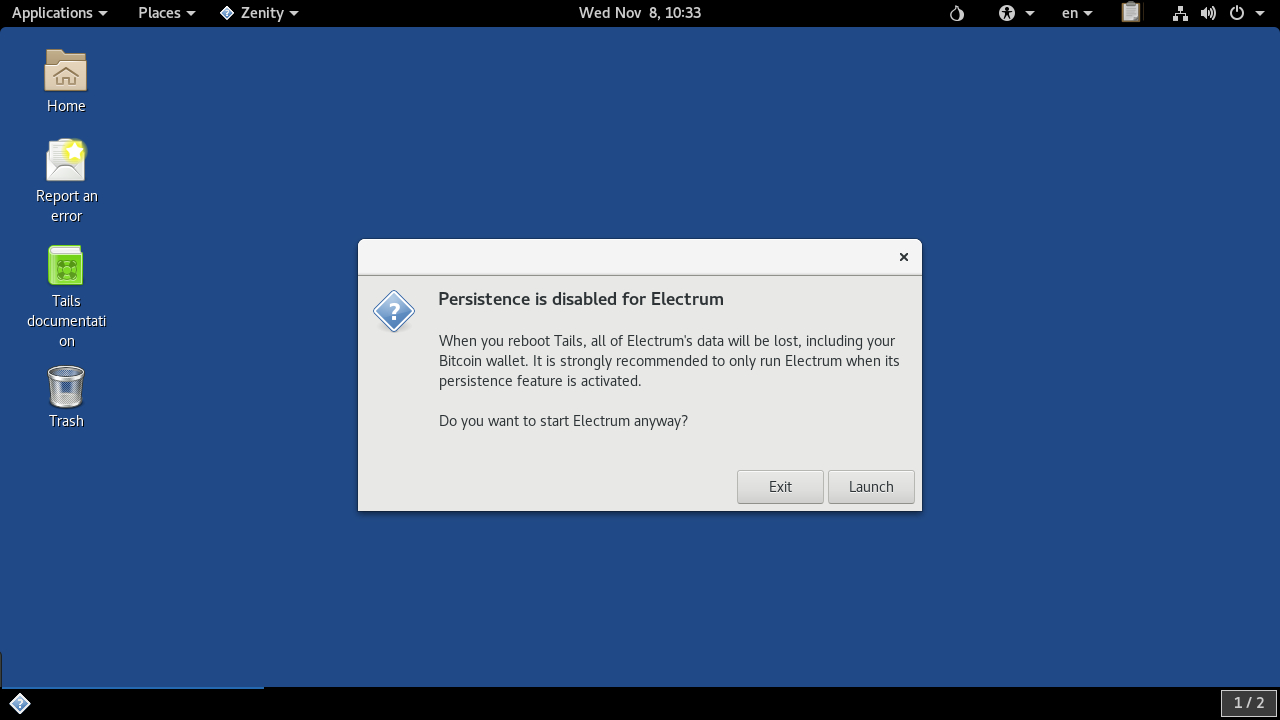
2. Create transition wallet
If you already have some Bitcoins, you will most likely already have a virtual wallet to store them in, either on your computer, or online such as with a Bitcoin Exchange like Bitstamp. As your IP address can be linked to these, first you'll use TAILS to create a temporary holding wallet for your coins before mixing them.
Click ‘Applications’ > ‘Internet’ then ‘Electrum Bitcoin Wallet’. The program will first display a warning saying that your Bitcoins will be lost if the machine restarts. Click ‘Launch’. (You'll learn how to back up your wallet in the next step).
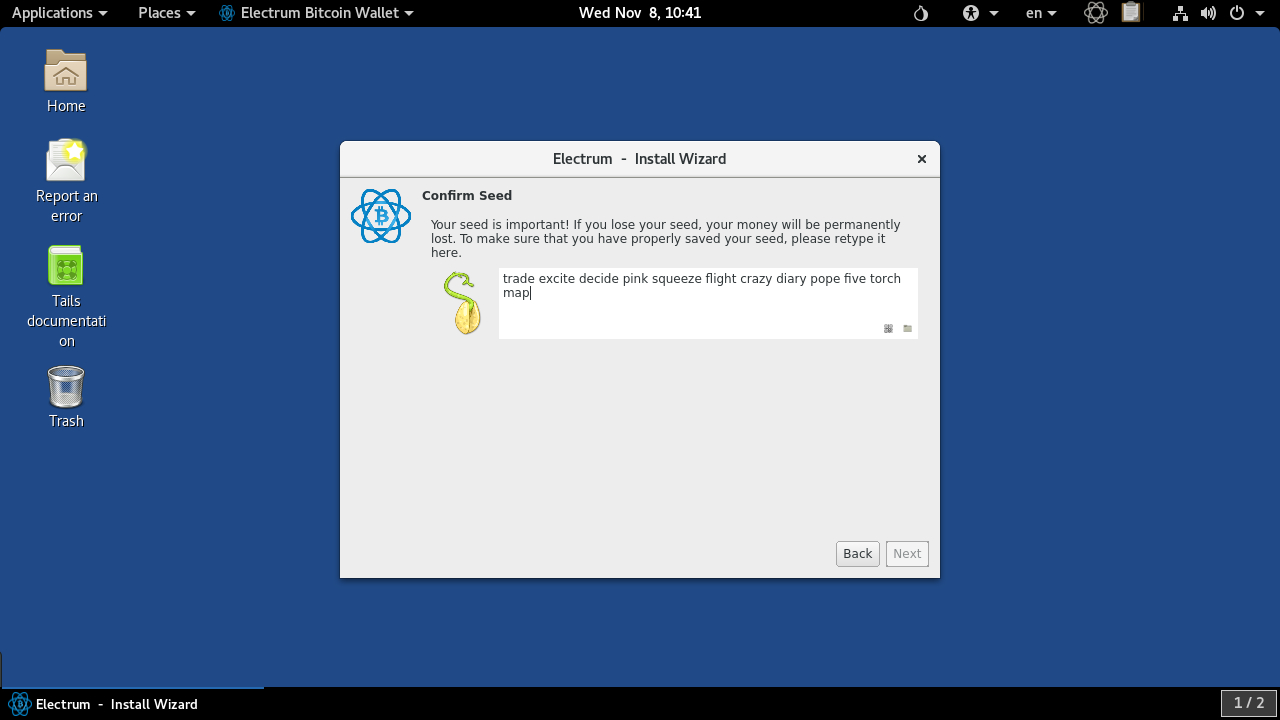
3. Back up transition wallet
In Electrum choose ‘Create a new seed’, then click ‘Next’. Electrum will now display 12 random words, for instance:
trade excite decide pink squeeze flight crazy diary pope five torch map
This is known as your ‘wallet seed’. Anyone with a copy of this can access the Bitcoins you send to this wallet. Write down the wallet seed (word order is important) on a piece of paper, then click ‘Next"’
Retype the wallet seed on the ‘Confirm Seed’ screen to make sure you have it written correctly, then click ‘Next’ again. Electrum will prompt you to set a password but there's no need – just click ‘Next’.
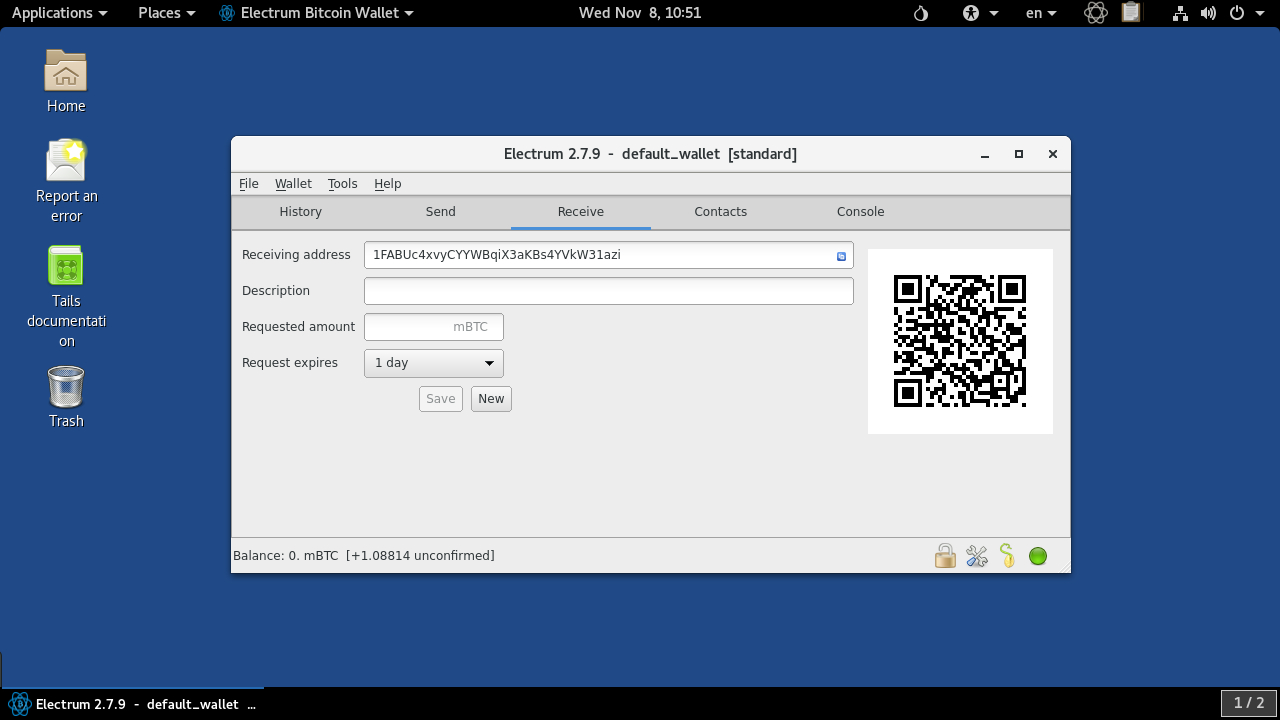
4. Send funds to transition wallet
Electrum will now generate your wallet addresses using the seed from the previous step. Click on the ‘Receive’ tab to see your current payment address for Bitcoin and be sure to write it down (for example: 1FABUc4xvyCYYWBqiX3aKBs4YVkW31azi).
Next, use your existing Bitcoin wallet to withdraw the amount of BTC you want to mix to this address. The steps to do this will vary. If you bought your BTC via Bitstamp, visit https://www.bitstamp.net/account/withdraw to send funds to your new wallet address.
Electrum will show this amount as an unconfirmed balance until funds are confirmed. Minimize the Electrum window for now.

5. Register with BitCoinFog
Click ‘Applications’ and then ‘Tor Browser’. The current deep web address for our mixer of choice, BitCoinFog, is http://foggeddriztrcar2.onion. Enter this into your browser and press return. (Note you can check if the address is still correct by following the official thread on BitcoinTalk here). Domains ending .onion are specific to the Tor network and are designed to anonymize your location.
Click on ‘Register’ at the top right and enter your chosen username and password. (We recommend using Diceware to create these). Note these down on a piece of paper. Once you've registered successfully, enter your details to log in.
6. Deposit funds to the mixer
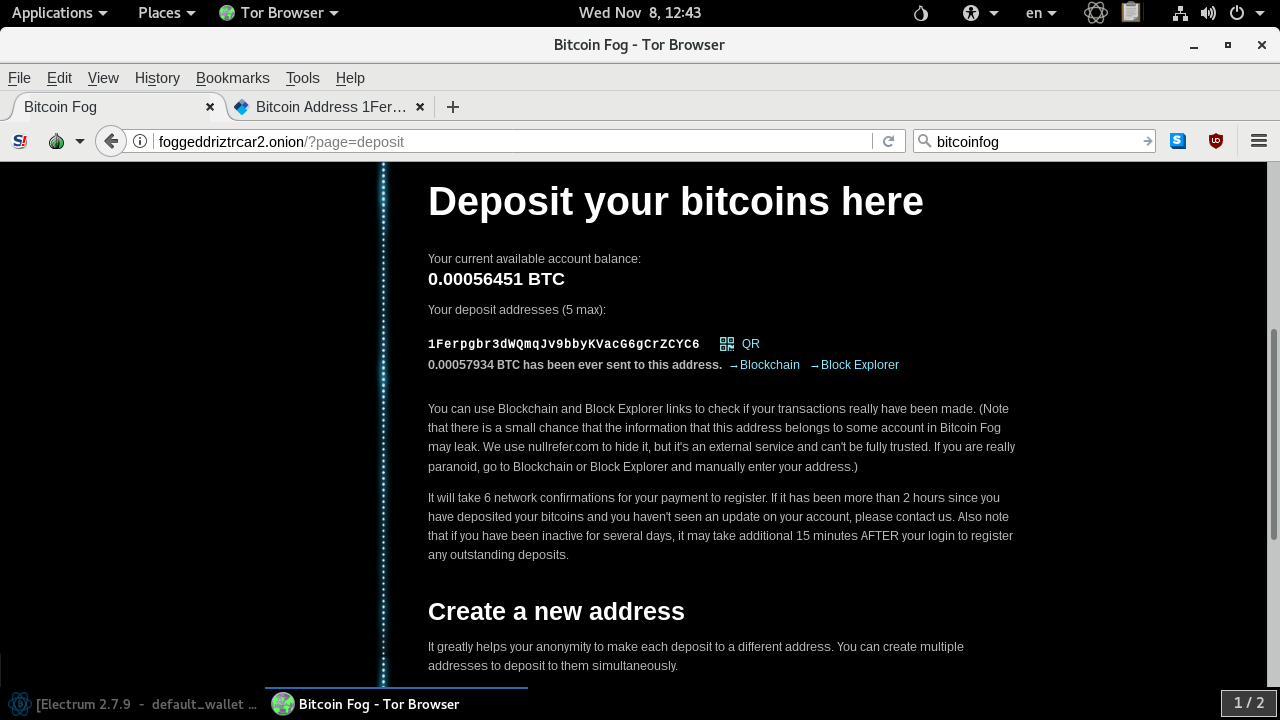
From the BitCoinFog page click ‘Deposit’. The website will automatically generate a deposit address for you.
Highlight this address with your mouse, right click and choose ‘Copy’. Reopen your Electrum Bitcoin Wallet and click on the ‘Send’ tab.
Right click on the ‘Pay To’ field and paste in the BitCoinFog deposit address. Click ‘Max’ under Amount, then ‘Send’. Electrum will confirm that the funds have been sent and will show you a transaction ID.
Reopen the Tor Browser and visit https://blockchainbdgpzk.onion. This is the dark net version of https://blockchain.info. Paste the payment address in the field at the top right to check the status of your funds. The transaction must be confirmed 6 times.
7. Generate storage wallet
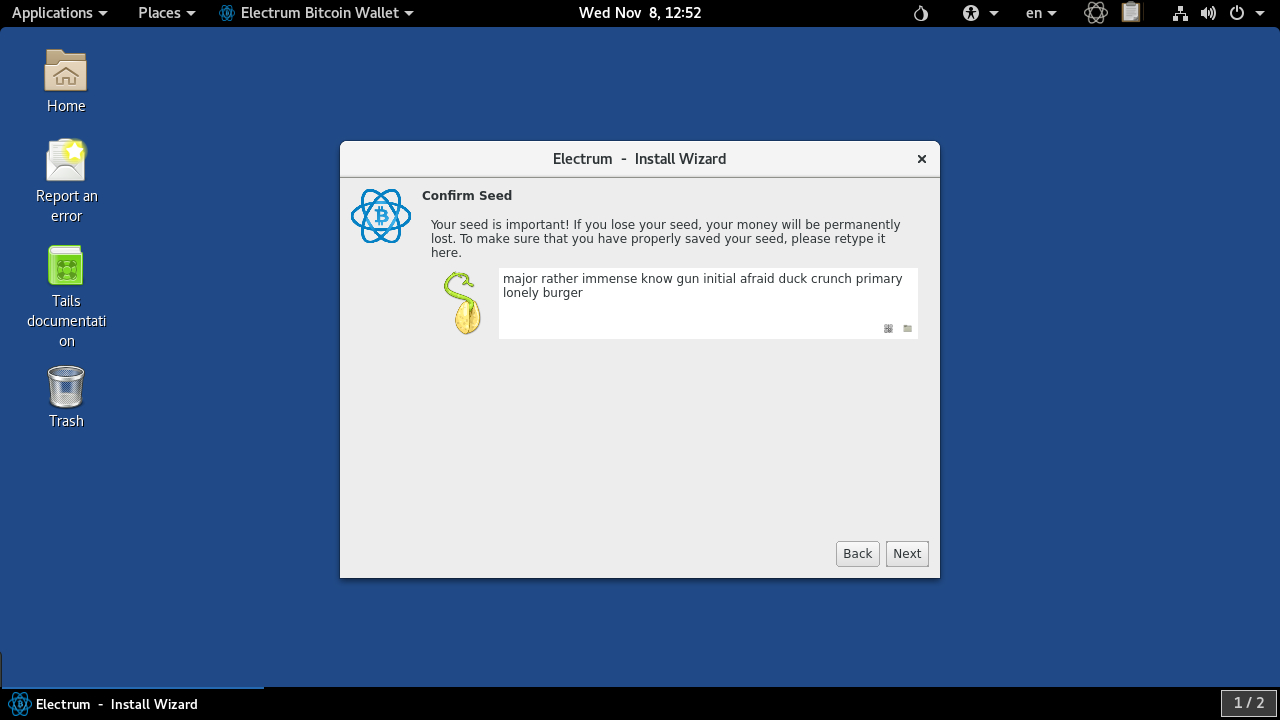
Restart your machine and load TAILS once again. Click ‘Applications’ > ‘Internet’ then ‘Electrum Bitcoin Wallet’.
Ignore the warning and click ‘Launch’. In Electrum choose ‘Create a new seed’, then click ‘Next’. Electrum will now display 12 new random words. Write these down on paper in their precise order, so you can access your new, mixed coins in future. Electrum will also ask you to retype the seed.
To avoid confusion you may want to put a line through the wallet seed you generated earlier after writing this new one down. Remember that anyone with access to this seed can control your BTC so keep it safe.
8. Set up withdrawal
Click ‘Next’ to skip past the Electrum password screen, then click on the ‘Receive’ tab to see your new payment address. Make a note of this (for example: 1vjB1PyehWn5jRPkLV7RYFKvNmk1HEcPr).
Click ‘Applications’, ‘Tor Browser’, revisit BitCoinFog and sign in.
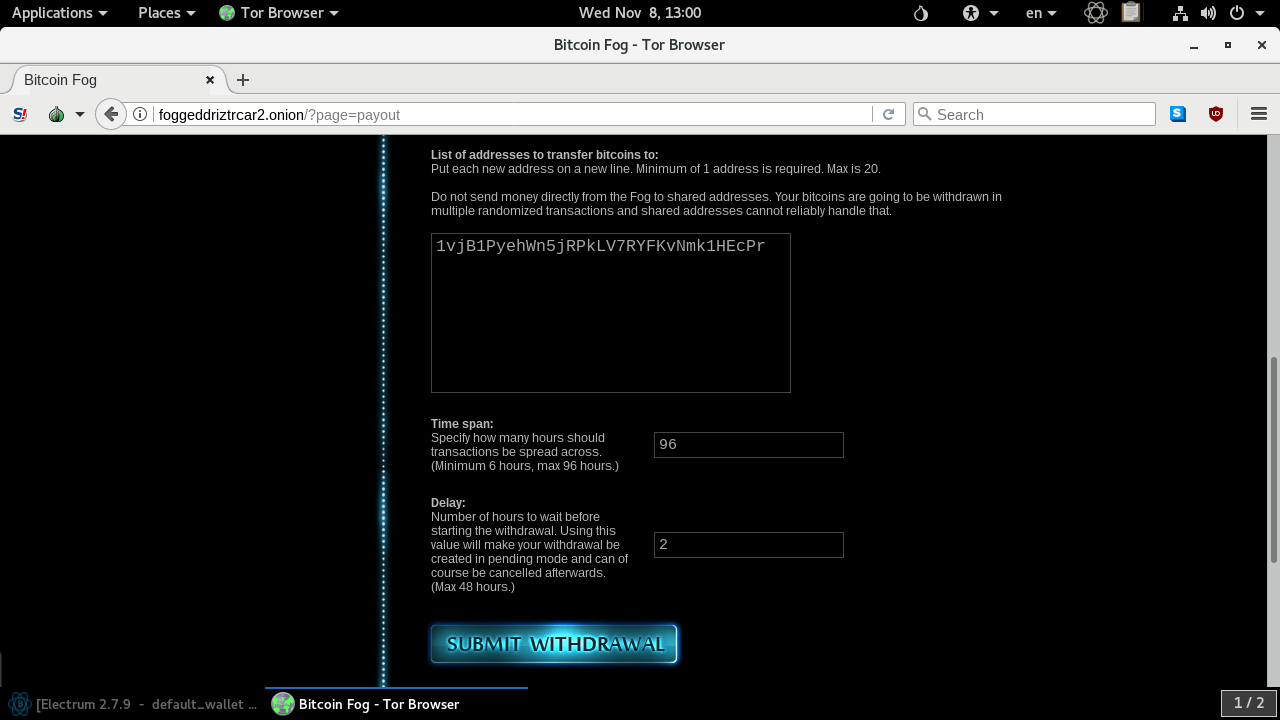
Click on the ‘Withdraw’ tab from the main page. Paste in your Electrum payment address in the box below.
Under ‘Time Span’, you can choose the period of time over which the coins will be withdrawn. Generally, the longer this period is, the less likely it is the coins can be traced back to you. The default is six hours, but you can choose up to 96 hours.
9. Mix your BTC
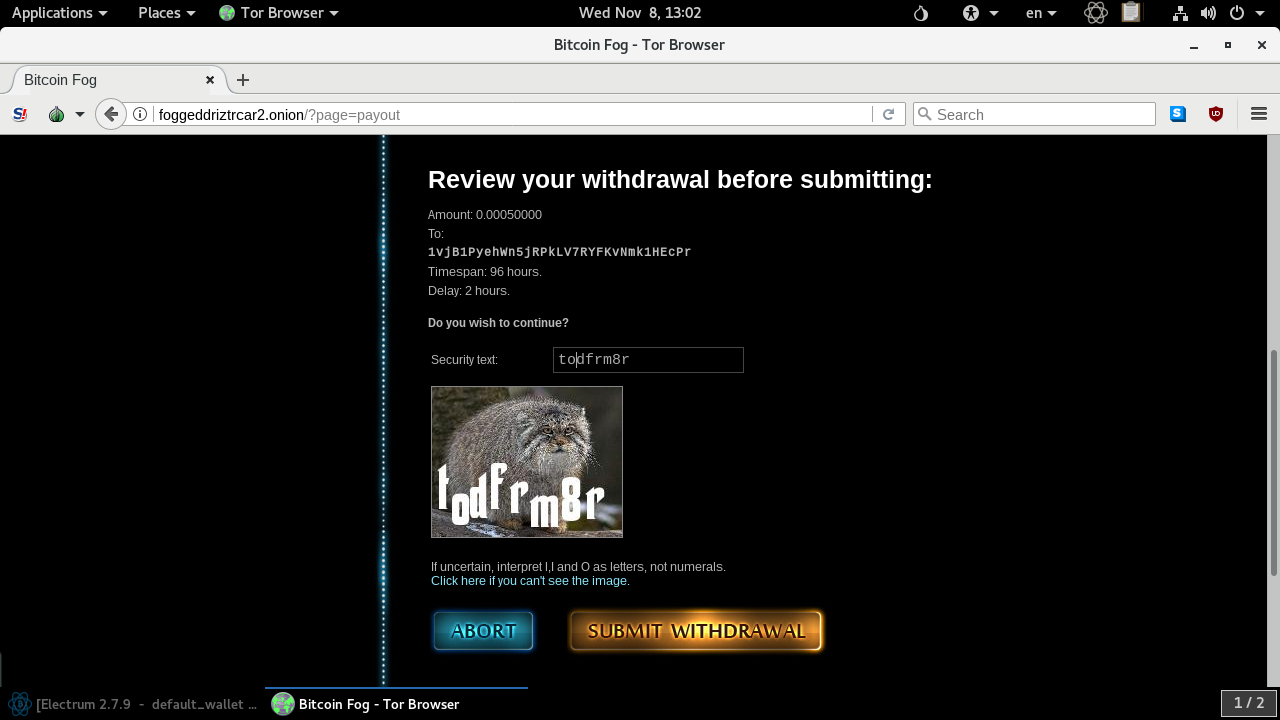
After you've set the ‘Time Span’ for withdrawals under ‘Delay’, you can vary the number of hours before starting withdrawal. Make sure to set this to at least one hour so no one can match the time of the transaction to when you were using the Tor network.
Finally click ‘Submit Withdrawal’. You'll be asked to complete a small Captcha to continue. Carefully check the destination address, time span and delay before clicking ‘Submit Withdrawal’ once again.
If you set a delay for withdrawal, be sure to shut down your machine before the funds are processed. BitCoinFog will deduct a randomized fee (1-3%) for mixing the coins.
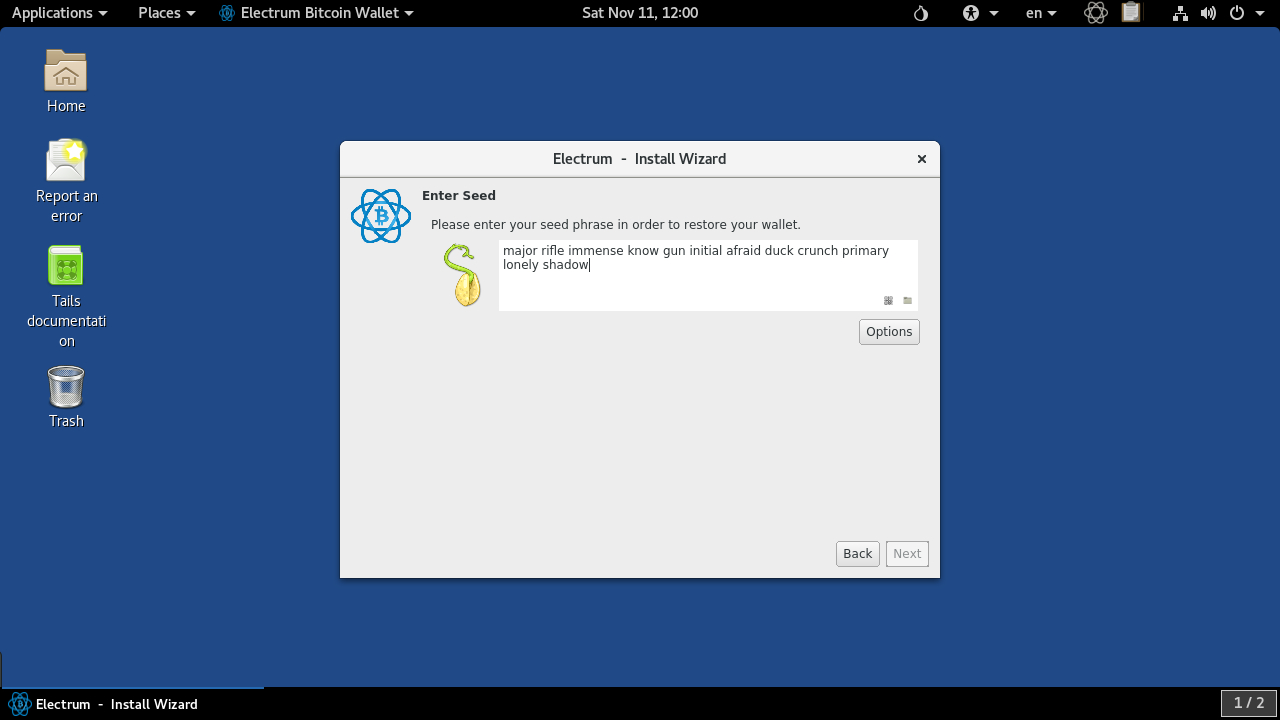
10. Restore your wallet
If you want to check on your newly mixed Bitcoins (or spend them!), reboot TAILS from your machine and return to ‘Applications’ > ‘Internet’ then ‘Electrum Bitcoin Wallet’.
Choose ‘Launch’ to start Electrum, then click ‘Next’. On the Keystore screen choose ‘I already have a seed’, then click ‘Next’ again.
On the ‘Enter Seed’ screen type in the seed of your storage wallet, click ‘Next’, then ‘Next’ again to skip past the password screen. Electrum will restore your wallet along with its balance.
Make sure you only access your wallet via TAILS in the future. This will ensure there's no connection between your real IP address and these Bitcoins.
Nate Drake is a tech journalist specializing in cybersecurity and retro tech. He broke out from his cubicle at Apple 6 years ago and now spends his days sipping Earl Grey tea & writing elegant copy.