How to use GoToMeeting
The goto option for meetings

GoToMeeting is one of many strategic business tools all trying to capture what has become the essential technology for those working apart.
Developed by LogMeIn from previous solutions GoToMyPC and GoToAssist, this video conferencing tool is best known for the high levels of encryption that it offers, and its ability to function behind firewalls.
Those wishing to experience a 14-day trial can sign up at https://www.gotomeeting.com/
In this feature, we’ll take you through your first day using GoToMeeting, and outline what to expect. Let’s get started with using GoToMeeting and provide the critical information you need to make the most of it.
- Read our full review of GoToMeeting here
1. The Hub
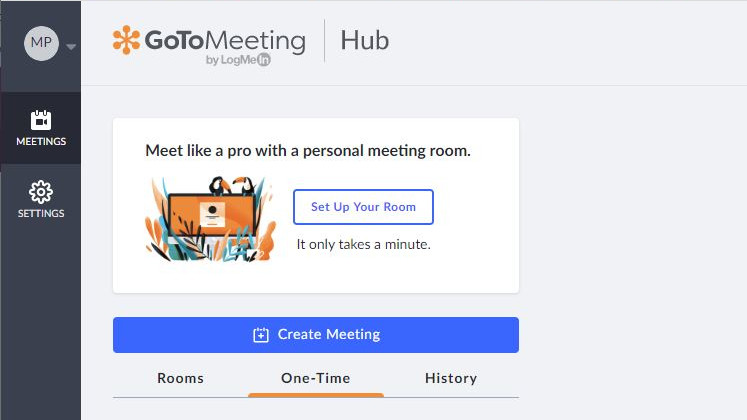
When you sign up for GoToMeeting you’ll first arrive at the web interface or 'Hub' as it is called, and in some conferencing applications, that’s all you need. And, you can do plenty here, but what you can’t do immediately is host a meeting.
We’ll cover what extra step you need to perform soon. But first, let’s look at the web interface of the Hub and organise our meeting space.
As the host of a meeting, you can define the name of the Room it will be held in, invite people to join you and schedule the event (or reschedule if required).
Are you a pro? Subscribe to our newsletter
Sign up to the TechRadar Pro newsletter to get all the top news, opinion, features and guidance your business needs to succeed!
But setting up the room is the first task you need to perform. Let’s do that now by clicking on the button labelled ‘Setup your Room’.
2. Setup your Room
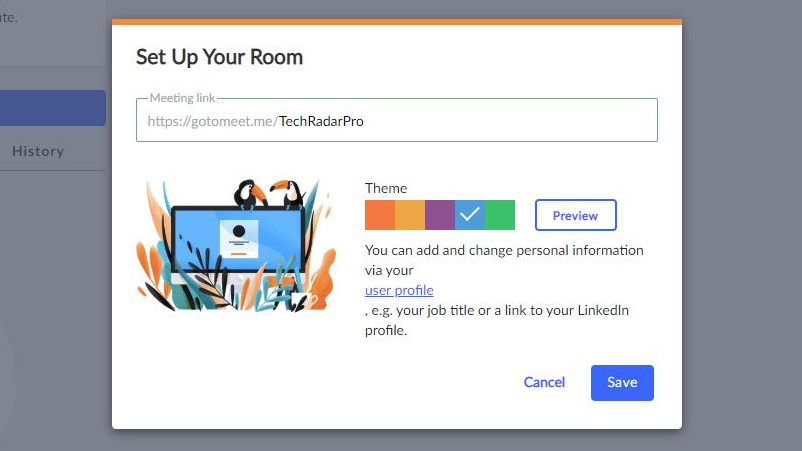
The first requirement for each room is that it has a unique name, and its best to pick something that those attending can easily relate to. We’d advise having a standard structure for the naming rooms and meetings, as it will be less likely that people will forget to turn up.
We call our room, imaginatively we think, TechRadarPro.
You can give the room a specific colour and even a theme if you want something a little distinctive.
3. Create a meeting
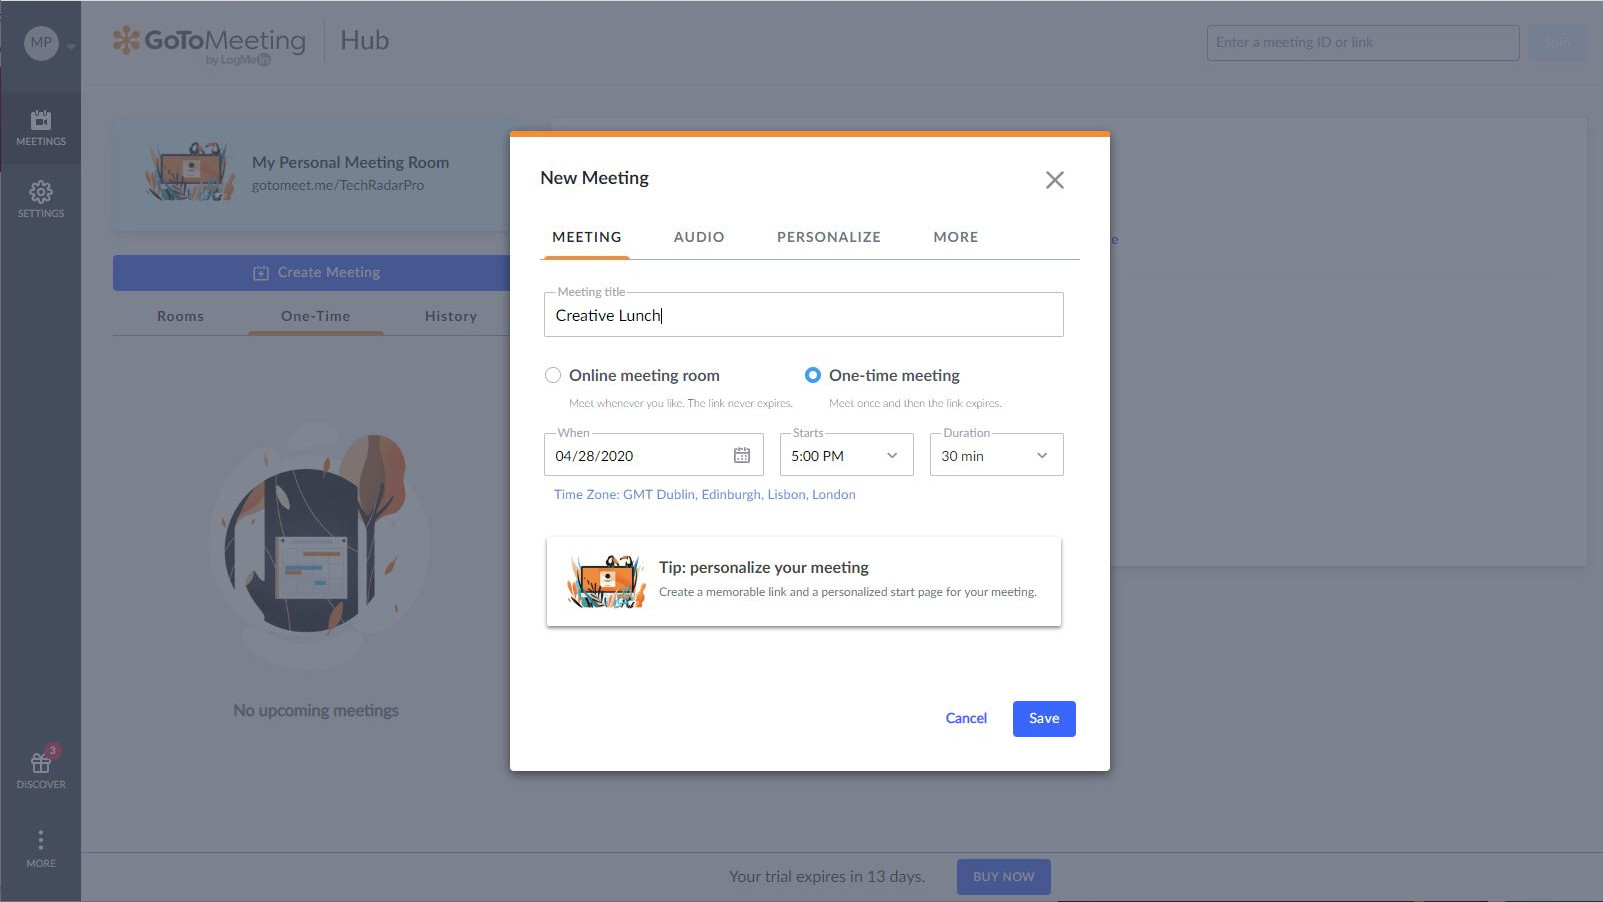
Once we have created a Room, we can use that virtual location to have a meeting. The Hub has a large blue button to do that, and that triggers a wizard that asks plenty of questions.
These include on the first page what the meeting will be called, when it will happen, and if it’s a one-time event or a regular venue.
There are three additional pages of the meeting definition, the second allows defines how audio will be handled, the third is for personalisation and the fourth enables a co-organizer to be defined and a password created that controls access.
The ability to have a co-organizer is an especially useful feature. Because it allows another person to host the meeting if the creator is unavailable.
4. Invitations
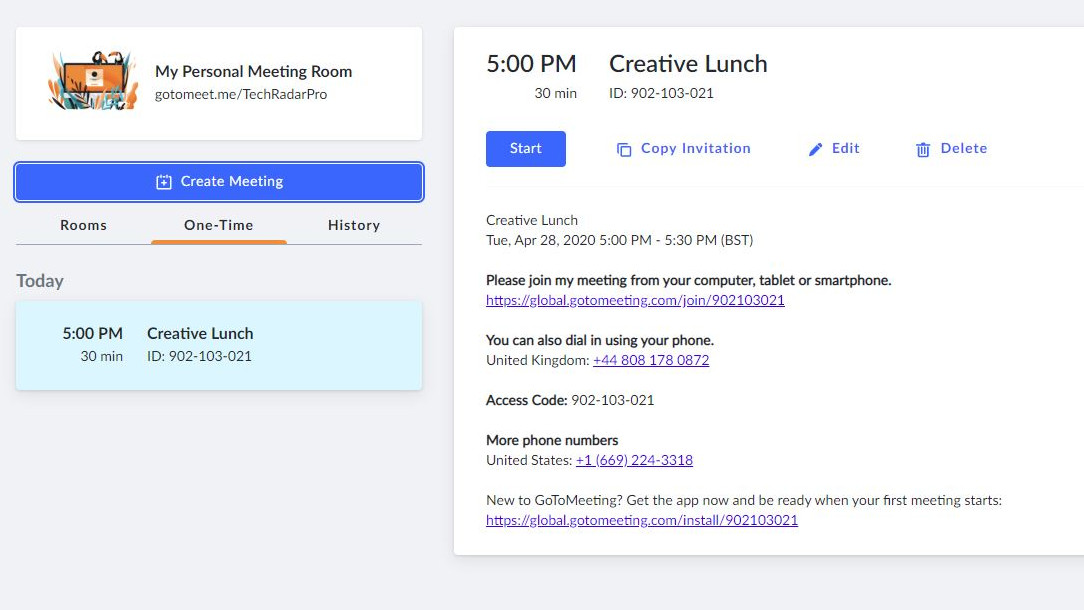
Once a meeting has been defined, it appears on the Hub, and from here you can copy the invite to all those you want to attend.
If you allow phones to ring in on a number and contribute purely with audio, then the localised phone numbers are also shown here.
You might think that you are now set to have a meeting, but there is an additional step that you need to take before you are ready to host or to join. On each computer, you will need to install the desktop application.
5. Install desktop app
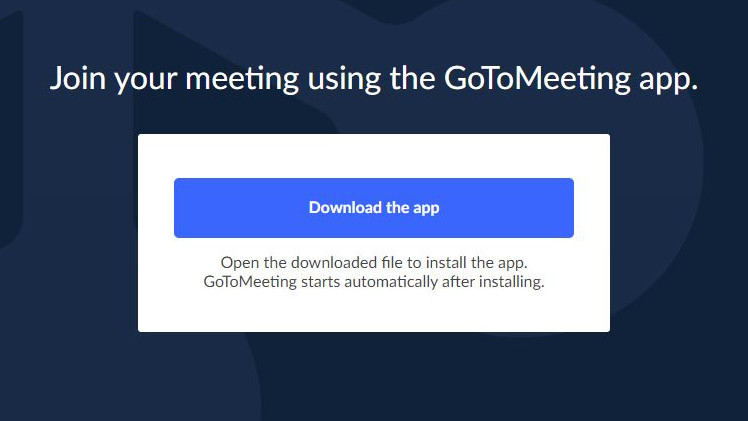
If you click on the ‘Start’ button for a meeting, and you have not installed the desktop application you will immediately be taken to a screen where you can download and install the app. It goes without saying that if ordinary users in your company are not empowered to install apps, then some liaison with those in your IS or IT department might be necessary to make this possible.
Once the application is happy installed it will launch when you click ‘Start’ and ask you how you would like to join the meeting.
With that out of the way, the meeting has effectively begun, although by default the video and audio streams are disabled by default. This is not a bad thing, as it gives you a chance to make sure that your appearance is acceptable, and the lighting is sufficient for others to see you, and that you’ve connected a microphone if needed.

6. Application controls
The GoToMeeting application has some simple controls along the bottom that allows users to disable and enable video and sound, share their desktop and leave the meeting.
The only difference that mobile platform users will notice is that they do not have the option to share their desktop, but in other respects it is identical. If video is enabled you will see a small panel showing what your video looks like, so you understand what others are seeing.
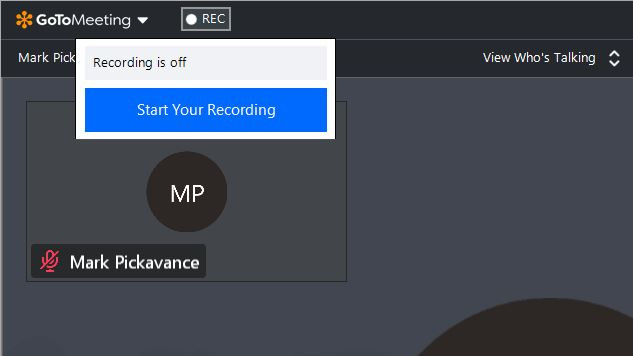
Another interesting feature is on the top left where you can see a ‘REC’ record button. This will record the meeting for future reference.
On the top right are four icons that show the participant panel, access the inbuilt chat functions, audio and video settings and an information section that also includes some support links.
And, finally, bottom left is a preferences icon where you can configure all the defaults. These include the preferred speakers and microphone, and application integrations, and where any documents relating to the meeting will be stored locally.
7. Managing a Room
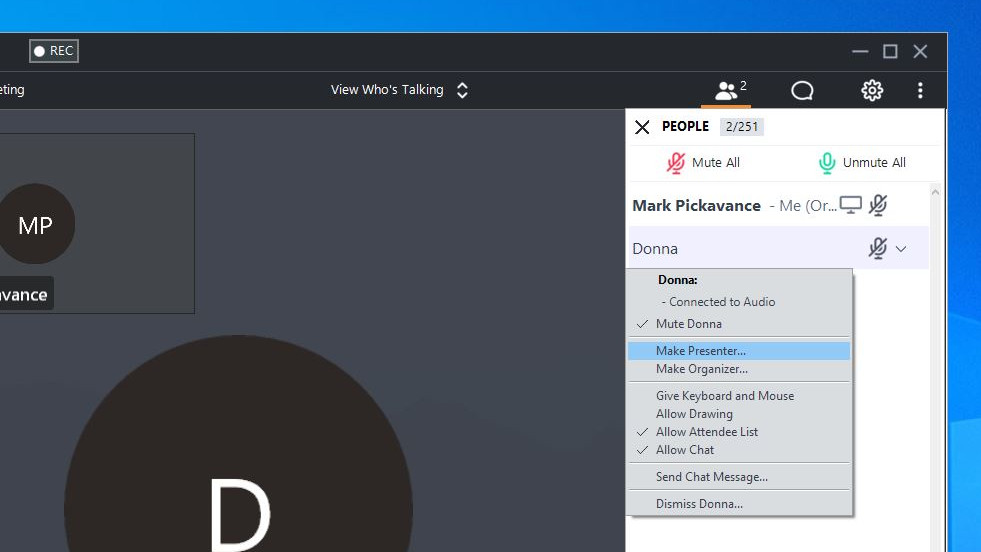
Managing a Room is very straightforward. As those you invited arrive, they appear in a panel down the right-hand side of the application, where you can see them.
Technically, GoToMeeting can have up to 251 people in the same meeting at the same time including the host, and it shows you how many are currently participating.
As the host, you can mute the audio of a participant, invite new people, lock the meeting from anyone entering who came late and give keyboard and mouse control of the hosting system over to another user.
And, should the host need to leave, maybe for another meeting, you can even make any attendee the presenter or organiser. Many of these features are on a drop-down menu that appears if you click on the chevron to the right of the participants' audio icon.
8. Just too many people
With the ability to handle so many participants, it can be hard to keep track of who is talking.
Thankfully, the developers of GoToMeeting those of that and you can filter who appears on the main panel of the application.
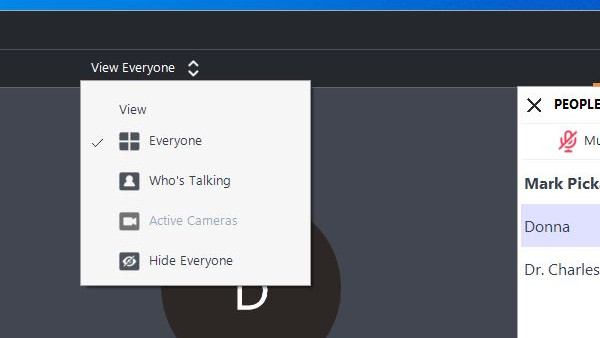
By default, the app will have View Everyone set, and you can see that in the centre of the bar along the top with two chevrons alongside it. Clicking on this will display a menu where you can switch to only show those participants actively talking, those with active cameras or hide everyone.
In our example, all the cameras were disabled, which is why that option is greyed out.
There are many other tricks and features to GoToMeeting, but hopefully, some of these pointers should help you get started.
- Best browsers of 2020: the fastest and safest ways to get online
Mark is an expert on 3D printers, drones and phones. He also covers storage, including SSDs, NAS drives and portable hard drives. He started writing in 1986 and has contributed to MicroMart, PC Format, 3D World, among others.
