How to use Netflix’s ‘secret’ video test patterns to improve your 4K TV’s picture
Here’s how to access and make good use of the video test patterns in the Netflix library
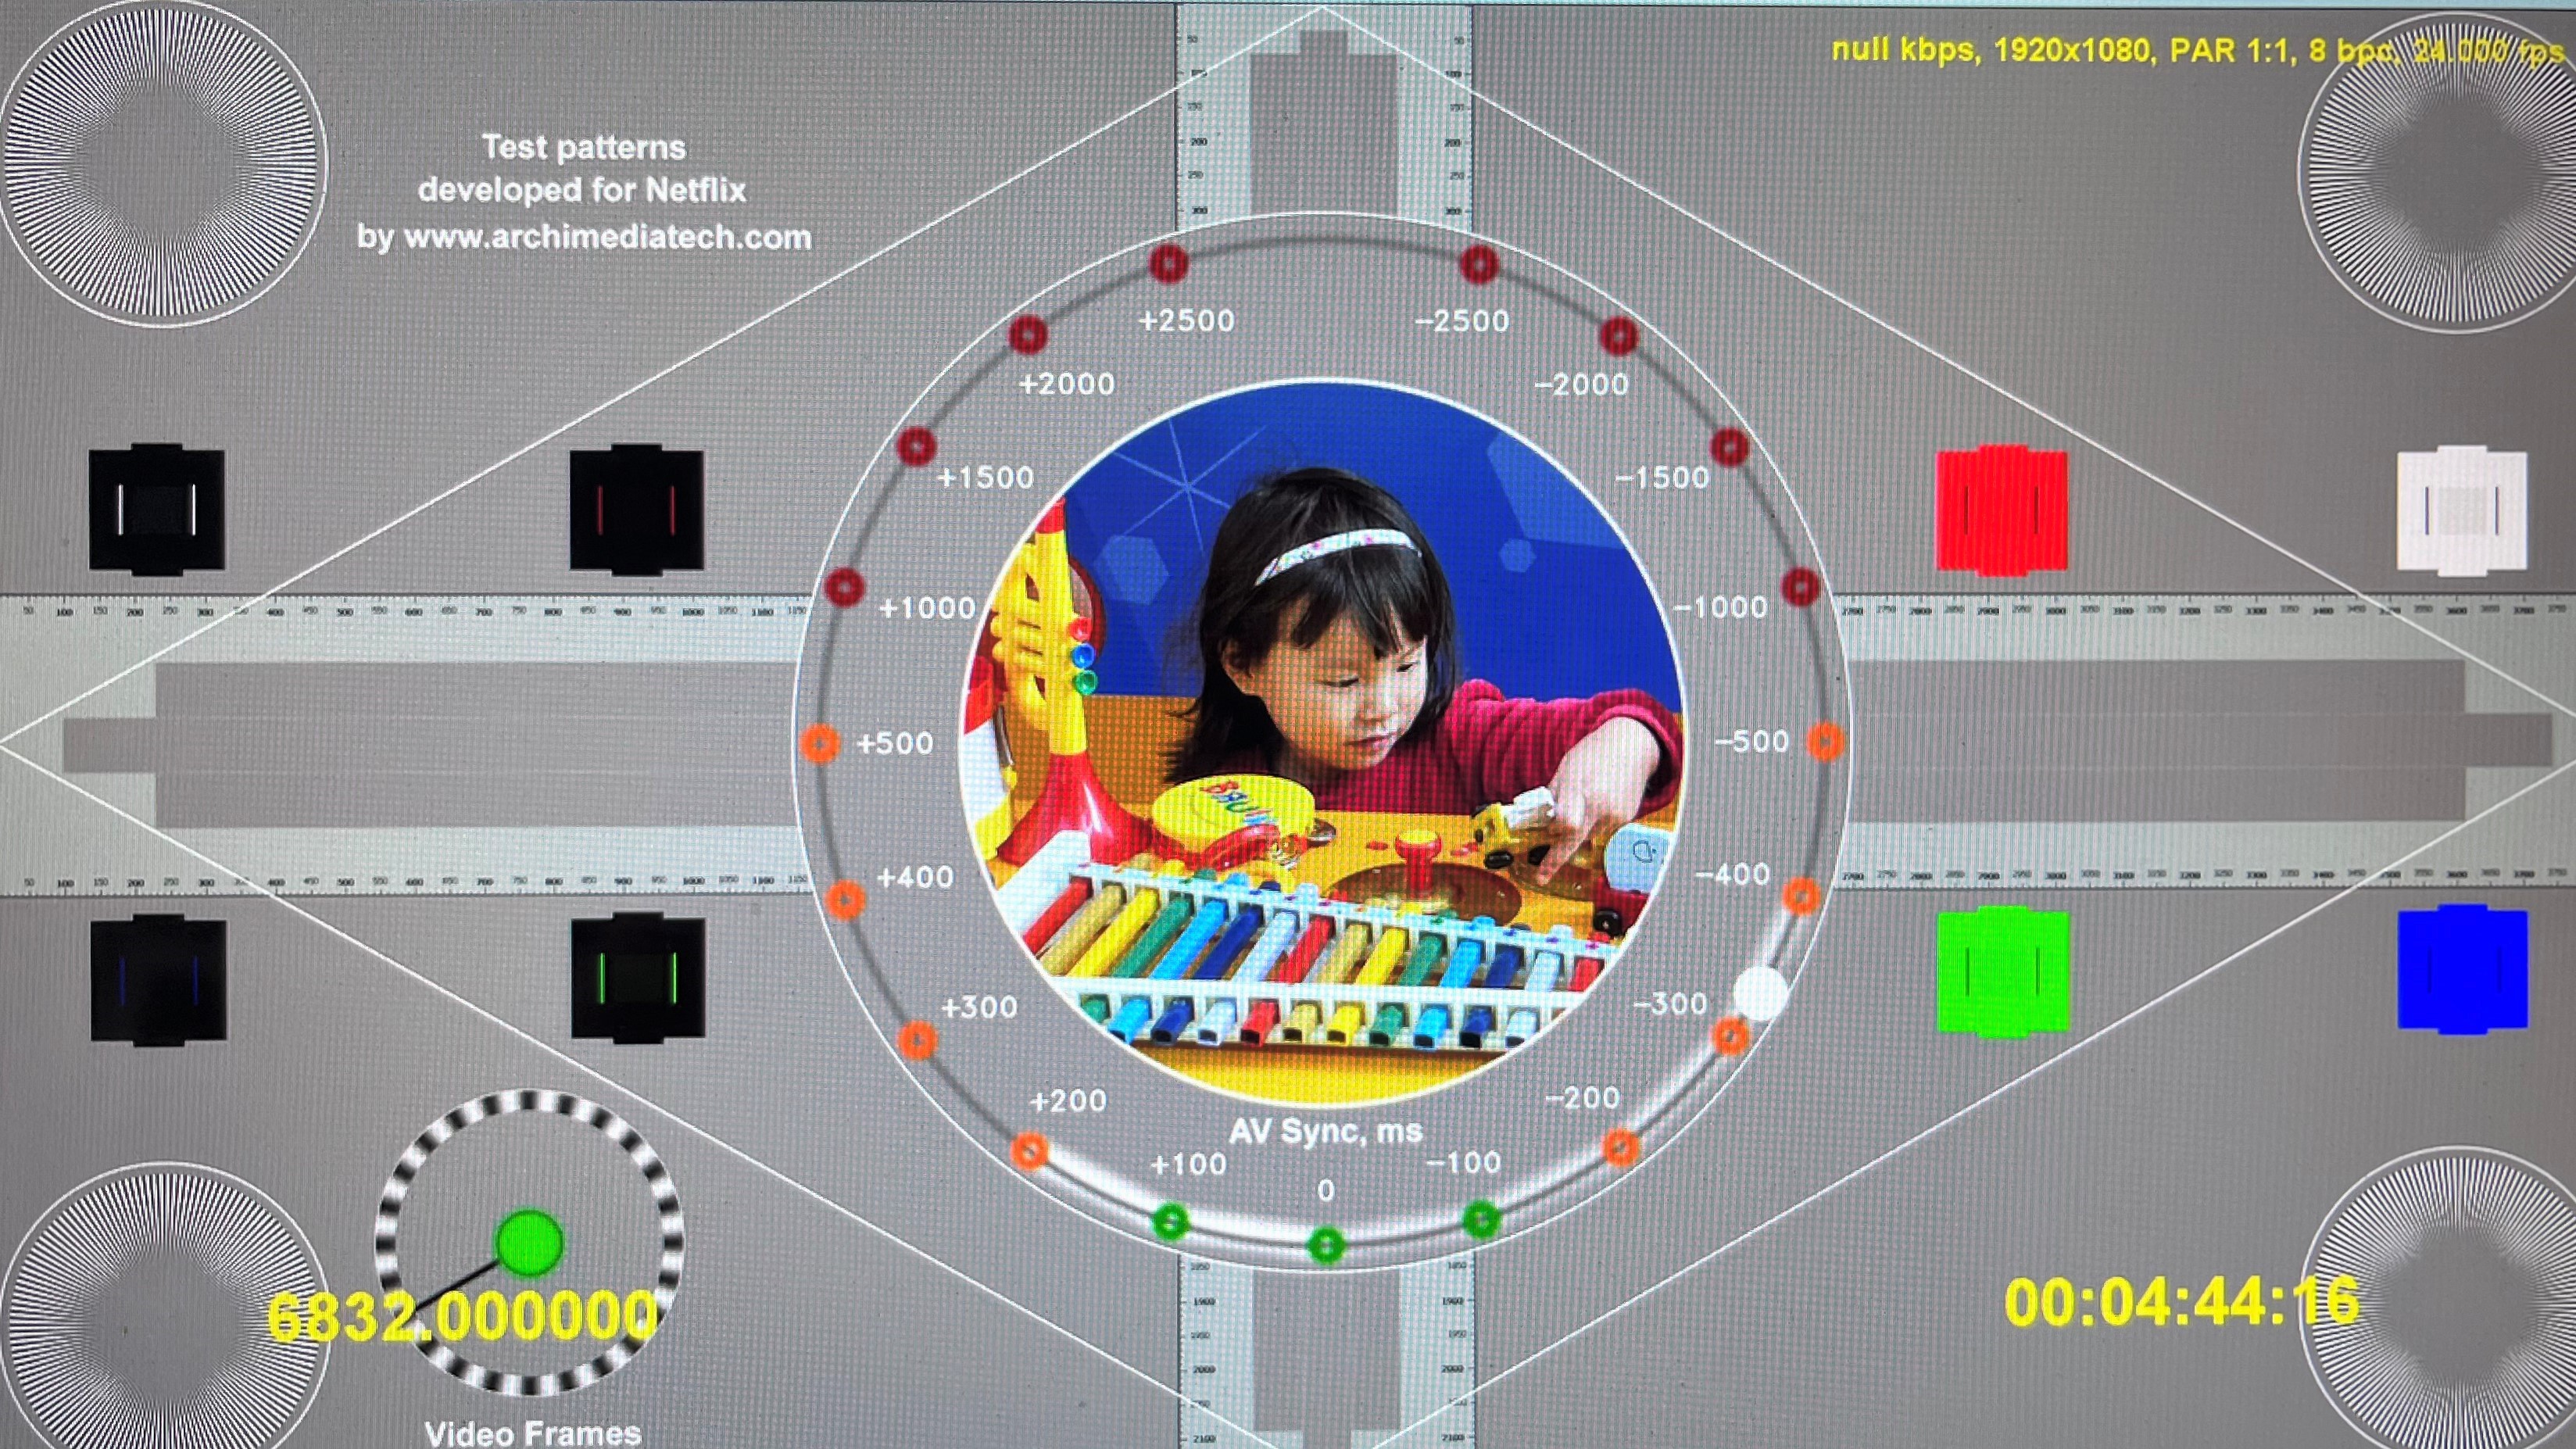
With its large selection of shows and movies in 4K with HDR, Netflix counts among the best streaming services for showing off the performance capabilities of your 4K TV. Netflix’s Premium tier offers many programs with 4K resolution, Dolby Vision HDR and Dolby Atmos audio, and as long as your TV and Dolby Atmos soundbar are set up properly, you can enjoy cinema-quality pictures and sound when watching them.
But how do you know if your TV’s picture adjustments are correctly set to provide optimal image quality? The Filmmaker picture mode on select TVs from companies like LG and Samsung provides some level of standardization, but other picture modes can be all over the map when it comes to the levels of brightness, contrast, color saturation and detail they deliver.
The only real way to know if your TV is displaying a picture that resembles what a program’s producers intended for you to see is to make sure its settings are properly calibrated. Blu-ray test discs such as the Spears & Munsil Ultra HD HDR Benchmark can be a great help in this regard (we use them when judging for our list of the best TVs), but not everyone wants to shell out money for an expensive test disc, and not everyone owns a 4K Blu-ray player.
If you happen to be a Netflix subscriber, there’s a sizeable number of video test patterns you can access to help adjust your TV’s picture settings. These used to be easy to find: you simply entered “Test Patterns” into the search box on the main Netflix menu and the patterns would be displayed. For some reason, the company has since hidden them from its search engine, but we’re going to tell you how to find them and, more importantly, how to use them to adjust your TV.
While both 1080p and 4K test patterns with HDR are located in the Netflix library, we’re going to use a 1080p one for this example since you’ll want to confirm that your TV is properly displaying standard dynamic range high-def video before making any additional adjustments for HDR.
Steps for how to use Netflix test patterns to adjust TV picture settings
- Sign into Netflix on your computer and then enter https://www.netflix.com/title/80018499 into a web browser
- Add the Multipurpose Chart 1920 x 1080: 60fps test pattern (S2: Episode 8) to your Netflix library by clicking on the Add To My List (+) button
- Open the Netflix app on your TV
- Select the Multipurpose Chart 1920 x 1080: 60fps test pattern in the My List section
- Make picture adjustments using the steps described below
Tools and Requirements
- 4K TV
- Netflix subscription
Step by step guide to adjusting brightness
1. Locate the PLUGE patch in the multipurpose chart
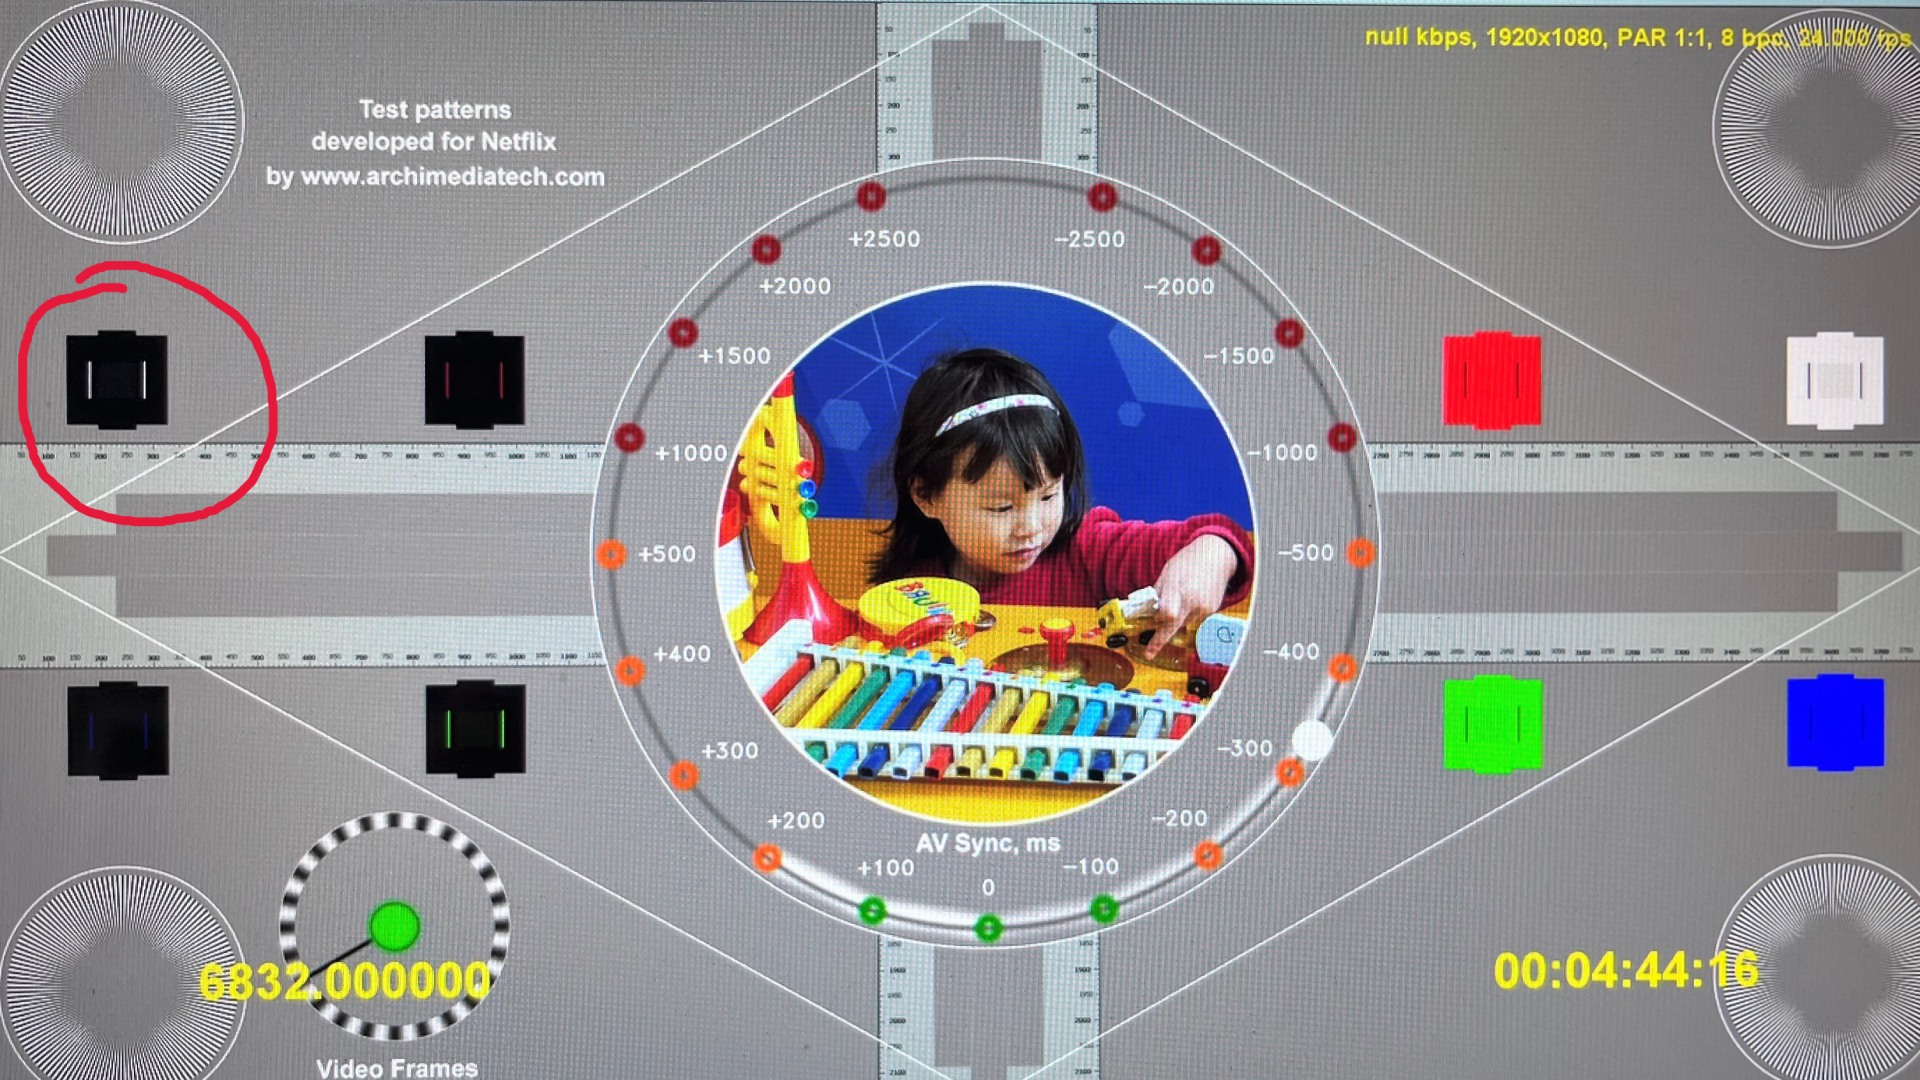
This is the black box at the left edge of the screen in the test pattern’s top row.
2. Adjust your TV’s Brightness control
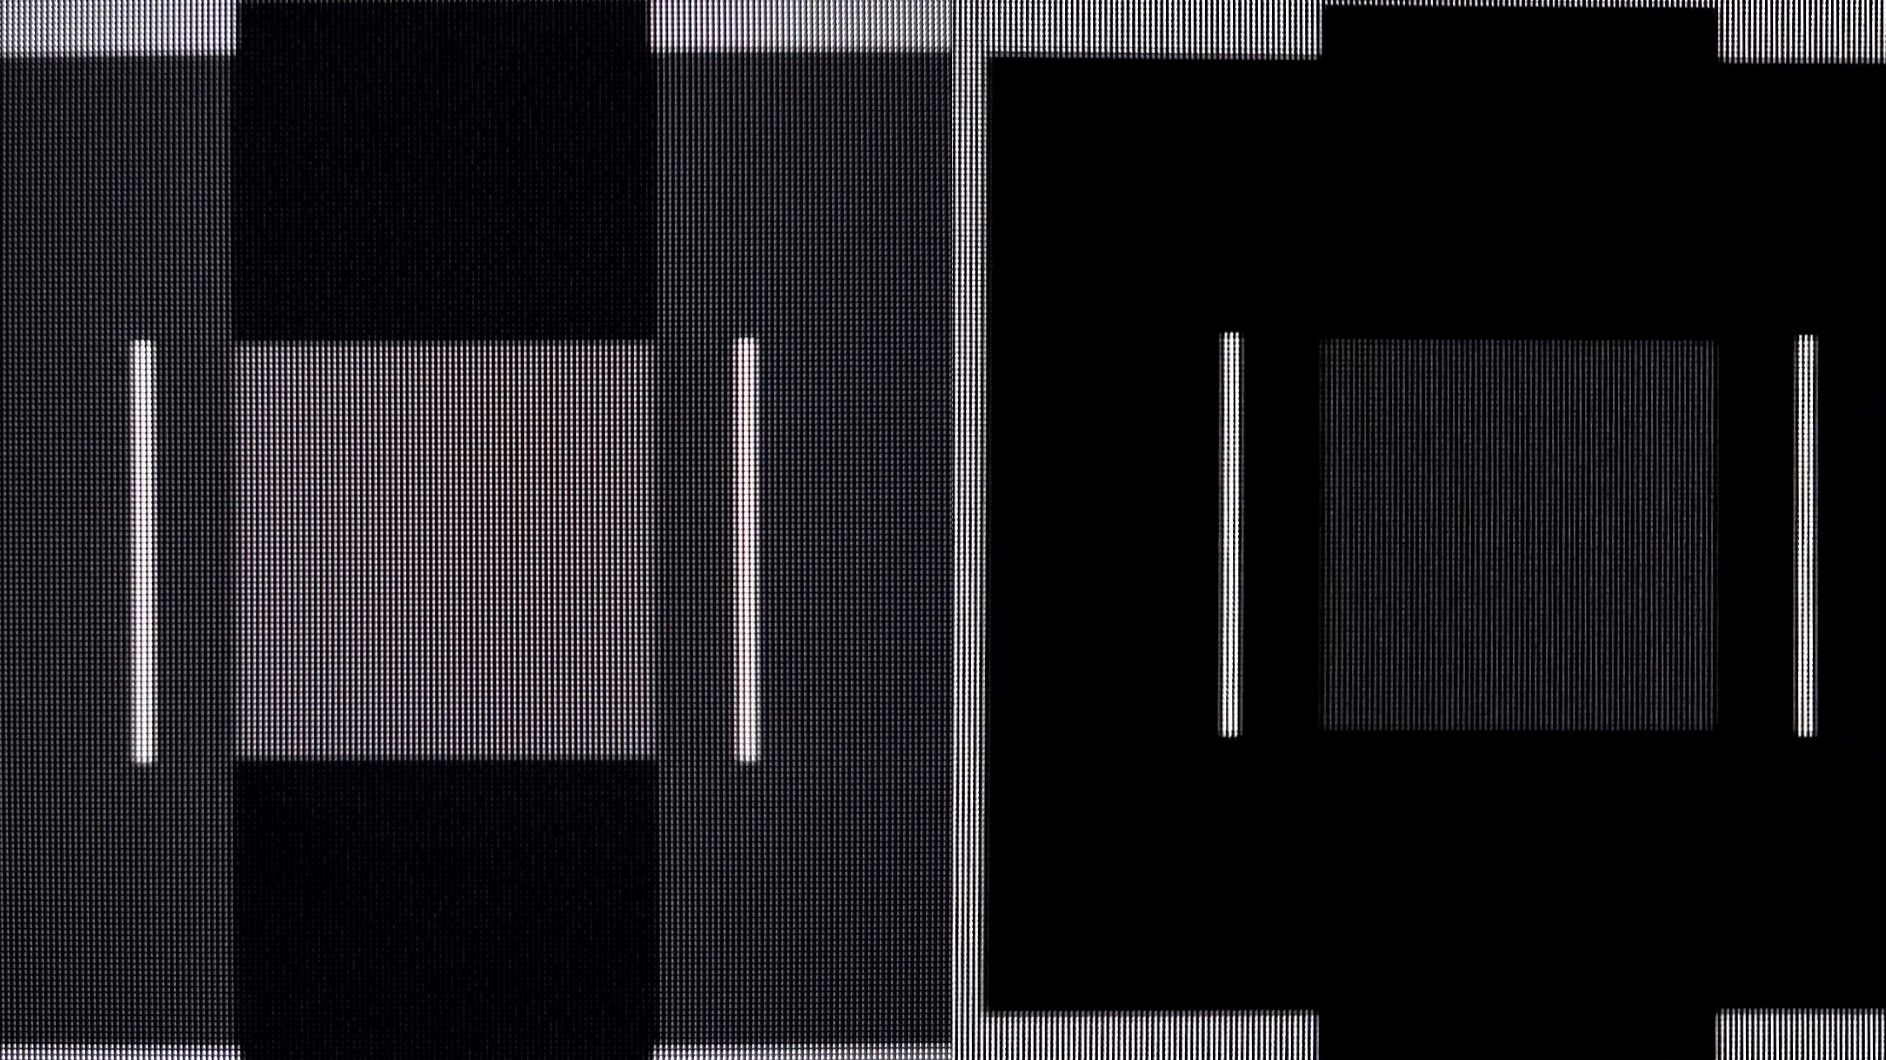
Adjust the TV's brightness control setting in steps until there is clear definition between the dark gray, lighter gray, and black boxes in the PLUGE patch – you want it to look like the image on the left above. If your TV’s brightness is set too low, the dark gray and black boxes will merge into an indistinguishable black mass (shown on the right). If brightness is set too high, there will be poor contrast between the dark gray and lighter gray boxes in the patch.
Step by step guide to adjusting contrast
1. Locate the contrast patch in the multipurpose chart
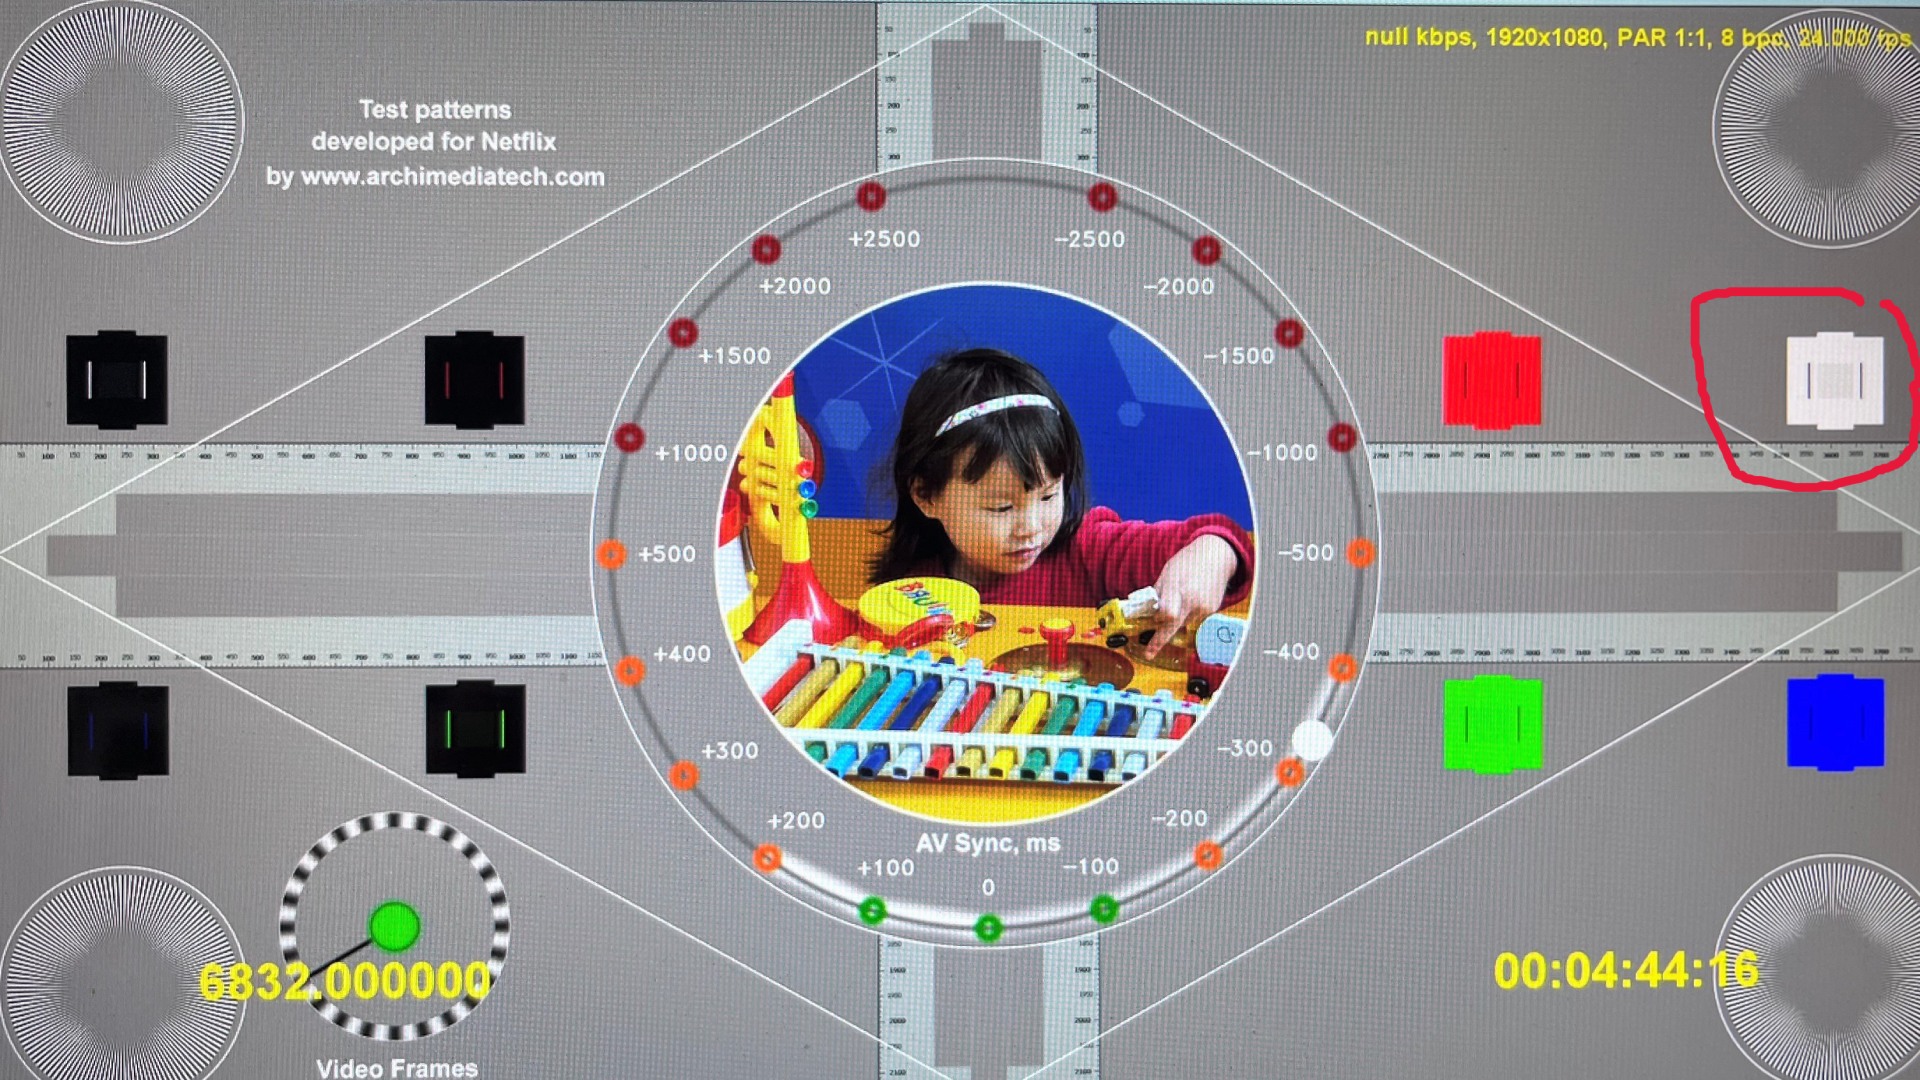
This is the white box at the right edge of the screen in the pattern’s top row.
2. Adjust your TV’s Contrast control
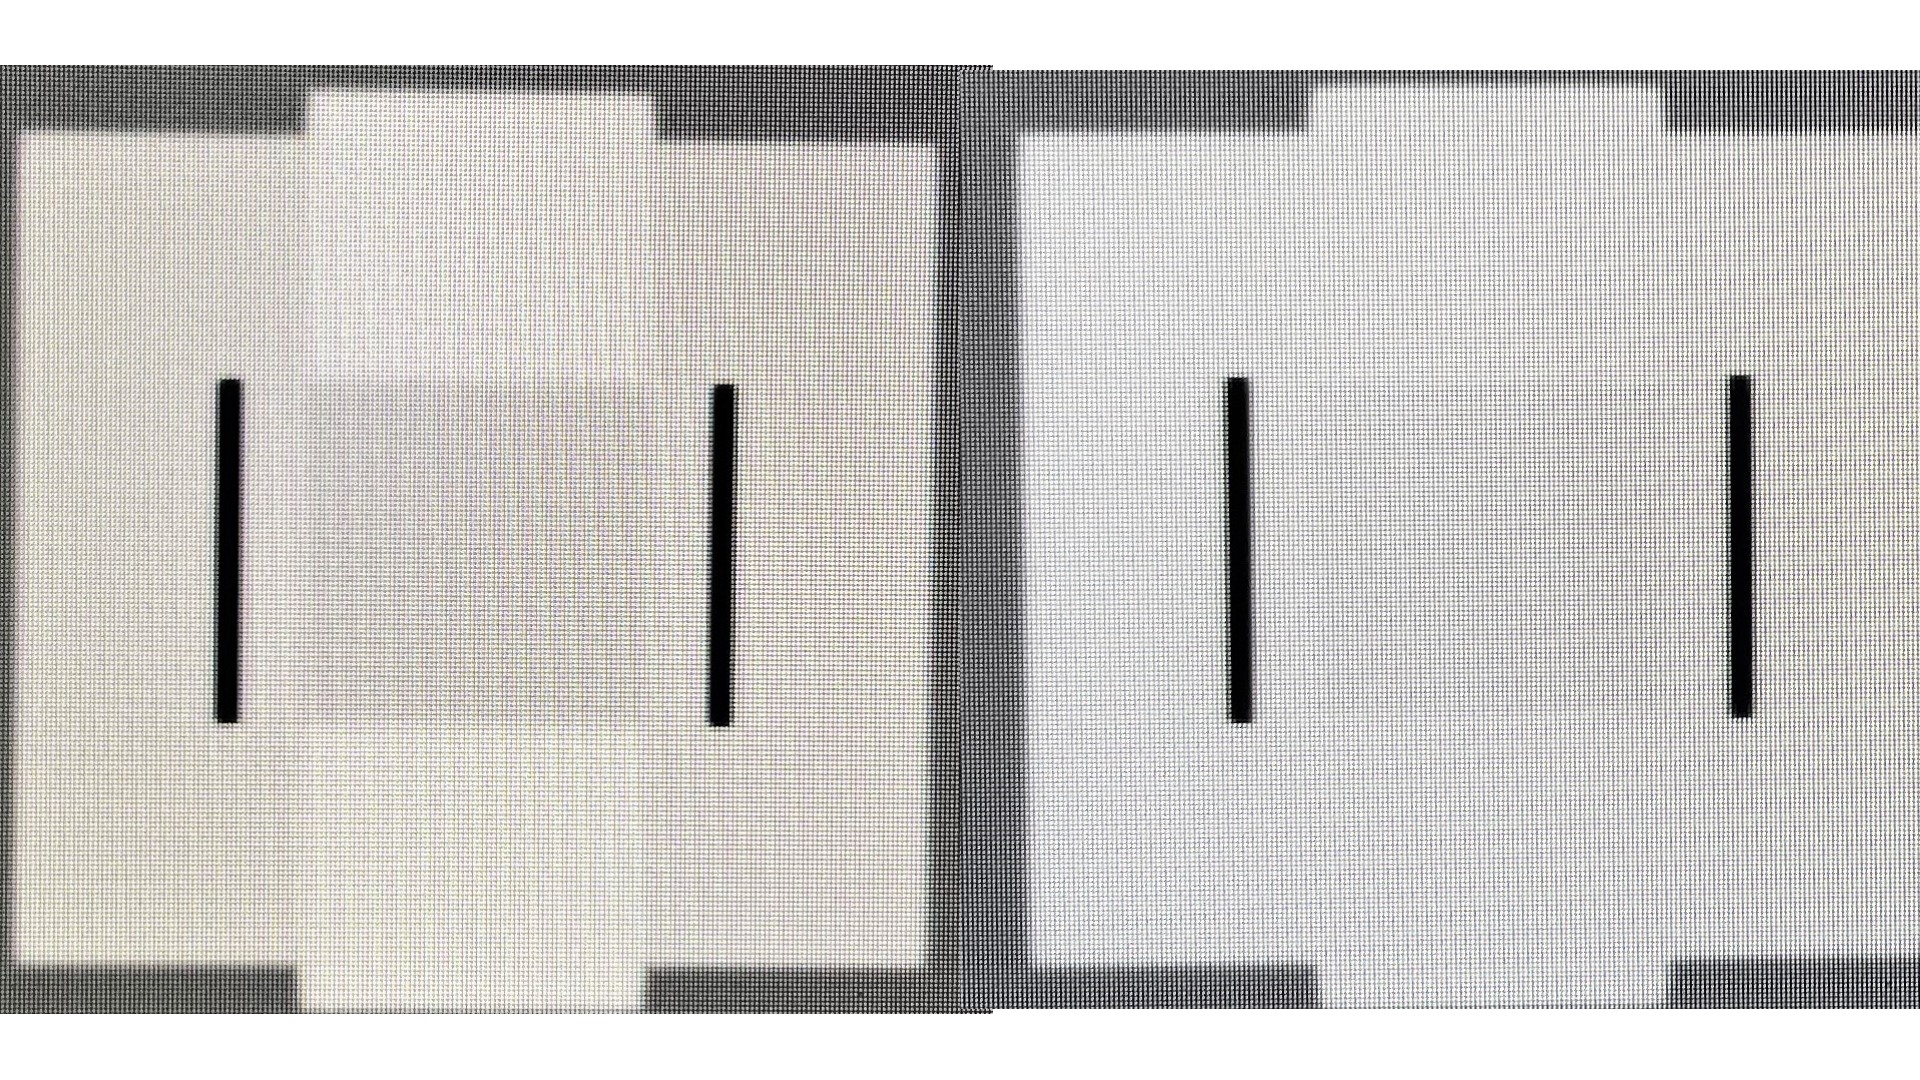
Adjust your TV's contrast control in steps until there is clear definition between the light gray, darker gray, and white boxes in the contrast patch (as it looks on the left). If your TV’s contrast is set too high, the light gray and white boxes will merge into an indistinguishable white mass (shown at right). If contrast is set too low, there will be poor definition between the lighter gray and white boxes in the patch.
Step by step guide to adjusting color saturation
1. Locate the red, green, and blue color patches
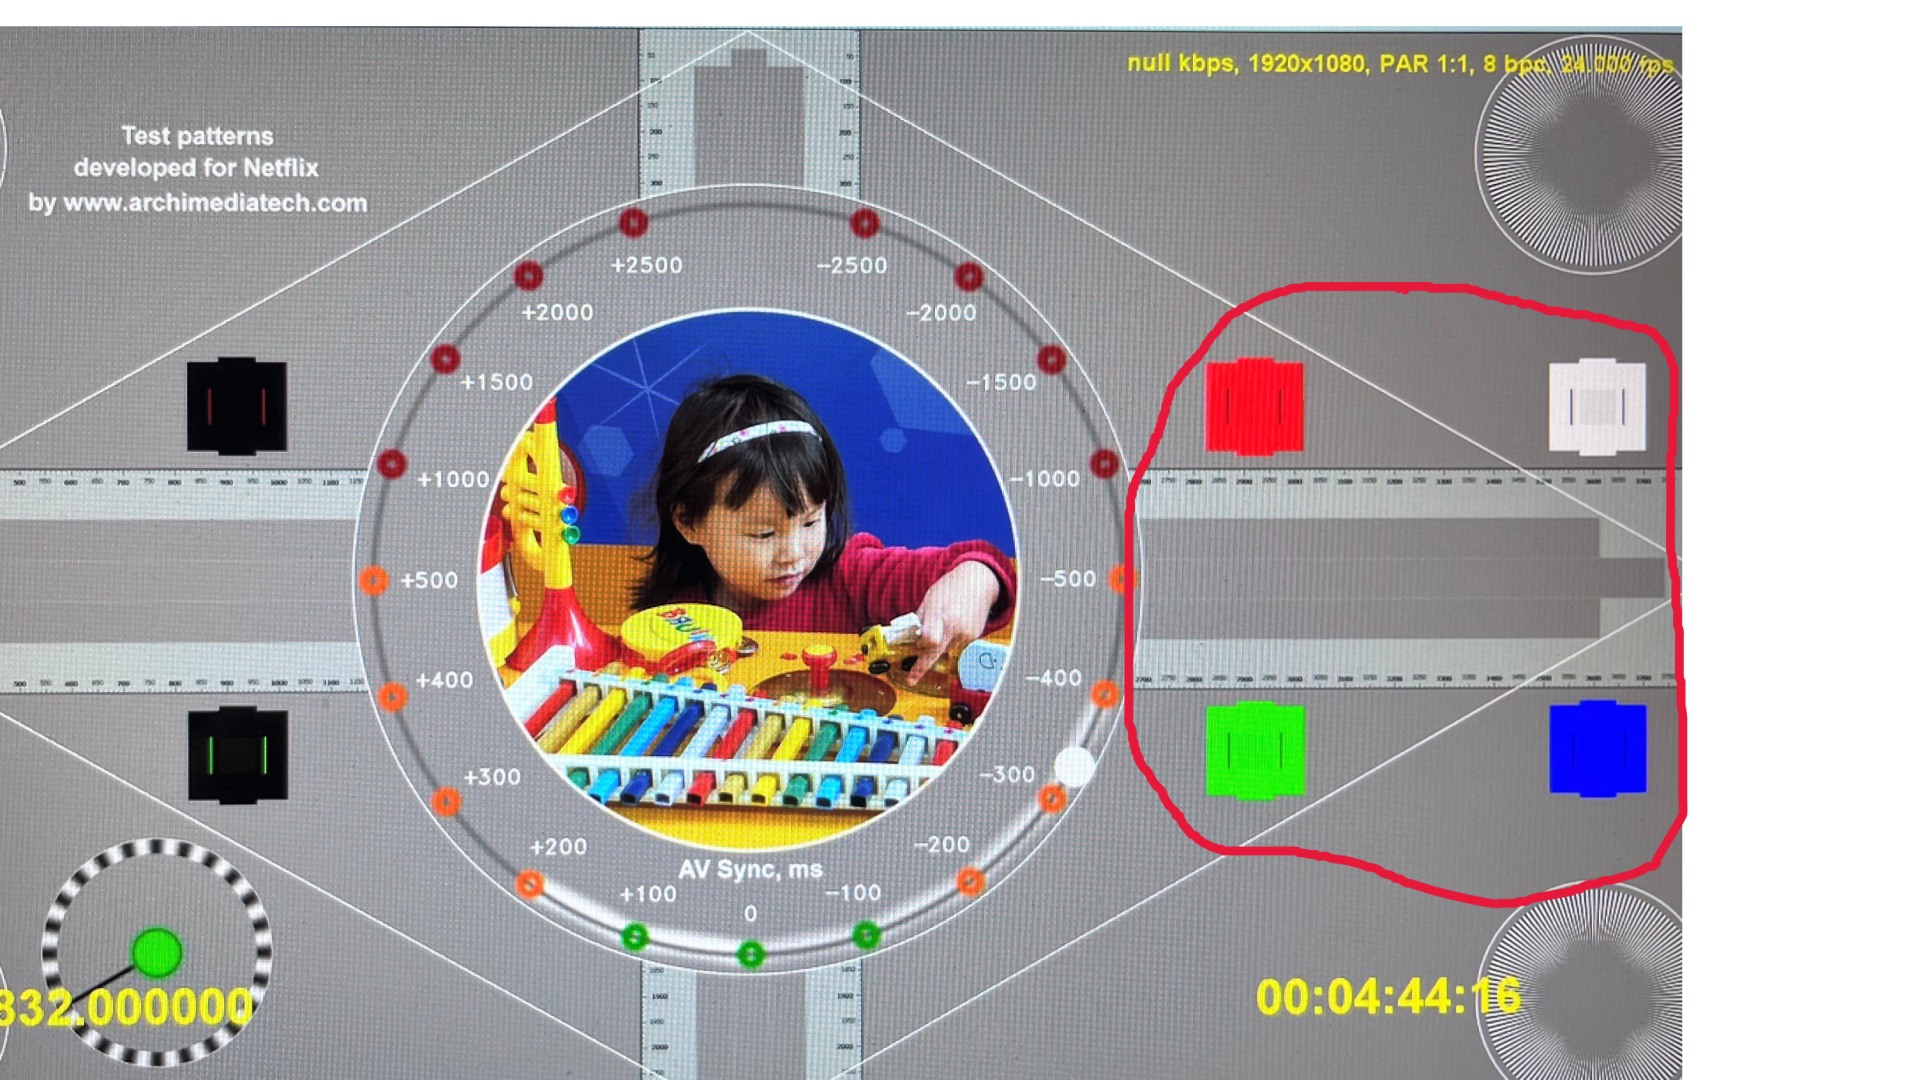
These are at the right side of the screen in the multipurpose chart.
2. Adjust your TV’s Color (labeled “color depth” or similar) control
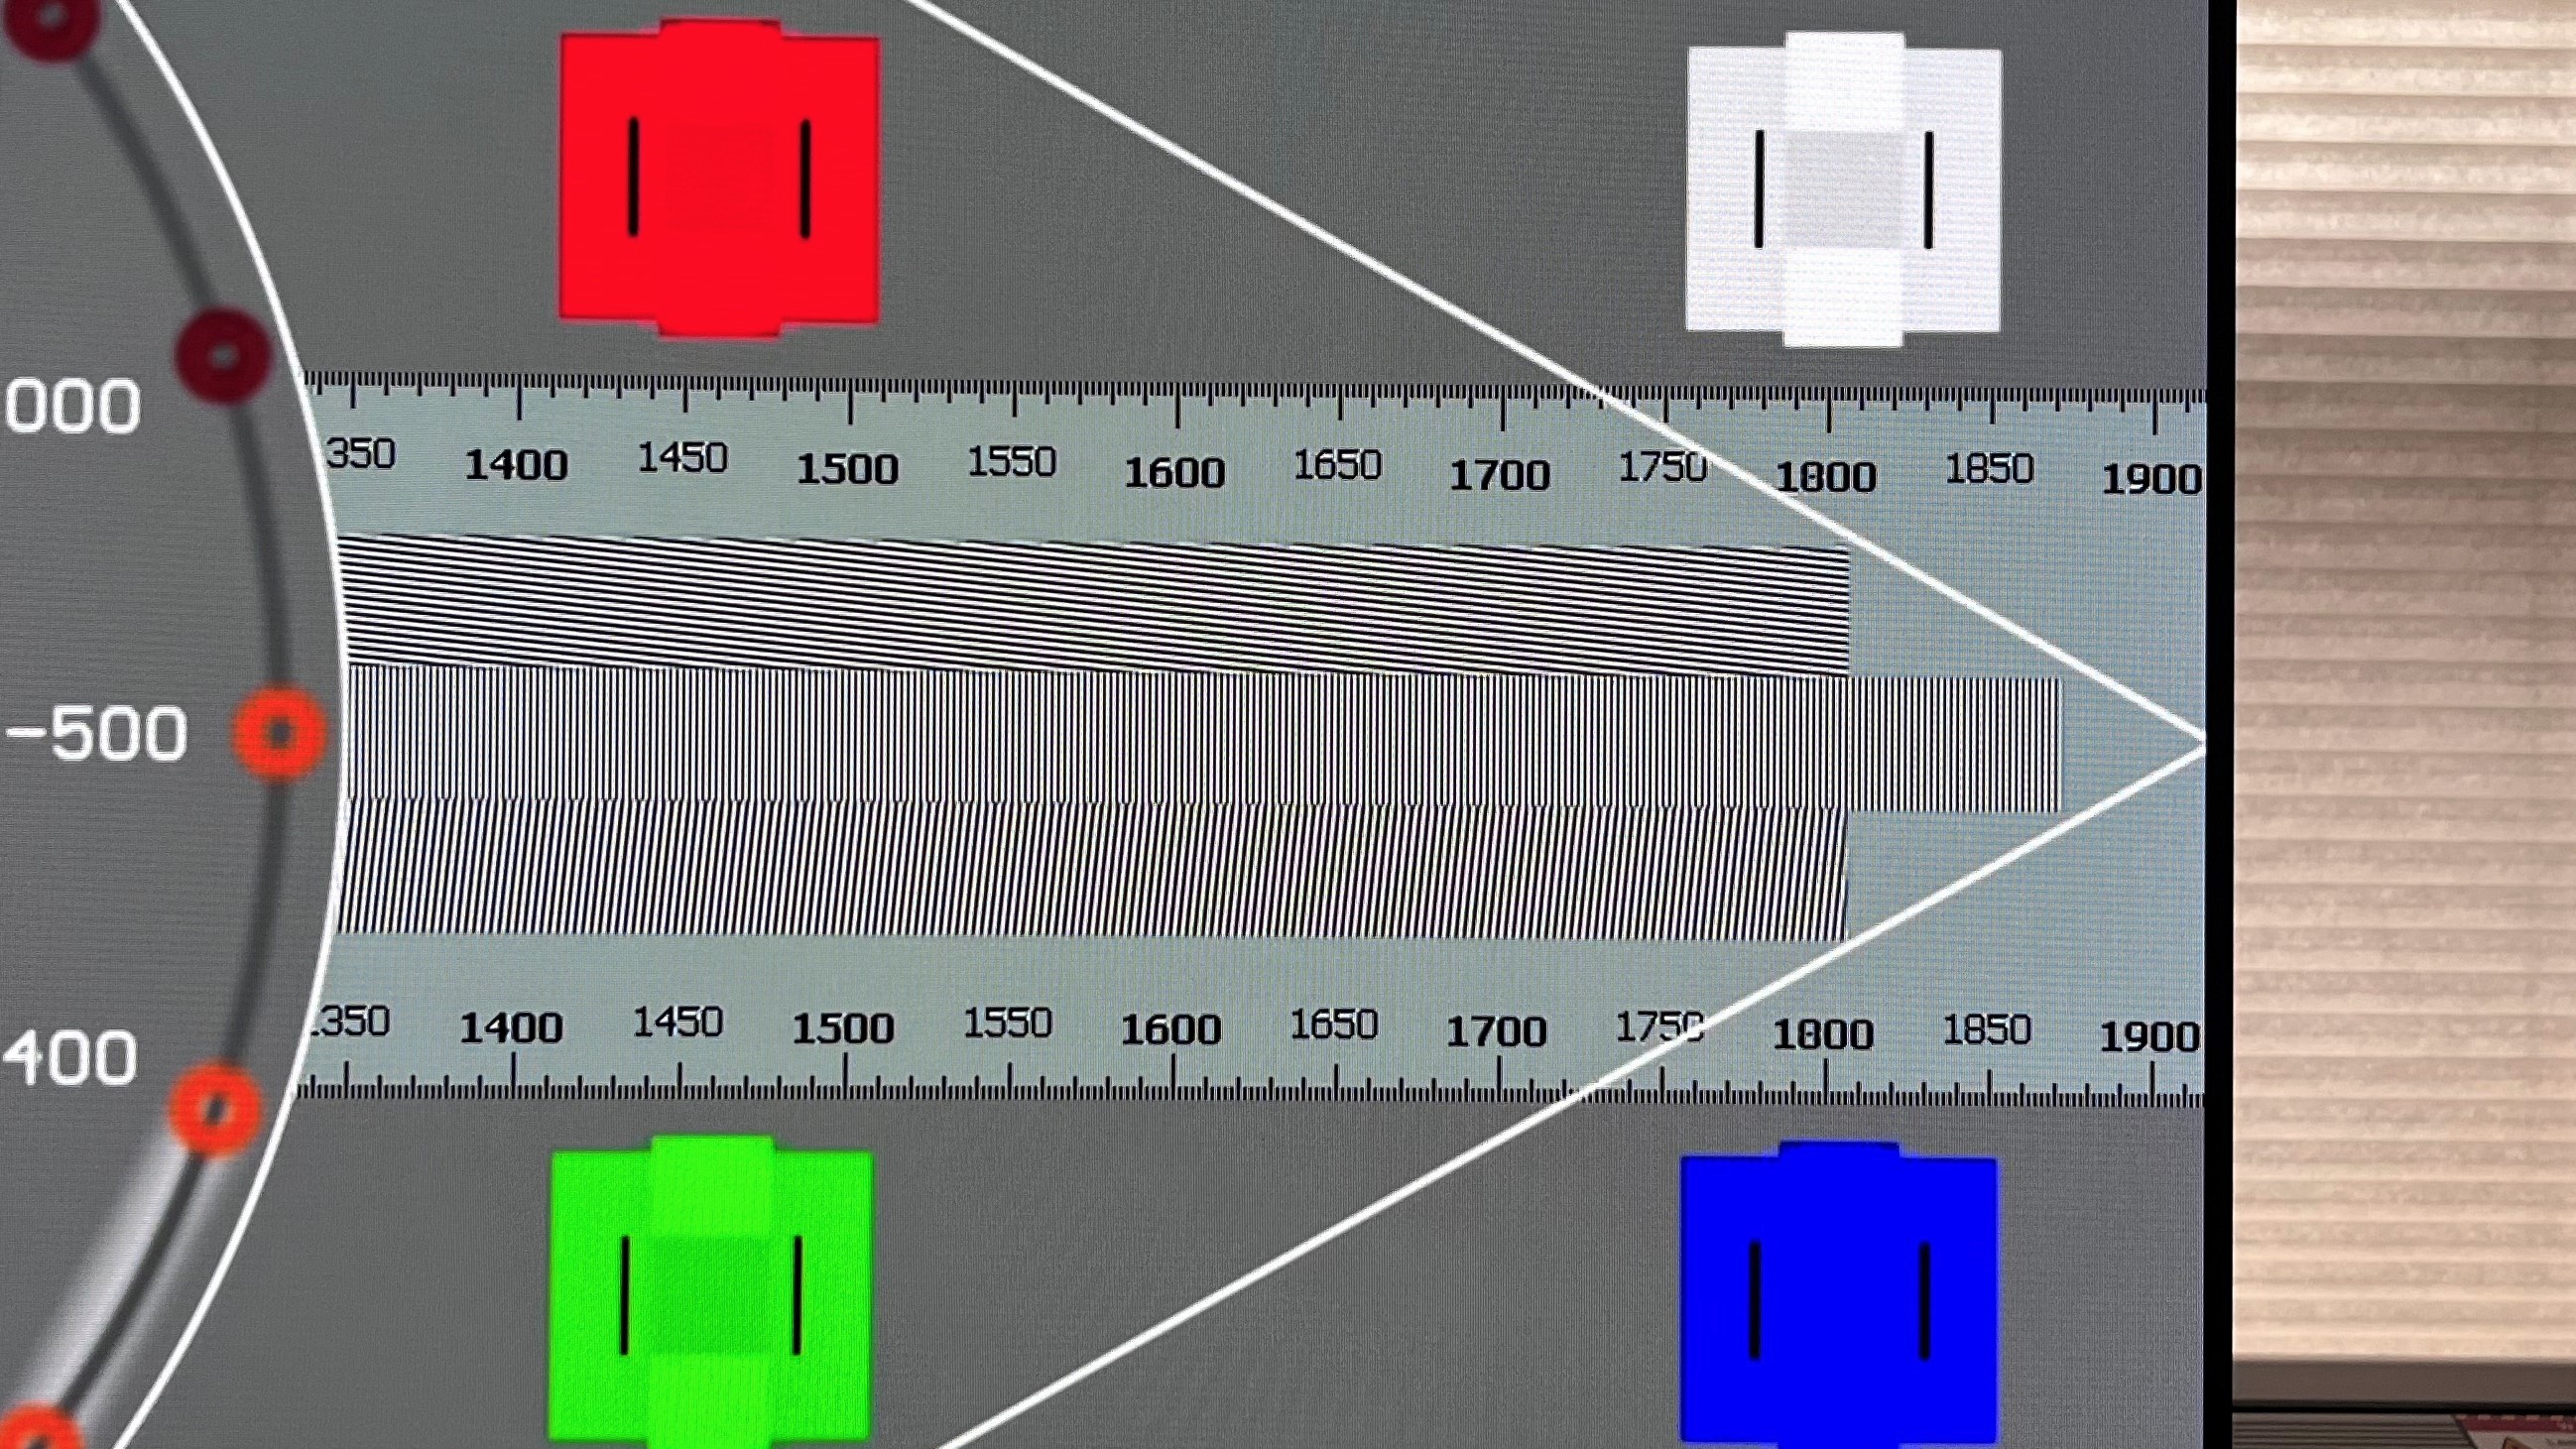
Adjust the color control steps until there is clear definition between the darker center and brighter surrounding squares in the color patches. (Our eyes are more sensitive to green and red light and less sensitive to blue, so it will be easiest to use those patches as a reference.) If the TV’s color level is set too high, the darker center and brighter surrounding squares in the patch will blend into an indistinguishable whole.
Step by step guide to adjusting sharpness
1. Locate the numbers in the resolution bars.
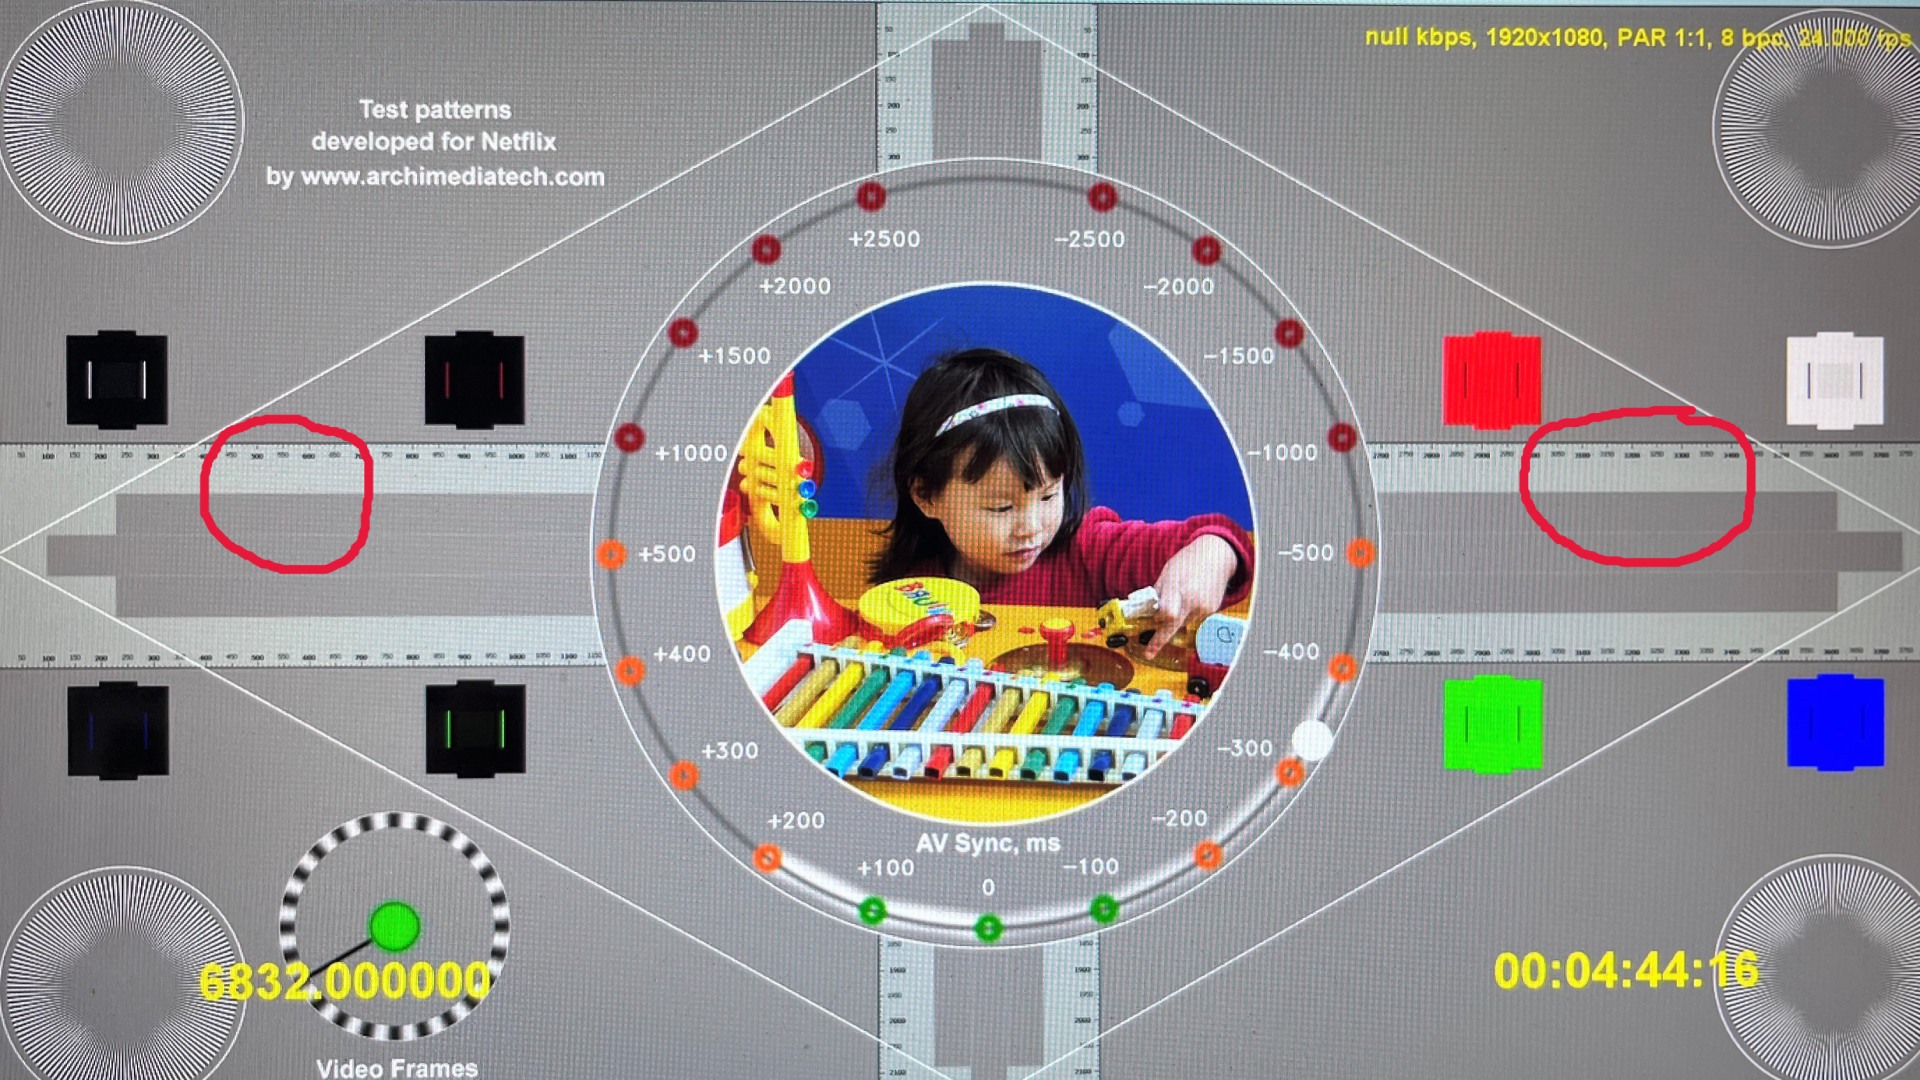
The resolution bars extend horizontally across the full test pattern.
2. Adjust your TV’s Sharpness (“detail” or similar) control
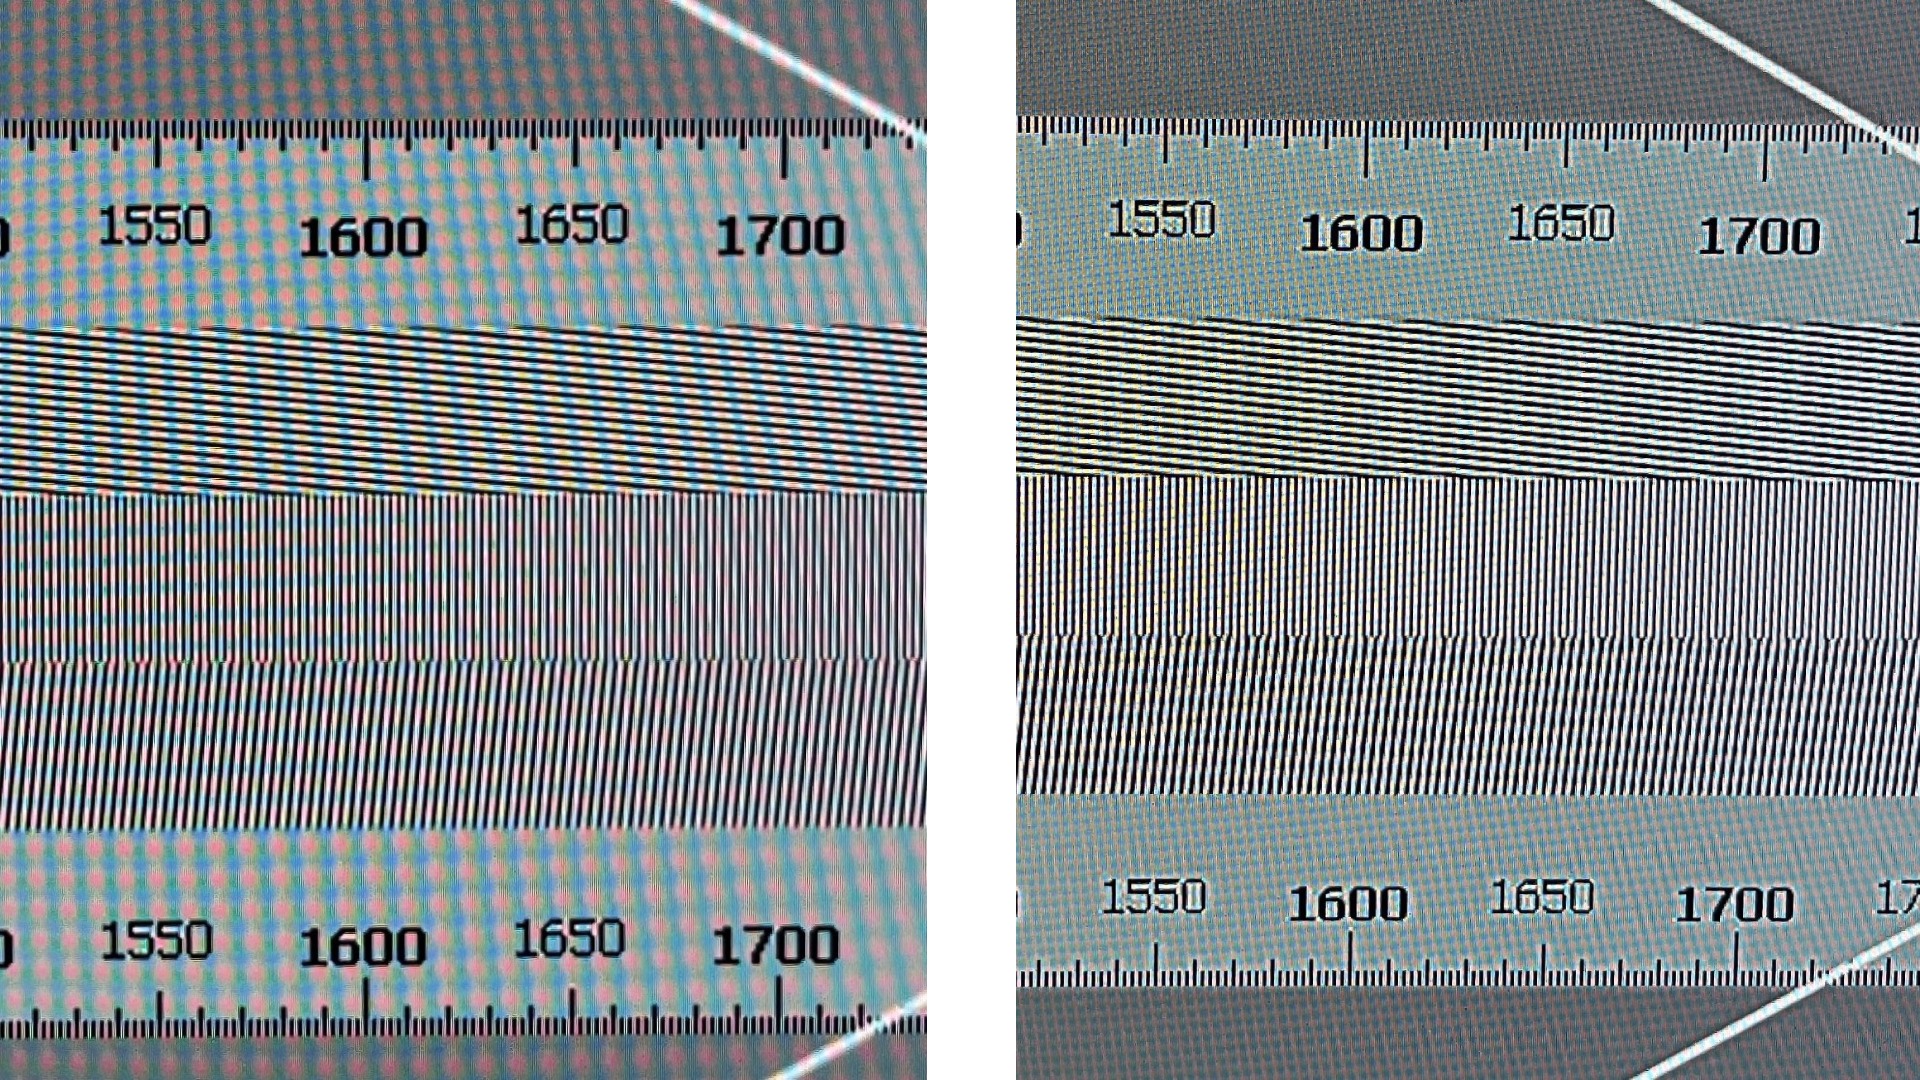
Adjust the sharpness or detail control until the numbers in the resolution bars that extend horizontally across the test pattern look solid and clear with no white “ringing” artifacts surrounding them. If your TV’s sharpness control is set too high, white lines will surround the numbers (shown at right). This is basically video noise that isn’t doing anything to add detail to your TV’s picture and should be removed.
Final thoughts
The adjustments described above are all easy, basic ones, and I used an LG C3 OLED TV set to its Filmmaker mode as the starting point for the adjustments depicted in the above photos. Netflix’s HDR test patterns, which are listed as different “seasons” and “episodes” within its test patterns library, will be more tricky to make adjustments with since TV’s tend to dynamically adjust contrast with HDR formats.
You can dig much deeper into TV setup by using the Spears & Munsil Ultra HD HDR Benchmark Blu-ray disc mentioned above. This goes well beyond the basics to evaluate parameters such as color temperature and color space, and also provides HDR demonstration material mastered at various peak brightness levels to check your TV’s HDR tone mapping performance.
Sign up for breaking news, reviews, opinion, top tech deals, and more.
While the focus of this how-to guide was TVs, Netflix’s test patterns are also useful for setting up one of the best projectors. Be careful to make the circles in each corner of the above pattern appear like circles instead of ovals and you will be ensured of distortion-free image geometry. Also note if the diamond-shaped lines traversing the pattern are fully visible and not cut off at the edges. If the latter is the case, you won’t be getting full HD or 4K (depending on the pattern) picture resolution.

Al Griffin has been writing about and reviewing A/V tech since the days LaserDiscs roamed the earth, and was previously the editor of Sound & Vision magazine.
When not reviewing the latest and greatest gear or watching movies at home, he can usually be found out and about on a bike.