People think you can’t game on a Chromebook, but we’re here to show you how to with Nvidia GeForce Now, which brings top-flight gaming to your Chromebook for free!
“For free?” we hear you cry. Yes, the basic account currently offers one-hour per session of Nvidia GeForce Now for free, perfect for casual gamers or for testing the new Nvidia cloud gaming system.
We’re going to take you step by step through how to set up Nvidia GeForce Now on your Chromebook, get your Steam games, get your Epic games, get your UPlay games up and running, add a controller, tweak the settings for better gaming and even experience advanced ray tracing lighting effects on the best Chromebooks.
- Here's how to use Microsoft Teams on a Chromebook
- How to use Zoom on a Chromebook
- How to screenshot on a Chromebook
1. Check your compatibility
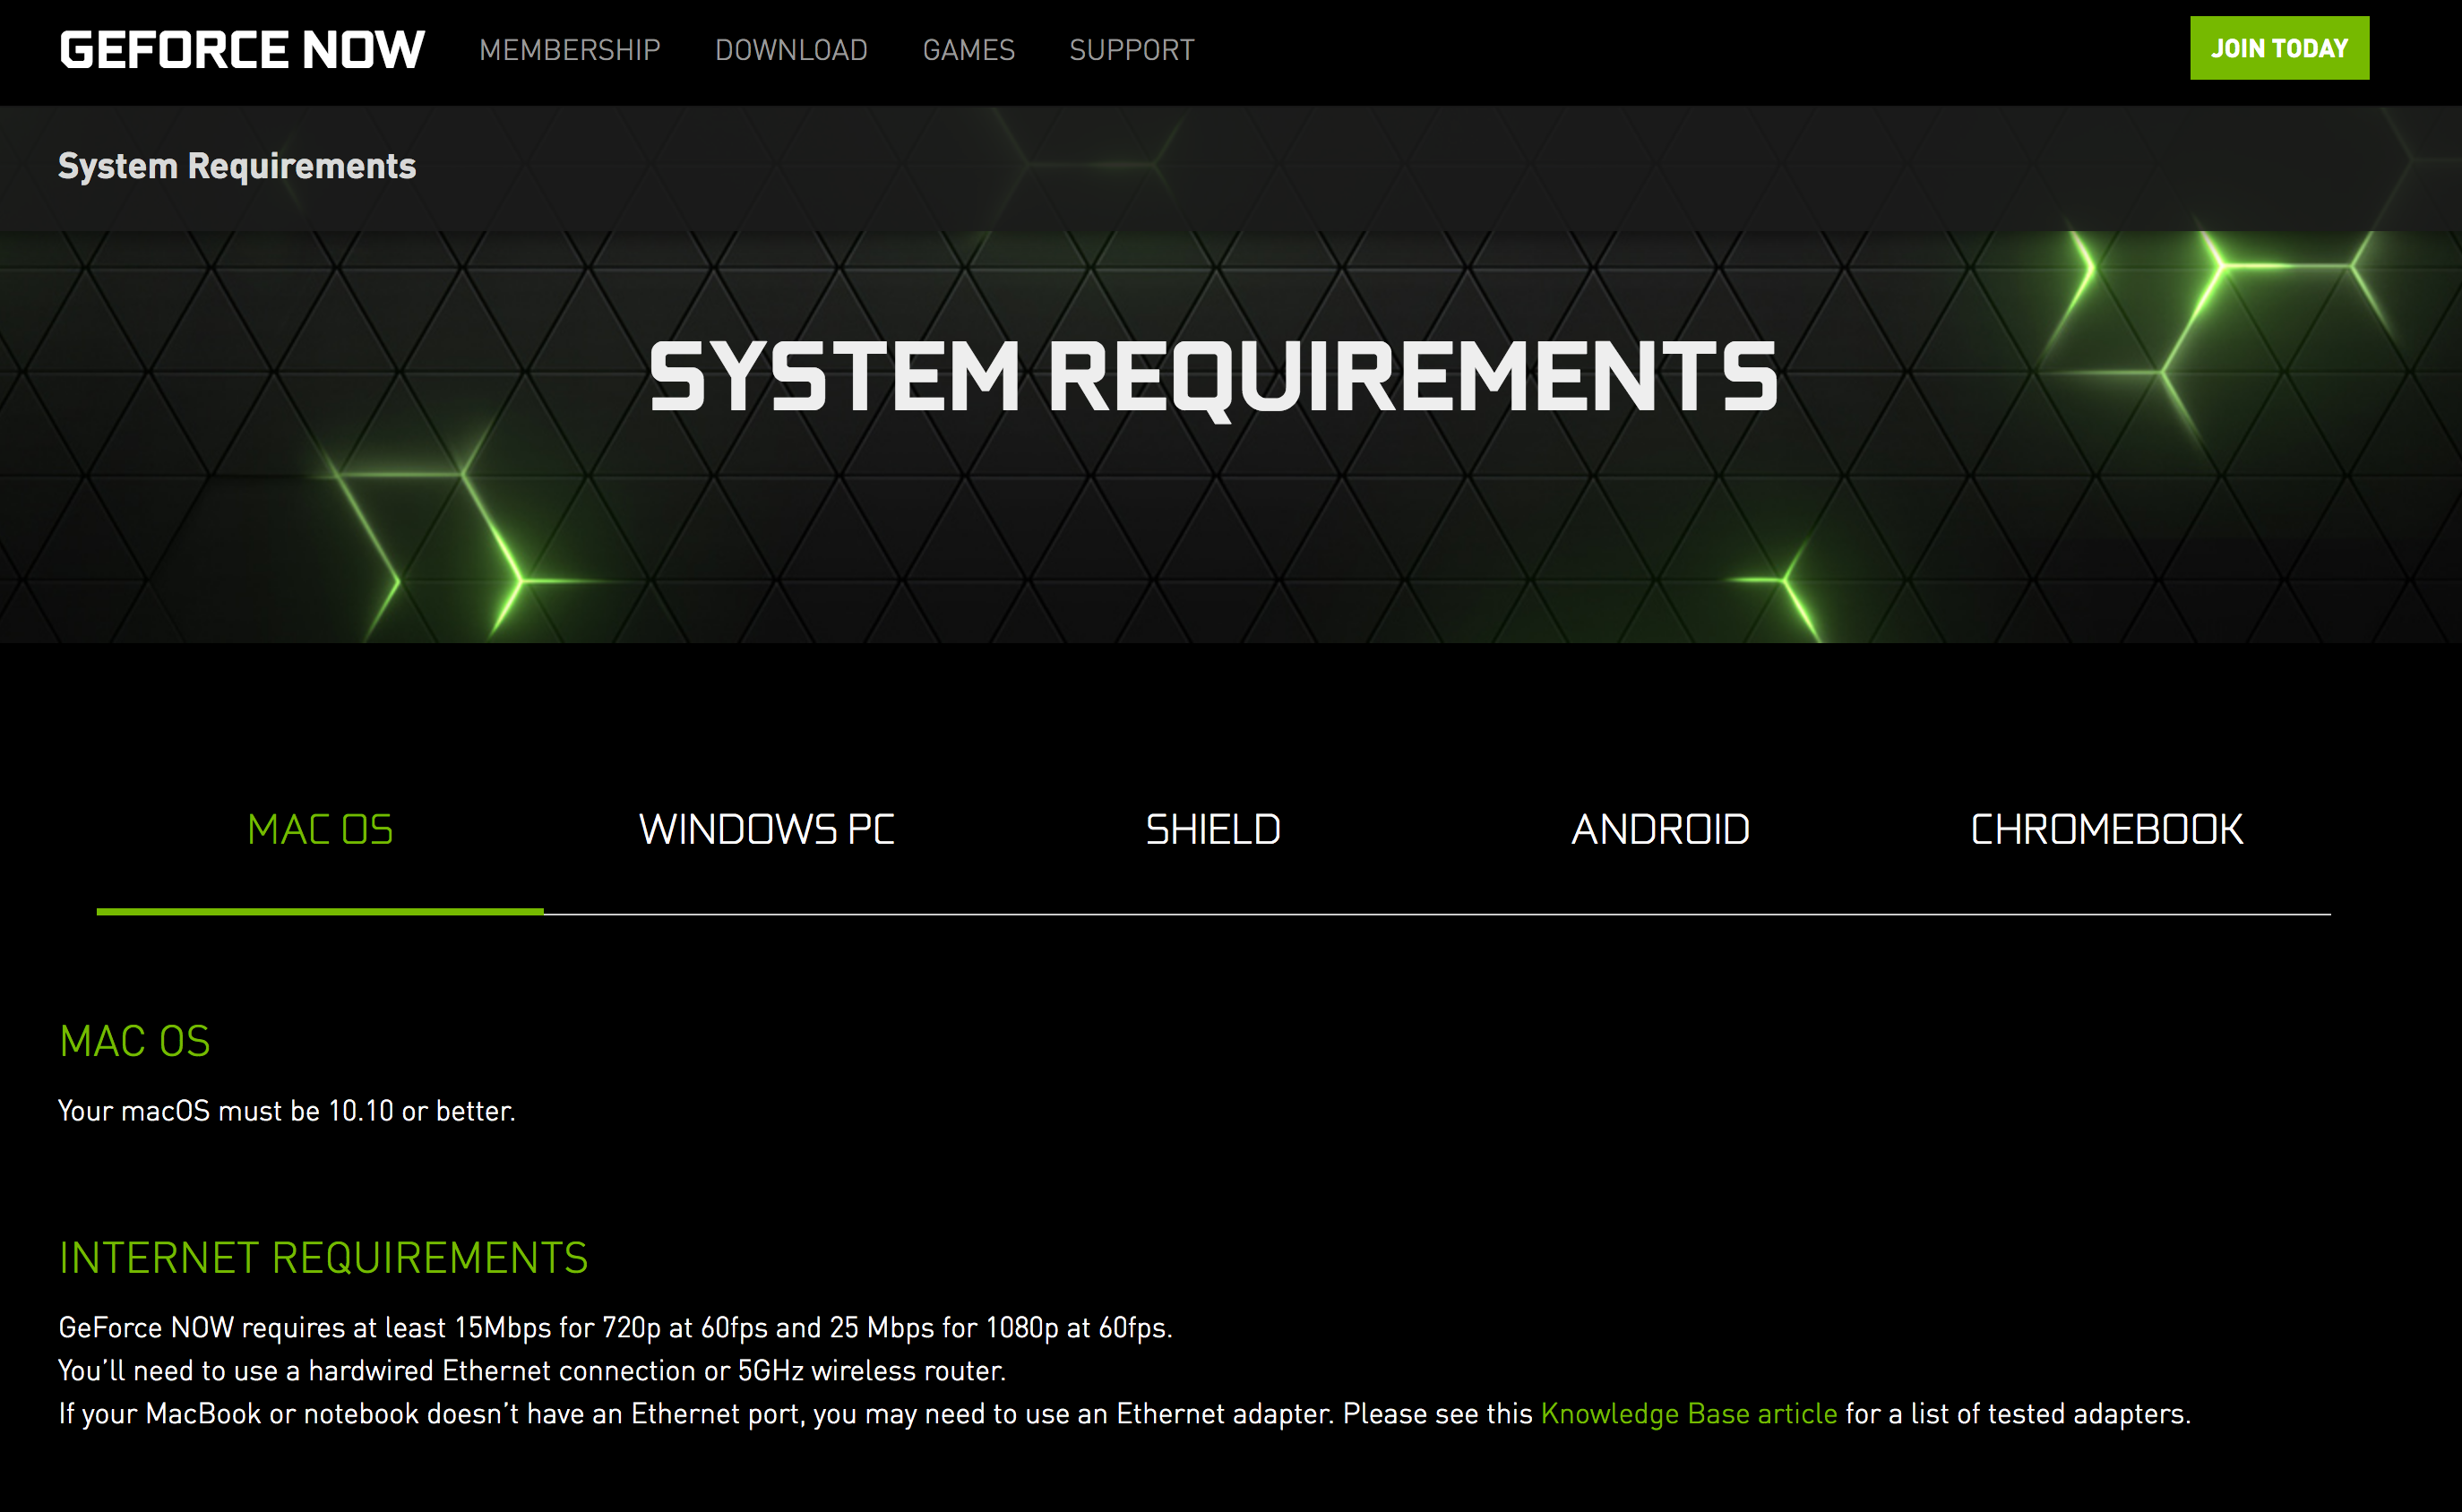
Officially GeForce Now supports 1080p at 60fps and requires a 25Mbps broadband connection. For slower 15Mbps speeds you’ll get 720p at 60fps. While a 5GHz wireless router is strongly recommended.
For Chromebooks, ensure your system is v77 or newer. To check, type chrome://version in the address bar and read off the very top number and update if not.
The official hardware requirements for using GeForce Now on a Chromebook is an Intel Core 7th gen or later, with 4GB of memory. However we tried it on an ancient (5-years old) Asus Flip C101 with 4GB of memory and it worked. So it's always worth trying it out.
2. Check your game support
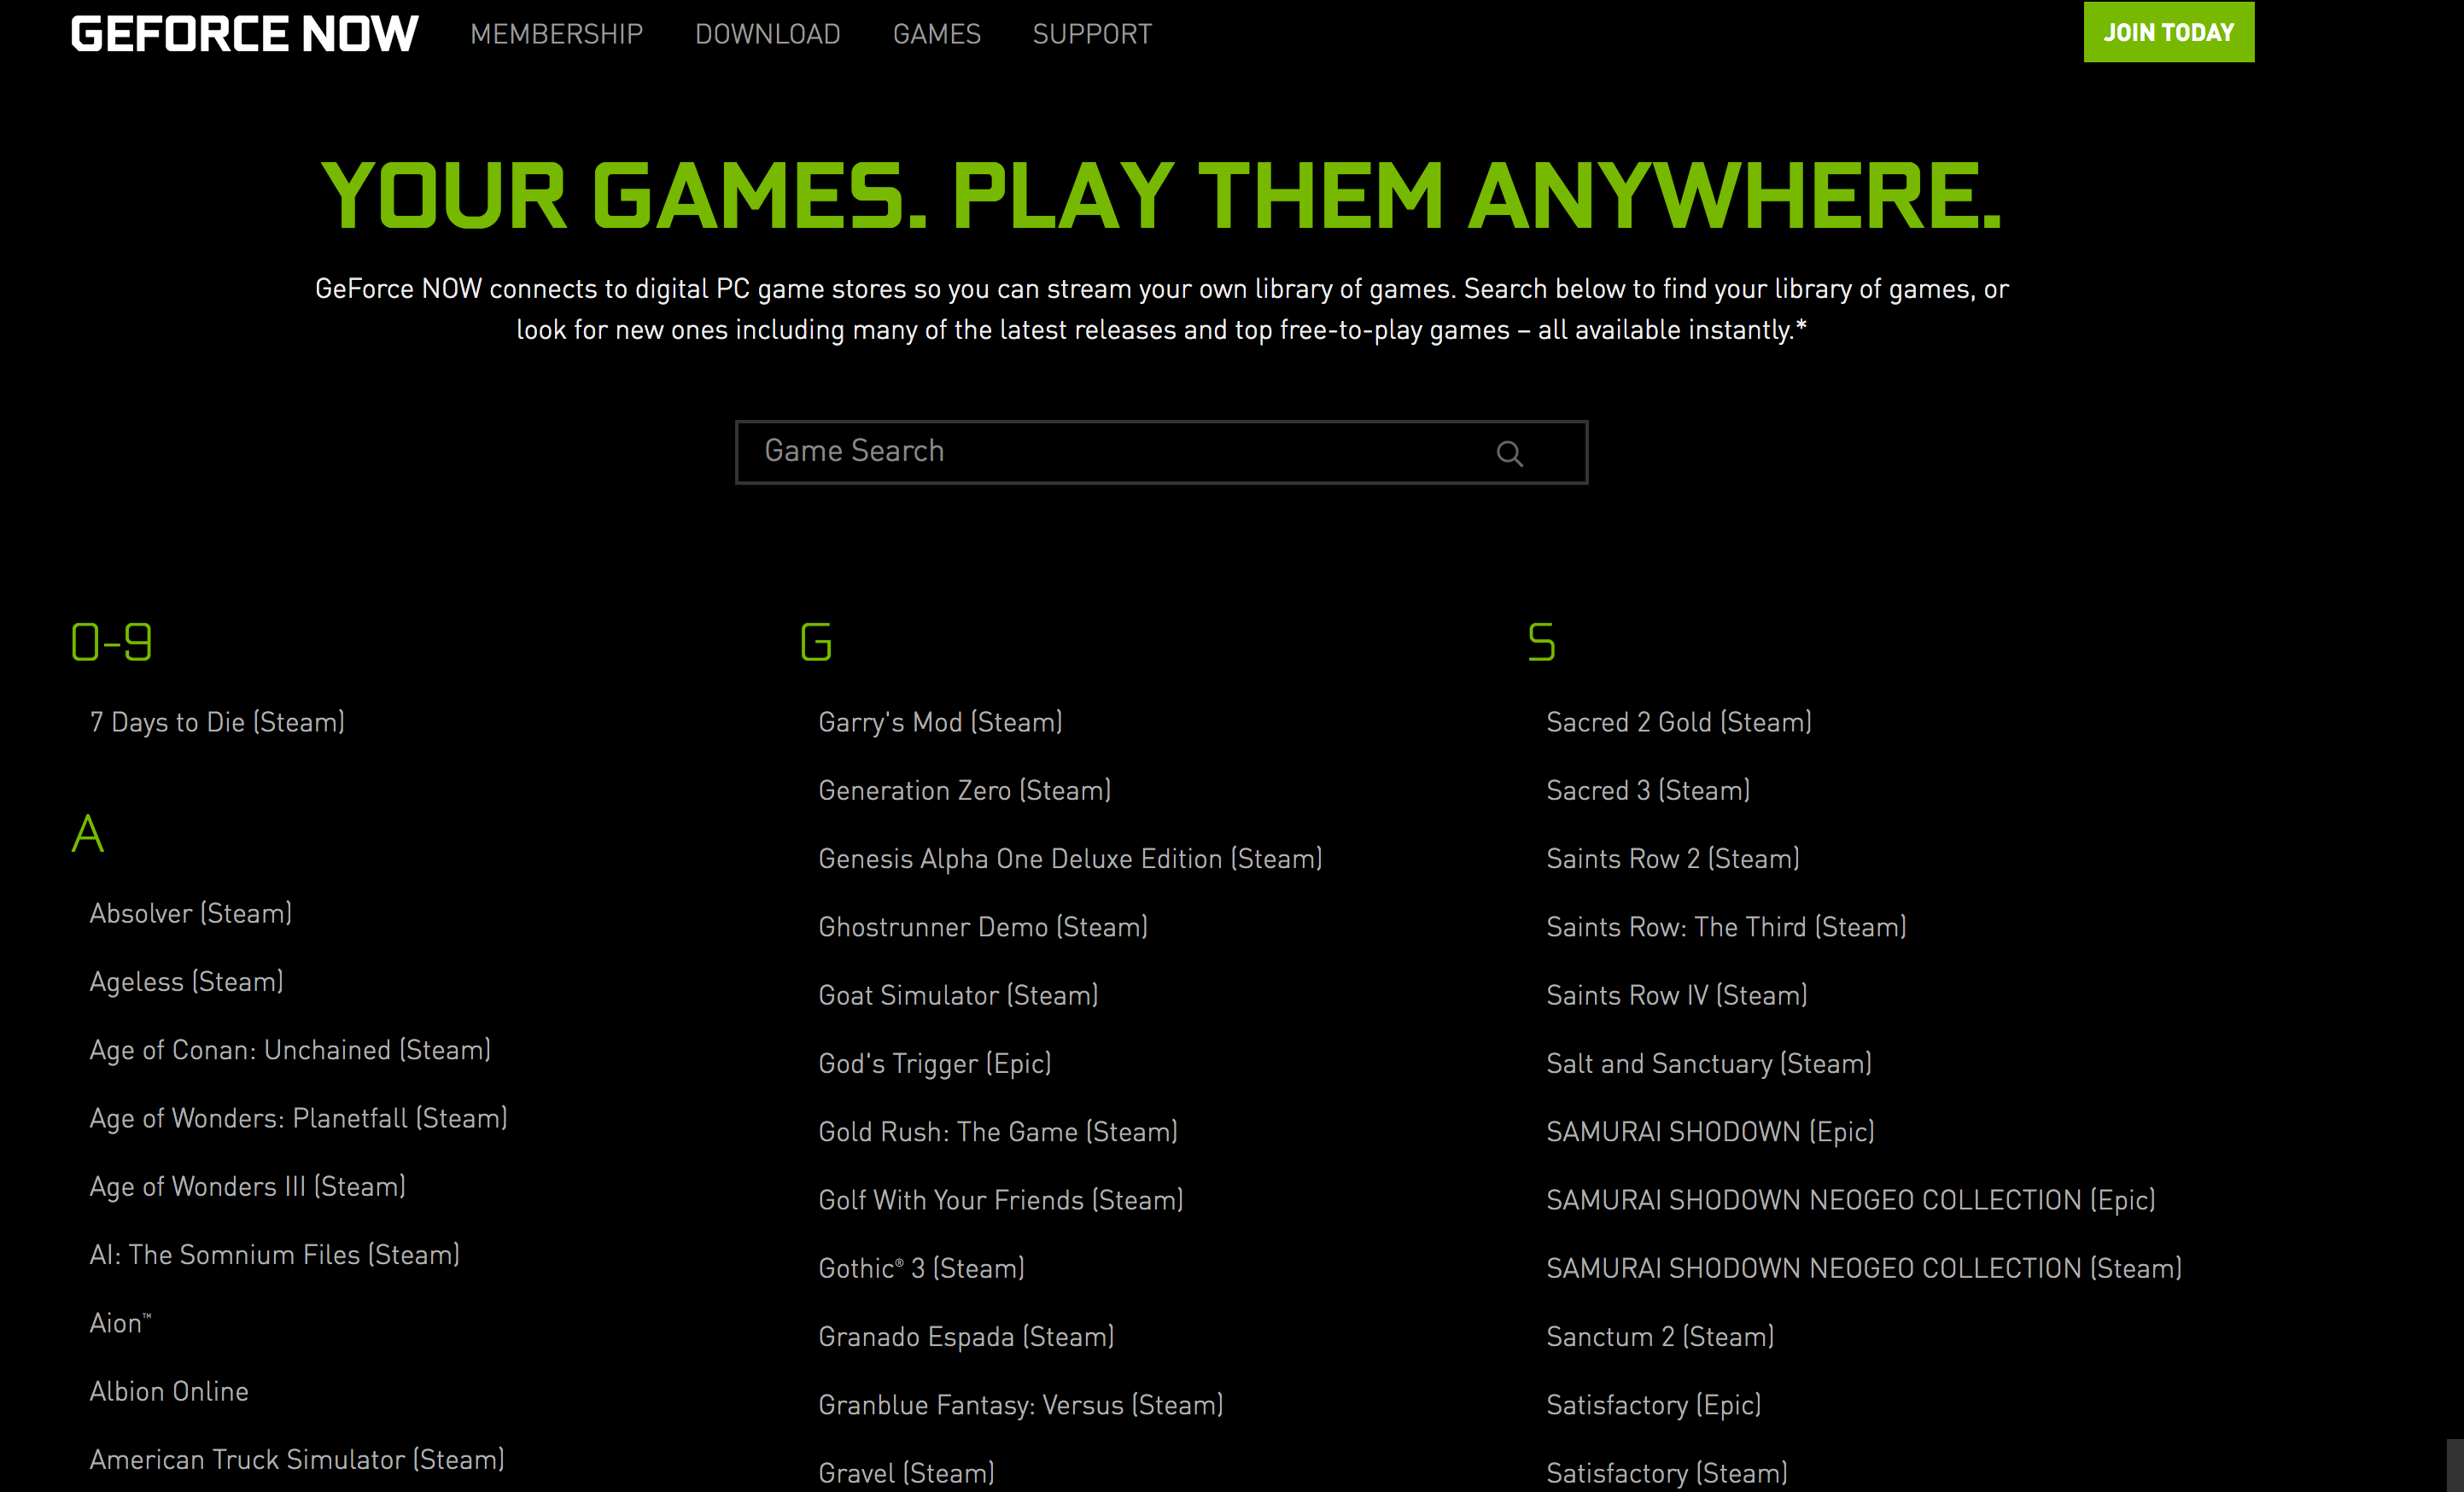
Nvidia GeForce Now isn’t a “universal” cloud gaming system, it has to directly support and offer the games you might be interested in, even though those games will technically be on any of the Steam, Epic or UPlay gaming services.
Get daily insight, inspiration and deals in your inbox
Sign up for breaking news, reviews, opinion, top tech deals, and more.
Due to boring licensing issues games can come and go, but if there’s a specific game you’re interested in get yourself to the "Big List Of Games" and see if yours is supported.
The more popular and new a game is, the more likely it’ll be listed, and if it offers Nvidia RTX support it’s a shoe in!
3. Sign up for Nvidia GeForce Now
It’s worth signing up for Nvidia GeForce Now just to test it out on your Chromebook. New games are being added all of the time and many are free, just requiring you to create suitable accounts.
To create an Nvidia GeForce Now account head to the membership page: and sign up.
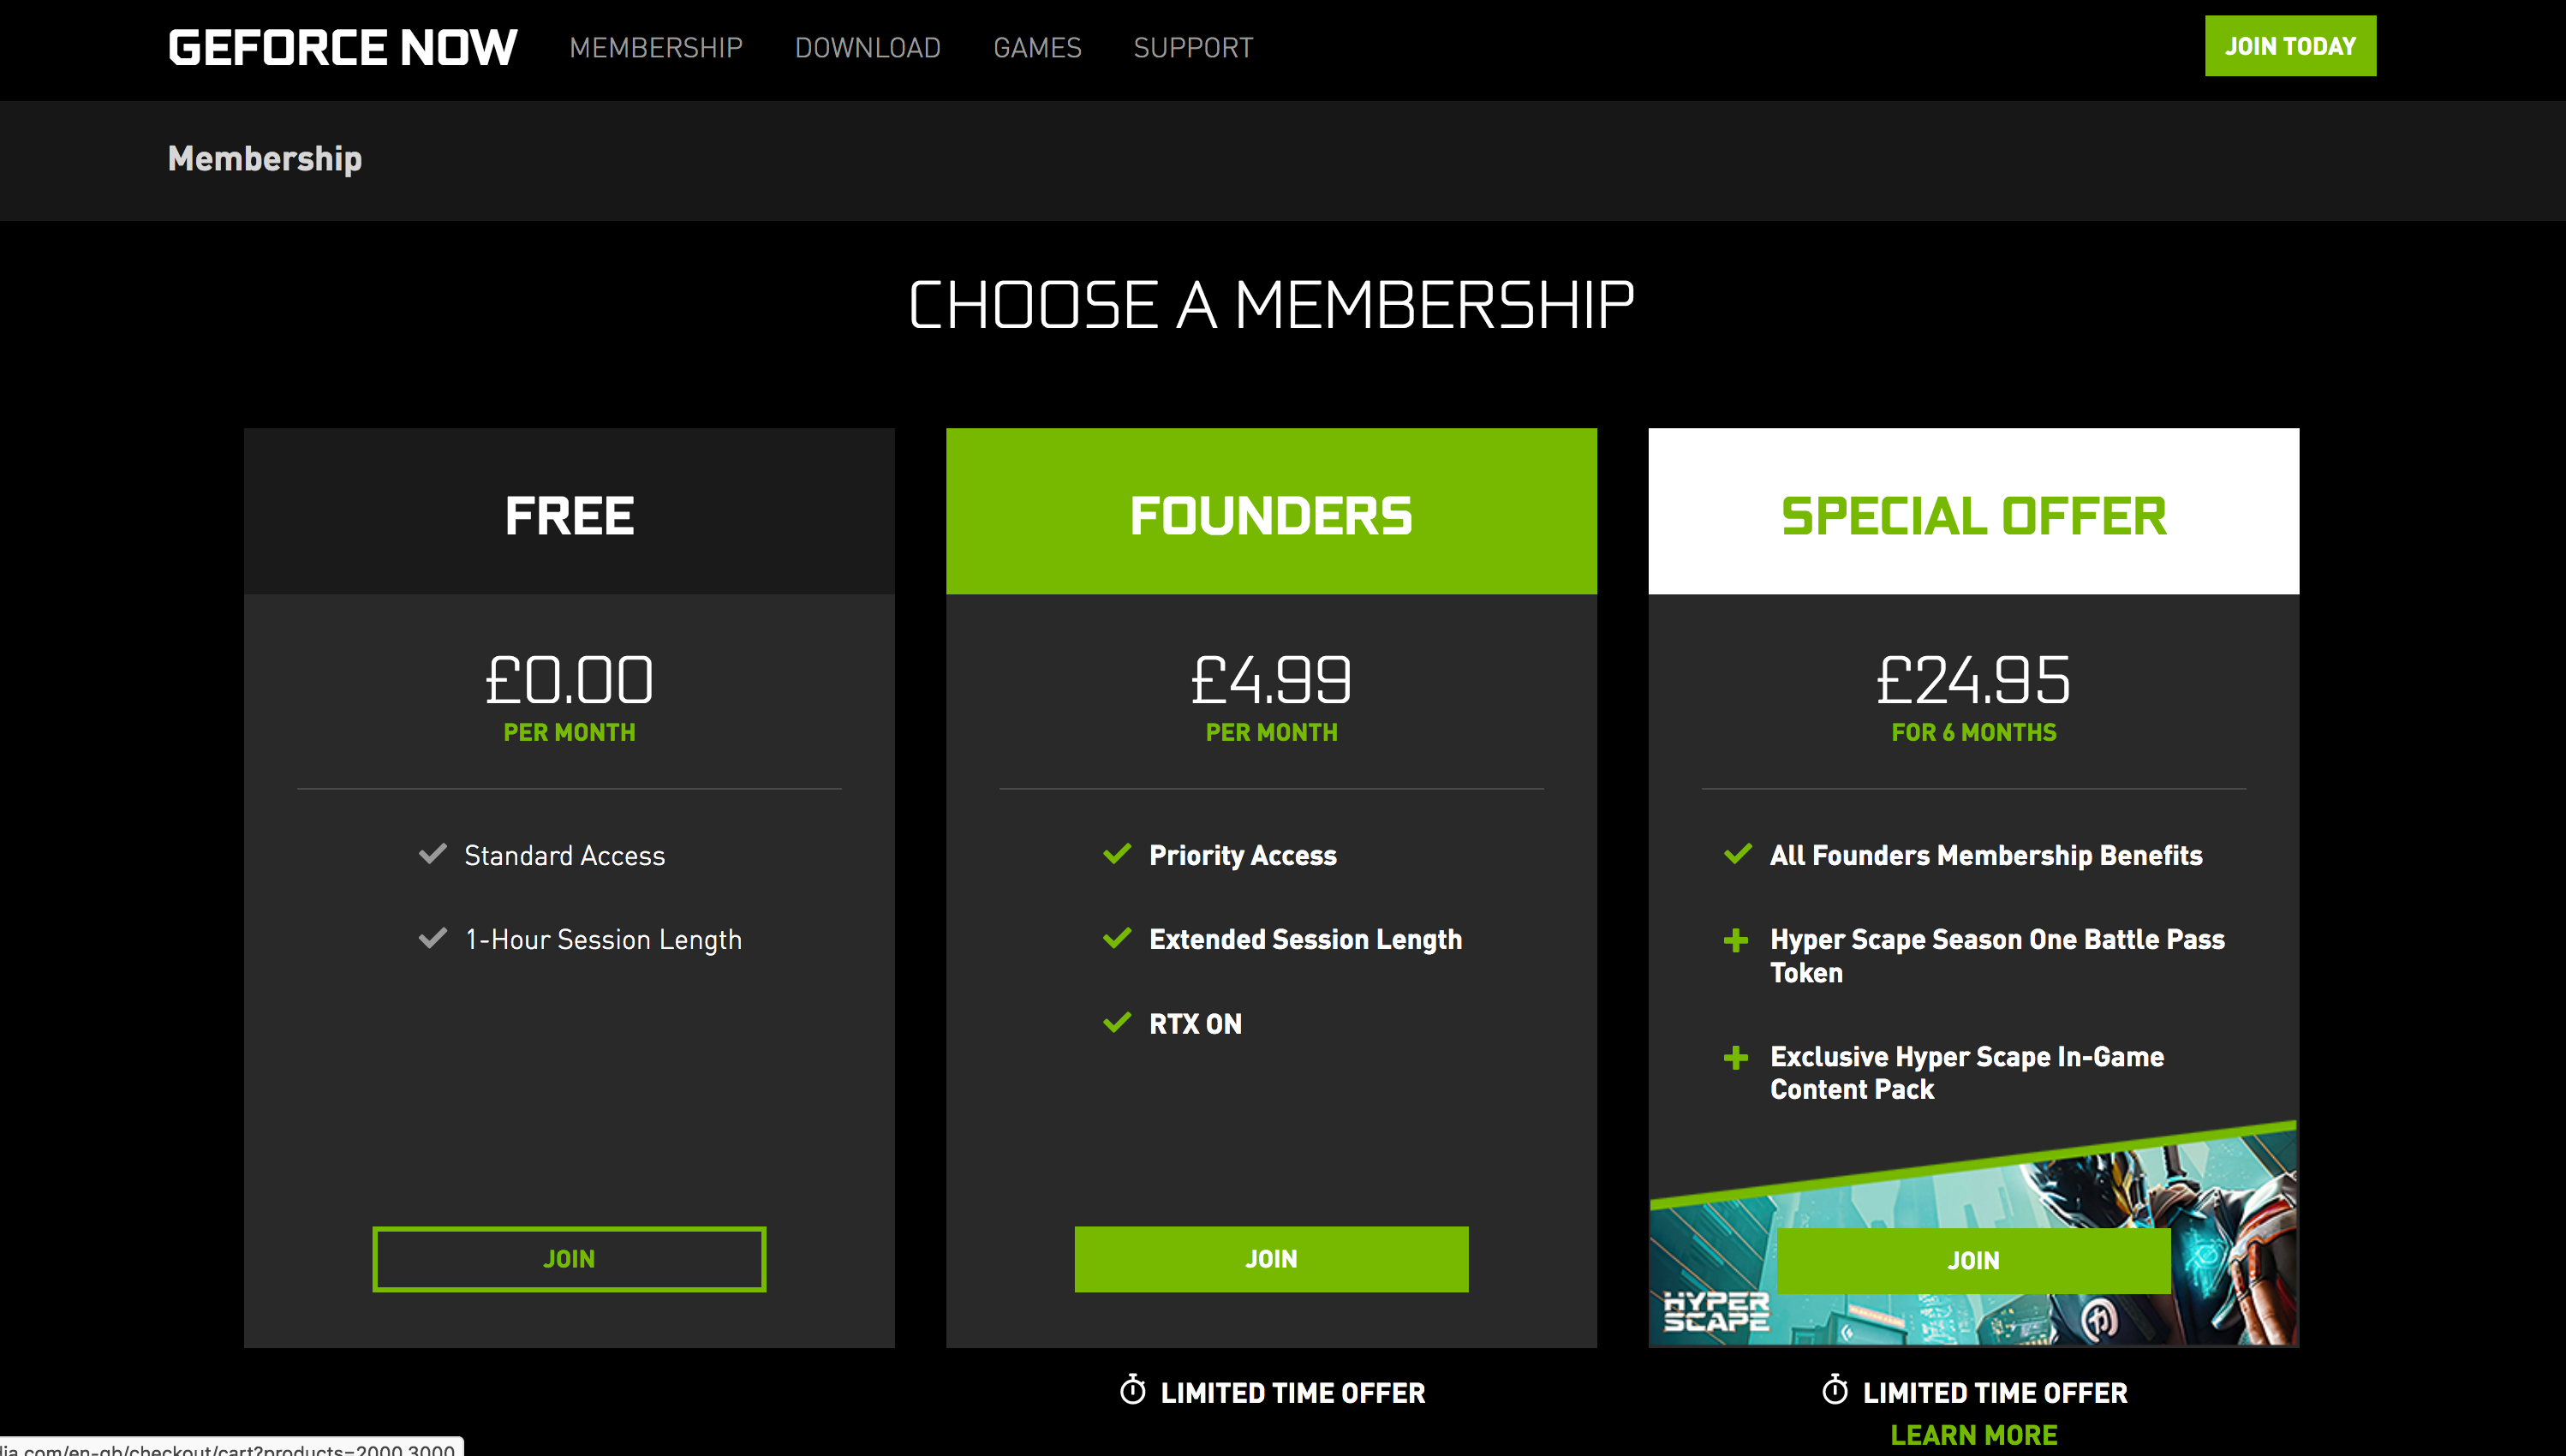
There are two basic tiers:
Standard (Free): This offers one hour of cloud gaming per session. The total number of available gaming slots is limited so paying members go ahead of you in any queue.
Priority member: You’re moved ahead of all Standard members in any queues and you get extended gaming sessions up to six hours. RTX raytracing is available with compatible games.
4. Login to Nvidia GeForce Now
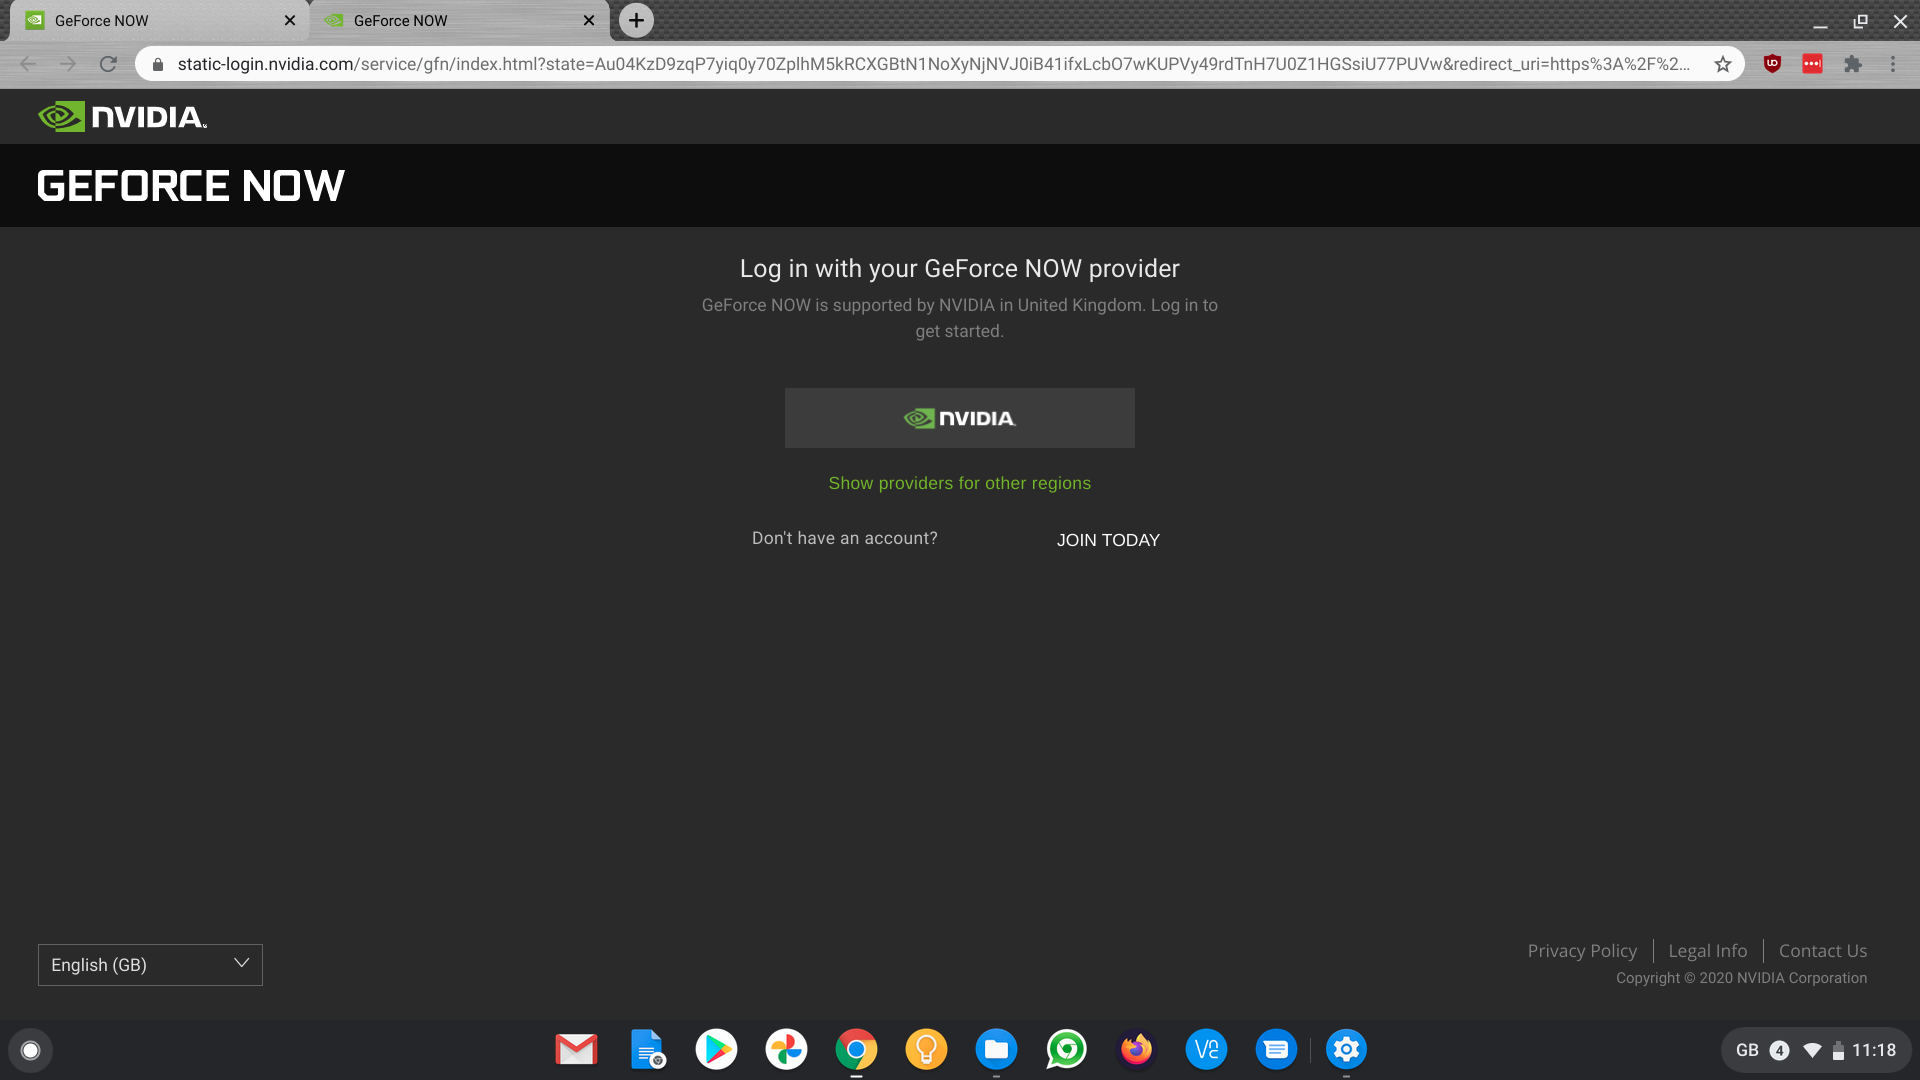
Once you’ve decided on your tier and signed up, using an existing Google or Facebook account to make life easier. You’re able to log into your account at: play.geforcenow.com.
Before you can continue you have to jump through one more hoop, which is choosing a local provider for the best performance.
A link does enable you to select other location options, but we’d imagine the automatic option will be ideal; Nvidia is running its own servers for the USA and European locations. Once selected you can close this tab and continue to your library.
5. Add a game to your library
To play anything on Nvidia GeForce Now you need to own a copy of the game already available on a suitable gaming service such as: Steam, Epic, UPlay.
The homepage provides a small selection of the latest and most popular supported games such as Fortnite, Assassins Creed, Hitman and so on.
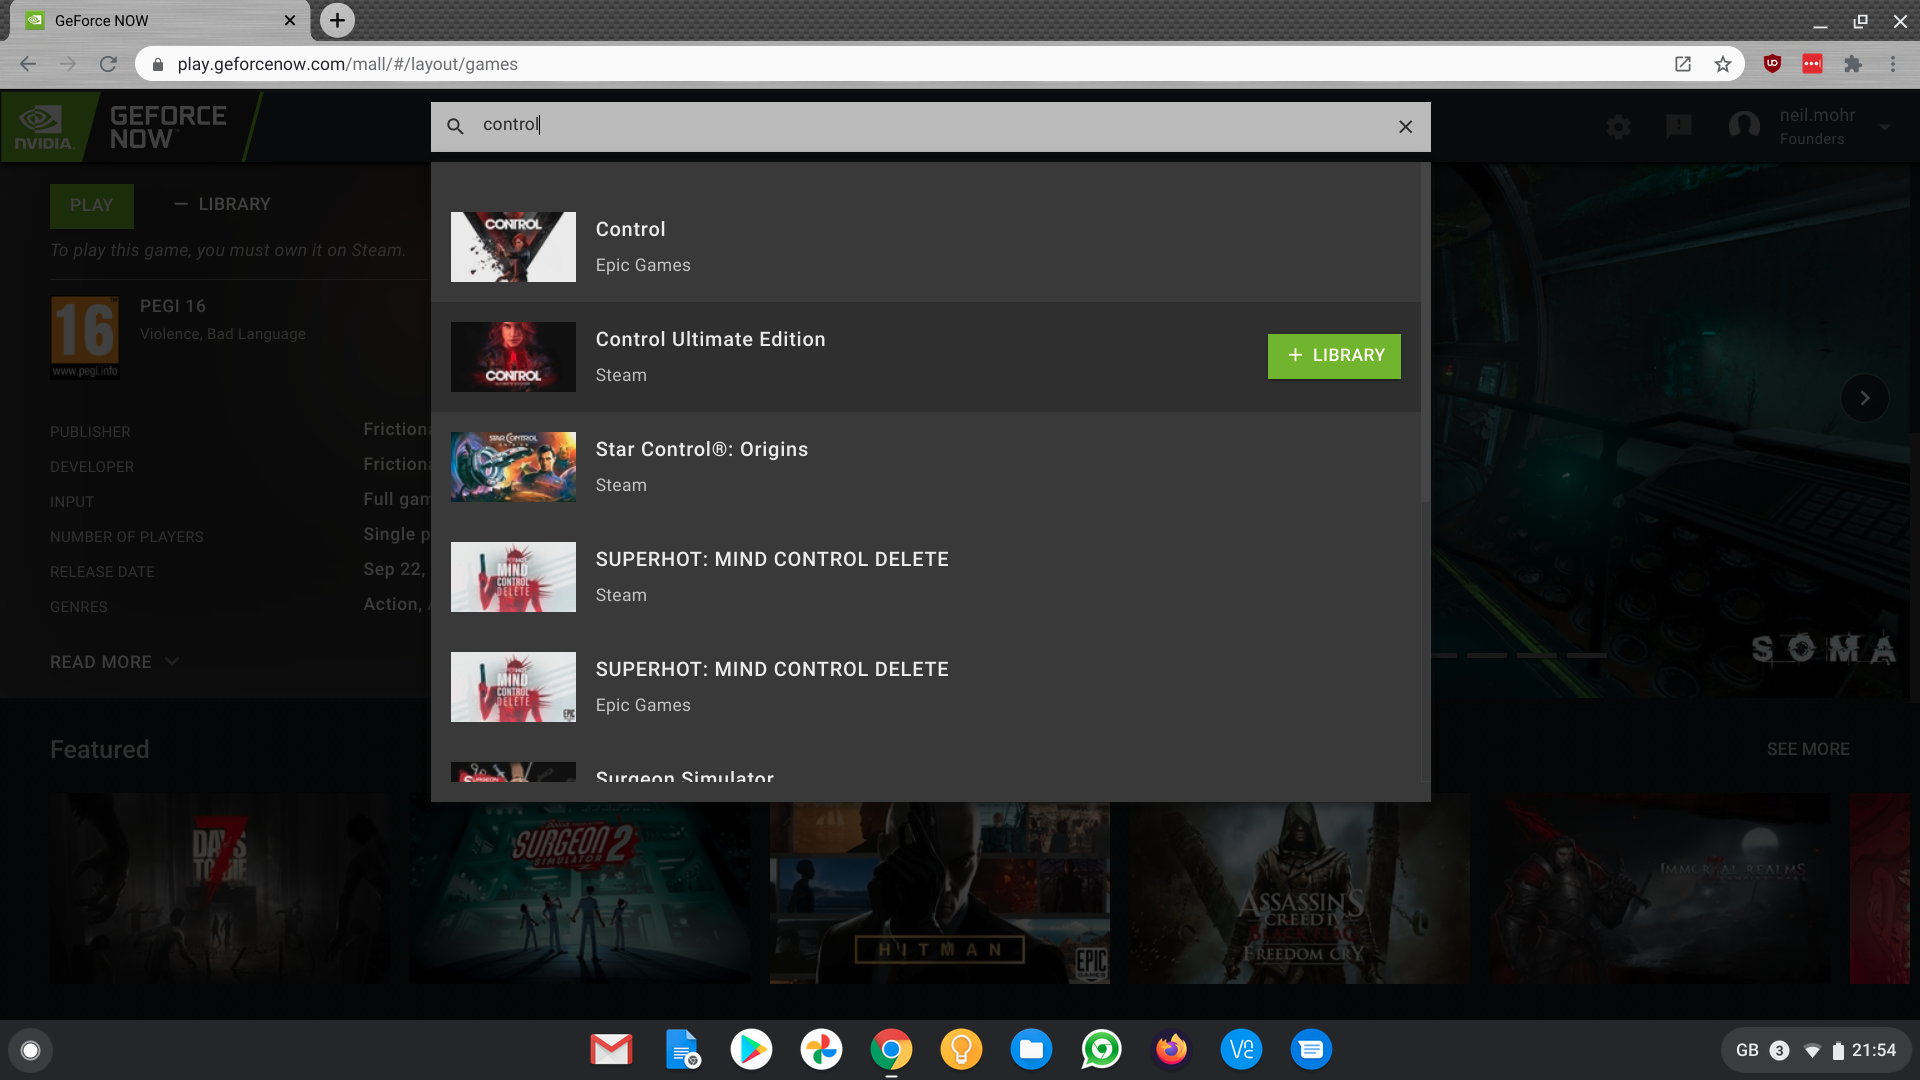
The easiest way to find a game you might want to play is use the 'Find and add your games' search button on the left.
Click this and as you type a list of possible games will appear – it’ll list the same game for Steam/Epic/UPlay as separate options – if it’s not already added to your GeForce Now account click the + Library button.
6. Tweak your keyboard
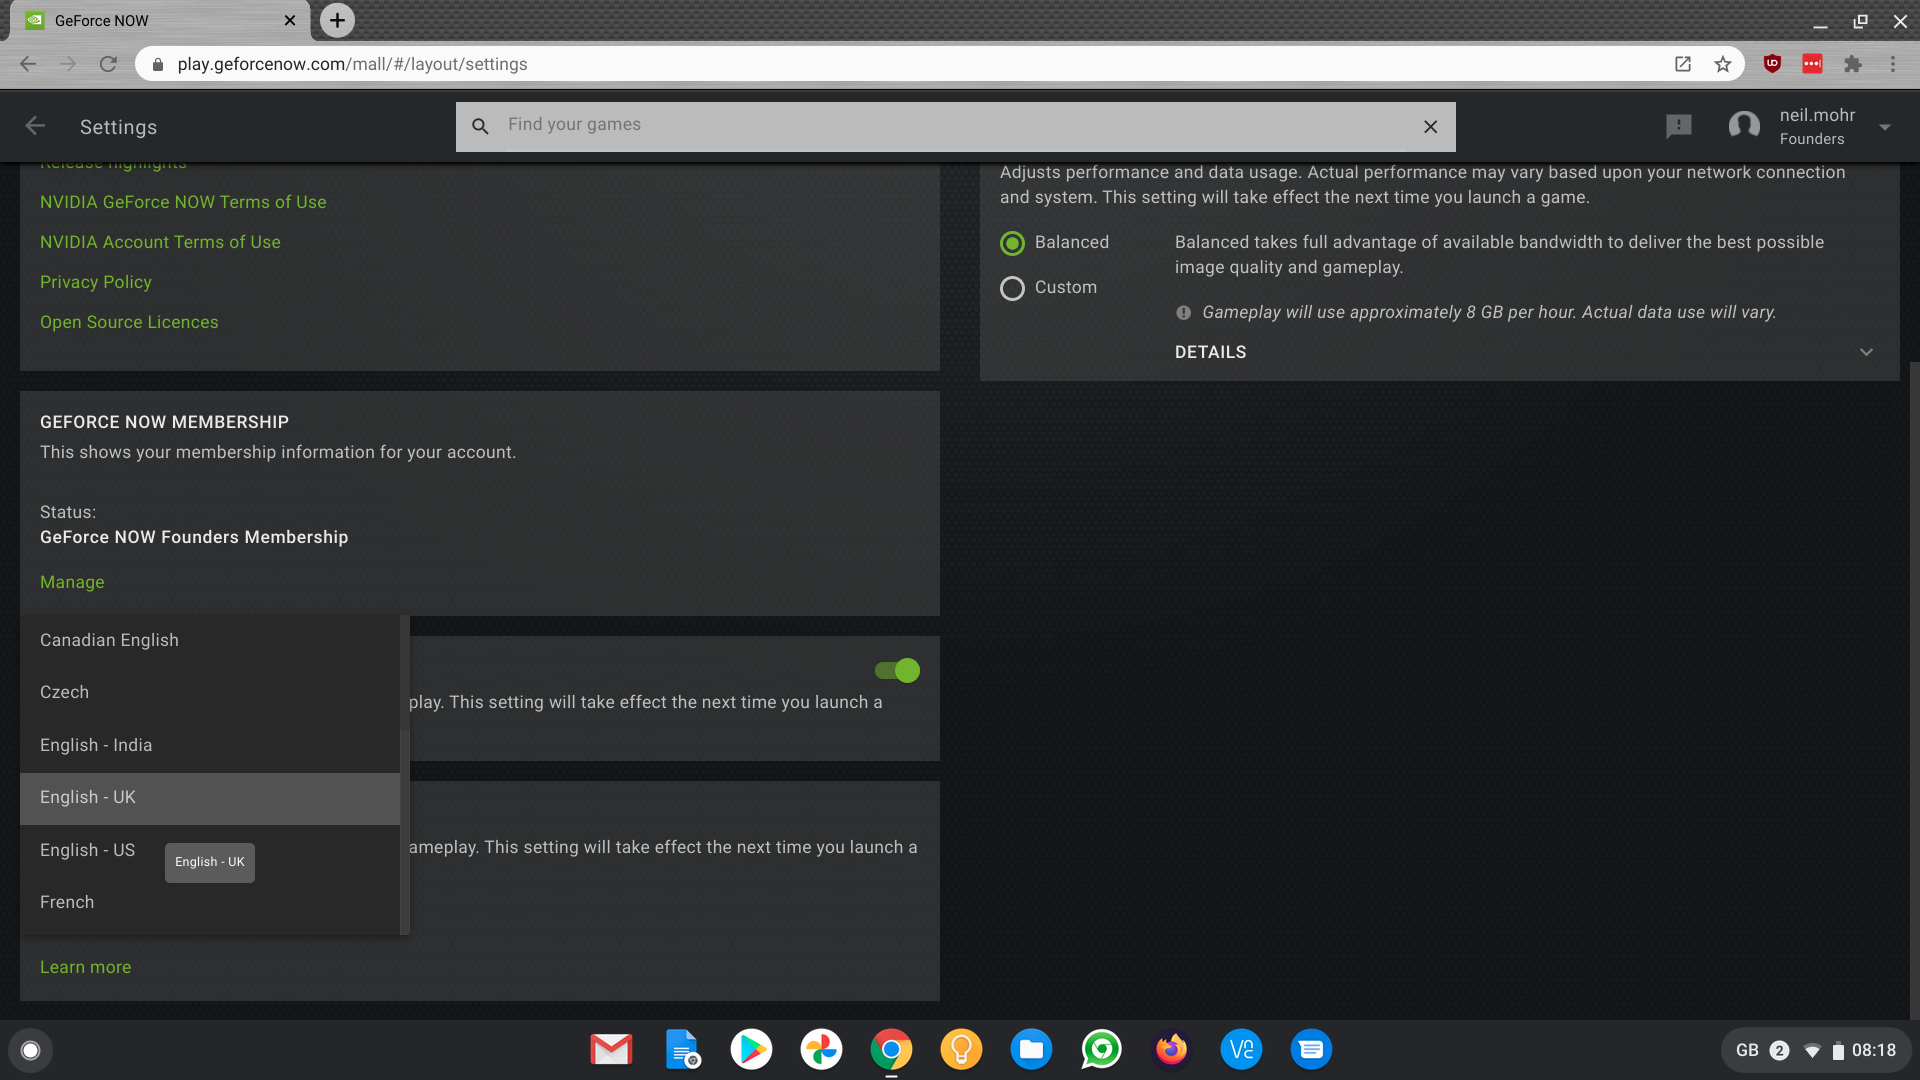
Before diving into play ensure you have your keyboard set to the correct language. The default is a US Keyboard so anywhere else is going to have a bad time entering passwords with symbols. So, click the top-right Settings cog icon.
The keyboard settings are bottom right, these control the in-game keyboard layout.
You can also force a default screen resolution and bitrate for Nvidia GeForce Now to try and use. This is good for trying out different resolutions with your system and to try and force a higher bitrate, but the default should be best as it’s adaptive.
7. First time run
Now a game is bound to your account you’re able to launch it by clicking the green Play button that appears when you hover the mouse over the game’s icon. Click 'Play' and GeForce Play Now will attempt to spin up a dedicated gaming rig, which takes a few seconds.
If one isn’t available right now, you’ll be placed in a queue for the next available one.
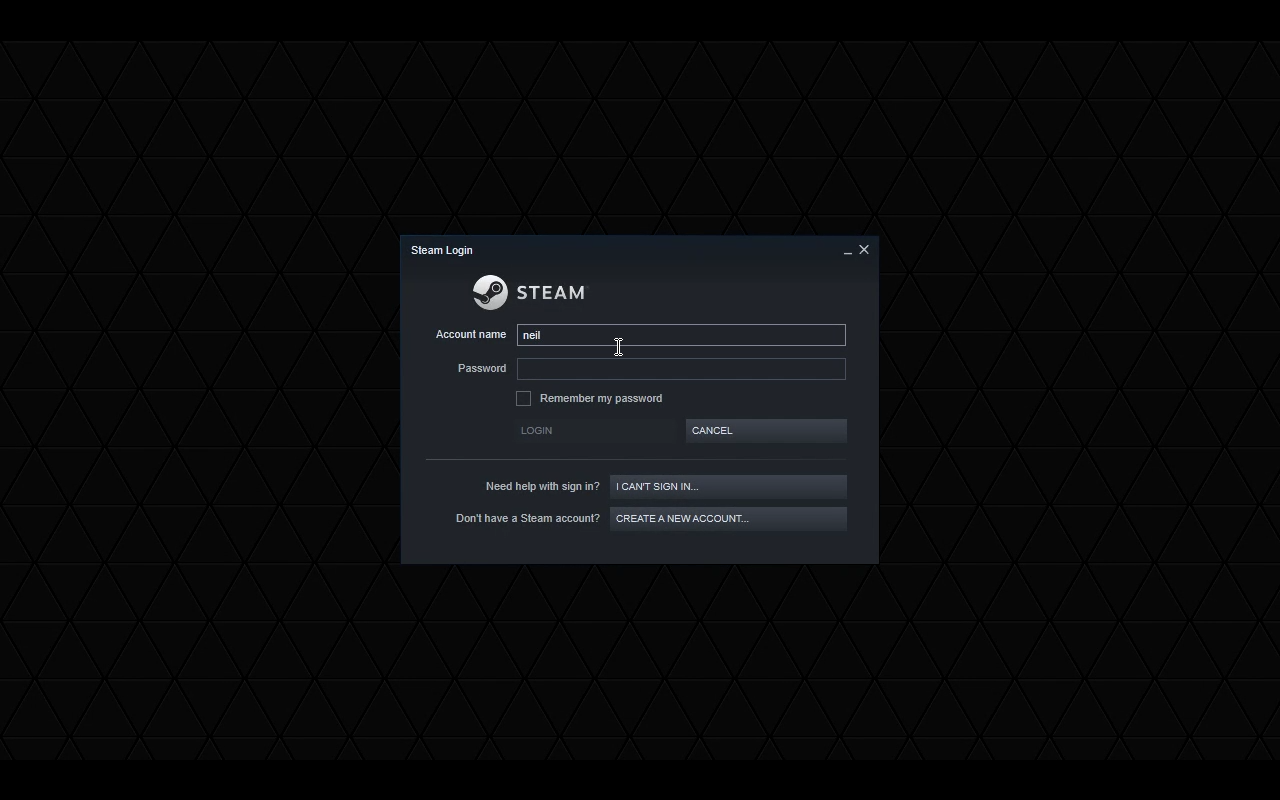
On a first run you’ll need to log into the gaming service used for this game by GeForce Now.
Currently this could be Steam, Epic or UPlay. So you’ll need your username and password to hand – password managers can’t access the system as it’s sandboxed – plus any second authentication you use ie Steam Guard.
Next time you run this game it'll jump straight in, so this is a one-off step.
8. Use a game controller or mouse
You’re not going to want to game on a Chromebook’s touchpad. Luckily any mouse or game controller you have should work without issue on a Chromebook.
For a USB mouse or gamepad this is no more complex than plugging it in.
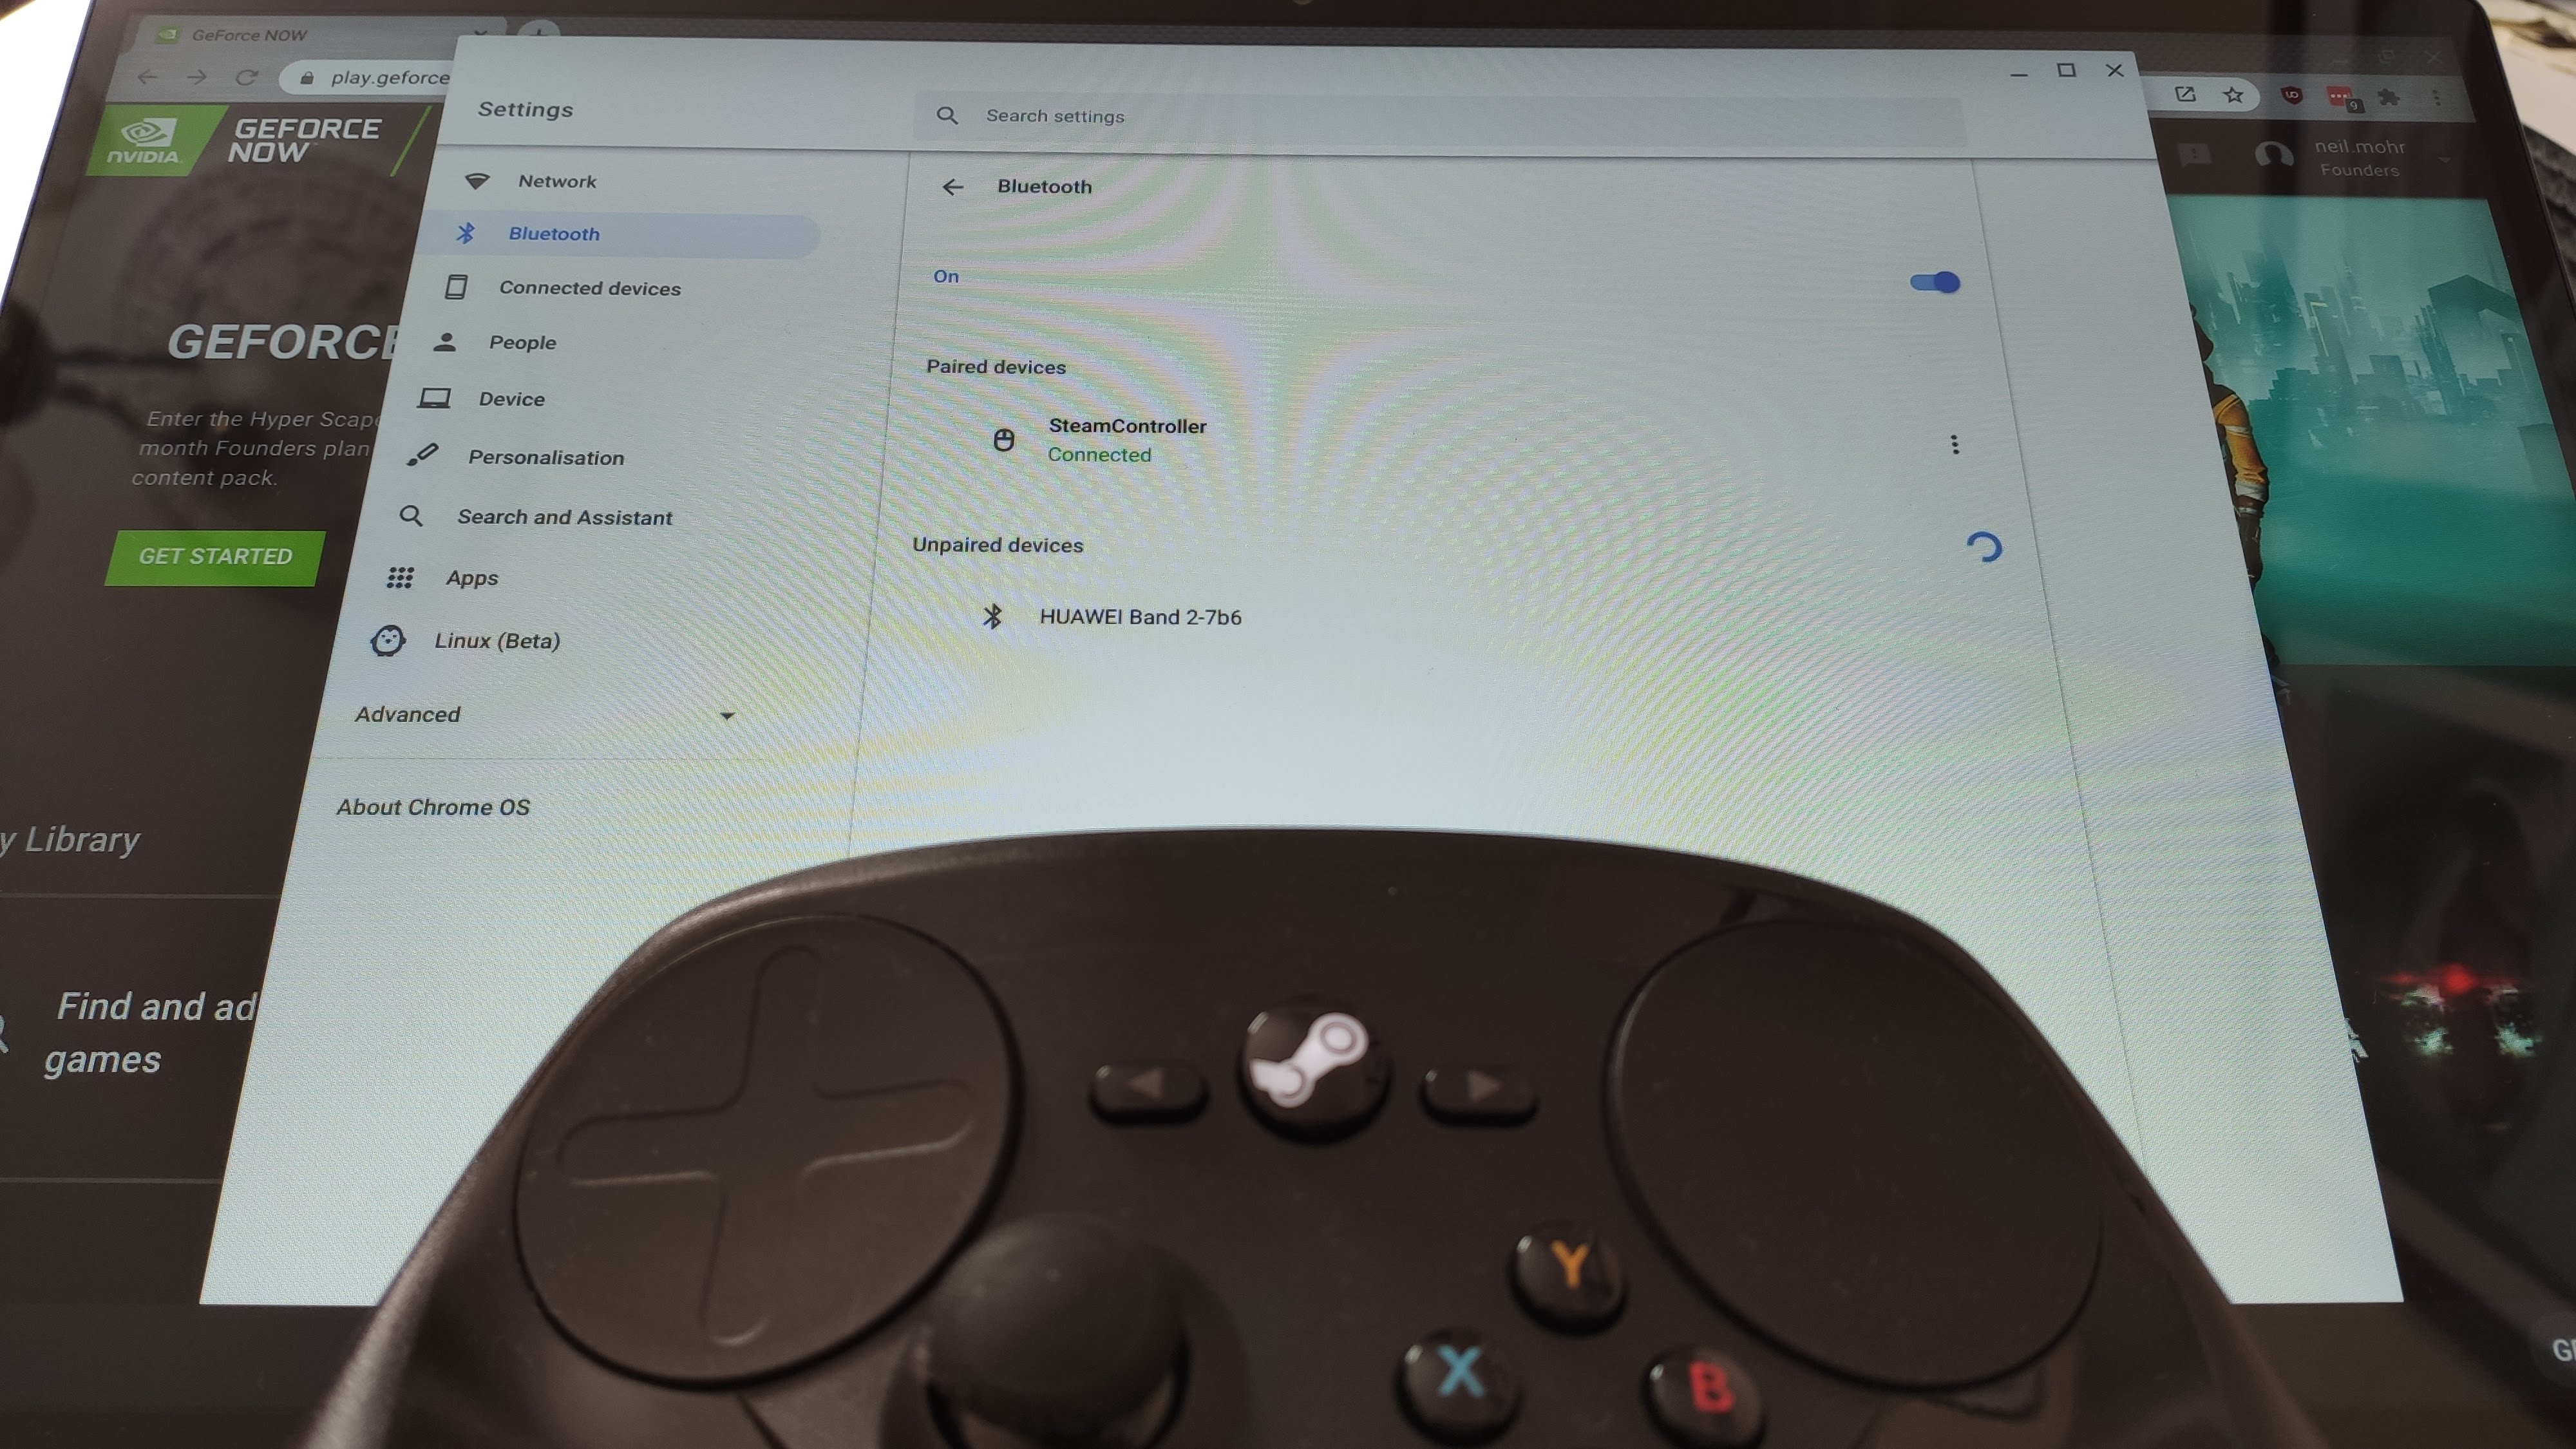
For Bluetooth-based gamepads, you’ll first need to pair your Chromebook with the gamepad via the Bluetooth settings. Click bottom-right Notification area > Bluetooth and switch your controller to its 'Pairing' mode to connect.
9. Some (Steam) installing…
Remember Nvidia GeForce Now is giving you cloud access to your Steam/UPlay/Epic account on a remote server. That account is still expecting you to log in and install games.
It will also still show the full interface, especially for Steam, which can be at first confusing.
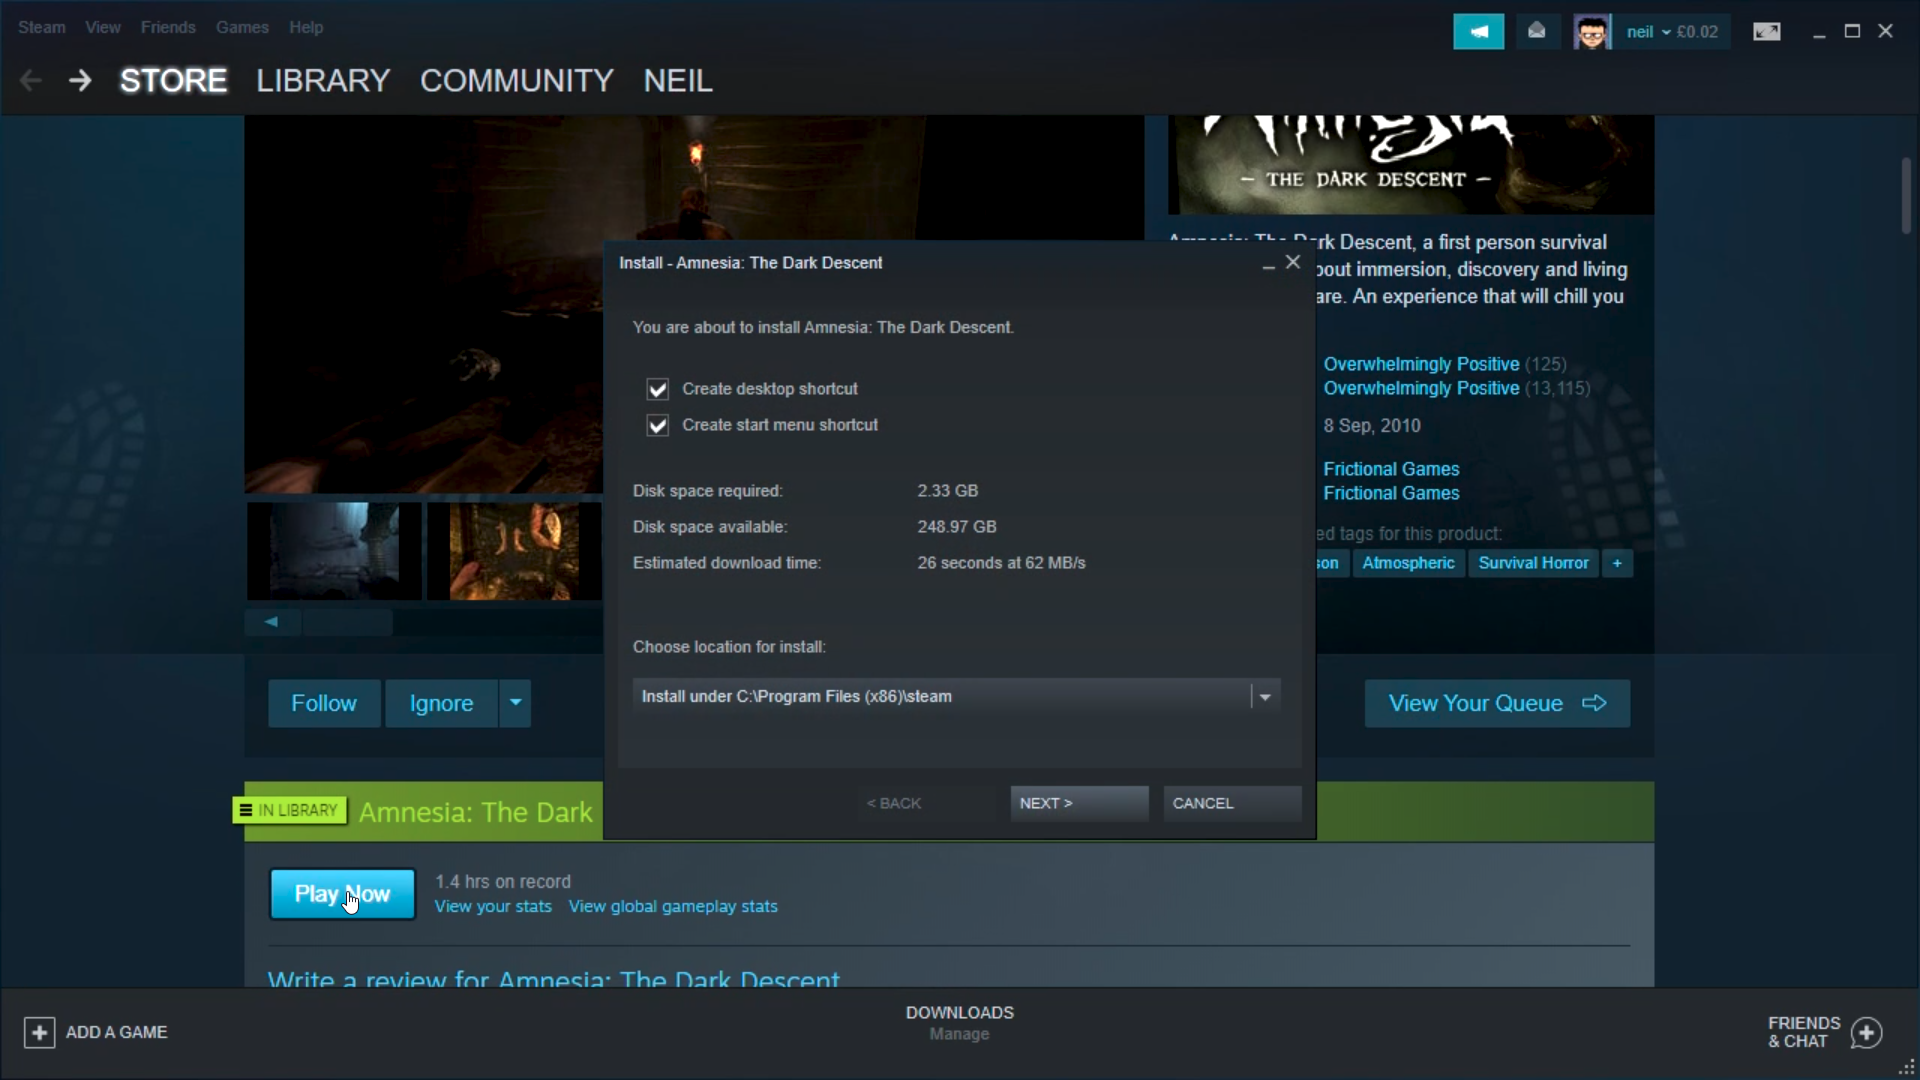
For Steam you’ll need to at least find the 'Play' button, this will launch the local install, which takes just a second. We did have one game (SOMA) that required us to find it in our game library and launch it from there.
Also be aware that software gamma options don’t seem to work, while some in-game graphic options may not work as expected. Also mismatching in-game resolution settings to GeForce Now does not look pretty!
10. Nvidia GeForce RTX raytracing
At this point you’re off gaming! Nvidia GeForce Now displays a color WiFi icon on the right to warm of poor connection speeds. If you’re on wireless get closer to your router, if this appears.
If you’re using a controller, as explained earlier, check the controller settings to ensure it’s configured correctly.
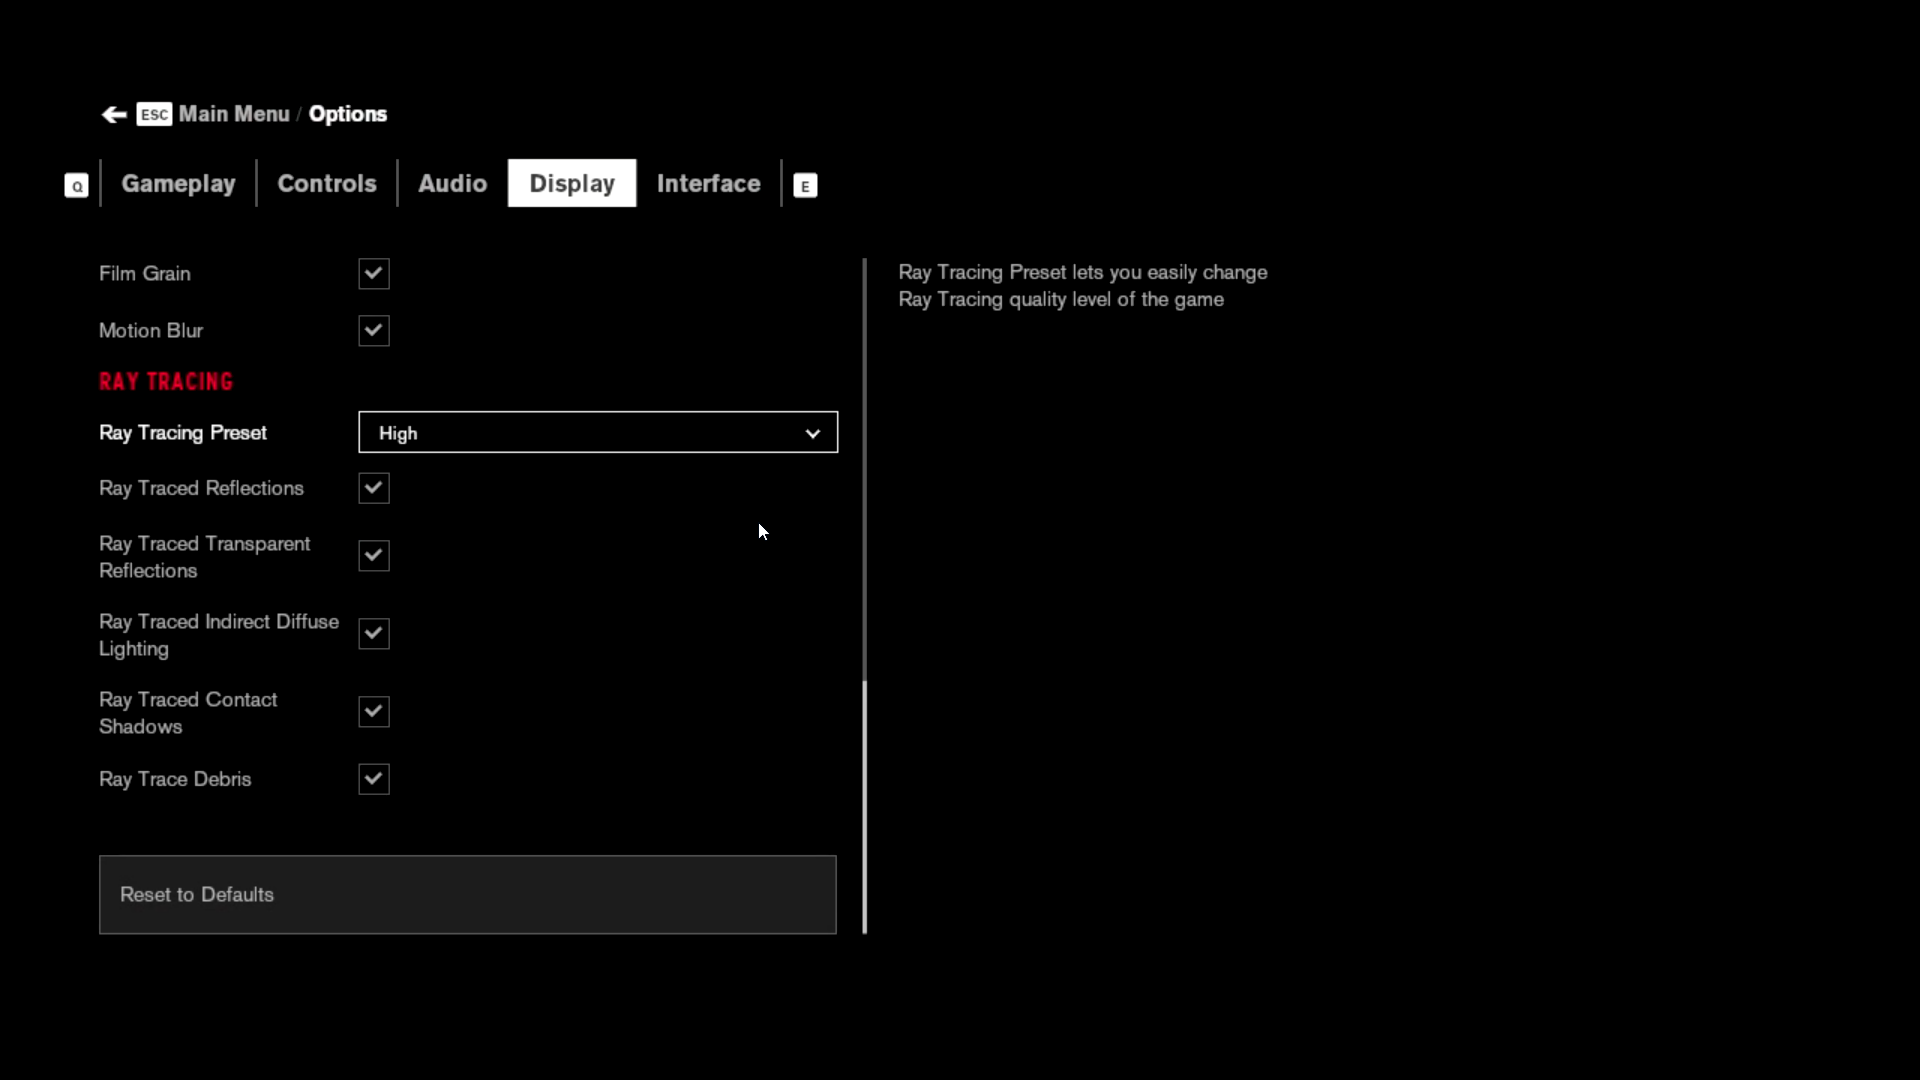
Nvidia RTX ray tracing is available to those on the paid-for Founders Membership that own games that support the technology.
Nvidia RTX will be enabled in-game by default, but you can still fiddle with the game’s graphical settings and crank the image quality to the max, then enjoy graphics way beyond your Chromebook’s capabilities!
- These are the best gaming laptops of 2020