How to use Zoom on a Chromebook
Use a Chromebook effectively for all your Zoom call needs
Throughout the course of 2020, Zoom went from being a niche, office-focused tool, to something that friends and family were using to keep in touch, socialize, and even play games over.
Zoom exploded, in other words, and part of its popularity is that it doesn’t matter what device or operating system you’re using. Zoom is truly cross-platform.
Zoom is both an effective and simple-to-use tool, especially if you’re using a Chromebook. It could even be the best video conferencing software to use, and in this guide, we show you how to use Zoom on a Chromebook.
Do you prefer Microsoft Teams? Here's how to use Microsoft Teams on a Chromebook. Need to make screenshots for presentations? Let us show you how to screenshot on a Chromebook.
1. Create a Zoom account
You don’t need a Zoom account to join a meeting, which is one of the strengths of the service over its competition. If you’re going to use it regularly, however, it’s worth setting up an account.
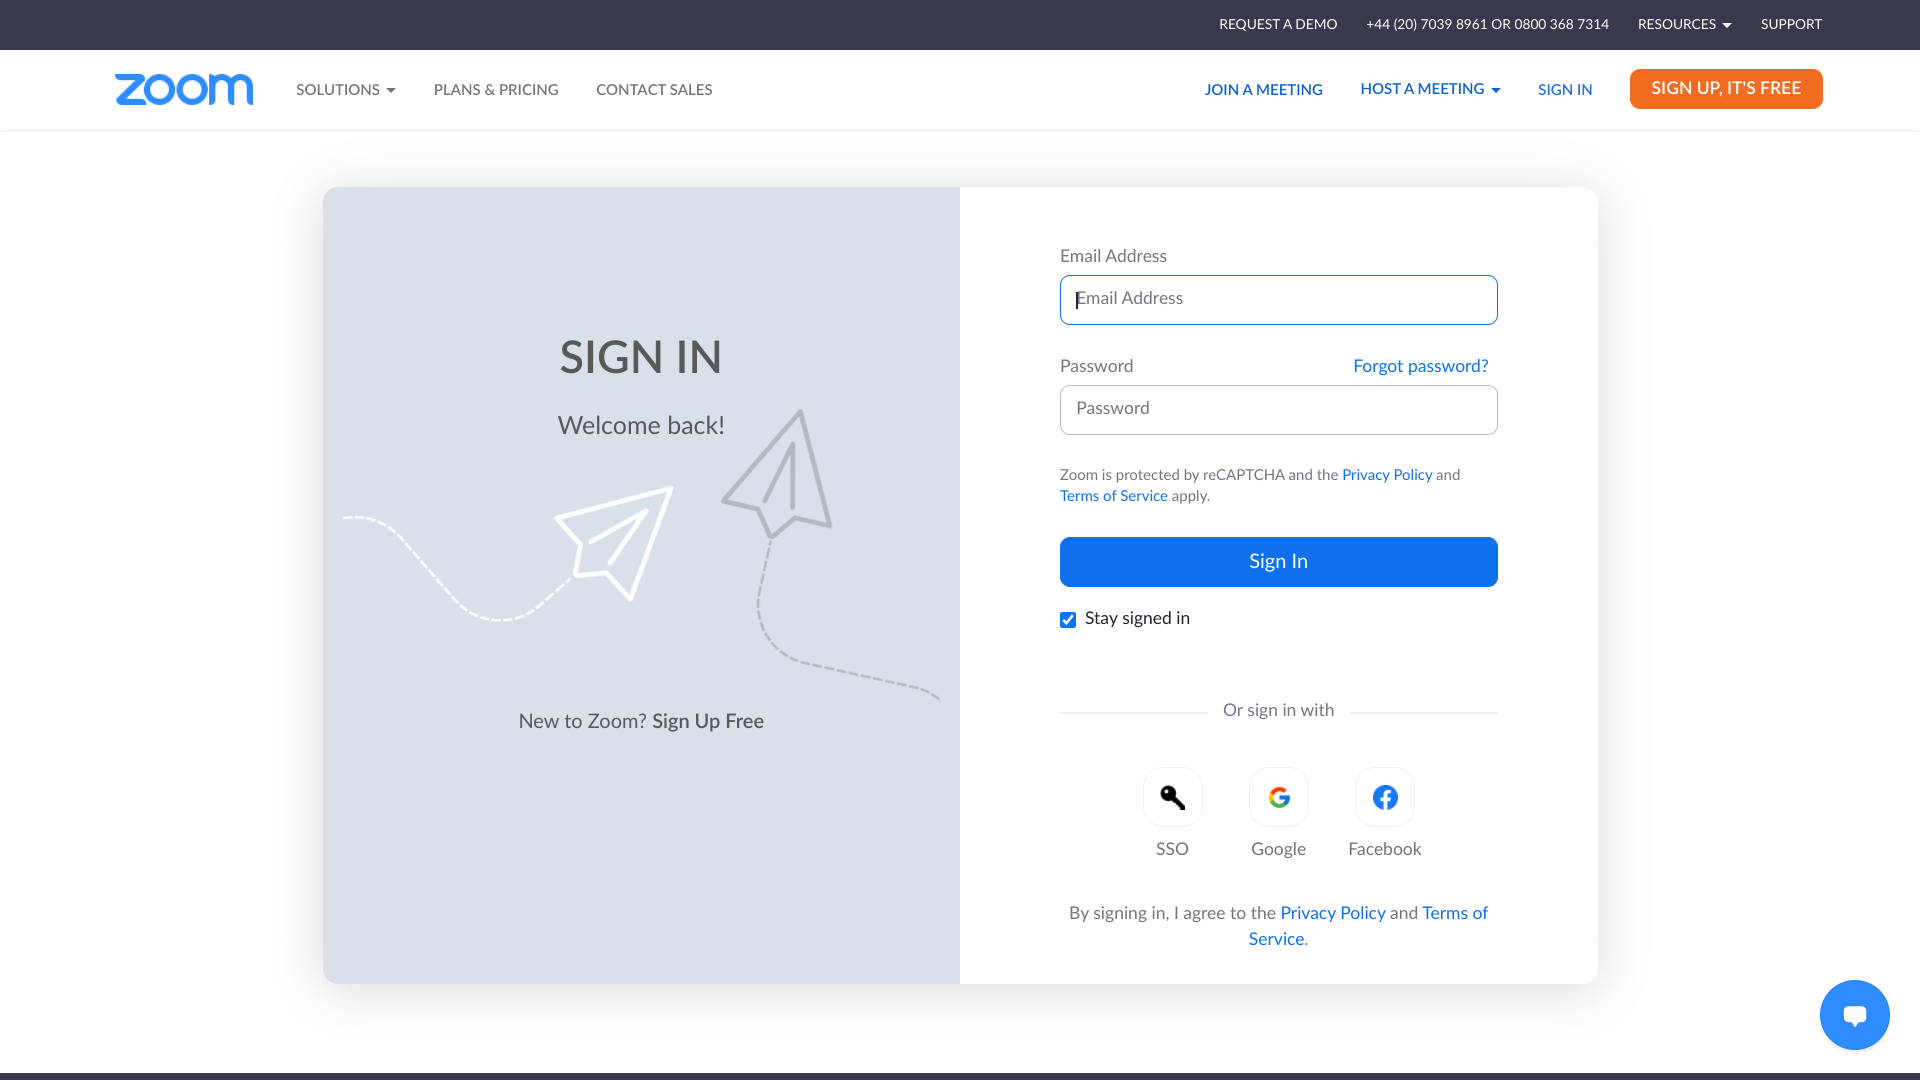
Head over to the Zoom website to begin where you’ll have some different options on hand to help create an account. If you want to sign up with an email address and password, you can.
Alternatively, you can sign in using SSO, Google, or Facebook logins to set up a Zoom account. With each, you’ll be asked to confirm your date of birth to check your age, though Zoom will not retain this information.
Are you a pro? Subscribe to our newsletter
Sign up to the TechRadar Pro newsletter to get all the top news, opinion, features and guidance your business needs to succeed!
2. Download the Zoom app for Google Chrome
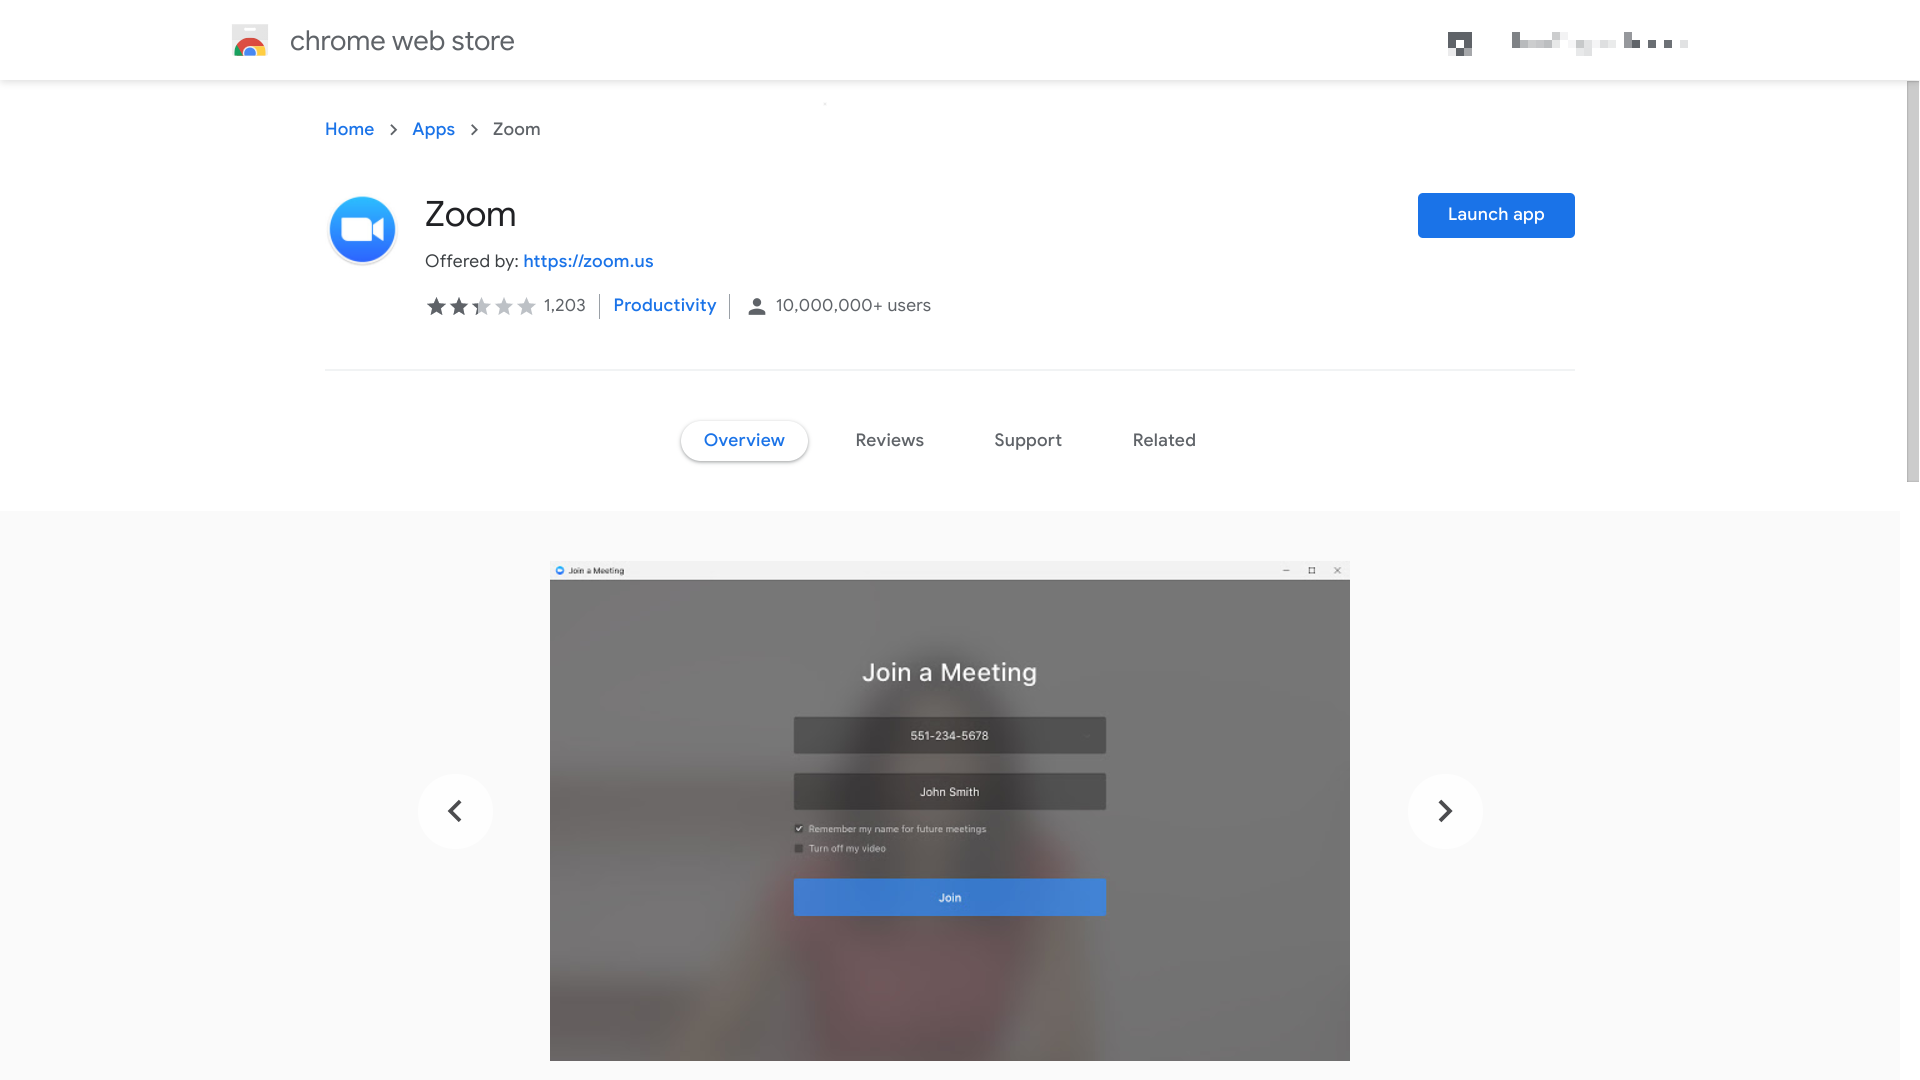
Regular users of Zoom will want to use the dedicated Chrome app in addition to the website. To download it, first head to the Chrome Web Store on your Chromebook.
In the ‘Apps’ section, search for Zoom. You’ll see a number of results, but the one you’re looking for is the official app published by ‘zoom.us’. To install on your Chromebook, click ‘Add to Chrome’.
Google has announced an end to Chrome apps in the future, replacing them with an alternative such as Progressive Web Apps (PWA). For now, the Zoom app is available and works great, so it’s worth downloading.
3. Joining someone else’s Zoom meeting on a Chromebook
Joining a Zoom meeting on a Chromebook doesn’t require any account information to be entered. This makes it simple to join someone else’s call.
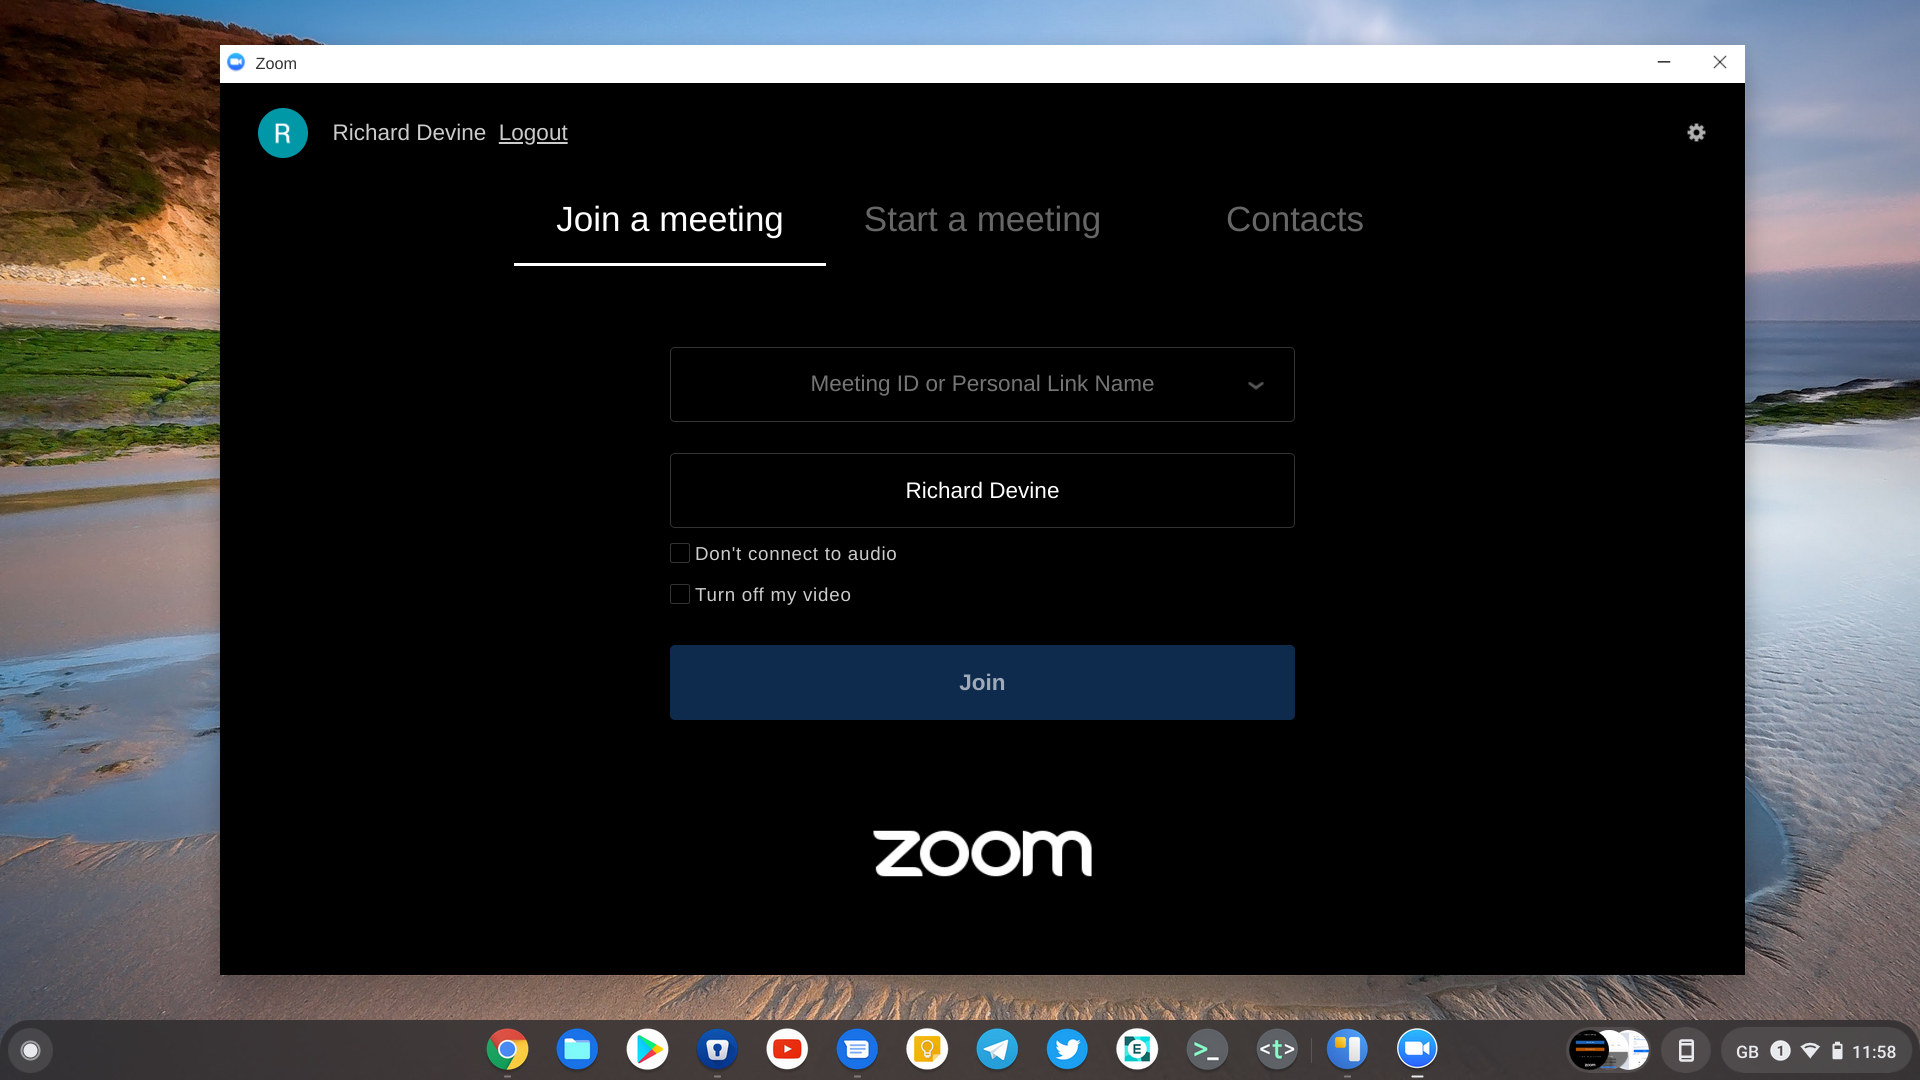
First, open up the Zoom Chrome app from your app drawer. Select the ‘Join a Meeting’ tab and enter the ‘Meeting ID’ you were provided with. Next, enter your name in the box below then click ‘Join’ to enter the meeting.
If you wish to exclude your audio and video from the meeting, you have options for each that you can enable before you join. Both can be turned back on when you’re in the meeting if you need to.
4. Creating a Zoom meeting on a Chromebook
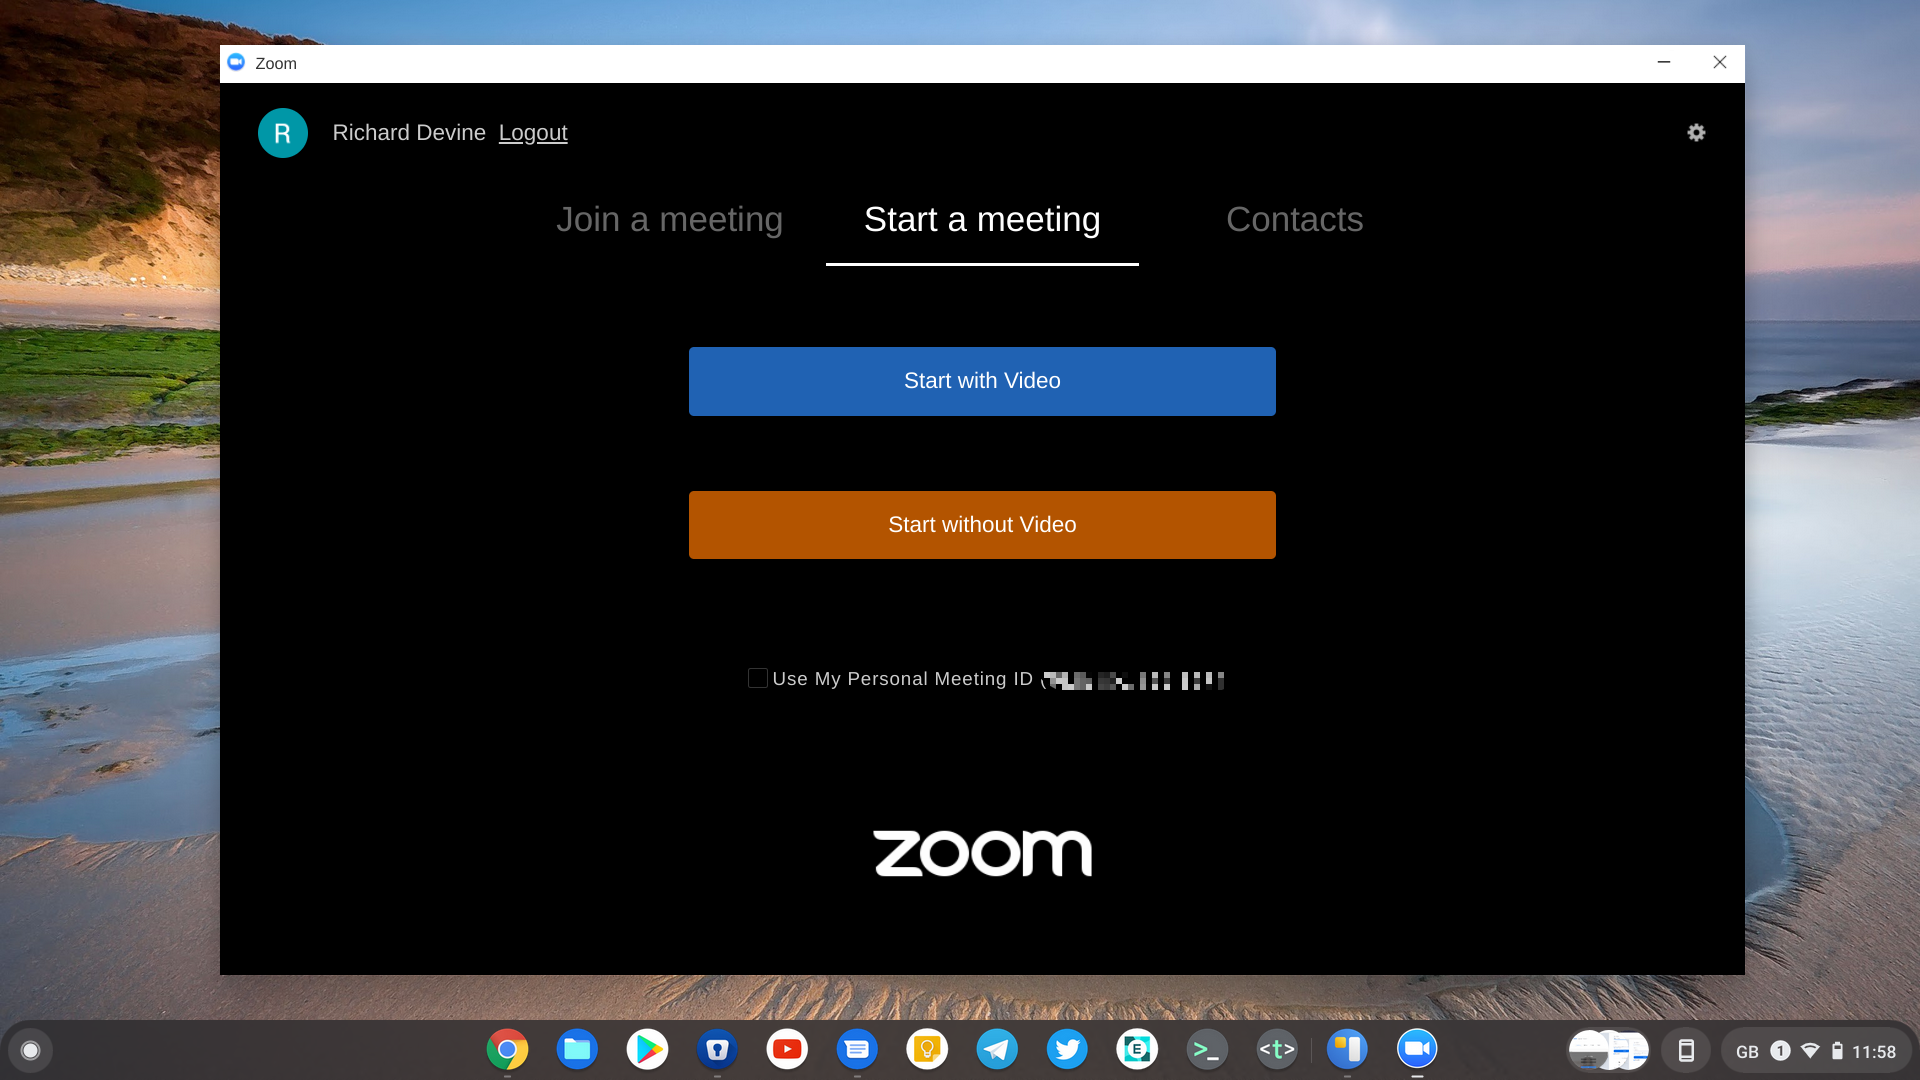
To create a Zoom meeting on your Chromebook, you will need to be signed in, which is why setting up an account is essential if you’re going to be a regular user. Open up the Zoom Chrome app and select the ‘Sign in’ tab, then enter your credentials.
When logged in to the Zoom app you have two options for starting a new meeting. You can either have video, or just audio, by selecting the relevant option. The third option is to use your personal Zoom Meeting ID if you wish, which is useful if you’re going to have a regular meeting with the same people, as you only have to share this one code.
If you start a new meeting, you’ll have a new Meeting ID generated, which you can then share with the participants you wish to invite. Alternatively, if you have a contacts list inside Zoom you can invite them from there.
5. Scheduling a Zoom meeting on a Chromebook
The most basic way to schedule a meeting on Zoom from your Chromebook is to use the web dashboard. Once you’re logged in, head to the ‘Meetings’ page and click ‘Schedule a Meeting’. You can now enter all your meeting specifics such as time, date, and topic, as well as generate a Meeting ID and add a secure pass code if you wish.
An even more convenient way to schedule Zoom meetings is with the Zoom Scheduler extension from the Chrome Web Store. This serves two purposes. The first is to allow you access to all the same tools as the web dashboard, and is accessible by clicking the extension and entering your Zoom login details.
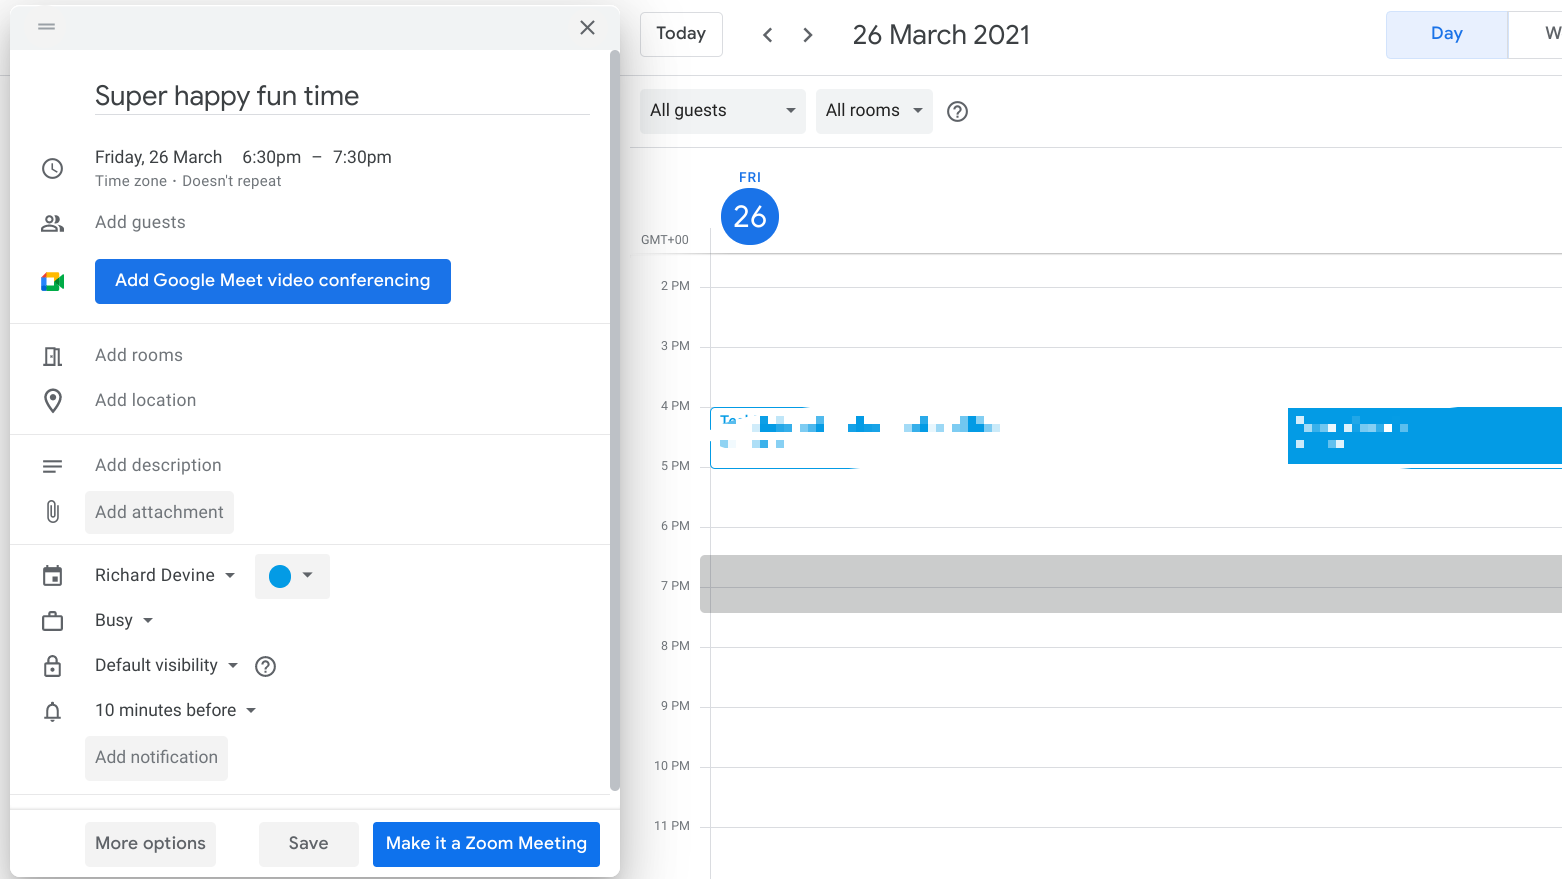
The extra benefit of the Zoom Scheduler extension is its integration with Google Calendar. Once installed, any appointment you schedule on your calendar can be turned into a Zoom meeting by clicking the ‘Make it a Zoom Meeting’ button. A new Meeting ID will be generated and attached to the Google Calendar entry which can then be shared as normal. Basically, the Zoom Scheduler extension makes using Zoom as convenient as Google Meet.
Summary
Zoom is a service that has been designed to work well on the web, which makes it perfect for use on a Chromebook. All its features are available, and while the Chrome app will eventually be replaced, Chrome OS is well-positioned to make continued Zoom use a breeze.
The Zoom Scheduler extension is an essential add-on if you’re frequently scheduling Zoom meetings. If you’re a Google Calendar user it’s especially useful and integrates Zoom seamlessly into your daily workflow.
- Best Chromebooks 2021: the top Chromebooks for kids, students and more