Lock down your passwords
Security experts often offer words of wisdom, such as: "Use a different password for every site" or "Make sure you don't use any dictionary words". But then they'll say contradictory things like: "a string of dictionary words is more secure than a random jumble of characters".
Those security experts don't want us to have an easy life, that much is clear. Seriously, though, your online security is important. Share passwords between sites and, if one of them happens to lose its password database to a hacker, your security across all those sites is compromised.
Remembering a host of long-winded passwords is difficult, though; do you write them all down in a book? If someone gets hold of that book, what then? It's much better to use a secure service, itself password protected, to manage the whole thing for you…
- We've put together a list of the best password managers on the market
- These are the best password recovery solutions
- Check out our roundup of the best business password management software
1. Getting hold of it
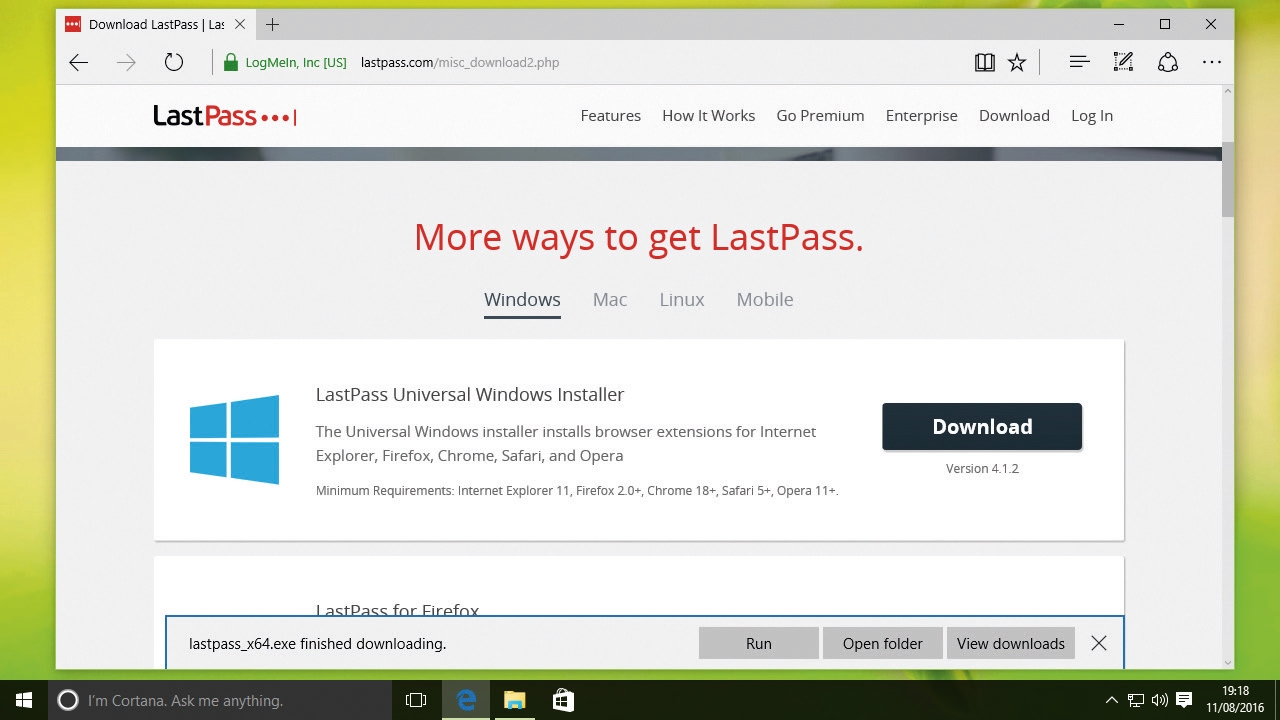
Though you can use LastPass entirely online, it's more effective to use its browser extension on your PC to manage logging into sites.
You never actually have to remember the passwords you've set. Head to the LastPass website, and download the Universal Windows Installer, which will add it to your browsers.
2. Installing it
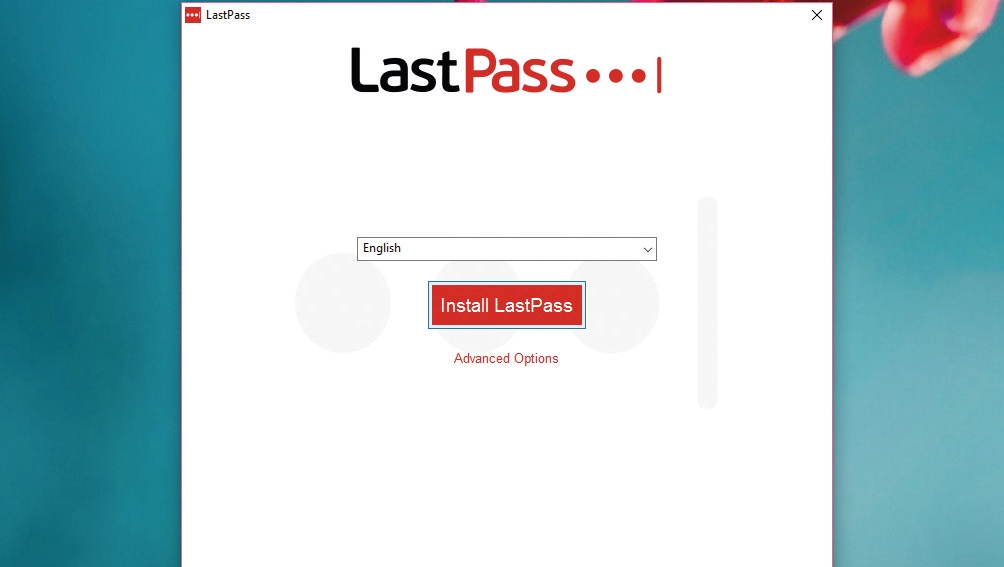
If Windows asks whether you want the app to make changes to your PC, click 'Yes'. Click 'Install LastPass', then 'Create a New Account'. You now need to set your master password, which is the only password you'll have to remember.
Make it a good one, and one you've never used anywhere else; try to make the green bar fill up to ensure it's strong enough. Click 'Create Account'.
3. Begin the lockdown
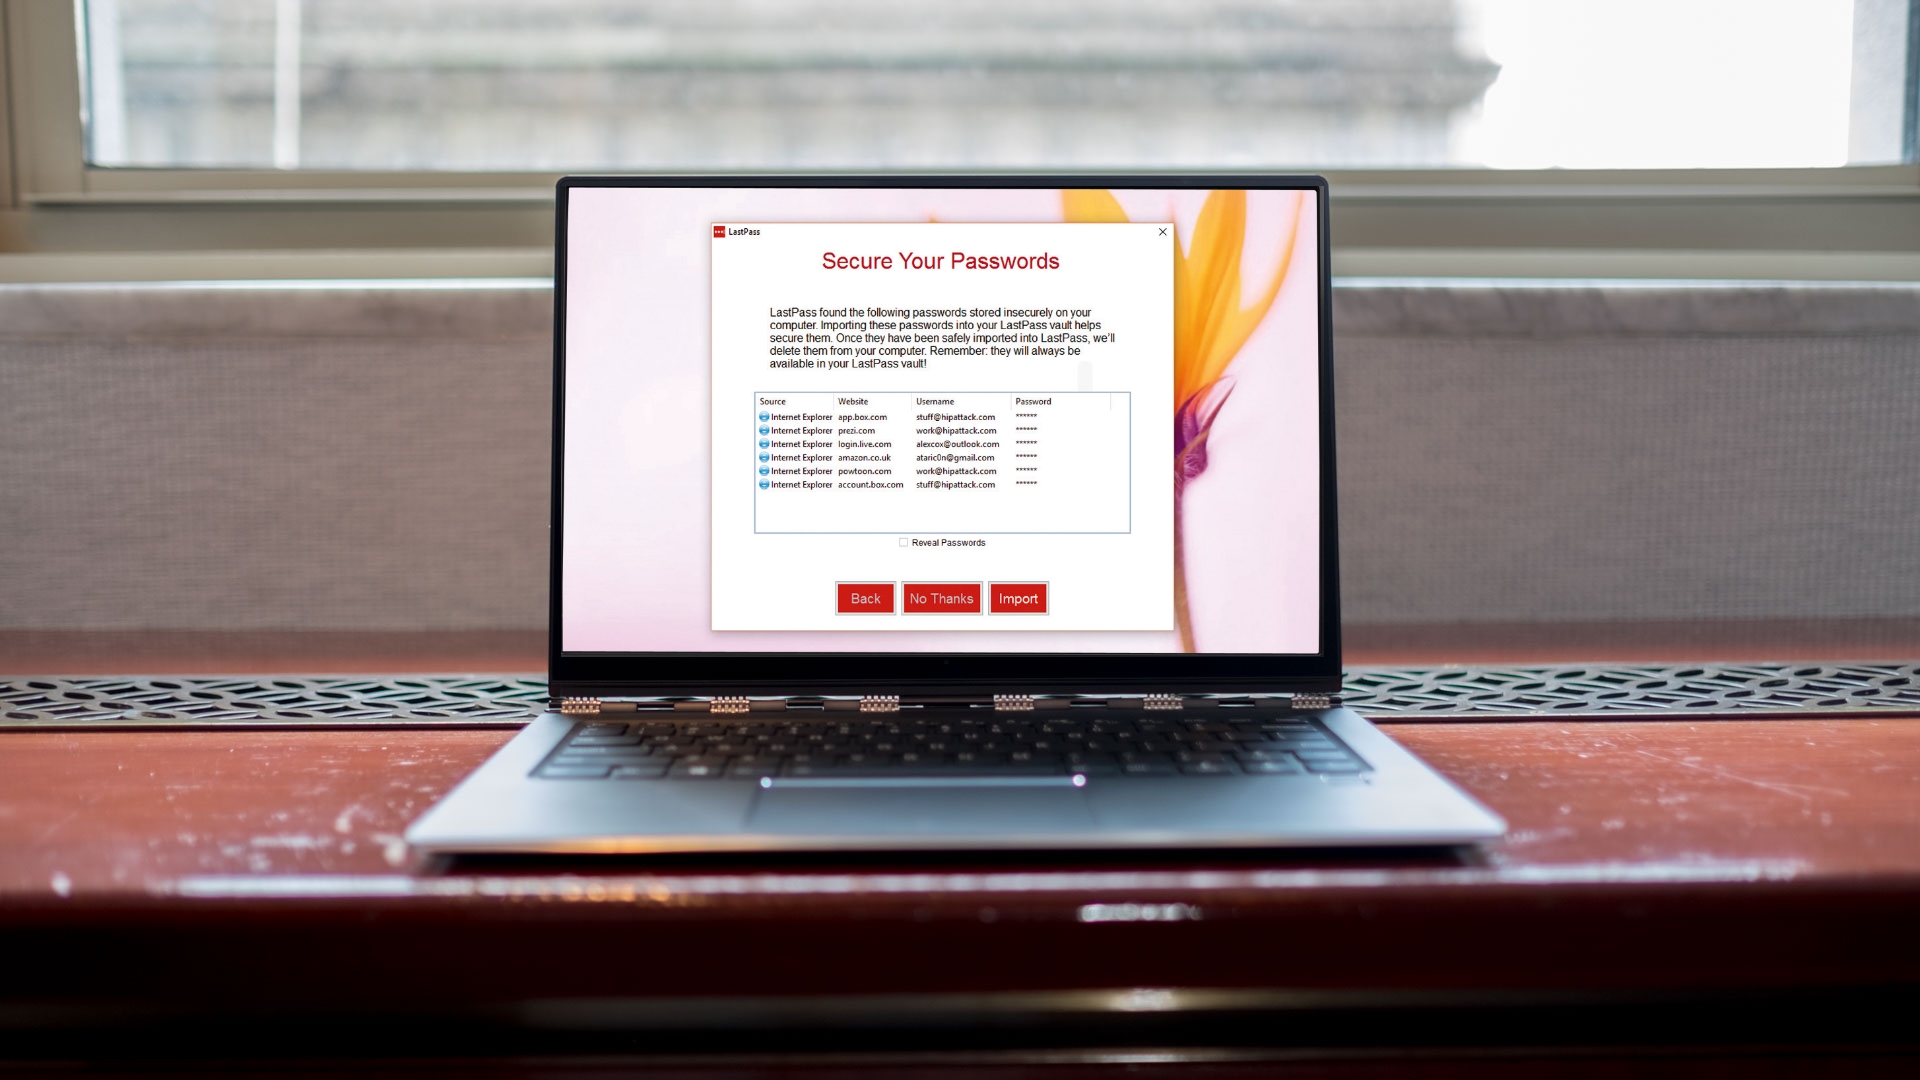
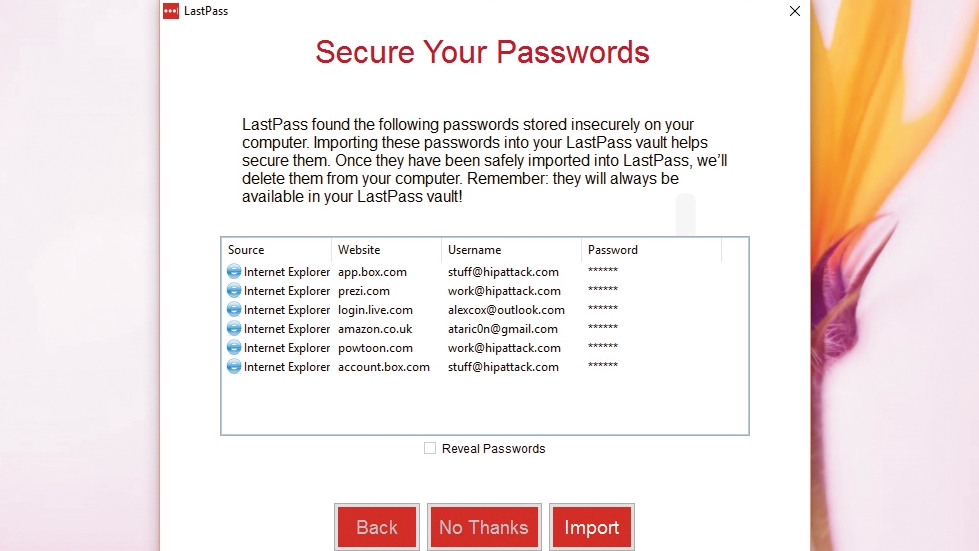
LastPass sniffs through your web browsers and attempts to detect insecurely stored passwords at this point. Hit 'Import' and it'll bring them into its secure vault and delete the insecure references to them.
LastPass will now open up any browsers into which it couldn't automatically install itself – you'll need to follow the instructions on each to get its browser extension ensconced.
4. Finding it
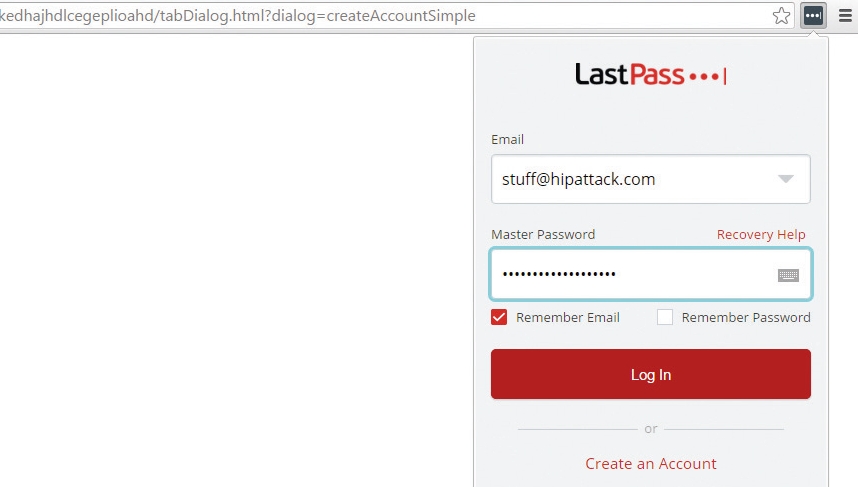
You'll now find LastPass – in whichever web browser you prefer – as a grey icon to the right of the address bar. Left-click it and enter the details from Step 2 to log in; we'd suggest not allowing it to remember your master password, since this adds an extra layer of security.
Now head over to a site that requires you to enter a username and password – we're using outlook.com.
5. Making memories
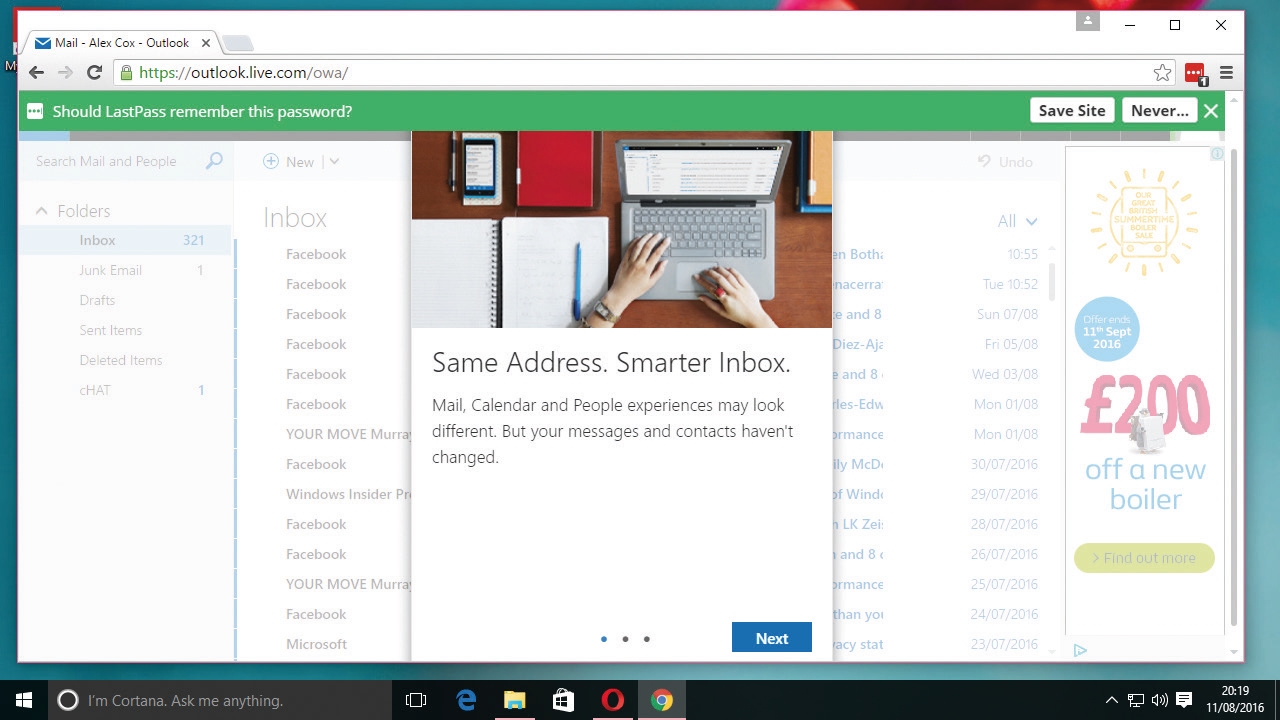
The login text-boxes will look slightly different from usual, with the LastPass logo on the right. Input your username and password as usual, and LastPass will pop up a green bar offering to remember your details.
Click 'Save Site', and confirm the details on the next page. Now log back out of the site and come back; you'll find that LastPass has filled in your details automatically.
6. Character soup
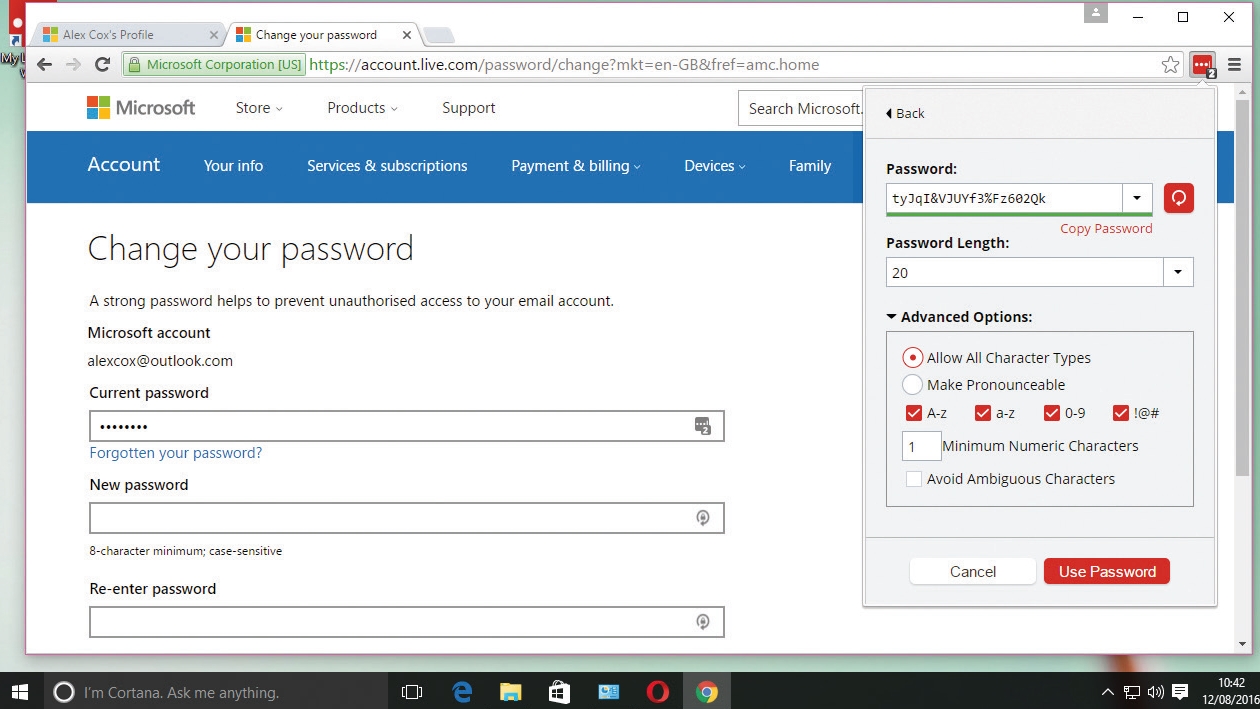
Let's now create a new, secure password. Head to your chosen site's account settings page and find the password change portion.
Fill in all the details the site asks for until it asks for your new password. Click the LastPass icon, then 'Generate Secure Password', and use the controls to create a suitably complex jumble of characters. Copy and paste it into the password box.
7. In the vault
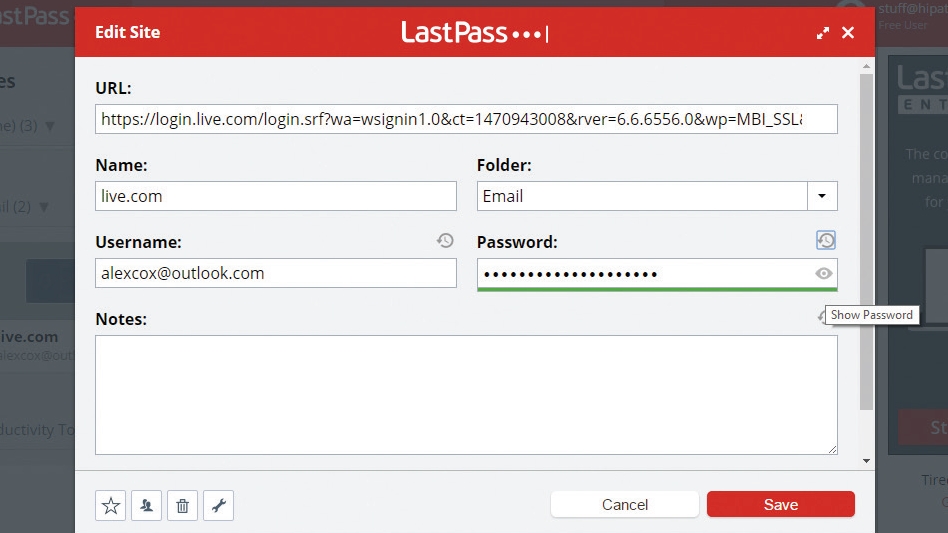
LastPass' vault is where it stores your passwords, should you ever need to use them to log in on a device that doesn't have LastPass installed. Either click the 'My Vault' option in the LastPass extension, or head to lastpass.com and log in with your details to see it.
Find the login for which you need the password, click the spanner icon, then click the eye icon to reveal all.
8. More secrets
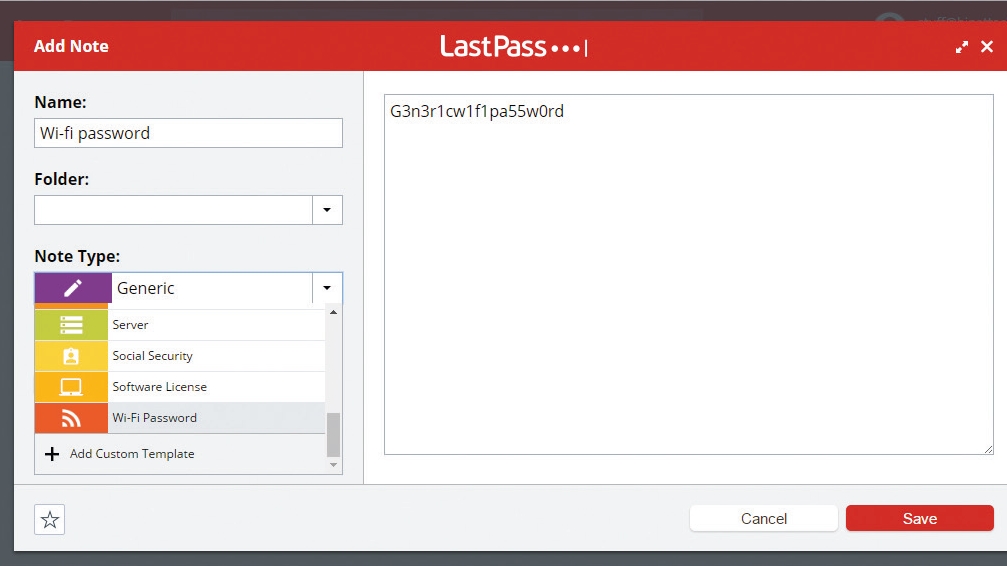
The vault isn't just a place to keep passwords. You can use its encrypted space to store anything you'd like to keep secret (but might need quick access to), such as WiFi passwords, passport info or bank details, though we'd still use caution with the latter.
Click the notepad icon, click 'Add Secure Note', and fill in the form; you can attach photos and documents if required.
- Enjoyed this article? Discover how to get the most from your PC and new things to do in Windows Help & Advice. Take advantage of an exclusive offer in our sampler today.