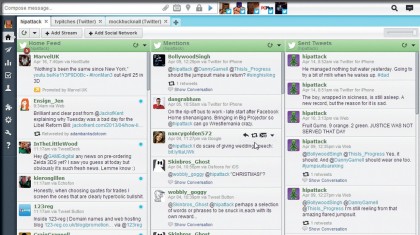
How to use HootSuite
Twitter is a great social network. The small updates and ease with which you can find people to follow makes it a brilliant way of keeping in touch with people all around the world – it's also a great marketing tool for your company.
Even so, it's easy to lose your place in what you're doing and end up confused as to who has responded to which of your posts – and it's easy to lose heart by simply spending too much time trying to keep track of everything.
This is where HootSuite comes in. Not only does it present a lot more information in a smaller space, but it also makes it much easier to communicate with people around the world – thanks to the combination of automatic translation of any tweet and the ability to set up scheduled posts.
These features, combined with better image control, make it a great way to use Twitter.

1. Create a HootSuite account
In order to use HootSuite – which is web-based, so there's nothing to download – you'll need to create an account. Go to HootSuite's website and pop your details into the box at the top-right of the site, then click 'Sign Up Now'.
Don't be scared by the talk of fees; you'll be able to use HootSuite with a free account if you don't want to pay for extra features.
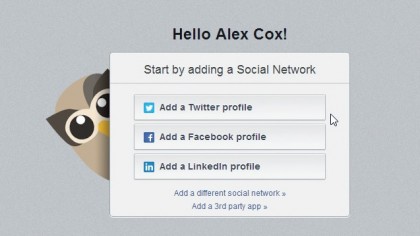
2. Get tweeting
Next, grant HootSuite access to your Twitter account on the second screen by clicking 'Add a Twitter profile'.
Click 'Connect with Twitter'; this pops up a window that covers what sort of access HootSuite has – it's all standard stuff for a Twitter app, but check that you're happy before agreeing.
Finally, enter your Twitter username and password and hit 'Authorize app'.
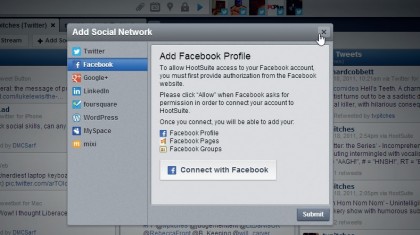
3. Getting more sociable
If you happen to have multiple social accounts, you can add these by clicking 'Add social network' at the top of the interface.
This doesn't just have to be a Twitter account – but as you don't know if it's the right app for you yet, we don't recommend this until you're more comfortable with it. You can add more profiles later, so for now, click the cross at the top-right to proceed.
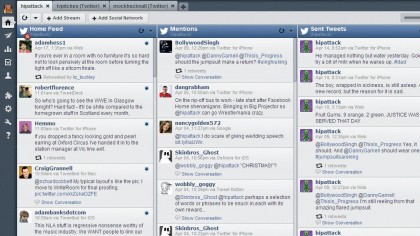
4. Column view
By default, HootSuite's first column is taken up by your main Twitter feed; the second column displays any replies and mentions; while the last one shows any sent messages you may have posted.
Scroll right and you'll find a column of your direct messages, retweeted messages, and pending tweets. Each column can also be scrolled through independently.

5. Click for more
The interface shows full tweets, but you need to click on appropriate links if you want to see an image. By default, these images open in a new browser tab away from HootSuite itself.
Just close the tab to get back to Twitter. Don't miss the 'Show conversation' link; you can see any tweet in context, with replies which may be relevant.
6. Go configure
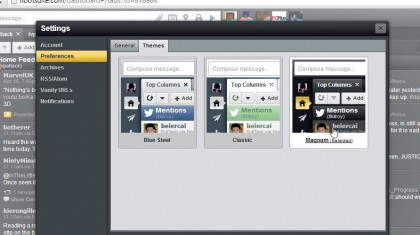
HootSuite supports various different ways of changing the appearance of the app, enabling you to customise a look that suits you.
Click the cog icon on the left and select 'Preferences'. The Themes tab enables you to select from one of three neat themes – we're quite partial to the Magnum theme, which uses a neat black/grey colour scheme to reduce eye strain.
7. Perfect timing
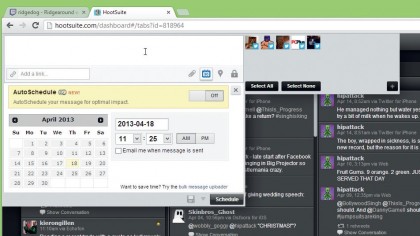
It's in the posting of tweets that HootSuite impresses, with features usually reserved for professional services. The ability to schedule tweets is great if you're tweeting for business and need to talk to your audience at a set time.
If your market is the US, for instance, you can time tweets to hit them at the best moment by clicking the calendar icon in the compose bar.
8. You're in!
There's a lot more to configure and play with in the HootSuite interface. The best way to find out what something does is to click it and explore; you're not going to break anything!
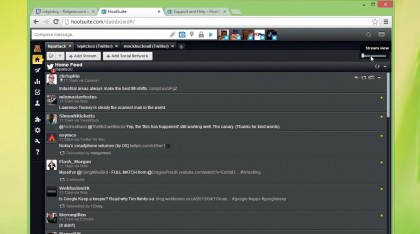
Hover over items and the HootSuite interface tells you what they do. Try dragging the slider in the top-right corner of the interface to change the size of your columns, for example.
- Find out more great Twitter tips and tricks