How to get more from your tablet with Windows 10 Anniversary Edition
Tablet mode gets even better
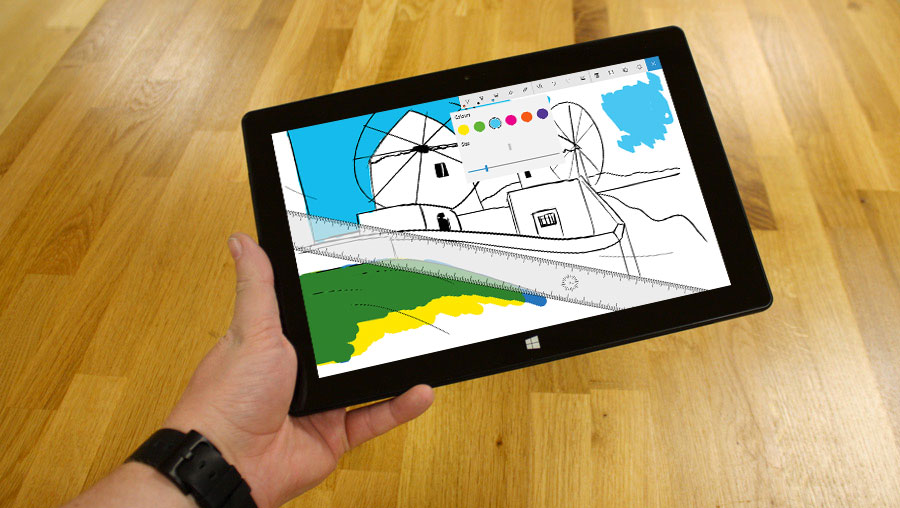
Tablet mode in Windows 10 Anniversary Edition
The Windows 10 Anniversary Edition update contains a number of new features and useful improvements, particularly if you're running Windows 10 on a tablet or laptop with a touchscreen.
Probably the most noticeable is the introduction of Windows Ink, a feature designed to encourage use of touchscreens and supported styluses. Although it's designed to work with the Surface Pen, many features will work with capacitive styluses and even your finger too, making it useful for any touch-friendly device.
In this tutorial, we'll examine how Windows Ink works, and also take a look at other improvements aimed at tablets and laptops, such as tweaking battery life settings and exploring changes to Tablet Mode.
There's even a feature to wirelessly share your tablet screen with your PC.
1. Tap into Ink
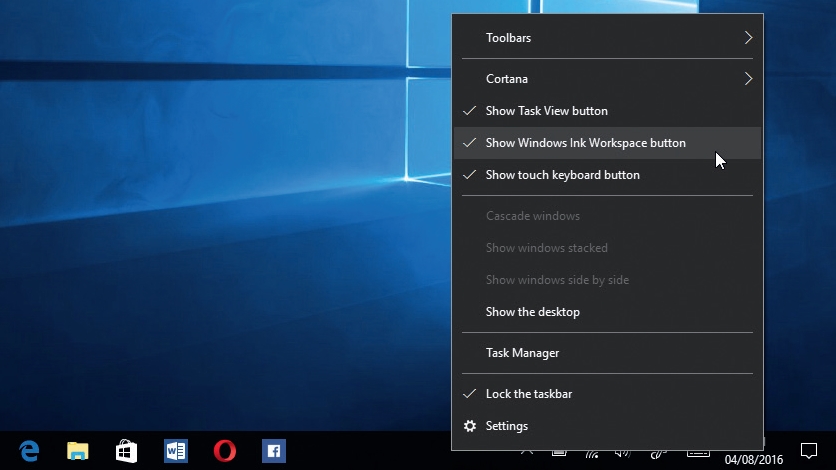
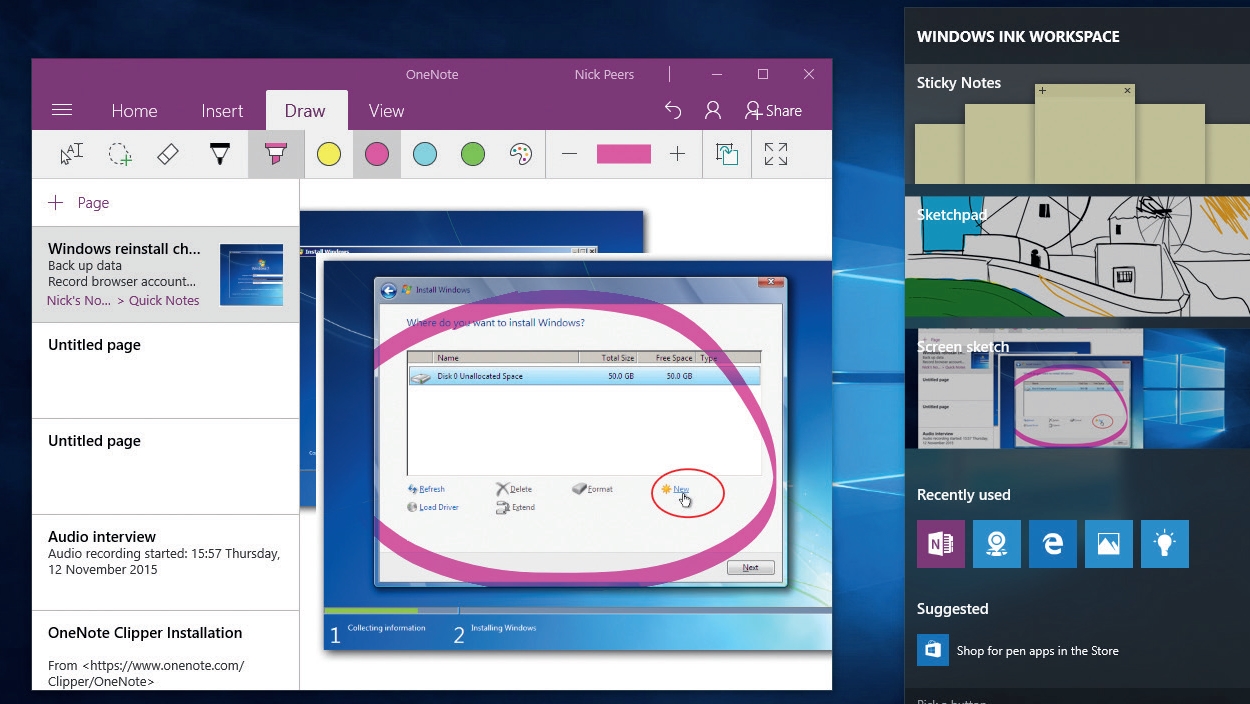
The Windows Ink Workspace is accessible through the new pen button that appears in the Taskbar Notification Area. It should be enabled by default on any touchscreen device, but if it's not visible, simply right-click the Taskbar and tick 'Show Windows Ink Workspace button', then click it.
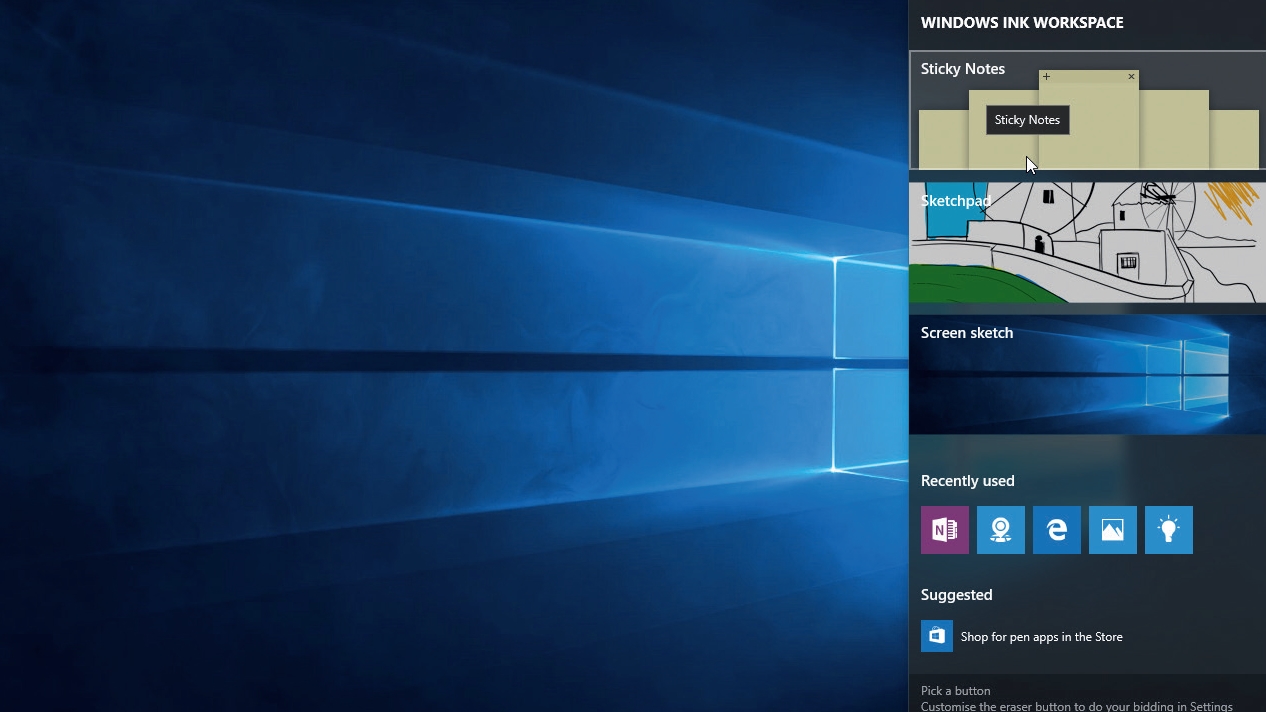
The workspace will pop up on the right of the screen. You'll see it's split into various sections.
2. New apps
At the top of the window, you'll see shortcuts to three new apps: Sticky Notes, Sketchpad and Screen sketch. Sticky Notes still requires a Bluetooth-powered stylus – Wacom is developing a universal stylus for all Windows tablets as we type.
If you have such a stylus, you can write or draw – and if your writing is neat enough, Cortana will read your notes and suggest reminders.
3. Screen sketch and Sketchpad
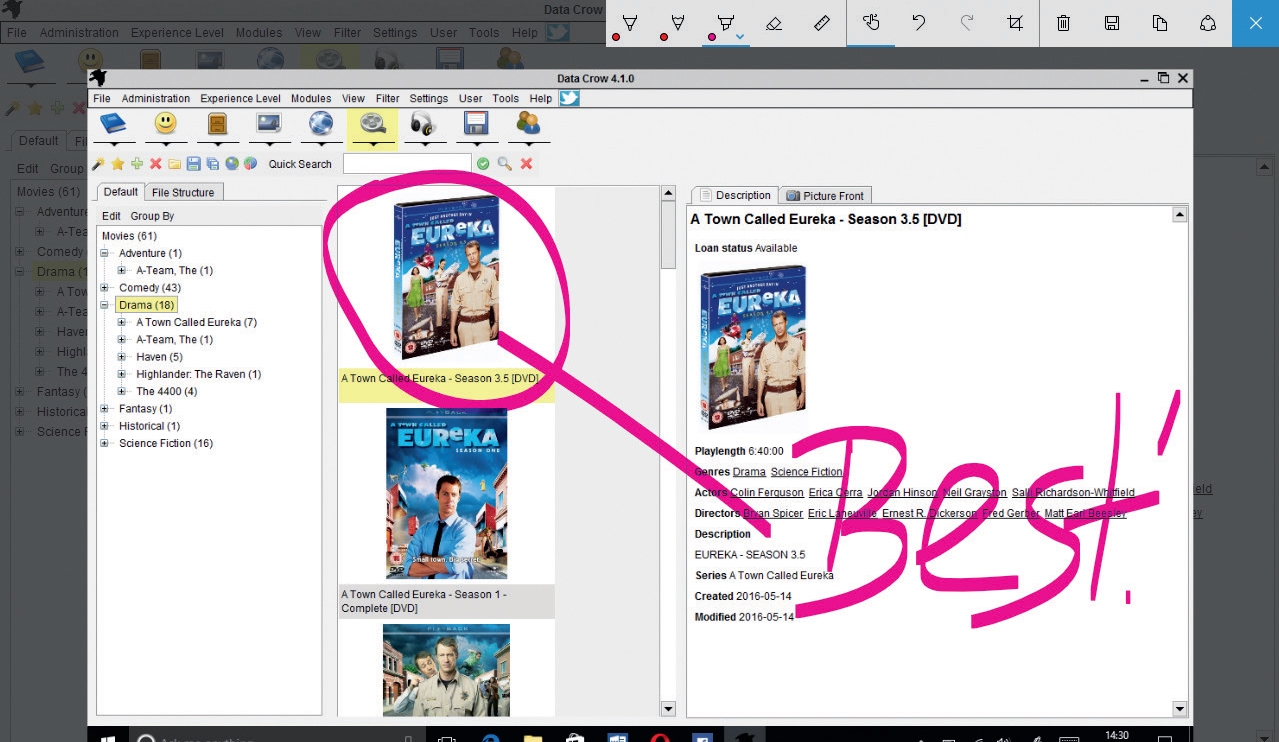
Tap 'Screen sketch' to take a screenshot of the current screen and then annotate it using your pen or finger to draw shapes or scribble handwriting.
Look for the finger button at the top of the screen – tap this to switch off handwriting if you'd rather use the mouse to draw instead. Sketchpad works in a similar way – see the annotated screengrab for details.
4. More workspace tools
A list of recently used apps that support Windows Ink appears underneath the main list – tap one to open it and then locate the relevant tools you need.
OneNote users should switch to the 'Draw' tab and select a nib to begin drawing. You'll also see a link to the Windows Store, which will take you to a list of other available apps that support Windows Ink.
5. Windows Pen settings
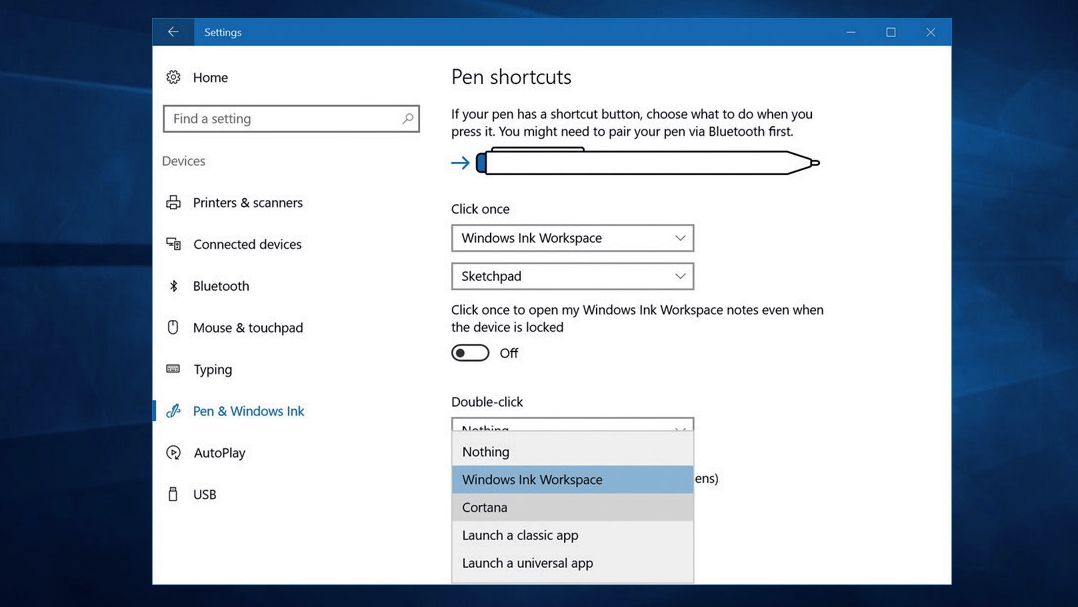
You'll also see an option marked 'Pick a button' at the bottom of the workspace – if you have a supported Bluetooth stylus, tap this to jump to 'Settings', where you can now assign specific apps or commands to the button when you click or double-click it.
Other tweaks include choosing which hand you write with and disabling touch input when the pen is in use.
6. Tablet Mode changes
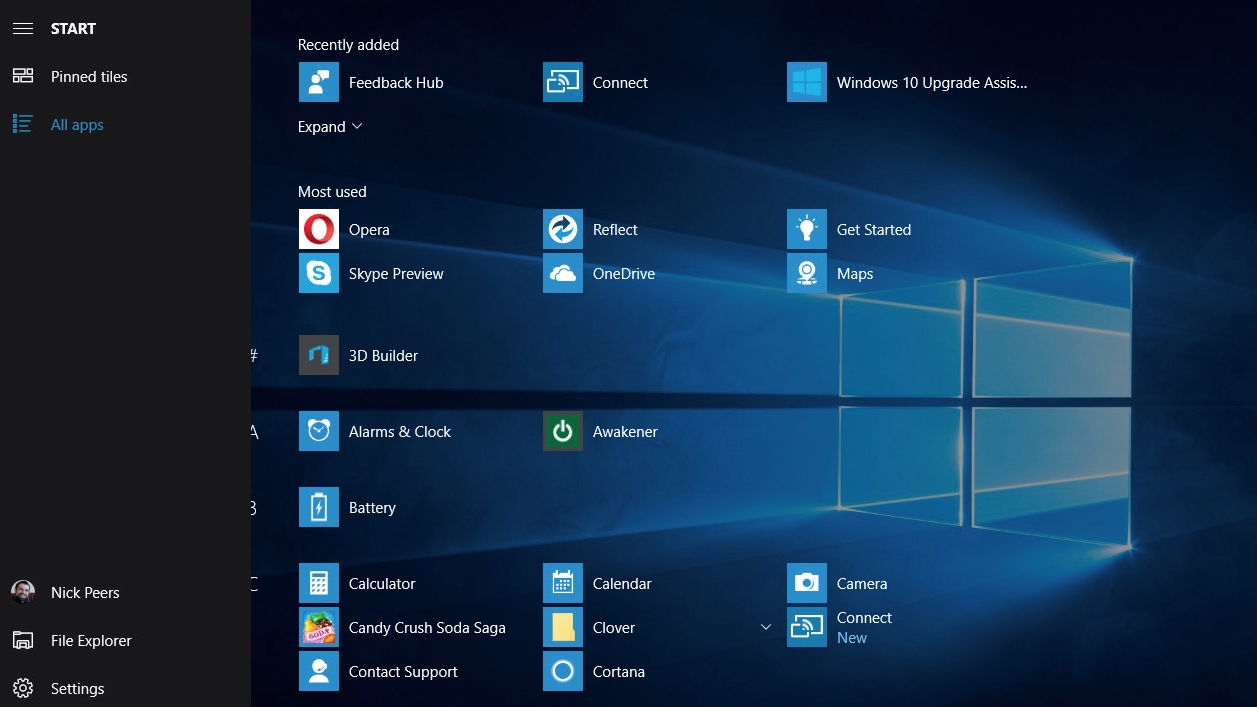
Switch to Tablet Mode and the screen looks more like the older Metro interface from Windows 8, with Pinned Tiles on top and the 'All Apps' list beneath it.
Switch views using the buttons in the top left-hand corner of the screen. Look out for handy shortcuts above and to the right of the Start button, including a back button to retrace your navigation to the previous step.
7. Hide Taskbar from view
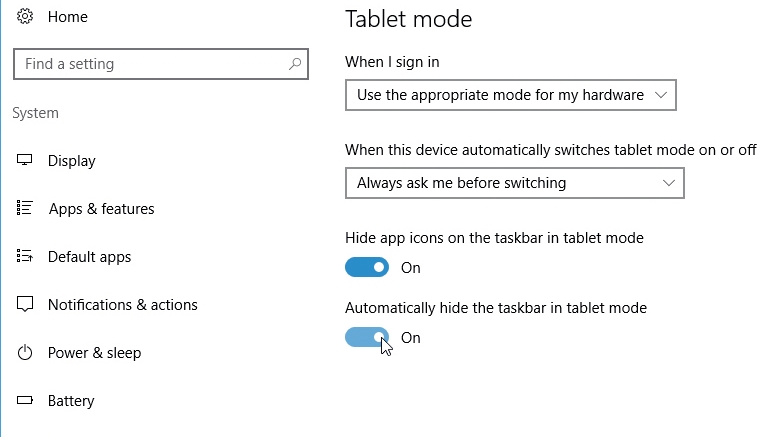
Click 'Start > Settings > System > Tablet mode' and you'll find the options have also updated. As before, there's an option to show app shortcuts on the Taskbar if you wish, but now you can also hide the Taskbar completely from view when running apps (it'll remain visible when you're at the Start screen – just press the [Win] key to open it at any time).
8. Improve battery life
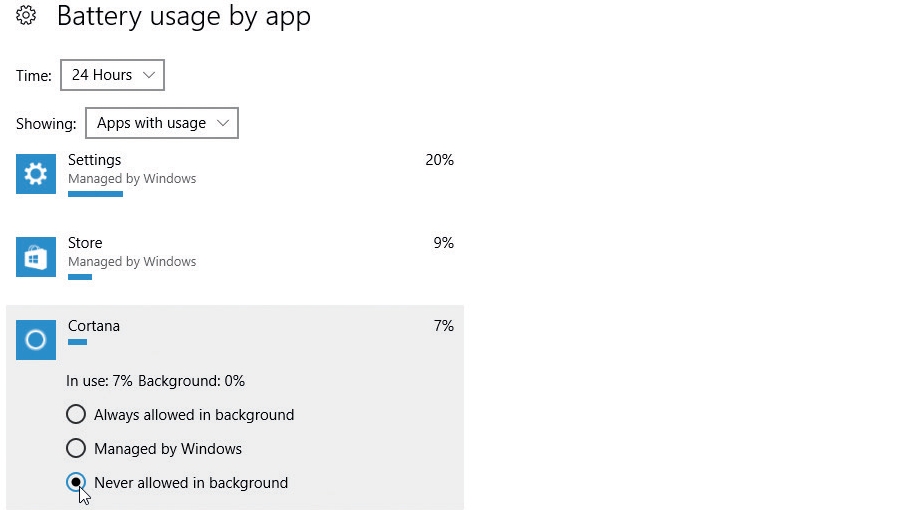
Go to 'Start > Settings > System > Battery > Battery usage by app'. You'll see that Windows is set to manage all apps automatically, but if you suspect certain programs are taking power from your battery (even when not being used), tap them on this list, verify their background usage and change the setting to 'Never allowed in background' to stop them in their tracks.
9. Project your PC
It's now easier to wirelessly project the screen from one supported device onto another, allowing you to use your PC or tablet's displays as extensions of each other.
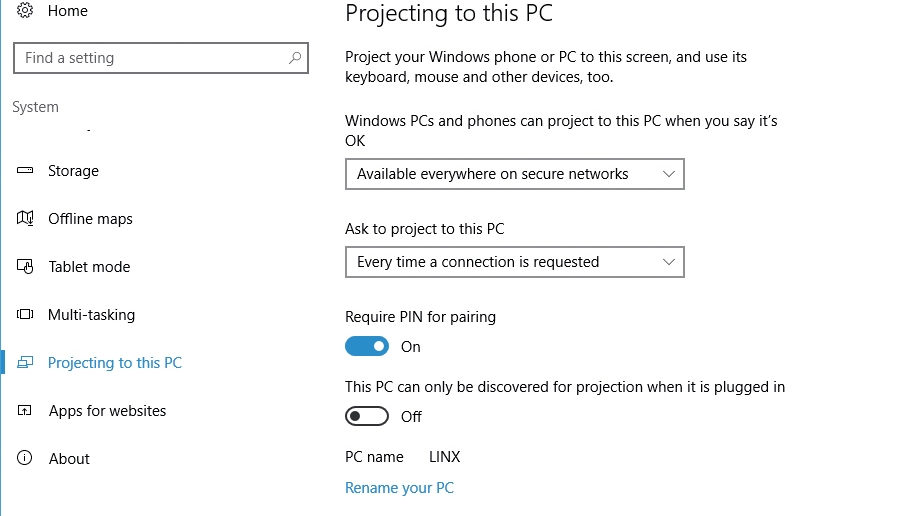
Both devices must support Miracast (your PC might not). Go to 'Systems > System > Projecting to this PC' on each device to verify compatibility, then select 'Available everywhere on secure networks'.
10. Make connection
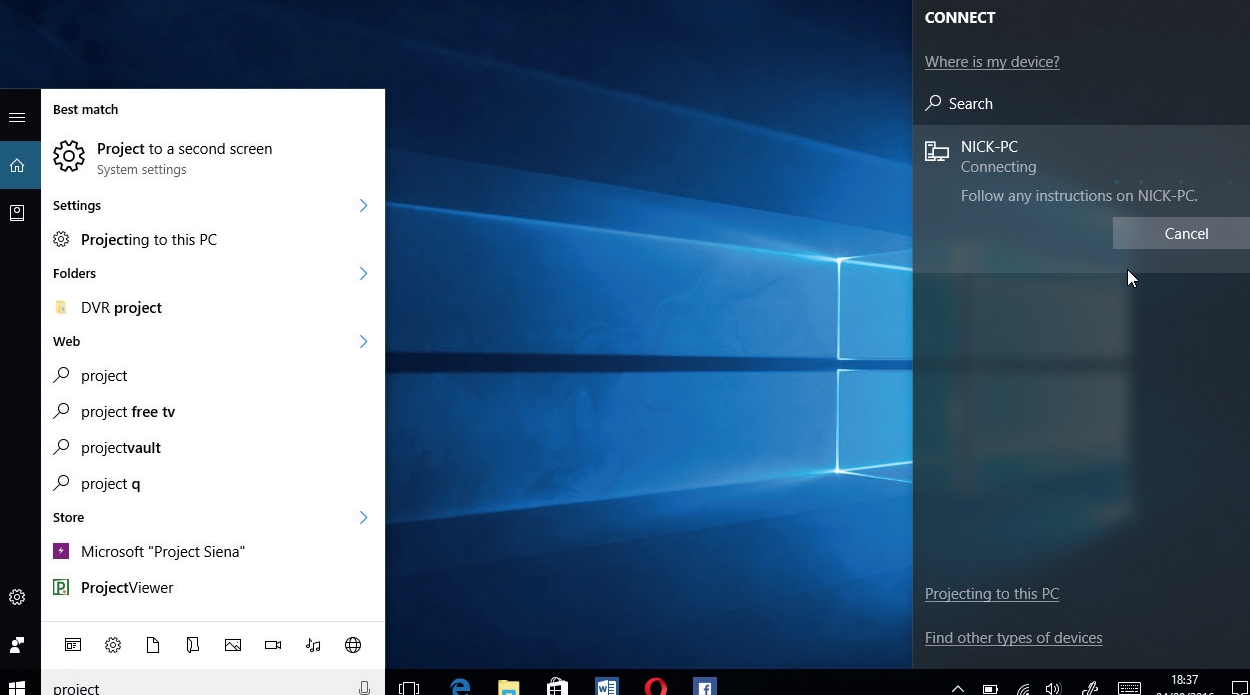
Once set up, type 'projecting' into the Search box of the device you want to extend and click 'Project to a second screen'. Select 'Connect to a wireless display', select your target PC and wait for the connection to be made.
Once done, you'll be able to use its screen as an extension of your tablet – either to duplicate its contents or to extend your tablet's desktop wirelessly.