A guide to the Clock app
The Clock app in iOS 9 is capable of doing much more than just telling you the time – after all, you can see that at the top of the screen in most places in iOS.
The app also has stopwatch and timer functions, but it's the alarm clock feature we're going to talk about. Like an old-school alarm clock, the app can wake you with a blaring klaxon, yet it also lets you wake to far more soothing sounds if you prefer to start the day with a little less of a fright.
New tones can be bought from the iTunes Store (which you can then use as sounds for other iPad features, such as FaceTime), or you can use any of the songs you've downloaded to the Music app, or synced from iTunes on your computer.
However, songs will play from their beginning; to choose a specific segment of a song, import it into GarageBand to trim and export the range you want to hear. When an alarm sounds, you can get nine extra minutes of rest by tapping the screen or using the iPad's physical volume controls to snooze it. And you can use Siri to check, set and even delete alarms.
1. World Clock
This shows the time, temperature and weather conditions at major cities of your choice. Tap one of the slots marked with a + at the top of the screen, then type into the search bar or scroll through the list to find the location you want to see on the map.
When all of the visible slots are filled, swipe leftwards on their row to bring another six into view.
2. Stopwatch
This will be indispensible if you are responsible for a sports team or are helping out a friend with their training. Tap Start to begin counting, and then tap Lap at the appropriate time to record each circuit to the log (the stopwatch will keep counting), or tap Stop when you're finished.
Sadly, the Clock app provides no way to export your lap times; you can take a screenshot by holding the Home button and quickly pressing the sleep/wake button.
The screen will flash to confirm, and the screenshot will be added to the Photos app. However, if you're doing serious training, you should investigate the Health & Fitness category in the App Store.
3. Timer
Dial in how long you want the app to count down, in hours and minutes, and tell it what sound you want it to play at the end. Like the Alarm feature, you can ask Siri to set a timer; the "Hey Siri" shortcut (Settings > General > Siri) is particularly useful if your hands are busy in the kitchen.
4. Alarm
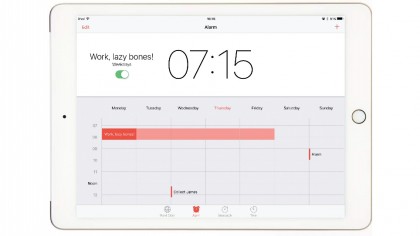
Tap this to see your alarms on a week-long view, similar to how events can be shown in the Calendar app. Each alarm shows its label, but if several occur in a short space of time, you'll only see the label of the latest one in that group; the earlier alarms around that time will be reduced to tall, thin bars.
You can't just tap on the view to set an alarm, but you can tap and drag existing alarms up or down to adjust their time – they'll snap to zero, 15, 30 or 45 minutes past the hour, unless you first drag your finger left or right off the alarm – after which dragging vertically moves the alarm in five-minute intervals.
1. Set an alarm
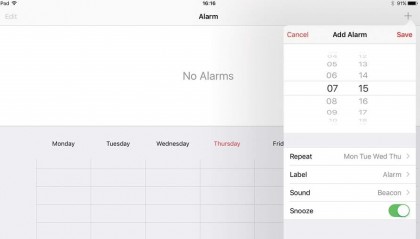
Tap Alarm at the bottom of the screen, and then the + at the top-right corner. This opens a form in which you set up your alarm: its time, how often it repeats, a label ('Alarm' by default, though customisable), which sound or song will be played, and whether the snooze option is even available.
Dial in a time, then tap Repeat to choose the days of the week on which the alarm will be active. When you have at least one alarm turned on, a tiny alarm clock icon near the right of the status bar will remind you.
2. Snooze options
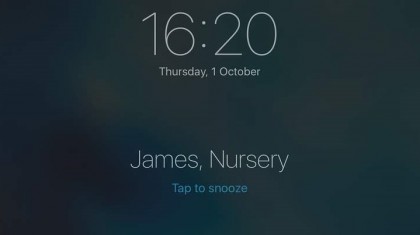
The Snooze switch is turned on by default for new alarms. If you leave it on, you'll be able to mute an alarm by tapping a small piece of text on the iPad's Lock screen, or by pressing one of the volume controls.
The alarm will trigger again nine minutes later. With Snooze disabled, you'll need to swipe on the screen to dismiss the alarm. You can work around the inability to customise the snooze duration by setting a second alarm to give yourself the extra amount of time in bed that suits you.
3. Switch off alarms
Tap Save and your alarm will appear on the week-long view; although setting labels is optional, it's a good idea to change them if you have many alarms, to help you remember their purpose.
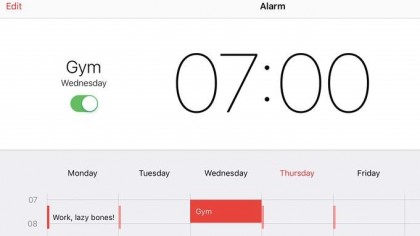
Tap an alarm (it'll be highlighted in red) and you'll see its exact time at the top of the screen. Note the adjacent switch, which sets whether the selected alarm is active; you can use it to, say, temporarily turn off your morning alarm when you're on holiday – but remember to come back and turn it on later.
4. Review alarms in a list
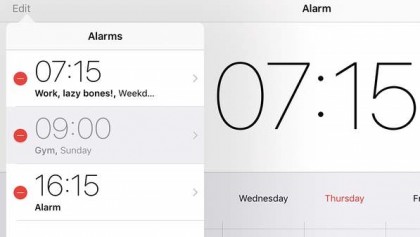
Tap Edit at the top-left to see all of your alarms in a list, ordered chronologically by time of day, but not necessarily by day of the week (because some might occur on multiple days).
Active alarms have a white background, inactive ones are grey. Tapping an inactive alarm and then Save turns it on. You can tweak any of the settings you chose in step 1 here. Also note that when creating or editing an alarm, you can set it to a precise minute, not just the five- or 15-minute intervals available on the week view.
5. Mute/Do Not Disturb
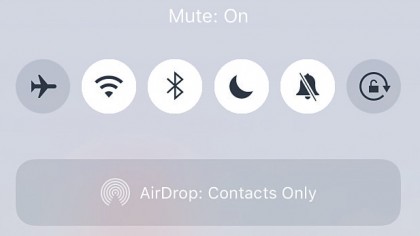
The Mute switch in Control Centre (on iPad Air 2/iPad mini 4; it's a physical switch on iPads that are older) silences the sounds from notifications, alerts and effects such as the keyboard clicking, but it doesn't silence purposeful sound, such as music, videos and, of course, your alarms.
Likewise, alarms are an exception to the range of sounds that are silenced when you turn on Do Not Disturb in Control Centre, so you can safely shut out intrusions with the assurance you'll be woken.
6. Control alarms with Siri
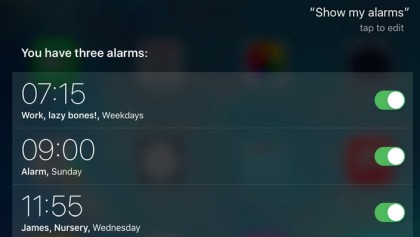
You can ask Siri to set alarms with phrases like "Set an alarm for 7" and "Wake me tomorrow at 8". Ask it to show your alarms and it will display all of them (or a summary, if there are many), or you can ask for those in morning, afternoon or evening.
It can change your alarms, too ("Change my 8am alarm to 7"). If you have few alarms and don't mind recreating them after a holiday, say "Delete all alarms". Remember, you can say "Hey Siri" to instruct your iPad as long as it is connected to an external power source.
- Enjoyed this article? Get more tutorials, guides, and tips on how to get the most from your Apple devices inside MacFormat. Take advantage of an exclusive offer in our sampler today.