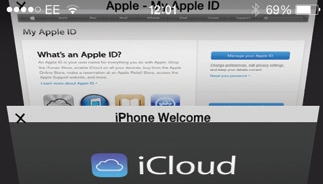
Apple ID explained
Whether you're using just an iPhone, other iOS devices, a Mac or all of these, your Apple ID is your key to the range of online services from Apple and much more.
Whether you want to sign up to services such as iCloud, buy some kit from the online Apple Store, find more apps for your iPhone or Mac, or simply download some music and movies from iTunes, you'll need to have an Apple ID.
At its simplest level, an Apple ID is your unique user name in the Apple world, identifying who you are so that you don't need to keep re-entering details such as your email, your physical address and a payment method every time you want to download something.
Your Apple ID is also your key to all kinds of features, including the ability to sync your Calendar events, Contacts and Safari bookmarks across multiple devices and computers. Once you sign up for Apple's free iCloud service, all the apps, music and books you've bought on one device are automatically available to download for free on other devices linked to the same Apple ID.
Your Apple ID is also vital for iOS features such as Photo Sharing, which enables you to share any pictures you take on your iPhone with your other devices and with other people. Plus, it's your gateway to joining the world of competitive gaming available via Game Center – your Apple ID serves as your Game Center account so you can find games that your friends are playing, challenge them online and post your achievements for others to admire.
If you use a Mac or another iOS device as well as an iPhone, then you can take advantage of the 'unified ID' in iOS 6 and newer, which means that messages sent to your iPhone number are also viewable on any device or computer linked to the same Apple ID.
If you bought your iPhone, iPad or Mac (or anything else) from the online Apple Store, or you've ever downloaded anything from iTunes or the App Store, then you'll already have an Apple ID. If not, you can create one as part of the process of setting up an iOS device or Mac, or you can visit the Apple ID website and click the Create an Apple ID button on the homepage.
If you're not sure whether you already have an Apple ID or you've forgotten your password, the same site will be able to help you out.
Note that the one thing you can't do on this site is add or alter any payment details. For this, you need to sign in to the iTunes Store or App Store on your Mac or iOS device.
Managing your Apple ID
It's possible to use one ID for your Store purchases and a different ID for iCloud – in fact, whenever you create an account for an Apple service, such as iCloud or the App Store, you're creating an Apple ID.
However, sticking to one ID makes life much simpler – it means your song purchases will be available on any device via iTunes in the Cloud, for a start. That said, creating a separate Apple ID can be ideal if you're giving your iPad to your children to use, for example, and want them to be able to install free apps but not paid-for ones: you can set up a new Apple ID for them with no payment card associated with it.
Be aware, though, that this does not work the same way as having multiple user accounts on your Mac or PC and switching between them – in particular, note that once you sign in to an iTunes Store account, you can't switch the Store to another Apple ID on the same computer or device for 90 days – but it does mean you can rest assured that your kids won't be able to run up a huge bill on the iTunes Store or by using In-App Purchases.
You can change your password or personal information whenever you like. It's also possible to change your main Apple ID at any time: you just need to sign out of all services that use your current Apple ID, and make sure you specify a valid email address for your new ID – you'll be sent a verification email, which you'll need to access in order to complete the process.
The only catch is that you can't use an iCloud email address (@icloud.com, @me.com,or @mac.com), because this is already an Apple ID itself.
The other thing you can't do is merge multiple Apple IDs into one, which can be a pain if, say, you bought something on iTunes using an older ID. You'll need to keep using the old ID to access music, movies, apps or other items that were purchased using that Apple ID.
If your old Apple ID is linked to an email address you no longer use, you can change it to one you do use (unless it's an iCloud email address, in which case you need to add your valid email address as an additional email address).
Got a query or want to know more? A good place to start is Apple's support website.
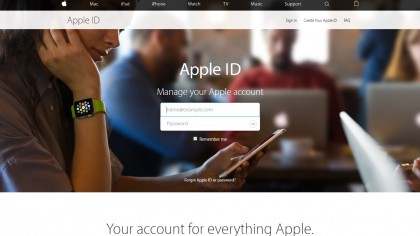
1. Creating an Apple ID
You can set up an Apple ID when you set up your iOS device or Mac, when you want to buy something from iTunes or download from the App Store, or by using a browser and going direct to the Apple ID website.
Click 'Create an Apple ID' and fill in the details, making sure to include a valid email address, then click Create Apple ID. Next check that email account for a message from Apple, click Verify Now and follow the instructions to finish setting up.
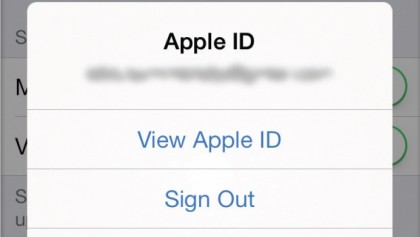
2. Settings and options
Forgotten your password, or want to change any details? On your iPhone or iPad, you can tap Settings > iTunes & App Store, tap your Apple ID at the top of the next screen, then tap the appropriate option – to change details, tap View Apple ID and enter the password.
If you've forgotten it or have never signed in, you can tap iForgot, use a browser to visit the site in step 1 or the splendidly-named iforgot.apple.com and follow the steps to reset your password.
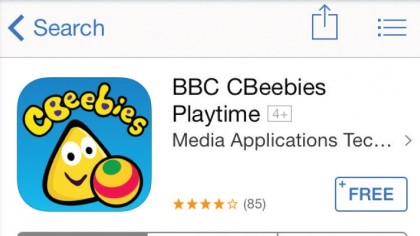
3. Additional Apple IDs
If you have older kids (aged 13 or older) and want to let them download free content on their own but not paid content, you can set up an additional Apple ID with no payment card attached.
You can do this in advance on the site in step 1 or in the next step. On their device, go to the App Store. If you're signed in as yourself, first scroll down, tap your Apple ID and tap Sign Out.
Now pick a free app – any will do, provided it's not already installed. Tap Get, then Install.
4. Sign in or create new
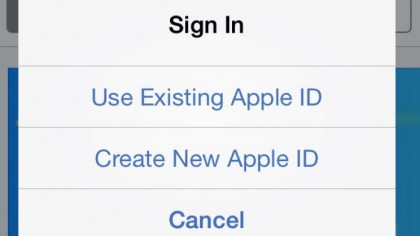
You'll now be asked to sign in. If you've already created the additional Apple ID, tap Use Existing Apple ID and enter the name of the kids' account. If not, tap Create New Apple ID and go through the steps to set one up now.
Tap Review, then Next, agree to the Ts&Cs and enter your payment card details. (Don't worry – this is just temporary! We'll remove this information in the next step.) After the app has downloaded, tap the back arrow at top left.
5. Unlink payment card
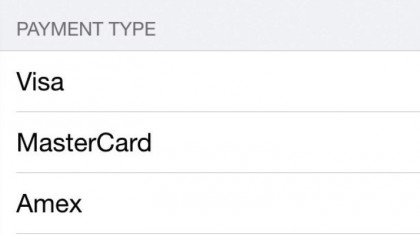
On the App Store's main Featured page, scroll down to the bottom and tap Apple ID > View Apple ID. Verify this is the kids' account and not yours, then sign in, tap Payment Information and under 'Payment Type' select None.
Now tap Done, then Done again on the next screen. Now when your children access the iTunes Store, App Store or iBook Store with this account they'll be able to download free apps or media but will have to enter the card details for paid-for items.
6. Gift or allowance
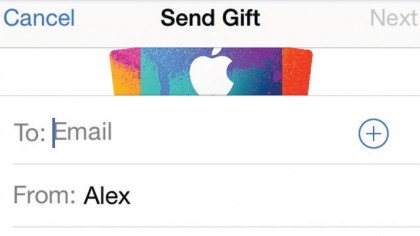
If you want them to have a paid-for app, you can enter the card details for them – or safer still, gift the app from another Apple ID. Sign in to the Store with your own ID (ideally on another device – remember you can't swap for 90 days), find the app, tap the Share button, then tap Gift and enter the email address of the kids' account.
To set up an allowance, scroll down the main Featured page in the Store, tap Send Gift, enter their account's email address and pick a value.
- Enjoyed this article? Get more tutorials, guides, and tips on how to get the most from your Apple devices inside MacFormat. Take advantage of an exclusive offer in our sampler today.