How to install a launcher to transform the look of Android
Make Android your own
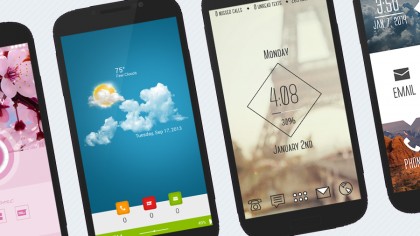
Understanding Android launchers
When you hit the Home button on an Android device, the launcher app kicks into action: on stock Android, it's the Google Now launcher that appears by default (with Google Now one swipe away from the home screen). Meanwhile HTC, Samsung and the rest all have their own takes on launchers that come pre-installed.
Android being the (relatively) open platform it is, you can install a third-party alternative too, a process that's been made much easier with official launcher support in recent versions of Android. They change the appearance of home screens, widgets, icons, app drawers and more besides, and in this guide we'll show you how you can install a new Android launcher to change the look of - and add features to - your Android smartphone or tablet.
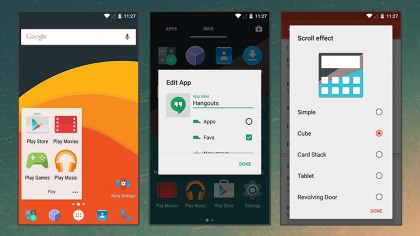
1. Choose your launcher: Nova Launcher
Installing a launcher is actually very easy, and you'll probably have more trouble choosing one from the Google Play Store. Nova Launcher is one of the most popular (there's also a premium version) - it looks similar to stock Android on the surface, but it comes with a whole host of customisation options, from scroll effects to icon labels.
If you cough up for the paid upgrade, you can get unread badge counts on your icons (just like iOS), for example, while the launcher also lets you hide apps you never use. There's support for different gesture customisations too and a scrollable dock bar.
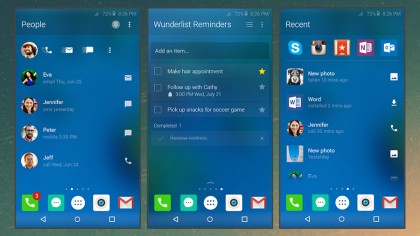
2. Choose your launcher: Arrow Launcher
Microsoft has an Android launcher of its own called Arrow Launcher. Tech company rivalries aside, Arrow is fast and fresh-looking, and is particularly good at getting your favourite apps organised so you can get to them easily.
The recent apps list is handy and there's a neat contacts customisation tool that makes it more straightforward to get in touch with your nearest and dearest. Wunderlist support is baked right into the launcher, so the well-known to do list app feels like a native Android feature. There's an iOS-style Control Centre swipe-up panel here too.
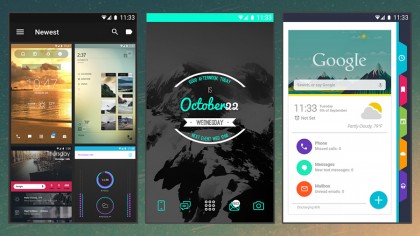
3. Choose your launcher: Themer
If you really want to transform the Android interface, choose Themer. There are stacks of gorgeous-looking themes to pick from, and the reskinning jobs they do are so good that it's sometimes hard to believe you're still using Google's OS on your phone.
The themes that come with this Android launcher feature wallpapers, new app icons (for email, dialler, messaging and so on) and revamped widgets, and any of the themes can be used as-is or customised further. Go and have a look at the app's website for a taste of some of the free themes on offer, or you can even create your own from scratch.
4. Choose your launcher: Go Launcher
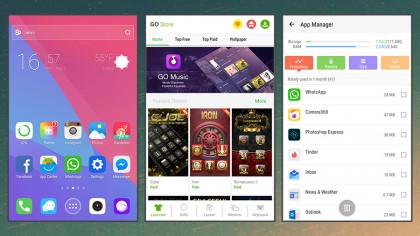
Go Launcher is bright, flexible and packed with features - you can, for example, add customised scroll effects, change the layout and order of the icons in the app drawer, adjust the behaviour of the dock on the home screen and much more besides.
You get a few extra utilities as well: an app manager for monitoring app performance, a system boost utility and a Google Now-style panel that links to frequently used apps, news headlines and other resources. As soon as you install the launcher you'll see a couple of slick new widgets on your home screen too.
5. Buzz Launcher
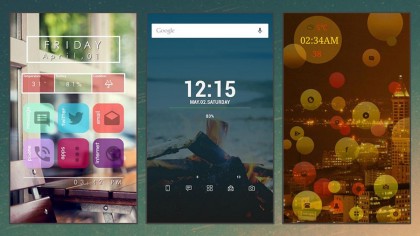
Buzz Launcher works along similar lines to Themer, allowing you to make wholesale changes to the look and feel of Android by installing theme packs that cover wallpapers, icons and widgets - you can browse through some of what's available online, and there are tens of thousands to choose from.
On top of the themes you can switch between, the app lets you quickly access your most-used apps and some key system settings (such as Wi-Fi and mute), rearrange your home screens and the app drawer, and much more. A memory cleaner utility is bundled with the launcher as well.
6. Install your chosen launcher
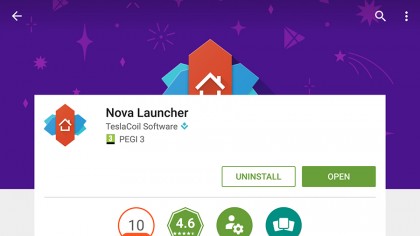
You might think we've spent a long time waffling on about launchers but the actual installation process is very simple (thanks Google): install your chosen launcher from the Google Play store then opt to open it up (you can install several at once if you want to).
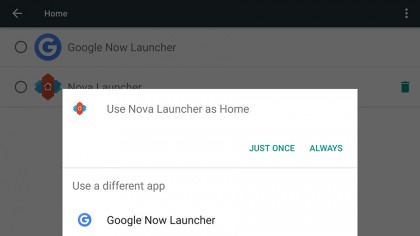
Your chosen launcher should appear on screen, probably rearranging your widgets and icons along the way, and the next time you press the Home button you'll be asked which launcher you want to use - make sure you choose 'Always' to make the new app your default launcher from now on.
7. Switch between launchers
Once you install an additional launcher, Android adds a new 'Home' entry to the Settings app (under the 'Device' heading on stock Android) - tap on this to see all the launchers you've currently got on your device, remove any you no longer need, and switch between them as you like.
You'll notice each launcher remembers your icon and widget layouts, so you can jump straight back to the Google Now launcher (or completely uninstall the alternative launchers) and carry on as if nothing ever changed. Trying out some new looks for your device is completely hassle-free.
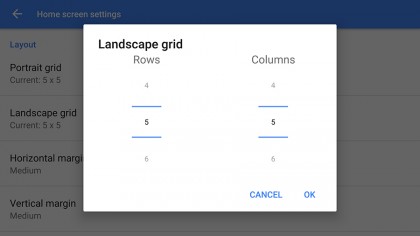
8. Configure your chosen launcher
Every launcher comes with a stack of customisation options for you to play around with (those shown above are some of the ones for Apex Launcher). Typically, you're going to be able to modify app icon sizes and spacing, folder behaviour, app drawer settings, and so on and so on - actually, the number of available settings can be quite daunting at first.
Every launcher works slightly differently but you should be able to find the settings page without too much difficulty. In the case of the aforementioned Themer, for example, use a long press on a blank part of the home screen to choose a new theme.

Dave is a freelance tech journalist who has been writing about gadgets, apps and the web for more than two decades. Based out of Stockport, England, on TechRadar you'll find him covering news, features and reviews, particularly for phones, tablets and wearables. Working to ensure our breaking news coverage is the best in the business over weekends, David also has bylines at Gizmodo, T3, PopSci and a few other places besides, as well as being many years editing the likes of PC Explorer and The Hardware Handbook.