iOS 9: 74 tips and tricks
Get the most out of Apple's new mobile OS
Get to know your iOS 9 tweaks
Downloading a new iOS release can be just as exciting as peeling the plastic screen cover off a shiny new iPhone 6S or 6S Plus, breathing new life into old devices and offering at least one or two must-have apps and features.
iOS 9 slows things down a bit, but there's plenty of new features, which is why we've created this iOS 9 tips and tricks guide. While there are lots of new things to try out (particularly for iPad users), many of its changes are of an intuitive nature. iOS 9 is a so-called maintenance release, focusing on improving the foundation and making it smarter rather than rebuilding and adding to it.
- Fancy trying out the latest version of iOS? Check out our guide on how to download iOS 10 beta right now
There are far more noticeable little changes in iOS 9 than big ones - like, for example, using watchOS's San Francisco as the main system font - and while it doesn't smack you in the face with its newness like iOS 7 did, there's still a lot to absorb. In some ways, version 9 feels like something of a culmination of what Apple started with iOS 8, smoothing many of the rough edges and bringing a greater sense of coherence and navigation. In a former time, it might have been called iOS 8.5.
If you want to see how much has changed between iOS 9 and the upcoming release of iOS 10, then check out iOS 10 vs iOS 9: the big changes.
But even though you won't find very many revolutionary changes with iOS 9, the usability and accessibility tweaks throughout iOS 9 make it feel like a complete, polished operating system rather than a work in progress. And as always, if you've missed anything, we've got you covered with 74 tips and tricks.
- Also check out our collection of how to use iOS 9 guides
1. How to set up your new iPhone
If you've got a brand new iPhone 6S, iPhone 6S Plus or iPhone SE then you'll have iOS 9 already installed straight out of the box.
So to make sure your experience with your new iPhone and iOS 9 goes as smoothly as possible, it's worth making sure you set up the device correctly before you delve into the rest of our iOS 9 tips and tricks, so check out our video below showing you how it's done.
2. Change emoji skin tones
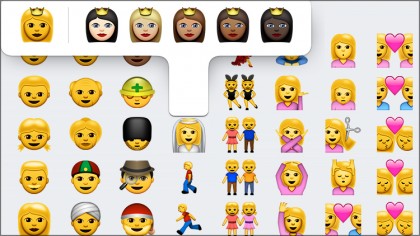
You probably noticed that, a couple of minor iOS updates ago, Apple added a ton of new emoji to its already sizable collection. But did you know that many of these come in various skin tones? Try touching and holding on many of the hands or faces; sometimes a window will pop up with various skin-tone options, letting you further personalize your picture prose.
3. Send massive files with Mail Drop
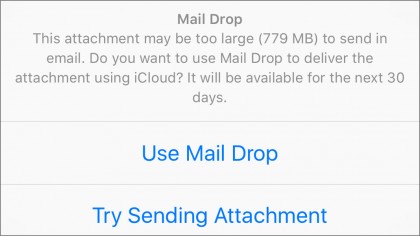
With iOS 9.2, the Mail Drop feature from OS X finally came to mobile, letting you send files as big as 5GB through iCloud. When you try to attach an especially large file to an email — say, a long video — a pop-up window will ask if you'd like to send it via the cloud using Mail Drop. Handy!

4. Download songs for offline listening
With iOS 9.2, you can download songs and albums from Apple Music to avoid streaming them and using up data. To do this, first play a song, then tap the title at the bottom of the screen to pull up its card (that screen with album art and play controls).
Next, tap on the three dots in the lower-right corner. On the window that pops up, tap the plus icon — this will add the song to your My Music section. Now just go to My Music, tap on the song, and touch the iCloud icon to download it.

5. iBooks 3D Touch shortcuts
iPhone 6S or 6S Plus owners can use several 3D Touch shortcuts in iBooks. First, you can press down on the app icon for instant access to recently read books, or to search the iBooks Store. You can also use 3D Touch to peek and pop into pages listed on the table of contents, your bookmarks, or your notes.

6. Quickly create a new playlist
While listening to a song in the Music app, tap the three dots in the lower-right corner of the play screen (the screen with the song's art and play controls). In the window that pops up, choose "Add to a Playlist." Now you not only have the option to add the song to an existing playlist, but to create a brand-new one, too.

7. Download songs from Apple Music
To save your mobile data when listening to music through Apple Music in iOS 9, you can download songs and albums.
To do this, play a song and then tap the title of the song at the bottom of the screen. A menu will appear (which contains album art and playback controls), and there will be three dots at the lower-right corner. Tap them, then tap the plus icon. This adds the song to your My Music section.
Go to that section, then tap on the song and touch the iCloud icon to download it.
8. Enter proactive assistant
Back when iOS 7 launched, Apple changed the position of the search bar from its original spot at the left of the first home screen to the top of anywhere you are (accessible by pulling down on the screen).
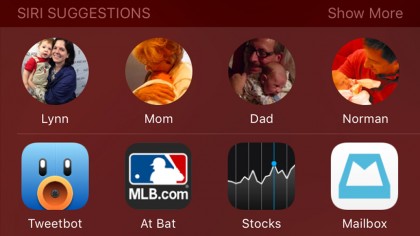
In iOS 9, Apple has rebooted the leftmost search in a big way. Now, when you swipe right on your first home screen you'll enter the Siri-powered proactive assistant, which offers a series of app, contact, location and news suggestions based on how you use your phone each day.
For example, if you check your email first thing in the morning, it'll offer a shortcut to your favorite email client, and when you go to make your nightly phone call to your mom, her contact info will be front and center.
9. Silence Siri in iOS 9
Siri can be useful, but it can also be a bit of a pain if you're out and about and Siri is happily jabbering away in your pocket.
In iOS 9 Apple has made it easier to silence Siri quickly and easily.
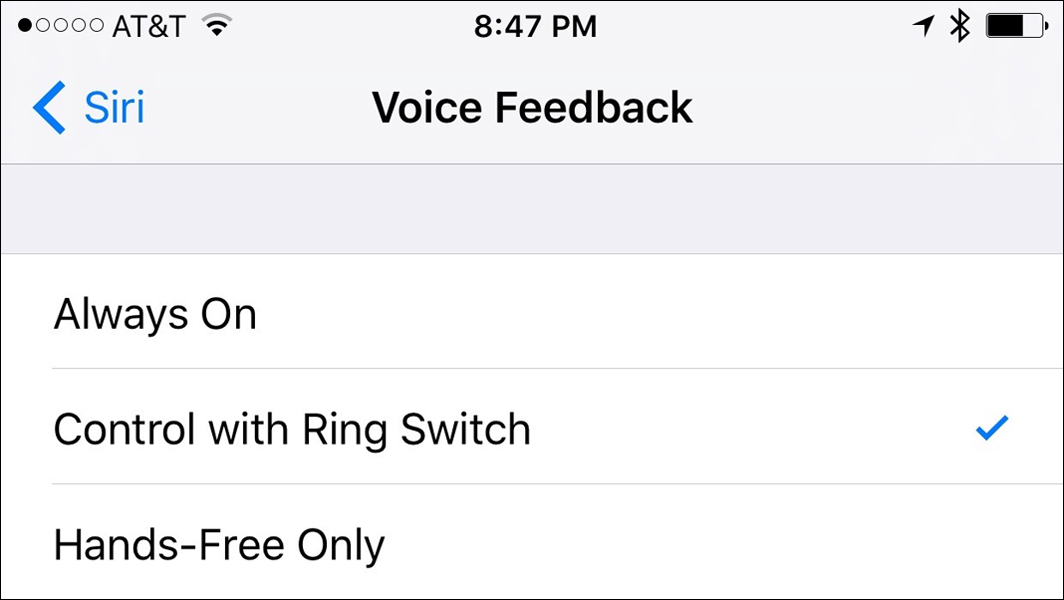
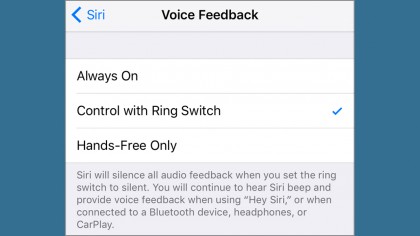
You can use the Silent switch on your iPhone to control when Siri talks. To do this open up Settings, select General > Siri > Voice Feedback, then "Control with Ring Switch."
You can now silence Siri by switching the Silent switch on the side of your device to silence. To turn Siri back on, turn the switch back to normal.
For more tips on silencing Siri, check out our how to shut up Siri in iOS 9 guide.
10. Turn off proactive assistant
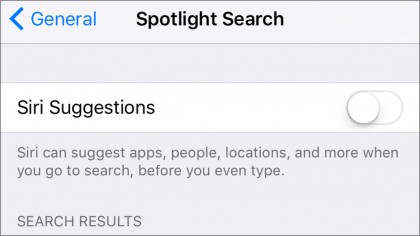
It might be one of iOS 9's premier features, but if you don't find proactive assistant useful, you can disable it by going to the Spotlight Search settings (in Settings > General) and flipping the Siri Suggestions toggle.
You'll still be able to search by swiping right at the first home screen, but all of the app, contact and news suggestions will be gone, as will the app suggestions that appear below the usual pull-down search.
11. Un-animate the keyboard
iOS users have struggled with the shift and caps-lock key since Apple changed its behavior in iOS 7.1, but iOS 9 should settle it once and for all. Now, when you tap the shift key, the keys will animate their case so you can plainly see the type of character you're going to type.
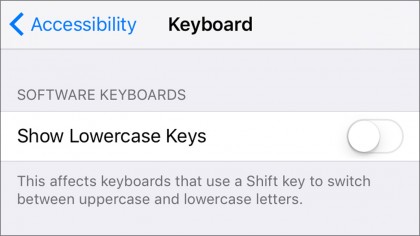
But if the case-changing letters are too distracting, you can shut it off by heading to Settings > Accessibility > Keyboard and flipping the Show Lowercase Keys toggle from green to white.
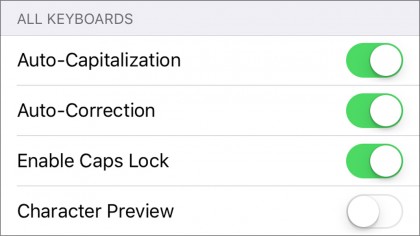
12. Turn off character pop-ups while you type
Speaking of the keyboard, Apple has always featured a useful bit of animated feedback via pop-ups when you tap one of the keys. But if you've always hated it, you can finally turn it off. Just take a trip to Settings > General > Keyboard and toggle off the Character Preview.

13. Draw, make lists and format text in Notes
Apple has beefed up its Notes app in a big way in iOS 9. With last year's update, it was nice that Apple finally added rich-text support for using bold, italicized or underlined text, but now Notes might actually be an app we use to, well, take notes.
Inside every file you'll see a gray plus sign just above the keyboard that opens a new menu of options; tap it and you'll be able to easily create a list, add a photo, change the formatting and even sketch a quick doodle. And when you're done you can even organize your notes into folders.
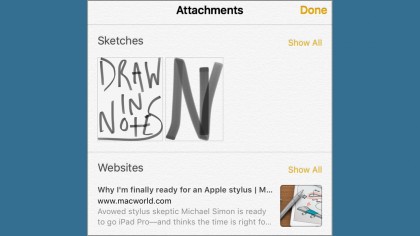
14. Save an attachment to a note
iOS 8 changed the way the apps we use share data and interact with each other, and now Notes is getting in on it, too. Whether you're looking at a photo, reading an article or working on a document in another app, you can quickly save it to any of your notes (or create a new one).
And if you lose track of what you've clipped, you can see an overview of every link and snap in the new Attachments Browser by tapping the grid icon in the lower-left corner.

15. Get public transit directions in Maps
Maps has made great strides since its melted Brooklyn Bridge days, and if you live in or frequent Baltimore, Beijing, Berlin, Chicago, London, Mexico City, New York City, Philadelphia, San Francisco, Shanghai, Shenzhen, Toronto or Washington it's about to get even better. With iOS 9, those cities include full transit information built right into Maps, including routes, directions, transfers and times. It'll take some time before it stretches across the world (or even the US), but it's a great start.
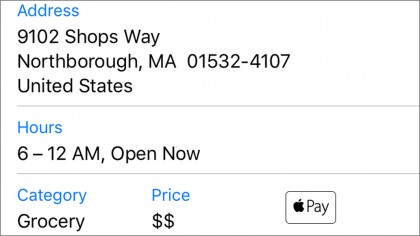
16. Find nearby Apple Pay locations in Maps
When you go to search for a location in Maps, you'll notice a new series of buttons offering shortcuts to places nearby, like restaurants, bars, shops and hotels. It's a quick way to find something good to eat in a strange city — and if you've forgotten your wallet, you can tap on any suggestion to see if it acceptsApple Pay.
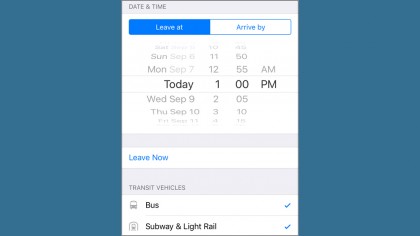
17. Plan tomorrow's subway trip
If you're going to be traveling to one of the cities supported by Apple Maps transit directions, you don't have to wait until you get there to plan out your route.
When you're looking at transit directions in Maps, you'll see a More Routes button next to the one suggested; tap it and then hit the Options button and you'll be able to set a date, time and method of transportation for your travels.
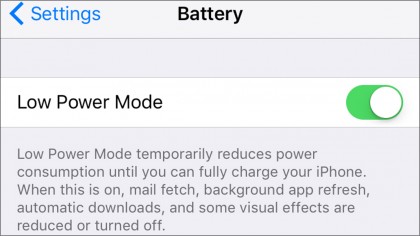
18. Turn on low-power mode
There's nothing more frustrating than a red battery icon on your iPhone. But in iOS 9 it doesn't have to send you into a panicked search for an outlet. Much like Apple Watch, Apple has introduced a new Low Power Mode in iOS 9 that helps squeeze out every bit of juice remaining in your battery.
Flip it on (inside the battery settings, which has moved to its own tab under Touch ID in the main Settings) and your iPhone's battery icon will turn yellow, indicating that it is conserving energy by reducing performance and networking activity, including Mail fetch, background app refresh, motion effects and animated wallpapers. And if you don't turn it on yourself, Apple will prompt you once your battery dips below 20%.

19. Customize the News app
No matter what you like to read, chances are you do a lot of it on your iPhone. And now Apple has given us a better way to do it. Among the new apps in iOS 9, Newsstand has been replaced with the News app(and your Newsstand mags have been moved into an ordinary "Newsstand" folder).
But News is very different from the app it's replacing; inside you'll be able to create a personalized feed of headlines from hundreds of sources around the web, from major publications to specialized blogs. Apple will even curate the day's top stories for you. Much like Apple Music, you'll be able to pick your favorite genres and sources, and the app will learn and offer "For You" suggestions based on what you read. But if you want to give it some help, you can always edit your feeds in the favorites tab.

20. Fill your Wallet
Just like Newsstand, the Passbook app has a new name and a new look in iOS 9, and it's a whole lot more useful than it was before.
You can add cards using the same method, but in addition to the boarding passes, tickets and gift cards it used to store, Apple's new Wallet app is also the home for your Apple Pay credit, debit and store cards, as well as soon-to-launch rewards cards from stores such as Dunkin' Donuts, Walgreens and Panera. And now Discover customers can get in on the fun, too.

21. Pick a payment card without unlocking
Apple Pay has transformed the way we pay for things - especially on the Apple Watch, where we can quickly choose a card just by double-clicking the side button. Just like Apple Watch, you can now double-click the home button while on the lock screen to bring up your cards on your iPhone, even if you're not in range of a NFC reader.
Read our full guide to how to use Apple Wallet from the Lock Screen for more information.

22. Navigate open apps more quickly
Apple has changed the way we multitask in iOS 9. Along with things like Split Screen and Picture in Picture on the iPad, you won't see a carousel any more when you double-click the home button. Instead, Apple has designed a series of sliding cards to help switch between apps.
But you won't be using it as much; when you open a link or tap a notification you'll see a new "Back to..." button at the top left of the screen; tap it and you'll be instantly transported back to the app you were just using.

23. Show iCloud Drive on the home screen
When Apple unveiled iCloud Drive as a key component in iOS 8, it seemed like it was finally bringing back iDisk, the pre-Dropbox drop box that let us quickly transfer files from our Macs to anywhere they needed to go.
And it was, except for one major flaw: we couldn't access it on our iOS devices without going into a supported app first. Apple has changed that in iOS 9. Head over to Settings > iCloud > iCloud Drive and you'll find a Show on Home Screen toggle. Turn it green and you'll be able to access everything inside, just like in the iTools days.

24. Find the new apps (and bury them)
With every new iOS update comes a couple more apps Apple thinks we all need. This year two apps that were previously available as App Store downloads have apparently risen to level of essential: Find My Friends and Find My iPhone.
If you didn't use them before, however, you probably won't now, since there isn't much different from the old versions, save better Siri integration and a new Find My Friends Notification Center widget. Oh, and you can add two more apps to the list of ones you can't delete.
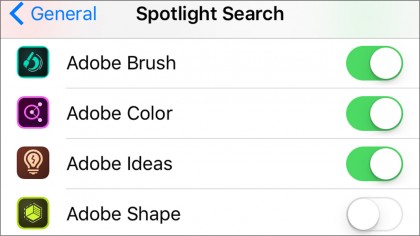
25. Remove apps from deep Spotlight searching
Apple has dramatically improved the intelligence of our searches in iOS 9, adding a natural language engine and the ability to find content stored deep within apps.
And it's all under your control. Visit Settings > General > Spotlight Search and you'll be able to choose exactly which apps you want to include in the search results.
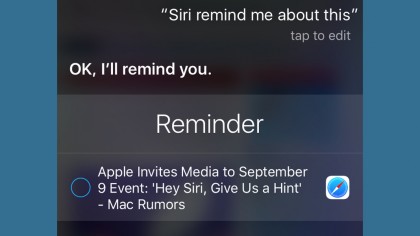
26. Set a reminder about what's on the screen
Siri is great for setting reminders, but in iOS 9 it's using its new-found intelligence to do it even quicker. If you're looking at something on your screen that you want to be reminded about - whether it's a website, calendar appointment or point of interest - just tell Siri to "remind me about this" and it'll scan the page for the relevant information and add it to the Reminders app.
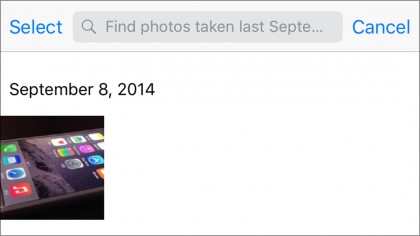
27. Search photos with Siri
iCloud Photo Library has given us access to every single shot we've ever snapped on every device we use, but with so many pictures to scroll through, finding things can be a pain. Now, Siri can help.
Just ask to search photos taken on a specific day at a specific place or whatever criteria you've assigned to them, and it'll take you right to them.
28. Silence Siri
We all love Siri, but we don't always want to hear its mellifluous voice. In iOS 9, you don't have to. A new setting called Voice Feedback (under Settings > General > Siri) lets you choose when you hear an audible voice, with three options: always on, hands-free only (which will only allow audio when using "Hey Siri" or connected to a Bluetooth device) and an all-new option, control with ring switch, which will prevent Siri from speaking when your ring switch is switched to silent.
29. Search inside Settings
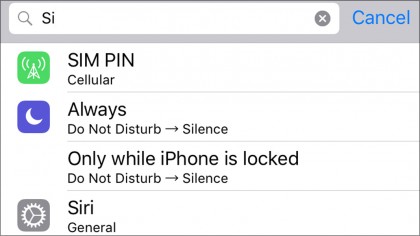
As our iPhones have gotten more powerful, the Settings app has become overloaded with so many switches and selections it can be hard to remember where they are. But once you install iOS 9 you won't have to blindly hunt through tabs to find what you're looking for anymore.
Apple has finally built a live search field into Settings, so all you have to do is type a few letters and it'll start filtering through the hundreds of toggles and titles in an instant.
30. Boost poor Wi-Fi signals with LTE
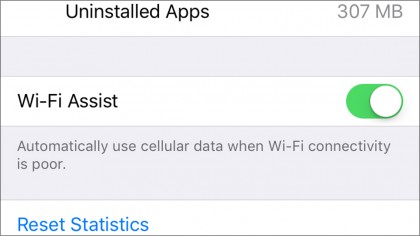
We've all experienced that no-man's land between the time our Wi-Fi signal drops and LTE takes over, and Apple understands our one-bar pain. Way at the bottom of Settings > Cellular (past all the installed apps asking to use cellular data), you'll find a new toggle named Wi-Fi Assist.
Turn it on and your phone will seamlessly switch to LTE whenever your signal is weak - even if the network hasn't completely dropped off.

31. Make a six-digit passcode
Apple has always taken security seriously, and in iOS 9 it's beefing up one of the easiest ways to prevent theft: the passcode. Instead of the four-digit passcode that has been in existence since the beginning, Apple has expanded the passcode to include six numbers, raising the probability of cracking it from 1 in 10,000 to 1 in a million.
Upgraders won't be prompted to change their old passcode, so if you want to take advantage of the stronger security take a trip to Settings > Touch ID & Passcode > Change Passcode, then select Passcode Options once it's available and set it to 6-Digit Numeric Code.

32. Quickly trash all in Mail
Finally! With each iOS revision, Apple has added little tricks and tweaks in Mail that help us navigate our messages faster, and there are a few in iOS 9, too.
The first is a new Trash All button. Where you previously had to use wonky workarounds to trash everything at once, in iOS 9 simply hitting the edit button will let you clear out your Inbox with just a single tap.
33. Add an attachment to a message in Mail
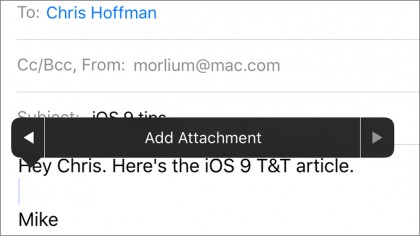
We've always been able to insert photos and videos in our Mail messages, but getting other attachments required a few more steps. Apple has eliminated all of those steps in iOS 9 with the adding of a simpleAdd Attachment button to the text menu.
Tap it and you'll be able to browse and attach anything that's in your iCloud Drive, just like you would if you were using a real computer.
34. Remove unknown contacts and events
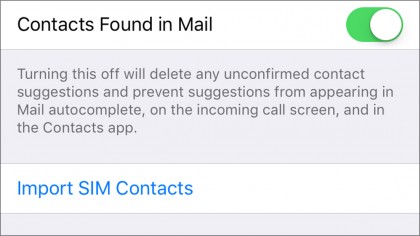
Part of iOS 9's expanded intelligence involves suggesting things that might be useful to you, whether it's an event you haven't scheduled or a contact you might want to add to your address book.
But if you're not too keen about your iPhone snooping through your messages, you can limit its access. Inside Settings > Mail, Contacts, Calendars you'll find a pair of toggles: Contacts Found In Mail and Events Found in Mail. Turn them off and it'll prevent any unwanted data from creeping into the suggestions you get.
35. Stream high-quality Apple Music tracks
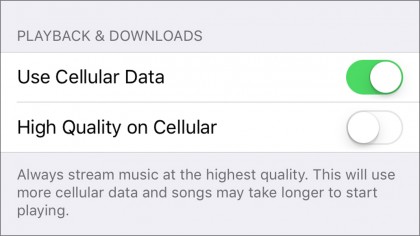
Apple Music made its debut in iOS 8.4, and in iOS 9 you'll find a slew of little changes to the interface, most notably in the way of simplified menus and a general cleaner look, plus you'll also find a few new settings to tinker with.
Check out the Music settings and you'll see a new Playback & Downloads section, which lets you choose the quality of your streams over cellular networks. As it stands, Apple Music tracks play at 256Kbps when you're not connected to a Wi-Fi network in order to save data, but in iOS 9 you'll be able to listen to your favorite songs in all their hi-fi glory wherever you may roam.
36. Upgrade without deleting your favorite apps
Back when iOS 8 was released, the relatively slow adoption rate was blamed on all those 16GB iPhones in the wild. The problem was that iOS 8 needed a hefty 4.6GB of free space to install, which many would-be downloaders didn't have. But rather than scramble to delete enough photos and apps to install iOS 9, Apple is helping this time around.
For one, it only requires less than 2GB of free space, which should eliminate the upgrade problem for most users. And for those pushing maximum capacity, Apple has added a new feature that will automatically delete enough apps to properly download and install the new update, then put them back when it's all finished.
37. Use Health to have a baby
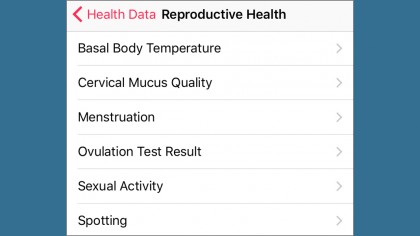
The Activity app has taken on a greater role in iOS thanks to Apple Watch, but Apple hasn't forgotten about Health. In addition to the myriad things it already tracks, Apple has added a new Reproductive Health tab, which lets women and couples keep tabs on basal body temperature, cervical mucus quality, menstruation and ovulation, among other things.
Inside you'll find your data plotted on the same gorgeous charts, and here's a bonus tip: now you can rotate your phone to get a more detailed landscape view.
38. Use CarPlay without plugging in your iPhone
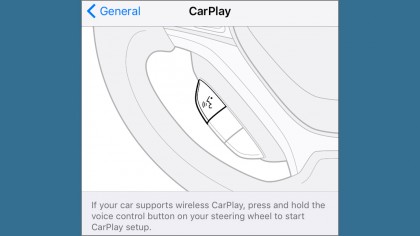
If you're lucky enough to drive a vehicle with Apple CarPlay integration, you're probably a little bummed that you need to plug it in each time you settle into the driver's seat. But that won't be the case for very long. The next generation of CarPlay will automatically recognize your iPhone when you enter your vehicle.
It's not entirely clear whether manufacturers will be able to upgrade existing wired systems, but iOS 9 brings some good news for current CarPlay users too: Apple is opening up the SDK to car makers, so you'll no longer have to switch out of the CarPlay app to access your navigation system's main controls.
39. Disable Shake to Undo
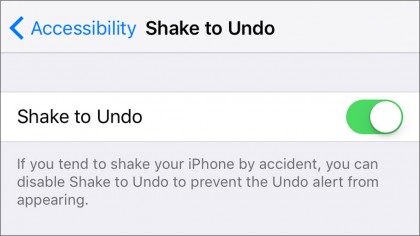
Some people might not even realize it, but Apple has had an undo gesture baked right into iOS since version 3. In apps like Mail and Messages, all you have to do is shake your phone to undo your last action (and if you change your mind, just shake again to redo it).
But if you don't want this function on your phone, there's now a way to disable it. Hidden inside Settings > General > Accessibility is a Shake to Undo toggle that will turn it off.
40. Ungroup notifications by app
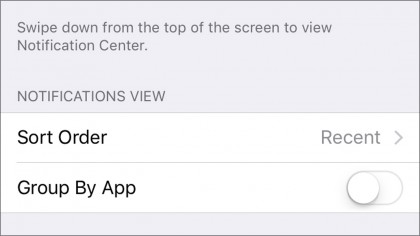
Each of iOS 8's two Notification Center view options — sorting manually or by time — creates an unwieldy list of everything you've missed for a specific app rather than showing the most recent (and presumably relevant) notifications first. Apple's changing that somewhat in iOS 9.
Inside a new Sort Order tab under Settings > Notifications, you'll be able to switch your view between Recent and Manual. Choose the former and a new Group By App toggle will appear. Turn it on and it will essentially mimic the Notification Center's old behavior, with bunches of notifications organized by app. But leave it off and you'll get a neat running list of your notifications as they arrive, letting you quickly catch up on what you've missed.

41. Keep your battery levels in check
Speaking of the Notification Center, there's a new widget in iOS 9. When you tap on the Today view, you'll be able to see the battery life remaining in your iPhone and, if you have one paired, Apple Watch. And if you hate it, removing it is no different than any other widget - tap the Edit button at the bottom of the screen and hit the red minus circle.
For more tips on preserving your iPhone battery life, check out our video below.
42. Change the speed of your slo-mo movies
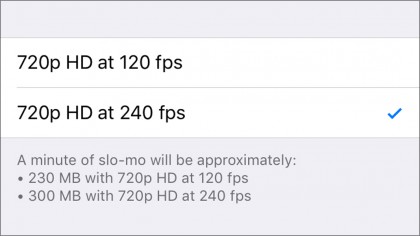
When Apple introduced slow-motion video with iOS 8, it wasn't the all-or-nothing affair it seems to be. You might not have realized it, but if you tapped the fps number in the top-right corner of the screen, you could switch between 120 and 240 frames per second.
In iOS 9, Apple has moved the options to Settings > Photos & Camera > Record Slo-mo, where perhaps more people are apt to find it.
43. Change resolution of recorded videos
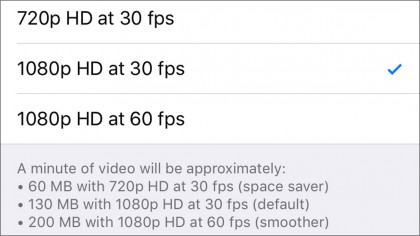
Don't worry, Apple hasn't forgotten about those who want to record videos at full-speed. Scroll to the bottom of the Camera settings and you'll see a new Record Video tab.
Inside you'll be able to change the quality of your videos to either 720p HD at 30 frames per second, 1080p HD at 30 fps or 1080p HD at 60 fps. But be warned: Apple notes that recording at the highest setting will be about three times larger than the lowest option, so make sure you have some gigabytes free.

44. Zoom a video while it's playing
If you've ever tried to zoom in while watching a video you recorded on your iPhone, you probably were confused; in previous versions of iOS, pinching to zoom only paused the video, as your pinch was misinterpreted for a tap. In iOS 9, you zoom in on a video (and reposition it on the screen) just as you would a photo, whether it's playing or not.

45. Quickly return to your photo library
Browsing your pictures in the Photos app has gotten a little faster in iOS 9 thanks to the addition of a small gesture.
Now when you enlarge a photo to see it full screen you don't have to reach all the way to he top left corner to get back to the album your were viewing. Just swipe down on the screen to whisk it away and return to the grid.
46. Use smart albums in Photos
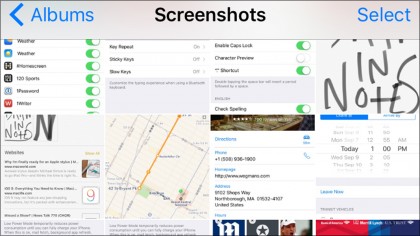
If you take a lot of selfies and screenshots, Apple has given you an easier way to organize them. Inside your Albums tab in Photos, you'll find two new smart folders, appropriately labeled Selfies and Screenshots.
While they won't remove them from your camera roll, the two albums collect all of your screen grabs and front-camera snaps where they can quickly be shared.

47. Quickly select batches of photos
We all know about the shift shortcut when selecting large batches of files on our Macs, but on our iPhones, we've always had to tap each individual photo to select more at a time.
That's no longer the case. In iOS 9, you can simply glide your finger over the photos you want to select and they'll all get blue checkmarks, ready to be shared, moved or deleted.
48. Hide photos from your photo library
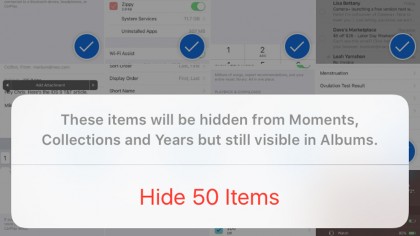
It's happened to all of us. We're showing our friends a bunch of photos we took while on vacation and they grab your iPhone to get a closer look. Panic sets in when they start swiping over fear they'll come across something they weren't supposed to see. Now you can stop that from happening.
If there's any photo you don't want in your main library, you can tap on the Share button, then the Hide button at the bottom, to hide it from plain sight (though it will stay in the All Photos album and any others you've added it to, so you can always unhide it later).
49. Customize your photo slideshow
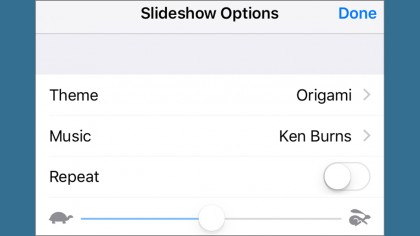
Apple has always had a nifty slideshow feature baked into its Photos app, but in iOS 9 it's gotten a bit of a surprising makeover. For starters, the controls are no longer in Settings; after you initiate a slideshow via the action inside the share sheet, you'll see a new Options button in the bottom right corner.
Tap it and you'll be able to change the theme, music and speed. A set of five new transitions are available to choose from, as well as matching music to accompany them, in case you don't want to use something from your Apple Music library.
50. Request desktop site in Safari
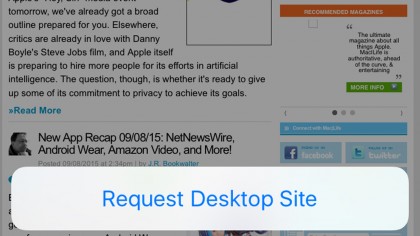
iOS 8 included a feature to request the desktop version of a site in Safari, but it was fairly hidden; however, in iOS 9, it's built right into the share sheet menu (just slide the bottom row to the left to find it). And here's an extra tip: tap and hold the reload button in the address bar and a Request Desktop Siteshortcut will appear at the bottom of the screen.
51. Disable frequently visited sites
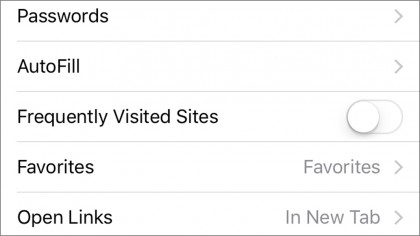
iOS 8 introduced a new Safari feature that displays shortcuts to your most visited websites for quick access to them. Individual icons could be deleted by using the usual tap-and-hold method, but there was no way to turn them off entirely.
Now there is. Take a trip to Settings > Safari and you'll see a new Frequently Visited Sites toggle. Turn it off and all of the shortcuts will disappear forever (or at least until you flip it back on).
52. Use two apps at once
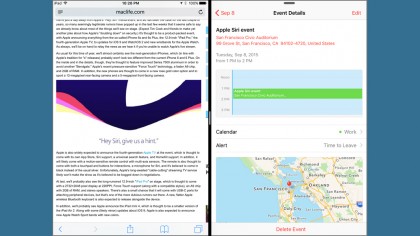
Multitasking on our tablets has always come down to the ability to quickly switch between apps, but Apple is improving it in a big way in iOS 9. While working on your iPad, just swipe from the right edge of the screen to bring up the new Slide Over feature, which lets you browse a second app inside a skinny panel. And with the iPad Air 2, you can pull the window further to enter Split View, letting you run two apps simultaneously, side by side.
53. Watch a video while you work
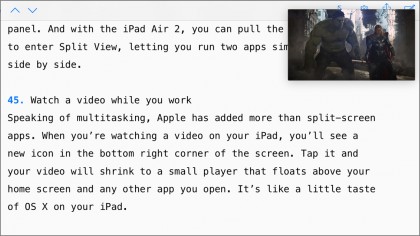
Speaking of multitasking, Apple has added more than split-screen apps. When you're watching a video on your iPad, you'll see a new icon in the bottom-right corner of the screen.
Tap it and your video will shrink to a small player that floats above your home screen and any other app you open. It's like a little taste of OS X right on your iPad.
54. Turn your iPad keyboard into a touchpad
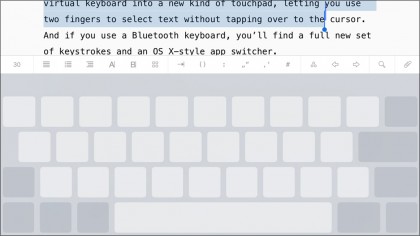
The last tidbit about iPad multitasking pertains to the keyboard. Along with a new shortcut bar that puts the controls for cut, copy, paste right at your fingertips, Apple has turned the keyboard into a new kind of virtual touchpad, letting you select text without needing to move your fingers off the keyboard.
And if you use a Bluetooth keyboard, you'll find a full new set of keystrokes and an OS X-style app switcher.

55. Quickly delete an alarm
Apple has brought the super handy swipe-to-delete gesture to most of its apps, but for some reason it neglected the Clock app.
To delete an alarm, you needed to tap the edit button first, wasting precious seconds on extra steps. Now all you need to do is swipe on a clock or an alarm to delete it.

56. Find on page in Safari
Find on page has always been a sort of hidden feature in Safari. To get to it before iOS 9, you needed to tap the address bar, type the word you wanted to look for, scroll down to the bottom of the suggestions window and tap on the word you typed.
In iOS 9, it's gotten a lot easier. Just hit the share button and you'll see a new Find on Page activity button in the bottom row. Select it and a new search bar will pop up right over the keyboard. The old way works too, however.
57. Customize Safari Reader mode
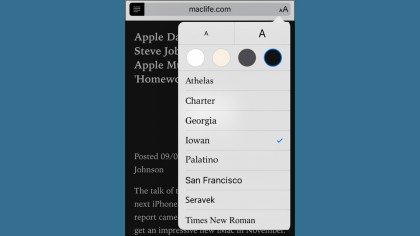
If you use Safari's Reader to view articles on the web, it's gotten whole easier on your eyes. After you enter Reader mode, you'll see a new button at the right on the address bar.
Tap it and you'll get a menu of options that includes eight fonts, two sizes and four color themes. And whatever you select will become the new default until you change it.
58. Adjust the touch sensitivity of the screen
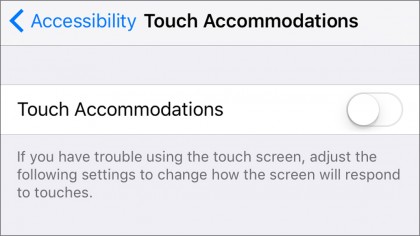
Accessibility has always been a major part of iOS's superiority. In addition to everything it does for blind, low-vision and deaf users, in iOS 9 Apple has expanded its technologies geared for those with physical or motor challenges. A new section called Touch Accommodations lets users change how the screen responds to your taps.
A series of options can tell your iPhone to ignore repeated touches, increase the duration of taps before recognized, and turn on Tap Assistance to allow any single finger gesture to perform a tap.
59. Password Protect Notes
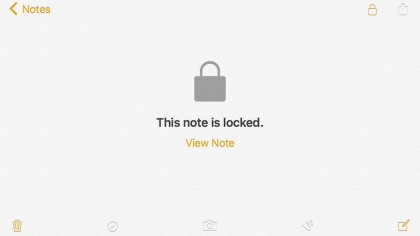
You can lock individual notes in the Notes app using a password or Touch ID, keeping your private information safe from prying eyes.
Open up the Settings app on your iOS device, scroll down the list to "Notes" and tap it. You should see a Password option on this screen: tap it and a menu will appear asking you to set up the new password. Fill out the fields and and verify the password, and be sure to include a hint in case you forget it. Next, in the same menu, slide on "Use Touch ID". Tap Done in the upper right corner of the screen to confirm.
To lock a note inside the Notes app, tap the Share menu button in the upper right of the screen, and select Lock Note. Input the password or use your fingerprint if requested, and the note should be locked.
60. Set up Night Shift
Night Shift was introduced to iOS 9 to help cut down on the amount of blue light an iOS device shines in your eyes. Enabling the function makes your device transition towards more yellow colours when the sun goes down and gradually turn to normal when morning dawns.
To customise Night Shift, tap into Settings > Display & Brightness > Night Shift. Here you can schedule it to come on automatically between the hours you dictate. You can also manually enable to come on until tomorrow, and set the desired colour temperature to be more or less warm.
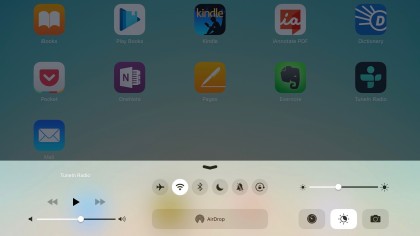
Now, whenever you want to turn Night Shift on, simply bring up the Control Center with an upward swipe from the bottom of the screen, and then tap on the button with the sun inside.
61. Quick Actions for native apps
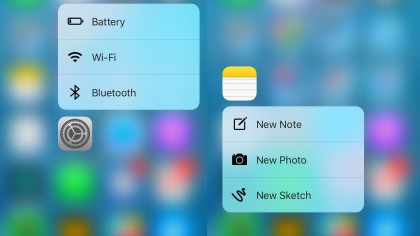
If you're an owner of an iPhone 6S and iPhone 6S Plus, you can take advantage of your device's 3D Touch capability for quicker access to in-app controls directly from the home page.
For example, a firm press on the Settings icon pops up an action menu with four shortcuts, allowing you instant access to the Wi-Fi menu, Bluetooth menu, wallpaper menu and battery menu.
Other app icons to get the 3D Touch treatment include the App Store, Compass, Weather, Stocks and Health apps. Try them out!
62. Turn off AutoFill for security
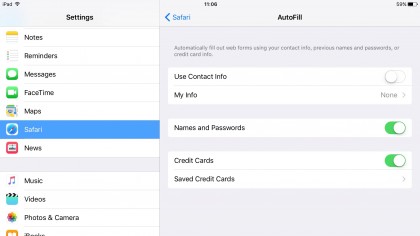
Safari's AutoFill feature is useful for remembering text and values you input into online forms, and can also speed up logins, registrations and online purchases. But if other people tend to use your device, there's a good chance you don't want that private data showing up when they're browsing the web.
If you're happy to disable AutoFill, open the Settings app, scroll down, and tap Safari in the list. Next, tap to open the AutoFill menu and toggle off the switch next to the details you don't want to include. You can also edit and delete stored bank cards from here by tapping Saved Credit Cards.

63. Share still images from Live Photos
Apple's neat Live Photos feature on newer iPhones turns a still photo into a short live action clip automatically. What if you're not bothered to keep the video clip and want to convert a Live Photo to a still photo? No problem. Here's how it's done.
Open the Photos app on your phone and tap to select the Live Photo you want to convert to a still. Next, tap the Edit button in the top-right corner of the screen, then tap the button composed of concentric circles in the bottom right corner. Finally, tap Done. You should see a "Saving Photo" message indicating that the new still is being processed. That's all there is to it.
64. Exclude Web History from Spotlight Search
Browsing history can be useful to have for finding a website of interest you visited recently but forgot to bookmark, and just serves as a handy cache for personal reference.
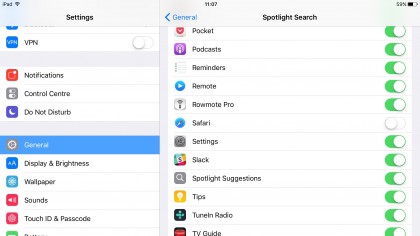
These websites can appear in Spotlight Searches. If you want that functionality turned off, open the Settings app and tap General, then select Spotlight Search. Then simply scroll down the Search Results list and toggle off the switch for Safari.
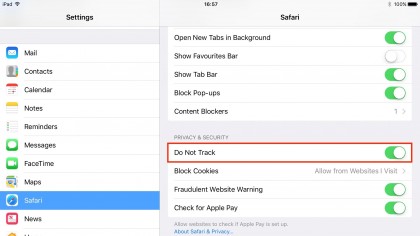
65. Turn on Do Not Track
Did you know some websites you've visited often actively track your other page visits across the internet? If the idea troubles you, it's worth turning on Do Not Track in Safari's settings. Basically, this makes the browser request that such websites quit tracking you. Sadly, it's up to the website to honour the request. Still, there's no harm in asking.
Open the Settings app, tap Safari in the list and under Privacy & Security, toggle the 'Do Not Track' option to the On position.
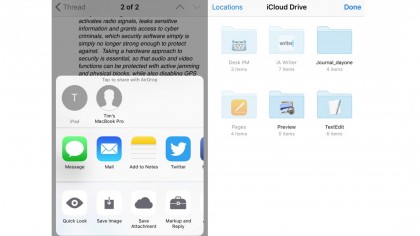
66. Save email attachments to iCloud Drive
If you want to make an email attachment easily available on all of your Apple devices, save it to your iCloud Drive.
With the email open in the Mail app, tap and hold the attachment for a second or two. The Share Sheet should appear with a cloud icon titled 'Save Attachment' in the list of options. Select it and you'll be taken to your iCloud Drive folders. Simply choose where you want the attachment to live and tap 'Move to this location' at the bottom of the screen when you're done.
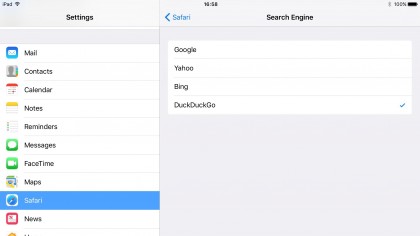
67. Set DuckDuckGo as your default browser
Google has become second nature to many of us when we search the web, but its tendency to log and track your searches might have you wondering if there's a more private alternative. Well, there is! It's called DuckDuckGo, a search engine that adheres to a strict non-tracking policy, and you can set it as the default service when you type search queries into Safari's search bar.
Simply open the Settings app, scroll down to Safari, tap Search Engine at the top of the list, and select DuckDuckGo from the options.
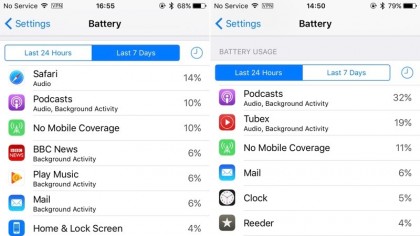
68. Find out which apps drain battery life
The power usage information has been enhanced in iOS 9, meaning you can now discover which apps are guilty of sucking the life out of your battery when they're in use (and even when they're not).
To find out which apps are culpable, open the Settings app, tap Battery and scroll down to the Battery Usage section, where you'll see tabs for usage over the Last 24 Hours and Last 6 Days.
69. Change Siri's gender and accent
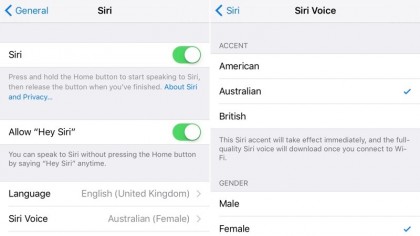
Siri can be trying at times, occasionally to the point of monotony, however you might get on better together by changing the personal assistant's sex and/or accent.
Open the Settings app and select General > Siri > Siri Voice. As the screenshot above shows, you can choose from an American, Australian, and British accent, and you can also switch Siri's gender in the lower list.
70. Add a third-party keyboard
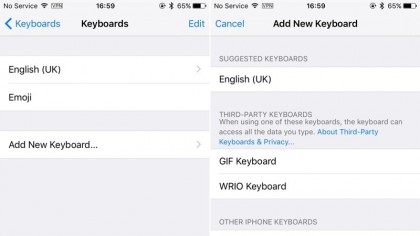
It's perfectly possible to use a third-party keyboard instead of the built-in one that comes with iOS 9. Keyboards can be found in the App Store, and many offer unique layouts and useful character options, depending on your usage.
Once you've chosen a keyboard from the App Store and downloaded it, you need to tell iOS to use it. Open the Settings app and tap General > Keyboard. Now, tap Keyboards > Add New Keyboard. Your newly downloaded keyboard should be listed under 'Third-Party Keyboards'. Select it and the layout will be added to your active keyboards list (where you can delete it at any time). You can now access it from the globe key the next time the basic keyboard pops up on your screen.
For a more in-depth look at using third-party keyboards in iOS 9, check out our how to install a third-party keyboard on iOS guide.
71. Create your own vibrations
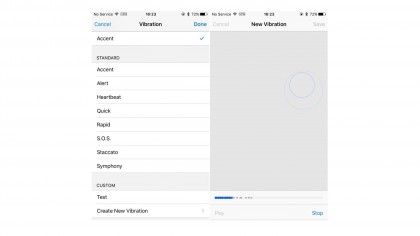
iOS 9 comes with a variety of different vibration alerts in the same way that it offers a range of ringtones. But did you know you can create a custom vibration to assign to a contact, so you know who's calling you even when your phone's on silent? Here's how.
Open the Contacts app and select the contact you want the vibration to apply to. Tap Edit at the top right, and then tap Vibration. On the Vibration screen, select 'Create New Vibration'. Now, simply tap away to create your custom vibration and press the Stop button when you're finished.
Play the vibration back with the corresponding button. Choose 'Record' if you'd like to try again. Once your happy with it, tap Save and give it a name. Tap Done on the Vibration screen and your creation is now auto-selected for the chosen contact.
72. Peak and Pop in iBooks
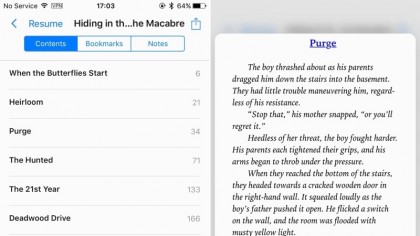
In iOS 9.2, Apple added some useful Peek and Pop gestures to the iBooks app. If you own an iPhone 6S or iPhone 6S Plus, you can make use of the 3D Touch features.
On the contents page of any book, press and hold firmly on a chapter title, and you can preview the content of that section without opening it up.
On the Bookmarks screen, you can peek at each of your bookmarked sections, and on the Notes screen, you can also peek at pages on which you've typed a note.
73. Use a Safari Content Blocker
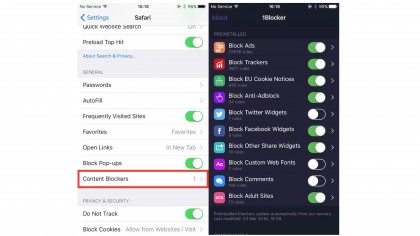
With iOS 9, Apple introduced Content Blocker support for Safari. Content Blockers are extensions that let Safari prevent cookies, images, resources, pop-ups, and other content from loading on your device. There's nothing to stop you from using more than one content blocker, however you do need an iPhone 5S, iPad Air, or iPad mini 2 or later to use them.
To turn on Content Blockers in iOS 9, first download a content blocking app from the App Store.1Blocker has won over many users for its range of options, but there are plenty to choose from.
Once the app is installed, open the Settings app, select Safari > Content Blockers, and enable the extension that you'd like to use. Individual options for your blocker of choice can be accessed within the blocker's app, accessed from the home screen.
74. Search inside the Settings app
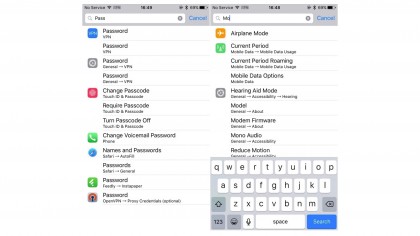
The Settings app has gotten pretty huge over nine iterations of iOS. Fortunately, Apple had the foresight to add a search bar at the top of the Settings app's main screen with iOS 9, allowing you to type the name of a setting instead of tapping through menu screens endlessly.
Type 'pass' for example, and the app returns results related to those letters, such as 'Change Passcode' in Touch ID, and 'Names and Passwords' in Safari's Autofill settings.