5 essential photography filters (and why you can't live without them!)
Photo filters every photographer should own
Essential photography filters: 3. Neutral density filters

What's it for?
Allowing you to use longer shutter speeds or wider apertures than would otherwise be available in the prevailing lighting conditions
What's the technique?
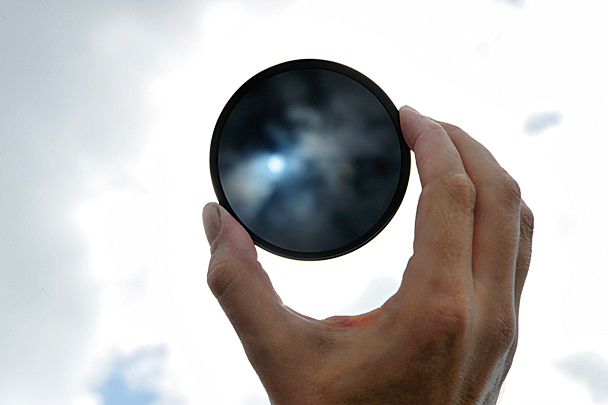
A straight neutral density filter (commonly referred to as an ND filter) is essentially a 'darkened' sheet of glass or resin that reduces the amount if light entering a lens, and therefore reaching the sensor.
Think of it as a pair of sunglasses for your camera! Crucially, it reduces the amount of light reaching the sensor without affecting the colors, hence the term 'neutral'.
Using straight neutral density filters is easy as you don't have to worry about positioning the filter, and in most lighting conditions you can still use the metering and focusing systems in your camera.

First, with your camera set to its lowest ISO, you need to frame your shot, and then select the shutter speed and/or aperture to give the creative effect that you want (such as a slow shutter speed in the case of blurring movement).
Get daily insight, inspiration and deals in your inbox
Sign up for breaking news, reviews, opinion, top tech deals, and more.
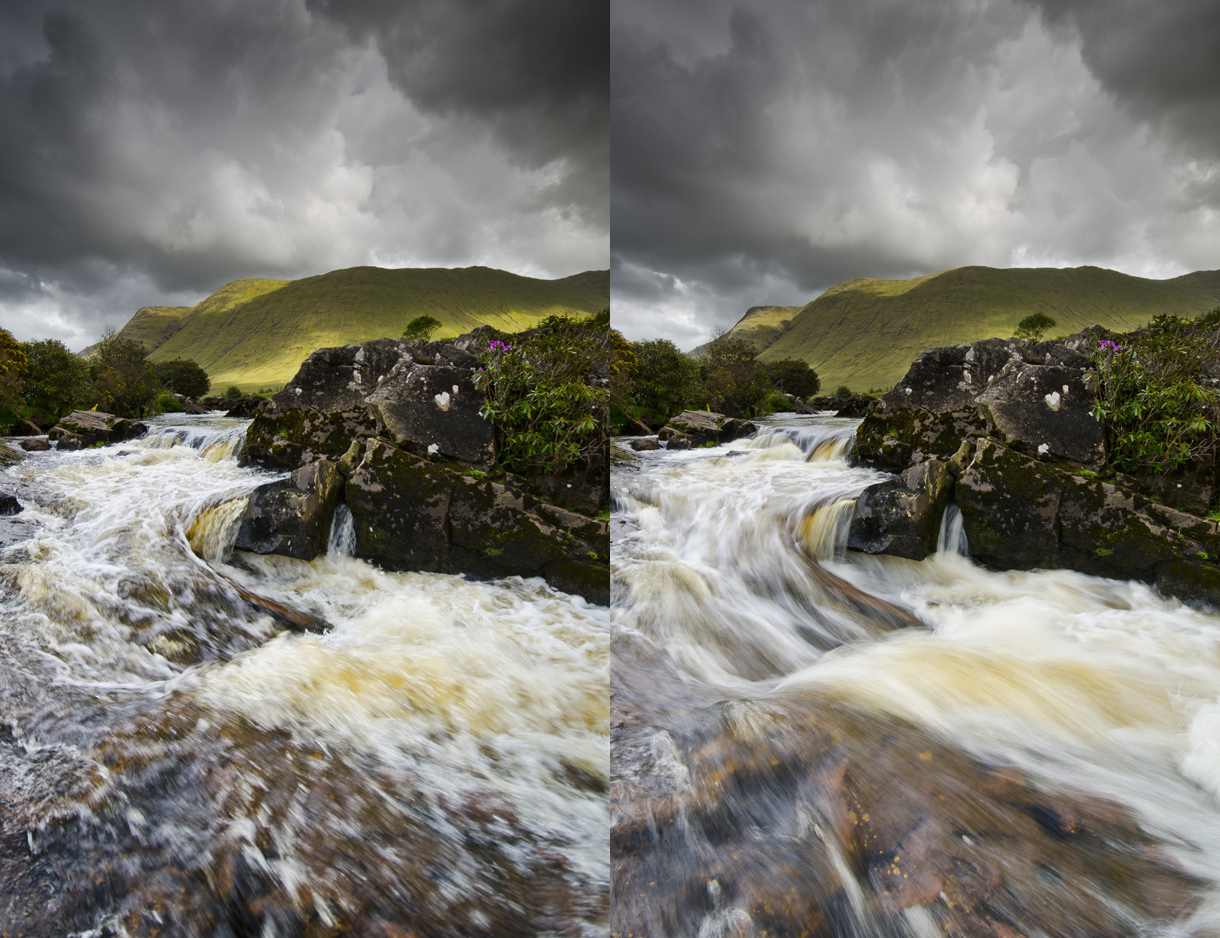
So, for example, you might want to blur a waterfall by setting a shutter speed of 2 secs, and keep everything sharp from front to back by setting an aperture of f/16.
In bright sunlight (or even in overcast conditions) these settings would result in a badly over-exposed image, because a two-second exposure would simply let too much light through to the sensor.
Setting a much faster shutter speed would help, but then the waterfall wouldn't be blurred. Reducing the aperture would help, too, but even f/22 or f/29 wouldn't be small enough for a correct exposure when the shutter speed is so slow, and f/29 is as small as many lenses go.
The other way to darken exposures is to make the sensor less sensitive by decreasing the ISO, but if you've already set ISO100, you can't go any lower (some cameras will go as low as ISO50, but again, this wouldn't be low enough in our example).
NDs come in different strengths or densities, most commonly reducing the light by one to three stops
This is where a straight ND filter comes in: NDs come in different strengths or densities, most commonly reducing the light by one to three stops.
For most lighting conditions, a three-stop filter, also known as a 0.9 or ND8, is suitable, though in very bright conditions, you may need an eight- or even a ten-stop filter, such as Lee's Big Stopper.
In our example at the top of the page, a waterfall in overcast conditions would need a shutter speed of 1/4 sec at f/16 and ISO100 for a correct exposure. To use a shutter speed as slow as 2 secs, you would need to reduce the amount of light reaching the sensor by three full stops (i.e. 1/4 sec > 1/2 sec > 1 sec > 2 secs).
Round or square?
Because you don't need to change the position or orientation of straight ND filters they are available in both round and square designs.
If you don't want to use them with other filters the round, screw-in designs are perfect, but if you want to use graduated neutral density filters at the same time it's better to go for filters that fit the same holder as the grads.
Current page: Neutral density filters
Prev Page Polarising filters Next Page Graduated neutral density filters