How to take double exposure pictures in your camera
A beginner's guide to blending scenes together
Double exposure photography 101
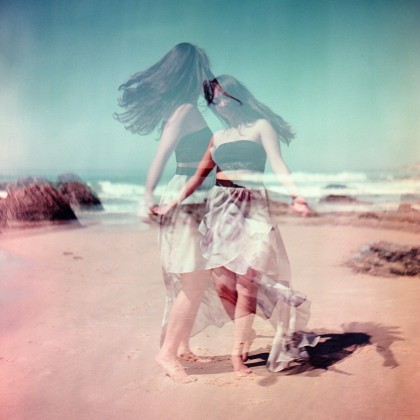
The method of superimposing two exposures in a single frame, most popularly called double exposure, is one of photography's greatest joys. Using this technique of overlaying images on top of each other, you could shape an image of nature into the silhouette of a person, stitch different urban scenes into one image, and even produce avant-garde and dreamlike photographs (like this one).
It's easily one of photography's most creative techniques, giving photographers endless possibilities to produce unique and more inspiring photographs. This is why more digital cameras these days offer a multiple exposure mode, allowing shooters (like yourself) to create double exposures without relying on Photoshop.
If you're one of the many photographers, novice or experienced, who haven't dabbled in the art of double exposure yet, you're in luck. Here's a short guide to shooting double exposures for beginners like you.
Make sure you have the right equipment
Not all DSLRs and mirrorless cameras have the multiple exposure mode. If your camera doesn't have that capability, don't let that stop you. It's worth shooting and experimenting with double exposures, so borrow the right camera from a friend, rent from your favorite store or, if you have some cash to spare, then by all means, buy one.
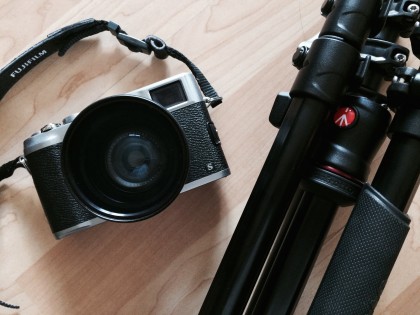
The Canon EOS 5D Mark III, Canon EOS-1D X, Canon 70D, several higher end Nikon DSLRs including Nikon D800 and Nikon D300, Fuji X-Pro1, Fuji X100s, Olympus OM-D E-M5 and some Pentax cameras, like the K10D, are among the many models that have multiple exposure capabilities. (For a full list of digital cameras with the multiple exposure feature, click here.)
Depending on what you're trying to achieve, a tripod, a shutter release cable, a flash and plain white or black background (it could be a muslin backdrop or that empty wall in your apartment) might come in handy, too!
Know your camera's multiple exposure feature
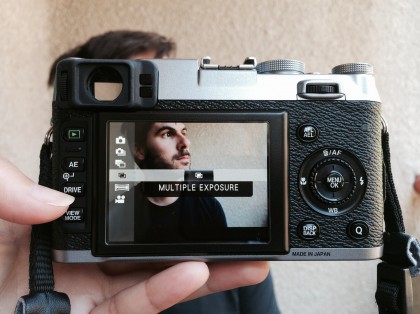
While shooting double exposures is essentially just shooting two images in a single frame, different cameras handle this process differently. So, it's important to familiarize yourself with how your camera's multiple exposure function works. Read the manual and practice the process, if need be, before you go out and shoot.
Additionally, some cameras, like the Canon 5D Mark III, will allow you to take two or more exposures in one image as well as use a previously shot image, offering users more flexibility. Other cameras may have many limitations – the Fujifilm X100s, for example, will only let users shoot two frames in a row. If you're planning on renting or buying a camera to shoot multiple exposures, knowing how you're going to utilize this function is key.
Understanding and shooting double exposures
Now, before you start shooting, it's important to understand how double exposures actually work. In the days of film, taking multiple shots in a single image usually involved snapping one frame, rolling back the film and taking another snapshot to overlay the original. In today's digital age, we're still overlapping images, but instead of re-exposing film, it's simply a matter of blending data and pixels.
Technically, shooting double exposures with your digital camera is easy. Simply set your camera to Multiple Exposure mode, shoot your first layer (or select one from your camera's memory card, if permitted), then shoot your second layer, and you've got your double exposure. The hardest part comes when you're choosing, framing and positioning your two shots so that they blend well together into one image.
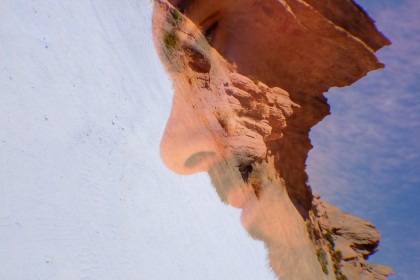
The first exposure or layer of your image serves as the base layer upon which elements of the second frame will blend into. The second layer is just as important as your base, and, in many ways, it can be the hardest layer to shoot. Sure, you can just randomly pick a subject, point and shoot, and hope for the best. But picking a great subject or scene, and working with your camera's angles so that it fits perfectly and complements (or provides a striking contrast to) the base layer will yield much better results.
Start with a concept
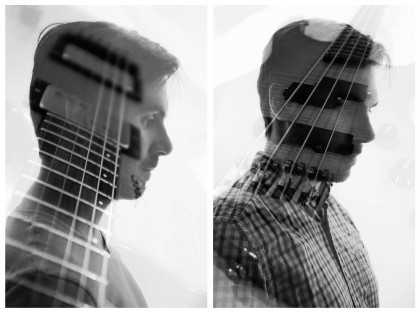
Don't get me wrong. Creating spontaneous double exposure images is exciting and can yield the most surprisingly beautiful and imaginative photos. For first timers, however, choosing to shoot around a concept – such as portraits or overlaying two landscapes – could make it easier for you to focus and learn the basics. Additionally, having a concept will help you decide when and where to shoot, which can make or break your double exposures.
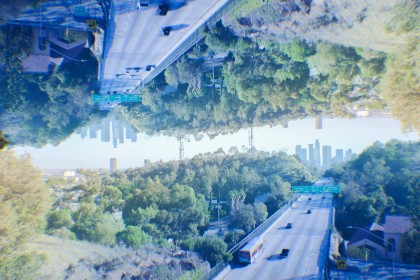
Shooting scenes in your everyday – like superimposing your morning commute over a self-portrait – is great for your first few images; but if you're feeling fearless, adding textures to portrait silhouettes is a great way to understand how double exposures work.
Dark vs. bright
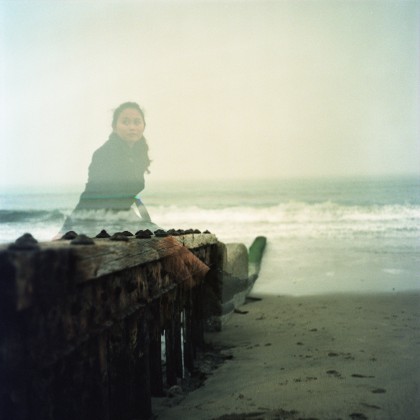
There are no actual rules to shooting double exposures. Be as experimental and as crazy you want to be. There's one thing you must keep in mind, however. Darker subjects or scenes will blend more easily, while brighter or lighter subjects may blow out some details in your double exposure.
This is why silhouettes are fantastic for double exposures, as are busy urban scenes or colorful graffiti and street art. A sunny sky or an overly bright landscape as your base photo, on the other hand, might produce a washed out image. In fact, many photographers prefer to shoot darker scenes first and lighter scenes second.
Choose your base exposure carefully
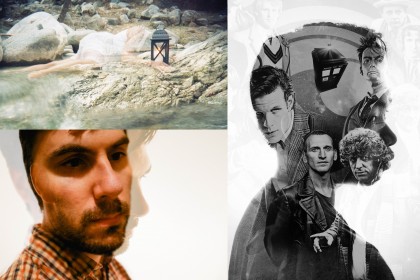
As previously mentioned, many photographers (film or digital) who have mastered the art of double exposure tend to use a darker subject or scene as their base or first exposure. But this not a rule of thumb. In fact, your base exposure really depends on the image you are trying to create.
When creating textured portrait silhouettes, a white background is actually preferable for the base exposure. The dark silhouette will allow the elements of your second exposure to fill in the void while the white background will wash out the rest, yielding a stunning and crisp portrait.
When shooting collages, a busy and colorful scene is better as a base image than a scene with plenty of light, neutral colors, as this will provide a more solid foundation for your your next layer.
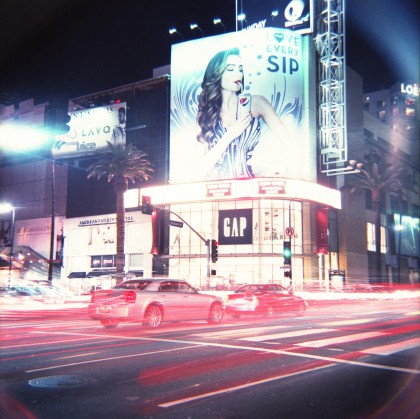
For double exposures that show movement or ghostly apparitions, you're more likely to use the same scene for the both layers. The only difference is, when shooting the second layer, you'll have your subject move out the frame or to a different position to get that translucent, ghost-like appearance. (A tripod is recommended for this type of photo).
Go experiment!
Now that you've learned the basics of double exposures, you're ready for the next step, which is to go out there and get experimenting. I'll leave you with seven great double exposure ideas to start:
- Create a dynamic portrait by adding a texture layer, like a brick wall or a cobblestone street (See: Slide 7)
- Convey movement like dancing or street traffic (See: Slide 1)
- Create your own Inception-inspired dream sequence (See: Slide 5)
- Make a collage of the most interesting things in your neighborhood
- Take multiple shots of your favorite architecture at different angles
- Tell a surreal story (See: above)
- Capture the supernatural (See: Slide 7).
- The best digital cameras you can own today

Michelle Rae Uy is the former Computing Reviews and Buying Guides Editor at TechRadar. She's a Los Angeles-based tech, travel and lifestyle writer covering a wide range of topics, from computing to the latest in green commutes to the best hiking trails. She's an ambivert who enjoys communing with nature and traveling for months at a time just as much as watching movies and playing sim games at home. That also means that she has a lot more avenues to explore in terms of understanding how tech can improve the different aspects of our lives.