Raw Masterclass
The power of raw

You've probably heard of it, even read about it too. But what is this mysterious thing called 'raw'?
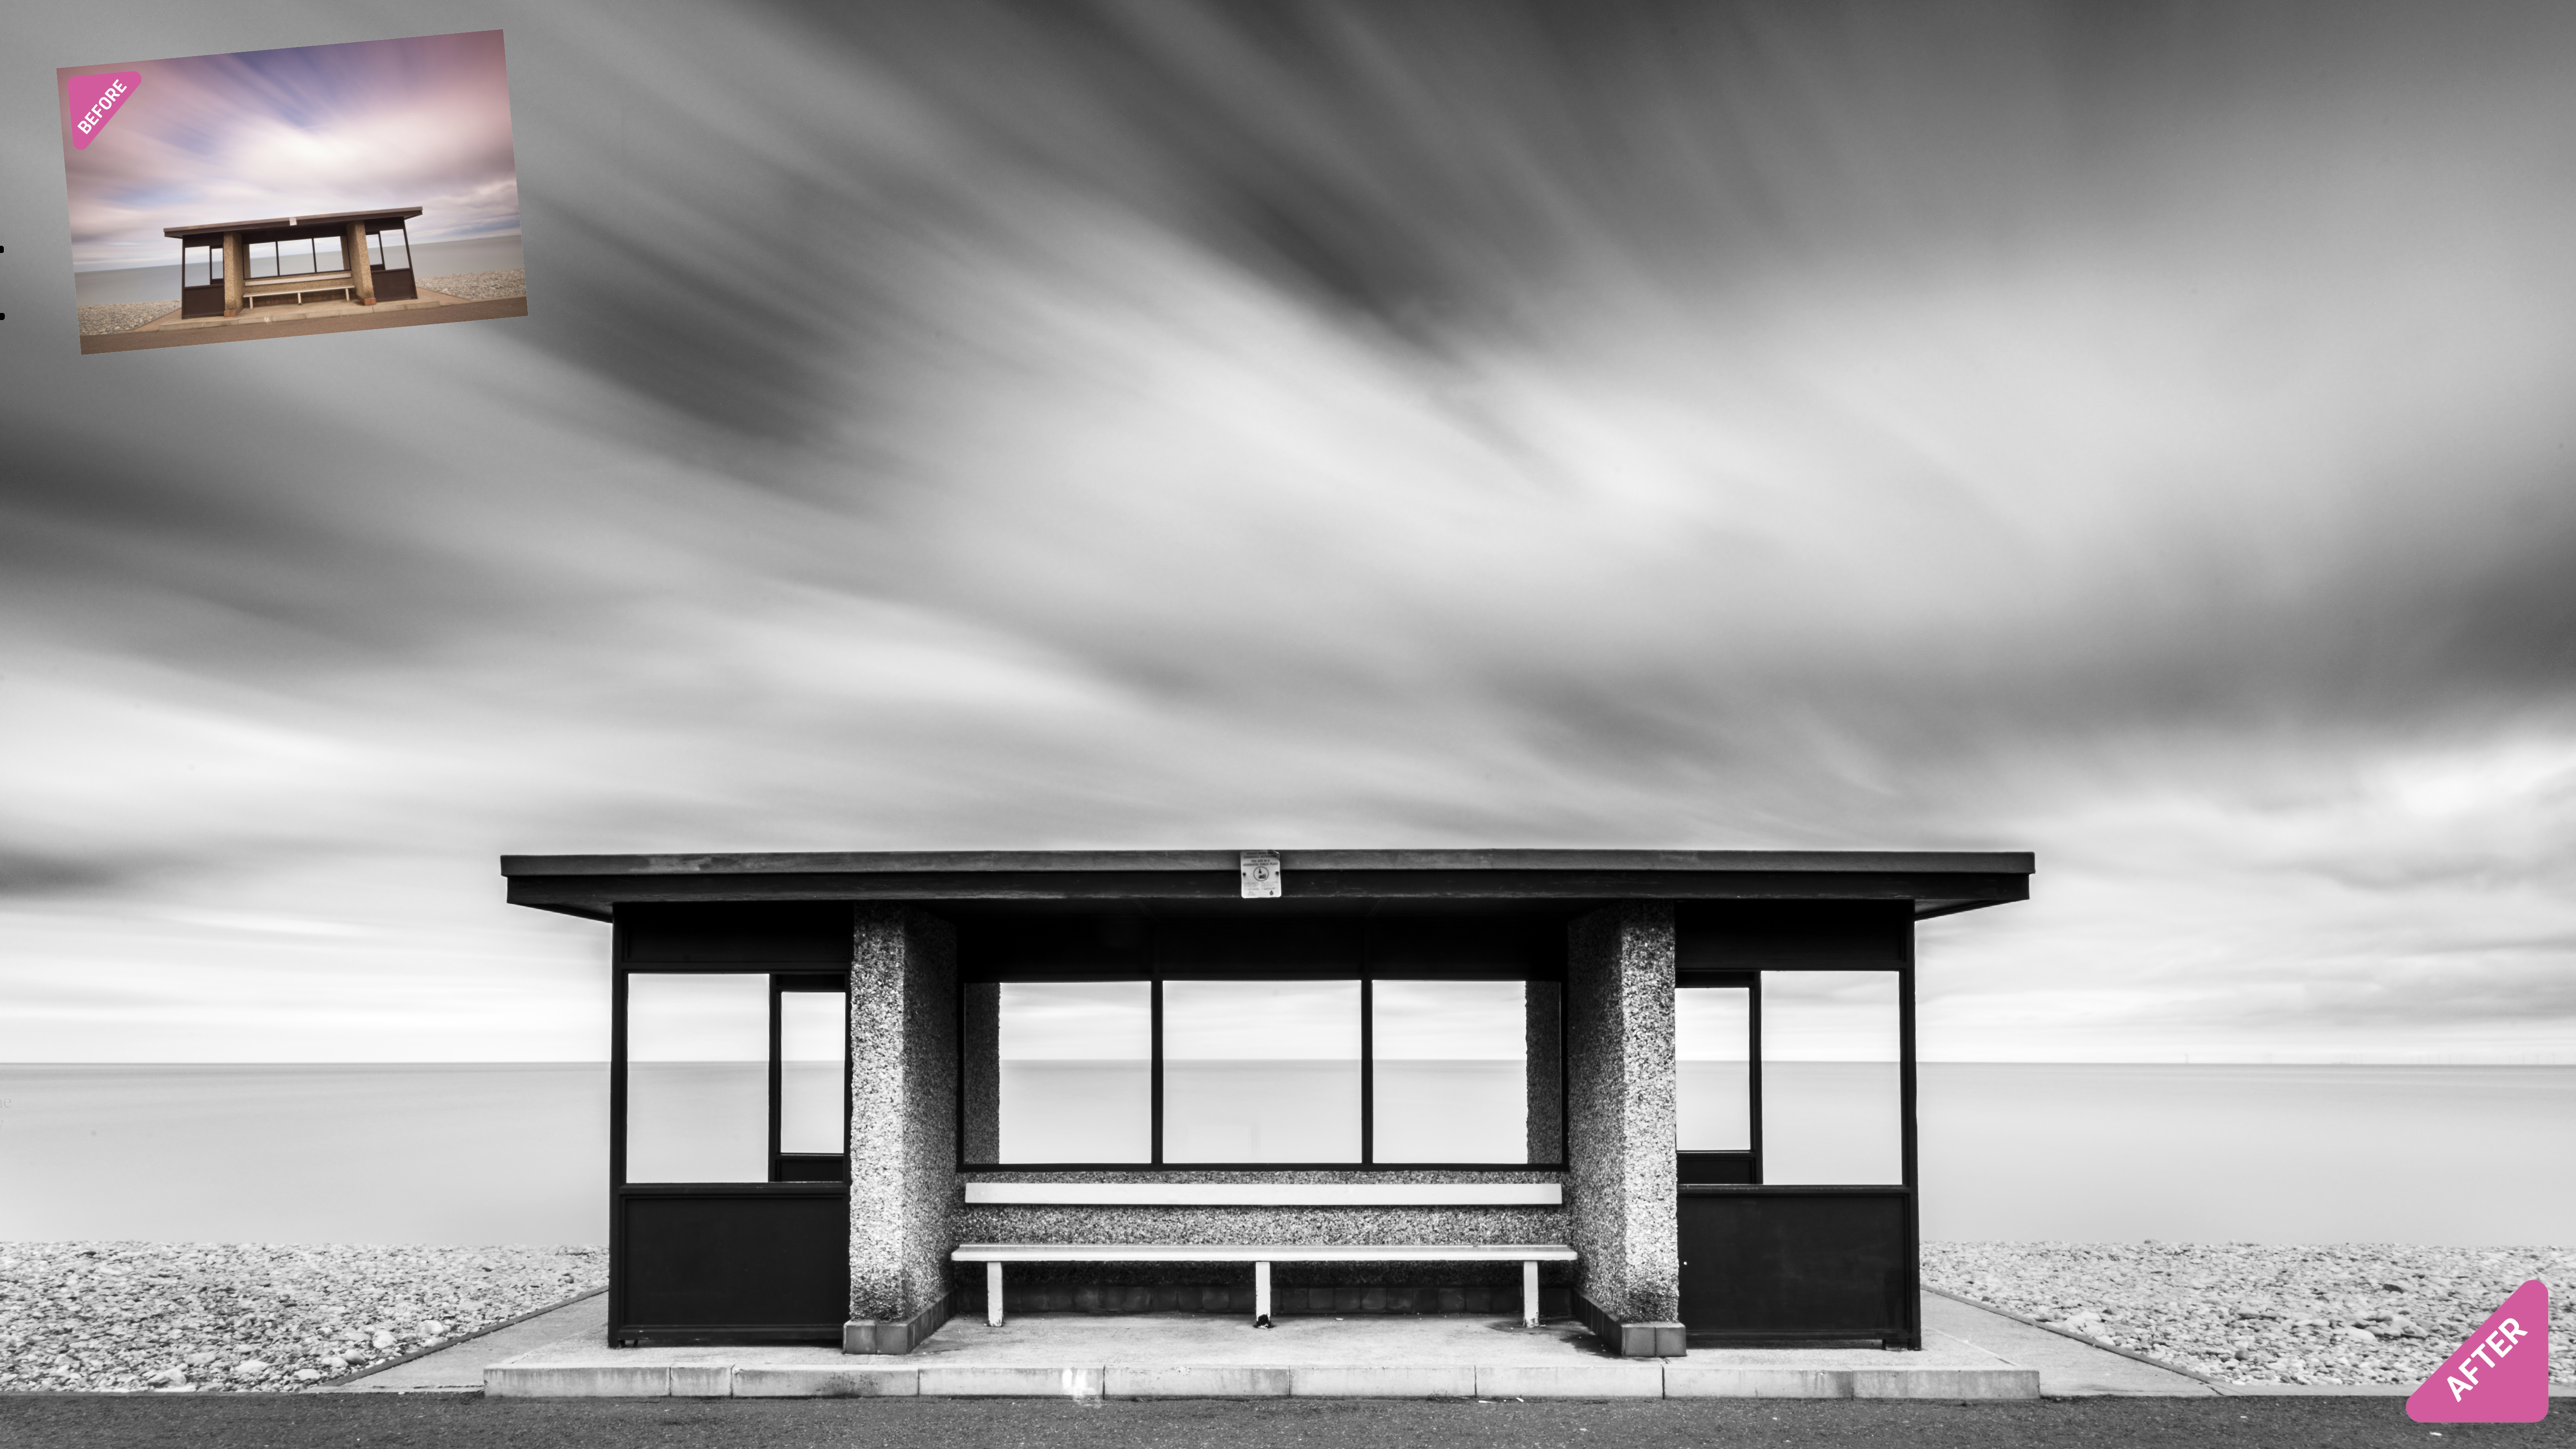
Raw files are simply a type of image file produced by cameras. They contain a great deal more colour and tonal information than a JPEG, which means they're able to record more detail. If you shoot a JPEG with your camera, on the other hand, the file is processed in-camera. A JPEG straight from the camera always looks more 'finished' than a raw file, which looks dull until it's processed – but you have less control over the look of JPEGs when you edit them later.
When you shoot in raw, everything about the camera and how you use it remains the same as when you're shooting JPEGs – you simply have to set the camera to shoot raw in the menu. But the files produced will be different, and require special software to process them. Adobe Camera Raw is built into both Adobe Photoshop and Elements, and is what we'll be focusing on here. Lightroom is another popular option for editing raw files, and its tools are broadly similar to those in Camera Raw.
All the adjustments you make to a raw file while image-editing are recorded in a secondary file – changes that then applied to any JPEG or TIFF you export from the original raw file. The original raw file remains untouched on your computer, always available to produce high-quality copies.
The potential for overall image quality is considerably higher when you use raw. We're going to show you everything you need to know to confidently get started…
Raw Masterclass: Interface
To open a raw file you simply navigate to the folder on your computer where you saved it and double-click, just like with any other type of file. This will launch either Photoshop or Elements, depending on what you have, and the Camera Raw window will open.

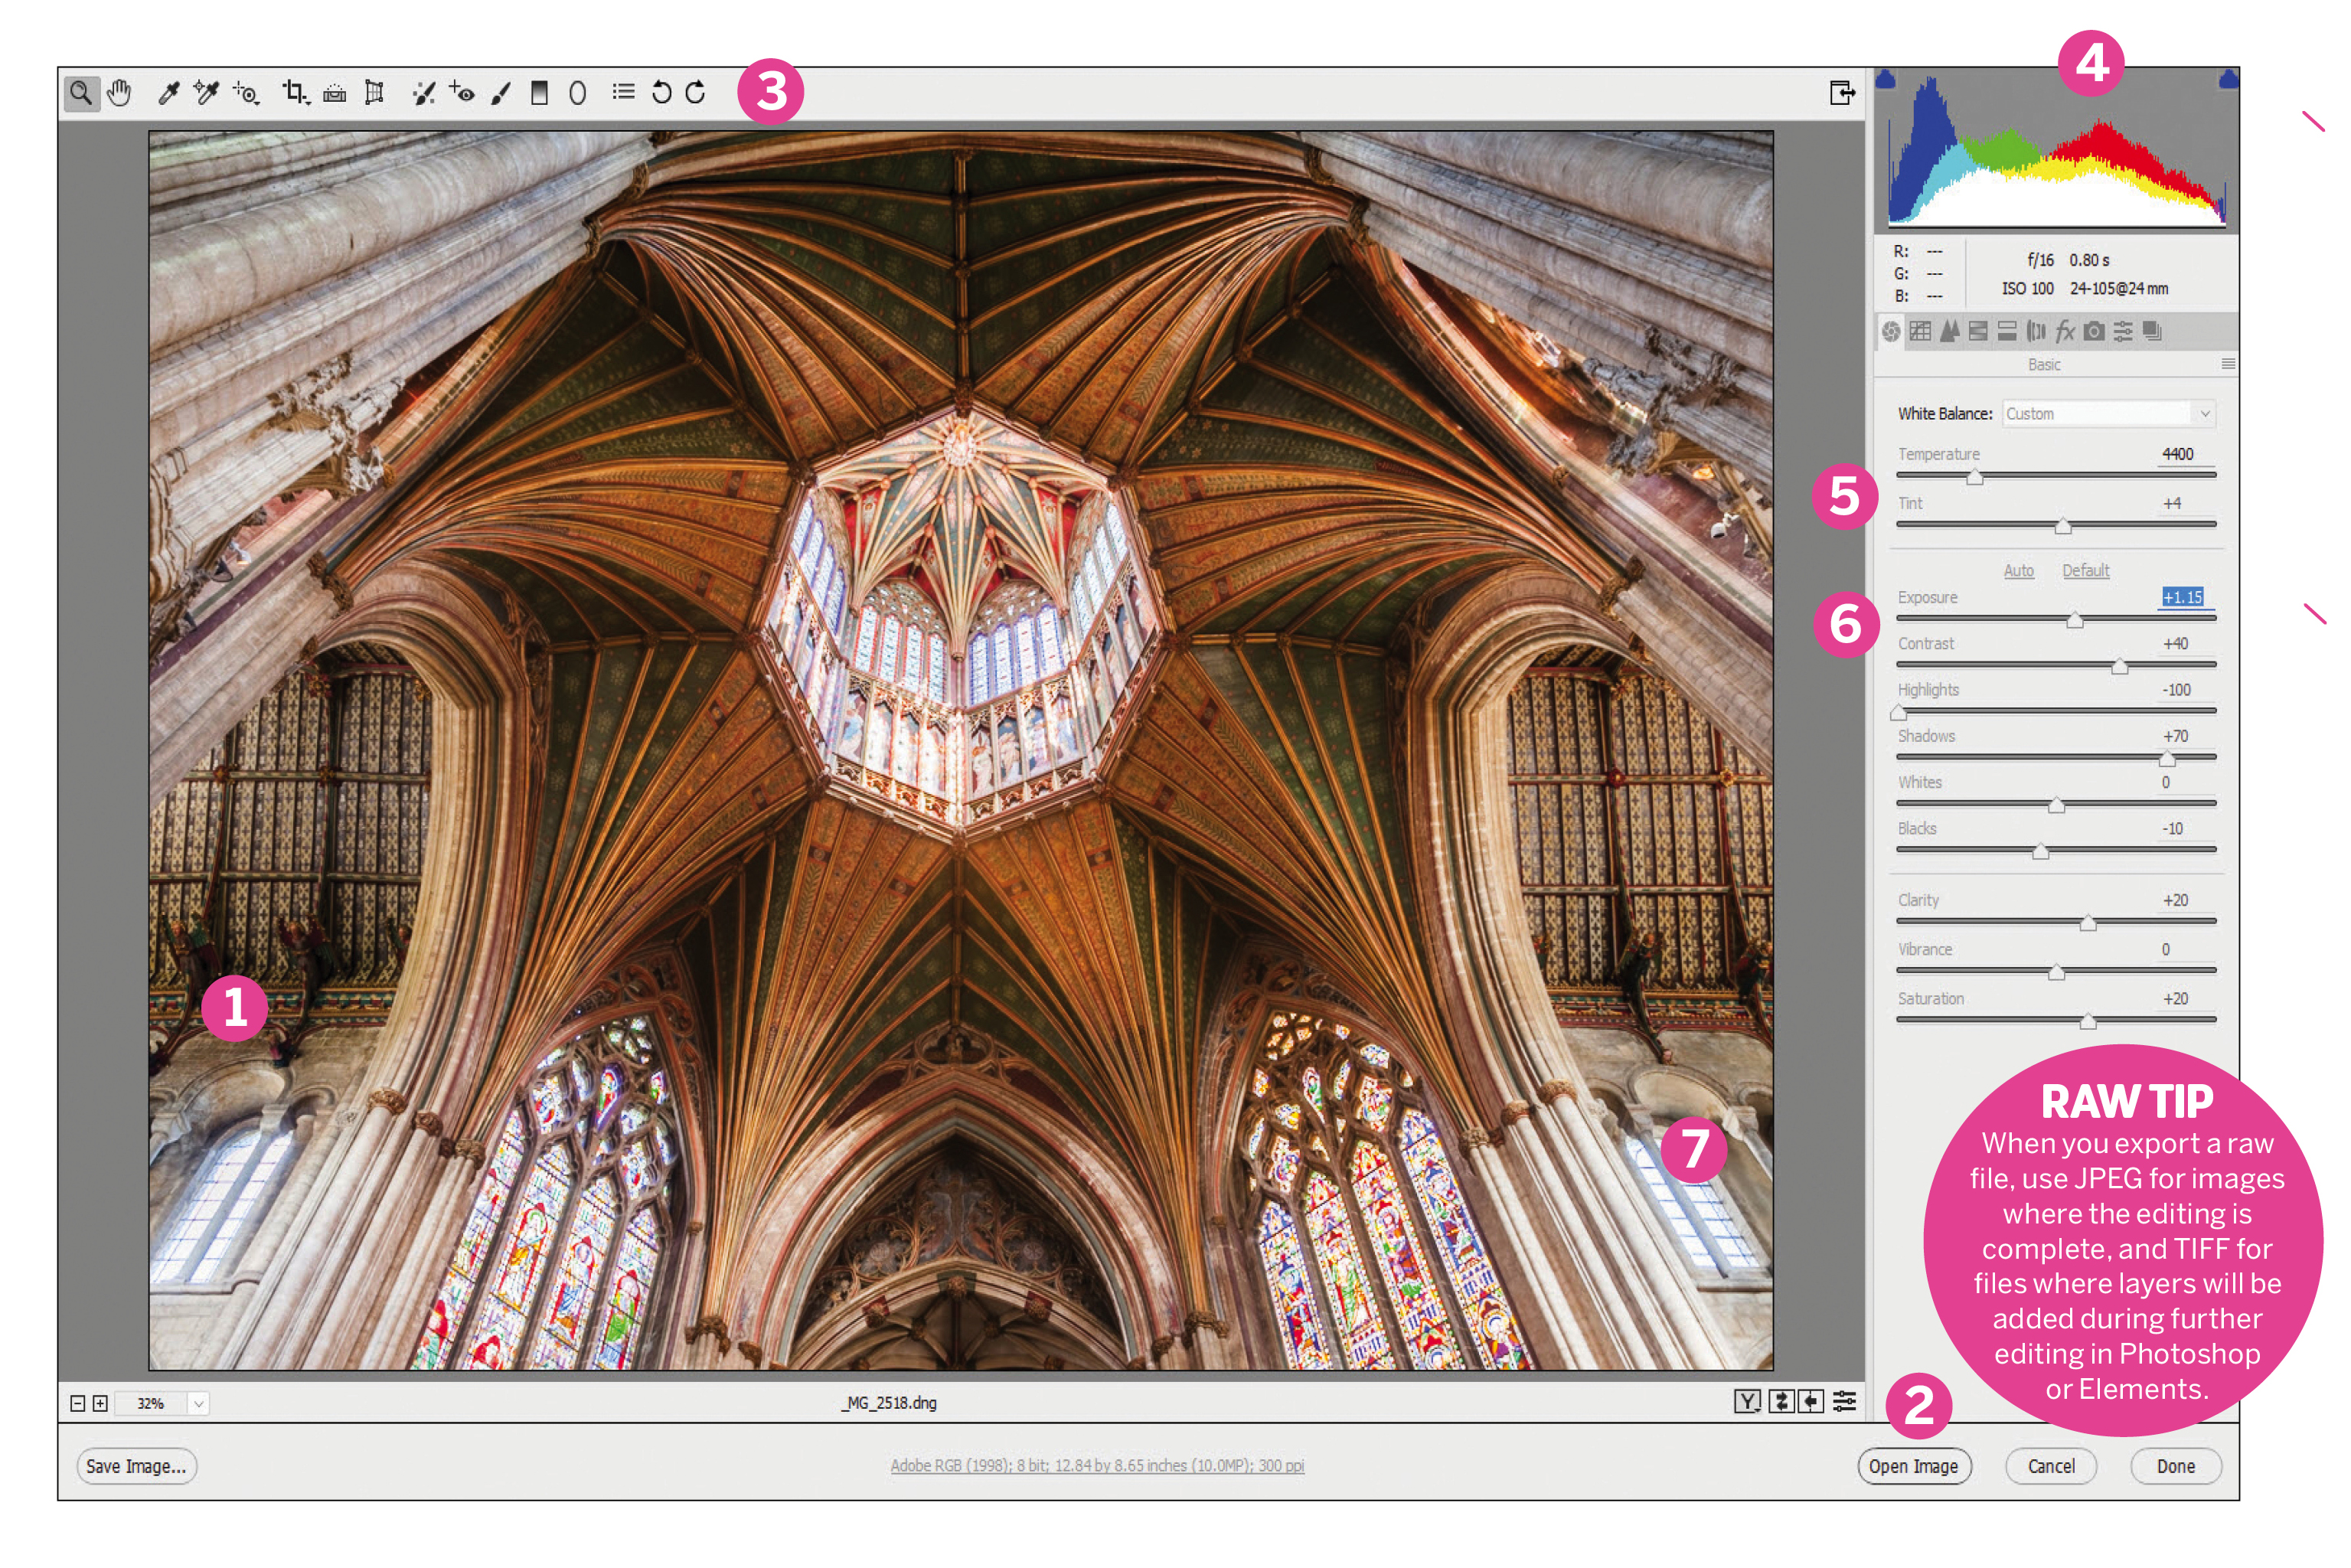
1. Main image area
Your image appears in the main window. You can zoom in and out using the Zoom Tool or by pressing Ctrl/Cmd and the plus key to zoom in, and Ctrl/Cmd with the minus key to zoom out. If you've zoomed in, holding down the space bar activates the Hand Tool and allows you to click and scroll around the image. If you have more than one image opened in Camera Raw, the Filmstrip will be visible to the left of the main image area, enabling you to switch images.
Get daily insight, inspiration and deals in your inbox
Sign up for breaking news, reviews, opinion, top tech deals, and more.
2. Save Image
When you've finished editing your images, you can open them directly into the main Photoshop or Elements editing area by clicking Open Image at the bottom right of the interface. Alternatively you can click on Save; now you can choose the file type to save to and the location. You can also name the file, resize it and set the colour space – use sRGB for images to go on the web, and Adobe RGB (1998) for print.
3. The toolbar
The toolbar is exactly what its name suggests – the place where you can activate a number of useful tools. From left to right, there's the Zoom Tool, Hand Tool, White Balance Tool, Color Sampler Tool, Targeted Adjustment Tool, Crop Tool, Straighten Tool, Transform Tool, Spot Removal Red Eye Removal, Adjustment Brush, Graduated Filter, Radial Filter, Open Preferences and two controls for quickly rotating images.
4. Histogram and tabs
In the top right of the interface you'll see the Histogram. This shows the distribution of tones, from shadows on the left to highlights on the right. Below this are some tabs that provide a range of controls. Basic is selected by default, and allows you to make several basic adjustments to how the image looks. Click on each one to see what's on offer.
5. White Balance
White Balance is the setting that makes different light sources appear neutral, as if they produced white light. There's a drop-down menu with presets or manual controls to add or remove blue/yellow and green/magenta. To use them, simply drag the Temperature or Tint sliders in the opposite direction of the colour you want to neutralise. These options can also be used to make creative colour effects.
6. Adjustment
The Adjustment sliders in the Basic tab will be the ones you use most often, especially Exposure and Contrast. Most are self-explanatory – Shadows and Highlights can be used to recover details in these areas, while Whites and Blacks focus on the brightness of the lightest and darkest parts of the image. Clarity boosts mid-tone contrast, and Saturation and Vibrance boost colours. Vibrance is especially helpful for portraits.
What are XMP files?
When you make adjustments to any raw file* in Camera Raw, the image file itself will remain untouched: instead a separate XMP file will be created, and this is where your adjustments will be saved. When you reopen a previously adjusted image, the relevant XMP file will automatically load the settings. *Adobe's DNG format is the exception, saving the changes inside the file.
James Abbott is a professional photographer and freelance photography journalist. He contributes articles about photography, cameras and drones to a wide range of magazines and websites where he applies a wealth of experience to testing the latest photographic tech. James is also the author of ‘The Digital Darkroom: The Definitive Guide to Photo Editing’.
