How to feel like you're flying with a drone and virtual reality
Glide through the air
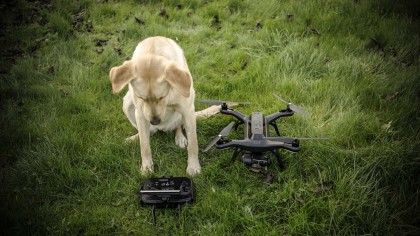
Virtual reality and drones
The latest generation of drones are equipped with cameras capable of capturing spectacular 4K footage. Advanced drones such as the 3DR SOLO harness the power of the small GoPro action camera, while other manufacturers such as DJI utilise their own integrated 4k solutions.
The stunning aerial footage captured is impressive but dulls when compared to the latest virtual reality potential. At present these drones are not equipped or designed to carry VR cameras but that option is likely to be just around the corner. However if you want to give it a go now, then it's easy enough to convert and equip your drone ready for VR.
As an early adopter new technology is never cheap and in this project I've opted to use the 3DR SOLO and 360Fly action camera, both solid performers in their field. The same principles will apply to cheaper drones and cameras, it might just take a little longer but the results will be just the same.
1. Selecting your drone
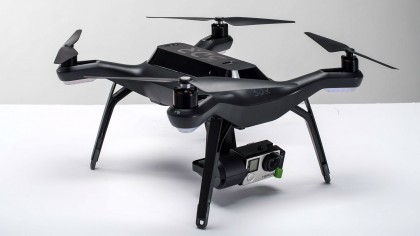
There's a good selection of drones on the market but when it comes to deciding on which you should use for your VR rig, you need to make sure that there's a way you can adapt the drone to hold a camera, and that it has the lift capacity to take off with the extra load.
The 3DR SOLO is one of the more expensive consumer level drones on the market, but comes equipped with a huge array of intelligent flight features that will make shooting watchable VR footage incredibly easy. It also has a lift capacity of 420 grams. This is more that enough to easily lift the 360Fly, although some modifications are required.
2. What VR Camera?
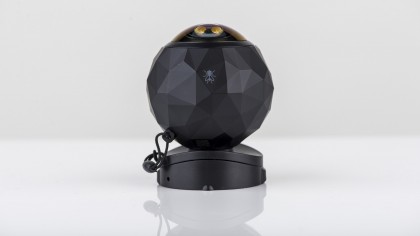
At present when it comes to VR cameras there are really only two usable options for our rig. The small Ricoh Theta with it's two small back to back mounted cameras, or the 360Fly with its single bug eye.
The Ricoh is the smaller and lighter of the two and shoots 360 in all directions. The 360fly on the other hand shoots 360 degrees horizontal and 240 degrees vertical, which with the way that we'll shoot the footage shouldn't be too much of an issue. It's also the easier of the two to mount. There are other options but these two are at present both available and easy to use.
3. A careful balance
The 3DR SOLO needs a slight change to its setup in order to attach the 360Fly, but as the 360Fly will be replacing the usual position of a GoPro if we lose the GoPro we're going to lose the live view stream.
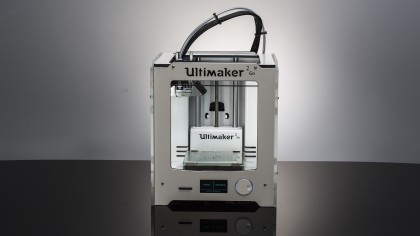
To get around this problem we'll create a mount using the Ultimaker 2 Go 3D printer, a version of this can be downloaded here. This will enable us to mount both the 360Fly and GoPro so that we can still get a live feed from the craft while airborne. The mount has been created to enable a slight shift of weight between the two cameras, a little trial and error will be necessary in order to ensure that the balance between the two cameras is correct before take-off.
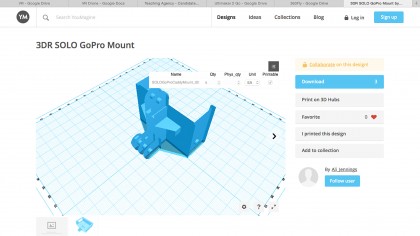
4. 3D Printing
If you're looking to get creative with tech then a 3D printer is essential. In this project we've used the ultra compact Ultimaker 2 Go which has enabled the quick construction of the extended legs and mount adapter that holds both the 360Fly and GoPro. All files that are used in this project can be downloaded.
The design of the parts has all been done using Cinema 4D and the free AutoDesk 123D software that can be downloaded from www.123dapp.com.
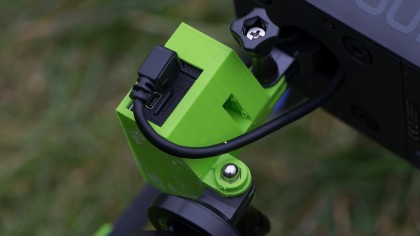
5. Live view
The 3DR SOLO is fully compatible with GoPro cameras and with the gimbal attached you're able to access most of the camera's operations, however without the gimbal we'll still be able to use the live view stream.
Using the mount that we've created we can simply attach the GoPro and link to the SOLO by means of the micro HDMI cable. With the cable attached it's just a case of booting the camera, handset and SOLO so that we can check the connection and live view stream. Any excess cable can be neatly tucked back inside the SOLO.
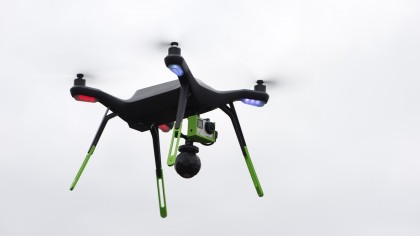
6. Test the setup
Drone flight times are pretty short so a quick visual test of what you're shooting with the VR camera is always a good idea. The easiest test is to simply flip the drone over so that it's resting on the ground with its belly in the air.
As you won't be able to adjust the camera once it's airborne it's worth seeing what's being captured. Connecting to the mobile app and taking a look at the live view stream is an easy way to do this. You'll see the landing gear in shot, but most importantly the camera should be looking directly up. Ideally you'd have two mobile devices so that during the test flight you can also check on the video.
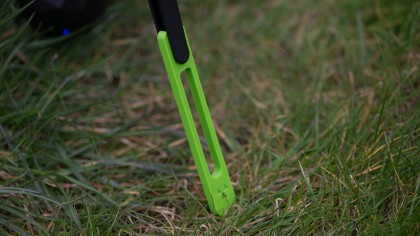
7. Flight checks and balance
The 3DR SOLO is designed to hold a lightweight GoPro rather that the 360Fly and this is instantly apparent when the 360Fly is attached, with the height of the 360Fly and its mount just exceeding the height of the SOLO's legs.
This issue is likely to be true for almost any drone of this size. To ensure that the lens of the 360Fly doesn't get damaged during take off and landing we've printed some simple leg extenders, again on the Ultimaker 2 Go. Before flight make sure you test the drones airworthiness by quickly taking off and landing to test the drone's balance.
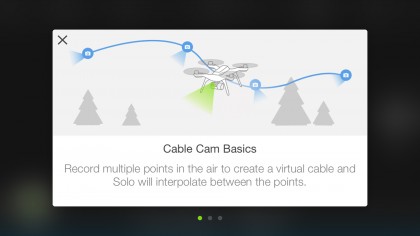
8. Shooting decent VR footage
The latest drones feature some incredible intelligent flight features, but on the SOLO we're just going to use the cable cam to create two points at which the drone will fly between. By using cable cam rather than flying the drone manually we'll be able to shoot far smoother footage which is less likely to make the VR viewer ill while watching it back.
Make sure as you record you shoot a good length of continuous footage, in this sample I'll fly the same flight path several times and adjust the speed of flight through the app.
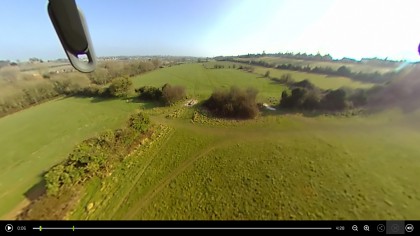
9. Editing the footage
Once you've shot your footage it's just a case of editing it down into watchable clips. As there is no way to control the 360Fly in the air the captured footage will need to be cut and edited. In order to do this you'll need to use the software that comes with your 360 degree camera.
Most 360 cameras come with their own editing app and for the most this is pretty basic, only enabling a few exposure and colour settings changes. However if you have FinalCut Pro X or Premier Pro then these clips can be edited to a greater degree before being reimported into the native software.
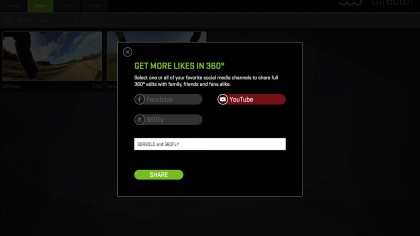
10. Exporting interactive 360 footage
360Fly, YouTube and many other platforms now offer 360 degree video support, but if you want to watch the footage back through VR goggles then you'll need to ensure that the platform you choose supports playback and interaction on a mobile device.
The 360Fly is a great choice for this as once the footage is downloaded and edited in the app, your 360 degree video experience is ready to be viewed in your choice of VR Viewer. Just hit the goggle icon in the app and the screen will split ready for viewing back in Google Cardboard or your own 3D printed viewer.
Alastair is a photographer, filmmaker and tech writer who has been working in the publishing industry since the late 1990s. For more than 25 years he has covered photography, video and technology across Future's photography, technology and gaming brands. He runs a photography and video production company and lectures in TV and film. He can usually be found testing mini PCs or prototyping and prop building with the aid of 3D printing.
Sign up for breaking news, reviews, opinion, top tech deals, and more.
You are now subscribed
Your newsletter sign-up was successful