How to get the best out of Canon's built-in HDR feature
Hyper-real HDR

Canon's HDR Feature
Newer Canon DSLRs offer a built-in HDR mode that merges three exposures in-camera. This enables you to tackle a variety of high-contrast scenes head-on by extending the camera's dynamic range, which means you can record detail in the brightest highlights and darkest shadows.
It's a handy feature that adds another weapon to your creative arsenal, whether you shoot 'serious' HDRs, or are just after a fun effect while out and about.
The HDR Mode takes three bracketed exposures. All you do is press the shutter and the camera fires three times continuously in quick succession. There's no need to hold the shutter or set a Drive mode (although a fast drive mode will mean shorter gaps between shots). Then it takes about ten seconds to merge the frames and produce the finished HDR image.
You wouldn't expect the in-camera HDR Mode to match dedicated software, but there are several useful settings and a surprising degree of control. You can decide the difference in stops between the three frames, and choose from five different 'Effects' modes for a variety of HDR looks.
The original frames can be shot in Raw (or JPEGs on some DSLRs like the Canon EOS 70D), but the merged HDR is a JPEG. You can keep the originals (not on the 70D) so, if you're unhappy with the result, you can always process the images later with HDR software.
What is HDR?
High dynamic range imaging is a technique that allows for greater dynamic range than a camera could achieve in a single frame. Simply put, it combines detail from the brightest and darkest parts of a scene, without having to sacrifice one for the other.
To shoot in HDR, you need three or more exposures at incremental differences, so all parts of the scene are correctly exposed across the range of frames. The files are then merged and 'tone-mapped' to reveal detail, add contrast and create a hyper-real HDR look.
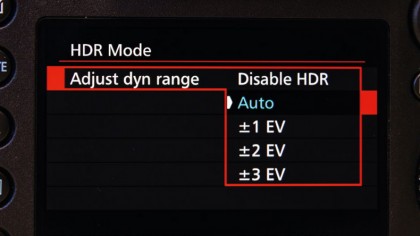
1. Set your camera up for HDR
Step 1. Set dynamic range
Go to the HDR Mode menu. By default, it's set to 'Disable HDR'. Switch to any other setting to enable HDR Mode. Choose a dynamic range to set the difference in exposure, from Auto or 1-3 stops.
Step 2. Auto image align
Even those with the steadiest of hands will find it hard to shoot three frames handheld that are in perfect alignment. The Auto Image Align feature can help by fixing slight differences between frames.
Step 3. High drive speed
The camera will fire three times when you hit the shutter. To minimize any effect of movement in the scene shoot the sequence as quickly as possible, so set your Drive mode to High-speed Continuous.
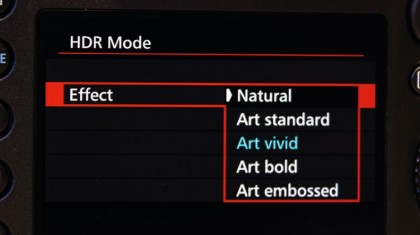
2. Select a HDR effect
Choose from one of five HDR Effects for a variety of looks, from the subtle to the hyper-real.
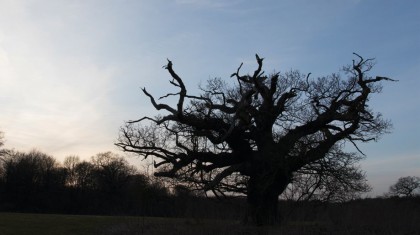
1. Original Image
Straight out of camera, a single frame struggles to record detail in either the sky or the foreground in this high-contrast scene. This is a good time to switch to HDR Mode and choose an effect.
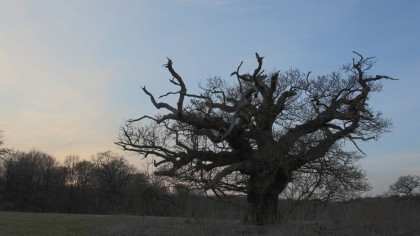
Step 2. Natural
Natural produces a flat effect, but with greater detail. There are a broader range of tones than you can initially see, so it's a good one if you want to apply local contrast or fine-tune the toning later.
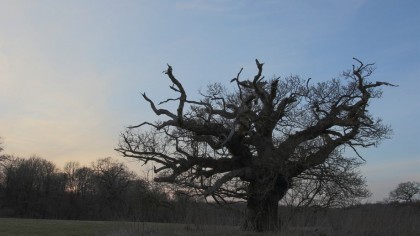
Step 3. Art standard
Art Standard is slightly more stylised than Natural, with more aggressive toning to tease out detail in the highlights and shadows. It's a good compromise between subtlety and impact.
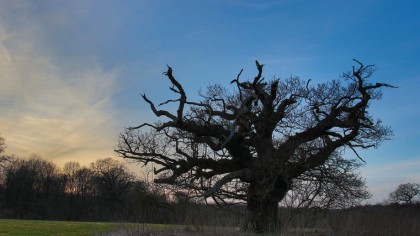
Step 4. Art vivid
In Art Vivid, the contrast and detail are similar to Art Standard, but as the name suggests, it pushes the colours more, so it's a useful one if the colours in the scene are lacking impact.
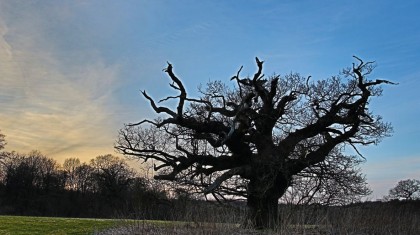
Step 5. Art bold
Art Bold applies greater contrast and pushes the detail further than Art Vivid or Art Standard, but can lead to unattractive haloes along edges, particularly in busy scenes like this.
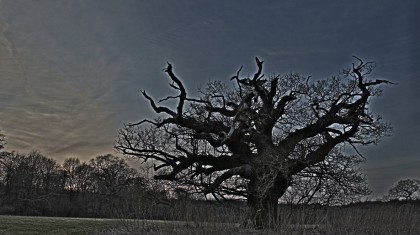
Step 6. Art embossed
Art Embossed reduces colour saturation so that midtones appear greyed out, while edge details are enhanced. It's the least useful of the effects, but may work on grungy interiors.
3. Choosing dynamic range
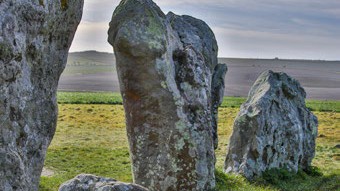
The Dynamic Range setting enables you set the difference in exposure between the three frames. There are four options: Auto, ±1 EV, ±2 EV and ±3 EV.
From an angle like this, where the objects in the foreground are in deep shade, a single exposure couldn't possibly record detail in both the rocks and the sky. A ±1 stop dynamic range begins to introduce detail, but a ±3 stop range results in a lot more cloud detail and is more obviously an HDR image.
4. Pick a good subject
The distinctive HDR look – with edge haloes, saturated colours and grungy details – can be applied to almost any subject, depending on personal taste. But using HDR techniques more subtly as a utility (in other words, extending dynamic range beyond the limits of a single exposure) is most effectively applied to high-contrast scenes.
Typical scenarios include landscapes at sunset with a dark foreground, subjects in shadow with their back to the sun, and gloomy interiors with bright windows. Scenes that work less well include flat, cloudy landscapes, subdued low-contrast subjects, and any scene with movement, like grass or people.
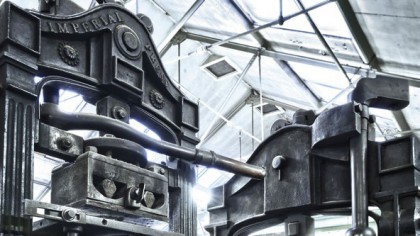
GOOD: Interiors
Interiors with windows work for HDR due to the big difference in light levels between the inside of the building and the outside world
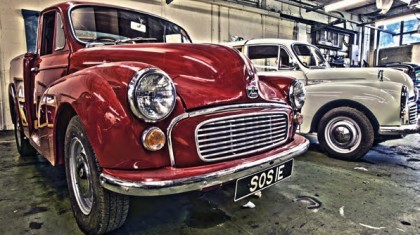
GOOD: Cars
Shiny metallic surfaces offer a good opportunity to push the HDR look further than you might go with a landscape

GOOD: Sunny scenes
In bright sunlight there's a big difference between highlights and shadows, which is ideal for the HDR treatment
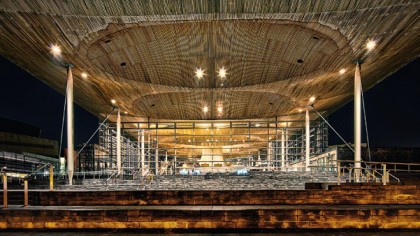
GOOD: Night architecture
At night there's a huge difference in brightness between artificial lights and the surrounding structures
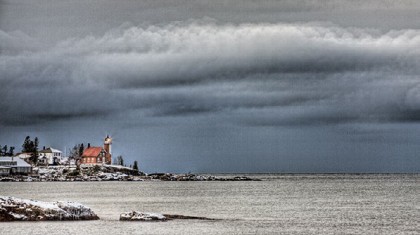
BAD: Moving clouds
When clouds are moving fast across the sky it might result in unsightly ghosting, jumps and jitters in the HDR process
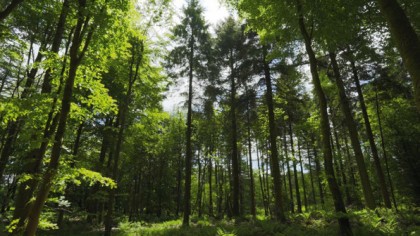
BAD: Blowing trees
Branches, leaves and foliage are fine in calm conditions, but not so good if it's breezy, so wait for a lull in the wind.
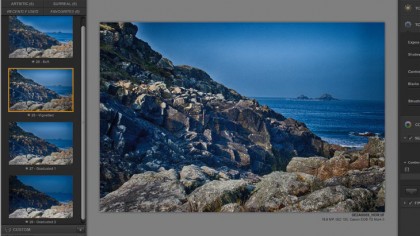
5. Process the picture on your PC
Unhappy with in-camera HDR? Process the originals in dedicated software.
Step 1. Preserve the originals
On most Canon DSLRs, you can choose to preserve the three original images shot in HDR Mode by setting Save Source images to All Images. This gives you the option to process them later in HDR software if the in-camera HDR isn't to your liking. Be sure to shoot in Raw for maximum tonal detail.
Step 2. Use Photoshop
To use Photoshop's Merge to HDR Pro command, go to File>Automate>Merge to HDR Pro. Once loaded, use the Highlights and Shadows sliders to control the tonal range and the Detail and Radius sliders to give it the HDR look. The presets in the dropdown can be a good starting point.
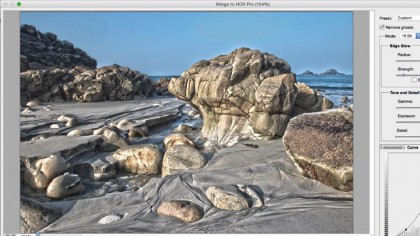
Step 3. Use a third party software
Photoshop isn't the only option. Many HDR enthusiasts use dedicated software, such as Nik HDR Efex Pro (pictured), Photomatix Pro or 32 Float, which have many more presets for fine-tuning the HDR look. These either act as Photoshop plugins, or standalone software.