Portrait retouching: 7 tricks for giving your portraits a professional finish
Remove unwanted blemishes, soften skin and boost eyes
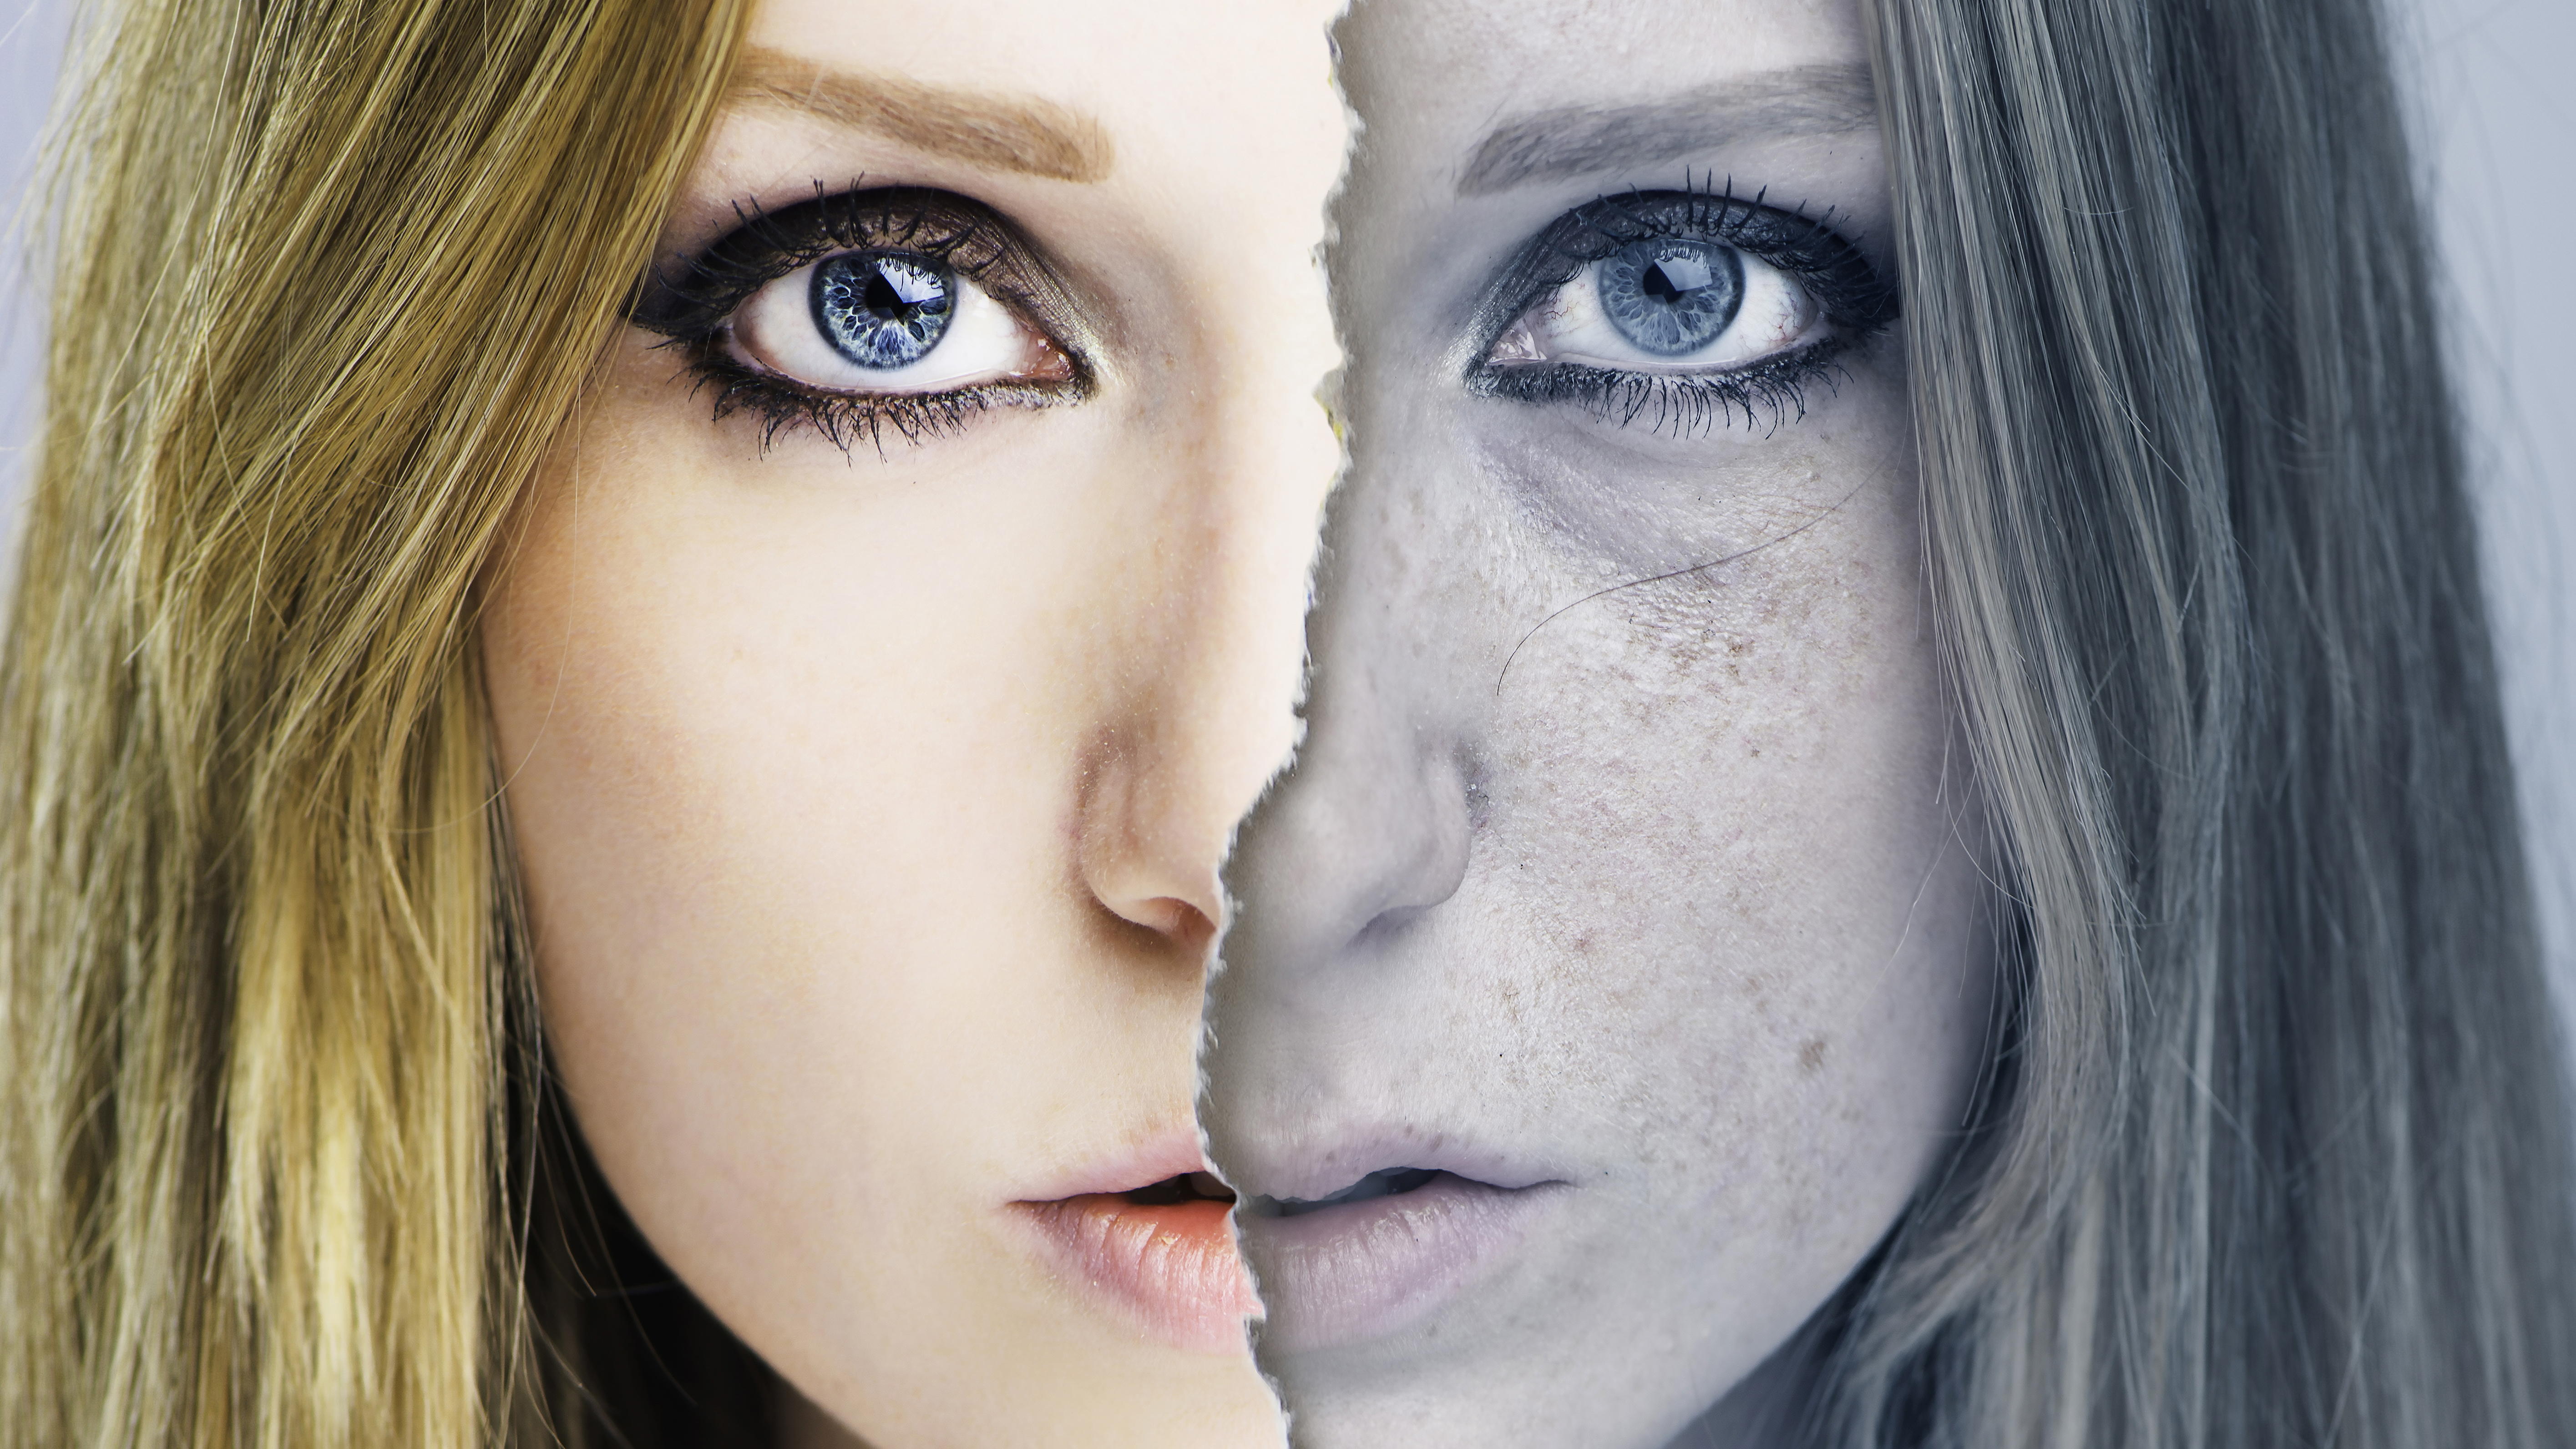
The trick with portrait retouching is not to go over the top. While it's now easier than ever to remove every wrinkle, change a subject's shape and size and remove every imperfection, the real trick is knowing when to stop.
Here we'll look at seven essential Photoshop retouching skills you can apply to your portraits that deliver subtle but effective refinements.
1. Boost the irises
Eyes are the most important part of a portrait. Here’s a speedy way to make them stand out…
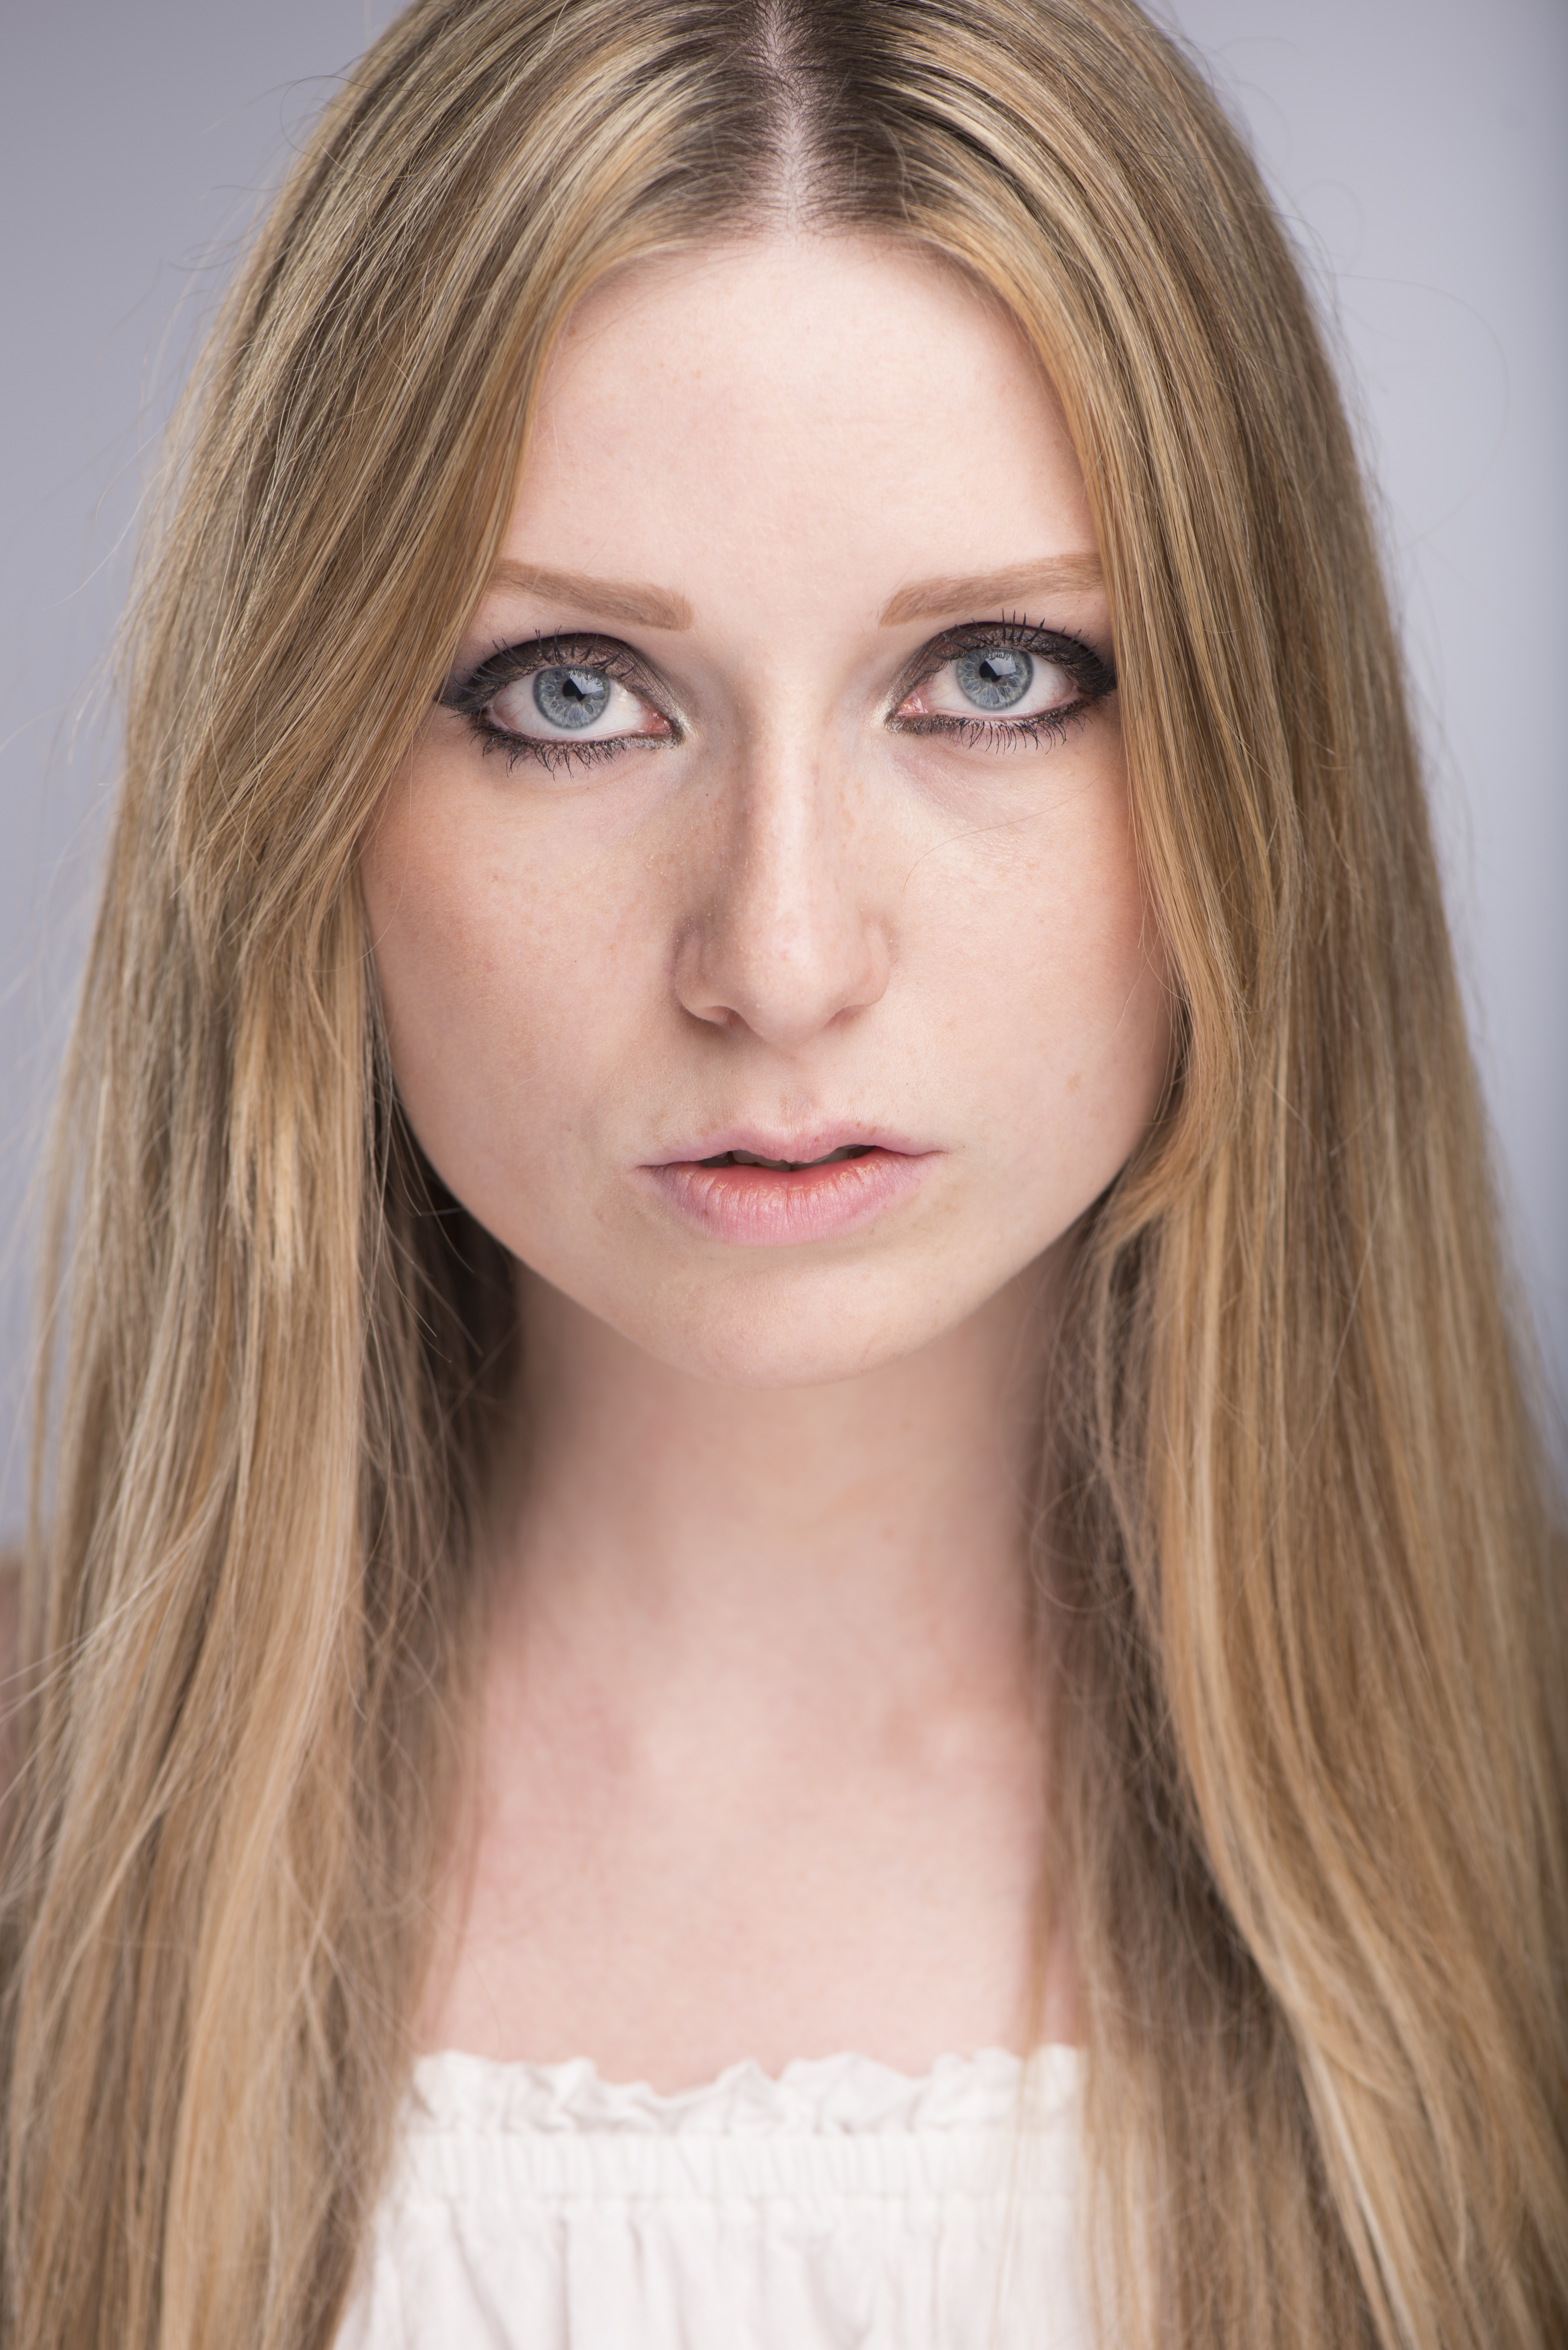
Before
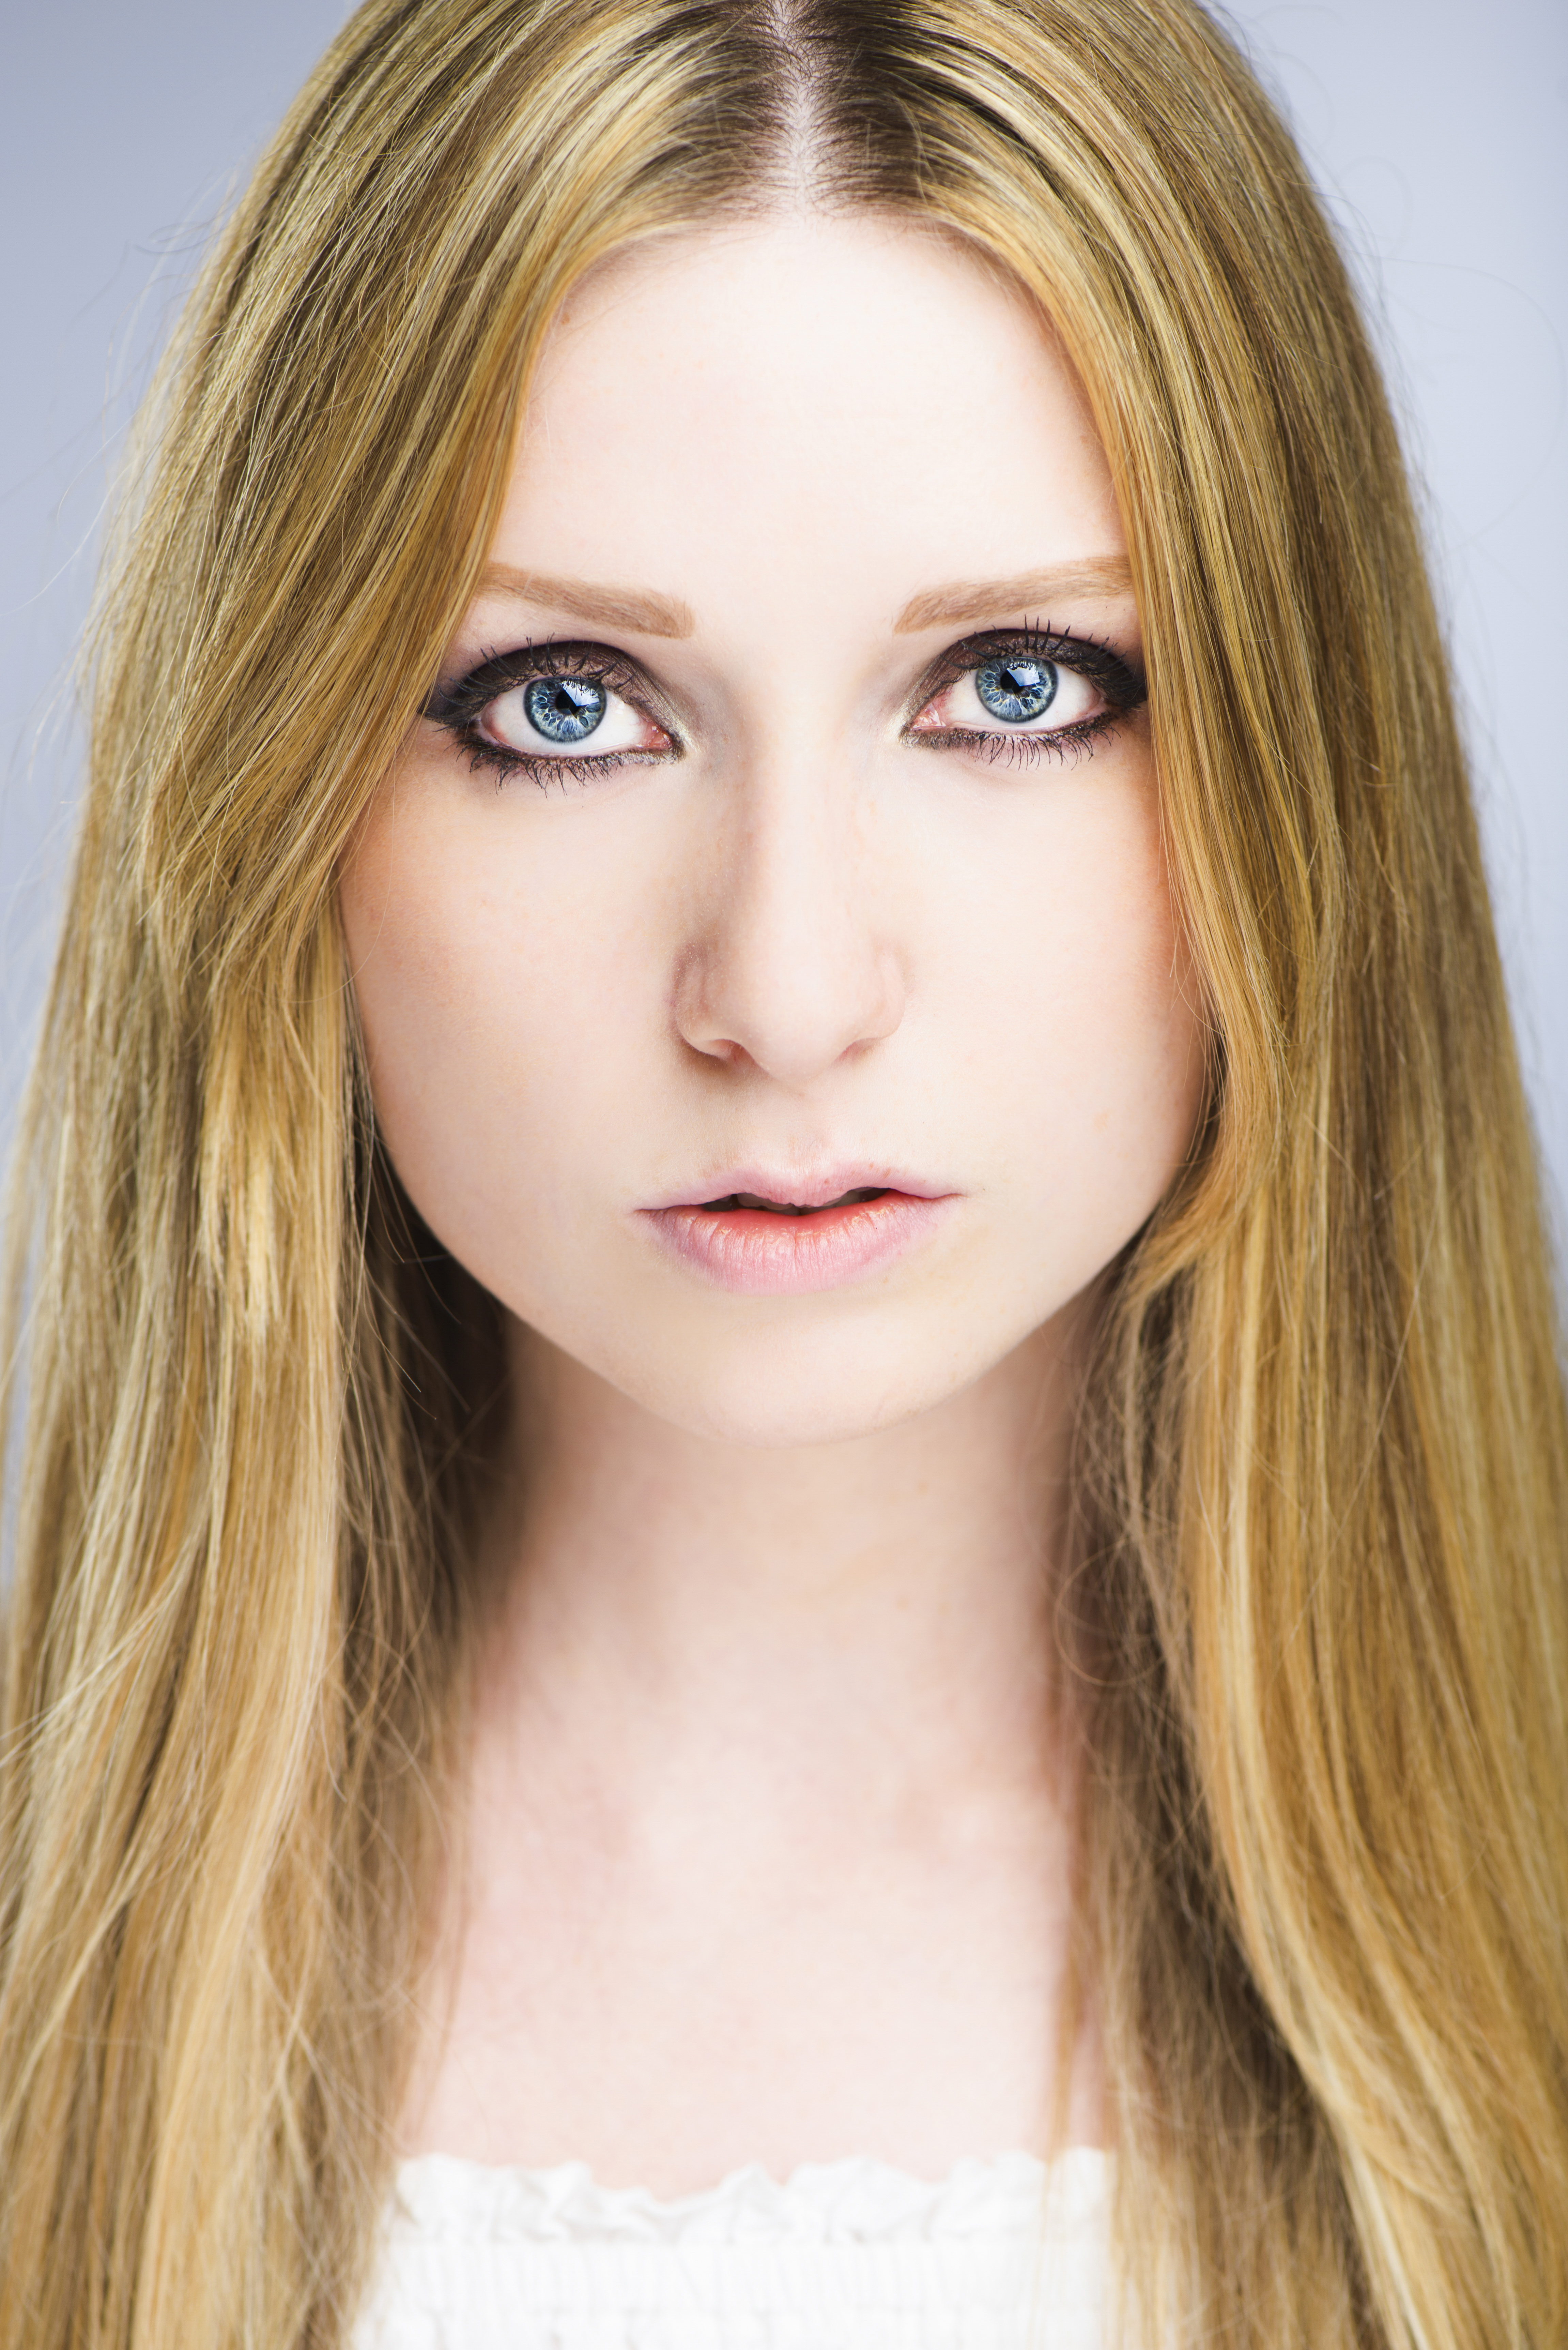
After
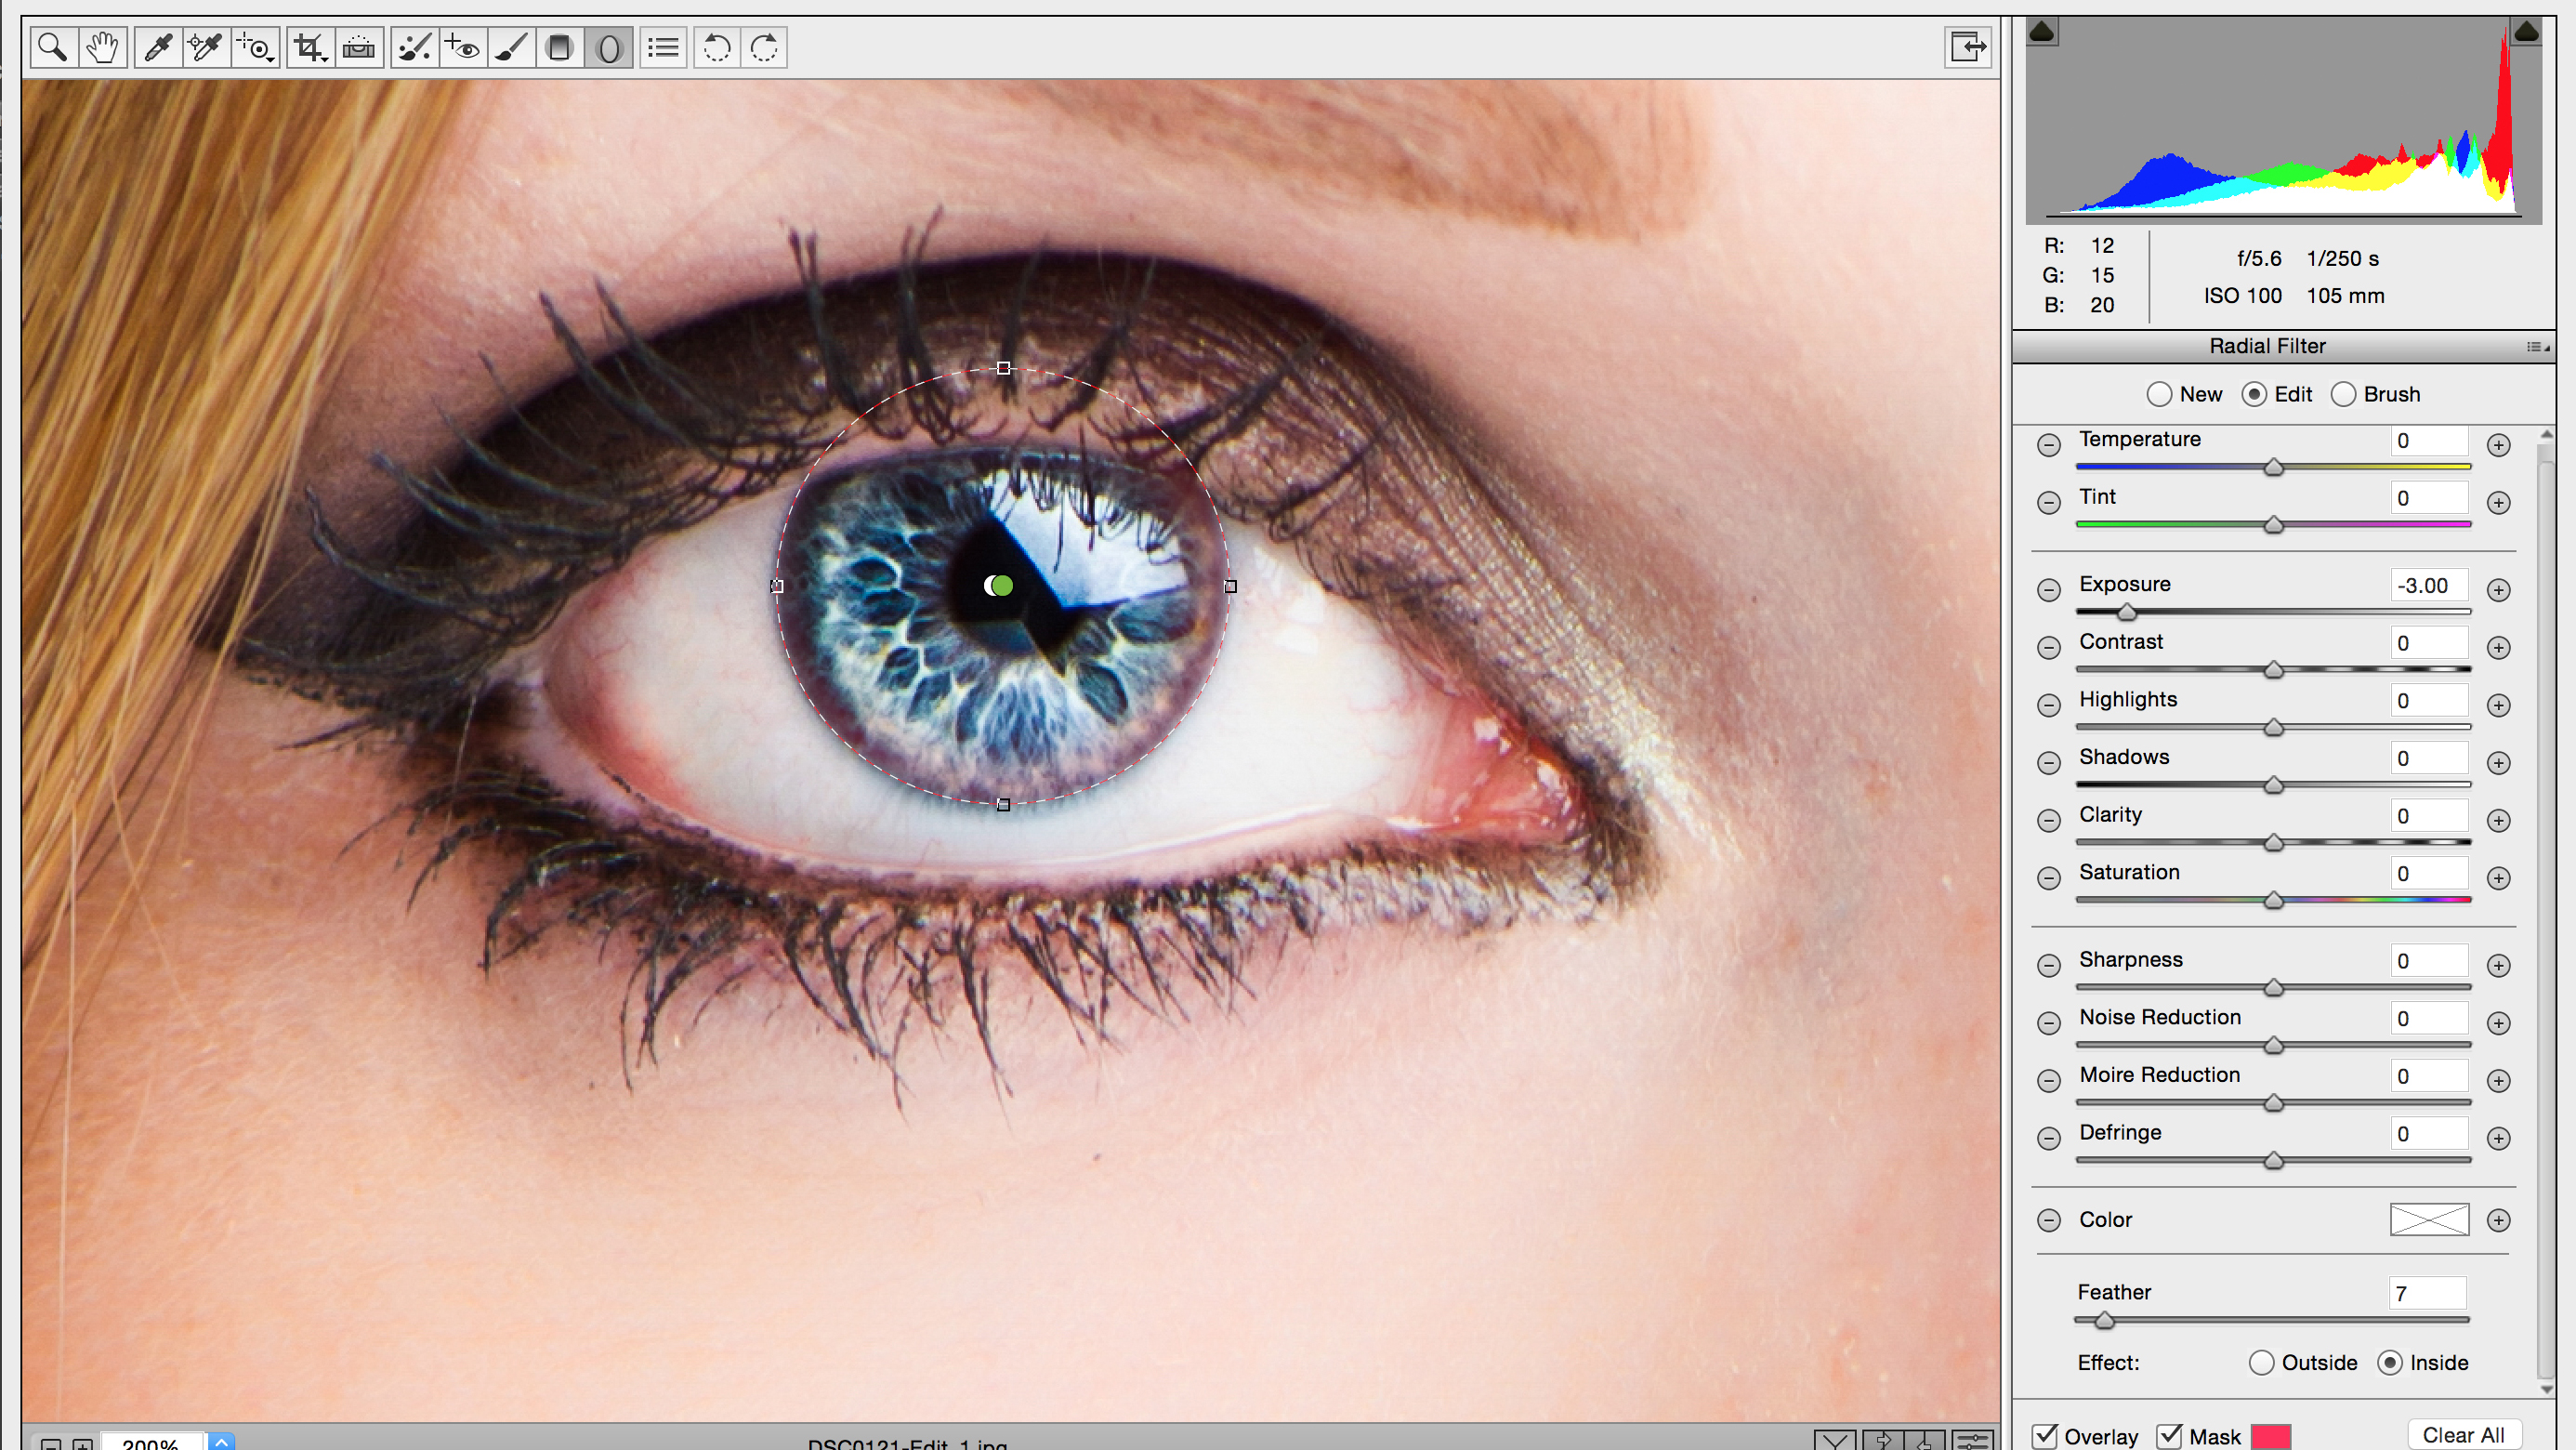
One of the quickest and easiest ways to give eyes extra impact is to boost the contrast and colour in the iris. One tool excels at circular adjustments like this: the Radial Filter. Simply open your image in Camera Raw or Lightroom, or with Photoshop CC’s Camera Raw Filter, then grab the Radial Filter from the toolbar.
Make an ellipse over the iris and use the Brush to erase parts if necessary until it precisely covers the iris. Then simply increase the Clarity, Saturation and Exposure until it looks right.
While you’re at it, darken the edges of the iris too. Hold down Ctrl/Cmd + Alt and drag the pin slightly to make a copy, then lower Exposure to darken the iris. Click the Brush, then erase the centre of the circle so that just the edges of the iris are darkened.
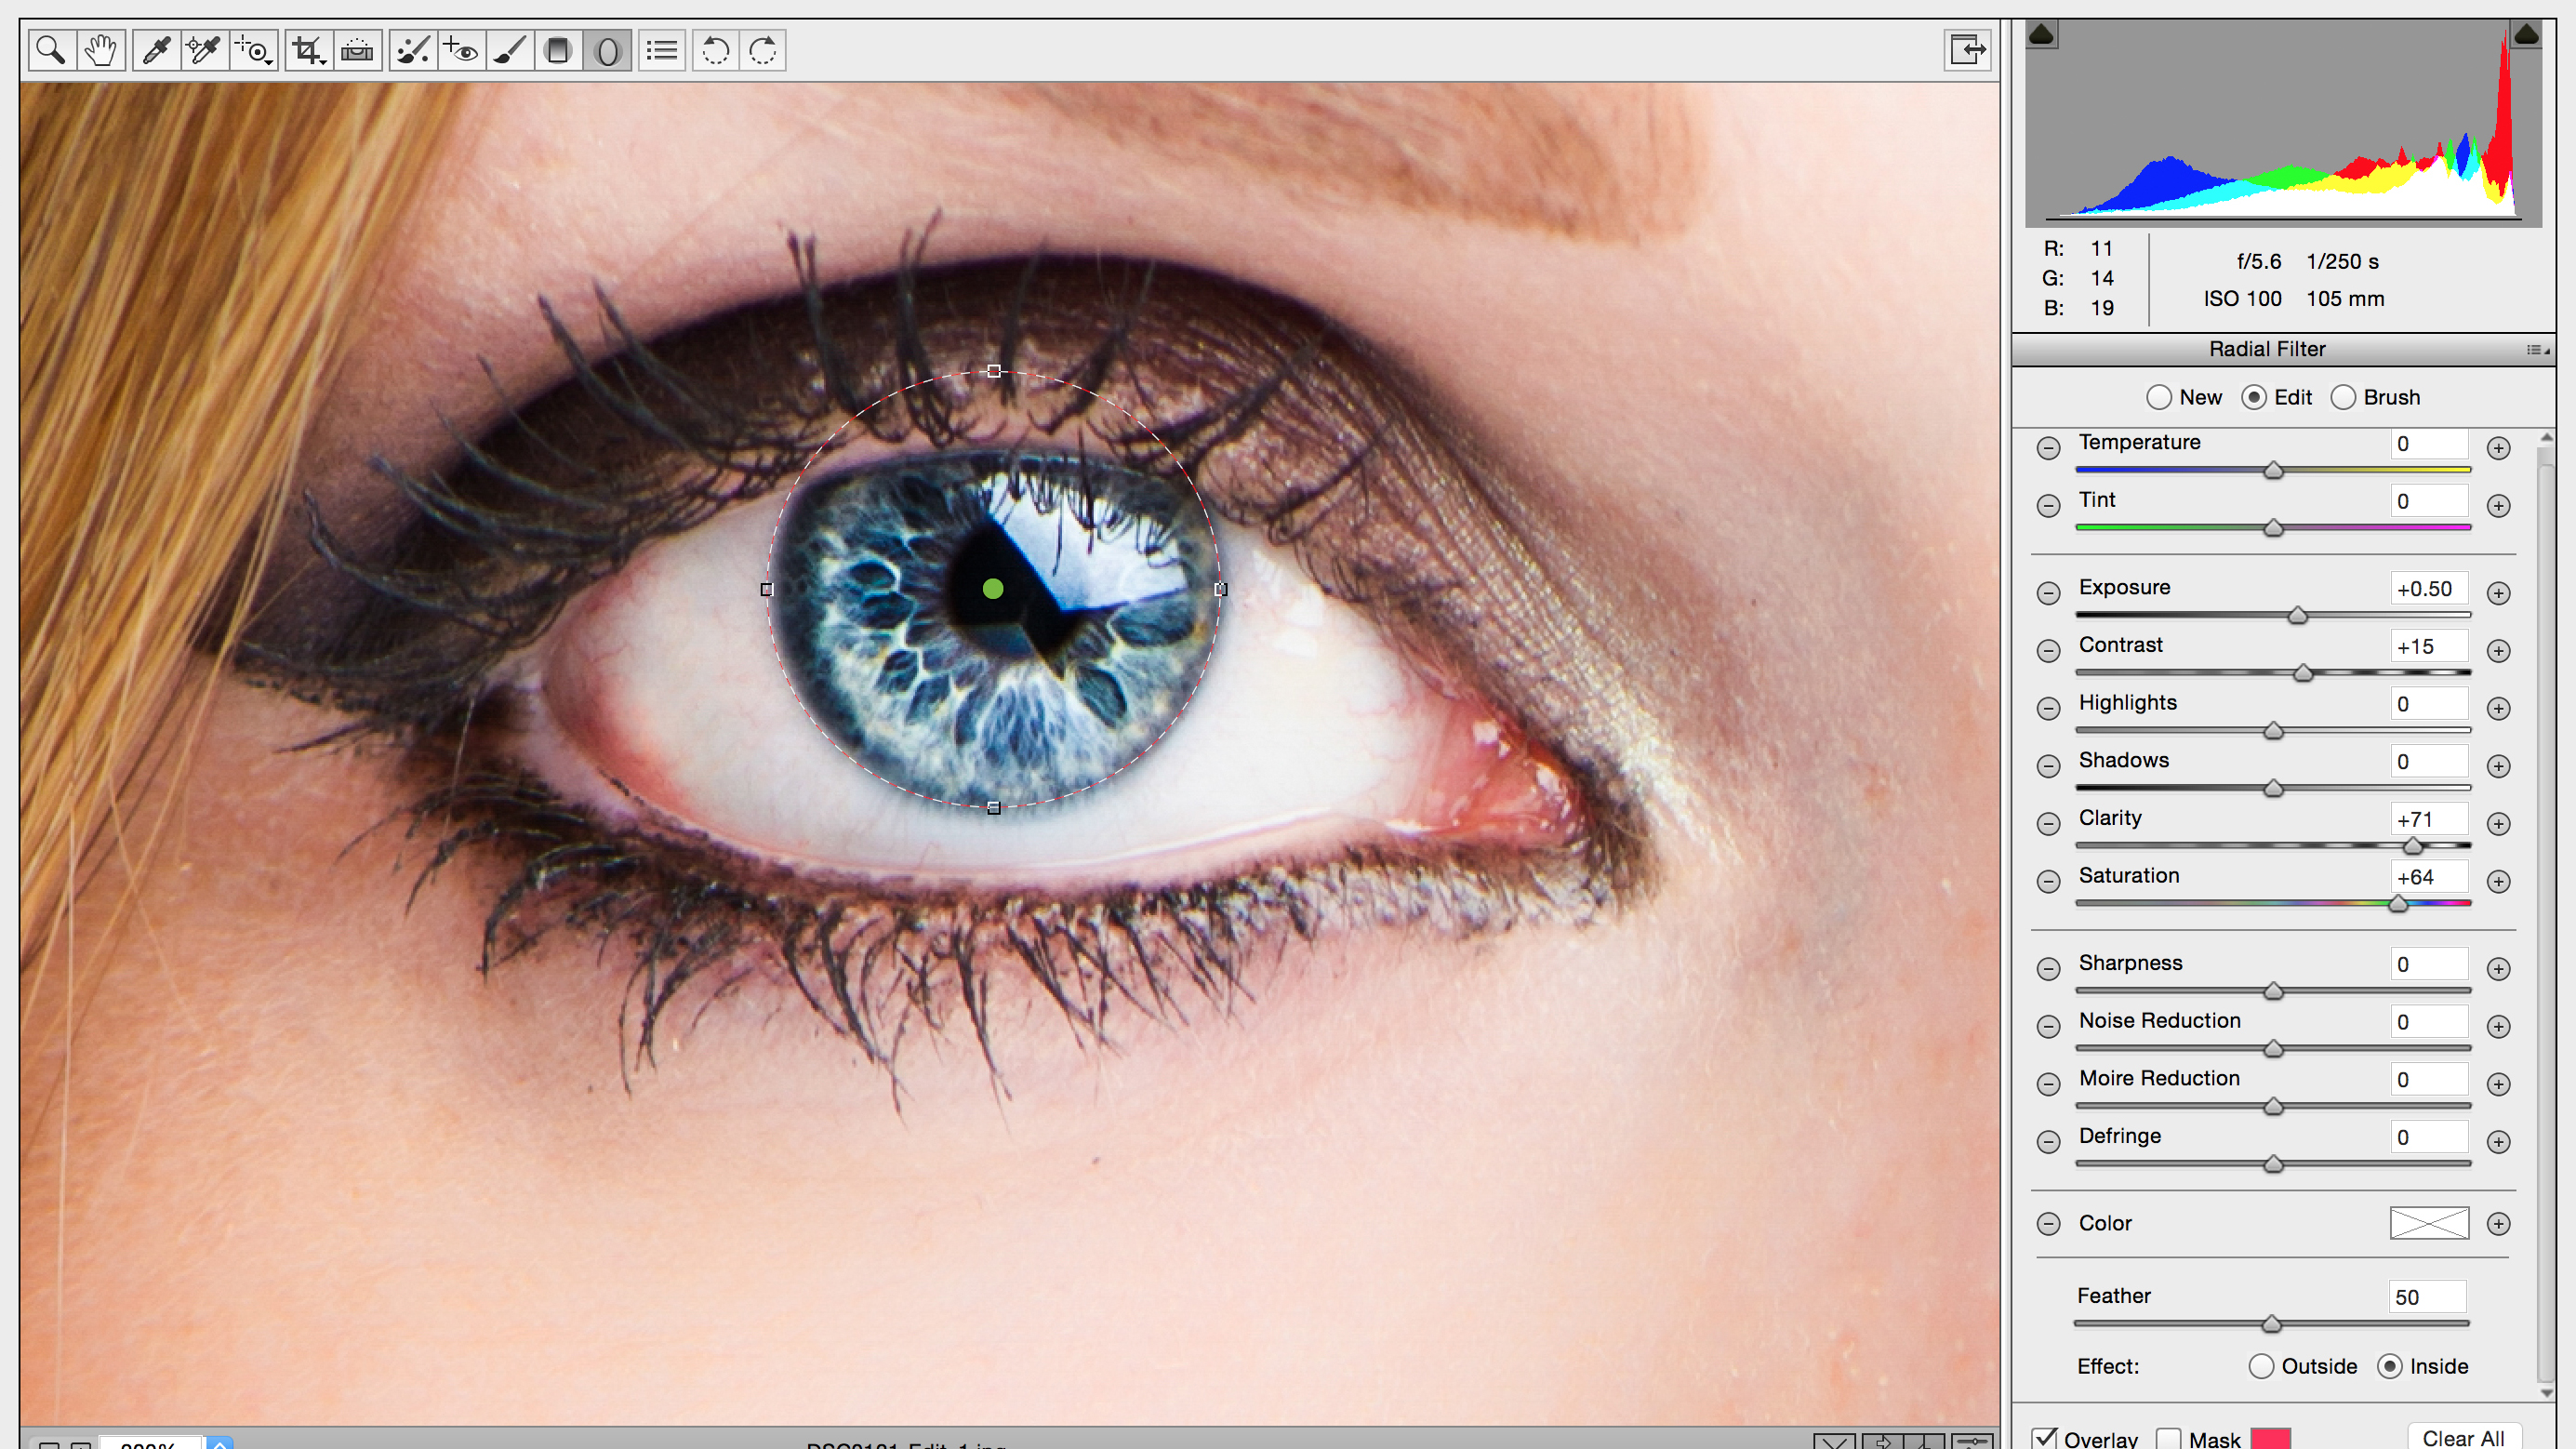
Top workflow tip: copy adjustment pins
Get daily insight, inspiration and deals in your inbox
Sign up for breaking news, reviews, opinion, top tech deals, and more.
Once you’ve perfected one iris, simply hold Ctrl/Cmd + Alt and drag the pins across to the other iris to copy them.
2. Super skin softening
If you want skin that looks soft and smooth without turning plastic, there’s a simple trick you can use
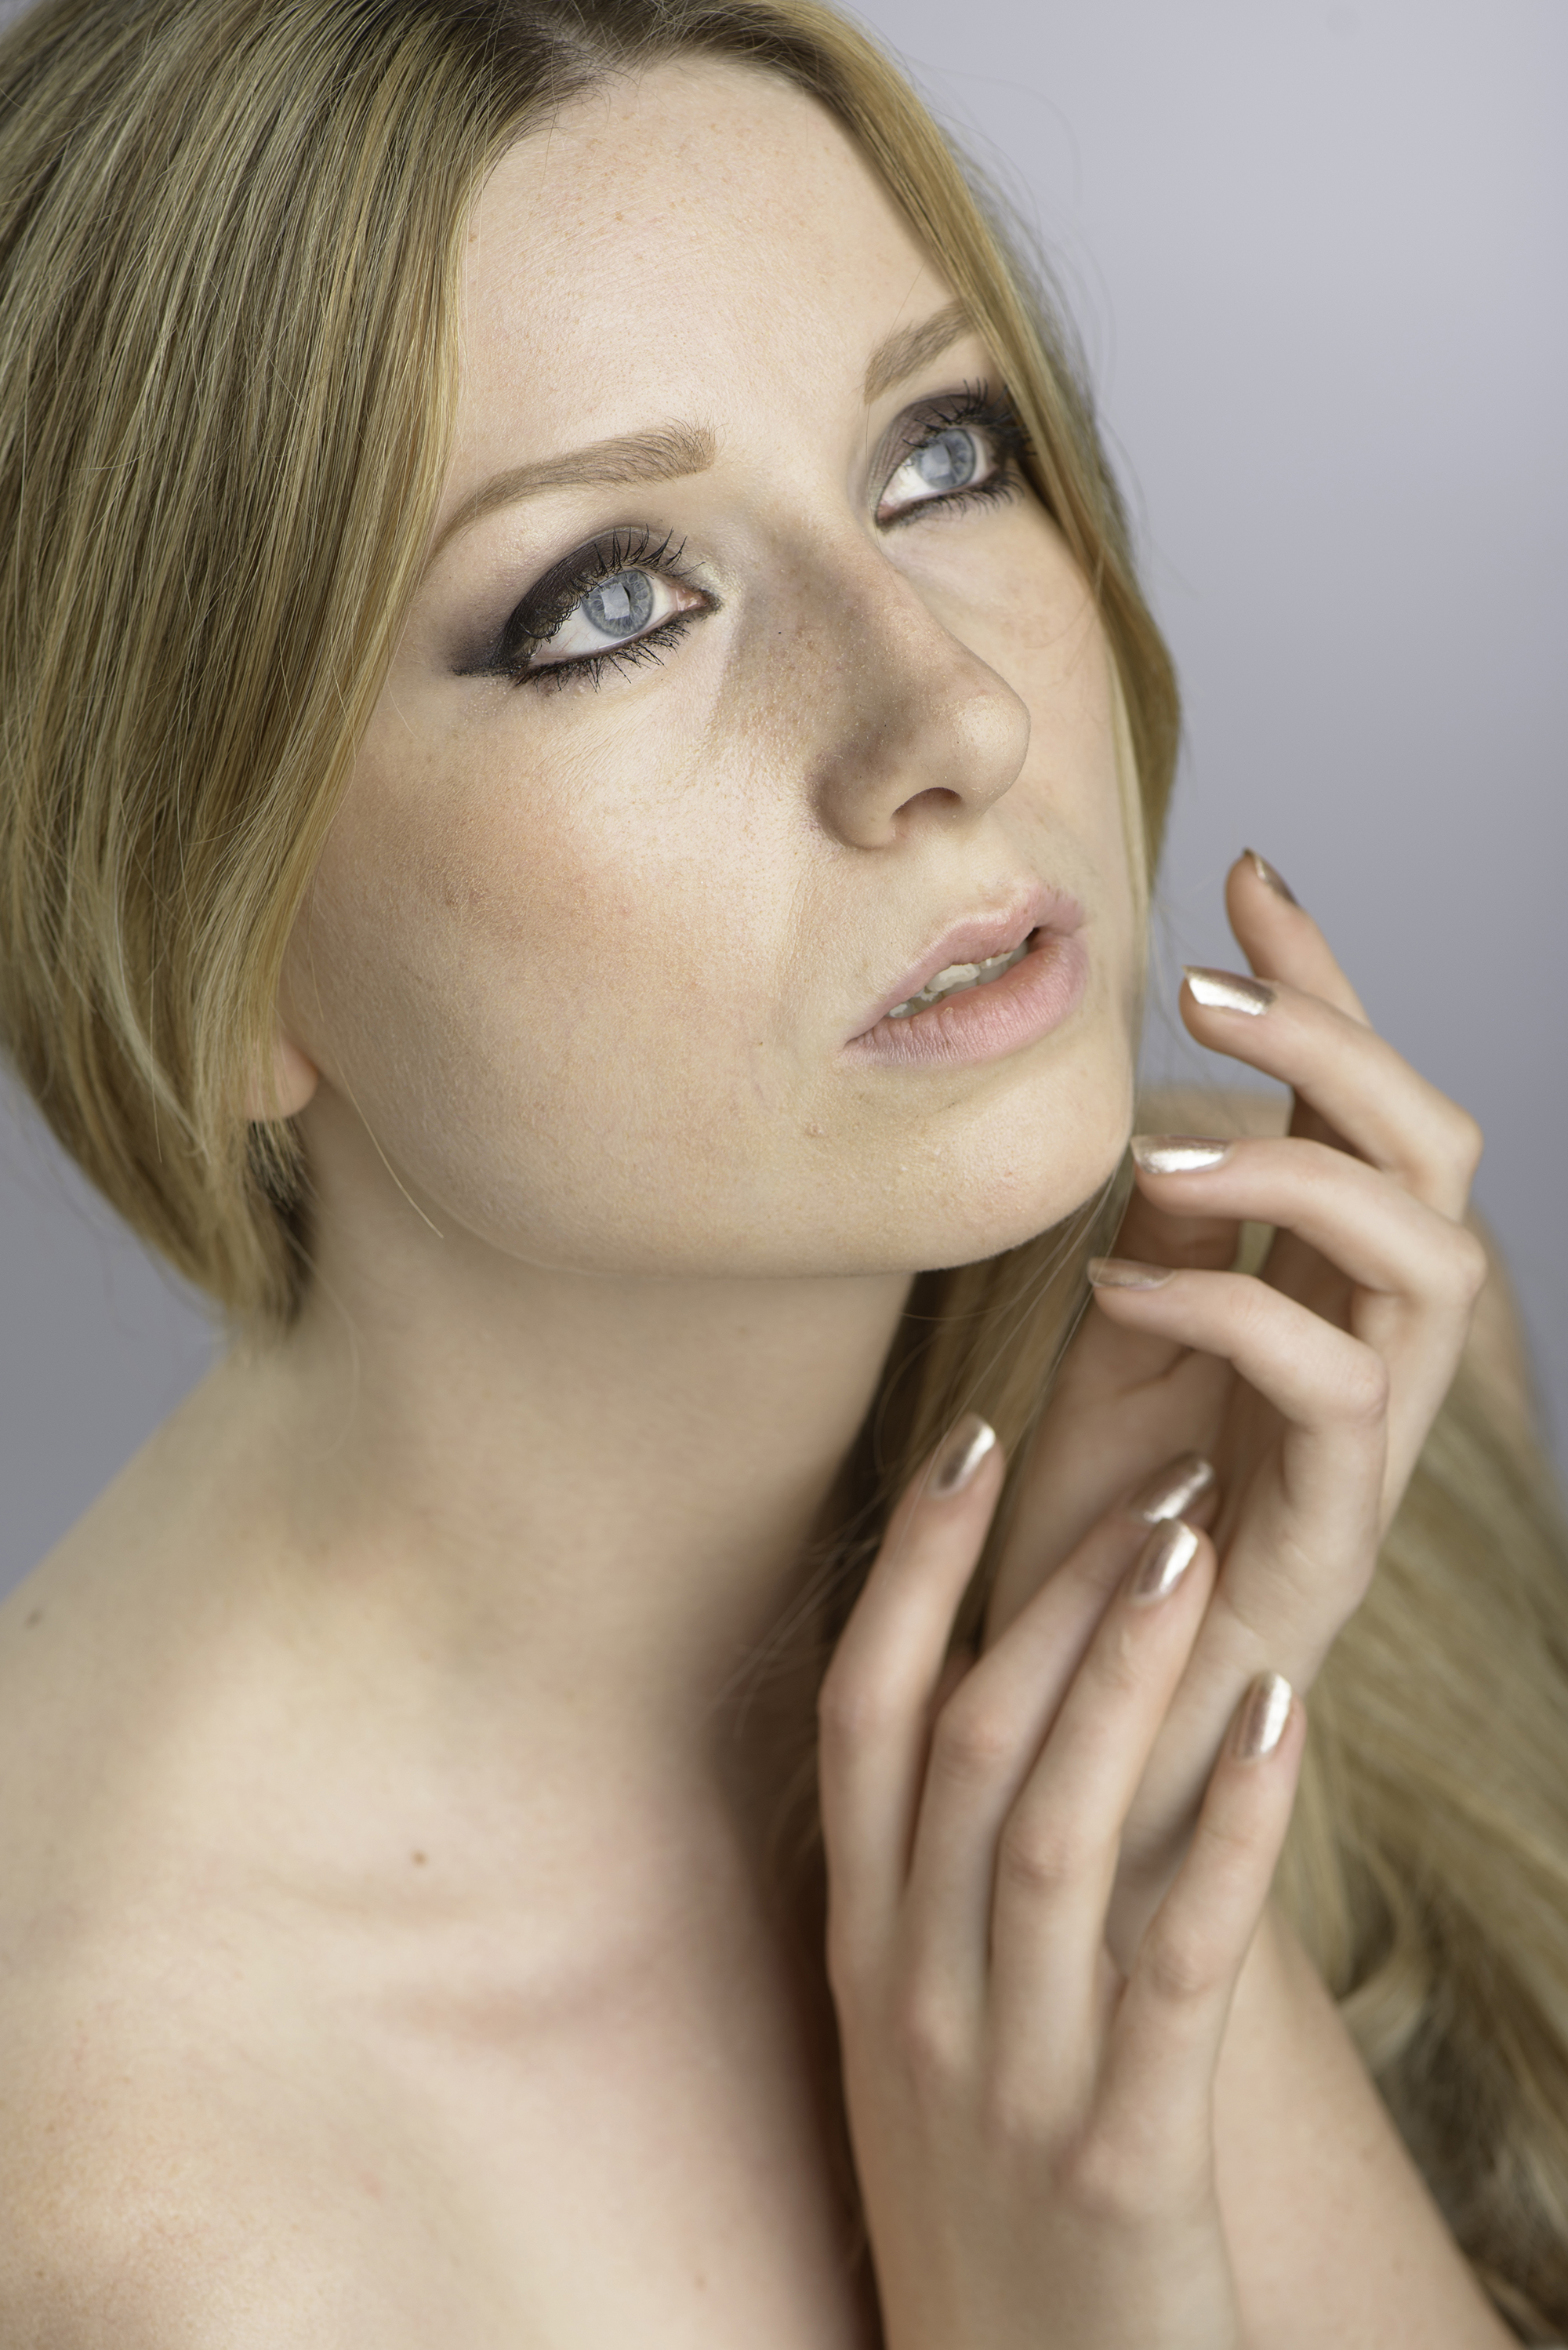
Before
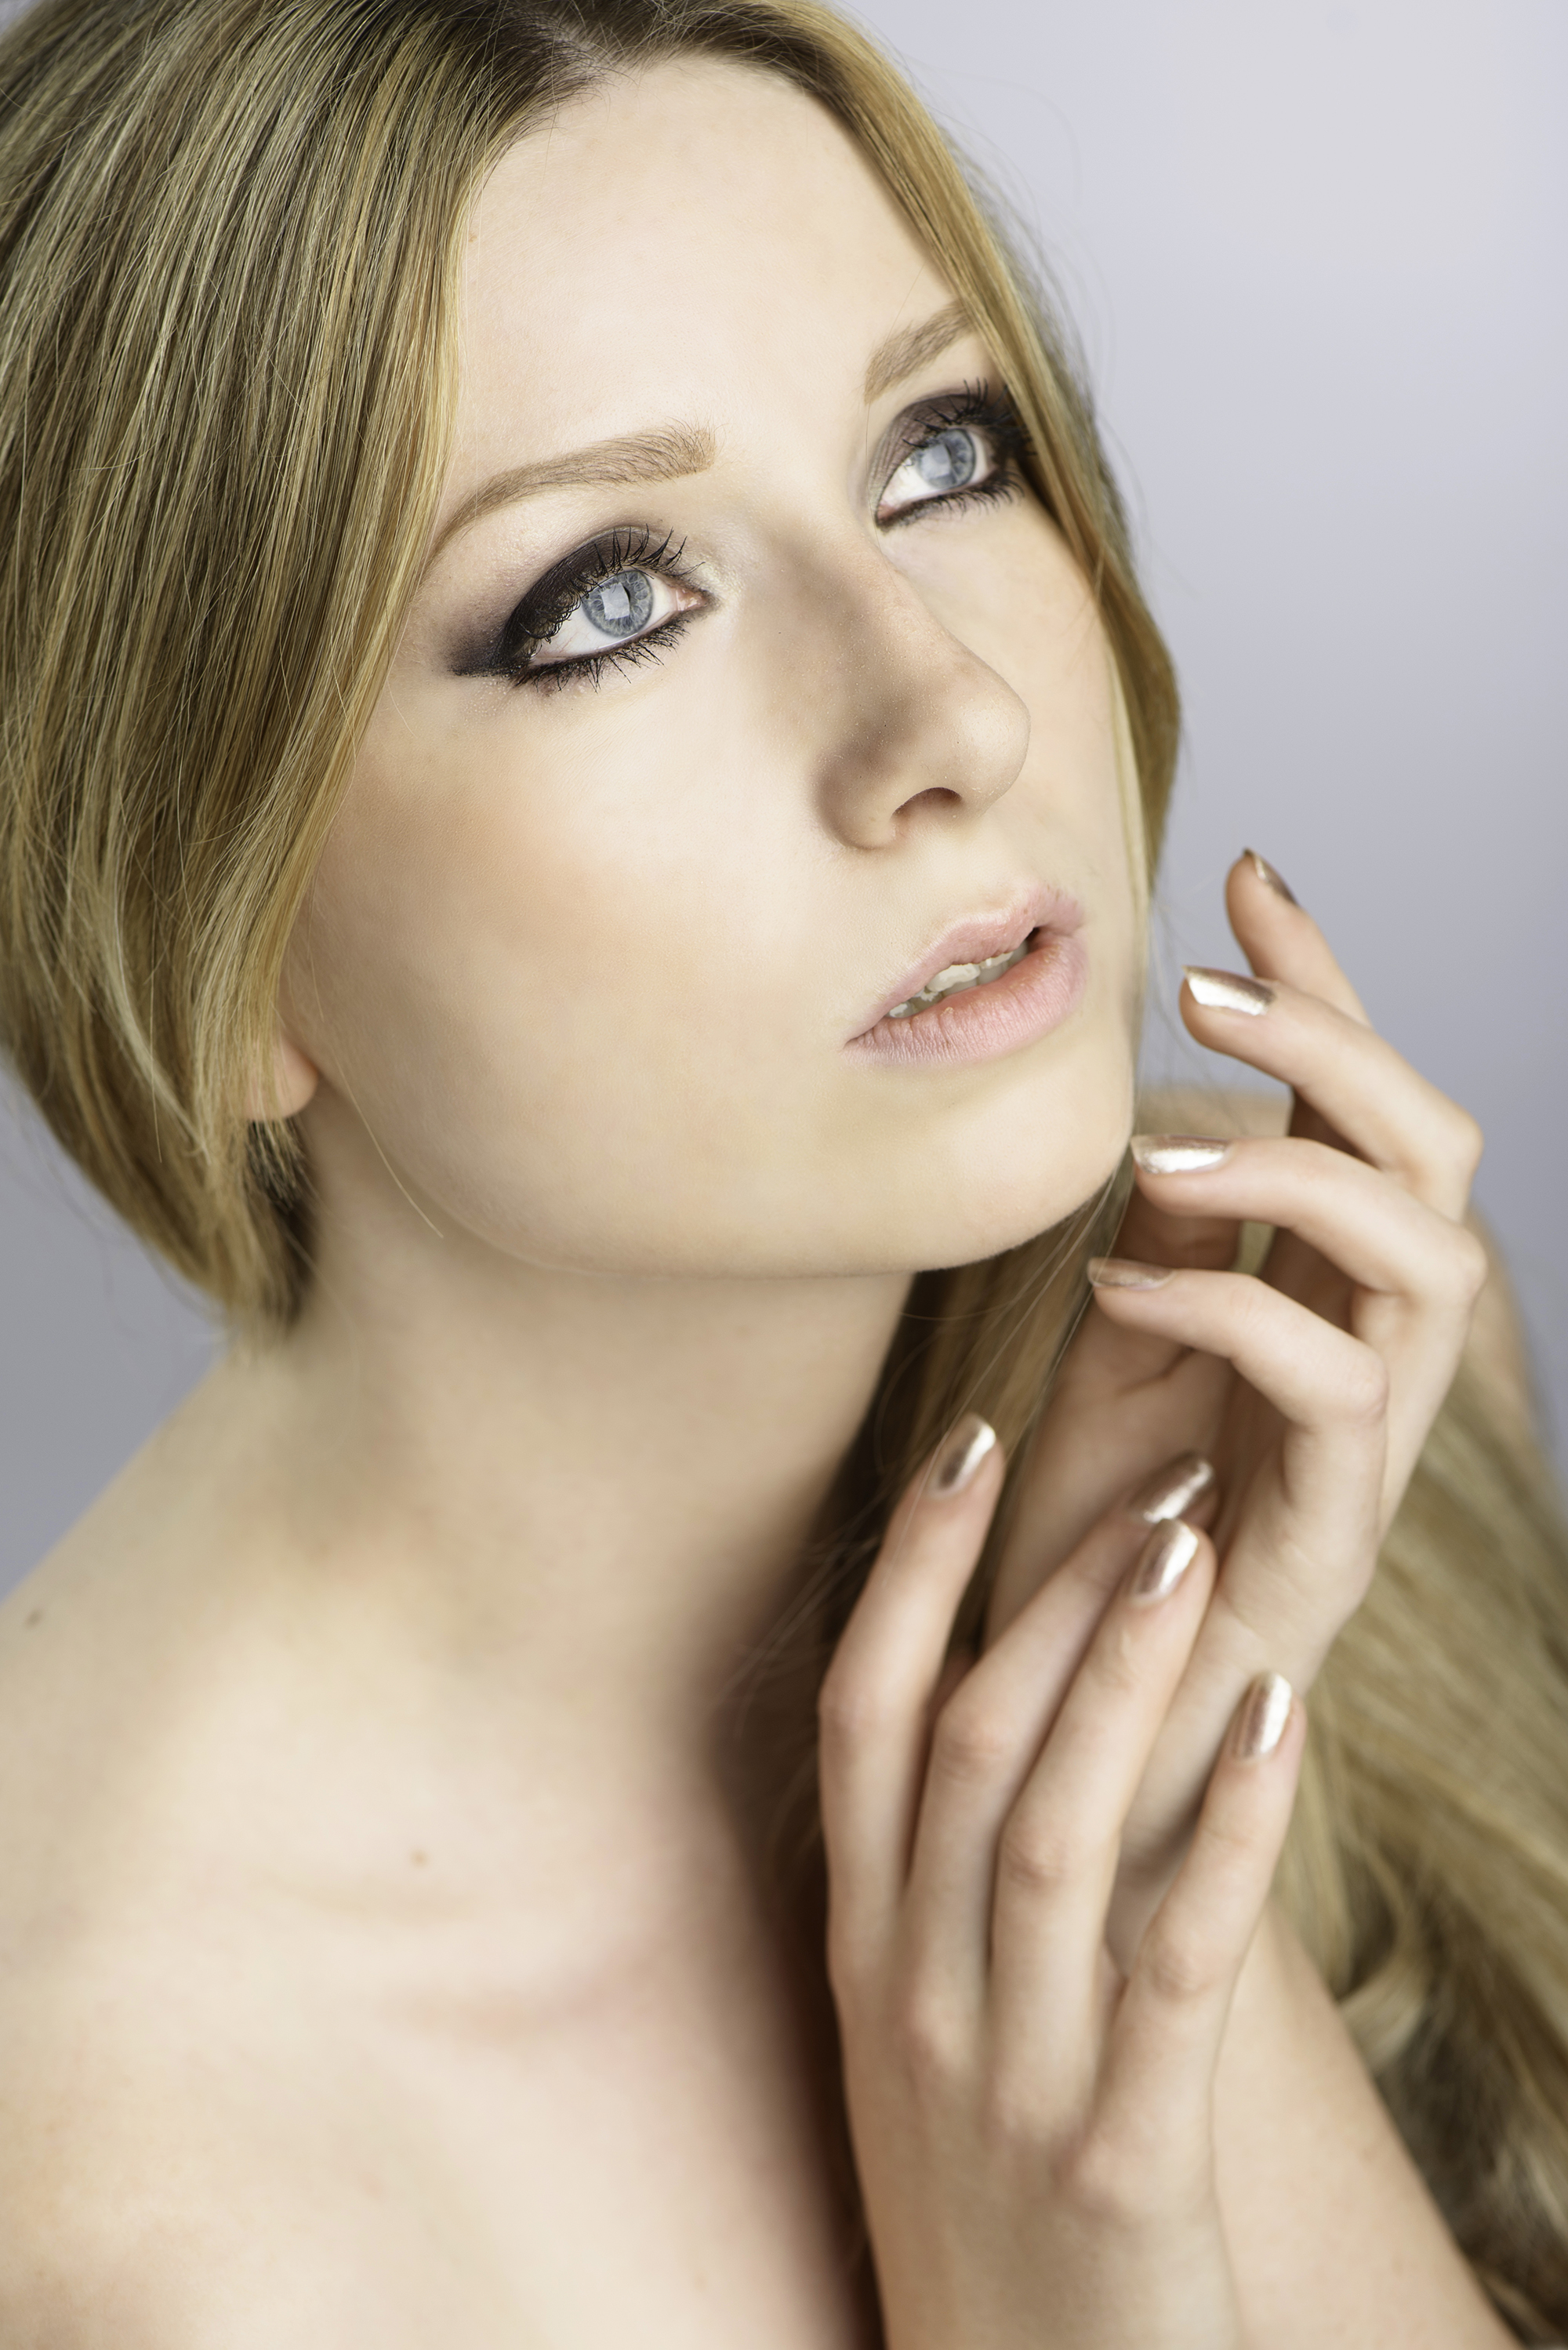
After
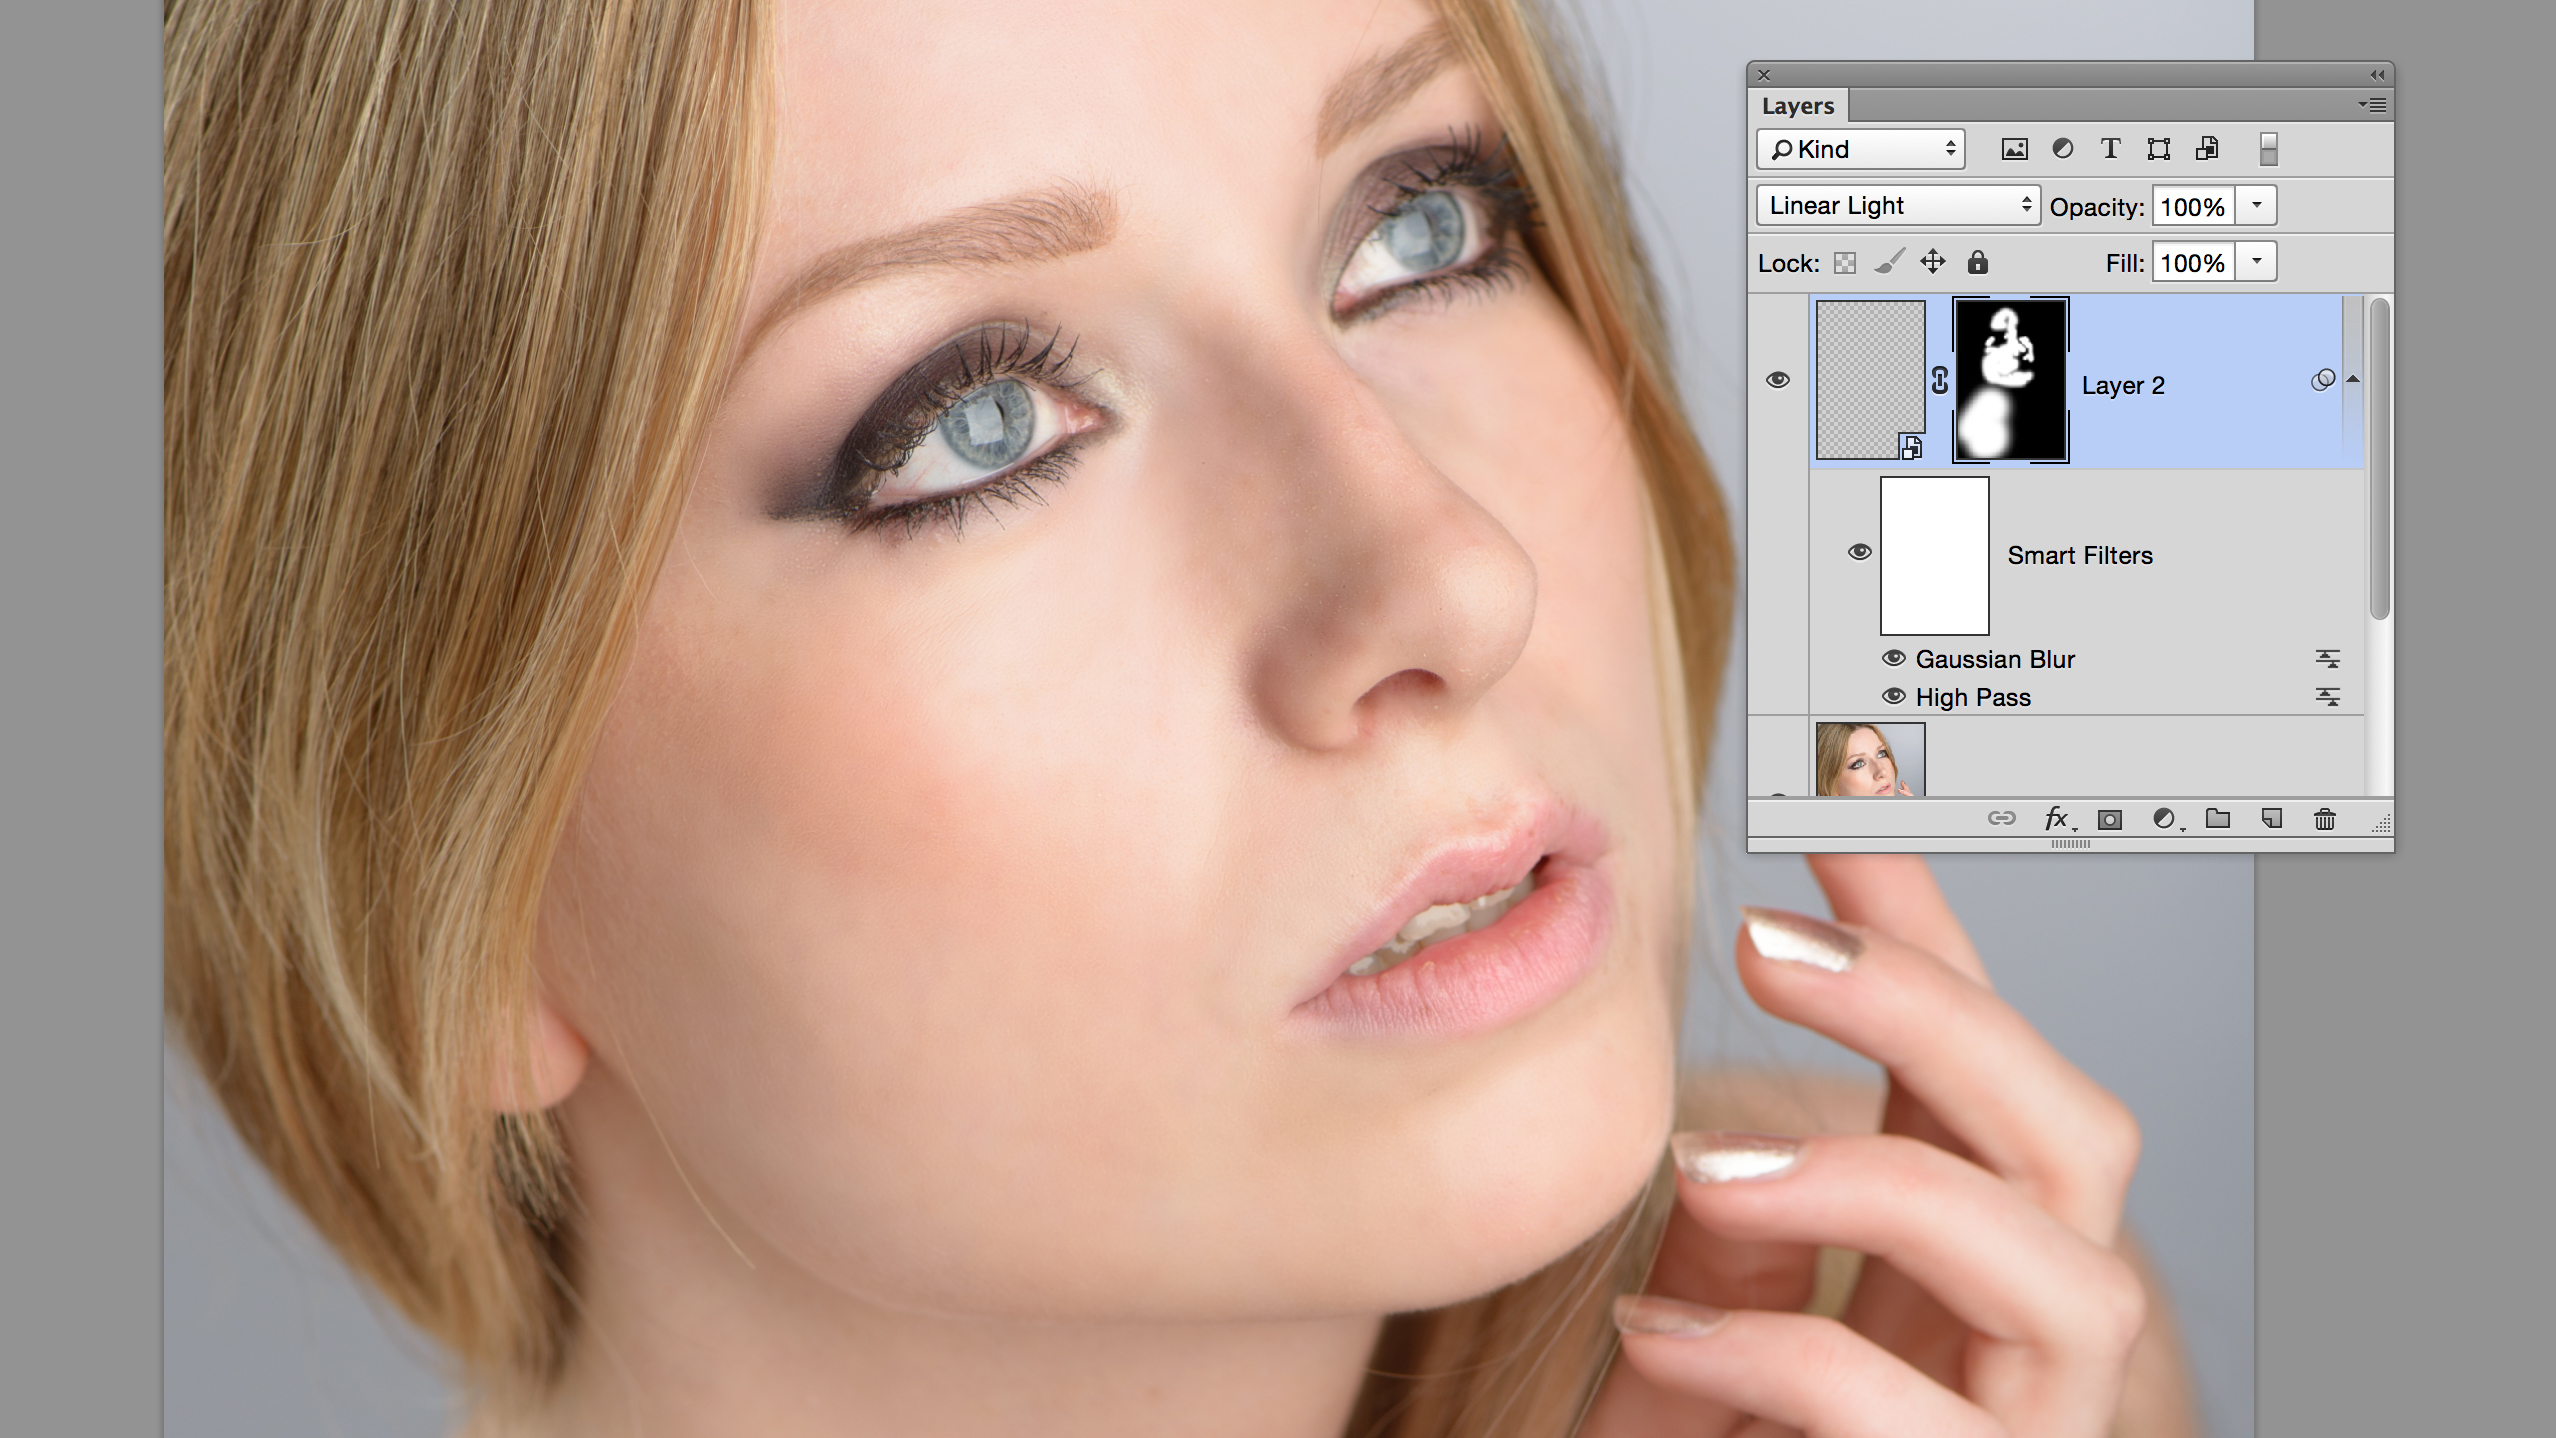
First retouch any marks and blemishes with the Spot Healing brush and Clone Stamp tool. Next, duplicate your layer with Ctrl/Cmd + J (or merge a new layer with Ctrl/Cmd + Shift + Alt + E). Invert the layer with Ctrl/Cmd + I, then go to the Layers panel, set the layer opacity to 50% and the Blend Mode to Linear Light.
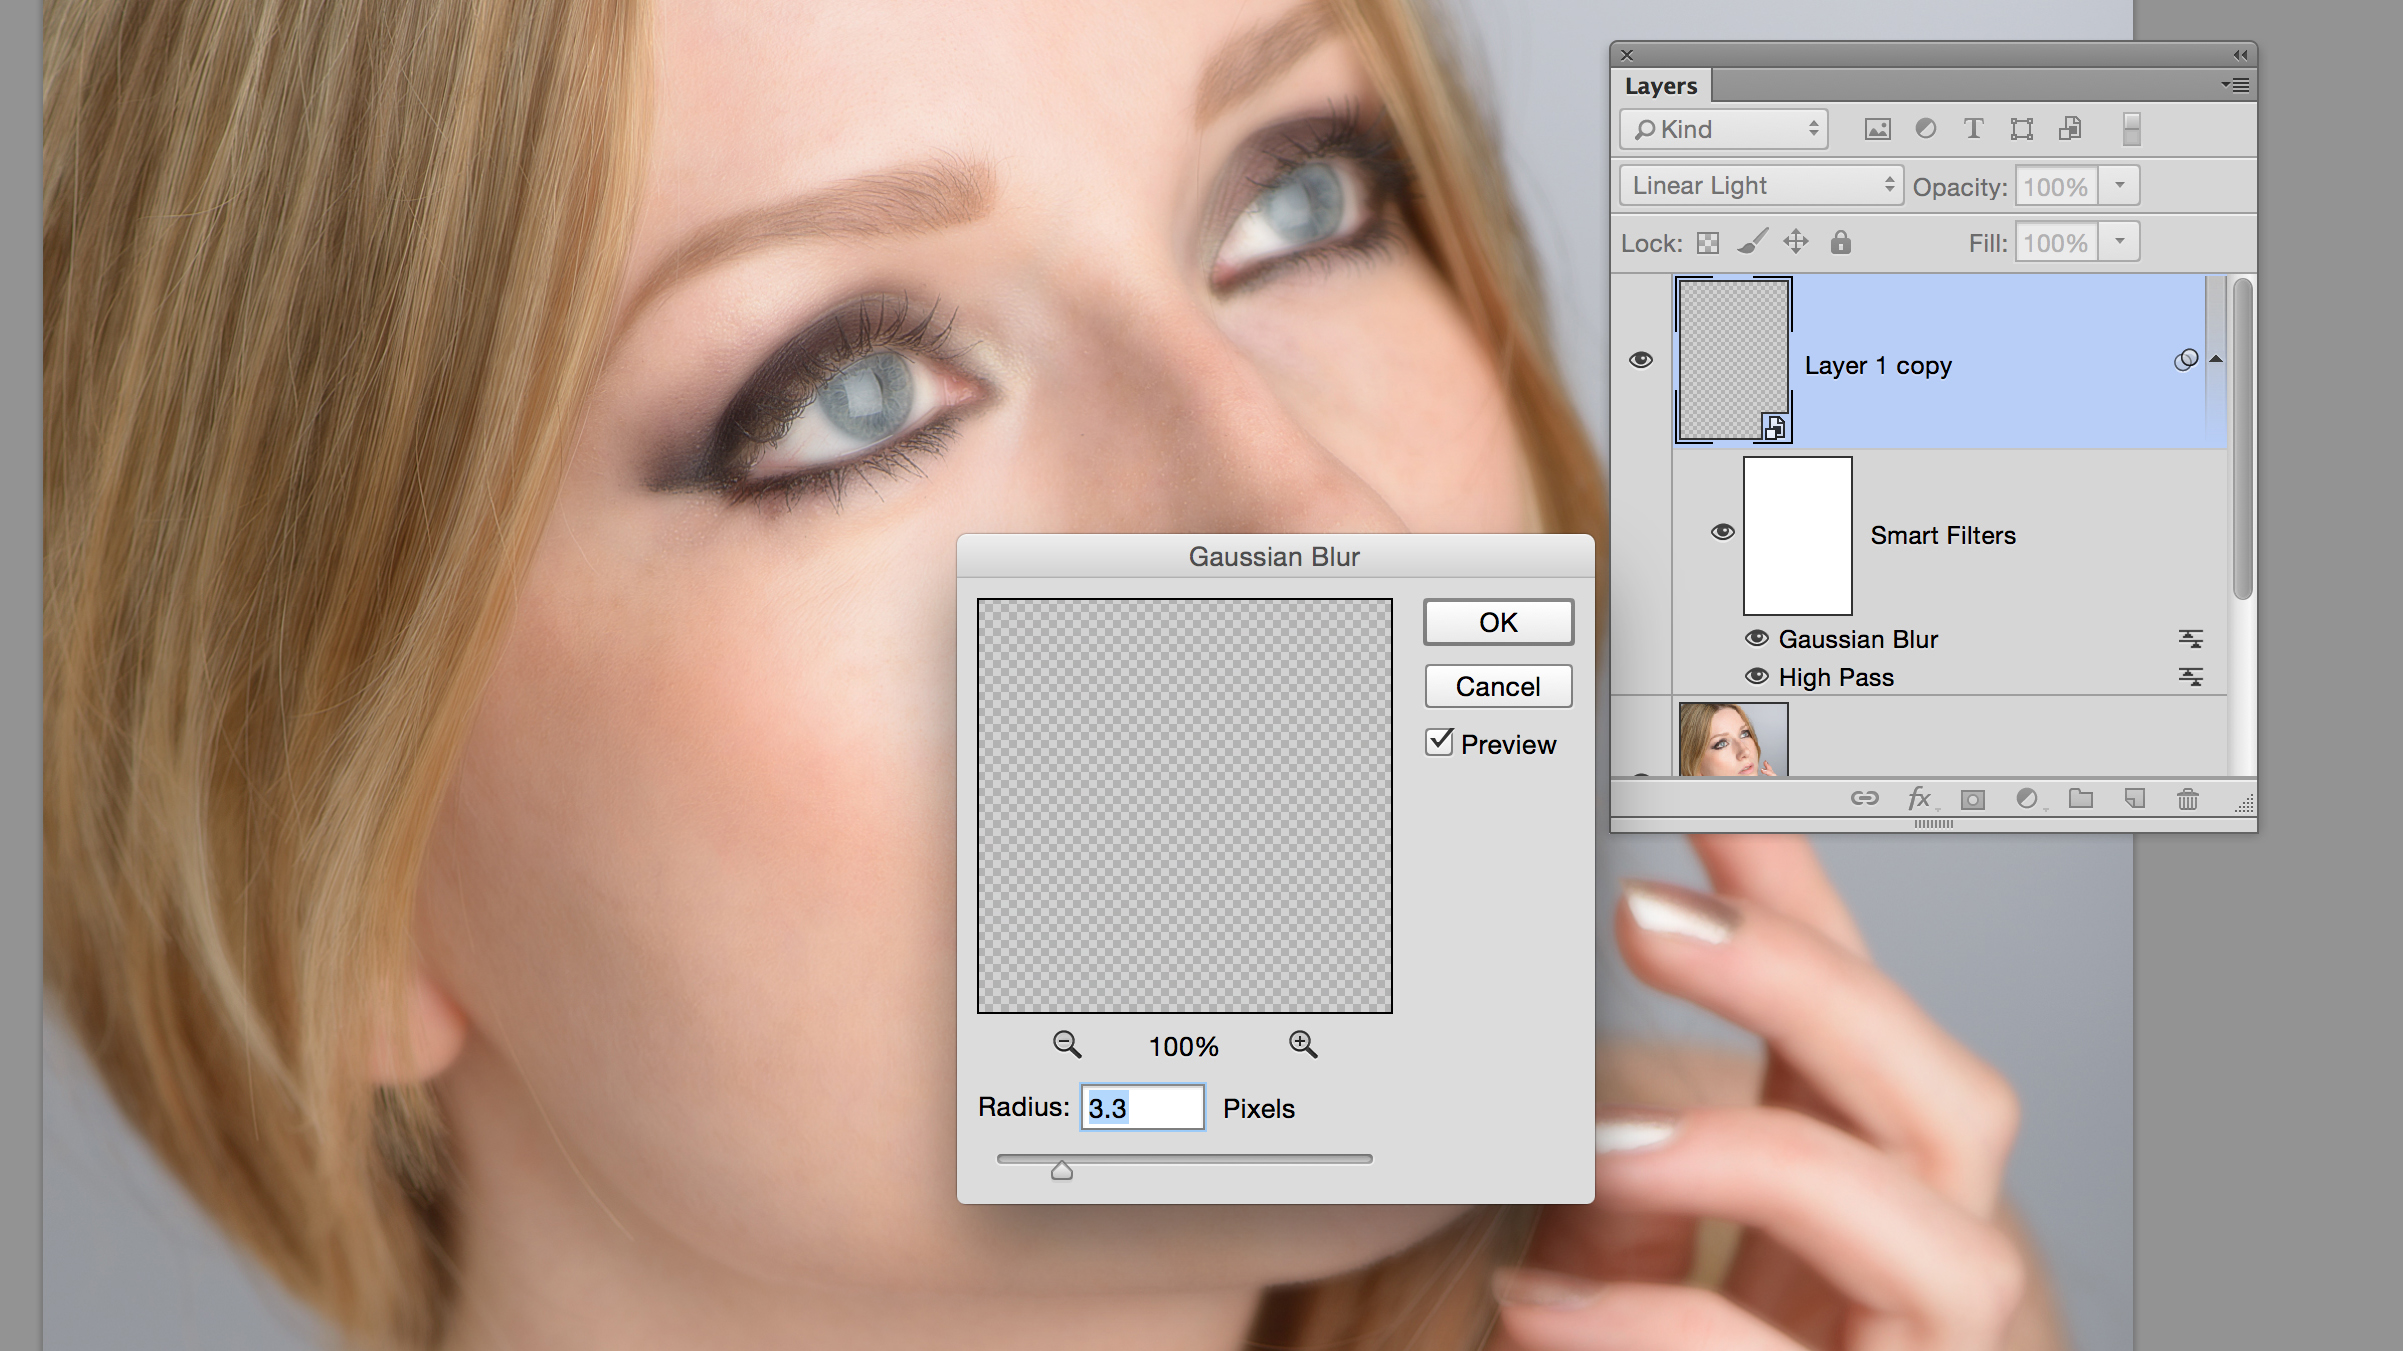
Right-click the layer and choose Convert to Smart Object, then go to Filter > Other > High Pass. Set an amount that blurs the skin – 9.9px here. Now to bring back texture, go to Filter > Blur Gaussian Blur and set a third of the value used for the High Pass Filter – 3.3px here. Finally, Alt-click the Add Layer Mask icon to hide the effect, then grab a white brush and paint over the skin to reveal it.
Top workflow tip: use layer masks
Retouching is all about making selective adjustments to soften skin, boost eyes and lift different areas. Layer masks give you this control. After making any edit on a layer, Alt-click the mask icon to hide the effect, then paint white to reveal it wherever you like.
Remove hot spots
Hot spots make subjects look hot, but not in a good way. Getting rid of them is easy…
Before
After
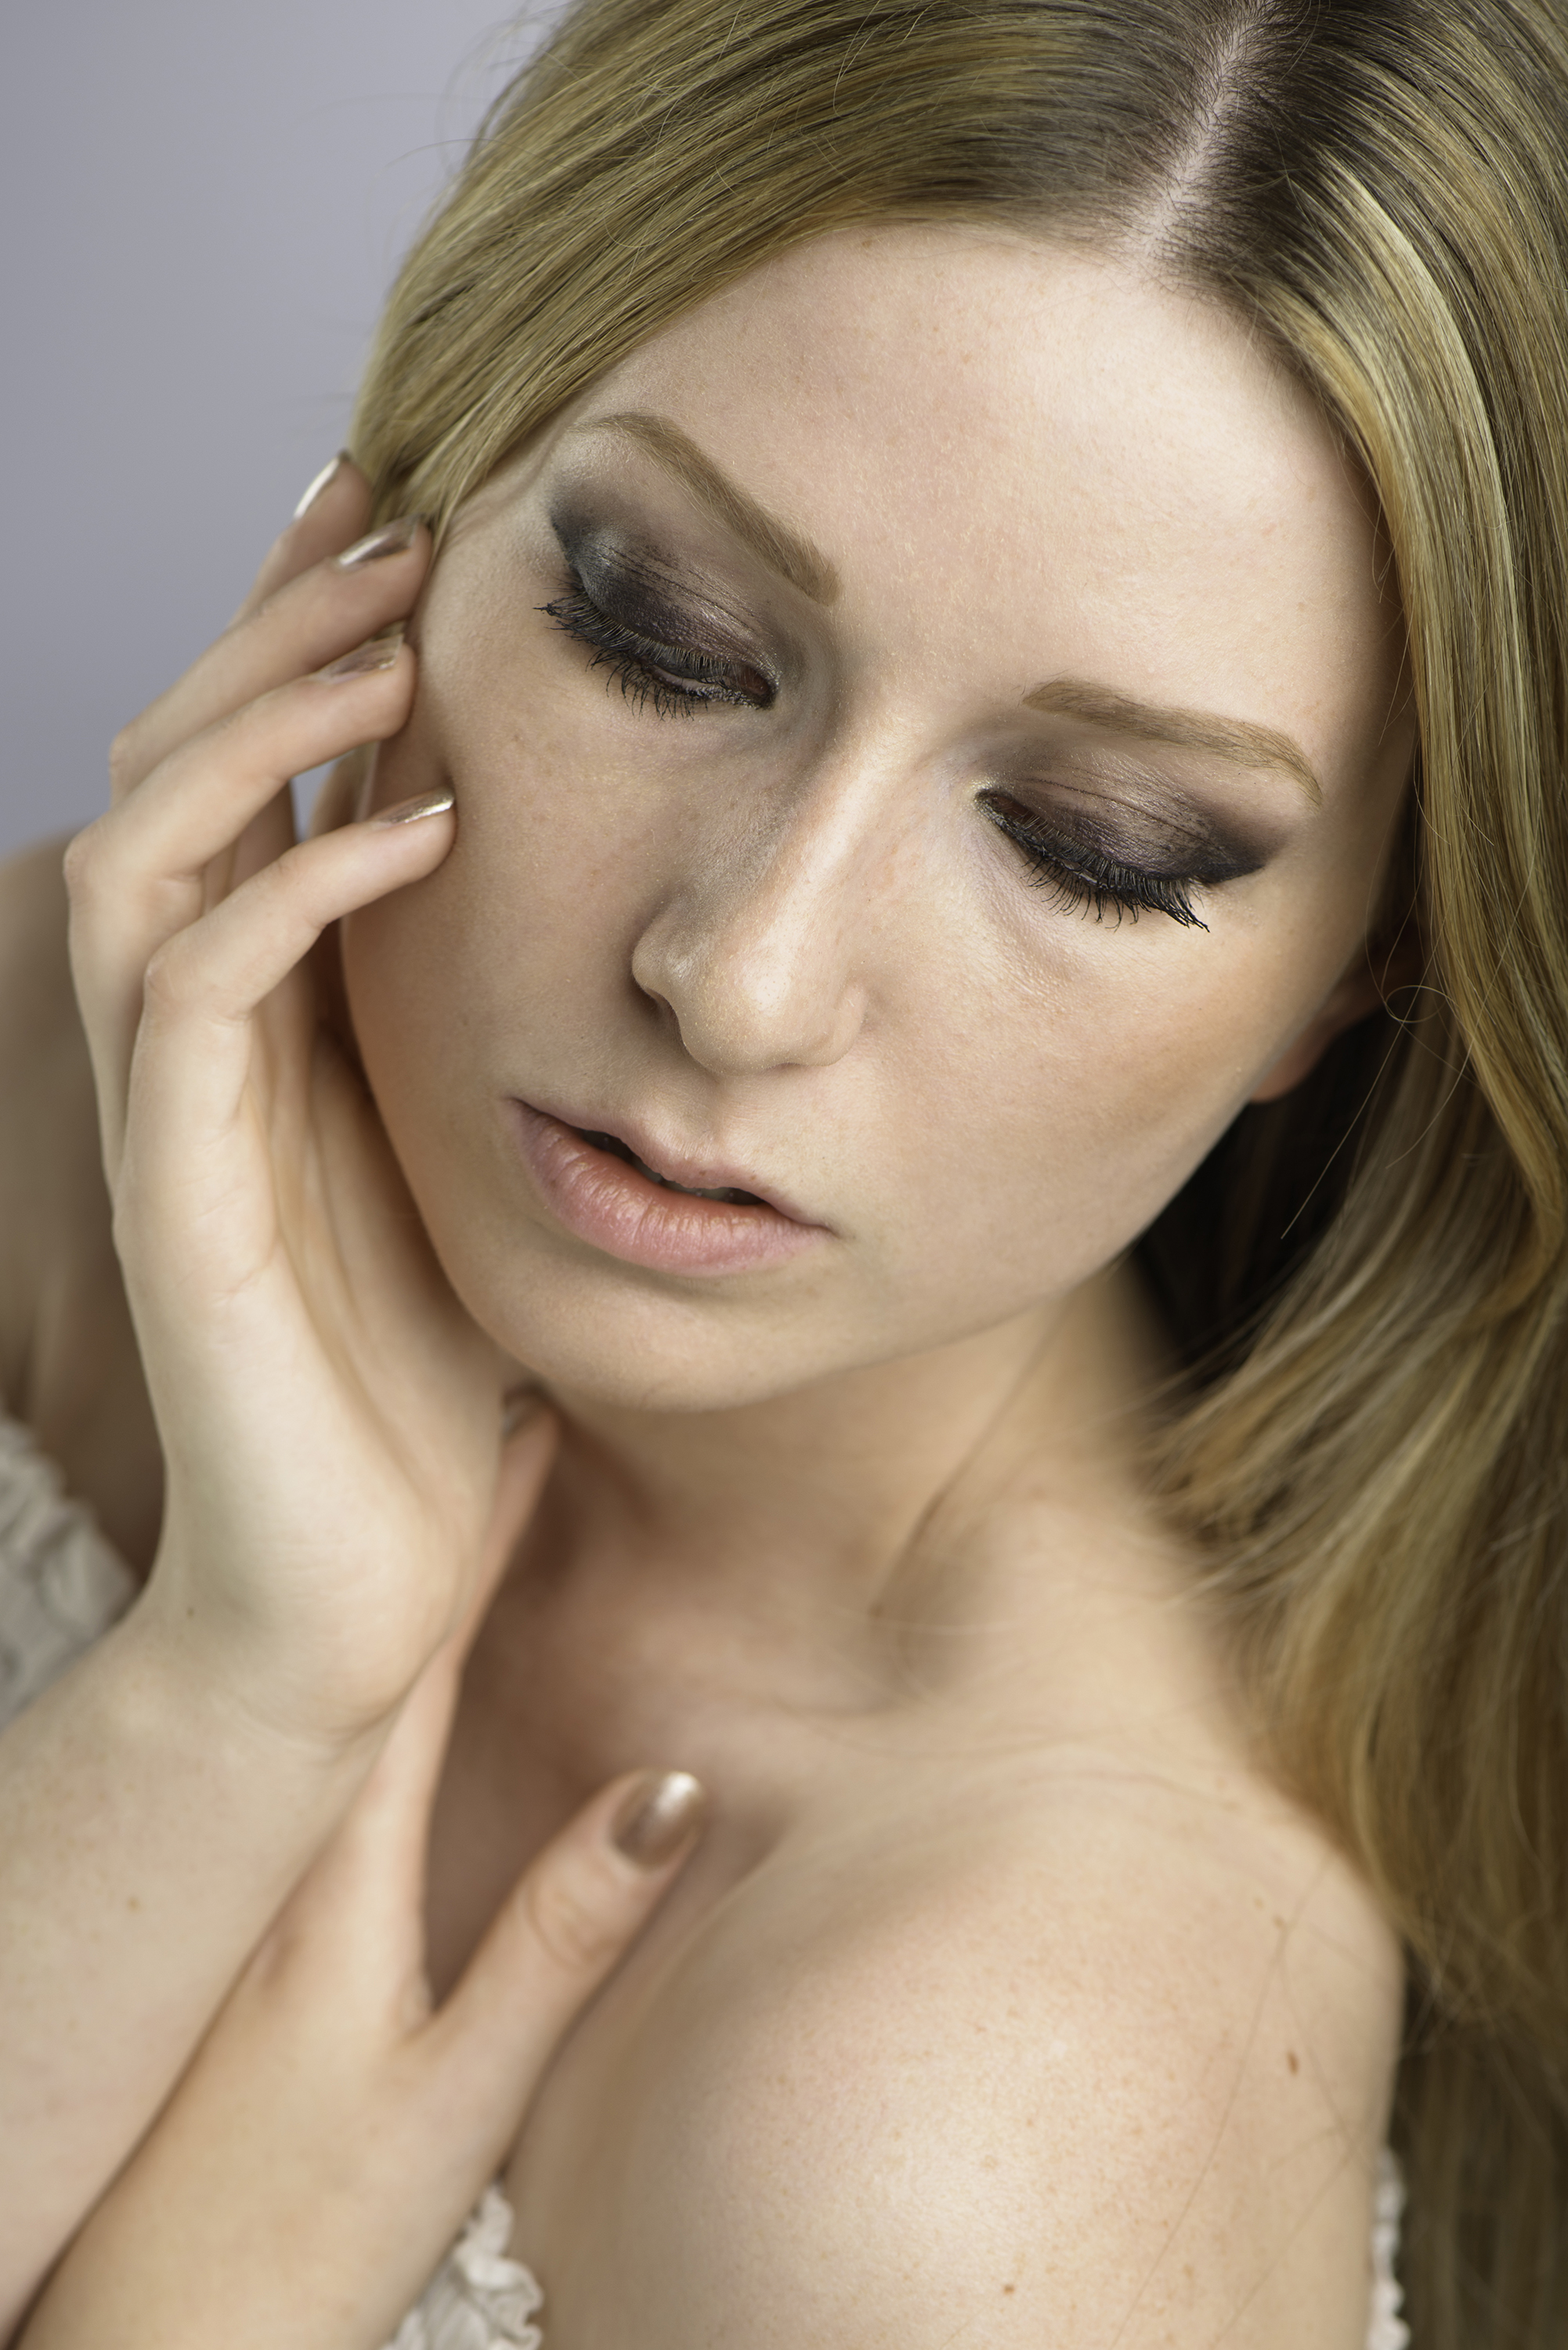
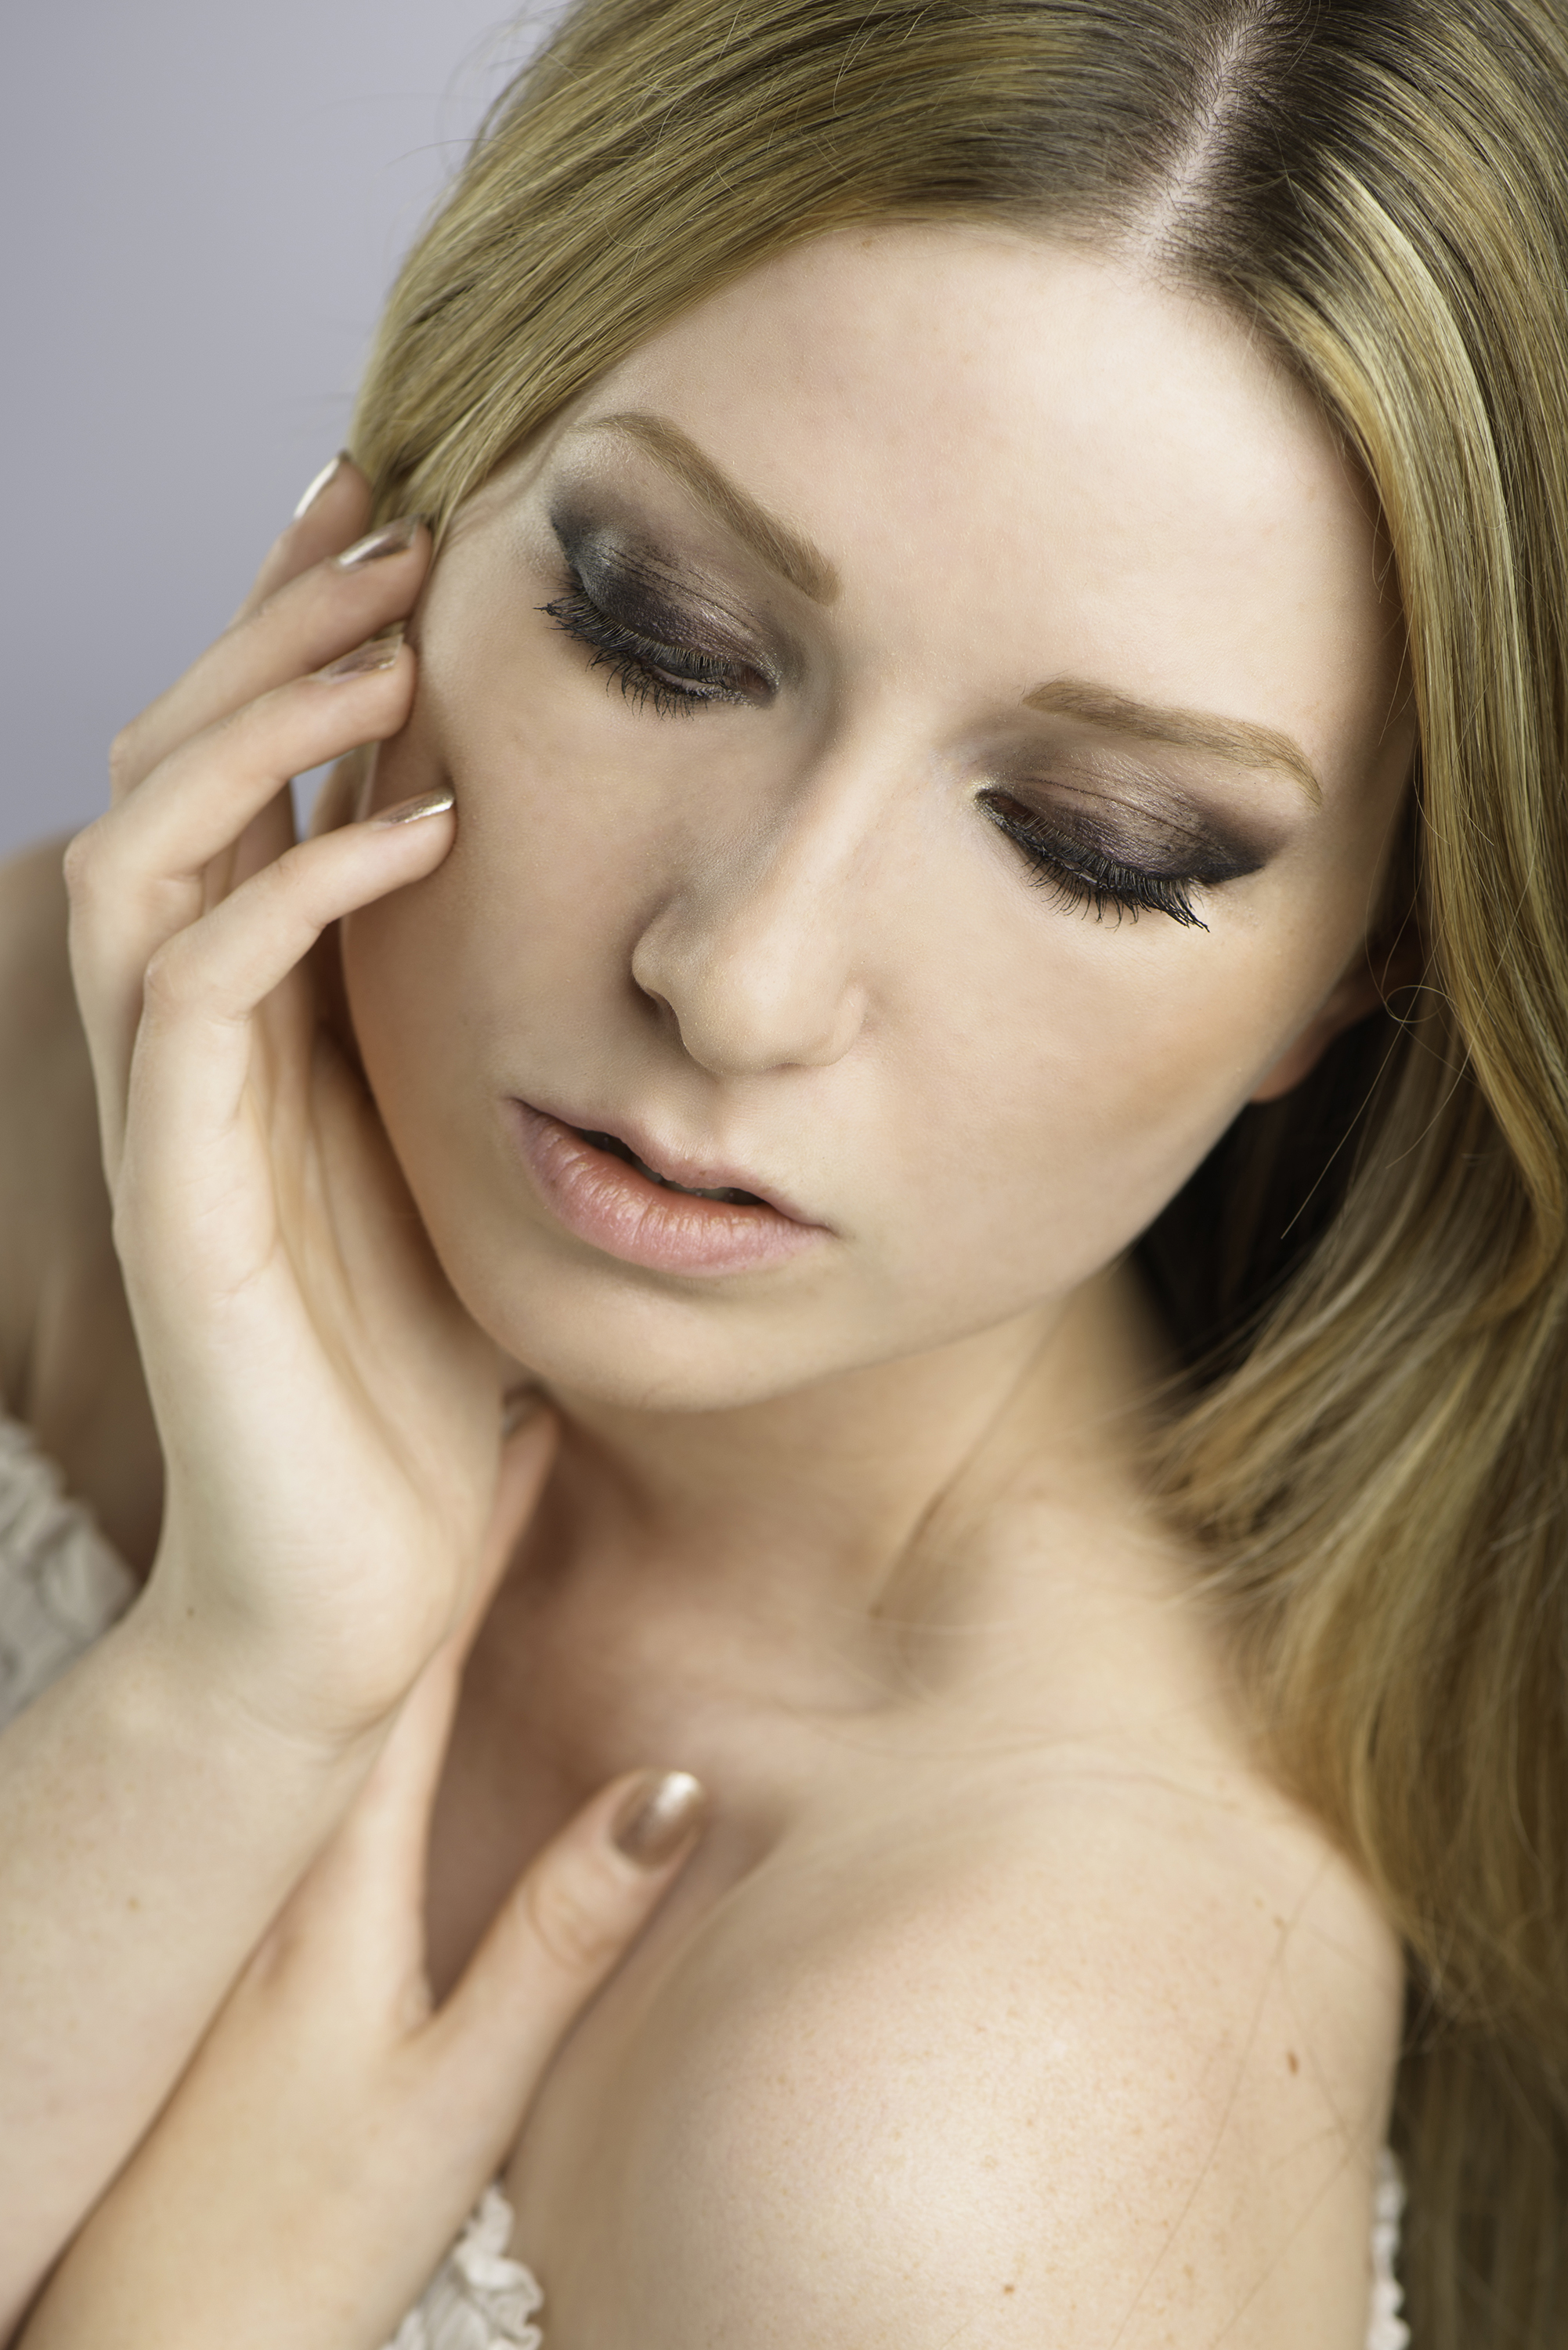
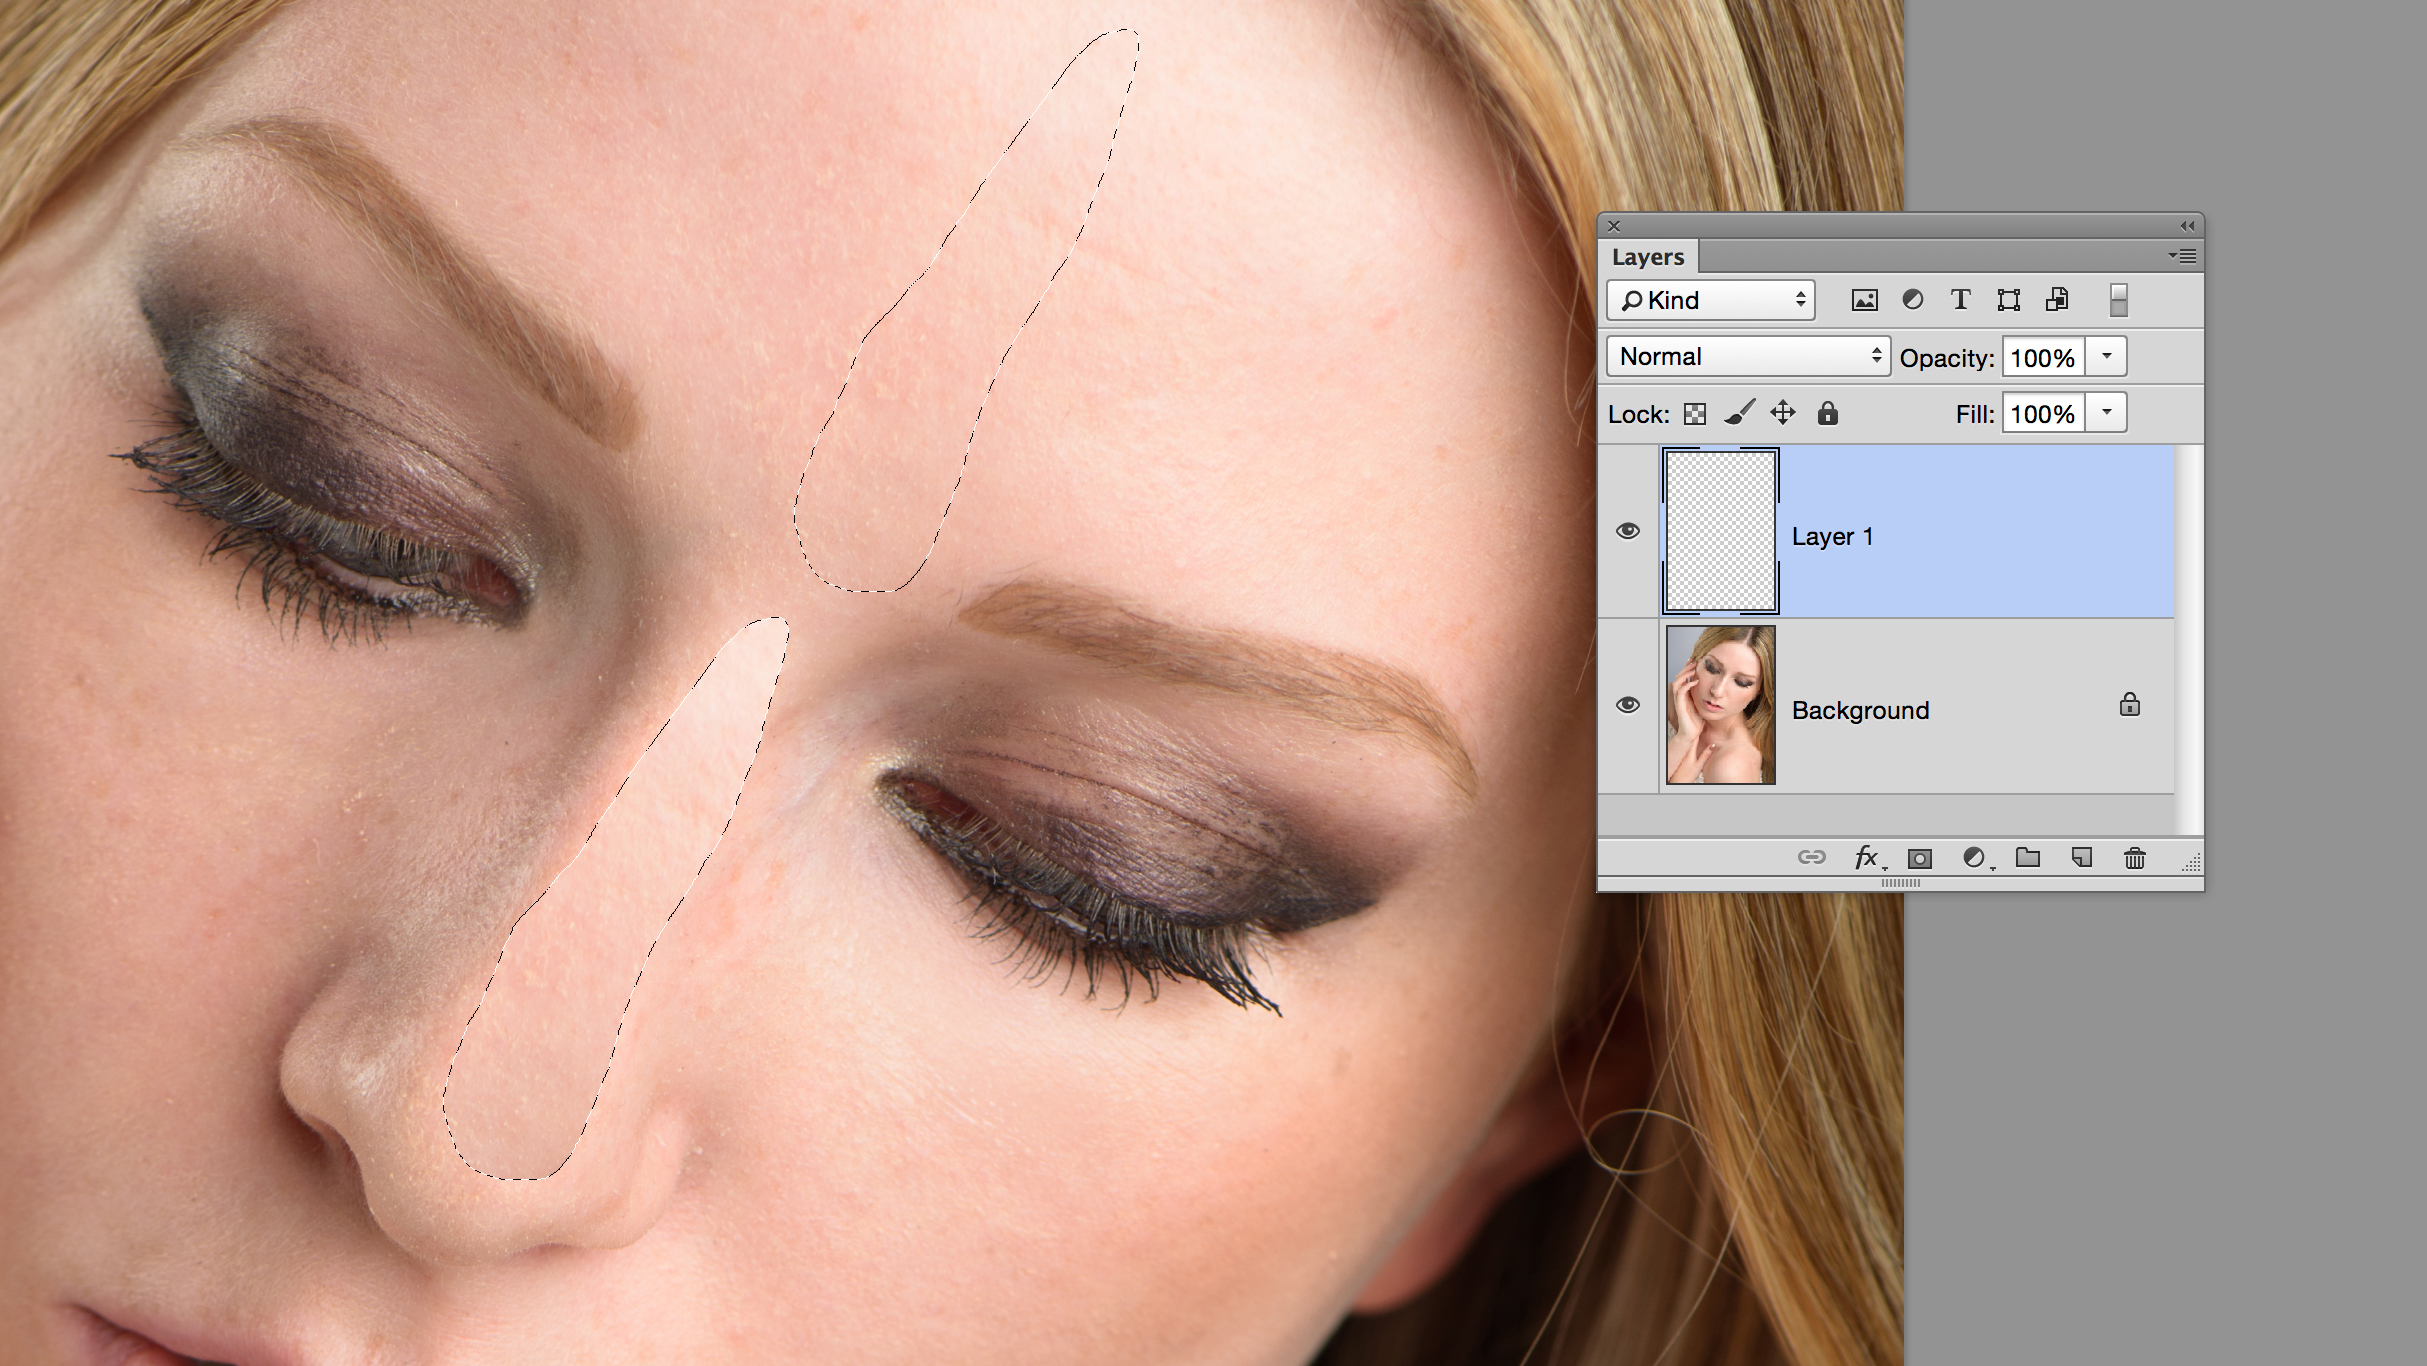
Hot spots are the bright reflected highlights that make faces appear sweaty even when they’re not. Ideally, it’s best to fix them on the shoot with a little powder, but if you need to remove them later, the challenge is to do so in a way that looks natural.
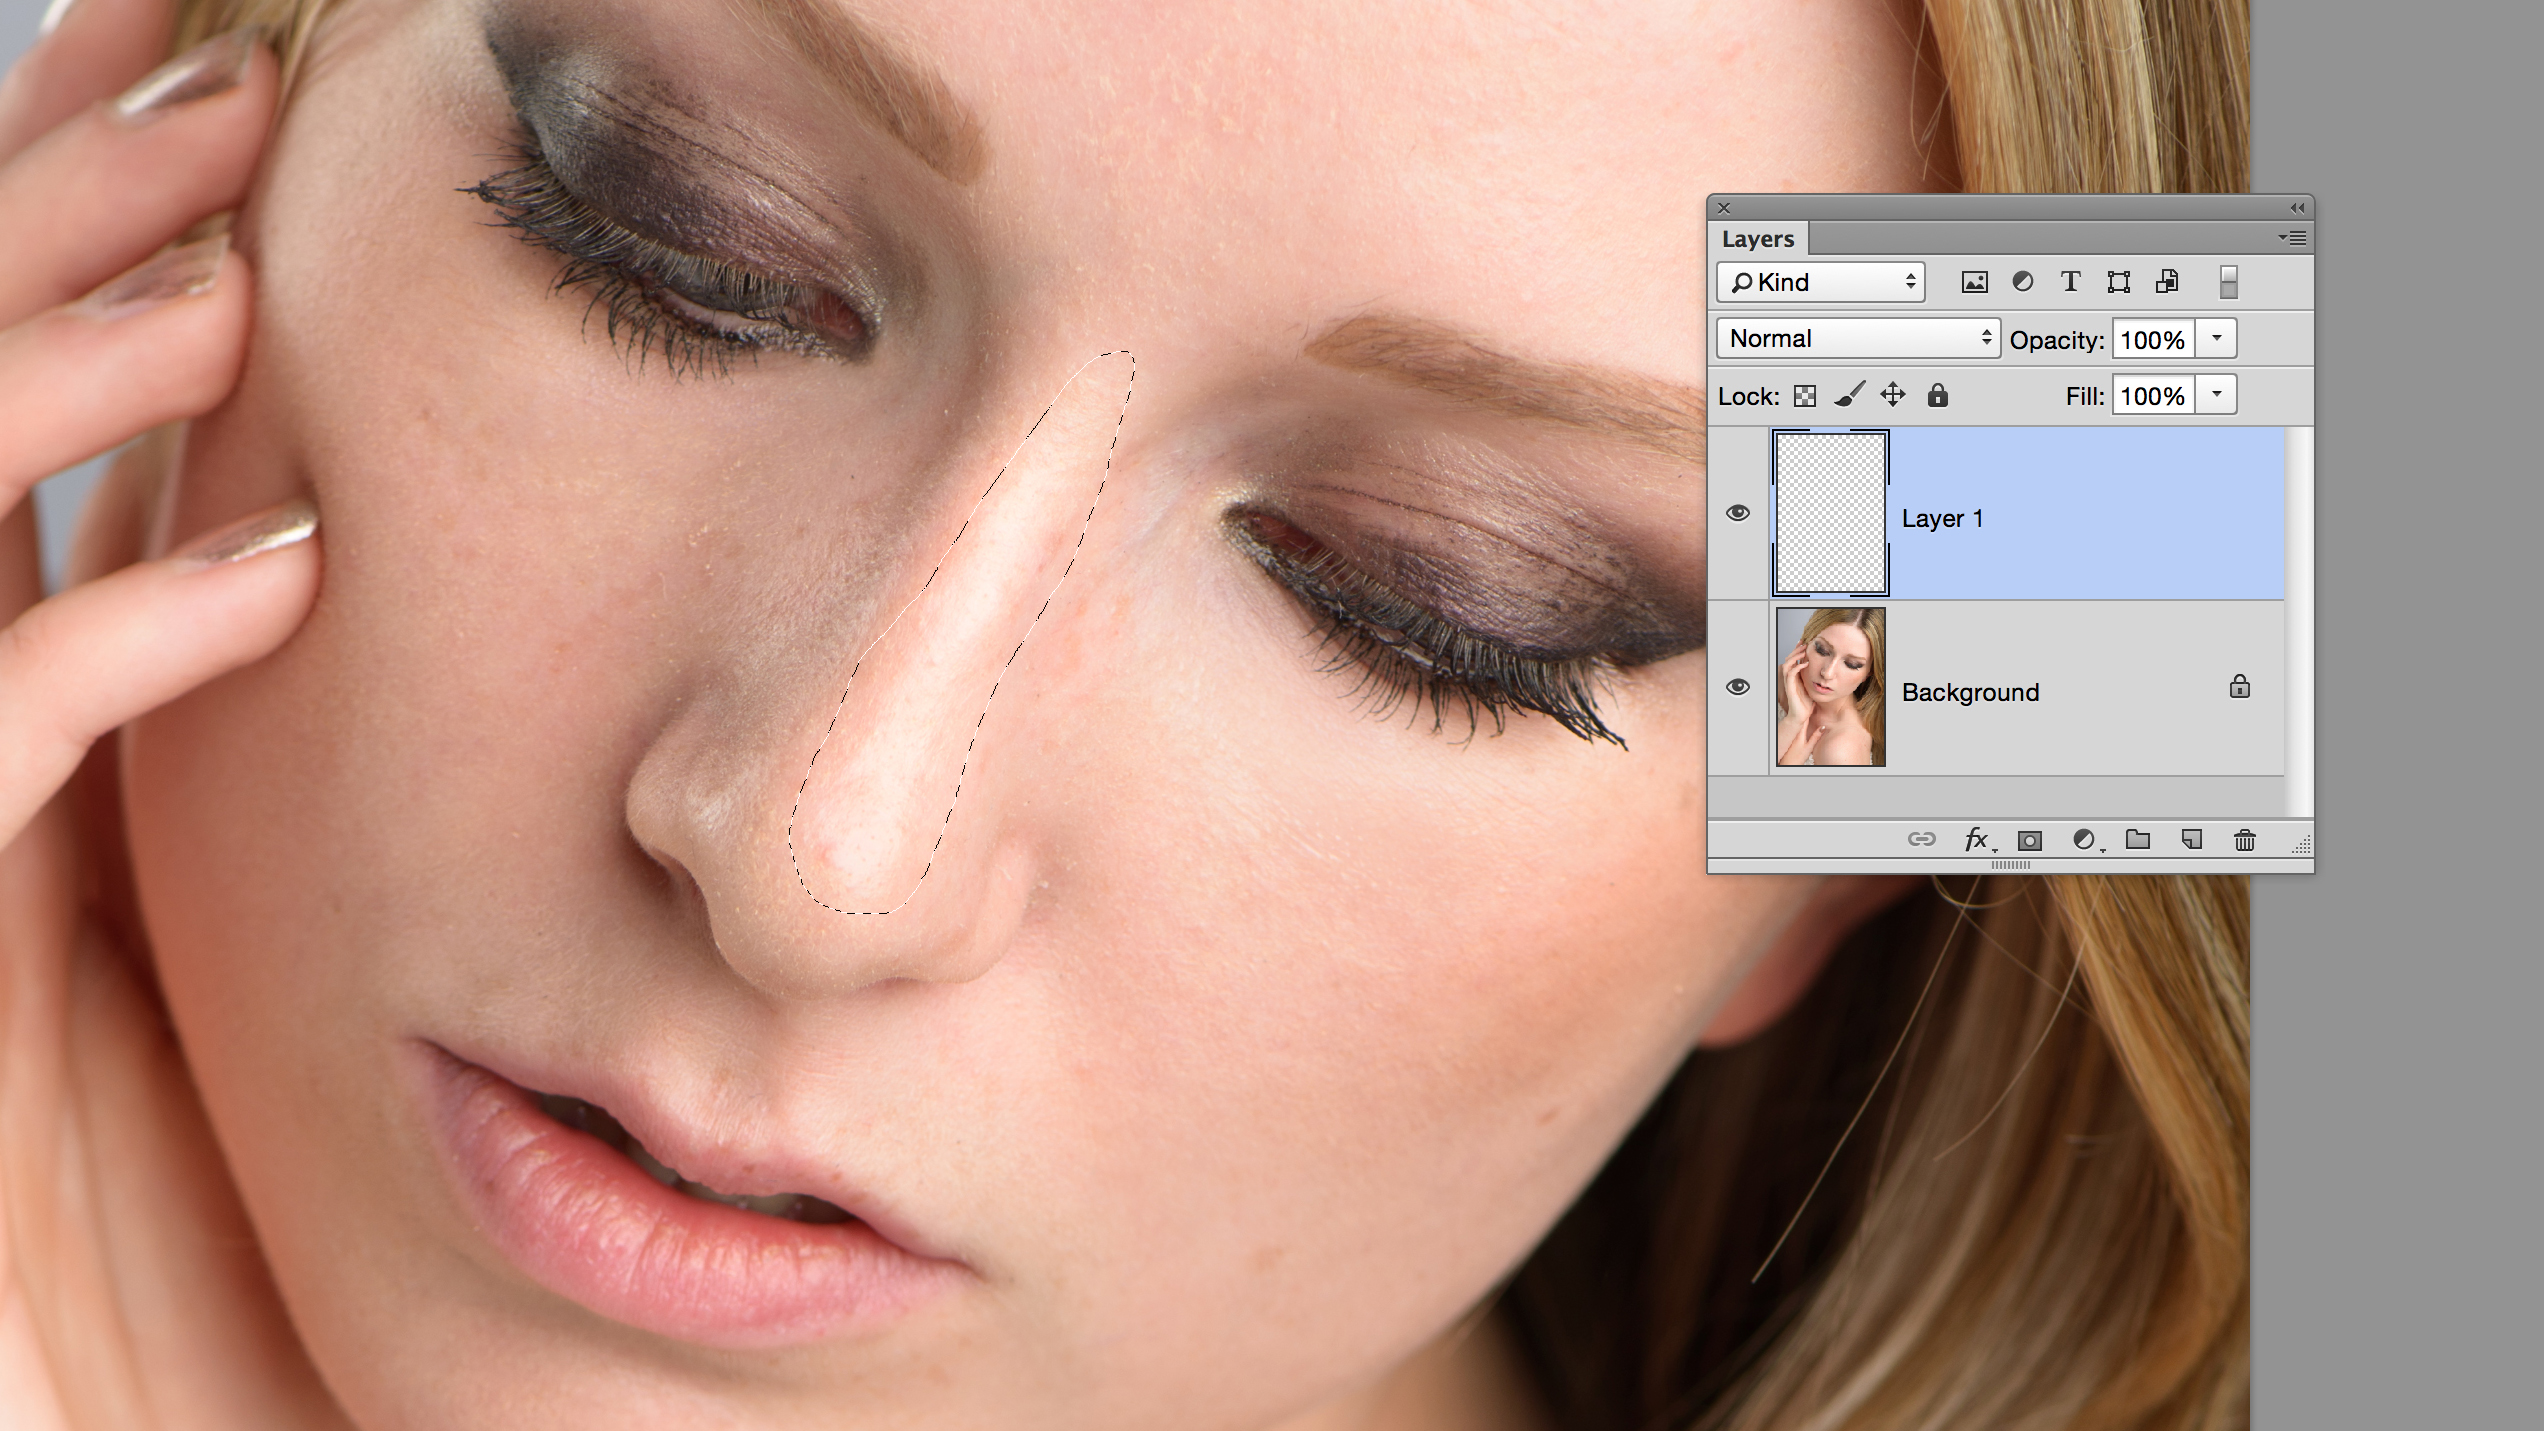
The Patch tool is ideal, because you can draw rough selections around hot spots, then drag them to a clear area. Use a new empty layer for this, and set the tool to Content-Aware and Sample All Layers in the tool options. Once the area is removed, try lowering the opacity to tone the fix down slightly so the highlight partially shows through.
Top workflow tip: control layer opacity
With retouching, using a separate layer for each edit not only makes your workflow non-destructive, it also means you can lower the layer opacity to tone down any over-the-top effects so that your retouching looks natural.
- 1
- 2
Current page: Eyes, skin softening and hot spots
Next Page Sharpening, dodge & burn, stray hairs and eye bags