Roll out your own Wikipedia clone with MediaWiki
Create an evolving knowledge base of user-generated content

MediaWiki is a collaborative documentation platform used by thousands of companies and organizations. Most notably, the software powers Wikipedia, the free online encyclopedia.
MediaWiki is suitable for large wikis with hundreds of editors. It has a simple editing interface and it’s easy to install. It’s also extremely versatile and optimized to handle millions of concurrent visitors.
MediaWiki is an open-source tool which means you can install it for free. You’ll need a web hosting provider. We used Hostinger, one of the world’s leading web hosts. TechRadar has partnered with Hostinger to offer a 100% rebate on a single shared hosting package for our readers.
How to roll out your own Wikipedia clone with MediaWiki: Preparation
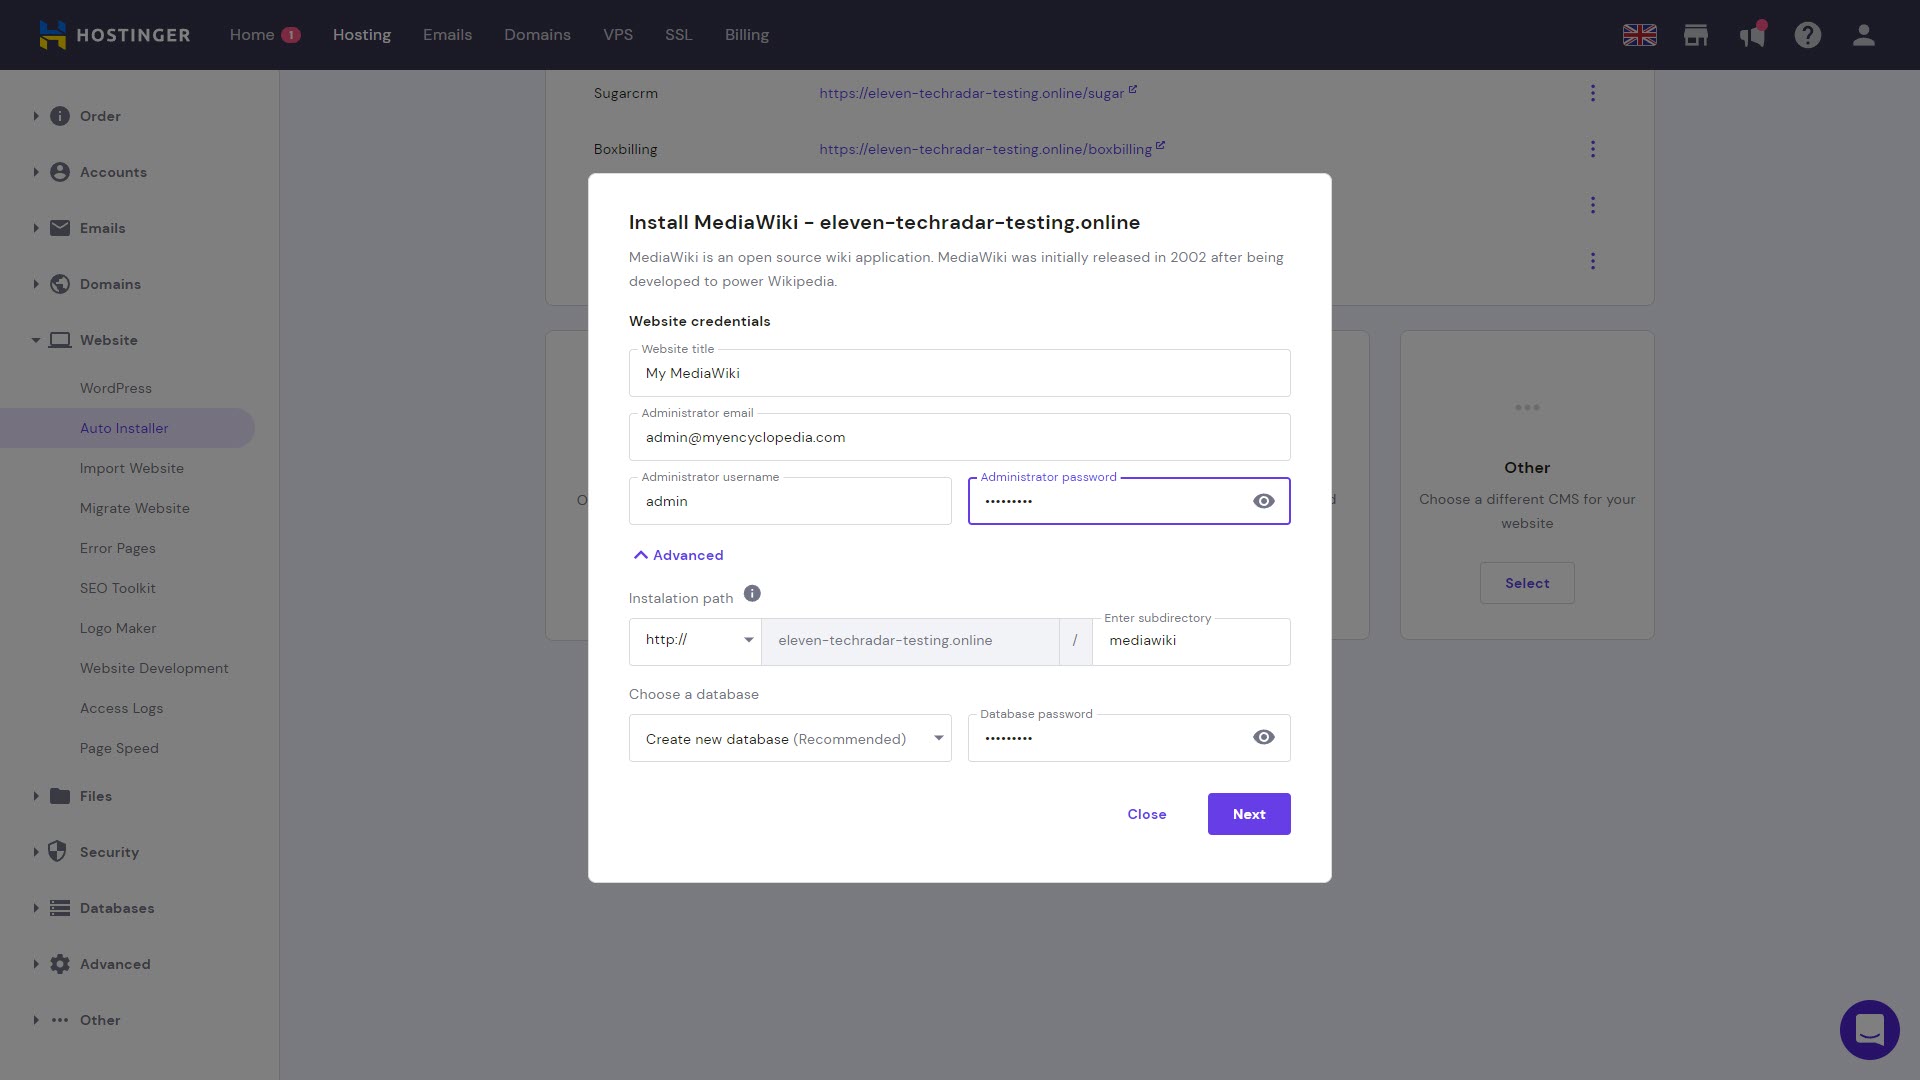
The easiest way to install MediaWiki is by using an installation wizard. For Hostinger, you’ll find this under Auto Installer in your website administration panel. Choose Other, then MediaWiki from the drop-down menu to start the wizard.
On the first screen, you’ll be asked to enter your website name and administrator login credentials. You can set MediaWiki to be installed in a subdirectory on your hosting. This will affect the URL visitors use to visit the encyclopedia. You have the option of choosing to create a new MySQL database (an open-source relational database management system) for MediaWiki or use one you’ve already created.
The second screen simply asks which version of MediaWiki you want to install and how often you want the software to update automatically. Generally, you can leave these settings at their defaults. Finally, click Install.
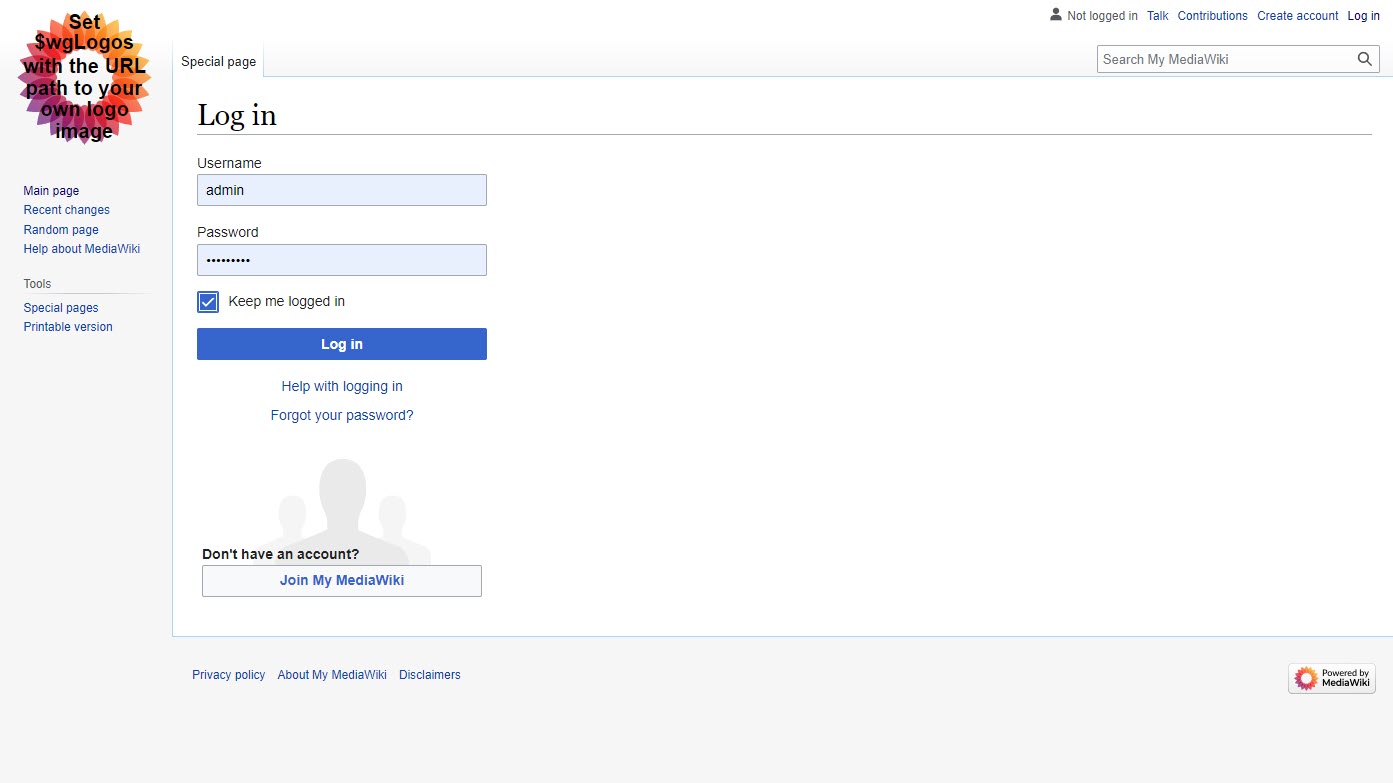
Step 1: Log in to your MediaWiki site with your administrator credentials
Once MediaWiki has finished installing, the URL for your new site will be listed on the Auto Installer page. Click on this URL and then choose Log in at the top right of the page. Enter the administrator login credentials you set in the Auto Installer and click the Log in button.
Are you a pro? Subscribe to our newsletter
Sign up to the TechRadar Pro newsletter to get all the top news, opinion, features and guidance your business needs to succeed!
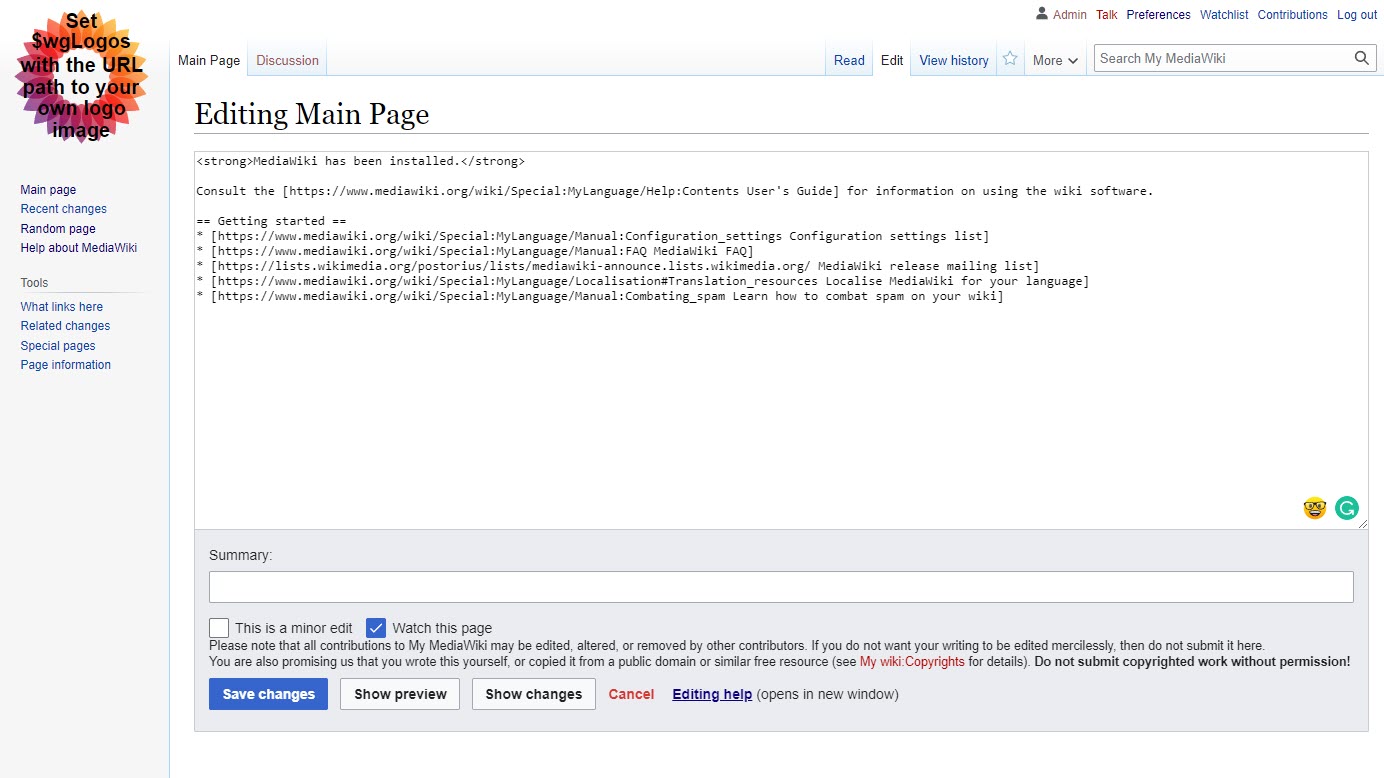
Step 2: Edit your main page
When you log in, the first page you’ll see is your Main Page. This page can now be edited by everyone who visits it. Get started by clicking on Edit to change the contents of the page. It will already be populated with some example text formatted using MediaWiki’s formatting syntax. When you’re finished, click Save changes, and the page will update to your new text.
You have the option of entering a summary of what you changed in your edit. This makes it easier for users of your wiki to see why each change was made.
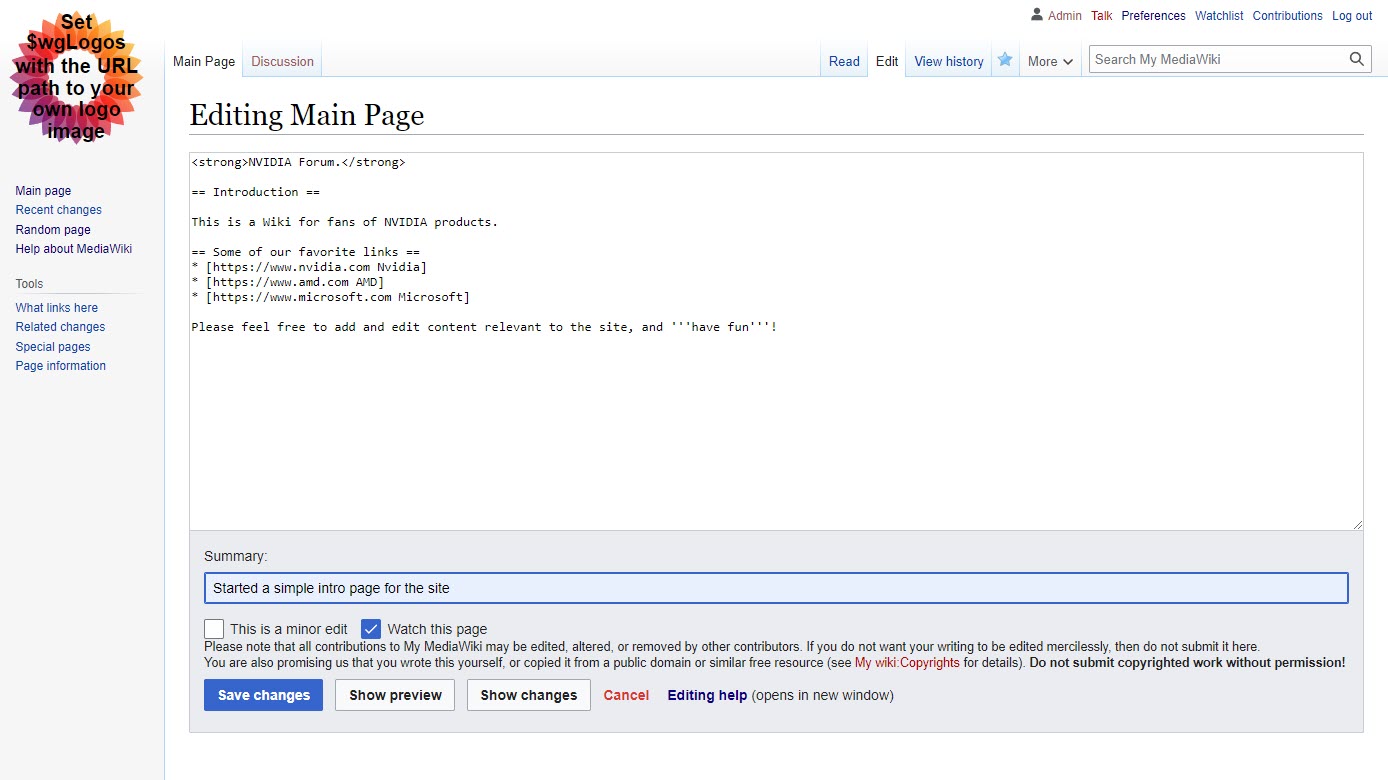
Step 3: Formatting your pages
You can use MediaWiki markup to better format your pages. For example, surrounding text with two apostrophes (e.g., ''italic'') will make the text appear in italics. Surrounding text with three apostrophes (e.g., '''bold''') will make the text appear in bold.
Using MediaWiki’s unique formatting syntax is also the way you can add links, lists, images, and tables. Some HTML tags are supported, too. It’s one of the most powerful features of MediaWiki. You can check the cheatsheet to get started, but new users should budget some time to learn this syntax until it becomes second nature.
Step 5: Adding pages
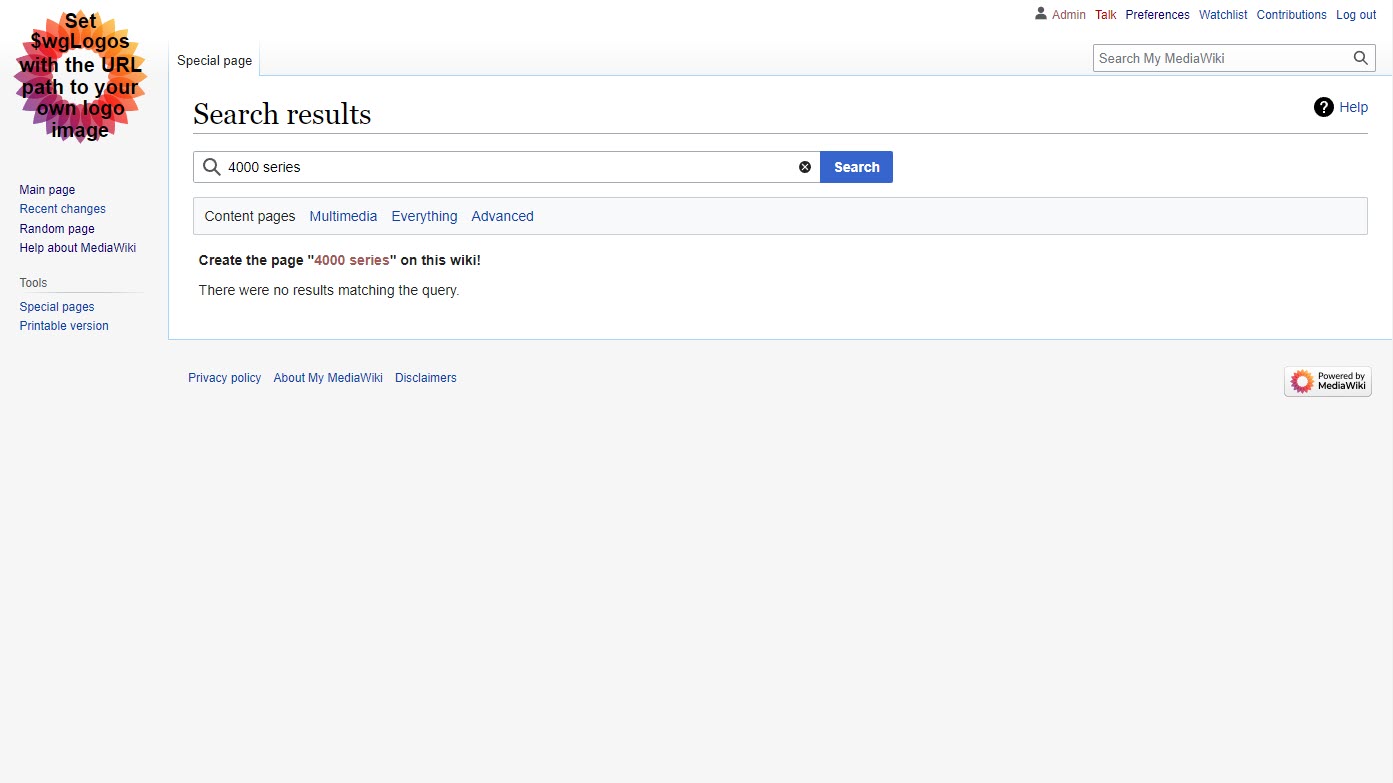
There are several ways to add a new wiki page. One of the simplest ways is to search for the topic title in the search box. If a page for the topic doesn’t already exist, you’re given the option to create a new page for the topic from the search results.
Step 6: Enable file uploads
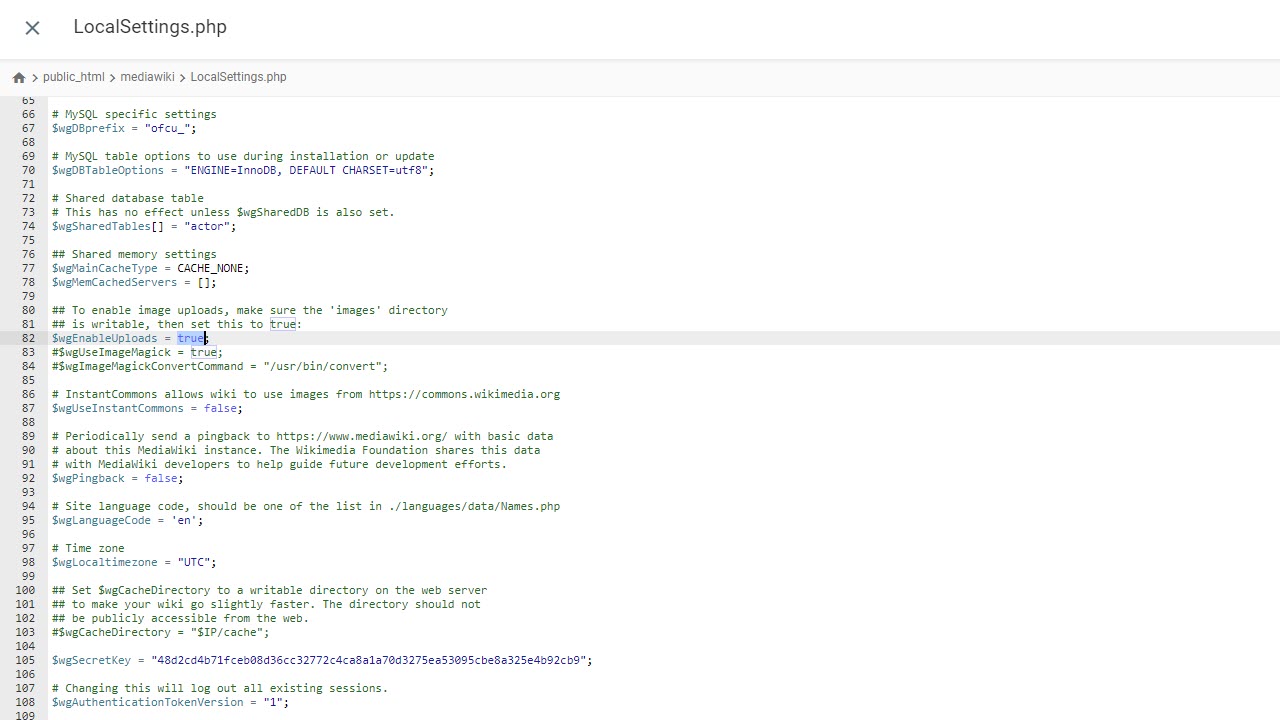
By default, file uploads are disabled on MediaWiki installations. To enable users to upload files that support articles, such as images, you need to edit a setting in the LocalSettings.php file.
In the Hostinger administration panel, open the File Manager. Browse to the folder where you installed MediaWiki and double-click LocalSettings.php to open it.
Find the line that says ‘$wgEnableUploads = false;’ and change it to ‘$wgEnableUploads = true;’. Click the Save button at the top right of the screen.
Users can now upload files such as images to your MediaWiki installation by clicking on the Upload file link available in the main menu.
Summary
In this guide, you’ve learned how to set up the powerful MediaWiki collaboration tool on your own web hosting. MediaWiki is one of the best-known team collaboration tools, and it can also be used to build a community based around a common interest.
We’ve previously asked a Fiverr design expert how they might redesign Wikipedia for better usability, an interesting read for those considering MediaWiki for their next project. We’ve also covered some of the potential flaws of user-generated wikis and Wikipedia’s attempts to crack down on poor editing. It’s all food for thought for anyone installing MediaWiki for the first time.
Read more in this series:
- How to start a blog with Joomla
- Build your own CRM using SugarCRM
- How to host your files online using Nextcloud Hub
- How to start your own help desk with Hesk
- How to build an HR System using OrangeHRM
- How to generate your own invoices using Invoice Ninja
- How to install live chat software with Sales Syntax
- Run your own ecommerce platform with PrestaShop
- How to create your own website with Soholaunch
- How to launch your own website with WebsiteBaker
- How to learn search engine optimization with SEO Panel
- How to kickstart your own Ancestry.com alternative with webtrees
- How to install a free ERP software called Dolibarr
- Demand gen vs lead gen: What's the difference?
- Host your own private forum with MyBB
- Build your own calendar application with WebCalendar
- Set up your own groupware service with Tiki Wiki CMS
- How to build your own email marketing service with phpList
- A Google Photos alternative: Store your photos online with Piwigo
- How to start with project management using The Bug Genie
- Make your own poll platform with LimeSurvey
- How to host your own learning management software with Moodle LMS
- Set up an accounting system with FrontAccounting
- Produce your own bills with BoxBilling
Richard brings over 20 years of website development, SEO, and marketing to the table. A graduate in Computer Science, Richard has lectured in Java programming and has built software for companies including Samsung and ASDA. Now, he writes for TechRadar, Tom's Guide, PC Gamer, and Creative Bloq.
