Run your own ecommerce platform with PrestaShop
Start building your ecommerce empire

Creating an online store is a great way to generate side income or start your own business. PrestaShop is a free, open-source ecommerce platform that enables you to easily create your own store.
To use PrestaShop, you will need web hosting, which will provide the server infrastructure and software you need to power your online store. In this guide, we explain how to set up your ecommerce store with PrestaShop, and provide important information to help you get started.
Run your own ecommerce platform with PrestaShop: Preparation
Before you begin creating your online retail empire, you should purchase hosting. We used Hostinger for this how-to guide, an industry-leading host that offers affordable, yet powerful hosting solutions. A powerful hosting subscription is a good idea if you plan to create a large online store.
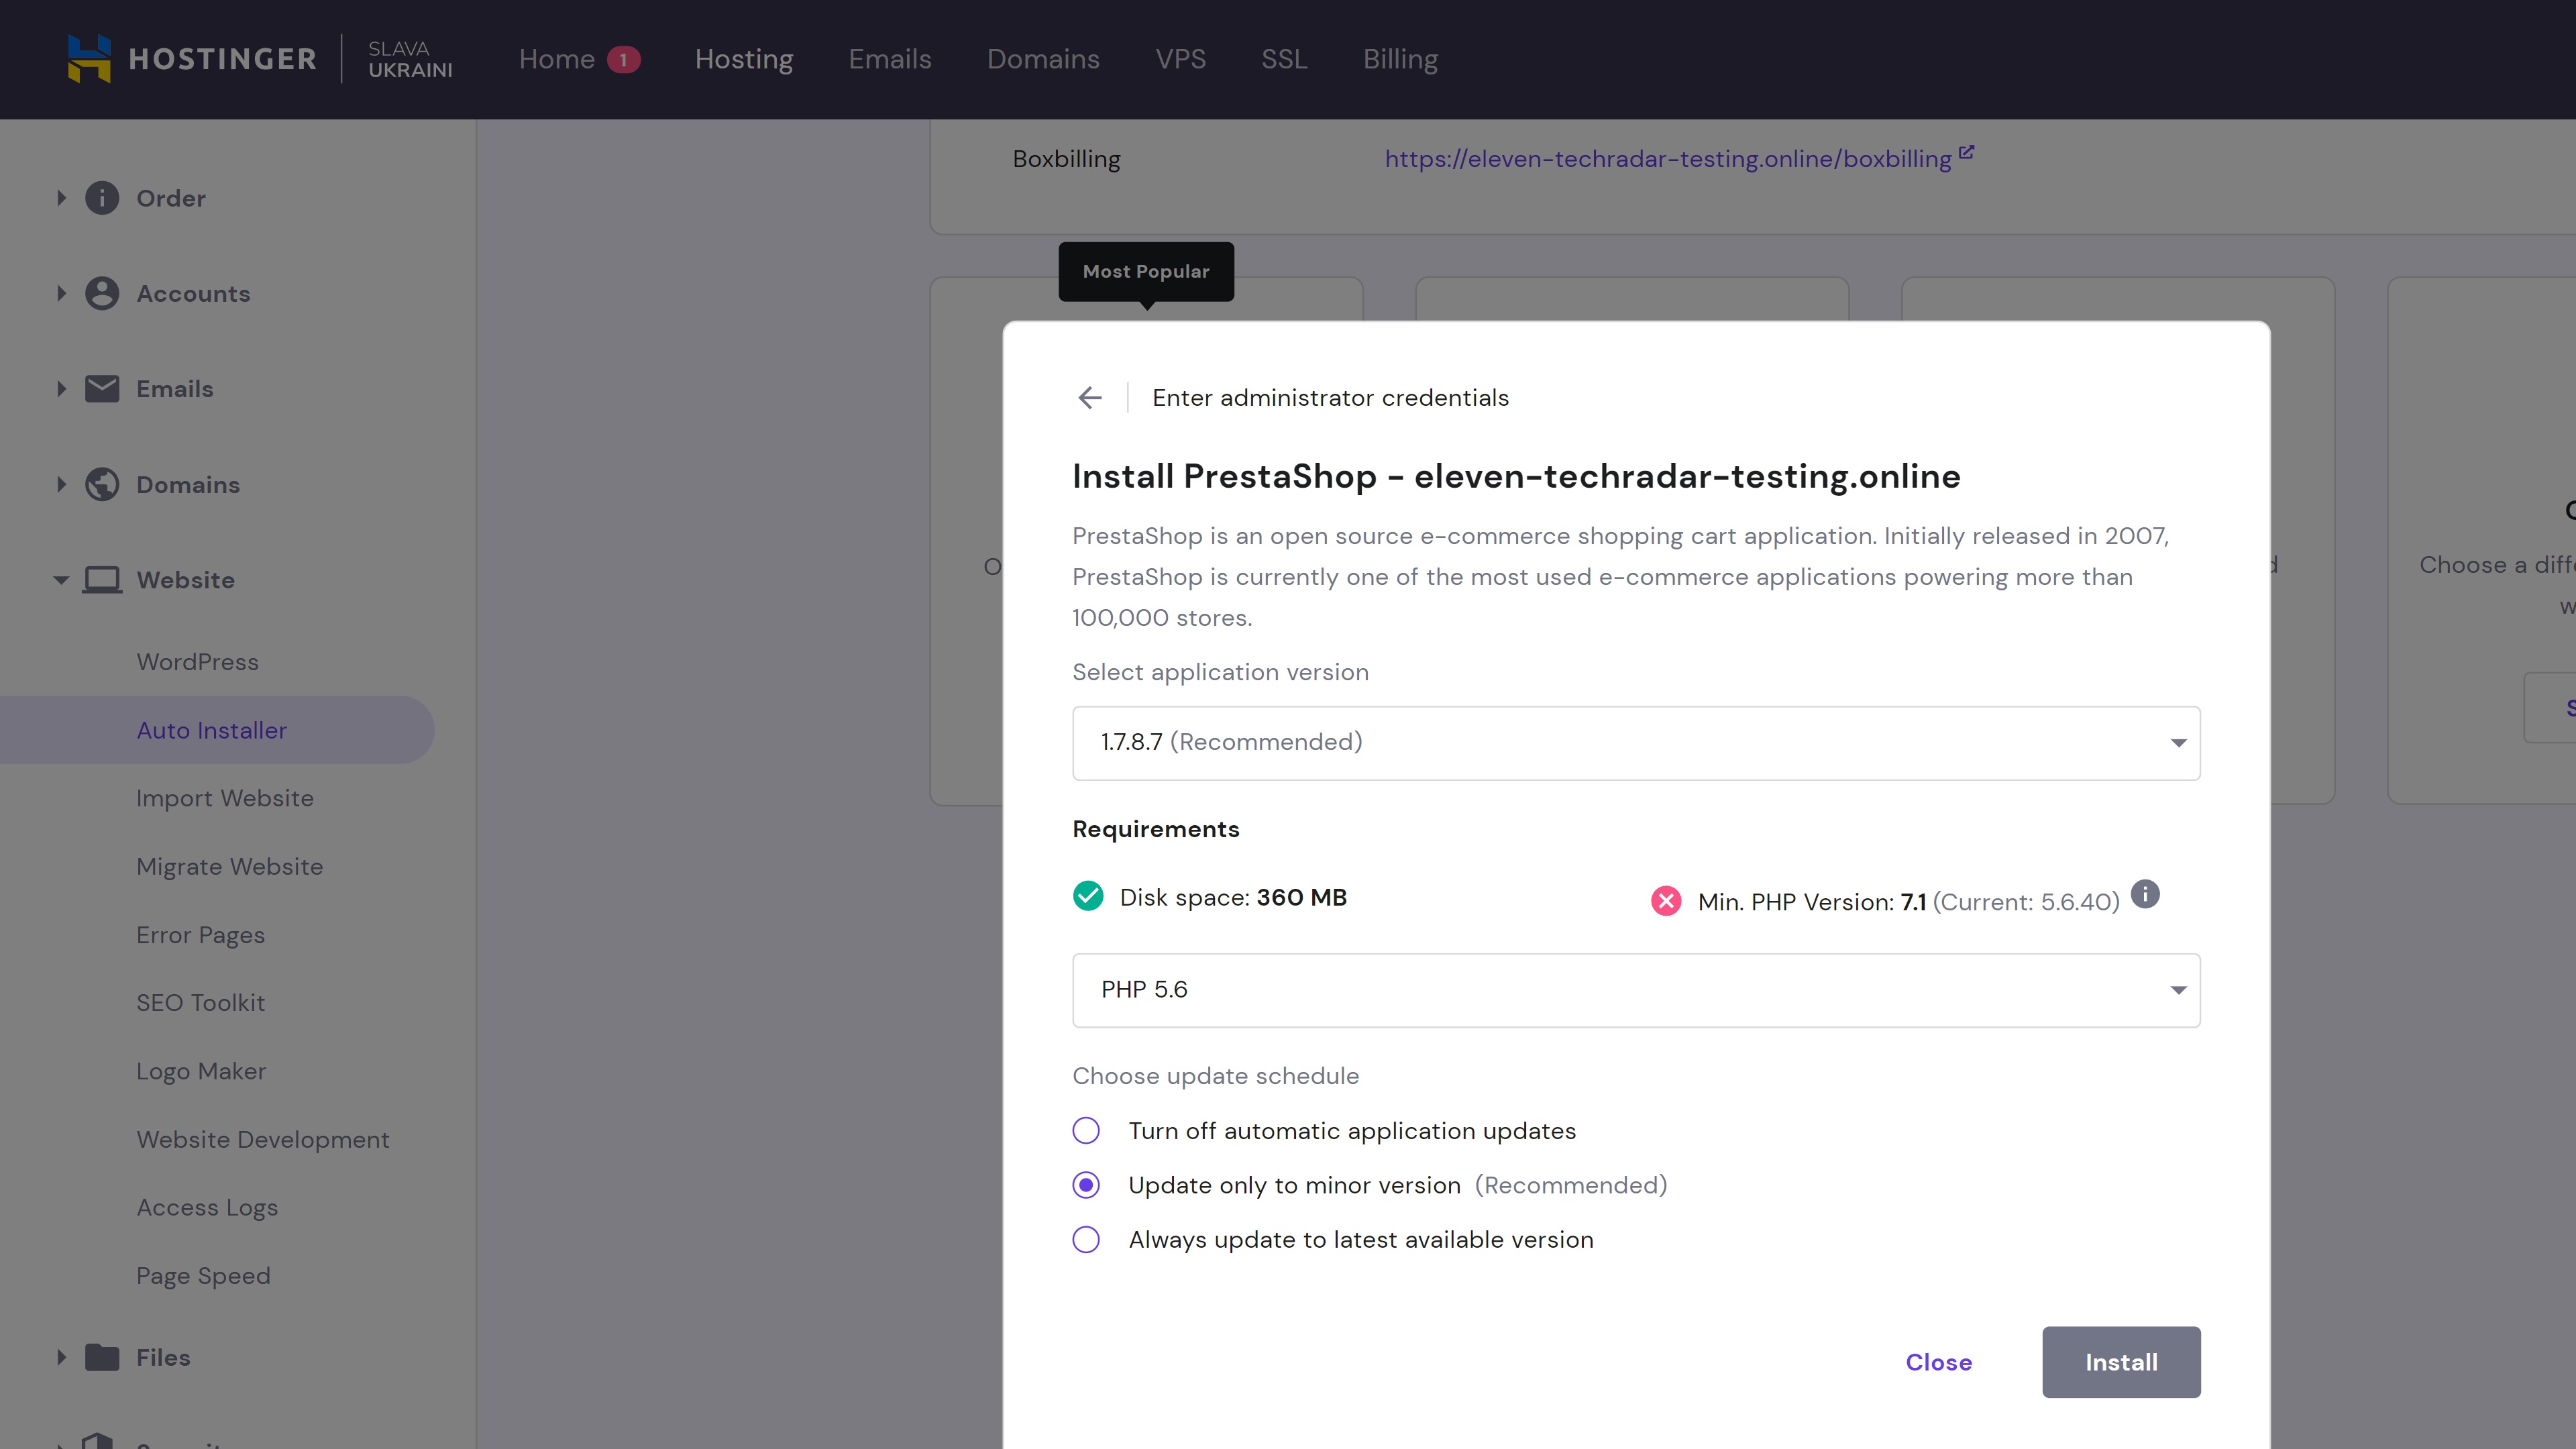
Once your hosting plan is in place, install the PrestaShop software on your hosting server. If you’re using Hostinger, you have access to a simple, user-friendly Auto Installer that enables you to install PrestaShop (and numerous other scripts) with a click of your mouse.
You will find the Auto Installer tool in Hostinger’s hPanel control panel. Click through to it, search for PrestaShop, and follow the prompts to install it. You can manage your installation and access the PrestaShop dashboard easily from the Auto Installer.
Should you need more help, Hostinger has published a comprehensive guide to installing and setting up PrestaShop.
Step 1: Choose a theme
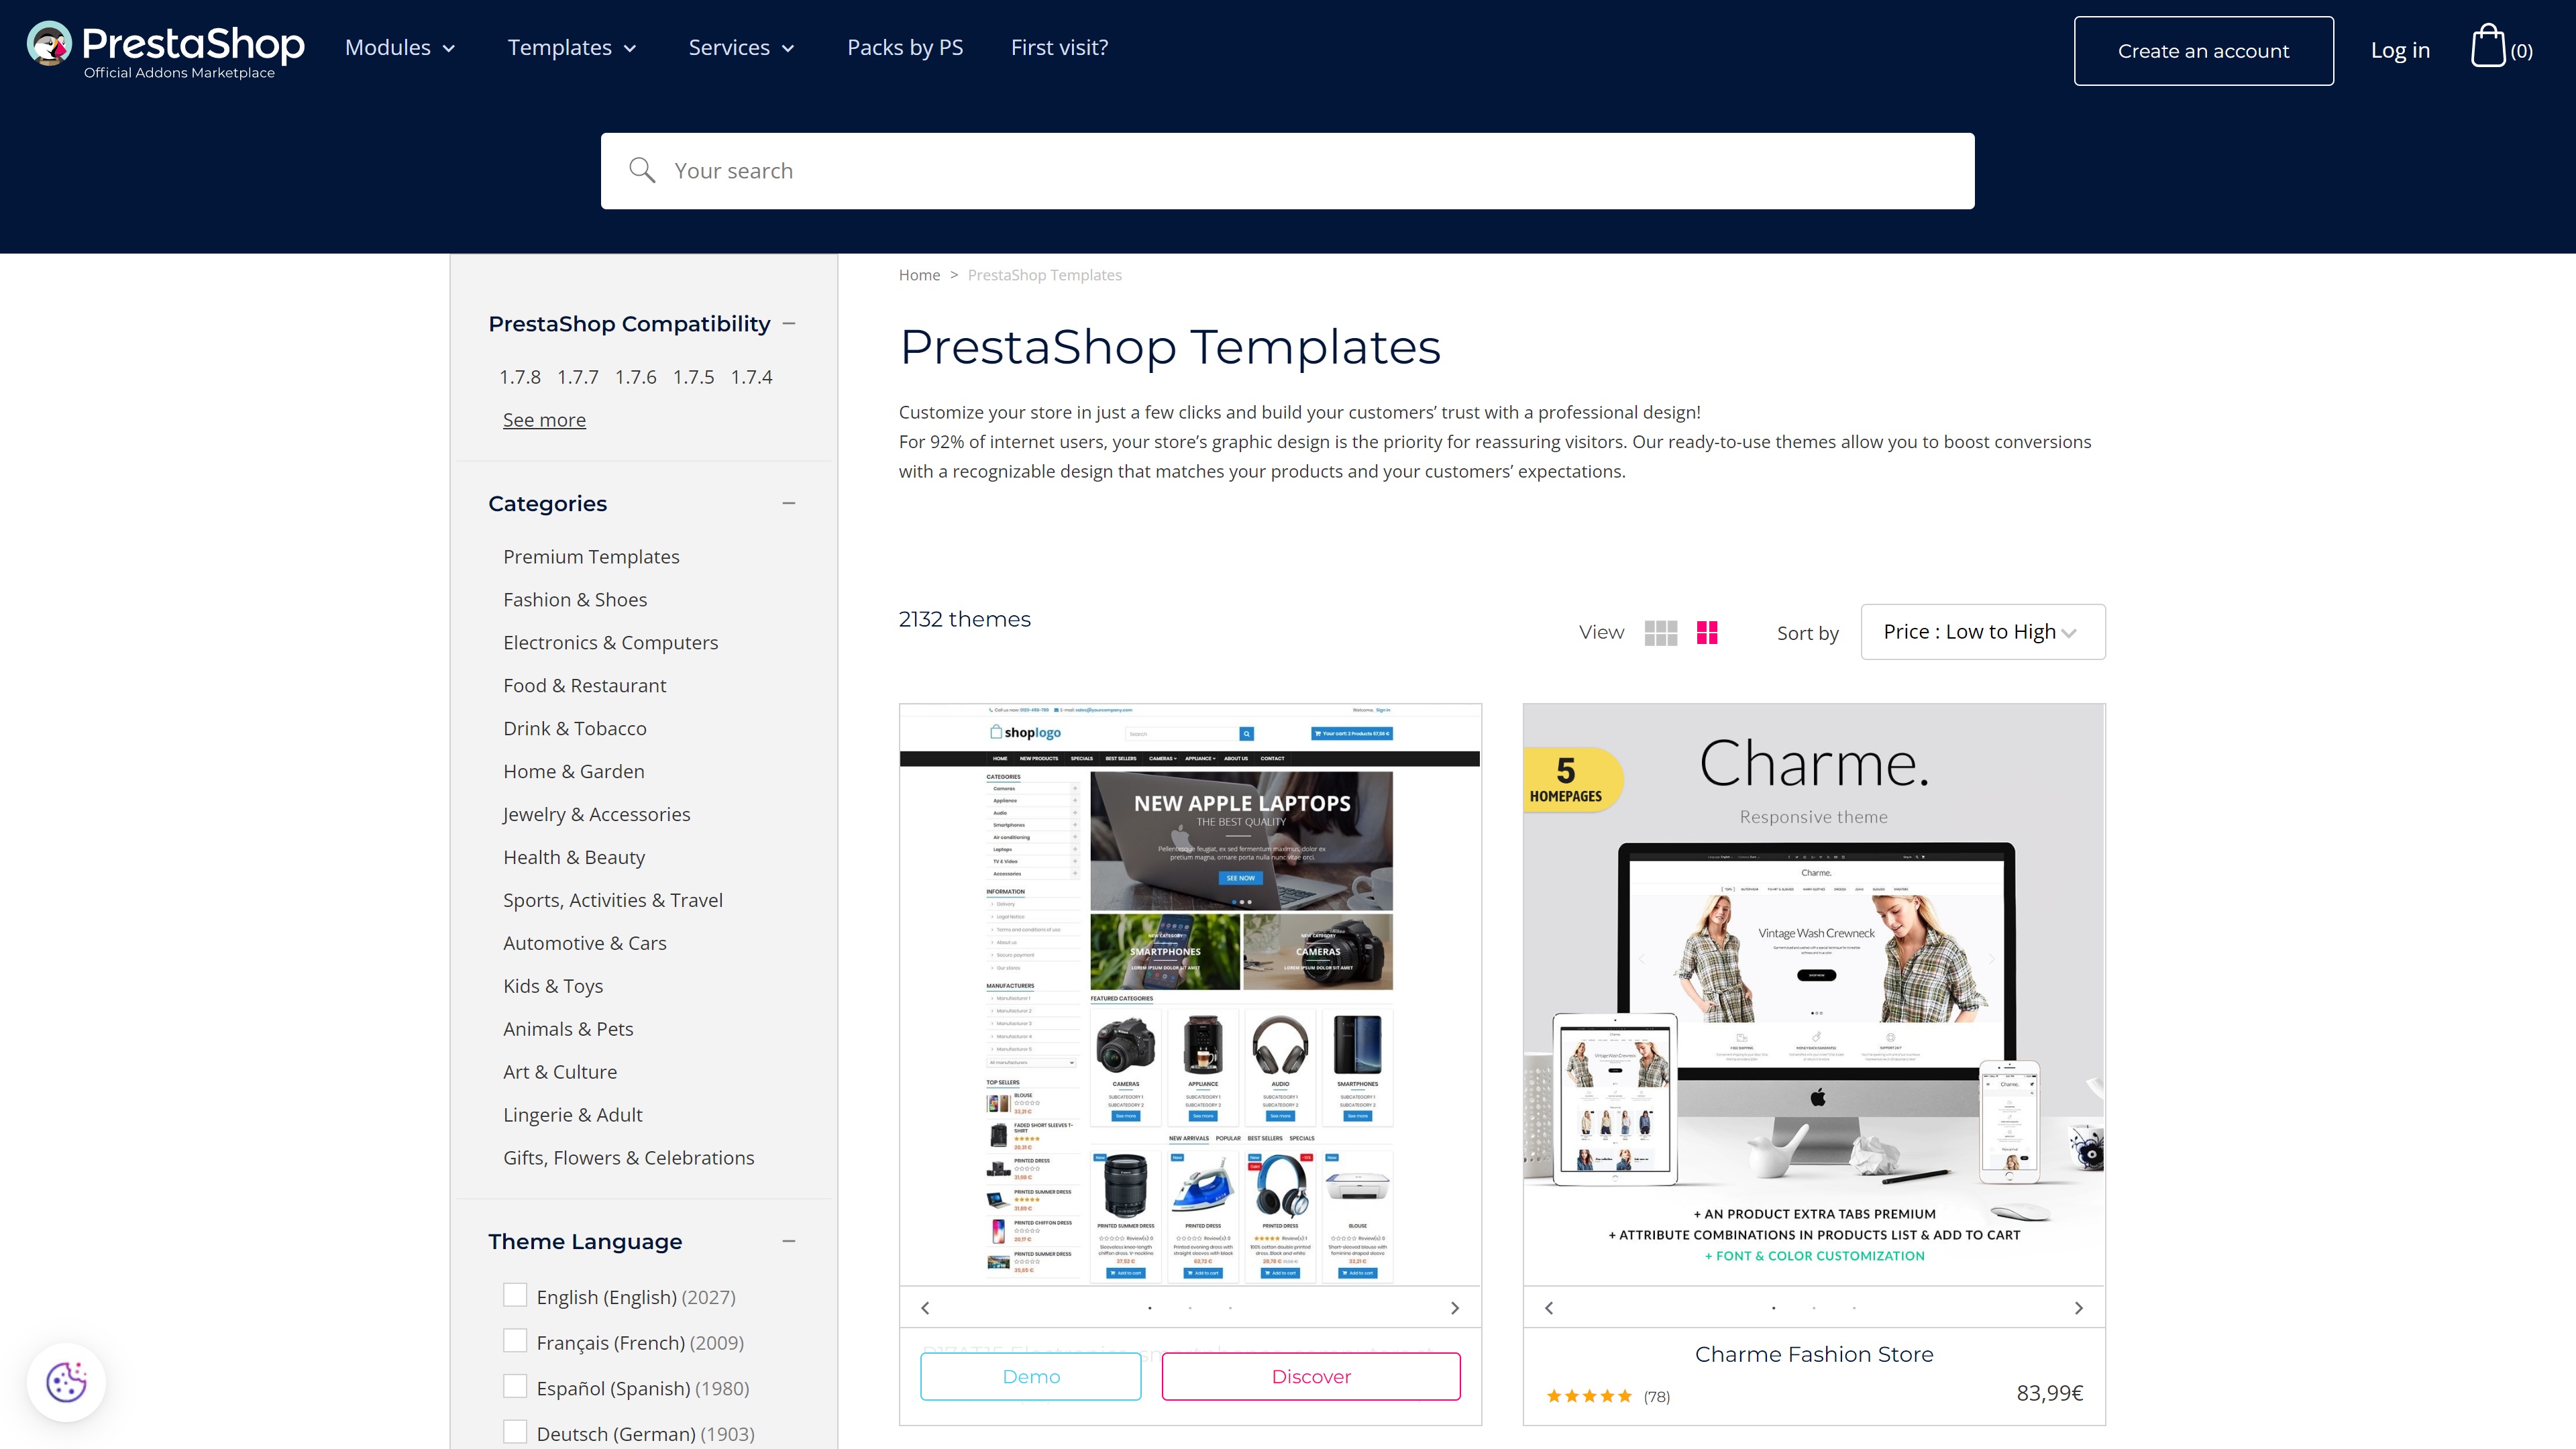
First up, you should choose a theme for your store. You can start from scratch and design your own site from the ground up, but we recommend you begin with a theme from the PrestaShop Addons Marketplace. This is where you will find 2000+ designs that are carefully categorized according to their primary use. Selling fashion items? Have a look at the Fashion & Shoes templates. You can also filter by theme language, included functionality, layout, and customer rating.
Are you a pro? Subscribe to our newsletter
Sign up to the TechRadar Pro newsletter to get all the top news, opinion, features and guidance your business needs to succeed!
All PrestaShop Marketplace templates are available with a one-time licensing fee. However, there are free template options elsewhere on the web if you’re on a tight budget.
Step 2: Add and customize pages
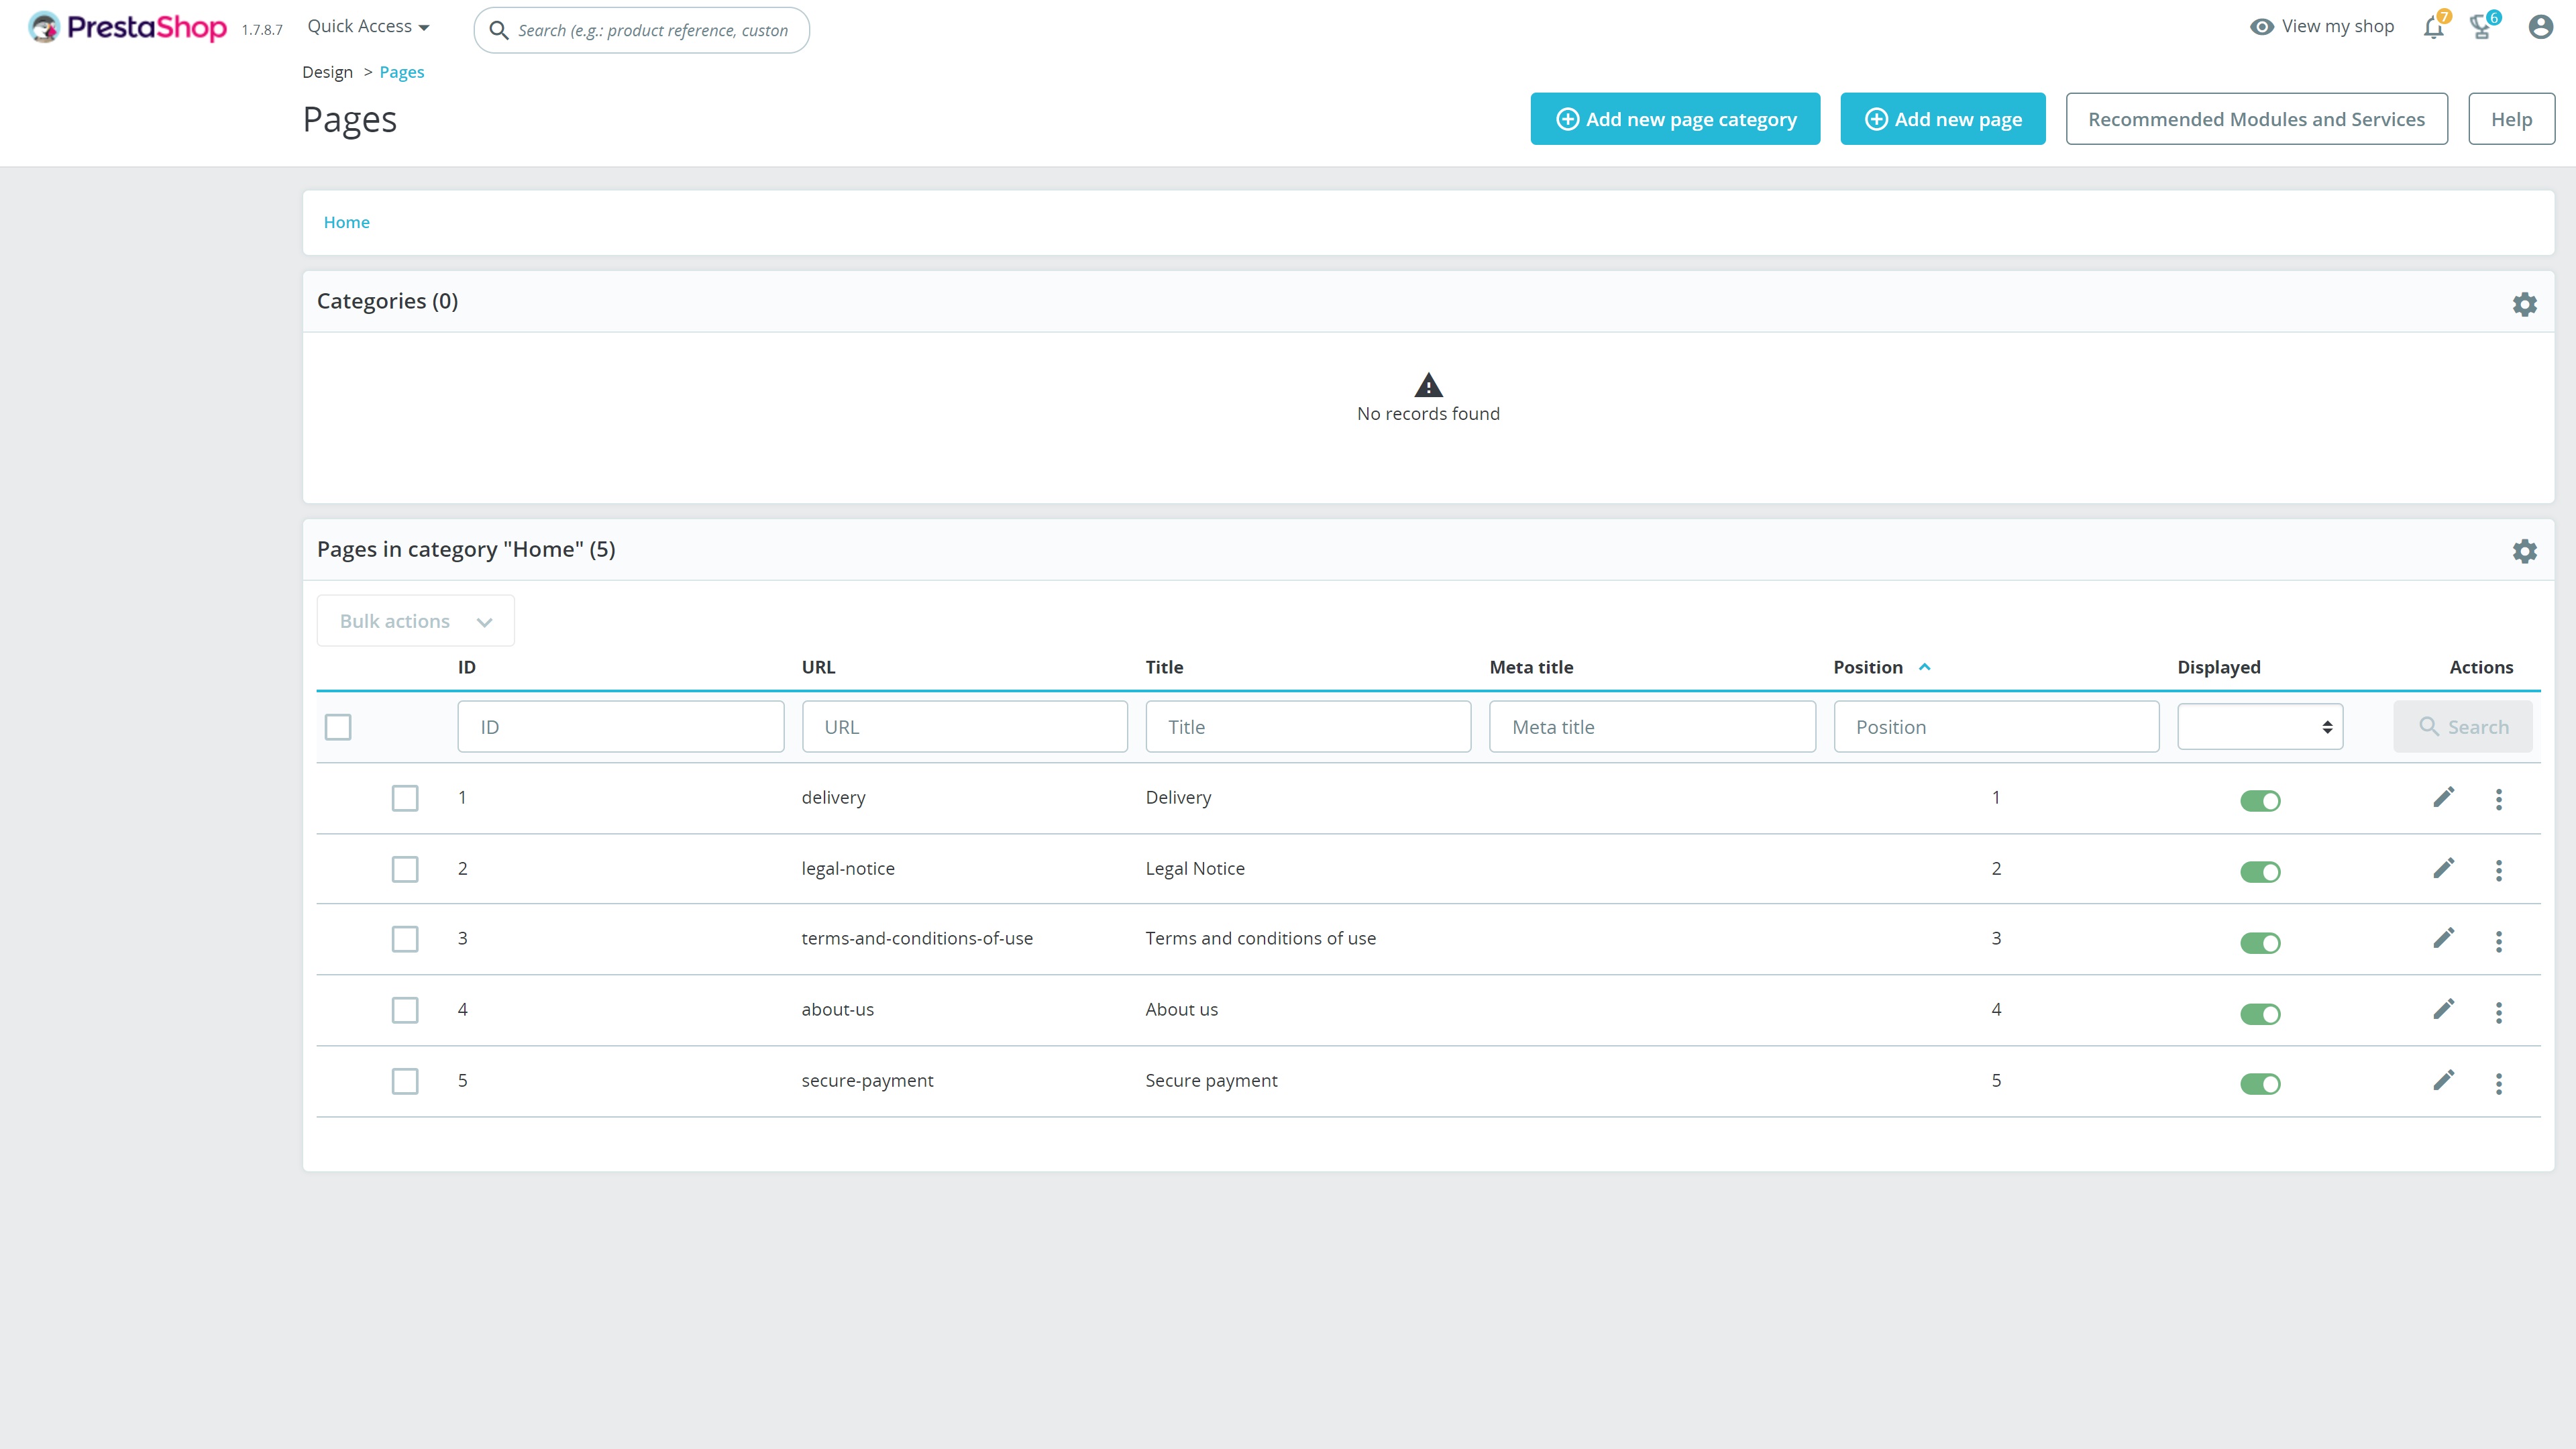
For the next step, head to the Pages menu under the Design tab from your main dashboard. Here, you can add and customize the pages you require. The default PrestaShop theme includes a few pre-added pages such as About and Legal, but you will likely need to add others.
To customize your pages, select the edit button and follow the prompts.
Step 3: Secure your store
Next up is security. Since you will be dealing with sensitive personal data and customer payment information, it’s crucial to maintain a high level of security. We suggest checking your hosting security setup to make sure it’s watertight, and to add a secure sockets layer (SSL) certificate to your store. This is achieved via your hosting account rather than through PrestaShop itself.
Step 4: Configure payment methods
Before you can begin accepting payments, you should configure at least one payment gateway. Bank transfer and check payment are the only default methods, and you will have to install modules for other gateways like Stripe and Amazon Pay.
Head to the Module Catalog to install these, before configuring them via the Payment menu.
Step 5: Add products
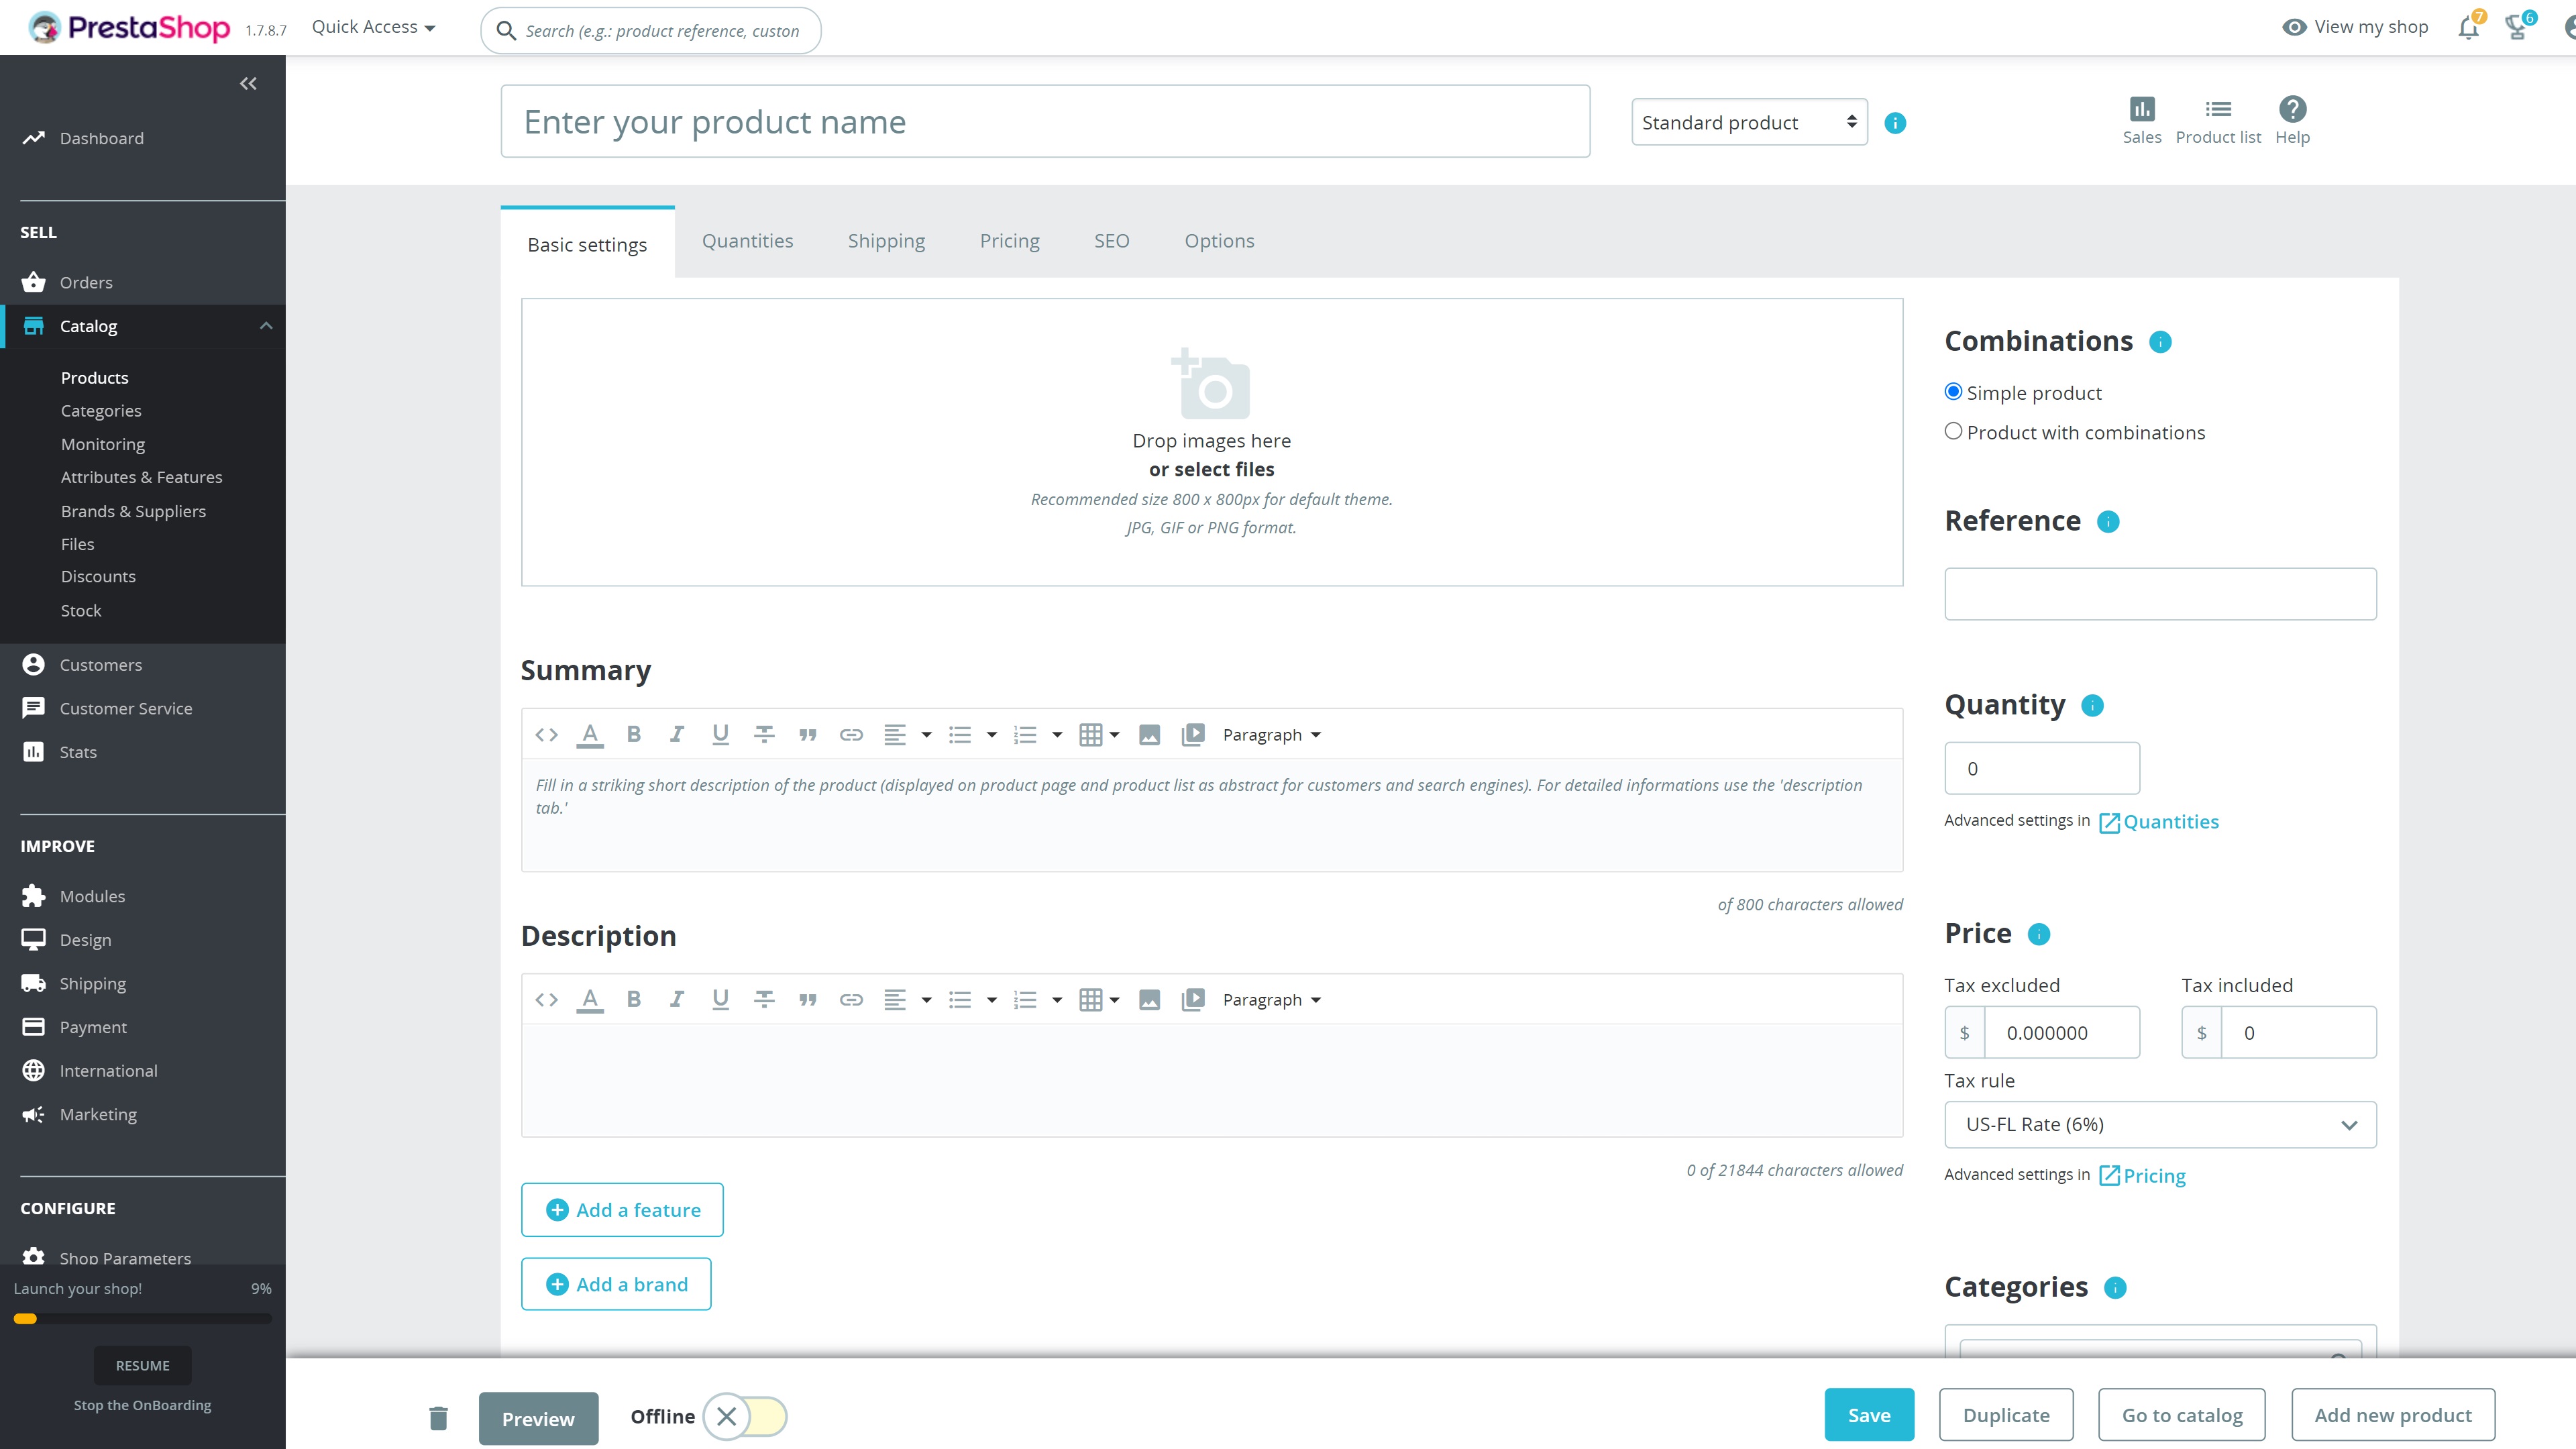
Your online store should be starting to come together, so it’s time to add your products. Head to the Product menu under the Catalog tab. This is where you add new products and manage existing listings. Your inventory and pricing information is clearly listed, and you can unpublish items with a click of your mouse.
Selecting the Add New Product button will reveal a suite of useful tools to help you create a new product listing. You can configure everything from pricing and shipping options, to SEO settings, and your general information.
Step 6: Add extra currencies if required
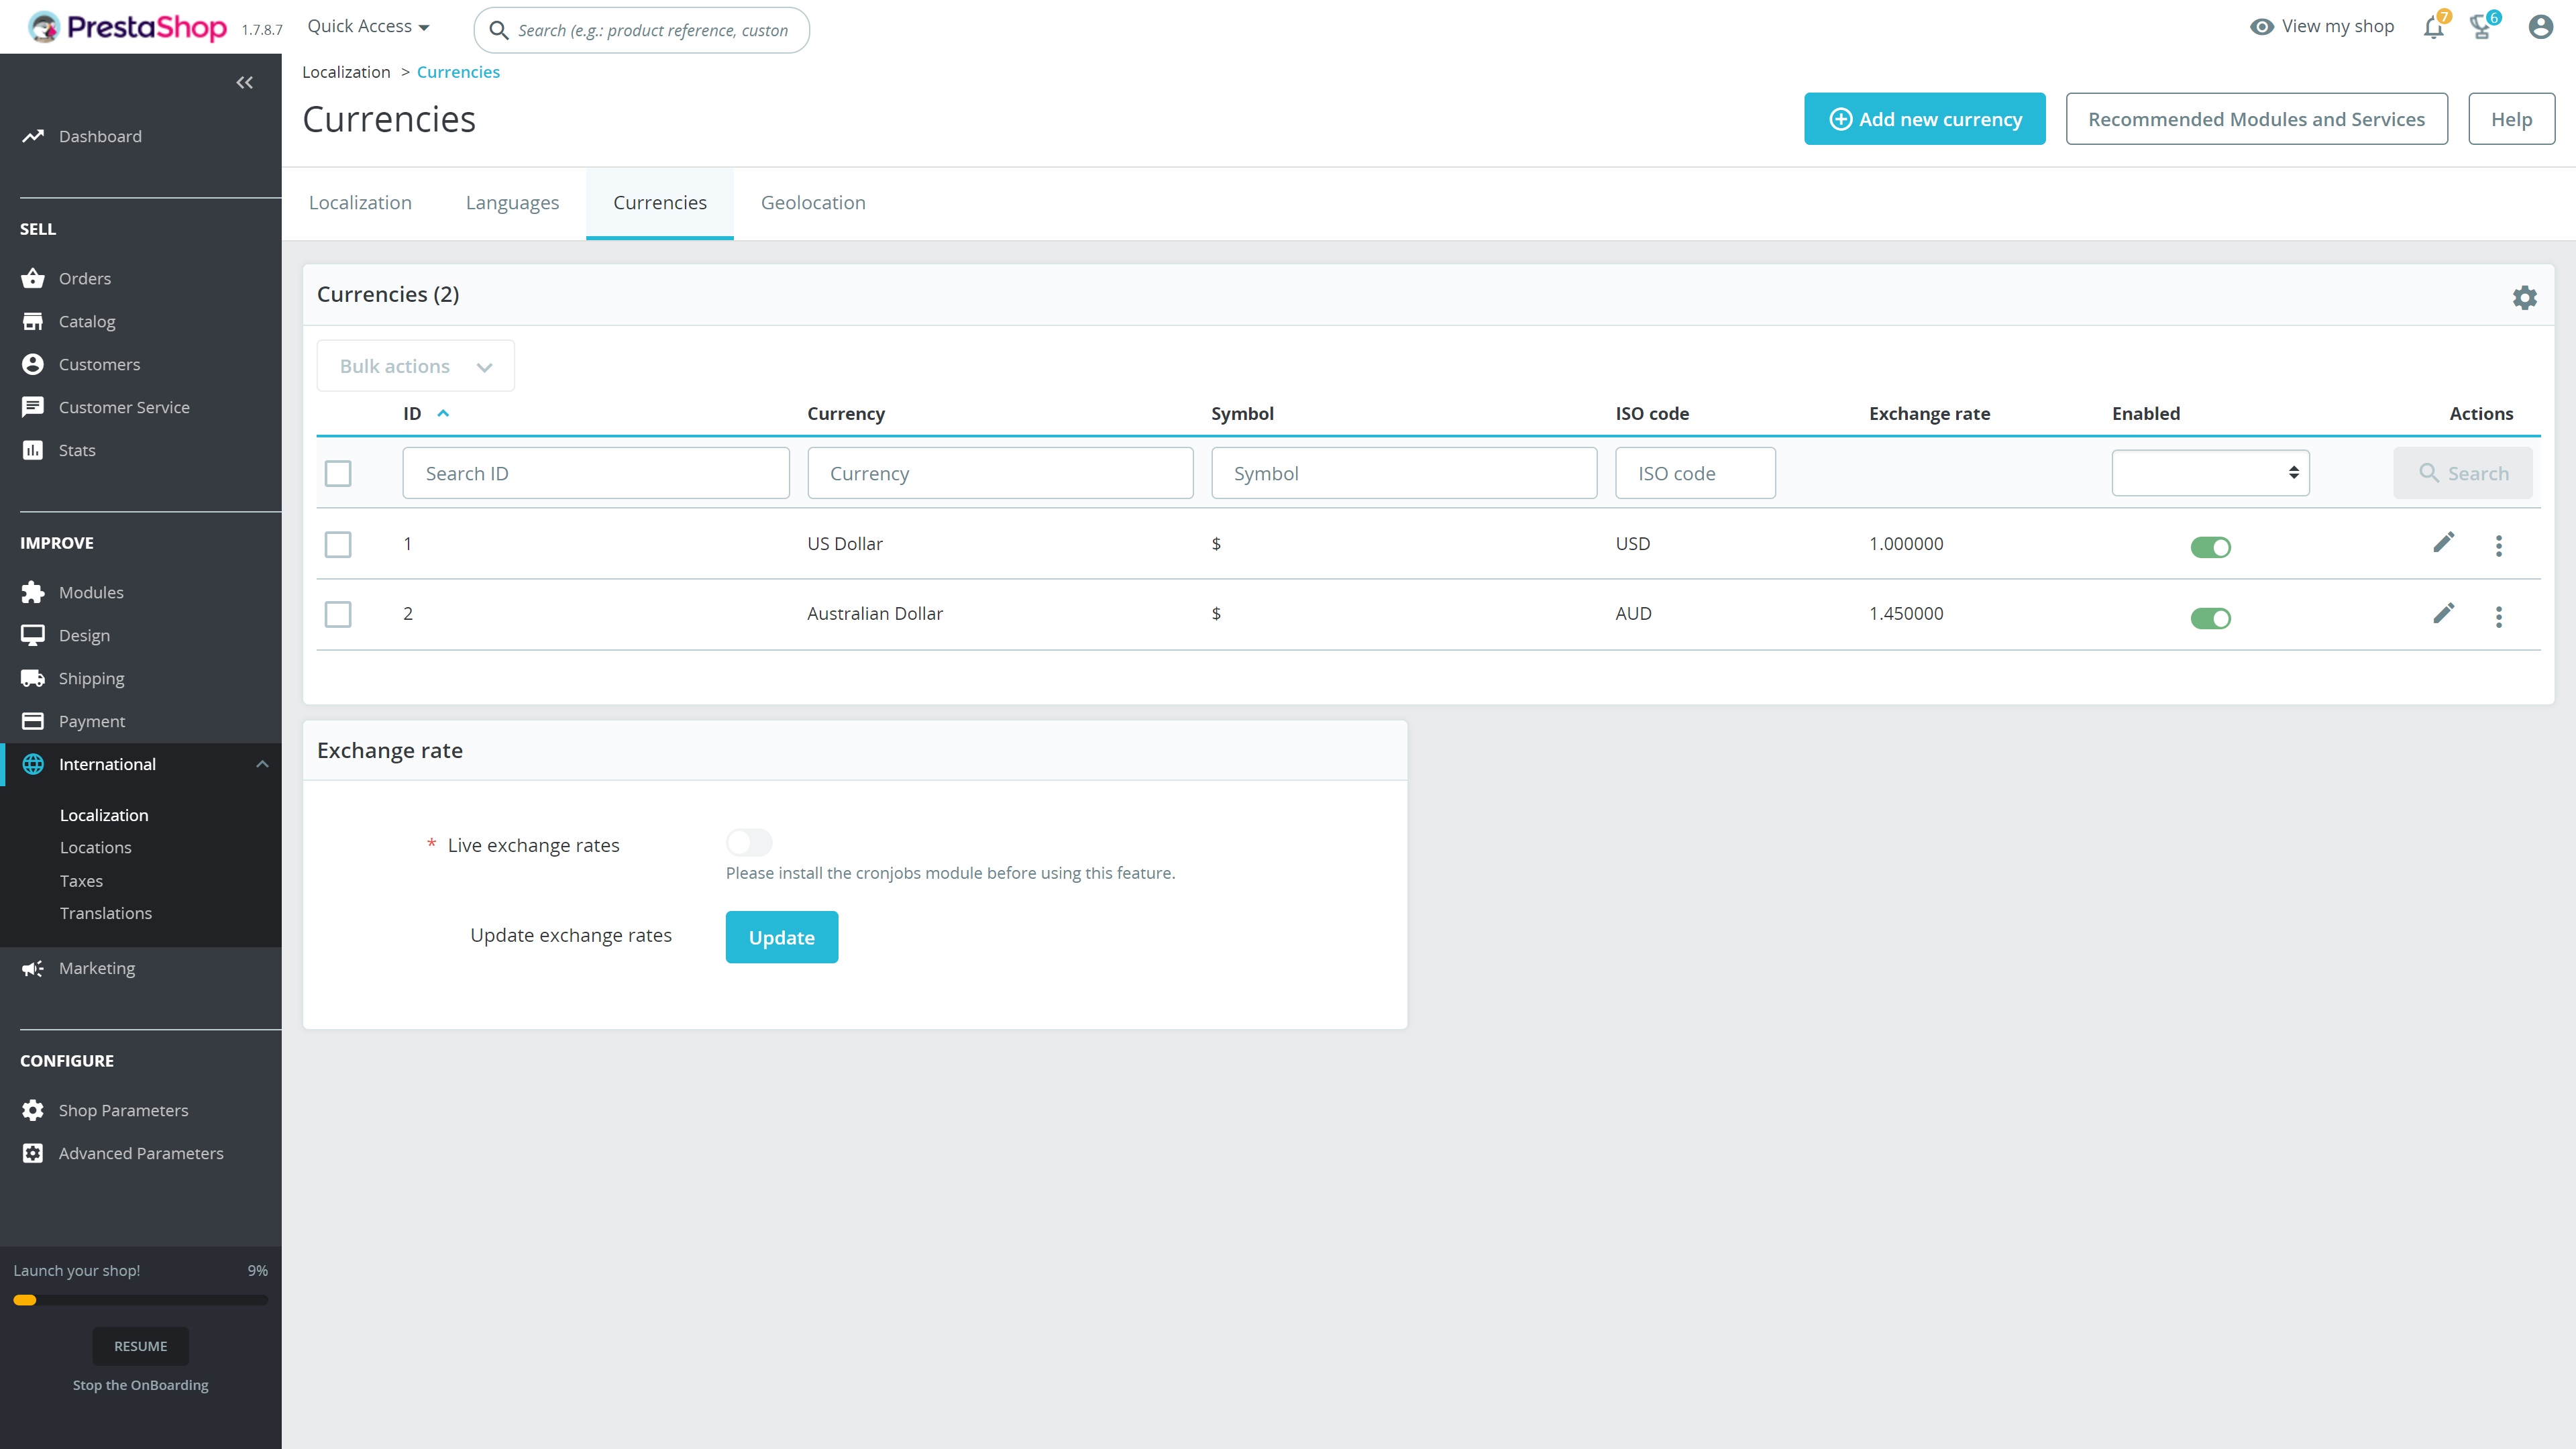
Under the International > Localization menu, you will find a Currencies tab that enables you to add additional currencies if required. Selling in USD is usually an acceptable method, but adding local currencies such as EUR, AUD, or CAD could help you attract more international customers.
To add a new currency, select Add new currency, pick the currency you want, then click Save. There’s a useful option for adding live exchange rates, which requires an extra module to install.
Step 7: Test, test, and test some more!
By this point, your store should be almost ready to launch. However, you must put it through rigorous testing, to ensure there are no bugs or glitches that could detract from the customer experience.
Spend time clicking through your site using different devices with different web browsers. It’s often a good idea to ask friends or family members to test it as well. Occasionally, an extra set of eyes will pick up something you may have missed.
Summary
Anyone can create an online store with PrestaShop. It’s simple to set up and use, and you shouldn’t have to pay more than a few dollars per month to get started. In this how-to guide, we outlined everything you need to know about creating your store, so jump right into it!
Check out our guide to the best PrestaShop hosting if you’re still looking for a host, and give our PrestaShop website builder review a read to find out more about this versatile platform.
Read more in this series:
- How to start a blog with Joomla
- Build your own CRM using SugarCRM
- How to host your files online using Nextcloud Hub
- How to start your own help desk with Hesk
- How to build an HR System using OrangeHRM
- How to generate your own invoices using Invoice Ninja
- How to install live chat software with Sales Syntax
- How to create your own website with Soholaunch
- How to launch your own website with WebsiteBaker
- How to learn search engine optimization with SEO Panel
- How to kickstart your own Ancestry.com alternative with webtrees
- How to install a free ERP software called Dolibarr
- Demand gen vs lead gen: What's the difference?
- Host your own private forum with MyBB
- Build your own calendar application with WebCalendar
- Set up your own groupware service with Tiki Wiki CMS
- How to build your own email marketing service with phpList
- A Google Photos alternative: Store your photos online with Piwigo
- How to start with project management using The Bug Genie
- Make your own poll platform with LimeSurvey
- Roll out your own Wikipedia clone with MediaWiki
- How to host your own learning management software with Moodle LMS
- Set up an accounting system with FrontAccounting
- Produce your own bills with BoxBilling
Daniel is a freelance copywriter with over six years experience writing for publications such as TechRadar, Tom’s Guide, and Hosting Review. He specializes in B2B and B2C tech and finance, with a particular focus on VoIP, website building, web hosting, and other related fields.
