How to get revising with the free Study Planner app
Plan study time to perfection
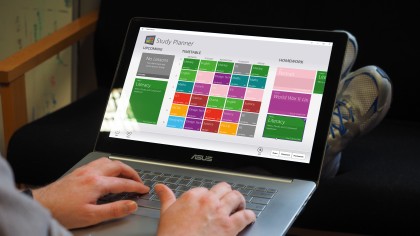
Put your school day in order
They say your school and college days are the best of your life, but that's no comfort when you're floundering in the middle of a difficult assignment or struggling to remember where you're supposed to be at any given moment. However, if you get revising with the Study Planner app, it could really help.
Study Planner won't improve your social life or actually do your essays for you, but it will at least help you remain organised and able to plan out your working week.
Input your timetable into the app for a quick and easy way to see when and where you need to be, plus what lessons to prepare for and what exams to get revising for. Study Planner can also be used to manage homework and allow you to organise your upcoming exam revision too.
Install the app on your laptop, tablet or Windows Phone and follow our tutorial.
1. Install Study Planner
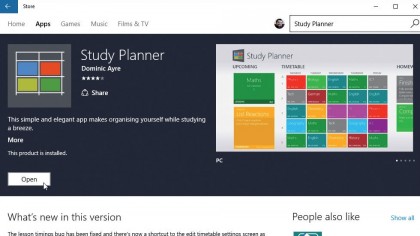
Study Planner can be found in the Microsoft Store – just type Study Planner into the Search box to locate it, then click the 'Free' button to install it.
Once complete, click 'Open' to launch it – from here you can then create permanent shortcuts by right-clicking its tile and choosing 'Pin to Taskbar', or right-clicking its shortcut on the Start menu and choosing 'Pin to Start'.
2. Configure timetable
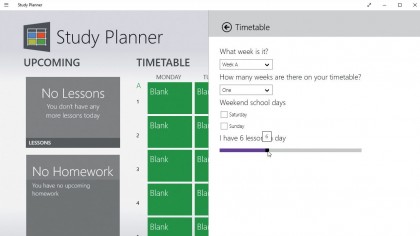
The timetable defaults to a single five-day week, with each day split into five. If you need to change this, click the hamburger button in the top-left corner and choose 'Settings' followed by 'Timetable'.
From here you can set up two separate weeks (Week A and Week B) of lessons, plus change the number of lessons per day and add 'Saturday' and 'Sunday' to the timetable too.
3. Set lesson times
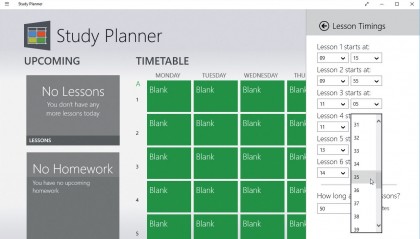
Open Settings again, but this time choose 'Lesson Timings' to choose when each lesson starts, and how long each lesson is to make allowances for breaks, lunchtime and when school finishes.
Sadly, you can't currently set different durations for individual lessons, so the best thing to do is set the lesson time to the most common length used.
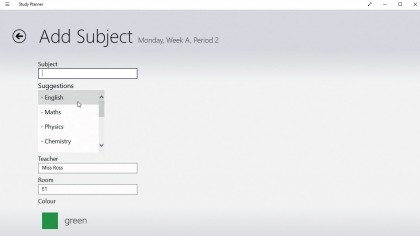
4. Enter lessons
Now click on the first green Blank card under Monday. Click 'Subject', then enter your subject or choose from the list. Next, type the name of the person teaching the class, what room it's in and assign it a colour from the 11 available.
Use colours to help differentiate between different subjects. Once complete, click 'Save' and move on to the next slot in your timetable.
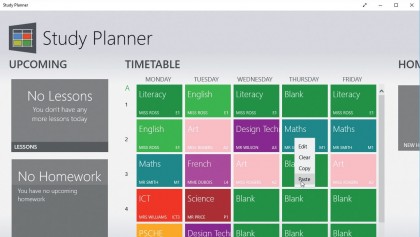
5. Fill timetable
You can fill each entry on the timetable, or copy and paste repeat subjects to speed things up: right-click the lesson you wish to duplicate and choose 'Copy', then right-click and choose 'Paste' in each slot where you need it to appear.
You'll also find 'Edit' and 'Clear' options from the same menu, allowing you to amend or remove entries. Finish Week A and – if applicable – Week B.
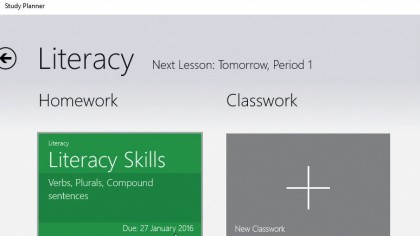
6. Add homework
Make a note of homework by clicking the appropriate tile on your timetable followed by 'New Homework'. Give your homework task a title, verify the subject is correct, add a due date and then record some details about it.
Click 'Save'. The homework will now appear not just when you tap the subject in your timetable, but in the Homework section by the timetable too.
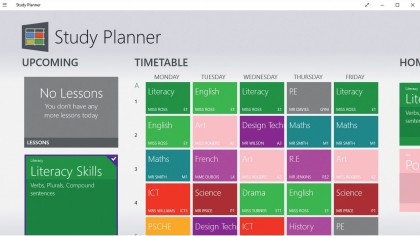
7. Mark completed
When you've finished your homework, tap it and select 'Done' to mark it as complete. You'll be prompted to confirm this by choosing 'Yes' – doing so effectively deletes it.
You can also amend the entry by selecting 'Edit'. Add new homework as you receive assignments – you can set up multiple items for a single subject. Homework is displayed with urgent items listed first.
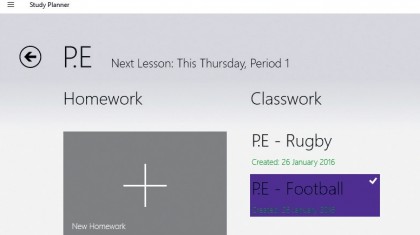
8. Record classwork
Record notes relating to your classwork by selecting the subject and clicking the 'New Classwork' box. Give your classwork a title and record some notes, then click 'Save'.
Click the item to edit it, or right-click it and choose 'Delete' to remove it. You'll also see an 'Add' option – select this and choose 'Classwork' (or 'Homework') to add extra items for that particular subject.
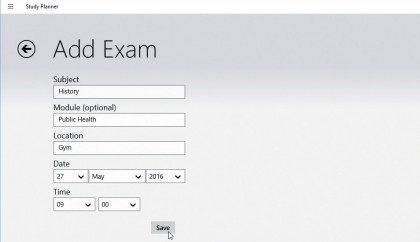
9. Set exam reminders
You'll see an Exam option – selecting this allows you to record details (subject, module, date and location) about upcoming exams.
Once created, exams will appear to the right of the classwork section in the main app and when browsing a subject, while the 'Upcoming' section will also change to list your next exam. Right-click an exam to make changes to it, or delete it.
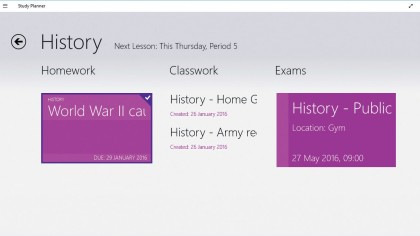
10. No more panic
Study Planner also ties in with the Windows 10 Action Centre to provide you with notifications reminding you of upcoming homework and exams.
It's a great tool for putting your study day in order, alerting you to upcoming lessons, exams and homework. Now there's no excuse for missing an assignment – unless you want to trot out the old 'dog ate it' excuse, of course…
- Enjoyed this article? Discover how to get the most from your PC and new things to do in Windows Help & Advice. Take advantage of an exclusive offer in our sampler today.