Online music storage is an area that has exploded in recent months, with Amazon, Google and Apple all becoming major players in the game. But what if you'd rather not deal with a third-party and instead host your own music? What if you could have all the freedom in the world to listen to music when you please, and whereever? We'll show you how to set up your own dedicated iTunes Server that will let you stream your music around your home network, to your iOS devices, and even when you're halfway across the globe, far away from home.
What You Need:
>> A Mac capable of running latest version of iTunes
>> Always-on internet connection
>> Wired or wireless network
>> Existing iTunes Library
1. Set Up a Dedicated Mac and iTunes
2. Set Up Home Sharing
3. Enable SSH/SFTP Access
If you wish to access your non-DRM music over the internet with your Mac or iOS device, you will need to turn on SSH/SFTP access in order to get access to the music files on your system remotely. We have covered this topic before, and you get get the instructions for enabling SSH by clicking here.
4. Connecting to Your iTunes Server via Home Sharing
While on your local network, you can access your iTunes Home Server through Apple’s Home Sharing features. To begin, you must enable Home Sharing on all of the Macs or PCs that you will be using Home Sharing on by going to Advanced > Turn on Home Sharing.

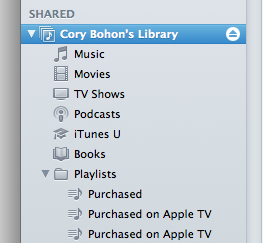
After doing this, your library will appear in the Shared section of the iTunes sidebar. Clicking on this section will give you access to all stored media on the iTunes Home Server.

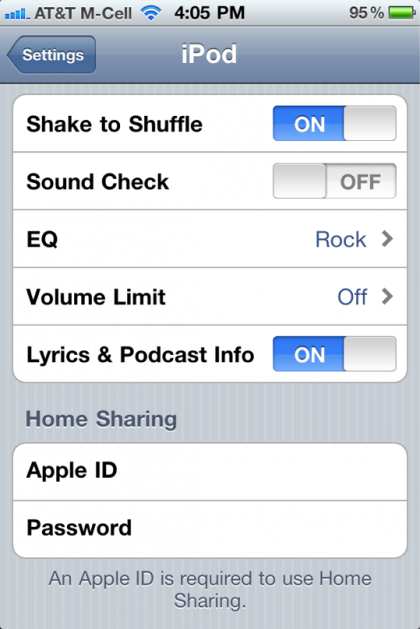
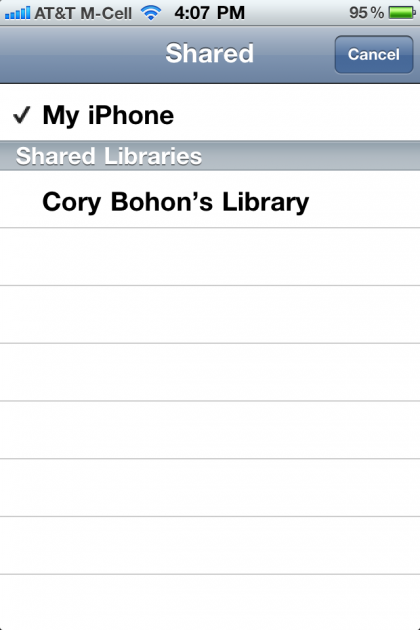
You can also access your shared library on your iOS device. Turn on Home Sharing in iOS by navigating to Settings > iPod, and typing in your iTunes username and password under the Home Sharing heading. While connected to your local wireless network, whenever you open your iPod app, you can access your iTunes library by tapping on More > Shared, and selecting the shared library you wish to connect with.

If you have an Apple TV, you can also enable Home Sharing in order to enjoy the same local network streaming right to your TV. To enable Home Sharing on the 2nd gen Apple TV, you can follow the instructions in this Apple tech note.
Get daily insight, inspiration and deals in your inbox
Sign up for breaking news, reviews, opinion, top tech deals, and more.
5. Connecting to Your iTunes Server via SFTP
If you so want to stream your music to your iOS device over the internet, you can do so by accessing your Mac over SFTP. Because we enabled this in step 3, we will be able to connect to the Mac remotely to access these audio files. We have already covered how to do this in a previous article, so if you are interested in streaming files over the internet, you can check out The Ultimate Streaming Setup.
Follow this article’s author, Cory Bohon on Twitter.