Photos for Mac provides a nice, succinct set of editing tools to help most typical users polish their memories. iOS users should feel right at home with the handful of options — Enhance, Rotate, Crop, Filters, Adjust, Retouch, and Red-eye — but iPhoto and Aperture users shouldn't have any trouble picking them up.
Like iPhoto, Aperture, and Photos for iOS, edits are non-destructive (you can undo them tomorrow or a year from now), and they even sync across devices if you use iCloud Photo Library. Crop a photo in Photos for Mac and add a filter for that extra style, and later you can revert back to the original from your iPhone or iPad. Yep, we live in the future.
As I mentioned earlier, the Edit button won't appear in the upper-right until it's needed (the idea is that users don't need to see certain tools until they are in the right mode or it is necessary). But once you're editing, the entire interface shifts to accommodate. The sidebar automatically hides, the light, Yosemite-standard background turns to black, and the edit tools appear on the right; it's pretty difficult to miss that you have left "organization mode" and are now in a different task.
Let's give some basic edits a try with a photo from Unsplash.com, a great photography project that regularly publishes beautiful photos which are free to use for anything you want.
Step-by-step: edit your photos

1. Time to Edit: To enter edit mode, find a photo in your library or download one from Unsplash.com (http://unsplash.com/) and drag it in (remember, all edits are non-destructive, so feel free to play around now and backtrack later). Double-click the photo to view it individually, then click Edit at the right of the toolbar.
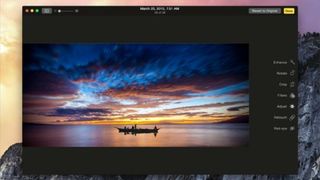
2. One-Click Fix: If your photo needs a quick boost, use the first tool, Enhance. It has no options or customization, but will assess your photo for things like white balance and color balance, then automatically tune it for sharing or posterity.
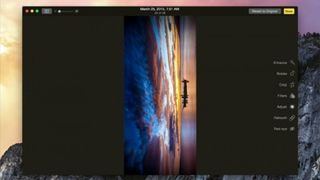
3. Right-Side Up: Sometimes a photo falls on its side, or your iPhone's rotation lock might have caused it to appear upside down. Use the Rotate tool to make it right. Bonus sub-tip: hold the Option key to switch the rotation direction.
Are you a pro? Subscribe to our newsletter
Sign up to the TechRadar Pro newsletter to get all the top news, opinion, features and guidance your business needs to succeed!

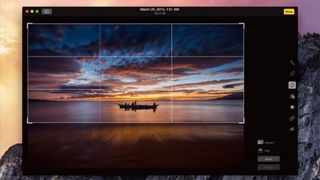
4. Crop for Focus: Editing tools should appear on the right. Let's focus on a good part of the photo by clicking the Crop tool. Now click and drag the handles that appeared around your photo to move the most prominent person or object to the center, or perhaps near the lower left or right corner.
5. Add Some Style: Move back over to the toolset on the right and click Filters. Apple includes a handful, so you could try "Process" to add a dreamy state, or "Noir" for some mystery. When you're happy, click Done in the upper right to keep your new masterpiece.
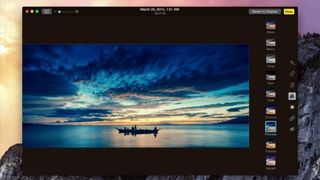
6. Throw It All Away: But what if you didn't just create a masterpiece, and maybe even ruined a priceless family memory? No problem! Double-click the photo again to view it individually, then click the Edit button. See "Revert to Original" right next to Done? There's your ticket back to square one.


