
How to use the iBooks app
Much as you might expect, iBooks is Apple's alternative to Amazon's Kindle and other ebook readers. It's been available on iPad and iPhone for some time, and is also available in El Capitan as a Mac app.
Best of all, books that you've bought on your iOS device in the past can be re-downloaded to and read on your Mac as well. The iBook Store can be browsed on your Mac, and new books can be purchased and downloaded straight to it.
There's a broad range of books available in the store, and some contain much richer content than a continuous flow of text. Some iBooks are made exclusively for Apple's store to take advantage of interactive features – everything from audio and video content to textbook diagrams that magnify details when you click an annotation.
The Children & Teens and Textbooks categories are particularly good places to find this kind of book. If you've purchased books in the PDF and ePub formats from other online book stores, they can easily be added to your iBooks library provided they're not copy-protected. Go to File > Add to Library… and locate the file for the book you want to add.
Note that while PDFs can be added to your library, they will open in Preview (or whichever app you have assigned to open the file type), hence some features available in iBooks are not available for such publications.
Looking for an iPad to use iBooks on? Check out our video review of the new iPad Pro 9.7 below.
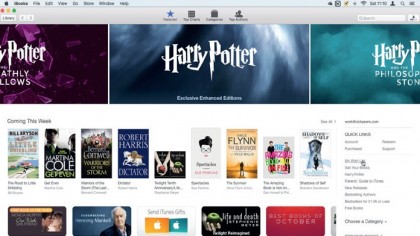
1. The iBooks Store
Click on iBooks Store (top left) to open the store. Manage your account under Quick Links on the right. Browse using the category buttons at the top, typing in the search bar, or clicking book covers.
Click 'Free Books' under your account details to view freebies.
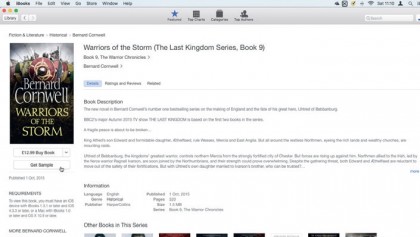
2. Download a sample
Click a book's cover to see a description of it, and a star rating compiled from other readers' feedback. Click Ratings and Reviews to read their thoughts in more detail.
Click Get Sample beneath the cover to download an excerpt from the start of a book.
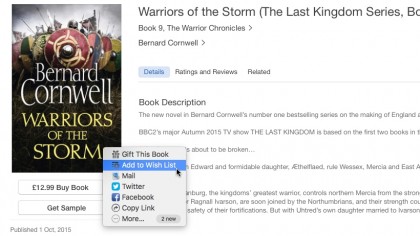
3. Buy a book later
Next to the Buy Book button is a downpointing arrow. Click it to share a link to the book on social networks and by iMessage and email.
The book can also be added to your wish list, which is accessible under Quick Links on the main store screen.
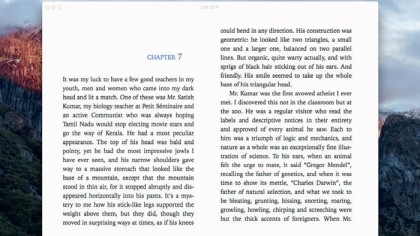
4. Read a book
Click the Library button at the top left to return to your own library. Double-click a book's cover in your library to open it.
If you need to refer to several books at once – perhaps for research – press Command+L while reading one to open the library in a new window.
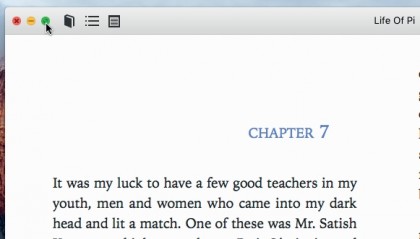
5. Fullscreen mode
Click the green icon at top left of a window to go fullscreen. Move the pointer to the screen's top edge to see the menu bar and a blue button that switches back.
When reading in a window, Command+1 and Command+2 switch between viewing one or two pages at a time.
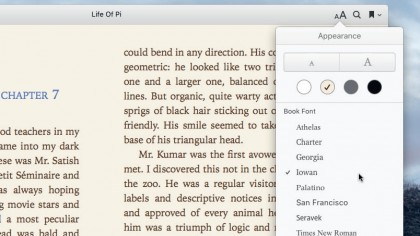
6. Text appearance
In the book's title bar, click the 'AA' icon (top right) to change how text looks. The font can be resized, changed for a range of alternative serif or sans serif typefaces, and set against a white, sepia or black background to make it much easier on your eyes.
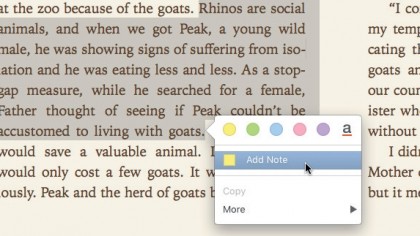
7. Take notes
Select a range of text and a panel pops up, with which you can mark the text with a highlight colour and, optionally, add a note. Click the square notebook icon at the top left of the window to review your notes.
Click the page number next to one to jump to it.
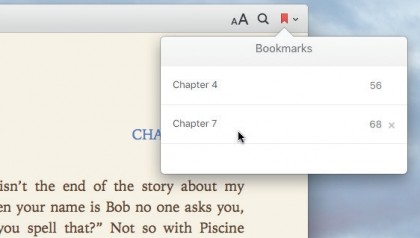
8. Add bookmarks
Click the bookmark icon at the top right of the window or press Command+D to create a bookmark. You can add as many as you want, making them a useful alternative to notes for marking longer passages.
Click the arrow next to the bookmark icon to see all bookmarks.
- Enjoyed this article? Get more tutorials, guides, and tips on how to get the most from your Apple devices inside MacFormat. Take advantage of an exclusive offer in our sampler today.