How to use Speechtexter to convert voice to text
How accurate is Speechtexter dictation software, and is it easy to use?

Speechtexter is a free software platform enabling business leaders and their employees to transcribe speech-to-text and benefit from this rapidly improving technology.
After a testing period, we believe Speechtexter is among the best speech-to-text software.
In this article, we explain how to use Speechtexter to convert voice to text, and make sure you and your employees are ready to begin using the platform immediately.
How to use Speechtexter to convert voice to text: Preparation
Speechtexter is primarily accessed through a web-based application. One of the benefits of a web app is that you don’t need to download any additional software before beginning to use it. However, you can only use Speechtexter through the Google Chrome web browser, so if it isn’t installed on your device, you’ll need to download it via this link.
Additionally, an Android mobile application is available, which you can download from the Google Play Store. The app itself is tiny, taking up only 2.5MB of space on your device.
Step 1: Choose a suitable microphone
The quality of your audio transcription relies in large part on the quality of your microphone. A weak or faulty microphone won’t provide the clear audio that Speechtexter requires to transcribe speech accurately. Poor-quality microphones are less able to distinguish between similar phonemes (the basic sounds we make when speaking). This can lead to confusion between similar words such as “spawn”, “horn”, or “lawn.”
We recommend investing in a high-quality external microphone for two reasons. Firstly, better hardware will result in better audio, leading to immediate improvements in transcription accuracy. Secondly, an external microphone can be strategically placed to maximize clarity. Directly in front of the speaker’s face is usually the best location.
Are you a pro? Subscribe to our newsletter
Sign up to the TechRadar Pro newsletter to get all the top news, opinion, features and guidance your business needs to succeed!

Step 2: Ensure your preferred microphone is the default recording device
There’s no point in buying a fancy new microphone if you forget to designate it as the primary recording device. How to do this varies across different operating systems. However, you’ll almost always find the audio control in your device’s settings application.
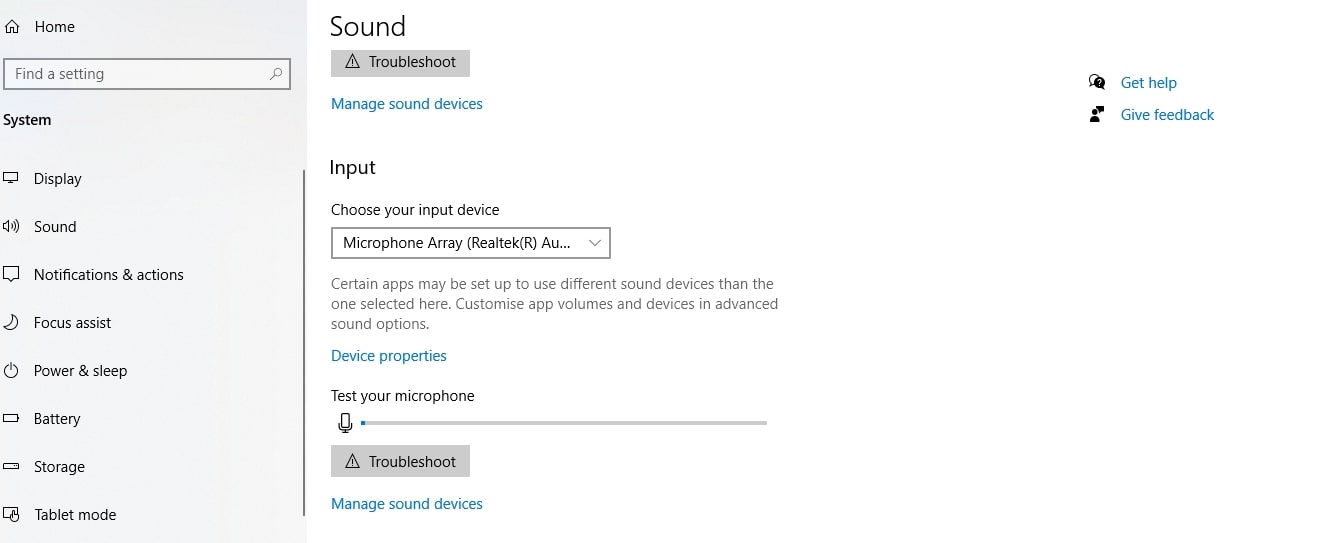
On Windows 10, you can choose your input device by going to Settings > System > Sound. From here, you should be able to see both your internal microphone and any external microphones that are connected.
Step 3: Grant Speechtexter access to the microphone
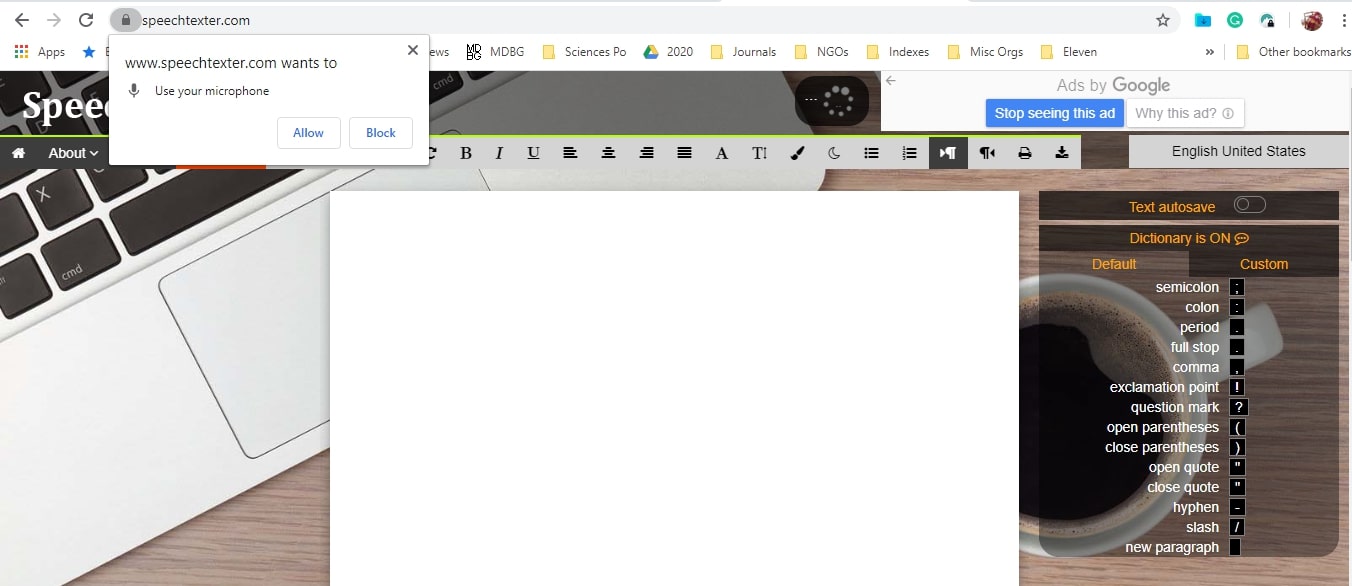
This is a simple step, but a crucial one. Whether you’re using the Speechtexter desktop or web application, you’ll need to grant the platform access to your microphone. On most platforms, this is as simple as clicking “allow” when asked.

Step 3: Choose the correct language
One of the biggest strengths of Speechtexter is its support for over 60 languages. Admittedly, the accuracy isn’t exceptionally high for some of these languages, but it’s an impressive feature nonetheless.
Before you begin voice typing, ensure that you’ve set the input language to English (or whichever language you’d like to use). It can be confusing and frustrating if you are trying to dictate only to have incomprehensible words appearing because you’ve set the platform to the wrong language.

Step 4: Begin voice typing
Once your microphone is set up, and the application is set to your preferred input language, you’re ready to begin voice typing. You can get going by clicking on the “start dictating” button.

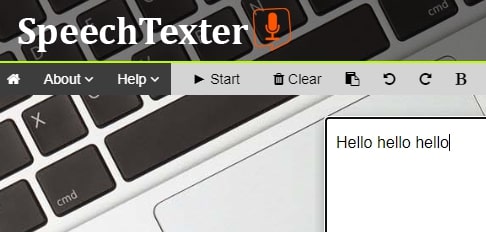
After you click this button, a text entry box will appear, as well as the voice commands box (this will be discussed in the next step). After seeing these two boxes appear, you need to press the “start” button in the top left-hand corner of the window. As soon as you click this button, it will change to “stop” and a small preview box will appear at the top of the screen. The software is now listening to your voice.

Try speaking a few simple phrases, and watch as they appear in text inside the white box in the center of the screen. You’ve now started voice typing! It might seem strange at first, as for many of us this is a new technology. But as you spend a few minutes interacting with the software and its interface, you’ll quickly become more comfortable.
With these four steps, you’ve now learned the basics of voice typing. If you want to know about some more advanced skills, read on.
Step 5: Introduce voice commands
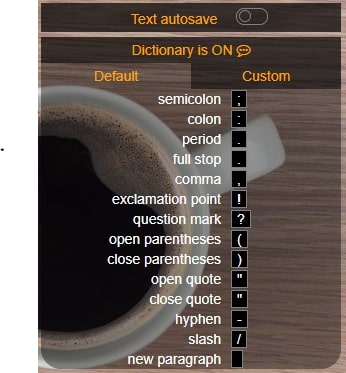
Most speech-to-text software enables you to take control of your transcribed document with voice commands. Speechtexter is no exception. Using voice commands, you can insert punctuation marks such as commas, semicolons, and hyphens. Saying the phrase “new paragraph” will insert a line break, allowing you to format your document on the go. Acquiring a mastery of these commands will significantly elevate your voice typing efficiency.

Conclusion
Speechtexter is one of the most popular free speech-to-text software providers available. Their platform is easy to use and access. Our tests found that the platform can compete against rival dictation software offered by companies such as Microsoft and Google.
- We've also listed the best text-to-speech software.
