Transferring photos from iPhone to Windows confusing? Here's an easy guide
Transfer them over a wired connection or from the cloud

Different companies want to create their own set of ecosystems. Android loves to be cross-compatible with everyone else. Yet, it encourages users to bring in devices that work seamlessly with Google’s services. Microsoft’s Windows works on a similar mantra as well.
Apple, on the other hand, is the most famous of them all for their walled garden. The company controls many aspects of the hardware and software design. Which is the reason that products like the iPhone and MacBooks work seamlessly. Tasks like sending a photo to the MacBook or even an iPad is just a click away thanks to AirDrop.
Ever since Apple introduced its Silicon range of chipsets with the M1, sales of the company’s laptops and desktops have been through the roof. But the majority of users around the world still use Windows and it hasn’t been an easy experience getting things done.
How to transfer photos from iPhone to Windows?
There are several ways to go about transferring your images to your Windows PC. And each one comes down to the choice of the end-user. It’s not as easy as transferring them over AirDrop, but that’s the downside to being in the Apple ecosystem.
Transferring images directly from your phone
The first option is transferring them through the File Explorer app. You will need to keep a Lightning to USB Type-A or Type-C cable handy for this method.
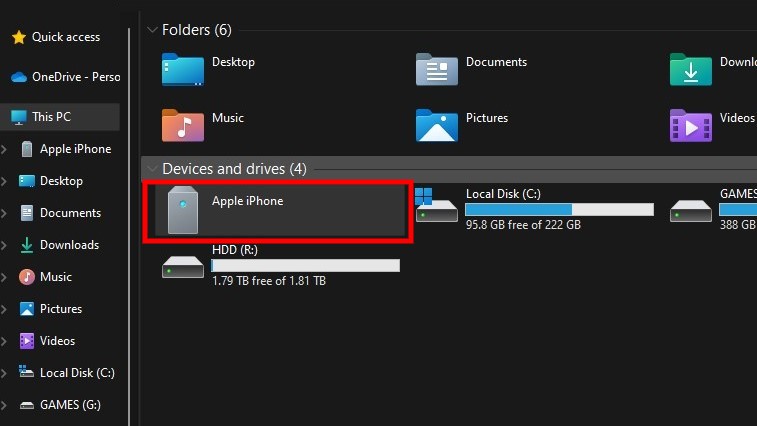
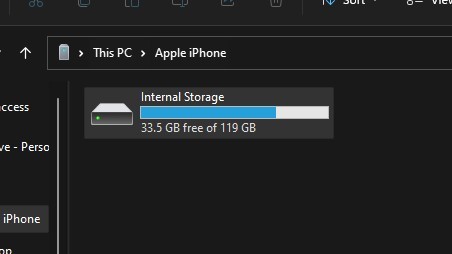
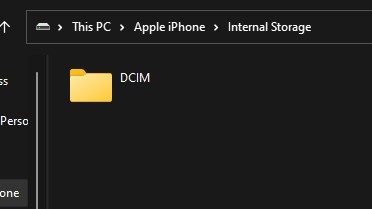
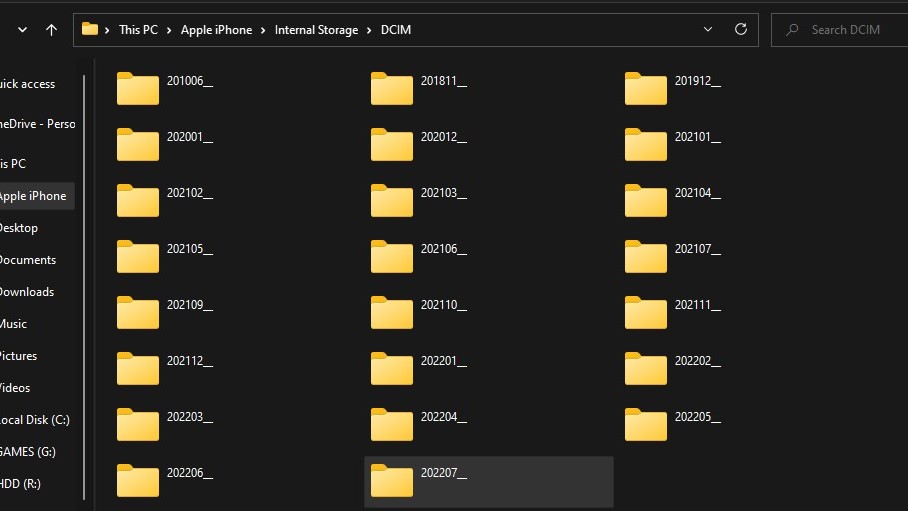
- Connect the iPhone to your PC. You will receive a prompt on your phone about whether or not you trust the computer you are connecting to.
- Select "Trust this computer"
- Next, you will need to enter the passcode on your phone. The File Explorer app in Windows will not show you the contents of your iPhone unless you enter the passcode.
- If you do not receive the prompt to enter the passcode or hit ‘Don’t trust’ by accident you can disconnect and reconnect the phone to repeat the steps.
- After entering the passcode, open the File Explorer app. Here you will see the Apple iPhone listed along with all your drives.
- Double click the iPhone drive to reveal the contents.
- All your images are stored in a folder named “DCIM”. This folder contains sub-folders named as per the year and month format.
Downloading your photos from the cloud
Get daily insight, inspiration and deals in your inbox
Sign up for breaking news, reviews, opinion, top tech deals, and more.
The second option would be to take advantage of the cloud storage services provided by either Windows, Google or Apple. This is are minor additional steps, but it works for transferring smaller image files. If you’re already backing up all your existing photos to Google Photos, Microsoft’s OneDrive or Apple’s iCloud then it becomes easy to download them.
If not, you will need to back up the photos you want to the cloud service of your choice. Then it becomes easy to download them from your browser.
A Malayali-Mumbaikar, Sachin found an interest in all things tech while working in the BPO industry, often spending hours in tech blogs. He is a hardcore foodie and loves going on long bike rides. Gaming and watching TV shows are also some of his other hobbies
