How to convert HEIC images to any format on iPhone
Can be used across all your Apple devices
When Apple first introduced HEIC, there were mixed reactions among many users. But most importantly, there was a lot of uncertainty for users who worked on both Mac as well as Windows for many of their workflow.
At the time the feature rolled out on iOS, users were given a choice to keep taking photos in either JPEG or save more space on their devices using the new HEIC format. While all of that sounds great, there have been often instances where the images cannot be read in their original HEIC format.
This would lead to either changing the settings on your smartphone to ensure that all images in the future are captured in JPEG or you would be a regular user who would transfer the images to your PC or Mac and then head to an online website that converts them instantly for you.
Windows 11 has brought support to read HEIC, however, there are still instances when some of these files fail to be read when sent to someone. It is possible to convert HEIC files on Windows 10 using the photos app.
But there is a simpler way to do the same directly from your iPhone and iPad or even convert the ones already saved on your Mac to any format you’d like with the power of automation. Apple introduced the Shortcuts app in 2018 to allow users to create automation instruction sets not just for IoT enabled devices but also for common tasks like taking notes, capturing screenshots or even calling a specific contact based on a particular action.
What is the Shortcuts app?
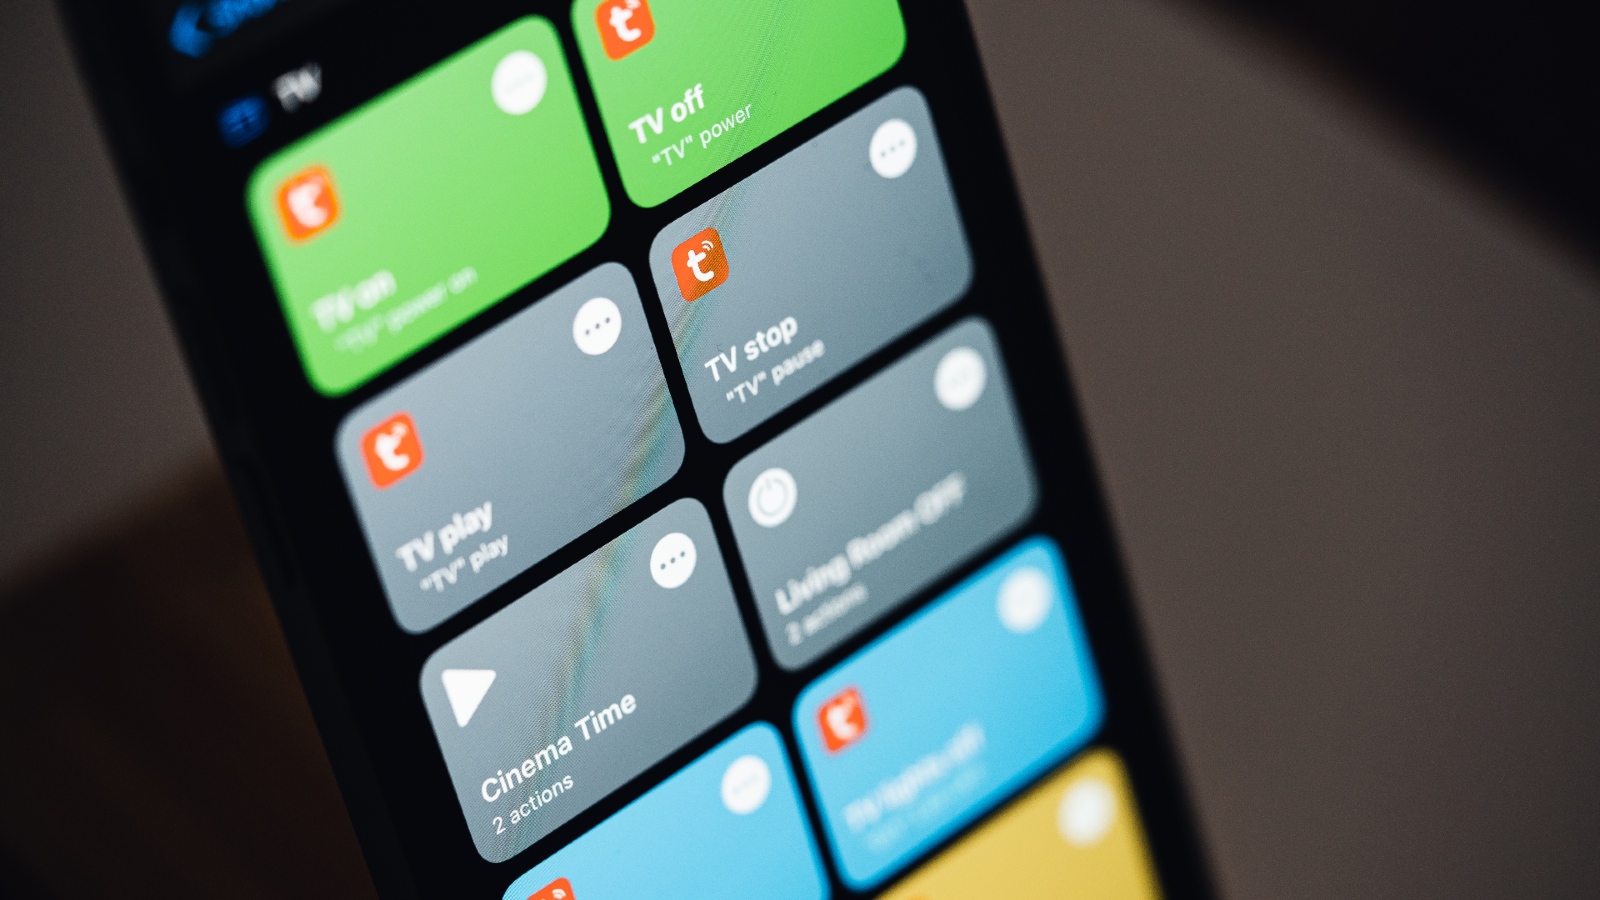
Available on iOS, iPadOS and macOS operating systems, the Shortcuts app allows users to automate tasks based on their needs. Like IoT automation, Shortcuts can create macros to carry out tasks that IoT devices can't. Like sending your location to your friend with just a voice command. Or playing a song or playlist automatically once you've connected your headphones.
Similarly, you can create an instruction set that would allow you to convert your images instantly right on your device. Moreover, you don't need to create the macros on other devices separately. Create it on one device and it's ready to use everywhere.
Get daily insight, inspiration and deals in your inbox
Sign up for breaking news, reviews, opinion, top tech deals, and more.
Some of the benefits of creating the macro through Shortcuts are:
- Can use Siri to activate the automation
- Syncs with iCloud and is available on all your Apple devices
- Can be customized or cloned for multiple file types
How to create macro in the Shortcuts app
As the app is already available on your Apple device, you are all set to create your automation in the next few steps. Here is how you can create your image conversion tool for your iPhone, iPad and Mac.
- Head over to the Shortcuts app on your iPhone
- Click on the ‘+’ icon in the top right corner
- Here you customize the name of the shortcut according to your preference. The name you assign will also be used to invoke the shortcut through Siri. You can also change the icon of the shortcuts to differentiate them if you do plan on creating multiple ones depending on your workflow
- Click on ‘Add Action’ and select ‘Media’
- Scroll down the list until you see ‘Images’
- Select ‘Convert Image’
- Next, under the list of 'Next Action Suggestions' you will need to select the option of 'Save to Photo Album'
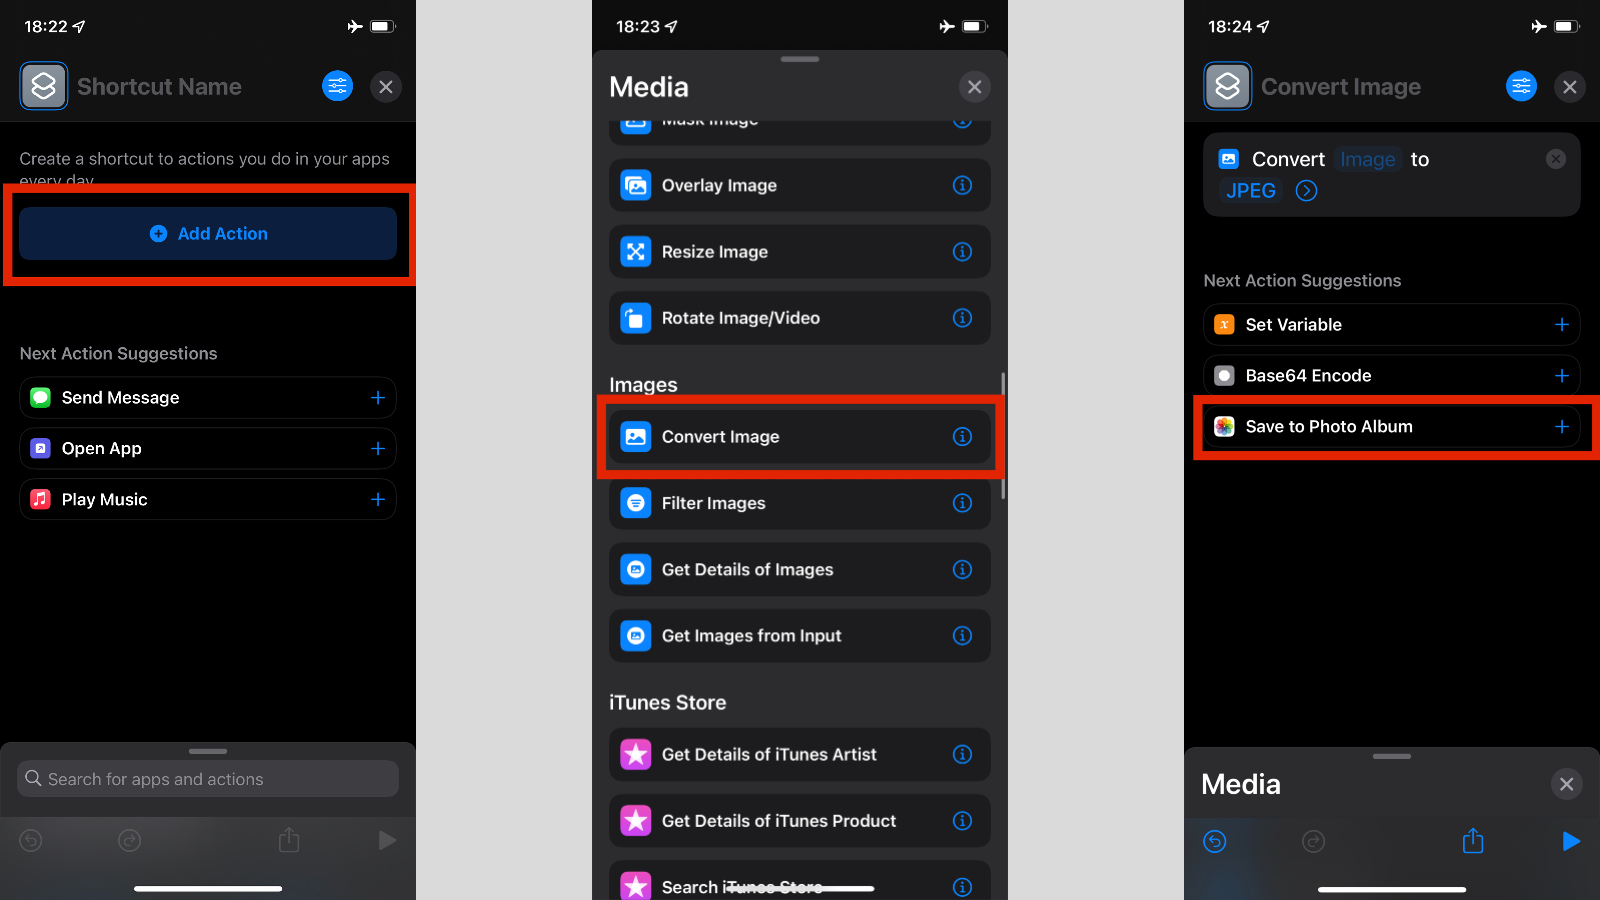
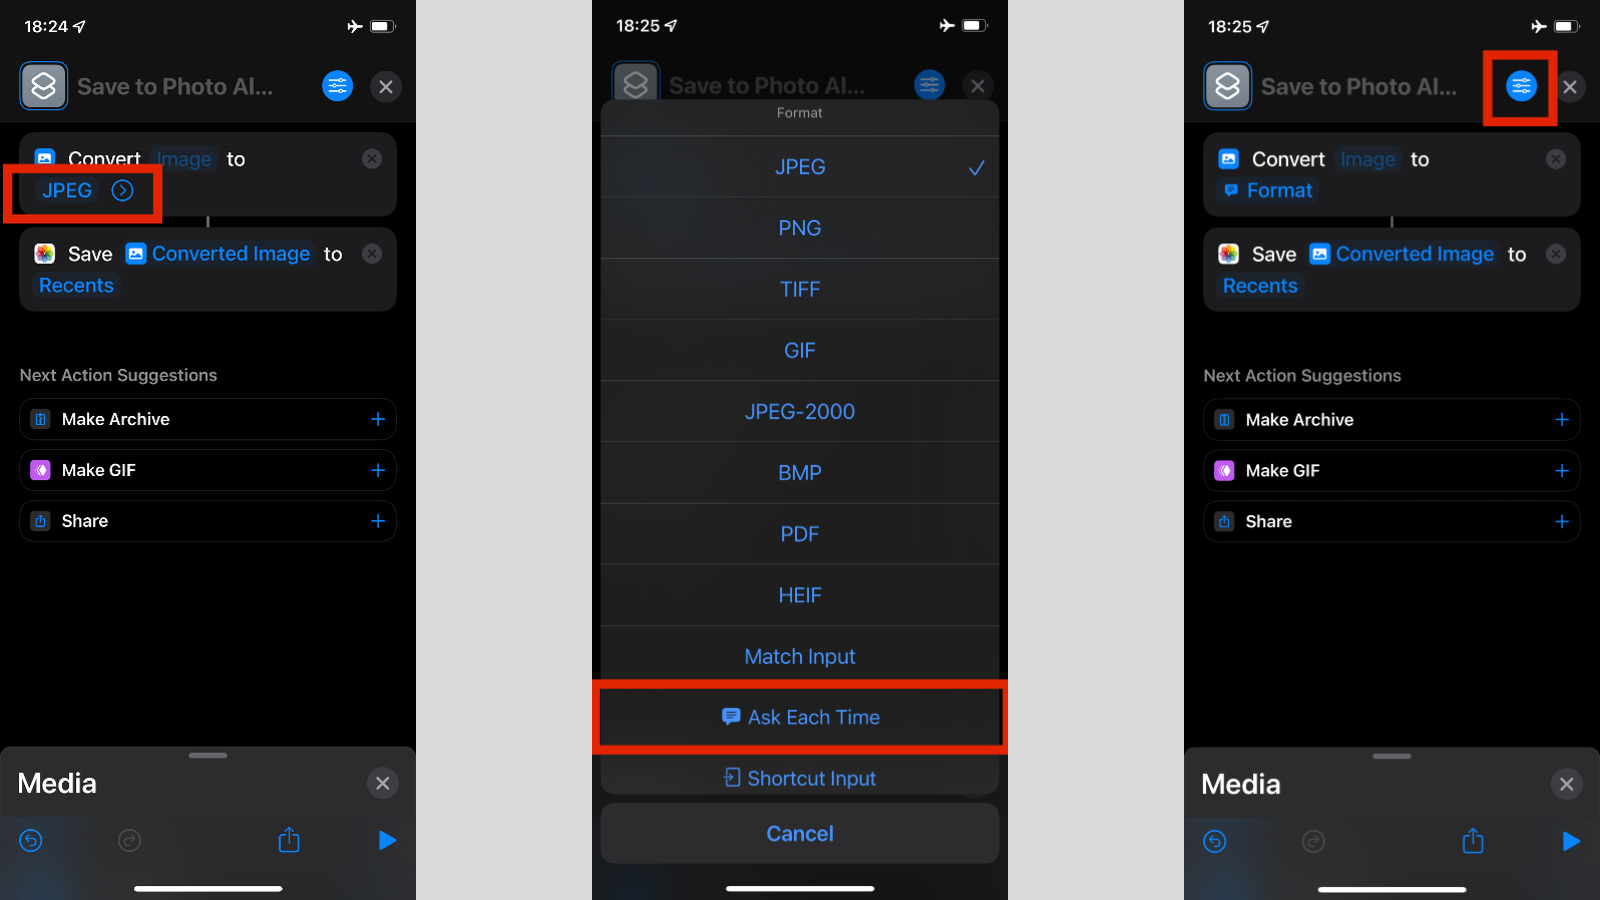
By default, the shortcut is meant to convert HEIC images to JPEG. However, you can customize the output by clicking on ‘JPEG’ and choosing from one of the options. For this example, we’ve chosen ‘Ask Each Time’, which will allow us to select the output each time we want to convert an image.
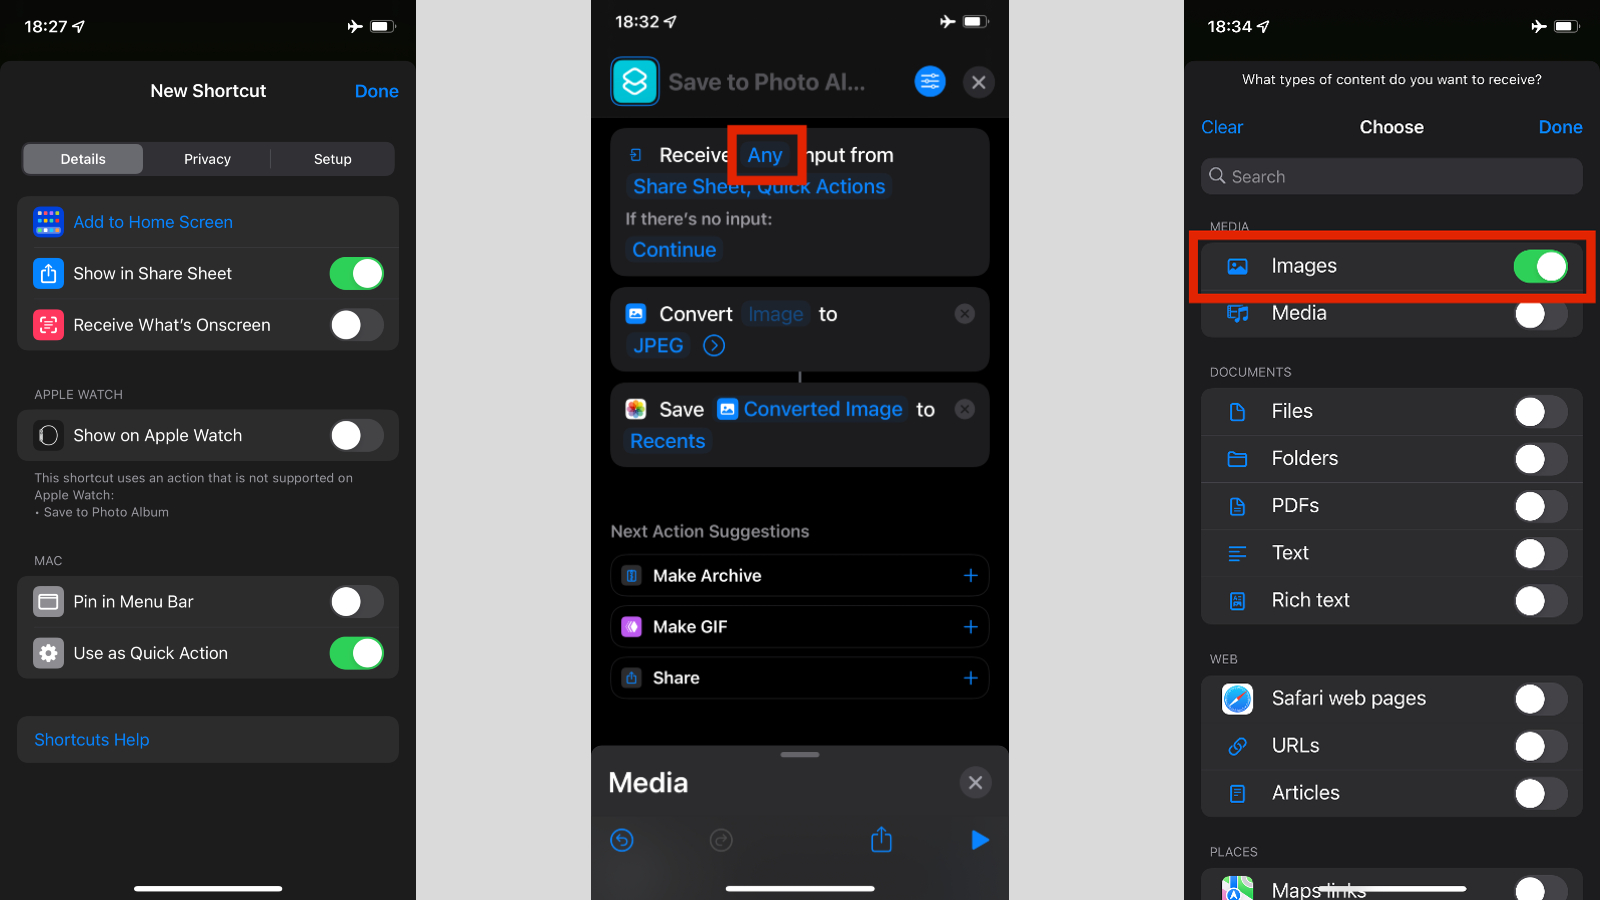
Now that the shortcut is ready, now all we need to do is make sure it’s accessible from all of your Apple devices. Click on the settings icon on the top-right next to the close button. As seen in the screenshot, you need to enable ‘Show in Share Sheet’ for your iPhone or iPad and ‘Use as Quick Action’ for your Mac.
Once these are enabled, you will see that the options within the instructions have changed. There is nothing to worry and it will function as designed. The last change you will need to make is to ensure we are converting only images.
- Click on the field indicated as 'Any'
- Click on 'Clear'
- Turn on the toggle only for 'Images' and click 'Done'
To save the shortcut, you can click on the cross at the top-right corner and it will be listed on the main menu. You can also choose to add the shortcut on the homepage as well for faster access.
A Malayali-Mumbaikar, Sachin found an interest in all things tech while working in the BPO industry, often spending hours in tech blogs. He is a hardcore foodie and loves going on long bike rides. Gaming and watching TV shows are also some of his other hobbies
