How to stream music around your home or office
Besides that, it has a flexible remote control system, it enables multi-user access to a shared library, it supports multiple streams, and it's perfectly possible to set it up and then never touch it again. It's also a decent media manager, and frankly it's possible to have multiple media managers working side-by-side. So bite the bullet, head to the dark side, download it and install it on your server.
The important thing with iTunes is not to give it any power. Open its diminutive new top-left menu, select 'Preferences > Advanced' and clear 'Keep iTunes Media folder organised'. If you then want to use other media mangers, streamers and so on, you can do so easily.
We're assuming that you want to organise your music yourself - if not, you can ignore this step.
Share and share

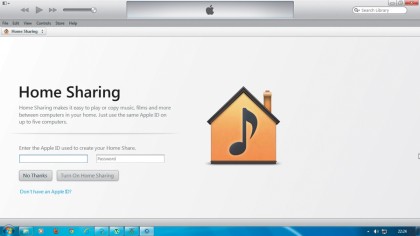
Before driving onwards, you need to share this newly installed iTunes music library. It's best to enable the Apple Home Sharing system first. It's one of the beautiful zero-click things Apple does so well, in that devices will just find each other and work without any prompting.
Open the menu and select 'Library > Turn on home sharing'. You will need an Apple ID for this, and you'll need to log in to activate it, but if this sounds hideous, it's possible to get by with PIN codes.
To start sharing, select the menu icon, then click 'Preferences > Sharing' and tick 'Share my library on my local network'. To simplify people's options, select 'Share selected playlists > Music'. Now click 'OK' and you're good to go.
Sharing to different types of systems and devices is, well, different. On a desktop or laptop PC or Mac, using iTunes is a breeze. Just open the pull-down menu that offers the local music, films and so on, and at the bottom there will be a new option under Home Shares. On Apple iOS devices, open the standard Music app, select 'More > Shared' and again choose the shared library. This gives you access to the entire music library as if it was stored locally.
Sign up for breaking news, reviews, opinion, top tech deals, and more.
Android devices can't access the iTunes library directly with any app we know of. If you already have Plex and are using its server and app, there's a Channel option that enables you to browse the iTunes library easily, but the app costs £3.21.
Another Android option is the free TuneSync HomeStream server and the associated free Android app. This ties in effortlessly with your existing iTunes library for shared streaming fun. The player itself needs a little work, but it's the best iTunes-based option we're aware of for Android.
Remote AirPlay

Once iTunes is encamped, with its hefty behind on your server, we can start doing some clever things. First on the cards is a little bit of remote control. This applies whether you're playing the audio directly from the server or streaming it to another box via your shared library. All the copies of iTunes running on a network computer can be remote-controlled. The only thing to remember is that the iTunes library on each system needs its own unique name, adjusted via the 'Preferences > General > Library name' setting.
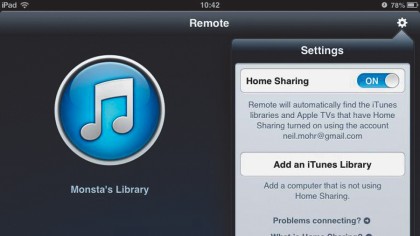
For iOS devices, Apple offers its free Remote app. If you're using Home Sharing it'll automatically spot and list these devices in its list of available remote libraries.
For devices not using Home Sharing you need to access the iTunes library list screen, tap the settings icon on the top right and select 'Add an iTunes library'. This provides a PIN and a new Remote icon, which will appear at the top right in the iTunes interface on your system running iTunes. Click this and enter the PIN to pair the devices.