How to detox and spring clean your Mac
Mac weighed down by files and apps? Put it on a diet
Cut out what you don't need, consolidate what you do
The first rule of deleting unwanted files is not to delete them until you're quite sure they're unwanted. It's all too easy to get carried away and bin everything that takes up more than 5K and doesn't immediately strike you as essential. This is a recipe for calamity.
Of course, the Mac has its own way of saving you from yourself, known as the Trash. Remember that trashing a file – whether by dragging it to the Trash, right-clicking it and choosing Move to Trash, or selecting it and pressing Command+Delete – doesn't actually erase it: open the Trash and it's still there, until you hold the mouse button down on the Trash icon and choose Empty Trash, at which point everything within it is erased from the disk forever.
It's only then that, having binned a number of unwanted files, you'll see an increase in available disk space. This makes it tempting to empty the Trash immediately after dragging a file to it to check the effect on your disk usage, but resist this if you can: the longer you leave deleted files in limbo, the better the chance of realising before it's too late if you still need them.
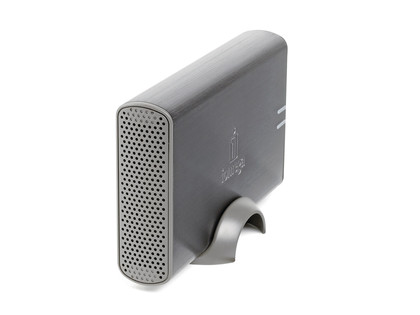
But maybe your hard disk is full of files that you do still need. In that case, rather than erasing them you just need to move them. The best place for them to go is usually an external hard disk. These are quite affordable, starting at around £75 for 500GB, and work at pretty much the same speed as your main hard disk, so there's no disadvantage in using them even to store files you use regularly.

Simply plug the drive in, drag all the files across that you want to store on it, wait for the copy to complete, then delete them from your main hard disk – and remember to empty the Trash.
Just don't try moving applications or system files across, as these need to live on your startup disk.
Get daily insight, inspiration and deals in your inbox
Sign up for breaking news, reviews, opinion, top tech deals, and more.
To move your iTunes Library, follow the instructions here. If you use the Time Machine backup system (included with Mac OS X 10.5 Leopard and higher), it's best to avoid storing other files on the drive you use for Time Machine, partly because they won't get backed up and partly because there's no way to tell Time Machine how much of the drive to leave free, so you'll end up fighting with it for space.
But Time Machine will coexist quite happily with another external drive and keep its contents backed up, as long as your Time Machine drive isn't significantly smaller than the total of your other drives.
Alternative storage
With a MacBook, keeping an external hard disk attached isn't so practical, although some neat portable models are available. But you might still be able to identify sets of files that you don't need every day, such as a collection of your previous work, and move these to a desktop drive – or to another Mac with a roomier hard disk – from which you can access them when needed.
Files that you only rarely need, or are keeping because you're obliged to but will probably never use, could be moved to DVD instead; spending a few minutes burning 4.5GB of data is worth it to free up 4.5GB of disk space.
Another option is online storage. The easiest way is to use your iDisk, if you subscribe to Apple's MobileMe; since this is constantly accessible in the Finder, you can copy files to and from it at will – though watch out not only for the 20GB storage limit, but also, if you'll use these files a lot, the 200GB/month data transfer cap; you can double these for an extra £30 a year.
Alternatively, if you have some server space, perhaps from your broadband ISP or as part of a web hosting plan, you should be able to access it via FTP, either by pressing Command+K in the Finder and typing an address beginning ftp:// or using an FTP utility such as Transmit 3 ($29.95, about £18, or free to try).
You'll need the appropriate username and password from your service provider. On most broadband connections, uploading your files will be fairly slow work, but you can then download them when needed at the full speed of your connection, so it can be reasonably convenient – and of course you can access this data from different Macs and locations too.
When archiving files – that is, copying them to other media and then deleting them from your Mac – always remember you're not 'making a backup'. A backup is a second copy. If that data is really important to you, make two copies, in different places, before you choose to trash the original files.
Invisible enemies
Aside from the files that you can see are taking up space on your hard disk, you might wonder about files that you can't see. There certainly are plenty of these around on your Mac, including system caches, which automatically store regularly used data to help make Mac OS X and your applications run more efficiently.
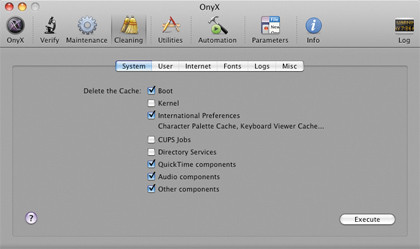
Various utility programs offer to 'clean' your caches, including OnyX and Cocktail ($14.95, or £9). This may help to avoid caches becoming bloated over time.

Don't assume, however, that deleting caches will necessarily serve the purpose of freeing up disk space and streamlining your Mac. Caches aren't a bad thing; the system uses them to improve performance, and in any case, if you delete them, they'll simply be recreated next time you restart your Mac or switch user accounts.
So cache cleaning isn't a panacea, and it's generally fair to say that if Mac OS X is hiding something from you, you should probably take the hint and leave it alone, unless you have reason to believe it's causing a problem.