iCloud: the essential guide
Backups, storage, Photo Stream, documents and more
As we've already discussed, iCloud takes care of backing up all of your iOS purchases on your Mac, and simultaneously installs any apps you buy on your Mac to each of your iOS devices. However, you can now go one step further and save your device backups directly to the cloud.
Previously, every time you synchronised your iPhone, iPad or iPod touch with iTunes on your Mac it would create a local backup. That way, should the worst happen, you could easily recover your documents, contacts, appointments and apps. That's still an option, but in iOS 5 and iTunes 5 Apple has improved on this feature in two ways.
First, you can now enable wireless backups to iTunes so that whenever your device is plugged into a power source and connected to the same Wi-Fi network as your iTunes library, it will automatically synchronise the two. You can opt instead to save that backup to iCloud, so that should your Mac be damaged or lost your backup won't be lost with it.
To enable this, connect your iOS device to your Mac, select its entry in the iTunes sidebar, and click the Back up to iCloud radio button on the Summary page. Now your device will be backed up once a day whenever it's plugged in.
The final piece of the iCloud puzzle (at least until iTunes Match arrives in the UK) is Documents in the Cloud, which maintains a backed-up copy of all of your remotely edited Pages, Numbers and Keynote documents.
Synchronisation with iCloud requires the latest versions of the iOS iWork apps. These updates are free for all existing users, but if you don't already have them, the apps are sold individually at £6.99 apiece through the App Store. They're all Universal apps, so work on the iPad, iPhone and iPod touch.
You need to opt in to use iCloud with each application individually. If you're firing up any one of them for the first time you'll be given the option to do this on the startup screens. But if you've already been using them in the past, you can activate them through the iOS Settings application where they appear among the third-party apps at the bottom of the menu.
Get daily insight, inspiration and deals in your inbox
Sign up for breaking news, reviews, opinion, top tech deals, and more.
Working with documents
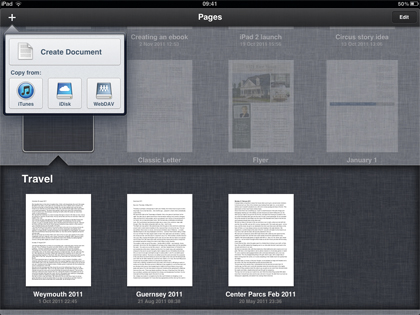
Open the iWork app of your choice and create a new document by tapping the '+' in the upper left corner of the screen. We'd recommend ignoring the option to use iDisk as this will disappear over time, so it makes sense to get out of the habit as soon as you can.
Tap Create Document and choose a document type in the usual way, then start working. When you've finished, and you return to the document menu, you'll notice that its thumbnail has a small arrow on a turned-over corner. This is a warning that the document hasn't yet been backed up to iCloud.
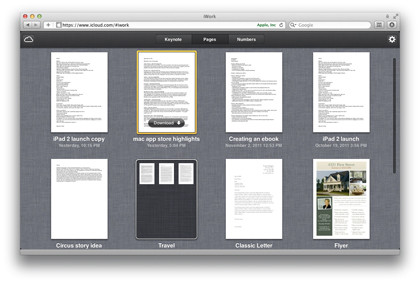
Your documents will automatically sync to the same apps on any other iOS device the next time you start them up, and are also saved to your online iCloud account. Point your browser at www.icloud.com/iwork, and you'll see that there are individual tabs for Keynote, Pages and Numbers, with the relevant documents organised inside each one. Here, things don't work quite as smoothly as you might hope…
Apple has made great claims about iCloud's ability to synchronise your documents across all devices. It says you can shut down your Mac on your way out the door and finish working on your document, spreadsheet or presentation on your iPad on the way home.
Technically that's true, but only if when using OS X you manually copy your data to and from iCloud. To access the document created on your iOS device, click it in the web interface and select the format in which you'd like to download it. Choose from the native iWork formats, their Microsoft Office equivalents and PDF.
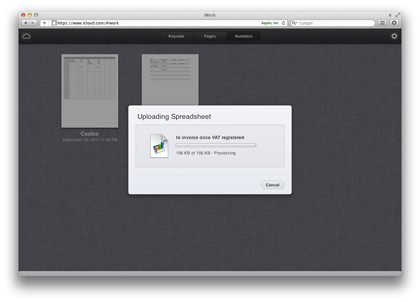
To send documents from your Mac to your iOS device, select the relevant application by clicking its name on the tabs at the top of the web interface; then drag the file into the document management area that fills the rest of the screen. A progress gauge monitors its passage onto iCloud.
We can expect to see more apps exploit Documents in the Cloud, as Apple has opened up the underlying hooks that will enable third-party coders to integrate the service into their own apps. But we would also hope to see iCloud integrated directly into the OS X iWork apps so that we no longer need to open a browser window to access our iOS documents.
How to manage iCloud files in your browser
1. Rename files
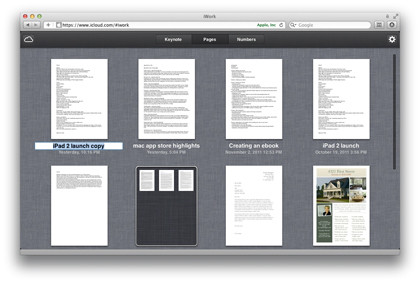
Click once on the document's filename and type a new name, pressing return as you would in the Finder to confirm the change. Filenames can be up to 255 characters in length and contain anything you like – so long as they don't start with a colon, dot or slash.
2. Copy a document
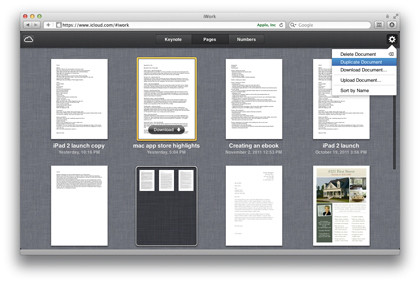
Click once on the document's thumbnail icon, followed by the cog icon, and then select Duplicate Document from the drop-down menu. The next time you check your iOS devices you will see that the file has been duplicated and is ready to work on.
3. Keyboard navigation
Now press Ctrl+Esc to activate the keyboard, then use the cursor keys to move around your files in the browser view. Pressing Shift+Esc has the same effect as clicking the iCloud icon – you will be taken back to the applications menu.
Current page: Essential iCloud guide: Backups and storage
Prev Page Essential iCloud guide: Photo StreamNik is an Esperanto-speaking, pencil-bothering, manual typewriter fan who also happens to have a soft spot for tech after sufficient years in the business to know what that disk icon on the save button actually means. Never happier than when out in his campervan, coffee in one hand, ebook in the other, listening to the rain on the roof.