The Mac user's guide to Time Machine
How to keep files safe and what to do when the worst happens

Your Mac is in all probability one of your more prized possessions. Perhaps you even have more than one – a desktop and a portable, and an iPod touch or an iPhone to complete the line-up.
What's easy to forget though is that the kit itself is only part of the story. It's actually your data that's really valuable. If your Mac breaks down, it can be repaired. But if a hard drive croaks or something is accidentally deleted and it hasn't been backed up, there's no way to ever recover it.
For most people, their Mac stores all their data, from bank account information to photo libraries, home movies and email correspondence. It's fair to say that for many users, their entire life is on their Mac. And yet backing up is sometimes thought of as an inconvenience and something that people only start to do after they've already lost some important files.
Since OS X 10.5 Leopard, Apple has offered Time Machine, a straightforward and hassle-free backup utility integrated into the system. It's so easy to use that there's no excuse not to be using it regularly.
We'll show you how it works, how to get the most out of it and how to restore deleted files, folders and even entire systems – plus, of course, the various online backup and other archiving tools on offer. With our guide to backing up, you need never lose anything again…
Introducing Time Machine
Mac OS X 10.6 is the most stable and powerful operating system that Apple has ever created, but that doesn't mean that nothing will ever go wrong with your files. An accident, a theft, or mistakenly deleting or overwriting a file or folder can all result in the loss of important data.
Get daily insight, inspiration and deals in your inbox
Sign up for breaking news, reviews, opinion, top tech deals, and more.
And that's not even counting the possibility of a hard drive failure or the unexpected disconnection of an external hard drive, either of which can in some cases be terminal.
With all the focus on using your Mac as the hub of your digital life, it's easy to forget that storing everything on a single machine is a great idea – unless something goes wrong with that machine.

With OS X 10.5, Apple introduced Time Machine, an outwardly simple and straightforward backup tool tightly integrated into the system. It was a typically Apple-like approach to nudging users towards a certain way of working – in this case, backing up. There are no complicated options, no fiddling and best of all, it works automatically.
You'll find Time Machine in your Mac's System Preferences if you're running OS X 10.5 or 10.6, with a large, friendly on/off button to activate or deactivate it. It works by initially making a byte-forbyte copy of your system to a secondary or external hard drive, including not just all your data and applications but also the system itself.
Every subsequent backup that you perform or that is done automatically is incremental, meaning Time Machine only backs up files that have been added or modified since the last backup. It's able to determine this information thanks to some complex low-level technology using something called 'fsevents', though all most users need to know about this is that it works invisibly in the background.
The great advantage of incremental backups is that they use far less space than just copying everything every time. It also means you can rest assured that every new or modified file is being backed up, without you having to know what or where those files are. r
Recovery operation
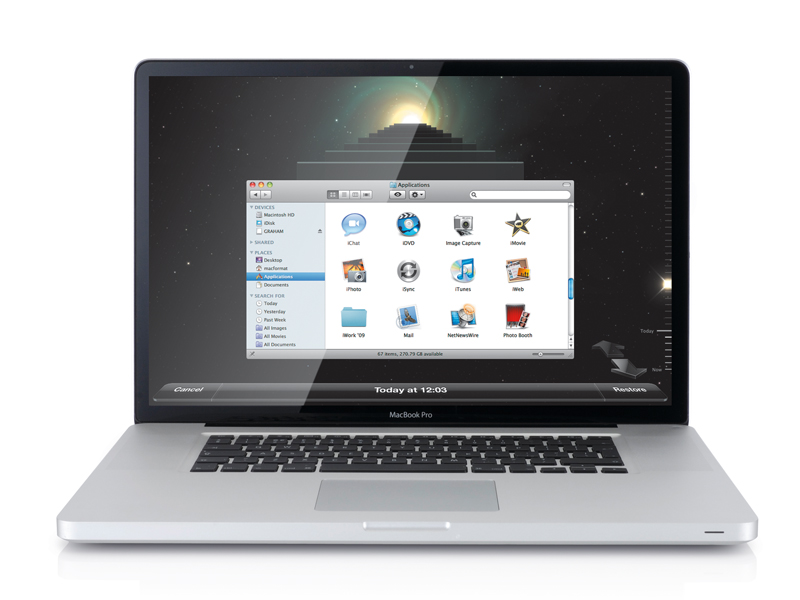
Time Machine would be merely a good solution if this was the whole story, but the reason it's special is that it lets you recover data in a really intuitive way. By entering Time Machine's 'history' view, your Mac can display snapshots of every file and folder at every point it has been backed up.
So, for example, if you have deleted or changed an item, you can go back to the last backup and locate it from the point before you changed it; or, from the point before that, for as many backups as you have. From there you can restore the file or delete it from the backup, if you wish.
You can use Spotlight to preview an item to see if it's the one you want, and navigate back and forth through a folder's history.
Big fast backups
It makes sense to back up to an external FireWire or USB2 hard drive, as these are both surprisingly inexpensive and huge in size, though network drives and partitioned internal drives are also supported in some configurations. For as long as the specified drive is connected and Time Machine is switched on, it will keep hourly backups for the past 24 hours, daily backups for the past month and weekly backups for previous months.
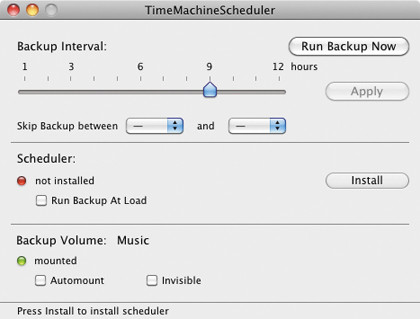
If you prefer, you can alter this schedule with a free app called Time Machine Scheduler. You might want to do this if you worry that an automatic backup starting up could interfere with your work or slow your Mac down. You can increase the backup interval and also force it to skip backups between specified times of day, but still leave it activated so you don't have to keep turning it on and off.

There's not much point in getting a backup drive that's the same size as your hard drive, as it will probably fill up quite quickly, especially if you regularly add or modify lots of large files. The good news is that very large drives are now commonplace and so a 500GB, 750GB or even 1 terabyte external hard drive shouldn't break the bank.
Western Digital's 1TB My Book Essential can be picked up for around £75, and LaCie's 2TB Neil Poulton Design drive is around £150. If your needs are more modest, LaCie makes a 500GB 2.5 inch drive for around £70.
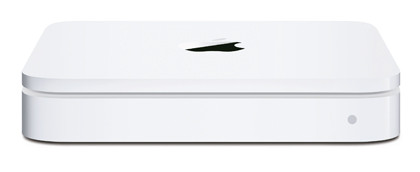
Apple of course makes the Time Capsule, a combined 802.11n wireless base station and 1 or 2 terabyte hard drive specially designed to work with Time Machine and offering wireless backups, so you don't have to manually connect a drive to one or more Macs to back them up.
Although it's more expensive than a basic drive, it does offer various other advantages such as dual band Wi-Fi, guest networking, wireless drive sharing and wireless printer sharing.
With regular backups comes the probability that a drive will eventually fill up, but there are things you can do to prolong the amount of time before this happens. Namely, excluding some items from backups.
Obviously you want your important data to be backed up regularly, and leaving Time Machine switched on and the drive connected is the most sensible way to achieve this. But there are situations where backing up certain files is unnecessary and will just eat up space.
For example, if you are temporarily storing large files on a drive before moving them somewhere else, you may not want them included in your hourly backups. Similarly, if you have a Final Cut scratch folder for storing temporary video files, backing this up could be undesirable.
The solution is to exclude them from Time Machine's schedule by clicking Options in Time Machine and adding the relevant folders to the list of excluded items. If you decide you do want them to be included, you can remove them from this list, even if it's only temporarily so they get backed up once a month, for example.