Troubleshooting tips for new Mac owners
Got a Mac for Christmas? Then you'll need this handy guide
How to get your printer working with your Mac
1. Plug it in
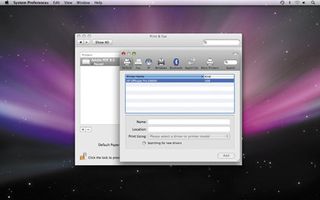
Unless it's out of the Ark, your existing printer will connect via USB or Ethernet. Just plug it into your Mac, turn it on, then open System Preferences, select Print & Fax and click the plus sign at the bottom left. Your printer should show up in the list.
2. Assign a driver
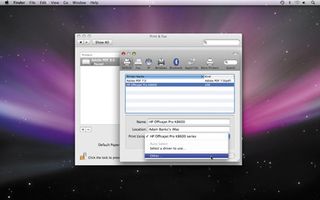
The message 'Searching for new drivers' appears. Mac OS X comes with loads of printer drivers, so your model may be recognised immediately. If not, set Print Using: to Other and supply your own Mac OS X driver (available from the manufacturer's website).
3. Find elusive drivers
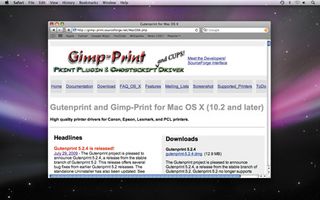
Many printers are rebranded units, so Google yours to find out its original make and model, then look for its drivers. Still no luck? Hundreds of Mac drivers are provided by Gutenprint, an open source project.
Get daily insight, inspiration and deals in your inbox
Sign up for breaking news, reviews, opinion, top tech deals, and more.
"Can I preview files, as with Windows Photo Gallery?"
Yes. Select a file and either tap [Space], or press Cmd+Y. Select multiple files and press Option+Cmd+Y for a slideshow; hit Esc to stop it.
"I've inserted a DVD – now how do I get it out again?"
Unlike PCs, Macs have never favoured a physical button on the drive. However, there's an Eject button at the top right of your Apple keyboard: press and hold this to pop the disc out.
Alternatively, press Cmd+E; or, in the Finder, drag the disc's icon onto the Trash icon at the right of the Dock, which turns into an Eject symbol; or open a Finder window, find the disc's icon in the Devices section of the Sidebar on the left, and click the Eject icon that appears next to it.
These last two methods also work with USB drives.
"I just unplugged my USB drive and was told my data may have been damaged. What's all that about?"
In Windows, remember, you're supposed to click the Safely Remove Hardware icon at the right of the Taskbar and select your drive before unplugging it.
This ensures any file operations have ended and the drive is properly released. The same principle applies in Mac OS X, and you should eject the drive (as described in the previous answer) before physically removing it. If you don't, not only could you lose recent files, but if you're unlucky the whole drive could become inaccessible.
How to burn DVDs
Unlike with Windows, DVD burning is fully integrated into Mac OS X. Insert a blank DVD and opt to open it in Finder, then drag files onto it. The files will initially appear as shortcuts (with a little curly arrow), but when you click the Burn icon beside the disc's name in a Finder window, the complete files are written to the disc.
You can also burn music files to audio CD or DVD by selecting tracks in iTunes and clicking Burn Disc at the bottom right, or burn photos by selecting them in iPhoto and choosing Share > Burn.
To create playable DVDs with menus, use iDVD; for movie discs, prepare your footage in iMovie, then go to Share > iDVD. To learn how to create a professional DVD with animated menus.
Current page: Printing, previewing and working with files
Prev Page Photos, music, movies and widgets Next Page Internet and networking